
How to: paint wheels, slam your fc, and fit wheels.

Thread Starter
Rotary Enthusiast
Joined: Aug 2005
Posts: 954
Likes: 0
From: Richmond, Virginia
How to: paint wheels, slam your fc, and fit wheels.
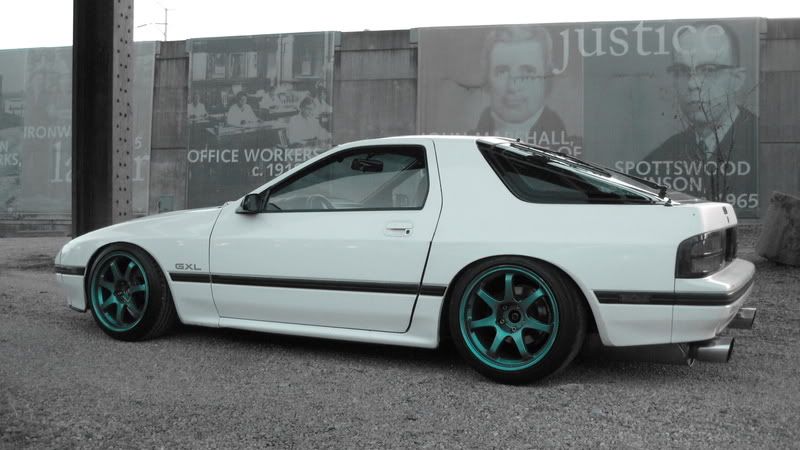
After enough bitching, I sucked up the tears and bought some better wheels, coilovers, and some badass paint to paint the wheels something crazy.
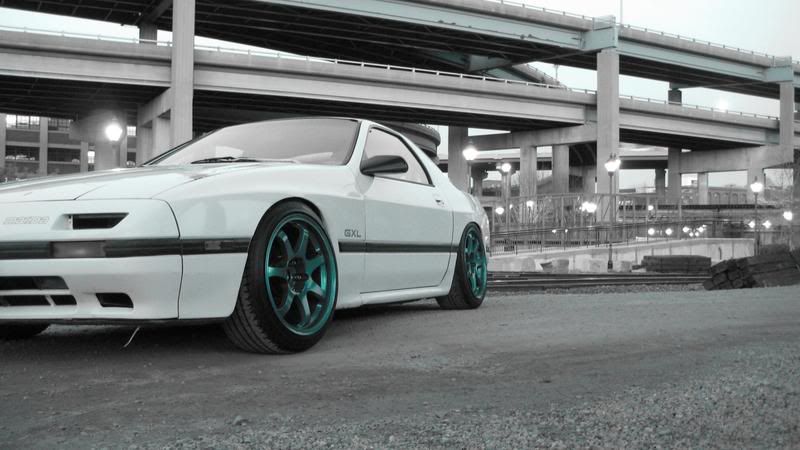
Wheels:
MB Weapons
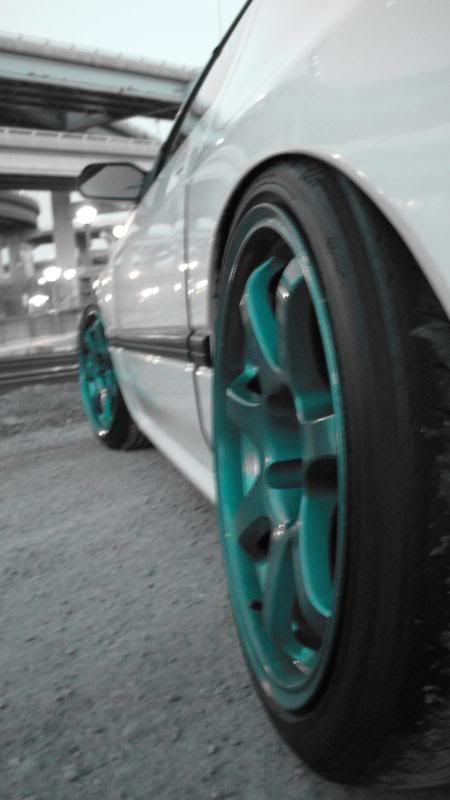
17x9 +2 (after 1" spacer) up front with a 215/45
17x9 +17 in the rear with a 225/45
-3 camber on all.
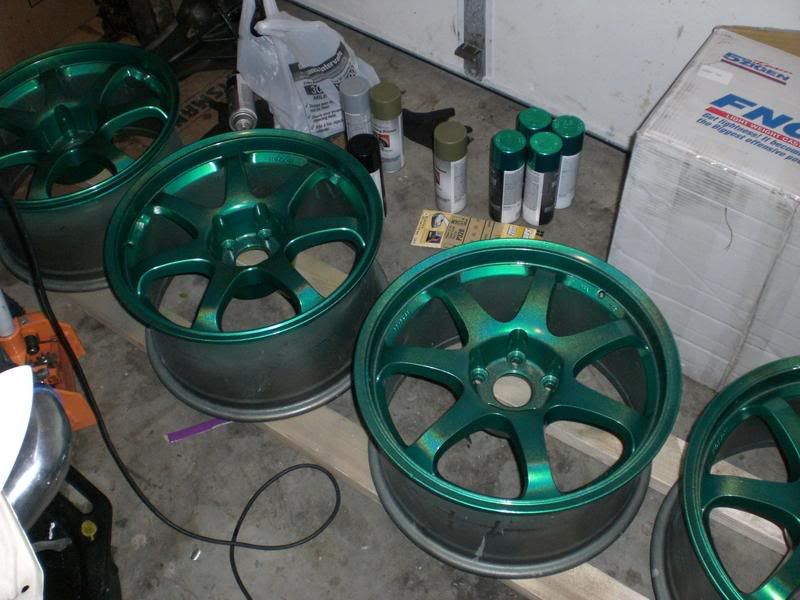
Painting process:
*Paint remover, I used "Aircraft Stripper"
*Solvent
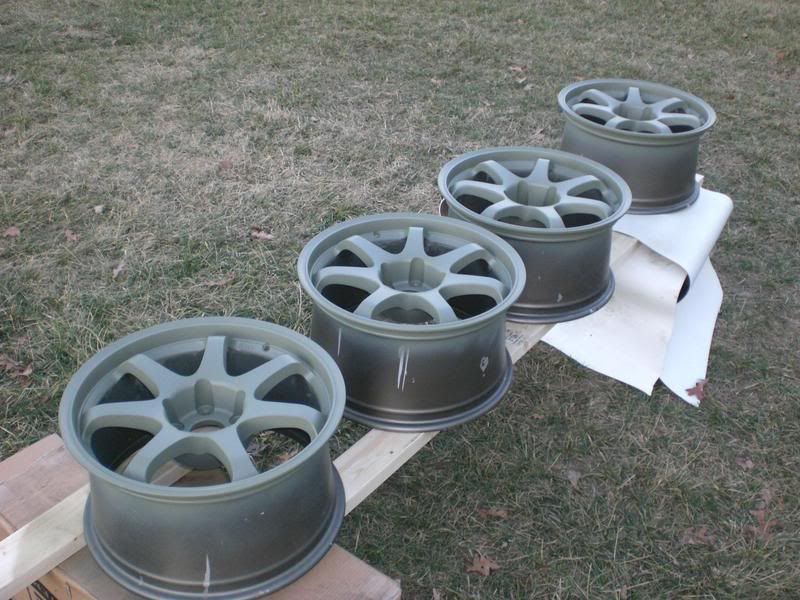
*3 spray cans of Self Etching Primer
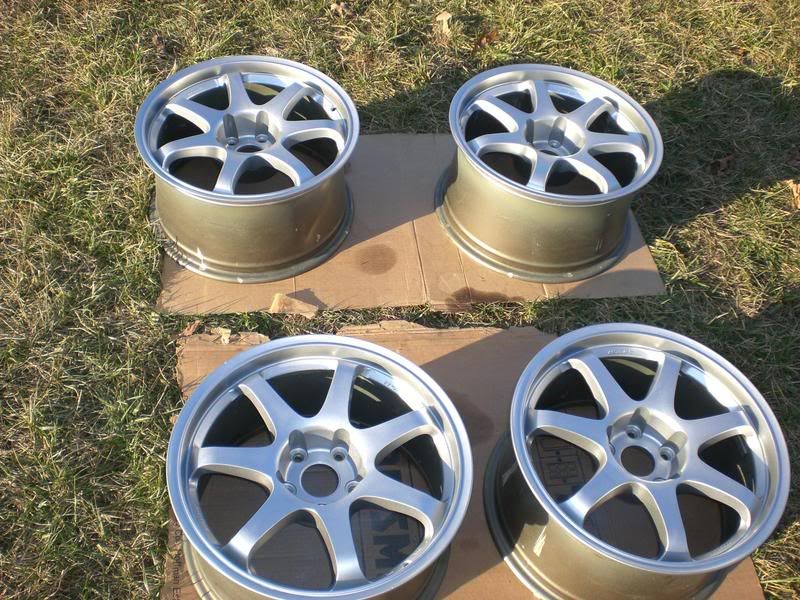
* 2 or 3 spray cans of Dupli Color metalcast Ground coat
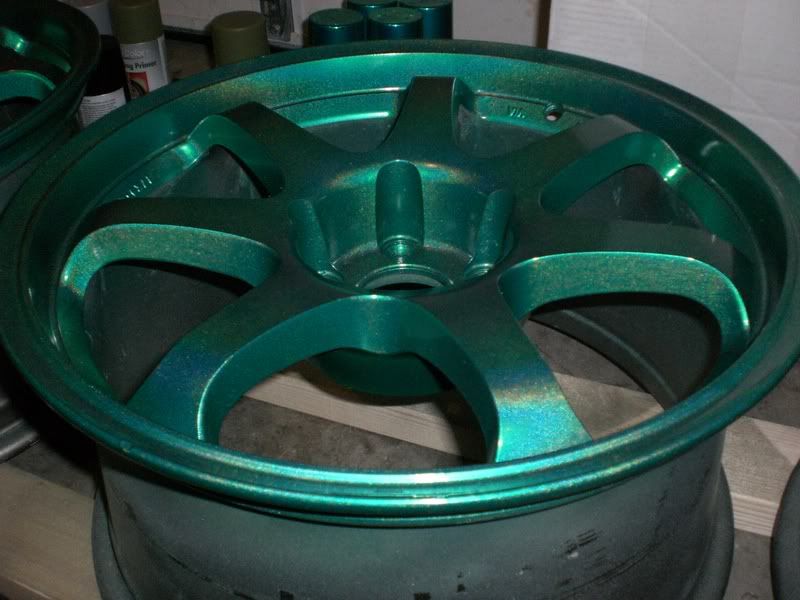
*2 or 3 spray cans of metalcast anodized paint
*2 spray cans of Duplicolor CLEAR effects for AWESOMETOWN clear coat and insane glitter/metallic flake
1) Strip all the previous paint and smooth it to the best you can by starting with Aircraft Stripper remover. Put on a thin coat of the stuff and let it sit for about 15 minutes or so. Paint will come off like butter after that, unless its powder coated like mine was, then it takes a looong time. Have fun.
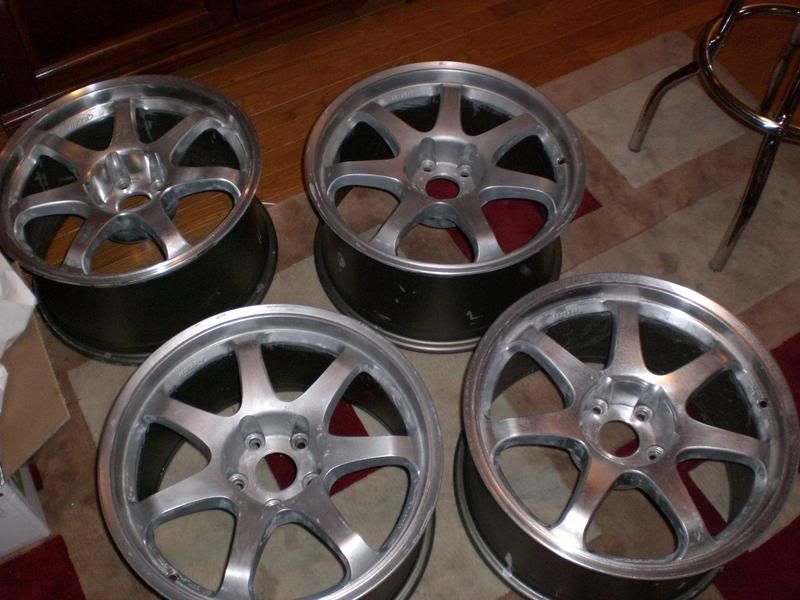
2) Wash them with soap, and then clean them with solvent to remove any grime, dirt, previous paint remover etc.
3) Prime them with the self etching primer. Don't forget the inside of the lips if you'll be stretching tires, oh and the inside of the wheel where it bolts to the hub.
4) Spray them down with several coats of the Duplicolor Metalcast ground coat. This is what will give it a deep metallic flake.
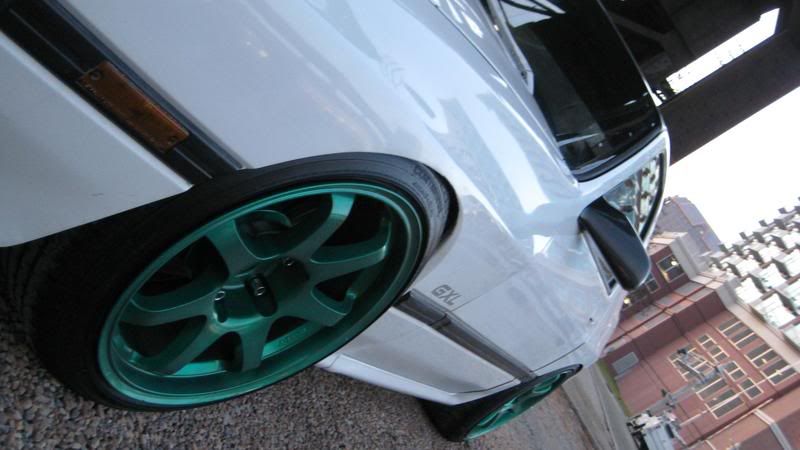
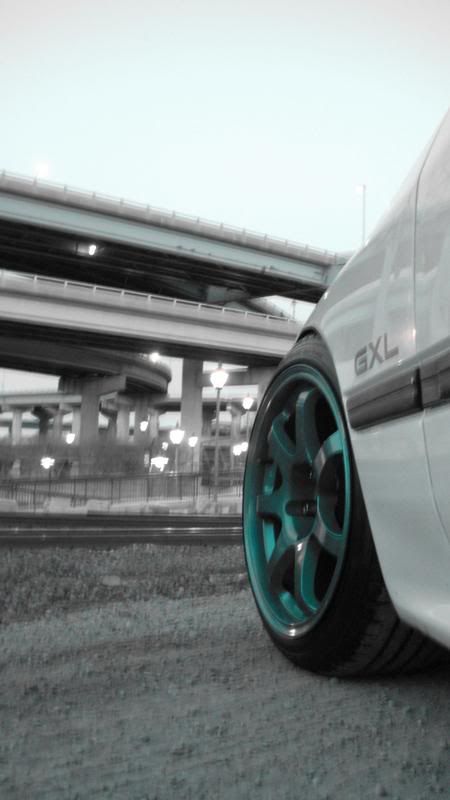
5) Spray them down with several light coats of the Green, or your color choice of the Metalcast anodized paint colors. End it with a thicker, wet coat. It comes out very thin, so be sure to get it all.
6) Other than the green, this is the most rewarding part - the Clear Effects glittery ****. ITS AWESOME. These pictures do no justice at all. In the sunlight, the wheel looks insane at each and every angle when you look at it. Indescribable. Do several coats of this. Seriously, pictures just don't do justice for how awesome they look in person. <3
YAYYYYYYY PAINTING WHEELS IS DONE!!!!!!!
Now, order coilovers. Just do it.
Then, slam it and set your damper settings
Oh, and then, take pictures and be happy
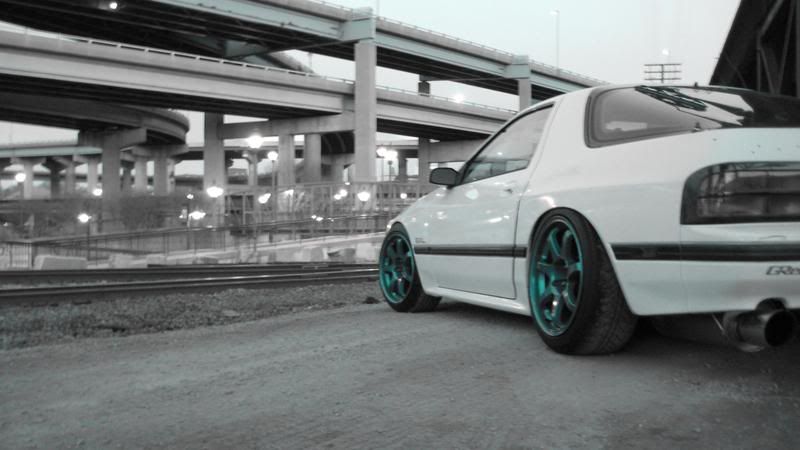

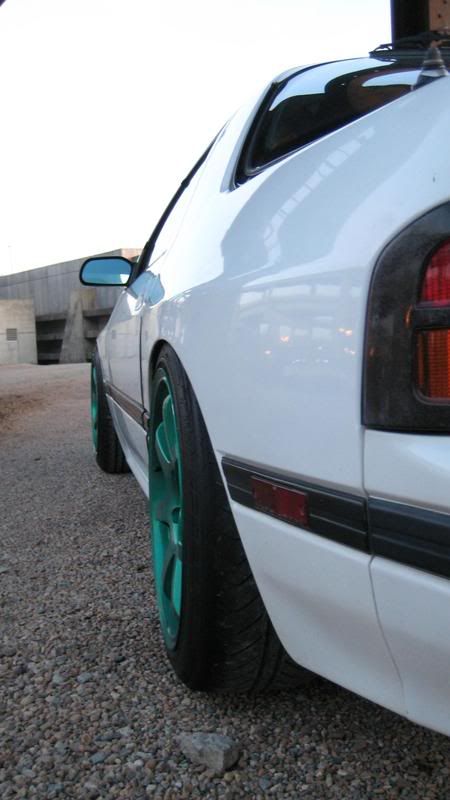
Sorry to go overboard with pictures, but I've been dying to have good fitment and wheels f o r e v e r.
Wheels:
MB Weapons
17x9 +2 (after 1" spacer) up front with a 215/45
17x9 +17 in the rear with a 225/45
-3 camber on all.
Painting process:
*Paint remover, I used "Aircraft Stripper"
*Solvent
*3 spray cans of Self Etching Primer
* 2 or 3 spray cans of Dupli Color metalcast Ground coat
*2 or 3 spray cans of metalcast anodized paint
*2 spray cans of Duplicolor CLEAR effects for AWESOMETOWN clear coat and insane glitter/metallic flake
1) Strip all the previous paint and smooth it to the best you can by starting with Aircraft Stripper remover. Put on a thin coat of the stuff and let it sit for about 15 minutes or so. Paint will come off like butter after that, unless its powder coated like mine was, then it takes a looong time. Have fun.
2) Wash them with soap, and then clean them with solvent to remove any grime, dirt, previous paint remover etc.
3) Prime them with the self etching primer. Don't forget the inside of the lips if you'll be stretching tires, oh and the inside of the wheel where it bolts to the hub.
4) Spray them down with several coats of the Duplicolor Metalcast ground coat. This is what will give it a deep metallic flake.
5) Spray them down with several light coats of the Green, or your color choice of the Metalcast anodized paint colors. End it with a thicker, wet coat. It comes out very thin, so be sure to get it all.
6) Other than the green, this is the most rewarding part - the Clear Effects glittery ****. ITS AWESOME. These pictures do no justice at all. In the sunlight, the wheel looks insane at each and every angle when you look at it. Indescribable. Do several coats of this. Seriously, pictures just don't do justice for how awesome they look in person. <3
YAYYYYYYY PAINTING WHEELS IS DONE!!!!!!!
Now, order coilovers. Just do it.
Then, slam it and set your damper settings
Oh, and then, take pictures and be happy
Sorry to go overboard with pictures, but I've been dying to have good fitment and wheels f o r e v e r.
Thread Starter
Rotary Enthusiast
Joined: Aug 2005
Posts: 954
Likes: 0
From: Richmond, Virginia
Thanks guys!! I really appreciate it, I've been trying to get this setup going on forever! We need more wheel fitment equipped FCs
haha yea, I drive through the city nearly everyday. The streets of Richmond aren't too soft either. With a 6 puck clutch, almost full damper stiffness, a jacked up driveshaft that causes HORRIBLE clutch chatter - this isn't the most relaxing dd
Trending Topics
a jacked up driveshaft that causes HORRIBLE clutch chatter
Please don't frag me if you are positive that it's the drive shaft, but the input shaft is a more common problem then the driveshaft's joints.
Thread Starter
Rotary Enthusiast
Joined: Aug 2005
Posts: 954
Likes: 0
From: Richmond, Virginia
Are you sure it's the driveshaft? A common problem on the FC is the tranny's input shaft. Once they wear/warp/get old, they will give a loud humm when in neutral with no clutch. Try this, next time you start the car, leave it in neutral and engage and disengage the clutch. See if the "clutch rattle" stops and starts. Not trying to prove you wrong here, just a little test. As I said, it's a common problem for FCs. Now, most will humm slightly, but when the input shaft is worn, it will be loud.
Please don't frag me if you are positive that it's the drive shaft, but the input shaft is a more common problem then the driveshaft's joints.
Please don't frag me if you are positive that it's the drive shaft, but the input shaft is a more common problem then the driveshaft's joints.
I'm surprised I haven't had a million "those wheels shouldn't be on an FC because the offset will destroy your steering scrub radius blah blah blah don't stretch tires idiot bullshit" comments yet.
yay

Thread Starter
Rotary Enthusiast
Joined: Aug 2005
Posts: 954
Likes: 0
From: Richmond, Virginia
Its a Greddy Power Extreme Catback. Oh I see you're in Richmond too! I live right near the Short Pump town center mall, like in the Glen Allen area, but travel downtown to VCU Monday, Wednesdays, and Fridays, and travel out through New Kent where my mom lives often... haha so I'm literally all over town daily. What about you?
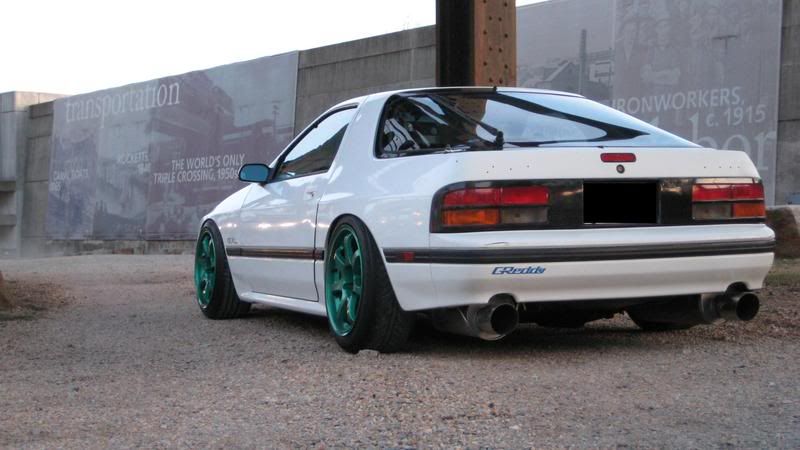
looks good.. welcome to the stretched tire flush fender club =p.
I think alot of guys here should take note on wheel sizing from you heheh.. I know those wheels are fairly priced, and alot better then most of the crap people throw on thier sevens here heheh.
whenever i post something up about my car, i get people telling me that I dont know tire sizes or that my tail lights are illegal lol


Thread Starter
Rotary Enthusiast
Joined: Aug 2005
Posts: 954
Likes: 0
From: Richmond, Virginia
Thanks all! and Lee, I agree.. everytime I look at the front I'm like "lowerrrrrrrr" haha and I'm getting some 15mm up front rather than 25s for oober flushness.
They hold up great, and I'm sure they will for a long time. The key to a good paint job on anything is prep.
Unfortunately, some rocks and **** made some little chips at a drift event this past weekend but hey, they're drift wheels anyhow
I should have a video up sometime from this past weekend so you can see they aren't just for hard parkin
They hold up great, and I'm sure they will for a long time. The key to a good paint job on anything is prep.
Unfortunately, some rocks and **** made some little chips at a drift event this past weekend
but hey, they're drift wheels anyhow I should have a video up sometime from this past weekend so you can see they aren't just for hard parkin
ha looks good...preping is the key to any painting project like you stated...body fill those holes out back so no water gets inside starts rotting your carpet etc...bump for a local guy also. im lik half hour away i go to short pump with gf quite a bit...oh and greatshamangt are you back yet..still intreasted in the red t2?

