my 20B porsche project
 08-03-11, 11:05 PM
#76
Senior Member
Thread Starter
iTrader: (1)

Join Date: Sep 2001
Location: San Francisco
Posts: 321
Likes: 0
Received 0 Likes
on
0 Posts
Thanks for the update, Logan. Looks great!! It looks like your work will put mine and other backyard mechanics' into shame... This will be done right once and for all...
 09-13-11, 11:56 PM
#78
Finally getting a chance to post some progress pics. Here is the drysump plate fabricated, and installed on current engine setup to set new height. We were able to drop the engine down a good amount, almost 3 inches.


Then made the new engine mount system. Went off the drysump front cover and lower pan plate. Made for a much lighter assembly, and easier for the times things need to be worked on. Not entirely finished, a few more reinforcements will be added to it. But that is enough to pull the engine out and tear down for inspection


Then made the new engine mount system. Went off the drysump front cover and lower pan plate. Made for a much lighter assembly, and easier for the times things need to be worked on. Not entirely finished, a few more reinforcements will be added to it. But that is enough to pull the engine out and tear down for inspection
Last edited by GtoRx7.; 09-13-11 at 11:58 PM.
09-22-11, 09:44 PM
#80
Engine removed and out of the car. Awaiting tear down for inspection and minor revisions


Everything looks normal and in pretty good shape. We will be going through the ports, smoothing some and adjusting port timing a little.


Normal side plate wear, we will be lapping all the irons to make it nice and perfect again.

Typical wear marks all around the rotor housings from aviation seals. These will be getting the Goopy treatment and goopy apex seals to avoid further wear and tear.

Looks like the front E-shaft had a bearing pinch at one time. Easy enough to smooth out, but scarred the front bearing on removal.

Last rotor and housing dis-assembly.

Fred, will be emailing you. Been so busy figured I would post it all first
Everything looks normal and in pretty good shape. We will be going through the ports, smoothing some and adjusting port timing a little.
Normal side plate wear, we will be lapping all the irons to make it nice and perfect again.
Typical wear marks all around the rotor housings from aviation seals. These will be getting the Goopy treatment and goopy apex seals to avoid further wear and tear.
Looks like the front E-shaft had a bearing pinch at one time. Easy enough to smooth out, but scarred the front bearing on removal.
Last rotor and housing dis-assembly.
Fred, will be emailing you. Been so busy figured I would post it all first
09-26-11, 03:02 PM
#82
Senior Member
Thread Starter
iTrader: (1)
Join Date: Sep 2001
Location: San Francisco
Posts: 321
Likes: 0
Received 0 Likes
on
0 Posts
It was most likely our doing, we'd have seen that before the assembly. Obviously the needle bearing wasn't pinched when the motor opened up. I think it must've happened temporarily, when we were setting up to check the rear end-play or something.
12-15-11, 01:56 AM
#83
I havent been accused of being santa claus, but this update might be a little like christmas
Making some paper templates for the frontal duct work.


Transfered to steel, and slip rolled to get a nice curve

All the parts TIG welded with only tacks for now


Started to remove and sort through all the wiring. This is definitely working us. LOTS of organizing and soldering ahead!


So we finally got the irons back from lapping and the rotor housings were resurfaced by goopy (they were finished ultra fast as always).

Making some paper templates for the frontal duct work.
Transfered to steel, and slip rolled to get a nice curve
All the parts TIG welded with only tacks for now
Started to remove and sort through all the wiring. This is definitely working us. LOTS of organizing and soldering ahead!
So we finally got the irons back from lapping and the rotor housings were resurfaced by goopy (they were finished ultra fast as always).
Last edited by GtoRx7.; 12-15-11 at 01:59 AM.
12-15-11, 02:00 AM
#84
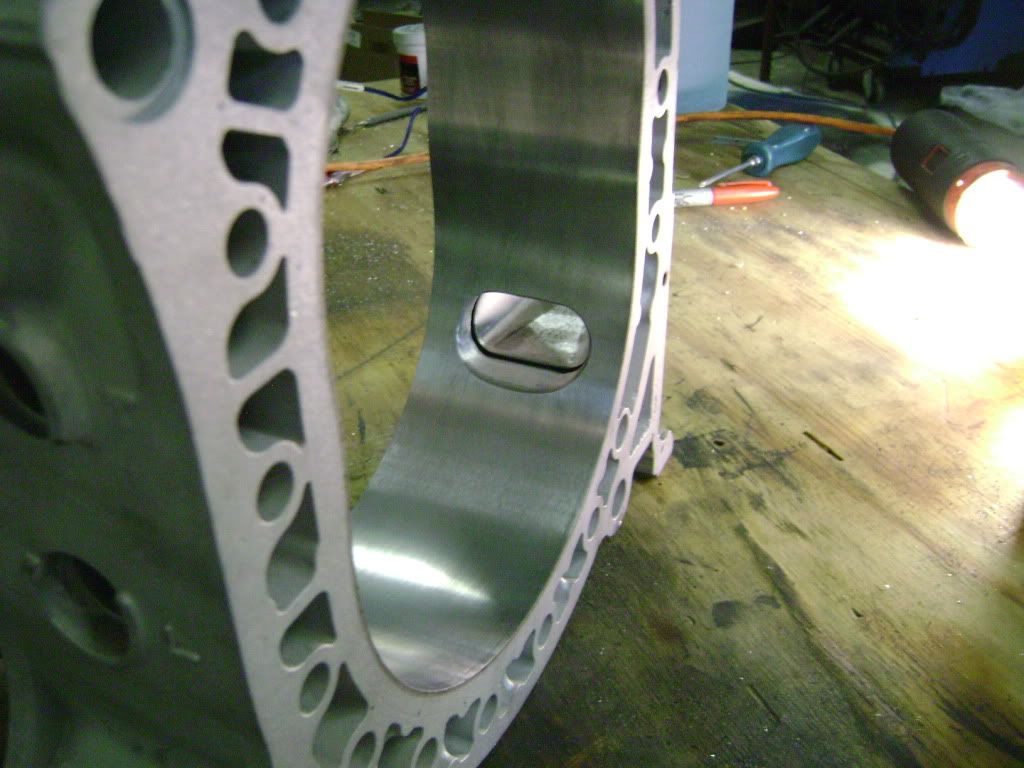
First step was to perform the drysump modifications. Removing the legs internally to fit in the drysump suction tubes.


Then smooth them out to remove any burs

Whenever lapping is done on irons, there is a small amount of debris from the grinding stones embedded into the surface. We take a few hours and use polishing compound on each iron. Rubing them together work out the leftovers.
Small detail, but important.


Next step was to mark and retemplate all the ports. Just to ensure port timing, and put a generous bevel on all the edges.
As noted earlier in the thread, the bearings got a bit damaged. So we pressed in new ones that were the proper clearance for the rpm/power this engine will produce.


Then smooth them out to remove any burs
Whenever lapping is done on irons, there is a small amount of debris from the grinding stones embedded into the surface. We take a few hours and use polishing compound on each iron. Rubing them together work out the leftovers.
Small detail, but important.
Next step was to mark and retemplate all the ports. Just to ensure port timing, and put a generous bevel on all the edges.
As noted earlier in the thread, the bearings got a bit damaged. So we pressed in new ones that were the proper clearance for the rpm/power this engine will produce.

 12-15-11, 01:36 PM
#89
Senior Member
Thread Starter
iTrader: (1)
Join Date: Sep 2001
Location: San Francisco
Posts: 321
Likes: 0
Received 0 Likes
on
0 Posts
Wow, it looks like Christmas is early this year!
Looks great, Logan. I knew you were the right man for the job all along.
The intake ports are pretty big, I did them as wide as possibly can, so be sure that they are not too wide (so that the side seals would fall into the port) and retain the bevel. Thanks!
Looks great, Logan. I knew you were the right man for the job all along.
The intake ports are pretty big, I did them as wide as possibly can, so be sure that they are not too wide (so that the side seals would fall into the port) and retain the bevel. Thanks!


 12-15-11, 08:27 PM
#91
Assembled stack


Block off plates put on to keep her safe

Front componets installed, note the drysump drive gear


The drysump needed some machine work. We removed material on the front to clear the belt path. Then I made the two notches to fit with the 20b front bolts


Cover installed, and drysump suction tubes put in.

Drysump plate installed

New series 4 waterpump put on. Its a great looking engine

Block off plates put on to keep her safe
Front componets installed, note the drysump drive gear
The drysump needed some machine work. We removed material on the front to clear the belt path. Then I made the two notches to fit with the 20b front bolts
Cover installed, and drysump suction tubes put in.
Drysump plate installed
New series 4 waterpump put on. Its a great looking engine


 12-17-11, 09:24 AM
#95
The General RE
Car is looking good. It is funny how much room there is on the passengers side of your motor. What are you gonna use for your dry sump oil tank? I have a stock 911 tank if you need it. 
12-17-11, 01:46 PM
#97
Senior Member
Thread Starter
iTrader: (1)
Join Date: Sep 2001
Location: San Francisco
Posts: 321
Likes: 0
Received 0 Likes
on
0 Posts
 So we're going with a racing aluminum one, probably on the passenger side of the motor.
01-09-12, 10:38 AM
So we're going with a racing aluminum one, probably on the passenger side of the motor.
01-09-12, 10:38 AM
#99
Junior Member

Subscribed!!! Great build and I'm a Porsche guy (just sold a 700hp 996TT) so this is making me want to do something similar!!! Loving my FD (13B) and had some wicked thoughts as well but you clearly beat us all to the punch with this monster idea!!!