
Monsterbox's 20b FD3S Conversion


Thread Starter
Mazzei Formula
iTrader: (6)
Joined: Jun 2006
Posts: 3,021
Likes: 145
From: Birmingham, Al
Update: 50 Days Post Receiving Motor
Fixed up the fuel leaks and wiring. These KG rails suck. Our trick was to stack a washer under each mounting tab of the rails to keep the position of the rail flat over the injectors. I utilized the larger O.D. set of o-rings for the primary rail to help seal the overbored holes. I know this information is easily found on the forums, however it would be nice if the distributors and manufactures would note these issues. This could have been a potential fire hazard nightmare for any newbie.
The injector wiring is finished and we will finish the wiring loom at completion. The coils have individual grounds to the block and quick spade connections to the main harness.
Today begins the coil bracket, spark plug wires, ex/intake manifold reinstallation and intercooler piping.
The injector wiring is finished and we will finish the wiring loom at completion. The coils have individual grounds to the block and quick spade connections to the main harness.
Today begins the coil bracket, spark plug wires, ex/intake manifold reinstallation and intercooler piping.
Rotary Enthusiast
Joined: Jan 2003
Posts: 1,349
Likes: 2
From: planet earth
its a nice piece , i like how it "floats " on the engine rather than resting on it , when i did mine it rested a bit on the engine , this tends to make the coils run a bit hot , so i used a ceramic-aluminium heat-shield to solve that issue
seems yours wont have any because it "floats" , nice
seems yours wont have any because it "floats" , nice
Thread Starter
Mazzei Formula
iTrader: (6)
Joined: Jun 2006
Posts: 3,021
Likes: 145
From: Birmingham, Al
Ignition finished!
Project is picking up speed. Maybe we can finish in under 60 days
Does anyone know the level of importance to shielding the CAS wiring for the microtech? The microtech CAS wire is too short to reach the CAS. I'm going to extend the wires into the 20b wire clip and I'm unsure exactly how much shielding is necessary?
Rotary Enthusiast
Joined: Jan 2003
Posts: 1,349
Likes: 2
From: planet earth
Shielding is important, especially if the cas wire is actually running close to the coils, you don't want any interference and crap bugging you later on.
Also those coils look pretty neat, what brand are they?
Starting to come together quit nicely there buddy
Also those coils look pretty neat, what brand are they?
Starting to come together quit nicely there buddy
Thread Starter
Mazzei Formula
iTrader: (6)
Joined: Jun 2006
Posts: 3,021
Likes: 145
From: Birmingham, Al
How would you recommend shielding the wires? I realize that you can purchase shielded wire, which carries the shielding end-to-end and grounds the shield wire. However, I'm attempting to add length to the Microtech wires.
What if:
1. Remove the wiring loom from the Microtech wire
2. Splice in the new wire and factory connector
3. Wrap the entire wire from connector to connector in aluminum tape
4. Wrap a small wire around the tape at the end and ground to a ring connector at the chassis.
4. Heatshrink over the aluminum tape
5. Reloom
Will this work?
Rotary Enthusiast
Joined: Jan 2003
Posts: 1,349
Likes: 2
From: planet earth
Not sure how well the foil actually works, is the not-shielded piece long?
I have a area exposed on mine as well, but it's more near the end end there is almost no other electrical wires near it, works great up til now
I have a area exposed on mine as well, but it's more near the end end there is almost no other electrical wires near it, works great up til now
Thread Starter
Mazzei Formula
iTrader: (6)
Joined: Jun 2006
Posts: 3,021
Likes: 145
From: Birmingham, Al
I'm going to proceed with Aluminum Tape, grounding it at the ECU end and report back. I see no reason why it should not work. Thanks for your support.


Buy a new harness from Microtech, your section of unshielded wiring is in the most critical area.
Btw, if you had installed the OEM plastic spacers that are supposed to be under the rail you would not have needed to use metal washers. The holes were not oversized, injectors come with all kinds of different O-rings. If the injector did not fit tightly in the rail, it should have been obvious it was going to leak.
Btw, if you had installed the OEM plastic spacers that are supposed to be under the rail you would not have needed to use metal washers. The holes were not oversized, injectors come with all kinds of different O-rings. If the injector did not fit tightly in the rail, it should have been obvious it was going to leak.
Thread Starter
Mazzei Formula
iTrader: (6)
Joined: Jun 2006
Posts: 3,021
Likes: 145
From: Birmingham, Al
It wasn't obvious and clearly there's no reasonable explanation for a difference in sizing between the secondary rail and the primary rail other than a mistake. It would make most sense for KG parts to have consistent sizing between the rails.
More importantly, pointing out this inconsistency certainly cannot hurt. In fact, it may help other DIY's like myself avoid potential confusion, as it may not be obvious to everyone else.
I will order a harness from Microtech as a last decision; for now I will proceed to make my own wiring / shield it myself. I've used the aluminum tape method on electric guitar pickups and it works great. Shouldn't be too big of a deal. Thanks for your support.
Thread Starter
Mazzei Formula
iTrader: (6)
Joined: Jun 2006
Posts: 3,021
Likes: 145
From: Birmingham, Al
Is it just me or has anyone else noticed that when using FD3S trans/starter, the lower starter bolt can not be used normally with the 20b? It appears the oil pan is blocking the bolt from coming all the way through the bellhousing/rear plate? I can't remember how it works on the 13b and no reference. I may be using the wrong bolt.
You are doing something wrong. The lower starter bolt does not go through the bell housing, only the lower ear of the starter. There is a bell housing bolt that needs to be installed before the starter.

Rotary Enthusiast
Joined: Aug 2008
Posts: 1,101
Likes: 13
From: Portsmouth UK
I don't recall the oil pan fouling anything? I remember I had to flat one side of a bolt on the bellhousing to clear a blanking plate I made to fill the gap on the passenger side (UK) of the bellhousing where is meets the block. You are making me wonder if I didn't spot something I should have now!?
Thread Starter
Mazzei Formula
iTrader: (6)
Joined: Jun 2006
Posts: 3,021
Likes: 145
From: Birmingham, Al
Im probably doing something wrong.
I did see and install the bellhousing bolt that goes in before the starter. I installed the top long starter bolt and nut on the end. The bottom is what throws me for a loop. I'm probably using the wrong bolt / confused. Thanks for the feedback guys I'll make it work.
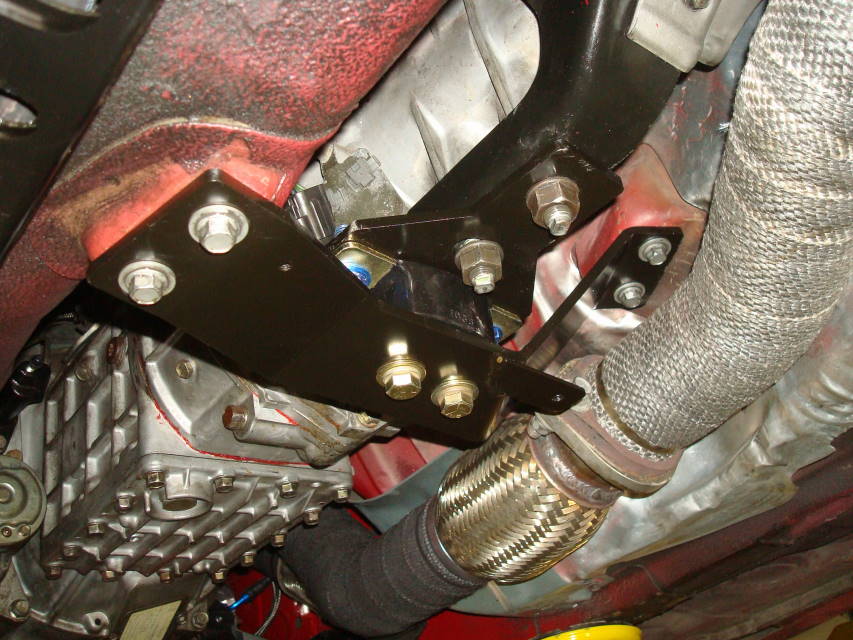
Should have some pics up soon of this manifold/dp/turbo setup installed shortly
I did see and install the bellhousing bolt that goes in before the starter. I installed the top long starter bolt and nut on the end. The bottom is what throws me for a loop. I'm probably using the wrong bolt / confused. Thanks for the feedback guys I'll make it work.
Should have some pics up soon of this manifold/dp/turbo setup installed shortly
Thread Starter
Mazzei Formula
iTrader: (6)
Joined: Jun 2006
Posts: 3,021
Likes: 145
From: Birmingham, Al
Thanks for the offer man, however I already went ahead and finished the wiring. Went with two, paired shielded microphone wire spliced between the connector and the microtech harness. Next, I'm going to wrap the extension in aluminum tape, ground the aluminum tape to the internal ground wire shilding of the microtech and heatshrink.
Thread Starter
Mazzei Formula
iTrader: (6)
Joined: Jun 2006
Posts: 3,021
Likes: 145
From: Birmingham, Al


Coming along at a nice and steady pace. As you can see from the pictures, the radiator sits lower and forward moreso than the usual mounting position. We cut and grinded off the lip of the front frame support and slipped the radiator up under the support to bring the radiator closer to the intercooler for easier ducting and additional turbo clearance.
Finished wiring up the gauge cluster, ecu, and 90% of the engine sensors.
Does anyone know if there is a 1/8npt threaded hole on the block somewhere that I can mount my Defi Coolant Sender? Otherwise, I'm going to tap the coolant filler neck.
Should be running by next weekend if I can find the time. Have to pull the turbo/IC setup off the finish up a few welds and install all necessary clamps gaskets, oil return line, feed line, etc