
TurboII swap Project: Complete vehicle reqwiring part 1: chassis

Thread Starter
Joined: Jan 2002
Posts: 2,397
Likes: 1
From: Mound, MN
Thanks, Im getting sporadic days of warmth and am just getting back into the groove of working on the car. After months of winter, I'm still working on figuring out where I left off on things. Should be making some real progress in the next couple weeks.
Thread Starter
Joined: Jan 2002
Posts: 2,397
Likes: 1
From: Mound, MN
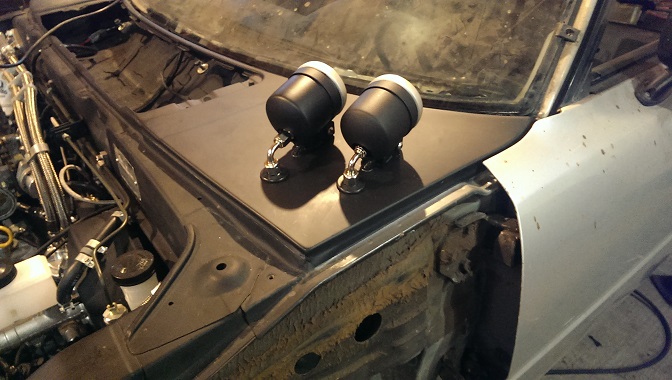
Got a start on design for the headlight motors. Only the most basic mock up here, I'm hoping to utilize the factory mounting positions as much as possible.
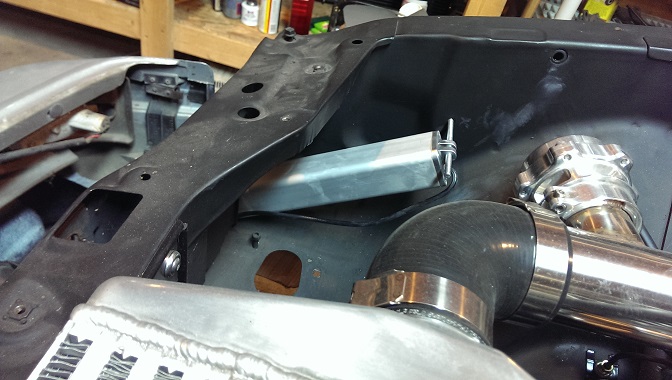
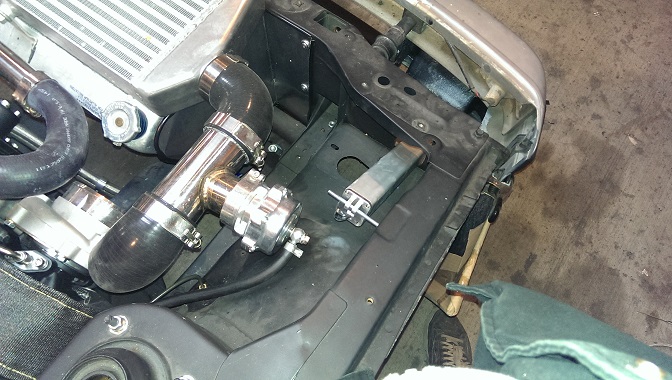
Transfering the motion to the headlamps is going to be tricky, but I've ordered some heavy duty bell cranks with adjustable ratios and angle that I'm hoping will simplify the action. I've got three inches of stroke on the motors that I need to cantilever into about 3.5 to 4.0 inches. Overall, I'm very happy with the look that I see coming together. Operation will require some relay logic, but Im going to tuck that away out of site.
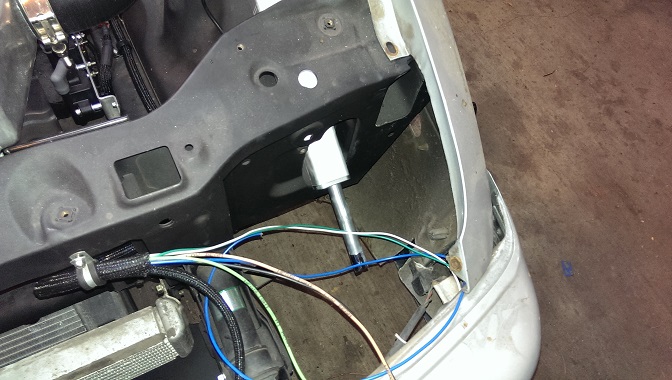
Transfering the motion to the headlamps is going to be tricky, but I've ordered some heavy duty bell cranks with adjustable ratios and angle that I'm hoping will simplify the action. I've got three inches of stroke on the motors that I need to cantilever into about 3.5 to 4.0 inches. Overall, I'm very happy with the look that I see coming together. Operation will require some relay logic, but Im going to tuck that away out of site.
Thread Starter
Joined: Jan 2002
Posts: 2,397
Likes: 1
From: Mound, MN
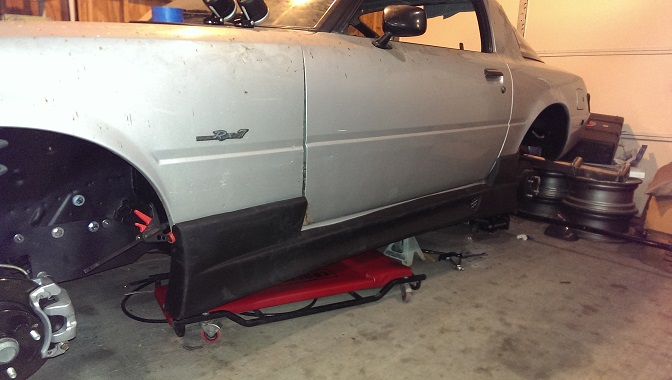
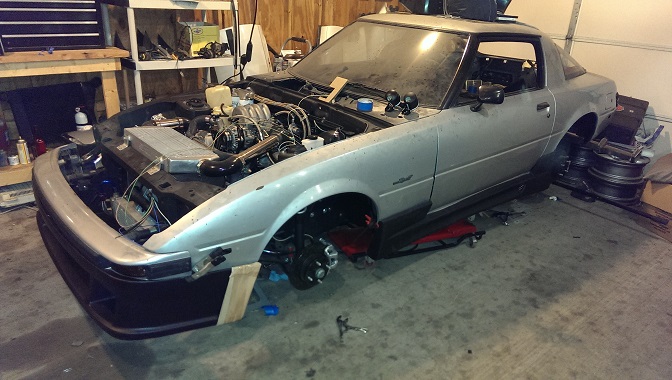
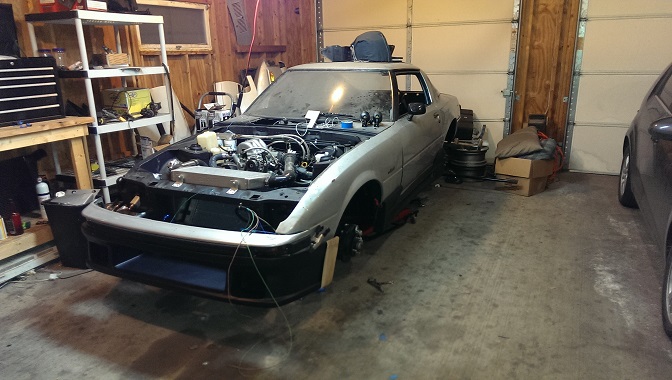
Also got the bumper and Sideskirts.
I purchased the VIS Magnum front bumper and the Extreme Dimensions GP1 sideskirts.
FYI!!!! the VIS Magnum is advertised as looking like the old Factory IMSA design, this is what it actually looks like. I was a bit disappointed at first and hashed it out with my Distributor and VIS. But after I did some basic mock up, I found the fit to be excellent, and the center inlet fit into my V-mount setup like it was designed for it, its uncanny.
The GP1 sideskirts are a different story. The look is good and the build quality is comparable, but the fit is poor. It does not fit around the door and I expect it to take much longer to fit. But overall I'm happy with how they look together.
This build has been incredible so far. Originally I thought that you were going for a sleeper approach but the gauges on the cowl look like you mean business! Quick question , how much fabrication did it take in order to fit the V-mount?
Thread Starter
Joined: Jan 2002
Posts: 2,397
Likes: 1
From: Mound, MN
It was pretty straight forward, and I worked around stuff I already had. The radiator is from my orignal setup and I had the intercooler laying around. I just sort of made it work.
Check my older threads, there are some detailed pictures of how it was fabricated.
Things are going to look real sick once everything is painted flat black and that shiny intercooler
is visible on the hood. And this thing is ALL BUSINESS! I'll be doing a lot of shows once its finished and everything is still fresh and clean and shiny, while I shake things down. After that it will get regular street use and some exibition racing.
How is the hood going to close with the intercooler mounted there? It seems like it's at least 2 " higher than the hood line. Oh, I get it! A cutout on the hood for the intercooler!
I went with cowl mounted gauges (Aussie style) on a previous build (Honda Civic lol) and some SOB stole them. Yanked them off and didn't even have the courtesy to unscrew the base plates!
Thread Starter
Joined: Jan 2002
Posts: 2,397
Likes: 1
From: Mound, MN
That sucks. I hope that doesn't happen here, as they are mechanical, and the lines have to be removed after they are pulled from the cup. Even if they pulled them out of the body, they would have to cut the AN line, not always a simple task.
That being said, I made some small progress despite the fact that we got EIGHT INCHES OF SNOW IN APRIL!!!! and its again below freezing. **** sucks, but I have been bearing it.
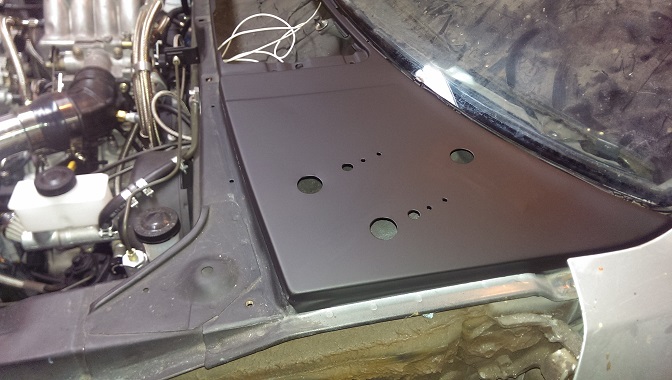
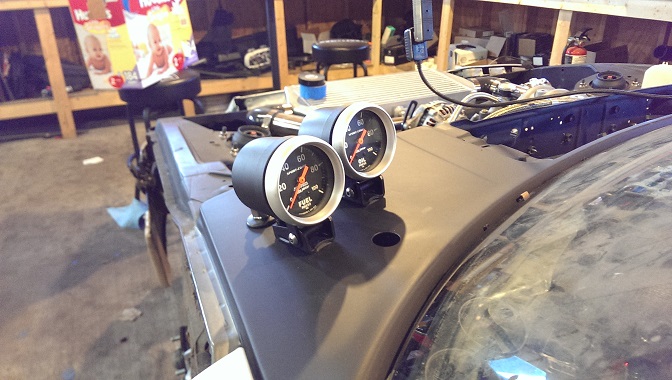
Got the cowl painted so I can permanently mount the gauges (being mech). Turned out pretty good for rattle can, I will definately spend more sanding time on the remainder, but I was pressed for time and it was cold. Color match is not perfect, but the engine bay paint is two years older.
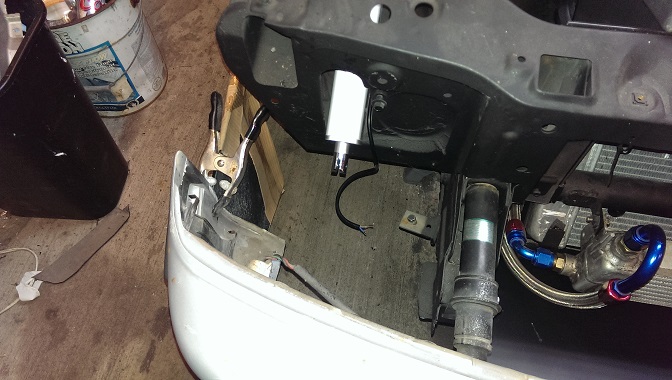
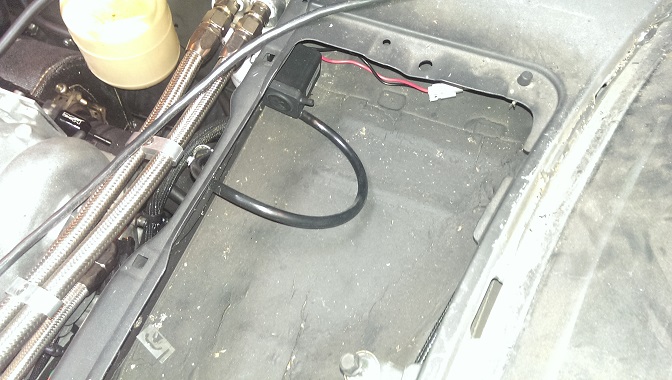
Also got the washer pump mounted and wired. A nice easy task in the never ending build.
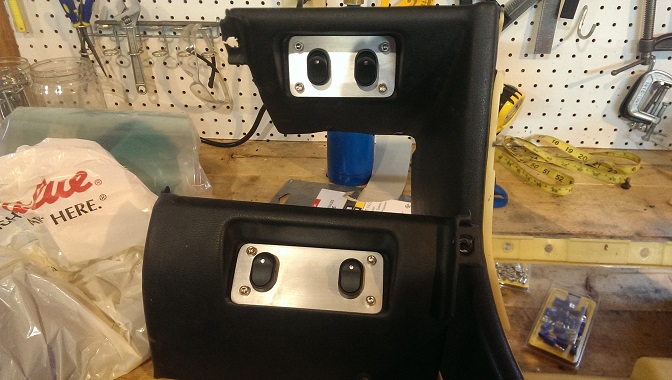
Fabbed up the lower switch panels. The lower panel; the left lower trim cover, has the light controls. Left is Fog lights, right is Headlights up. The upper panel; the right lower trim/console has the manual overrides for the fuel pump and cooling fan, which are otherwise controlled by the Haltech SprintRE. I will put labels on them eventually.
Lastly, I ran the speaker wires for the radio. I abandoned the plan for a 5 channel amp with a sub and am just going to run the deck. I went with Pioneer equipment. The Reciever is a Mech-less unit with full Android compatible phone/music/Pandora by Blu-tooth. Not that I'll be able to hear it over the exhaust.
I should have a big update soon, with a mostly finished dashboard. But it wont be warmer than 40F until Sunday, so probably not until then.
That being said, I made some small progress despite the fact that we got EIGHT INCHES OF SNOW IN APRIL!!!! and its again below freezing. **** sucks, but I have been bearing it.
Got the cowl painted so I can permanently mount the gauges (being mech). Turned out pretty good for rattle can, I will definately spend more sanding time on the remainder, but I was pressed for time and it was cold. Color match is not perfect, but the engine bay paint is two years older.
Also got the washer pump mounted and wired. A nice easy task in the never ending build.
Fabbed up the lower switch panels. The lower panel; the left lower trim cover, has the light controls. Left is Fog lights, right is Headlights up. The upper panel; the right lower trim/console has the manual overrides for the fuel pump and cooling fan, which are otherwise controlled by the Haltech SprintRE. I will put labels on them eventually.
Lastly, I ran the speaker wires for the radio. I abandoned the plan for a 5 channel amp with a sub and am just going to run the deck. I went with Pioneer equipment. The Reciever is a Mech-less unit with full Android compatible phone/music/Pandora by Blu-tooth. Not that I'll be able to hear it over the exhaust.
I should have a big update soon, with a mostly finished dashboard. But it wont be warmer than 40F until Sunday, so probably not until then.
fm


Also got the bumper and Sideskirts.
I purchased the VIS Magnum front bumper and the Extreme Dimensions GP1 sideskirts.
FYI!!!! the VIS Magnum is advertised as looking like the old Factory IMSA design, this is what it actually looks like. I was a bit disappointed at first and hashed it out with my Distributor and VIS. But after I did some basic mock up, I found the fit to be excellent, and the center inlet fit into my V-mount setup like it was designed for it, its uncanny.
The GP1 sideskirts are a different story. The look is good and the build quality is comparable, but the fit is poor. It does not fit around the door and I expect it to take much longer to fit. But overall I'm happy with how they look together.
Extreme Dimensions M Sport kit

I actually like the piece you got better, which is why I was looking online for it. The Magnum/IMSA piece is much more flat vertically. I like the little bit of setback it has below the bumper.
edit: Yep, that's what you got. Take a look at this eBay auction:
http://www.ebay.com/itm/79-85-Mazda-RX7-M-1-Duraflex-Front-Bumper-Lip-Body-Kit-/400665818259?pt=Motors_Car_Truck_Parts_Accessories&hash=item5d498b3493&vxp=mtr
The half bumper looks exactly like yours.
Last edited by Frankenrex; Apr 19, 2014 at 01:22 PM. Reason: added more
Thread Starter
Joined: Jan 2002
Posts: 2,397
Likes: 1
From: Mound, MN
Maybe it's just that mine is still unpainted, but I think there might be some minor difference. I don't think mine tucks in and back as much, and the grill was mounted completely different. The ED one is cheaper too.
The pictures I see online (tiny advertising pictures, of course) show the VIS pies as being pretty much flat, vertically, like an old school air dam, which it is, I guess. Still, the one you ended up with looks good, whatever model it is, and if you like it, that's all that really matters, right?
Thread Starter
Joined: Jan 2002
Posts: 2,397
Likes: 1
From: Mound, MN
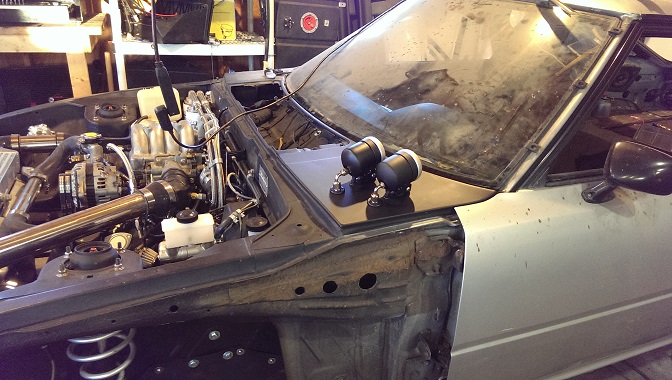
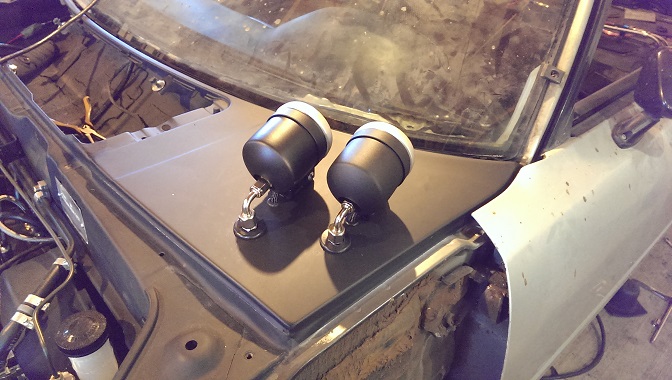
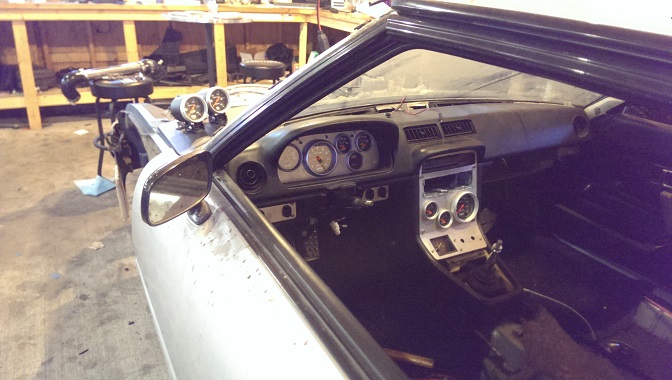
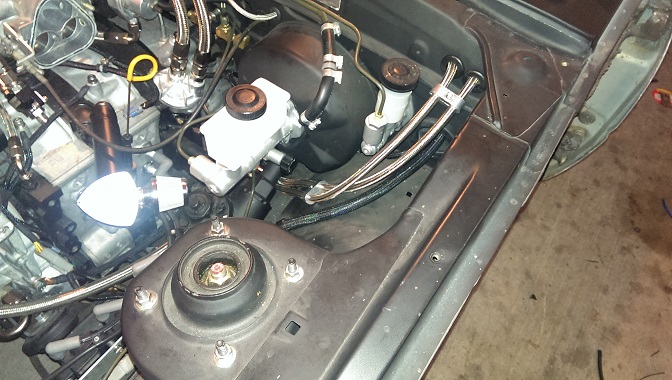
Got the cowl gauges finished out, but unfortunately one of the fittings was incorrect and Ill have to order a different one from summit. No problem as there are other things to do. Couldn't help but mount them for a look.
Next goal is to fit the center dash, mount the Radio base plate and USB bulkheads to the center dash bezel and add the turn/pass indicators to the gauge cluster and mount that. I cant wait to see the dash completed again, its been a while, and I have 2 more gauges now.
Next goal is to fit the center dash, mount the Radio base plate and USB bulkheads to the center dash bezel and add the turn/pass indicators to the gauge cluster and mount that. I cant wait to see the dash completed again, its been a while, and I have 2 more gauges now.
Thread Starter
Joined: Jan 2002
Posts: 2,397
Likes: 1
From: Mound, MN
Those are pressure lines, the gauges are mechanical. The wiring is right behind the mount directly under the gauge cup, you can see it in the last picture. it has black braid over it like the rest of the car.
Thread Starter
Joined: Jan 2002
Posts: 2,397
Likes: 1
From: Mound, MN
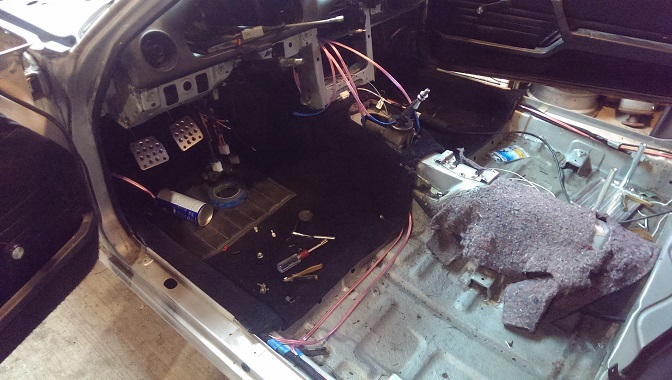
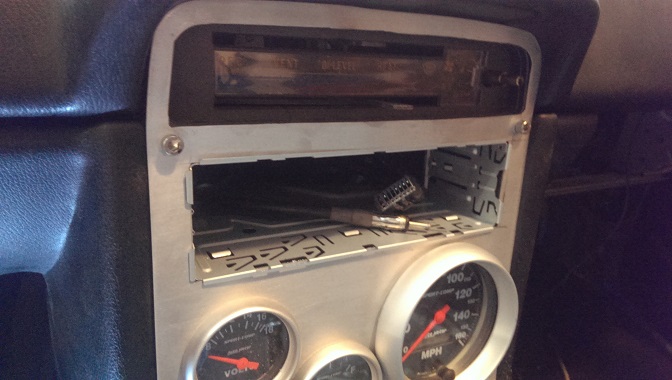
Got most of the console assembled. Fitting the radio mount was super time consuming. The fit was very tight; there was zero room for error on its vertical position and minimal on horizontal.
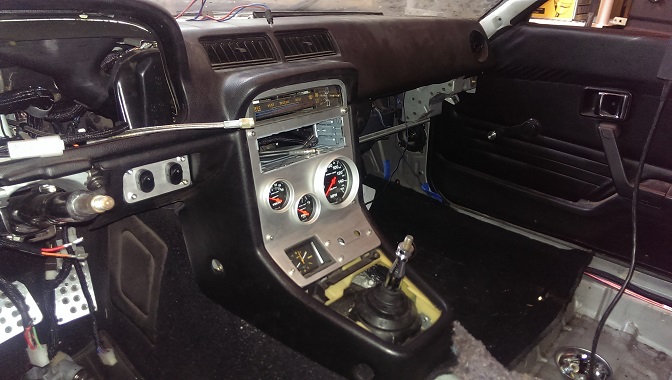
But after cutting and filing for nearly an hour, the fit turned out perfect. I still need to secure it, but that should be cake. The radio headunit is a nice fit as well, with matching black and metal. Its a Mech-less, so it short, for an easier fit.
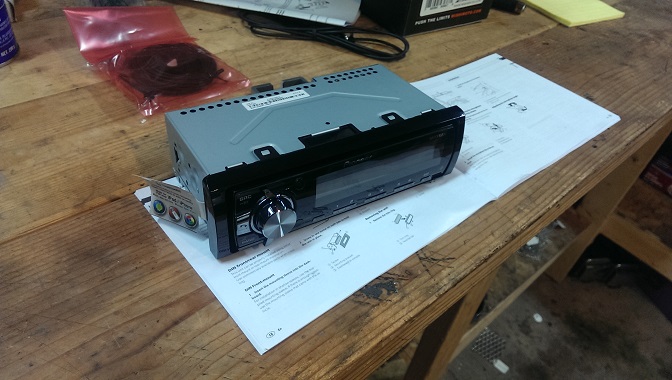
But after cutting and filing for nearly an hour, the fit turned out perfect. I still need to secure it, but that should be cake. The radio headunit is a nice fit as well, with matching black and metal. Its a Mech-less, so it short, for an easier fit.
Center console is looking good, too.
Thread Starter
Joined: Jan 2002
Posts: 2,397
Likes: 1
From: Mound, MN
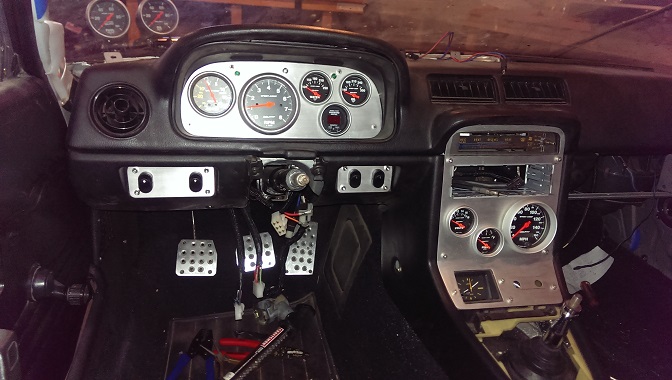
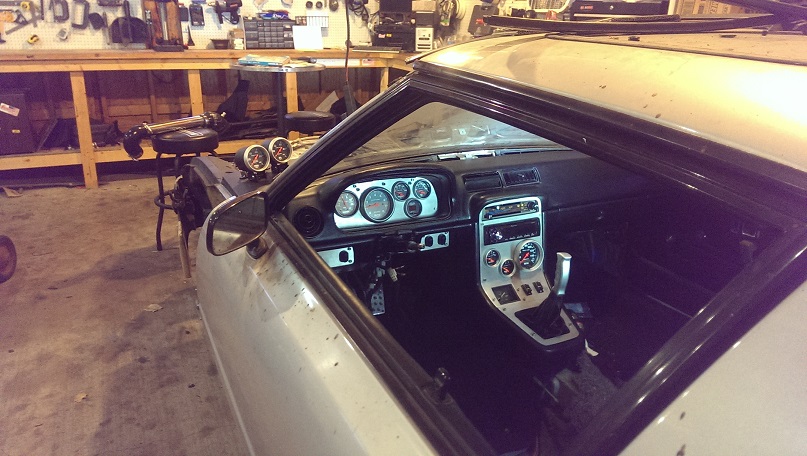
Things are coming together. Almost got the dash finished up, but had to drive to 3 different places before I could find a basic A to A Usb cable to finish the radio install. Still need to mount the Haltech into the Glovebox and mount that. Along with a few other random trim parts.
First is a redo of a Picture I took of the car over 10 years ago when I did the Autometer gauges the first time. Ill see if I can find the original.
Finishing the Cowl Gauges proved tricky, but in the end I am very happy how they look. In retrospect I should have painted the whole cowl, not just the drivers side, but whatever; this project was never about fancy paint.
Thread Starter
Joined: Jan 2002
Posts: 2,397
Likes: 1
From: Mound, MN
Dash is more or less finished. Got the radio finished up, but I may pull the trim and paint it silver to match the gauges. Painted and mounted the USB ports by the clock. Left is radio, right is Haltech. Also finished the shifter trim, tightened up the boot and installed the new Hurst SHifter. Turn and highbeam indicators were added to the cluster.
And gave a thorough cleaning to everything. I am very happy with how things are turning out. Next phase is finishing the battery cables and mount, and fitting the seats.
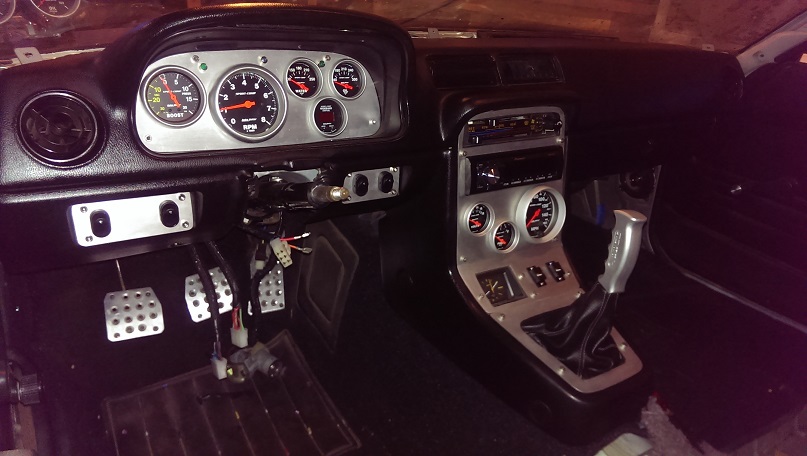
And gave a thorough cleaning to everything. I am very happy with how things are turning out. Next phase is finishing the battery cables and mount, and fitting the seats.
Thread Starter
Joined: Jan 2002
Posts: 2,397
Likes: 1
From: Mound, MN
thanks, Im loving how its turning out.
dug up this old pic off the forum. THis is how I built it orginally when I was 17 (12 years ago). Took me 5x time to fab and didnt look nearly as good. I also used clearcoated steel and it rusted.

dug up this old pic off the forum. THis is how I built it orginally when I was 17 (12 years ago). Took me 5x time to fab and didnt look nearly as good. I also used clearcoated steel and it rusted.