
Servicing an Air Pump?

Thread Starter
Wrkn Toyota, Rootn Wankel
Joined: Sep 2007
Posts: 1,642
Likes: 1
From: "Haystack" Hayward, CA
Servicing an Air Pump?
I know in the industry we don't really rebuild things anymore as much as R&R, and an Air Pump doesn't seem like it would be something you would normally rebuild. But I own a First Gen RX7, which we all know means to things:
1.) Never having enough money for everything you want.
2.) Hating to buy new parts when old ones could be fixed.
So has anyone ever take one of these bad boys apart and repaired them?
1.) Never having enough money for everything you want.
2.) Hating to buy new parts when old ones could be fixed.
So has anyone ever take one of these bad boys apart and repaired them?
Thread Starter
Wrkn Toyota, Rootn Wankel
Joined: Sep 2007
Posts: 1,642
Likes: 1
From: "Haystack" Hayward, CA
It turns over a little roughly, It won't spin too freely. It will turn over and then need a bit more force to turn past. At first I thought it was because it was compressing air, but the sticky part doesn't cause a puff of air really. Gah Go 1 for shitty explanations.
Joined: Jun 2008
Posts: 8,376
Likes: 28
From: Chino Hills, CA
I bought a spare one specifically for purposes of expeirmenting with it, but I haven't gotten any further than putting in on the "to do" list.
IIRC, I think Ray mentioned that he'd gutted one to use as an idler pulley on a smog delete. He said that they were "surprisingly complex" inside, as I recall.
IIRC, I think Ray mentioned that he'd gutted one to use as an idler pulley on a smog delete. He said that they were "surprisingly complex" inside, as I recall.
1st of all you wait 24 hours before bumping up a tech thread.
They are easy to take apart and no they are not complex inside. What happens is that moisture will get inside and corrode what looks like brushes. Just clean them up and put it back together and it should be fine.
1
They are easy to take apart and no they are not complex inside. What happens is that moisture will get inside and corrode what looks like brushes. Just clean them up and put it back together and it should be fine.
1
Trending Topics


Joined: Mar 2001
Posts: 31,833
Likes: 3,232
From: https://www2.mazda.com/en/100th/
i took apart an FC one, and there are two problems.
1. its hard to get it apart without breaking it
2. you cannot buy parts for it! so if you take it apart, and there is something wrong inside, what are you going to do? make a plastic vane?
1. its hard to get it apart without breaking it
2. you cannot buy parts for it! so if you take it apart, and there is something wrong inside, what are you going to do? make a plastic vane?
Thread Starter
Wrkn Toyota, Rootn Wankel
Joined: Sep 2007
Posts: 1,642
Likes: 1
From: "Haystack" Hayward, CA
I'll get another one, this is just to see if I could possibly serice it and make it work better
Thread Starter
Wrkn Toyota, Rootn Wankel
Joined: Sep 2007
Posts: 1,642
Likes: 1
From: "Haystack" Hayward, CA
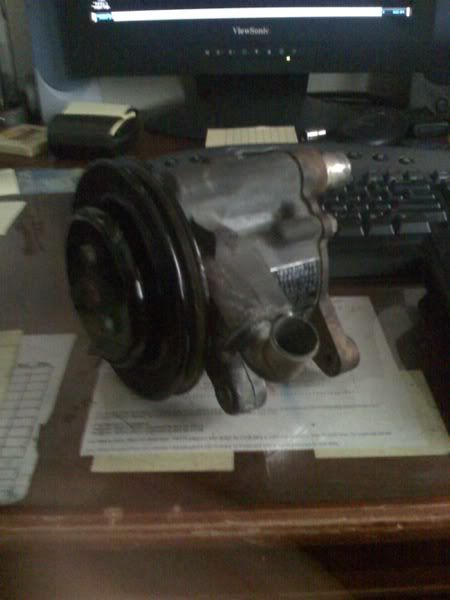
Okay then guys, had some time on my hands today and I decided to crack that puppy open. Surprisingly its not complicated at all, its a simple rotary vane pump and everything in it looks easy to clean and put back together.
First off, I removed the pulley, which turns out you don't need to do in order to disassemble the unit, so don't even bother with it if you are doing this yourself.
Then remove the four 12mm bolts on the back of the unit and use a knife or small wedge (in this case I used a flat head screwdriver) to gently tap around the seam of the backing plate to the housing. Be careful, because the housing is cast aluminum and the backing plate is made from cast iron. All you're doing is gently prying the plate off evenly to unseat it, 20 years of rust and use tends to stick it to the housing I found.
After you remove the plate, slide it straight up and set it aside, now you can see the inside of the unit and it is rather easy to discern what to take out. I slide the vanes out as one bunch, but as you can see in the pictures they are pretty hard to mess up when reassembling.
In regards to a previous poster saying that the vanes were made from plastic, in this particular unit (1986 N/A 13B 6-Port) I found them to be metal. There is also inset seals in the circular housing that are made from metal, one side has a similar setup to an Apex seal so I removed those as well, a simple pocket screw driver to gently pry them out worked well enough. If you inspect the bearings, you can see that they aren't anything special and I believe the grease that is used is very similar to wheel bearing grease or any other bearing grease, hence why they probably do not want us to oil the unit its self.
Okay, enough talking, here's some pictures to help you guys along with my long winded post:
The Mazda 13B Air Pump Unit!
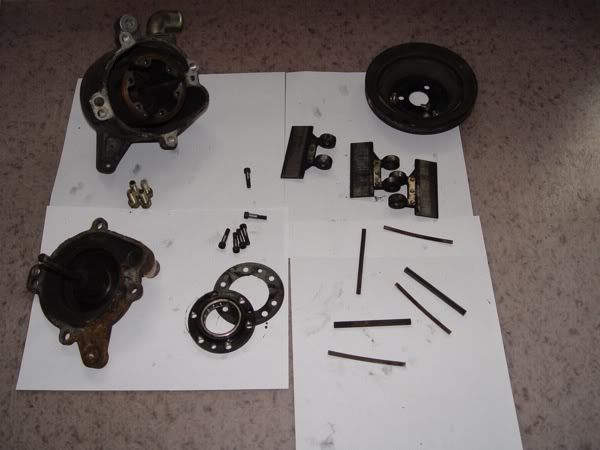
This is how it should look when you have it all apart:
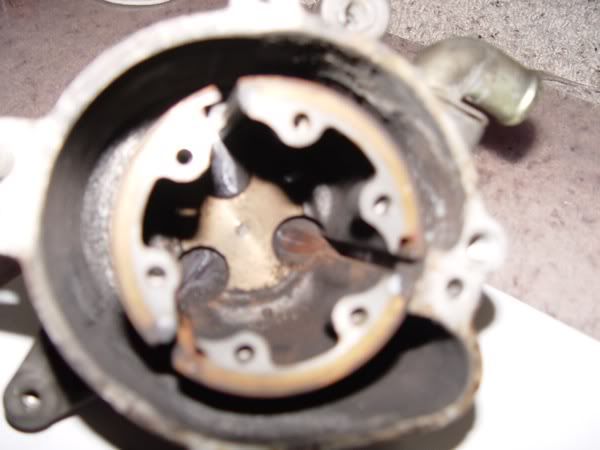
This is a shot of the inside of the case: (Sorry for the blurry picture, my camera was not happy with focusing so close and using flash)
These are the metal vanes that actually push the air around:

Right now I set the parts aside as I am going to properly clean them and then grease the bearings before assembling the unit, it seems over the 20 years of use that soot and debris caked on the inside of the unit and seeped into the center portion which made the bearings a little grabby. Luckily the bearings look fine and this Air Pump looks like it can be salvaged by a simple cleaning and a little love.
First off, I removed the pulley, which turns out you don't need to do in order to disassemble the unit, so don't even bother with it if you are doing this yourself.
Then remove the four 12mm bolts on the back of the unit and use a knife or small wedge (in this case I used a flat head screwdriver) to gently tap around the seam of the backing plate to the housing. Be careful, because the housing is cast aluminum and the backing plate is made from cast iron. All you're doing is gently prying the plate off evenly to unseat it, 20 years of rust and use tends to stick it to the housing I found.
After you remove the plate, slide it straight up and set it aside, now you can see the inside of the unit and it is rather easy to discern what to take out. I slide the vanes out as one bunch, but as you can see in the pictures they are pretty hard to mess up when reassembling.
In regards to a previous poster saying that the vanes were made from plastic, in this particular unit (1986 N/A 13B 6-Port) I found them to be metal. There is also inset seals in the circular housing that are made from metal, one side has a similar setup to an Apex seal so I removed those as well, a simple pocket screw driver to gently pry them out worked well enough. If you inspect the bearings, you can see that they aren't anything special and I believe the grease that is used is very similar to wheel bearing grease or any other bearing grease, hence why they probably do not want us to oil the unit its self.
Okay, enough talking, here's some pictures to help you guys along with my long winded post:
The Mazda 13B Air Pump Unit!
This is how it should look when you have it all apart:
This is a shot of the inside of the case: (Sorry for the blurry picture, my camera was not happy with focusing so close and using flash)
These are the metal vanes that actually push the air around:
Right now I set the parts aside as I am going to properly clean them and then grease the bearings before assembling the unit, it seems over the 20 years of use that soot and debris caked on the inside of the unit and seeped into the center portion which made the bearings a little grabby. Luckily the bearings look fine and this Air Pump looks like it can be salvaged by a simple cleaning and a little love.
Thread Starter
Wrkn Toyota, Rootn Wankel
Joined: Sep 2007
Posts: 1,642
Likes: 1
From: "Haystack" Hayward, CA
Thread Starter
Wrkn Toyota, Rootn Wankel
Joined: Sep 2007
Posts: 1,642
Likes: 1
From: "Haystack" Hayward, CA
One more think I forgot to mention that you can see in the picture, the hold down bolts for the vane assembly will require a 4mm Allan Wrench to remove. There is also a gasket looking piece that I would be very careful with as it has been pointed out that no one makes replacement parts for this unit.


Full Member
Joined: Nov 2008
Posts: 56
Likes: 0
From: London England
Big Big Thank u to Demon -did my pump 12A FB -and my vanes are plastic type
and my seals are carbon type with a spring underneath .cleaned with petrol and greased bearings -all were very dry also put some SAE 90 gear oil to soak into front bearing -goes in better by revolving the outer cylinder .Note how bits come out and wear ends on seals as then easier to refit.ran pump without hoses connected to clear any excess of oil after drying out by hand -Good pressure and smooth running.And of course clean the sticker that says -do not remove and smile Good for another 25 years.
and my seals are carbon type with a spring underneath .cleaned with petrol and greased bearings -all were very dry also put some SAE 90 gear oil to soak into front bearing -goes in better by revolving the outer cylinder .Note how bits come out and wear ends on seals as then easier to refit.ran pump without hoses connected to clear any excess of oil after drying out by hand -Good pressure and smooth running.And of course clean the sticker that says -do not remove and smile
Good for another 25 years.

Thread
Thread Starter
Forum
Replies
Last Post
Skeese
Adaptronic Engine Mgmt - AUS
65
Mar 28, 2017 03:30 PM
12abridgeport
1st Generation Specific (1979-1985)
2
Aug 17, 2015 06:28 PM