Rusty floor boards :(

 10-25-09, 04:04 PM
#27
Full Member
Thread Starter
Join Date: Jun 2009
Location: St. Thomas, Ontario.
Posts: 122
Likes: 0
Received 0 Likes
on
0 Posts
So here's an update ugh...
Went to start my car today, hooked up the batterycharger got a full charge, turned the ignition and not even a click fml! so I'm thinking my starter is done.....
In other news. I'm just waiting on a Text from a friend to get the car in to be welded up. maybe when it goes on the trailer I can push start it (can you do that with a 1st gen???) I can't see it being any different then any other standard car out there. Get it rolling, put it in first and slowly let off the clutch?
if not PLEASE inform me of any special needs to push start the car lol.
11-11-09, 10:07 AM
#29
Full Member
Thread Starter
Join Date: Jun 2009
Location: St. Thomas, Ontario.
Posts: 122
Likes: 0
Received 0 Likes
on
0 Posts
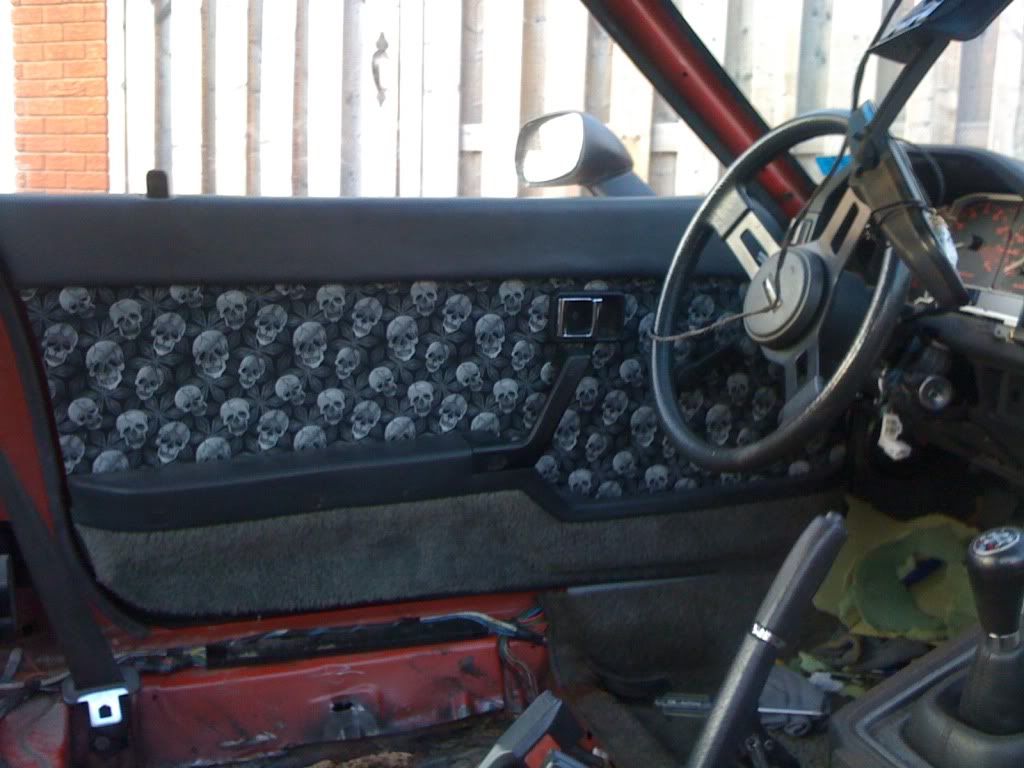
Well I'm digging this thread out of the abys! I think this may just become my slow speed build thread lol. anyway I've gotten some little things done on the Rx7. Those being the interior is now mostly redone, and the floor will be done hopefully this weekend!
Anyway heres the pictures you've all been waiting for :P
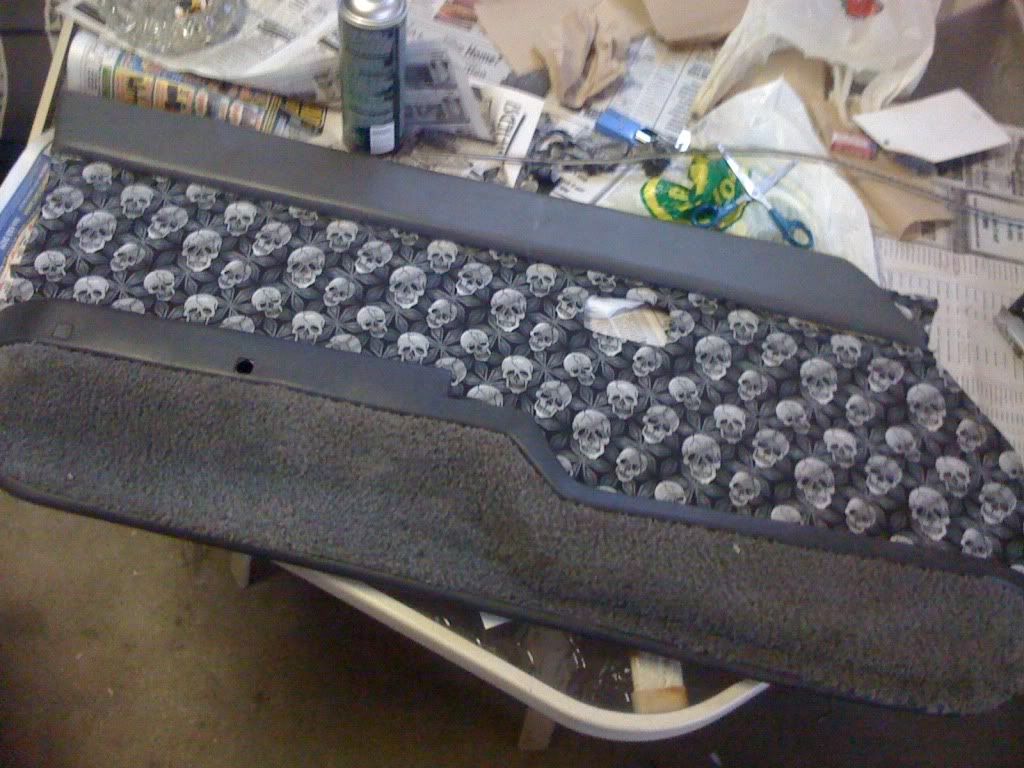
Sunroof Ruff.
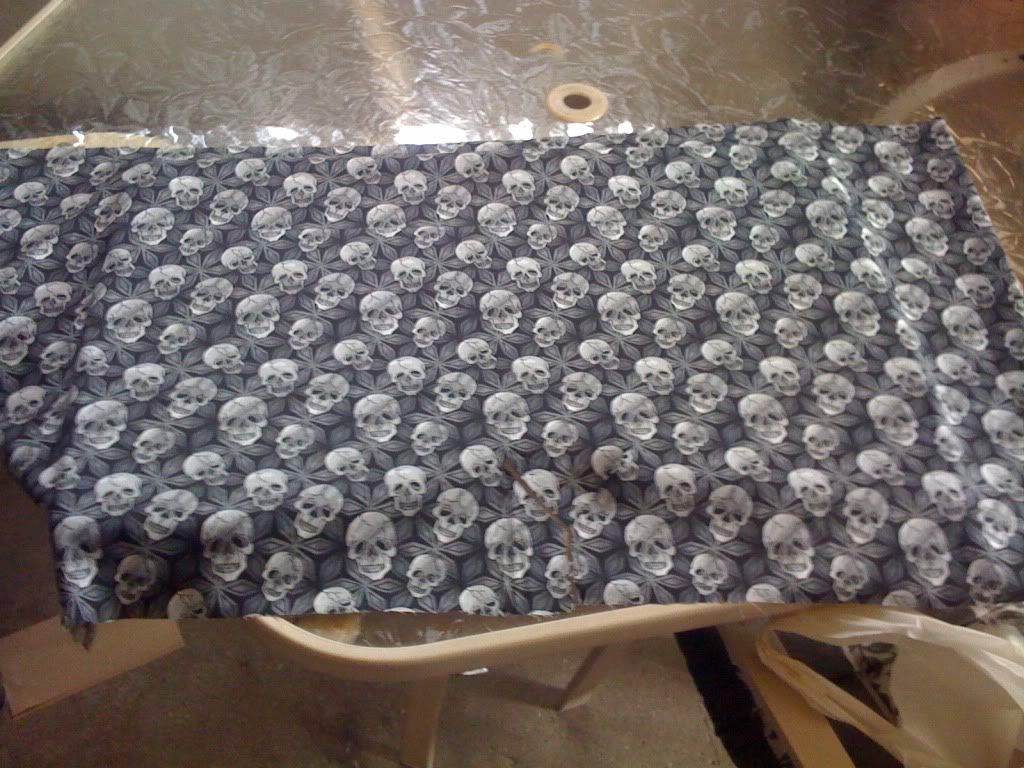
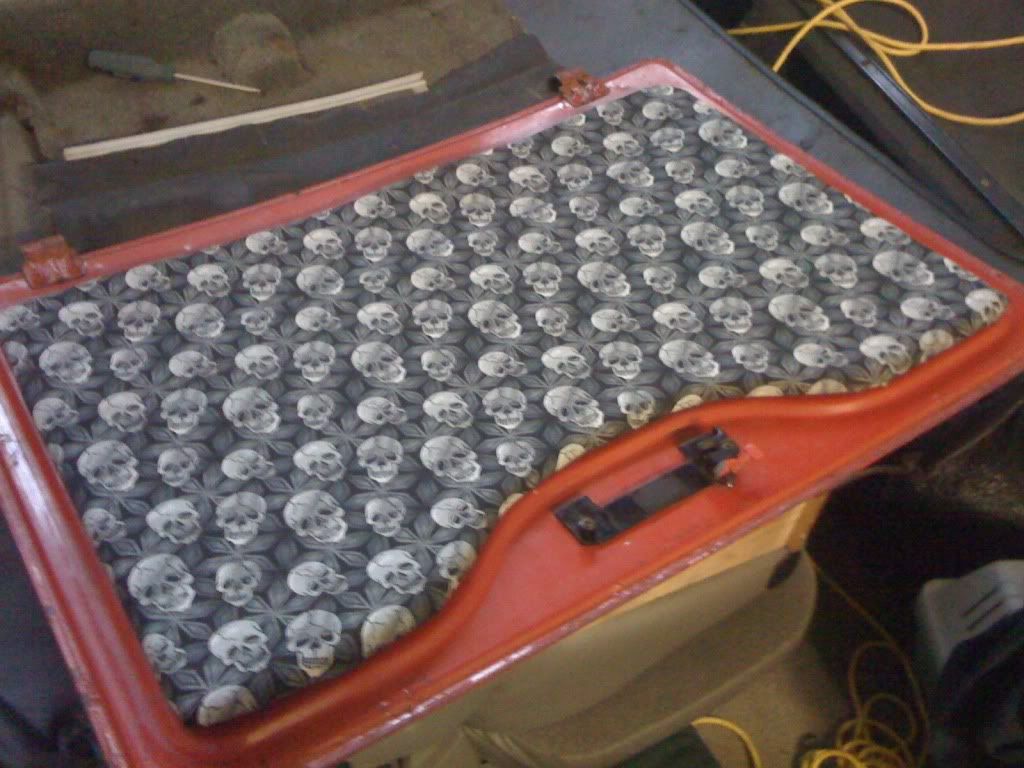
Door Card Ruff.
And the finished product!
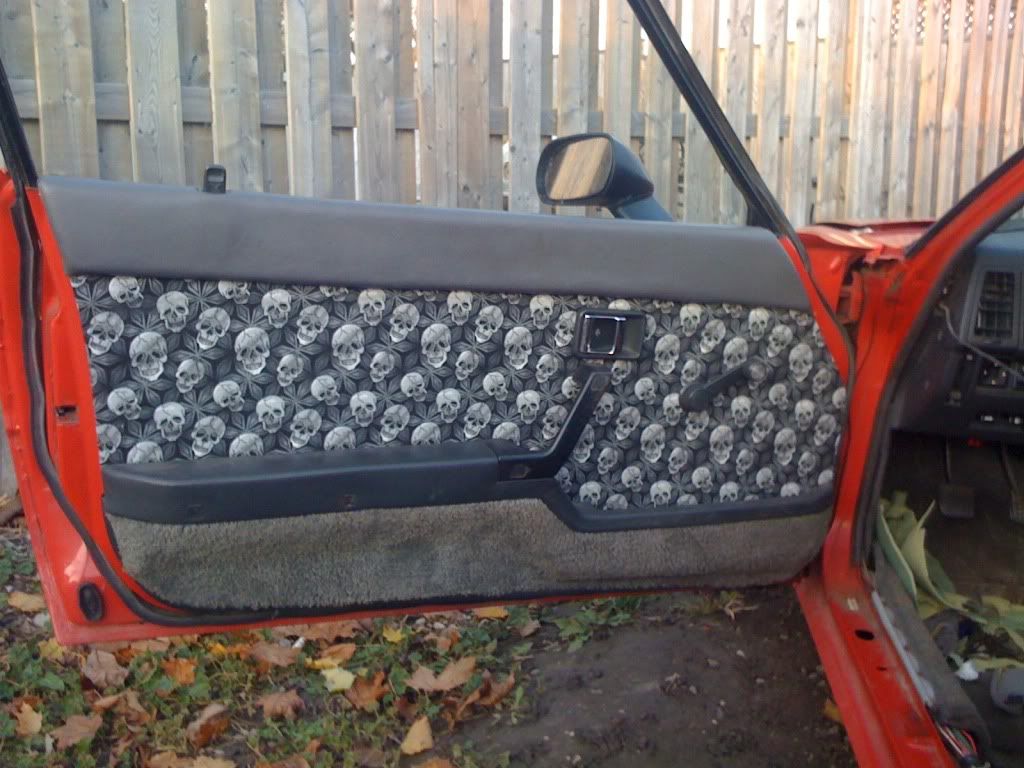
Thats a teaser until its 100% complete.
Also in the news, My car may be getting a surprise..... in the forum of a 650 Holley We found one in my garage today! just need to rebuilt it
Other then that all keep you all posted.
Anyway heres the pictures you've all been waiting for :P
Sunroof Ruff.
Door Card Ruff.
And the finished product!
Thats a teaser until its 100% complete.
Also in the news, My car may be getting a surprise..... in the forum of a 650 Holley
We found one in my garage today! just need to rebuilt it Other then that all keep you all posted.
Last edited by tiexgrr; 11-11-09 at 10:10 AM.
11-11-09, 07:21 PM
#30
CorV8tor

Join Date: Aug 2009
Location: Sydenahm ON
Posts: 2
Likes: 0
Received 0 Likes
on
0 Posts
Rust repairs
Use Weld through primer where ever you weld things together. It will form a Zinc coating where ever it melts because the welding will melt the properties of the primer!!!!!!! This will help your repairs last a lot longer!!! If you can remember"If you don't remove ALL the RUST it will come back. Be ever vigilant about spotting the rusties!!!!
11-11-09, 07:24 PM
#31
Full Member
Thread Starter
Join Date: Jun 2009
Location: St. Thomas, Ontario.
Posts: 122
Likes: 0
Received 0 Likes
on
0 Posts
Use Weld through primer where ever you weld things together. It will form a Zinc coating where ever it melts because the welding will melt the properties of the primer!!!!!!! This will help your repairs last a lot longer!!! If you can remember"If you don't remove ALL the RUST it will come back. Be ever vigilant about spotting the rusties!!!!
............ I used RestCheck on all the rust, its already converted to zinc.
 11-12-09, 09:05 AM
#33
Full Member
Thread Starter
Join Date: Jun 2009
Location: St. Thomas, Ontario.
Posts: 122
Likes: 0
Received 0 Likes
on
0 Posts
11-15-09, 01:37 AM
#35
Banned. I got OWNED!!!
iTrader: (7)

Join Date: Dec 2008
Location: Oregon
Posts: 1,326
Likes: 0
Received 0 Likes
on
0 Posts
a few months ago my alternator **** out on me and I had to push start it every time I had to go anywhere. I just hung my left foot out the door and pushed it like a reverse skateboard. or flinstone reverse. thats one benifit to being so low.
11-19-09, 09:34 AM
#36
Full Member
Thread Starter
Join Date: Jun 2009
Location: St. Thomas, Ontario.
Posts: 122
Likes: 0
Received 0 Likes
on
0 Posts
Man I wish I had a DSLR today! cars covered in raindrops and there everything is damp/dark out such a sinister lighting right now! Anyway, on to the updates.
We (My friend Nick and I) Spent a good hour for so trying to get the beast to start, and trust me she put up a fight! anyway, we towed it slowly behind his truck as we both weigh less then 180lbs haha so we dont have much on this damn car! I got the rotors spinning and she just about fired but it wouldnt have anything to do with it.... of course.
Yesterday I spent the day searching for bad grounds, and other things that could cause a problem. I also pulled out the ignition switch and found what its issue was, turns out it's burned out its contact pads.... oh well lol. Called a few places for prices,
CarQuest - $243
Napa - $250
Mazda - $...... never called me back.... jerks.... lol
So I'm now waiting for an IM from a member on here about one he has otherwise i'm going with a start button..... which I may do anyway..... Kinda like the Idea of it personally.
Other then that the metal for the floor is here now it needs to dry out up here to get it welded!
We (My friend Nick and I) Spent a good hour for so trying to get the beast to start, and trust me she put up a fight! anyway, we towed it slowly behind his truck as we both weigh less then 180lbs haha so we dont have much on this damn car! I got the rotors spinning and she just about fired but it wouldnt have anything to do with it.... of course.
Yesterday I spent the day searching for bad grounds, and other things that could cause a problem. I also pulled out the ignition switch and found what its issue was, turns out it's burned out its contact pads.... oh well lol. Called a few places for prices,
CarQuest - $243
Napa - $250
Mazda - $...... never called me back.... jerks.... lol
So I'm now waiting for an IM from a member on here about one he has
otherwise i'm going with a start button..... which I may do anyway..... Kinda like the Idea of it personally. Other then that the metal for the floor is here now it needs to dry out up here to get it welded!
11-29-09, 01:16 PM
#37
Full Member
Thread Starter
Join Date: Jun 2009
Location: St. Thomas, Ontario.
Posts: 122
Likes: 0
Received 0 Likes
on
0 Posts
Update
Well today's been my first chance to actually accomplish anything on the Rx, I've been working on it for about 4.5 hours straight however I broke my last drill bit and was down to 3 rivets anyway so I guess that worked out haha.
So here's what I've managed today.
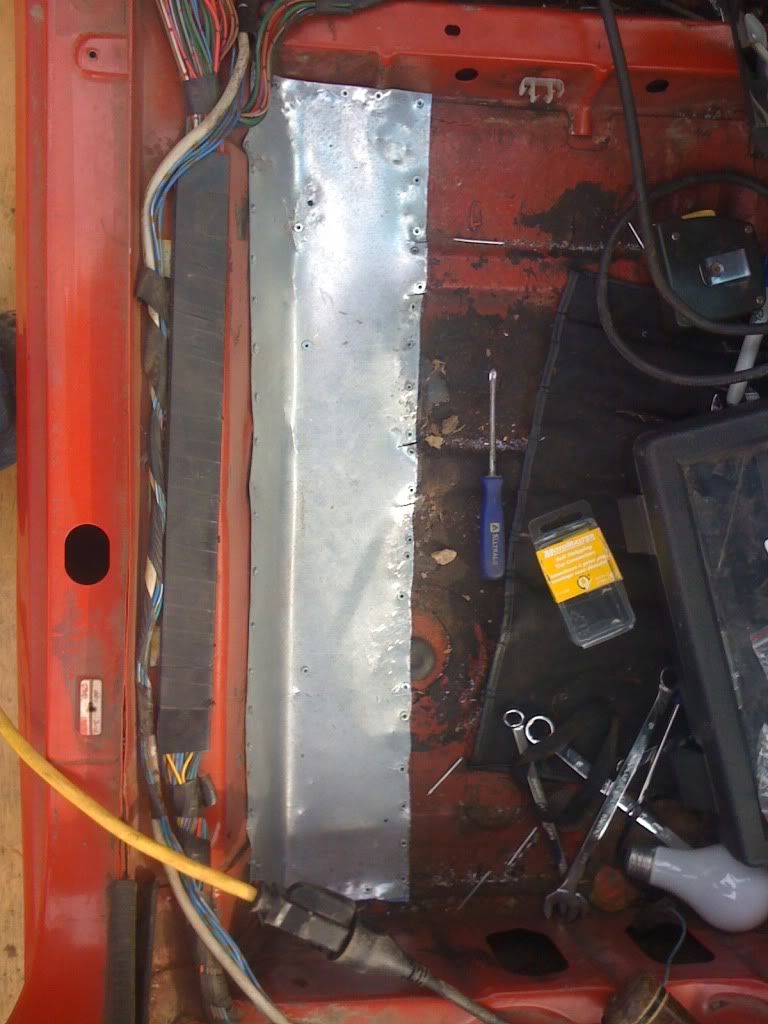
And the piece that broke my last bit (of course!)
It seems to be coming together very, very well. Also, I know someone on here is going to say "You should have welded it." However I do not own, nor do I know how to weld. Also our houses wireing is VERY bad as its aluminum (was built in the early 70's) and it probably cant handle a 110v mig.
I've used almost 100rivets between those 4 panels, and still have 1.5 to do so likely another 35ish will be put in the car. I still have to follow up with some POR15 or something like that on the inside, and get the underside very VERY well undercoated.
Else where in the car, its been tempermental with starting so I put a button in it (I know how ricey can I get?) but it's functional I still have to tweak it though.
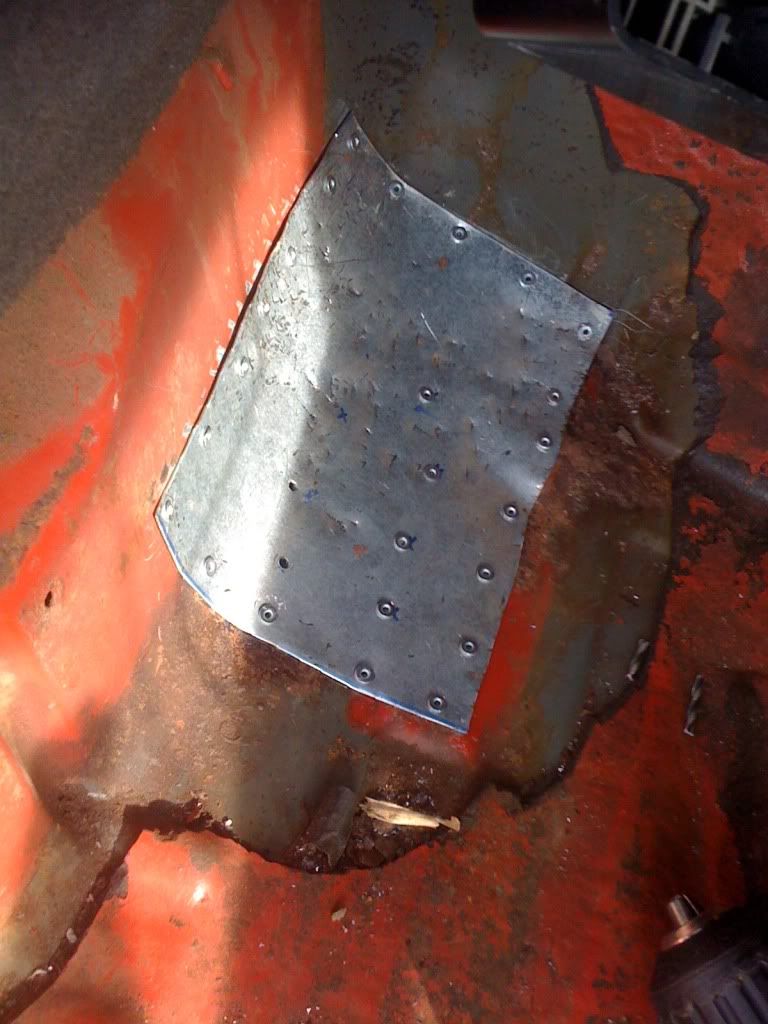
On top of this I've found a very disturbing rust hole on the car and its making me think I may not be able to save it however I'll do what I can to keep her from going to the junk yard.... The spot is right along the edge of the front mount for the suspension on the drivers side, the 4 link still seems VERY sturdy, however I'll have to have that welded in with some heavy steel to prevent and suspension movement I think.
Anyway thats all for today, I'll be picking up more rivets / drill bits tomorrow and be right back at it.
So here's what I've managed today.
And the piece that broke my last bit (of course!)
It seems to be coming together very, very well. Also, I know someone on here is going to say "You should have welded it." However I do not own, nor do I know how to weld. Also our houses wireing is VERY bad as its aluminum (was built in the early 70's) and it probably cant handle a 110v mig.
I've used almost 100rivets between those 4 panels, and still have 1.5 to do so likely another 35ish will be put in the car. I still have to follow up with some POR15 or something like that on the inside, and get the underside very VERY well undercoated.
Else where in the car, its been tempermental with starting so I put a button in it (I know how ricey can I get?) but it's functional I still have to tweak it though.
On top of this I've found a very disturbing rust hole on the car and its making me think I may not be able to save it however I'll do what I can to keep her from going to the junk yard.... The spot is right along the edge of the front mount for the suspension on the drivers side, the 4 link still seems VERY sturdy, however I'll have to have that welded in with some heavy steel to prevent and suspension movement I think.
Anyway thats all for today, I'll be picking up more rivets / drill bits tomorrow and be right back at it.
11-30-09, 12:55 PM
#38
CorV8tor
Join Date: Aug 2009
Location: Sydenahm ON
Posts: 2
Likes: 0
Received 0 Likes
on
0 Posts
Just so that you know!! Rivets are required to be no more than 1" apart9 best would be about 1/2") in your case so that the rivets will actually act as a structural member. With out all the extra squesings the patches won't be stable. This will allow for flexure along a given line where the stress is present and may pull the other rivets loose after a while. It is ultimately up to you though so it's great to see you getting after it as it were.
Enjoy !!!!!!!!! And keep us posted to! This is great!!!!!!!!!!!!!!!
Enjoy !!!!!!!!! And keep us posted to! This is great!!!!!!!!!!!!!!!
12-01-09, 10:32 PM
#39
Full Member
Thread Starter
Join Date: Jun 2009
Location: St. Thomas, Ontario.
Posts: 122
Likes: 0
Received 0 Likes
on
0 Posts
Just so that you know!! Rivets are required to be no more than 1" apart9 best would be about 1/2") in your case so that the rivets will actually act as a structural member. With out all the extra squesings the patches won't be stable. This will allow for flexure along a given line where the stress is present and may pull the other rivets loose after a while. It is ultimately up to you though so it's great to see you getting after it as it were.
Enjoy !!!!!!!!! And keep us posted to! This is great!!!!!!!!!!!!!!!
Enjoy !!!!!!!!! And keep us posted to! This is great!!!!!!!!!!!!!!!
In other news,
It looks like its going to be crappy out tomorrow, so I'll see what I can get done before work.
I'll keep you all up to date!
P.s. The rivets are currently 1.5-2inches apart at the most a bit more where required but I've gone through well over 125 rivets on the 4 patches I've put in
 12-02-09, 11:54 AM
#40
Full Member
Thread Starter
Join Date: Jun 2009
Location: St. Thomas, Ontario.
Posts: 122
Likes: 0
Received 0 Likes
on
0 Posts
Another update :)
Well, I got the inside of the floor done! finished putting in the last rivets, then opened the doors and hatch and sparyed them with rubber undercoating top and bottom so they wont rot.
after that dried I put the Emissions Control box back in its place, despite the patch on the floor under it it fit like a charm! Also re-installed the rear carpet section.... even though it looks like absolute crap from years of staining and smoking in the car even has a small melted spot! but that will be hidden by the seats anyway and this is not show car so I dont care.
Wired in a Start button to, as my ignition switch burned out the pads in the "start" position. Still wont turn over but the battery is pretty much gone now, after being on the charger all night it only holds 12volts max and that doesnt last more then a few hours.... oh well! Any one have a battery they recommend?
Other then that I broke my last drill bits (again!) So I'll be off to Canadian Tire to get them replaced.... probably the only good thing about mastercraft is the lifetime warrenty!
thats all for now
12-02-09, 09:09 PM
#42
Full Member
Thread Starter
Join Date: Jun 2009
Location: St. Thomas, Ontario.
Posts: 122
Likes: 0
Received 0 Likes
on
0 Posts
Thanks
and I will! Next project in the spring for it may be new paint and lowering springs plus I have a Holley 600cfm carb sitting waiting for a rebuild or boost prep.... or both 
We'll see if she survives the winter first hopefully it will be her one and ONLY winter with me and im hoping its mild too.
12-04-09, 12:31 PM
#43
Full Member
Thread Starter
Join Date: Jun 2009
Location: St. Thomas, Ontario.
Posts: 122
Likes: 0
Received 0 Likes
on
0 Posts
Well, bins are finished now, and the interior is back in the car! just have to clean it up a bit and button up the dash etc.
its strange to see the interior in the car after so long :S
Next step will be the windshield, and then the safety which hopefully will be soon as well.
its strange to see the interior in the car after so long :S
Next step will be the windshield, and then the safety which hopefully will be soon as well.
12-04-09, 10:51 PM
#45
Full Member
Thread Starter
Join Date: Jun 2009
Location: St. Thomas, Ontario.
Posts: 122
Likes: 0
Received 0 Likes
on
0 Posts
12-05-09, 06:38 PM
#46
CorV8tor
Join Date: Aug 2009
Location: Sydenahm ON
Posts: 2
Likes: 0
Received 0 Likes
on
0 Posts
Rust repairs Floor!!!!!!
I find it alot of fun and a challange as well. With iregret I've resigned my self to buying another one!!!!!!!!!!!!!!!!!! TOO much work. It looks like the Rr suspention mounting boxes are rusted through as I didn't fix my 3 way meal tool. box brake, shear and roller.
If you get stuck finding the right shape you can always cut a cardboard pattern then copy it to steel then cut and attach. I forgot to tell you this. It eliminates a lot of frustrations of trying to unsderstand a lot of abstuse directions on "HOW TO...simple...."? some times it's not as simple as it seams but I see you are doing great!!!!!
ENJOY !!!!!!!!!!!!!!!
TOO much work. It looks like the Rr suspention mounting boxes are rusted through as I didn't fix my 3 way meal tool. box brake, shear and roller.If you get stuck finding the right shape you can always cut a cardboard pattern then copy it to steel then cut and attach. I forgot to tell you this. It eliminates a lot of frustrations of trying to unsderstand a lot of abstuse directions on "HOW TO...simple...."? some times it's not as simple as it seams but I see you are doing great!!!!!
ENJOY !!!!!!!!!!!!!!!
12-06-09, 09:15 AM
#47
Full Member
Thread Starter
Join Date: Jun 2009
Location: St. Thomas, Ontario.
Posts: 122
Likes: 0
Received 0 Likes
on
0 Posts
I find it alot of fun and a challange as well. With iregret I've resigned my self to buying another one!!!!!!!!!!!!!!!!!! TOO much work. It looks like the Rr suspention mounting boxes are rusted through as I didn't fix my 3 way meal tool. box brake, shear and roller.
If you get stuck finding the right shape you can always cut a cardboard pattern then copy it to steel then cut and attach. I forgot to tell you this. It eliminates a lot of frustrations of trying to unsderstand a lot of abstuse directions on "HOW TO...simple...."? some times it's not as simple as it seams but I see you are doing great!!!!!
ENJOY !!!!!!!!!!!!!!!
TOO much work. It looks like the Rr suspention mounting boxes are rusted through as I didn't fix my 3 way meal tool. box brake, shear and roller.If you get stuck finding the right shape you can always cut a cardboard pattern then copy it to steel then cut and attach. I forgot to tell you this. It eliminates a lot of frustrations of trying to unsderstand a lot of abstuse directions on "HOW TO...simple...."? some times it's not as simple as it seams but I see you are doing great!!!!!
ENJOY !!!!!!!!!!!!!!!
Haha well I've come to find my 4 years of art courses are coming in handy.... Im really enjoying doing this as well
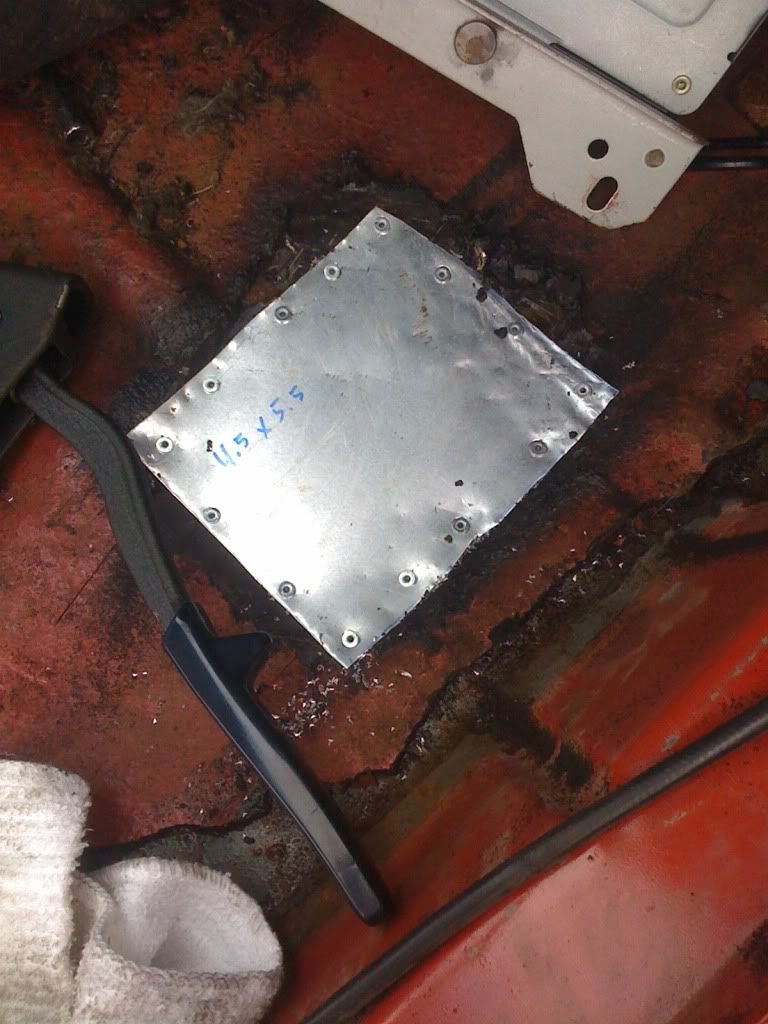
I've been measuring everything for an aproximate size, then hand bending it into the correct shape, its been working pretty well so far and what isnt perfect a metal forming hammer works well.
gotta get my lazy butt out there now but its currently -3�c (26�f) outside so we shall see how long I last!
12-12-09, 12:54 PM
#48
Full Member
Thread Starter
Join Date: Jun 2009
Location: St. Thomas, Ontario.
Posts: 122
Likes: 0
Received 0 Likes
on
0 Posts
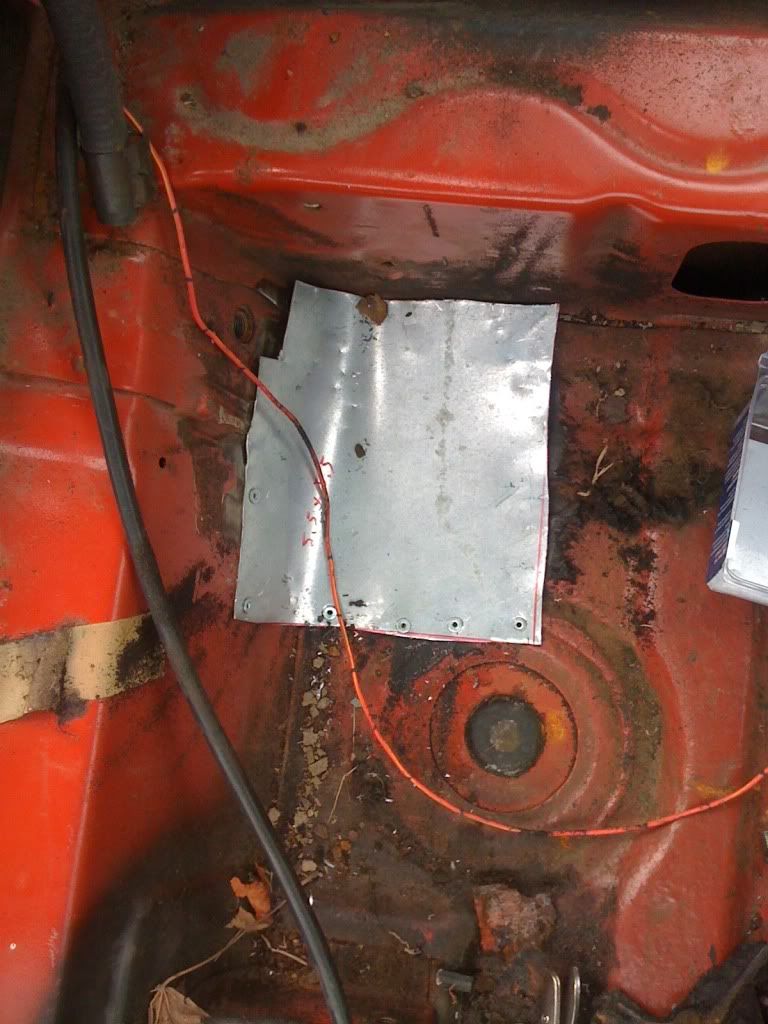
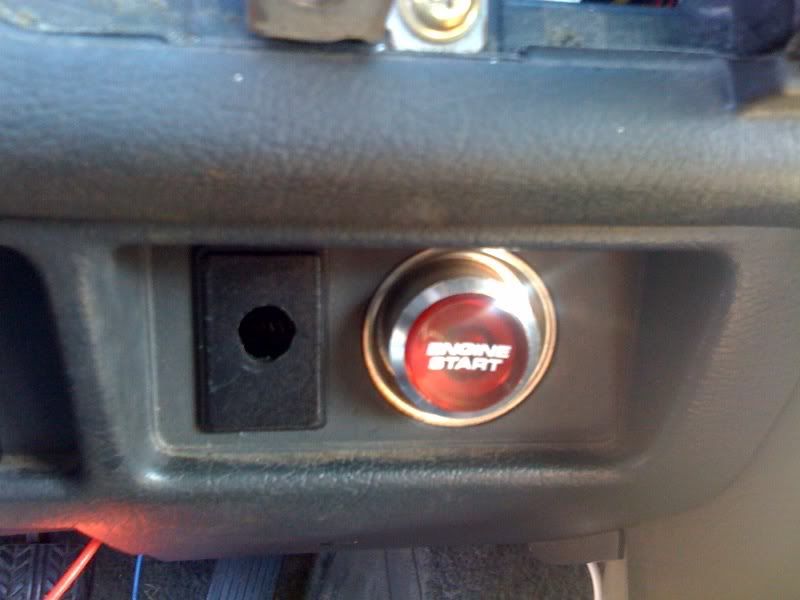
So I got a few things done today, mostly Rewiring my Start button, putting the panel back in place, cranking the car over (still wont start but it needs a new battery) And I fixed the sunroofs leak (I hope)
Anyway I took a few pictures for everyone of the current state of the car.
Start button in the stock lighter location (I'll probably move the cig lighter somewhere else as I dont smoke....)
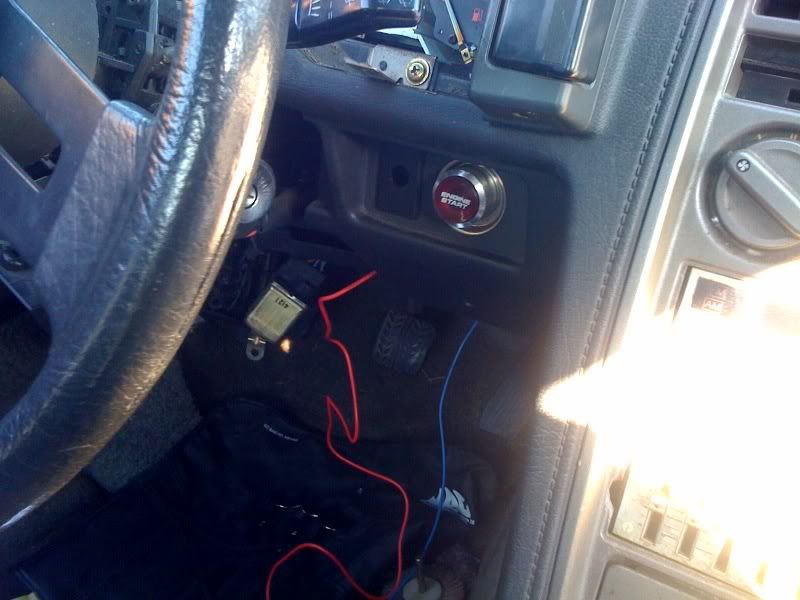
angle view, it actually is in the perfect spot. please excuse the hanging wires and relay.
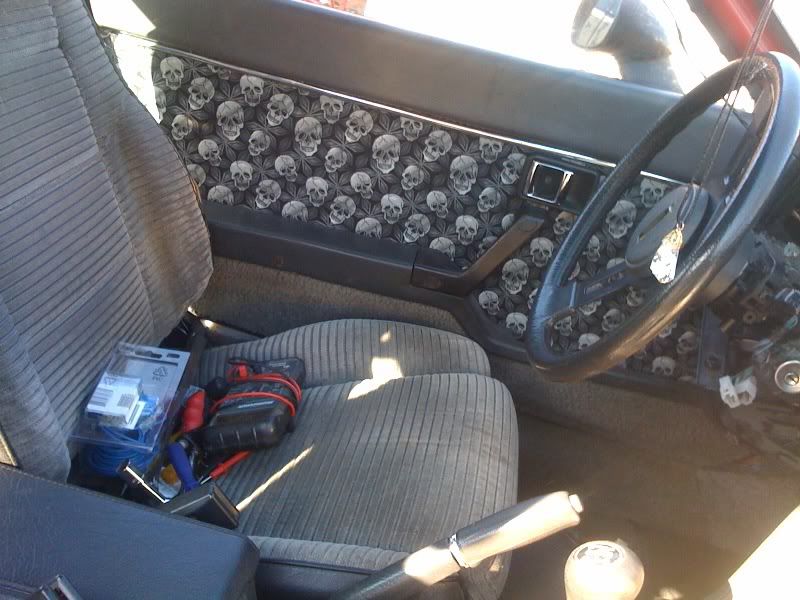
and a shot of the drivers side interior in the car I think it looks pretty good.
anyway thats all for now, I've totally finished the floor and undercoated the new metal. Next step will be the Battery then the Windshield and hopefully a Safety by New Years..... well thats the plan at least.
Anyway I took a few pictures for everyone of the current state of the car.
Start button in the stock lighter location (I'll probably move the cig lighter somewhere else as I dont smoke....)
angle view, it actually is in the perfect spot. please excuse the hanging wires and relay.
and a shot of the drivers side interior in the car I think it looks pretty good.
anyway thats all for now, I've totally finished the floor and undercoated the new metal. Next step will be the Battery then the Windshield and hopefully a Safety by New Years..... well thats the plan at least.

Thread
Thread Starter
Forum
Replies
Last Post
Jeff20B
1st Generation Specific (1979-1985)
73
09-16-18 07:16 PM
LongDuck
1st Generation Specific (1979-1985)
12
10-07-15 08:12 PM