
Respeed race coilover kit and camber plates install

Thread Starter
love the braaaap
Joined: Jul 2003
Posts: 3,771
Likes: 5
From: Bognor, Ontario
Respeed race coilover kit and camber plates install
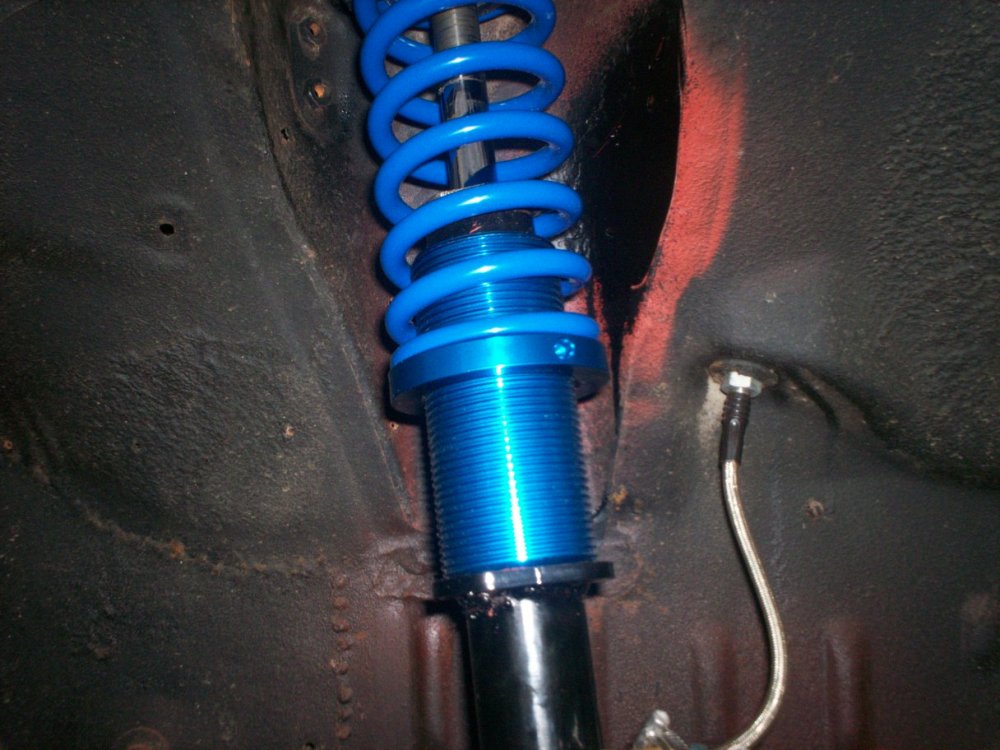
Alright, I finally got my Respeed race coilover kit and camber plates all installed today. This is the "weld on" coilover kit that Respeed offers. All the parts are very high quality and well worth the money. I put Suspension Spring Speciallists Blue Coil 250lb 7" long springs on with this kit. At the same time I also installed polyurethane bushings on everything and installed new tie rods.
Anyway, to the goods. The kit was quite easy to install overall. I was quite impressed by the quality of the parts for the price. But anyway, the hardest part was probably cutting the original spring perches off and cleaning the strut tube up so I could weld the "perch" for the threaded sleeve on the strut tube. This is where I ran into a little bit of a problem, something that mabey should be addressed by Billy at Respeed. The weld on perch was too tight to fit on. I had to bore out the center hole to fit onto the strut tube. It was fine on the top section of the tube, but it gets bigger about 2 inches down and wouldn't even pass this ledge. I ended up having to break out the carbide burr and die grinder to clearance it.
After that was out of the way, the welding was quite easy. I slipped the weld on perch first, then slipped on the nylon spacer, then the threaded sleeve. I set the bottom of the sleeve the desired distance from the top of the tube (5.5" in my case) the held the perch against it and tacked it in place. This made sure the perch was square to the strut tube. After that I took the nylon and sleeve off and fully welded the perch in place. I painted the tube to protect it and let it dry.
The next part was to turn down my struts. Since the top of the strut was too large to fit the camber plates, I had to turn them down. This was fully expected though, so it was no big deal. I actually did this the redneck way on a bench grinder, making sure not to stop in one place on the strut so as not to create a flat spot. I took a little off, checked the fit, then took a little more off and checked the fit. Did this untill the camber plate slipped on easily, but didn't have any excess play. The one problem I had with the camber plates was the lack of threads at the top of the shaft. The camber plate slipped on too far and I had to use washers to take up the excess space between the nut and the camber plate. It all worked out fine though.
After the paint had dried on the strut tubes, it was time to assemble everything. First goes on the nylon spacer, then the threaded sleeve, then the strut insert, the spring with attached upper perch, the washers and needle bearing on the upper perch and the camber plates on top of it all. Tighten down the nut on the top of the strut to hold it all together.
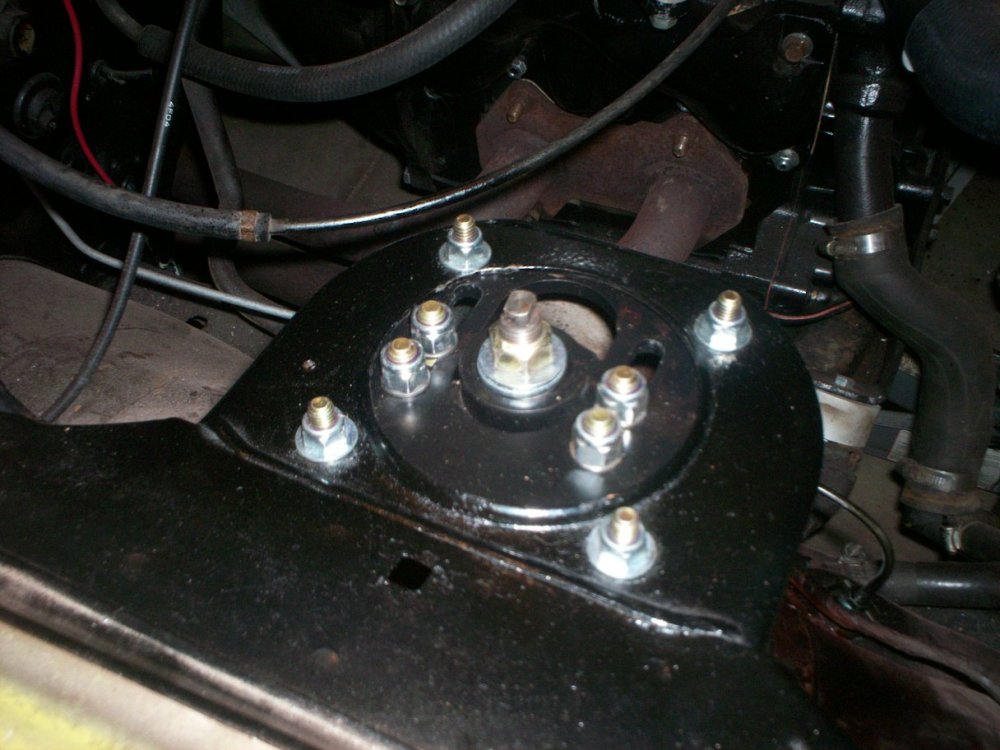
I next had to put them on the car. I had the whole suspension apart to instal the new poly bushings, which took a little work. The damn sway bar frame mounts were a PITA. But anyway, when It came time to install the struts, I found my first real gripe with the camber plates. The camber plates mount to the strut towers by nuts and bolts. There were no washers supplied with these, and they are just loose in the holes. You have to have 100 joints in your hand to be able to get those rear bolts into place then hold them. I also opted to put washers on the nut side of the bolts on top of the strut tower, which IMO should have been supplied with the kit. One thing I would change, make the holes in the camber plates threaded so the bolts will stay in place when installing the whole assembly. Other than that, everything else went good.
But, as I was typing that little gripe about the mounting bolts in the camber plates to the strut tower, I realized that I probably could have removed the 4 nuts holding the strut mount onto the plate that mounts to the strut tower. Geez I was stupid! Why didn't I think of that before! Anyway, here are a few pics of the struts after I welded the perches on and the finished product before install onto the car. I have to get pics yet of them on the car and my digi cam batteries died on the only pic I got of them out of the car fully assembled. I'll be getting pics of them on the car tomorrow most likely with them at max height, min height, and my selected ride height of 1" lower than stock.
IMO the race weld on kit is much cleaner looking than the kit that uses the stock perch. I just don't like the way the stock stuff was designed. Kinda... messy looking. And before you guys/gals ask, yes that is the Respeed big brake kit as well, which also looks much better than stock stuff.
Anyway, to the goods. The kit was quite easy to install overall. I was quite impressed by the quality of the parts for the price. But anyway, the hardest part was probably cutting the original spring perches off and cleaning the strut tube up so I could weld the "perch" for the threaded sleeve on the strut tube. This is where I ran into a little bit of a problem, something that mabey should be addressed by Billy at Respeed. The weld on perch was too tight to fit on. I had to bore out the center hole to fit onto the strut tube. It was fine on the top section of the tube, but it gets bigger about 2 inches down and wouldn't even pass this ledge. I ended up having to break out the carbide burr and die grinder to clearance it.
After that was out of the way, the welding was quite easy. I slipped the weld on perch first, then slipped on the nylon spacer, then the threaded sleeve. I set the bottom of the sleeve the desired distance from the top of the tube (5.5" in my case) the held the perch against it and tacked it in place. This made sure the perch was square to the strut tube. After that I took the nylon and sleeve off and fully welded the perch in place. I painted the tube to protect it and let it dry.
The next part was to turn down my struts. Since the top of the strut was too large to fit the camber plates, I had to turn them down. This was fully expected though, so it was no big deal. I actually did this the redneck way on a bench grinder, making sure not to stop in one place on the strut so as not to create a flat spot. I took a little off, checked the fit, then took a little more off and checked the fit. Did this untill the camber plate slipped on easily, but didn't have any excess play. The one problem I had with the camber plates was the lack of threads at the top of the shaft. The camber plate slipped on too far and I had to use washers to take up the excess space between the nut and the camber plate. It all worked out fine though.
After the paint had dried on the strut tubes, it was time to assemble everything. First goes on the nylon spacer, then the threaded sleeve, then the strut insert, the spring with attached upper perch, the washers and needle bearing on the upper perch and the camber plates on top of it all. Tighten down the nut on the top of the strut to hold it all together.
I next had to put them on the car. I had the whole suspension apart to instal the new poly bushings, which took a little work. The damn sway bar frame mounts were a PITA. But anyway, when It came time to install the struts, I found my first real gripe with the camber plates. The camber plates mount to the strut towers by nuts and bolts. There were no washers supplied with these, and they are just loose in the holes. You have to have 100 joints in your hand to be able to get those rear bolts into place then hold them. I also opted to put washers on the nut side of the bolts on top of the strut tower, which IMO should have been supplied with the kit. One thing I would change, make the holes in the camber plates threaded so the bolts will stay in place when installing the whole assembly. Other than that, everything else went good.
But, as I was typing that little gripe about the mounting bolts in the camber plates to the strut tower, I realized that I probably could have removed the 4 nuts holding the strut mount onto the plate that mounts to the strut tower. Geez I was stupid! Why didn't I think of that before! Anyway, here are a few pics of the struts after I welded the perches on and the finished product before install onto the car. I have to get pics yet of them on the car and my digi cam batteries died on the only pic I got of them out of the car fully assembled. I'll be getting pics of them on the car tomorrow most likely with them at max height, min height, and my selected ride height of 1" lower than stock.
IMO the race weld on kit is much cleaner looking than the kit that uses the stock perch. I just don't like the way the stock stuff was designed. Kinda... messy looking. And before you guys/gals ask, yes that is the Respeed big brake kit as well, which also looks much better than stock stuff.

Could you provide more details on why the strut shaft needs to be turned down? I guess what I'm asking is would it be easier to drill the hole in the camber plate larger, or there not enough room to do this, or are you using struts with with larger diameter shafts?
This is another mod I hope to do down the road and am curious how much extra modding will be needed.
This is another mod I hope to do down the road and am curious how much extra modding will be needed.

85rotarypower, Glad you had fun  Looks great. As you found out, the best way is to mount the slotted plates in the chassis and the slider on the strut. Then slide the strut assembly into the slotted plate. I will look into the washers for the top side.
trochoid, All camber plates on teh market use a 5/8 ID bearing. The next size up bearing does not leave enough shoulder where the bearing rest on the strut tube. Any machine shop can do the turning and should not charge you more than a few dollars to do it. Two side notes to this: The "race tokicos" we sell do not need to be turned down. We offer to turn the shafts free of charge for camber plate customers as long as the inserts will ship back at the same time the camber plates ship.
-billy
Looks great. As you found out, the best way is to mount the slotted plates in the chassis and the slider on the strut. Then slide the strut assembly into the slotted plate. I will look into the washers for the top side.trochoid, All camber plates on teh market use a 5/8 ID bearing. The next size up bearing does not leave enough shoulder where the bearing rest on the strut tube. Any machine shop can do the turning and should not charge you more than a few dollars to do it. Two side notes to this: The "race tokicos" we sell do not need to be turned down. We offer to turn the shafts free of charge for camber plate customers as long as the inserts will ship back at the same time the camber plates ship.
-billy
Thank you sir, good to see you're keeping on top of business as usual. I have a feeling that I'm going to be ordering a bunch of stuff in the next few months. Do you give larger order discounts? LOL.
Trending Topics
Originally Posted by trochoid
Thank you sir, good to see you're keeping on top of business as usual. I have a feeling that I'm going to be ordering a bunch of stuff in the next few months. Do you give larger order discounts? LOL.
-billy
Thread Starter
love the braaaap
Joined: Jul 2003
Posts: 3,771
Likes: 5
From: Bognor, Ontario
Thanks for the nice comments. Hopefully today I'll be able to get the rest of the install pics up. But otherwise like I said, the install went real smooth. Its was harder getting those poly bushing on the control arms into place, had to use a mallet to hammer the control arm in and get the holes lined up. That and dealing with a 25 year old car thats full of rust and just about every bolt was rusted in place. Didn't break anything though. I'm glad they used those 21mm nuts and bolts on the tension rod mounts, which also incorporate the sway bar frame mounts. I had to remove these to get the sway bar mounts off to put the poly bushings in. Boy was that a PITA! But anyway, I was able to reuse all the original bolts by cleaning them up with a tap and die set. A tap and die set is your friend, and one of the best things you can have in a tool box. More useful then even a die grinder. Also, when reinstalling old bolts, ALWAYS use antiseize to keep them from seizing up again.
But anyway, the way its set up with the 250lb springs, the ride height is pretty much stock with the adjusters in the uppermost position. In the lowest position, there is only 2" of shock travel, I wouldn't even be able to get my jack out in this position. I'm figuring about 1" lower than I currently have it would be a good ride height. Not too low but not too high.
Thanks again Billy for making a nice high quality product. #1 in my books for quality and price. Oh yeah, I have an interesting design for a strut tower brace you might be interested in seeing. Its really nice looking and functional too. One thing I don't like about the ones on the market right now is price and the design of them. They look too flimsy. I wanna make a prototype, but I could scan my intial sketches and get your opinion on it. PM me.
My wife bought me 2 RX-7s
Joined: Aug 2001
Posts: 2,328
Likes: 3
From: Saskatoon, Saskatchewan, Canada
Frick, if the money fairy drops some coin on me this spring, I'm definitely ditching my RB springs and KMACs for a set of those. Very cool! 
What are you running for rates in the rear?
What are you running for rates in the rear?
Thread Starter
love the braaaap
Joined: Jul 2003
Posts: 3,771
Likes: 5
From: Bognor, Ontario
The rears I figure will be around 150lb.
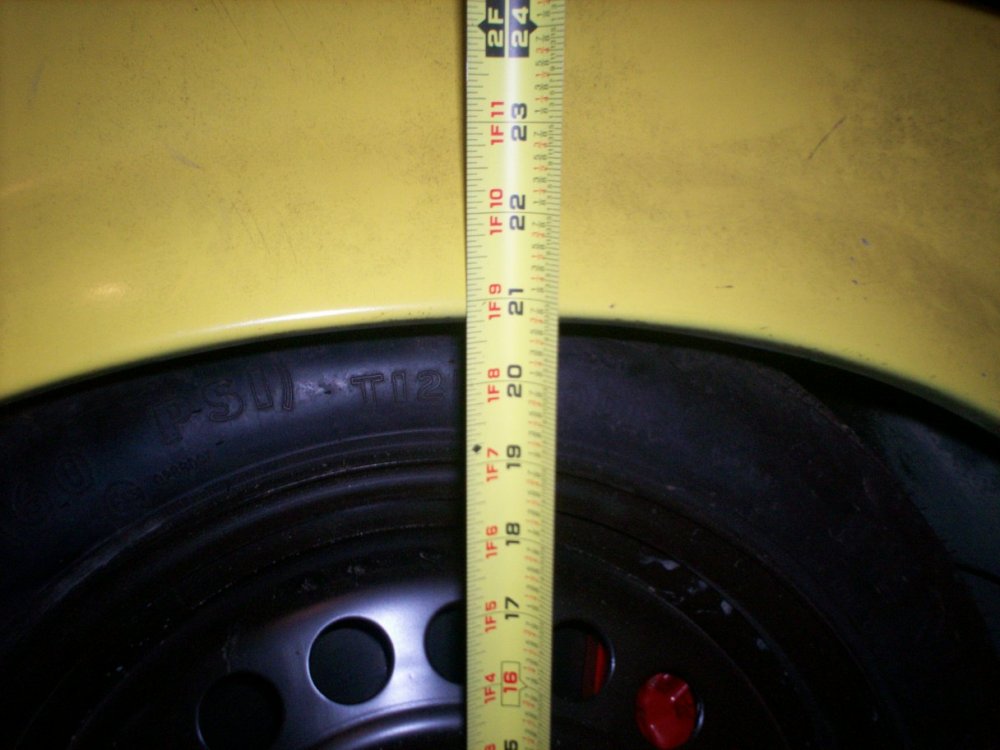
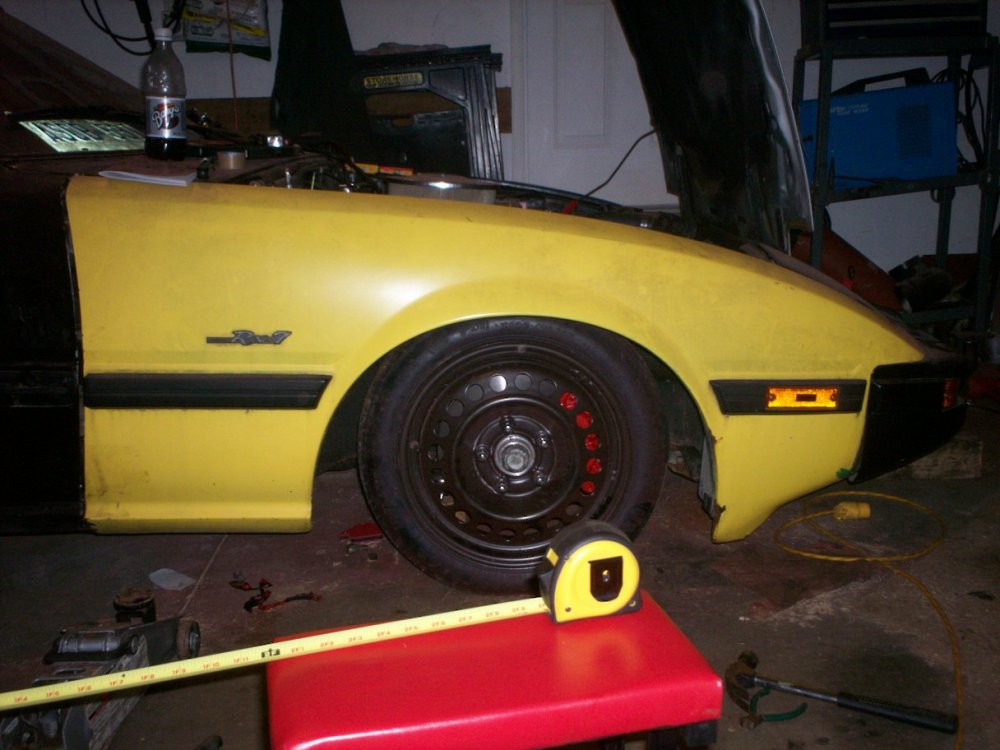
Here are pics of the struts installed on the car.
This is stock ride height. The adjustment sleeves are at the highest possible point.
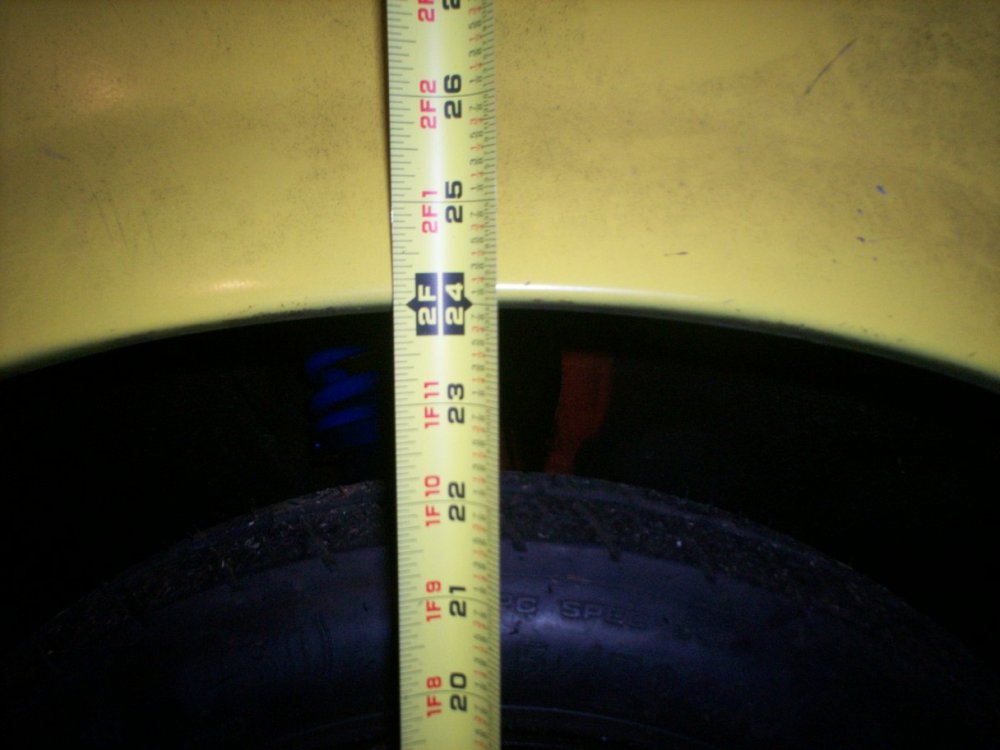
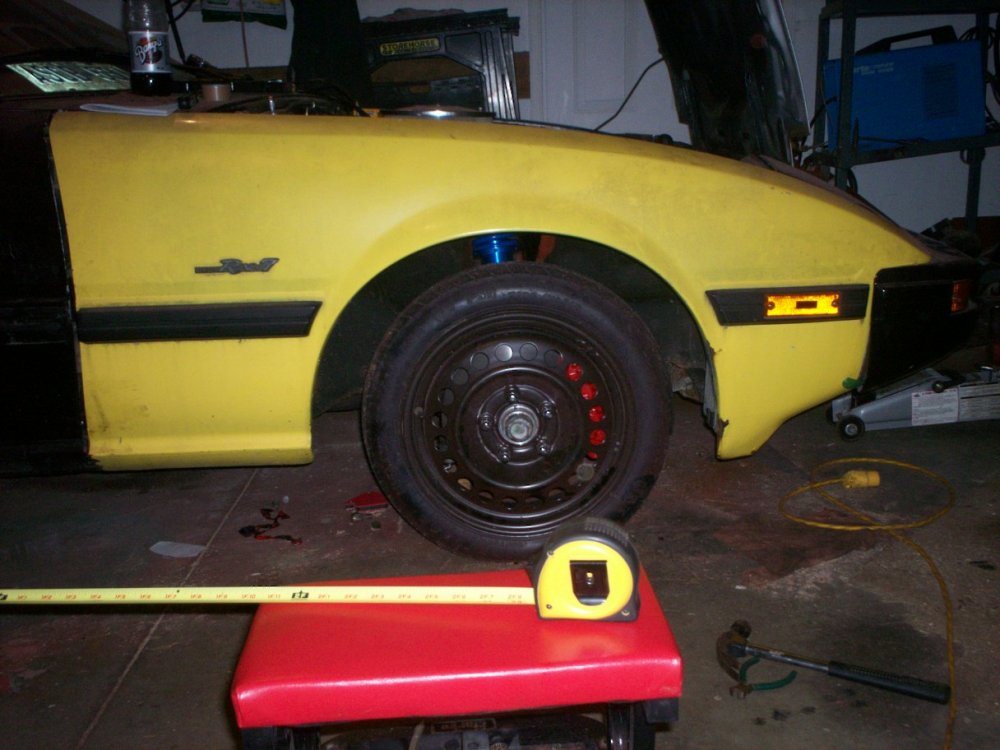
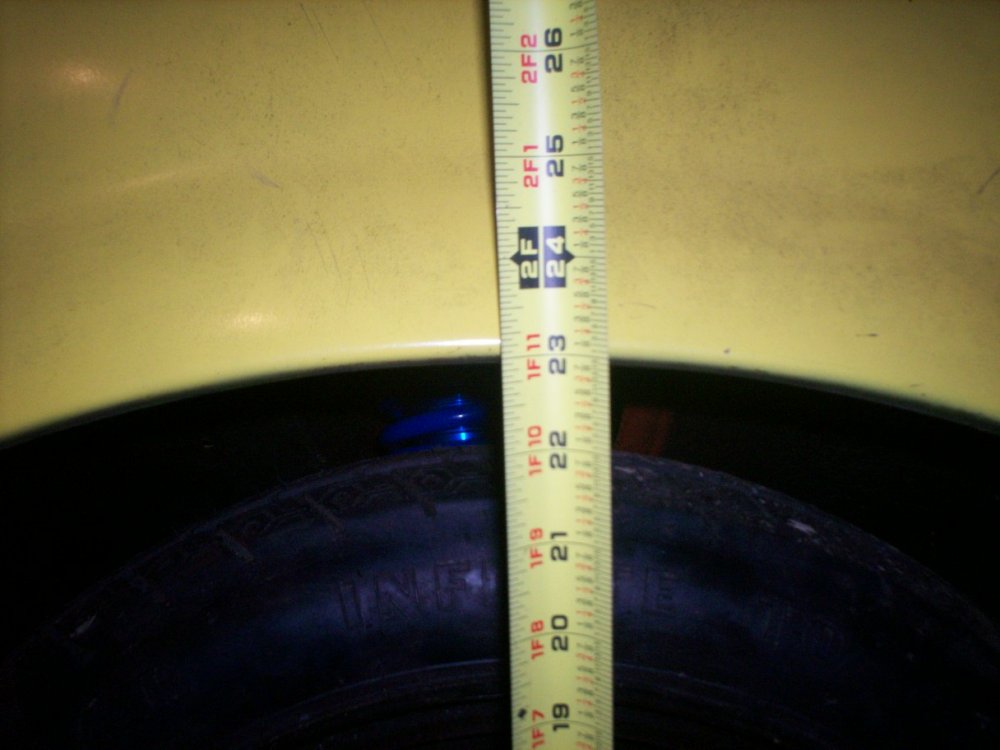
This is with the lower perch as low on the sleeve as possible. The strut is sitting at the bottom of travel, and I don't think even the whole weight of the car was supported by the spring.
Here are pics of the struts installed on the car.
This is stock ride height. The adjustment sleeves are at the highest possible point.
This is with the lower perch as low on the sleeve as possible. The strut is sitting at the bottom of travel, and I don't think even the whole weight of the car was supported by the spring.

Originally Posted by 85rotarypower
-billy
Thread Starter
love the braaaap
Joined: Jul 2003
Posts: 3,771
Likes: 5
From: Bognor, Ontario
Originally Posted by bwaits
Those washers will restrict the spherical bearing from being able to move. If you need space it should be a thin wall spacer.
-billy
-billy
