Rear Storage Box Replacements
 09-11-05, 01:21 PM
#26
Junior Member
Thread Starter

Join Date: Sep 2005
Location: Hampton, Virginia
Posts: 22
Likes: 0
Received 0 Likes
on
0 Posts
Thanks all, especially cosmicbang. I ordered 4 feet of the 3" black plastic piano hinge from McMaster Carr. Should be a close fit after I trim it a bit. A lot cheaper than getting new bins and the material looks to be a lot more durable than the original.
I'll give Malloy Mazda a call this week and see how their prices are for some other parts I need. I drive through Woodbridge every now and again so I might be able to save on some shipping too.
John
I'll give Malloy Mazda a call this week and see how their prices are for some other parts I need. I drive through Woodbridge every now and again so I might be able to save on some shipping too.
John

 09-11-05, 04:20 PM
#28
Roll to Heaven in a RX-7
Join Date: Feb 2005
Location: New Westminster, B.C - Canada
Posts: 790
Likes: 0
Received 0 Likes
on
0 Posts
Originally Posted by John64
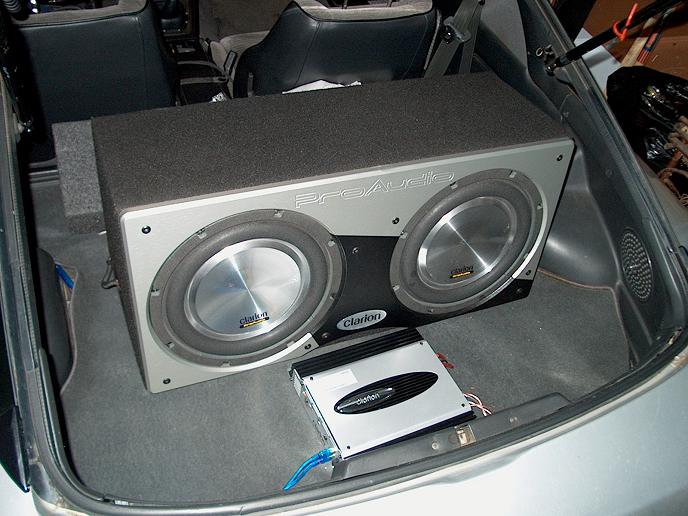
Ok, all of you who post thats its a bad location have never tried it. I did it and it sounds awesome. I would recommend only 10's, but I used 12's but they could handle the small enclosure size. Your only going to get about .5-.6cuft on each box.


So, until you do it yourself, don't go spouting off at the mounth that they don't work! I hit 138db's with this set up.
So, until you do it yourself, don't go spouting off at the mounth that they don't work! I hit 138db's with this set up.
 09-12-05, 01:02 AM
#30
Roll to Heaven in a RX-7
Join Date: Feb 2005
Location: New Westminster, B.C - Canada
Posts: 790
Likes: 0
Received 0 Likes
on
0 Posts
Originally Posted by John64
Have fun with that idea. Your box will be 11/2ft higher then the rear deck.
09-12-05, 04:51 AM
#31
backyard tuner
iTrader: (1)
Join Date: Sep 2002
Location: BC, Canada
Posts: 1,265
Likes: 0
Received 0 Likes
on
0 Posts
why not try building a enclosure into the spare tire wheel well? will look more like it fits and is the best position to get a clean sound from my experience. back in my stereo days i tried putting all different sub/amp combos in my first FB and this worked the best. i also have a similar setup in my supra.
09-12-05, 05:49 AM
#32
Driveline Killer
Join Date: Jul 2004
Location: OC the wicked 714
Posts: 1,463
Likes: 0
Received 0 Likes
on
0 Posts
Originally Posted by Dan_s_young
Want bass? Then point your subs to the back like this:
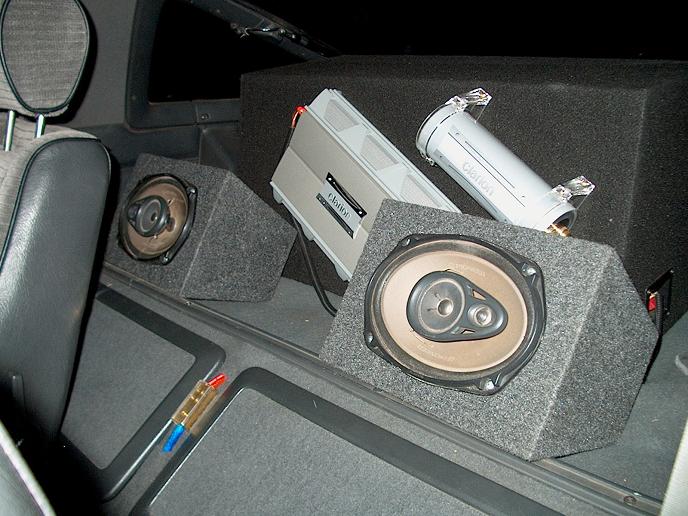
Everytime the bass hits you clench your teeth together helping the hatch doesn't shatter... Right now the hatch glass flexs a solid 1-2 inches...
Everytime the bass hits you clench your teeth together helping the hatch doesn't shatter... Right now the hatch glass flexs a solid 1-2 inches...
Too much clutter for my eyes in an FB but it must sound damn nice.........
09-12-05, 05:57 AM
#33
Driveline Killer
Join Date: Jul 2004
Location: OC the wicked 714
Posts: 1,463
Likes: 0
Received 0 Likes
on
0 Posts
Originally Posted by John64
Ok, all of you who post thats its a bad location have never tried it. I did it and it sounds awesome. I would recommend only 10's, but I used 12's but they could handle the small enclosure size. Your only going to get about .5-.6cuft on each box.
So, until you do it yourself, don't go spouting off at the mounth that they don't work! I hit 138db's with this set up.
So, until you do it yourself, don't go spouting off at the mounth that they don't work! I hit 138db's with this set up.
That is similar to my current dual 12 setup also.
But my box is built in to the car so it utilizes more usualble air space.
My subs face straight up..and they share a common airspace(no divider)
You know everyone keeps saying point your subs to the rear for better bass which is true....and always has been but, the reason that works is because usually there are so many ambient bass frequencies that you don't want to hear being created and pointing the subs to the rear cancels them out by the time the sound wave travels forward. Bass is non directional...
In theory you should be able to point your sub in any direction and get the same bass......Like with a home theater....
But you still can do that in a car just use an accessory like the Audio Control Bass controllers that use frequency analyzers. They are only about $180 and the size of an E.Q. With one of those it will sound like your box is pointed to the rear no matter where they are.
Wow we keep trying to jack this thread for car audio............My badd!!!!
Peace out..........
09-12-05, 10:08 AM
#34
Junior Member
Thread Starter
Join Date: Sep 2005
Location: Hampton, Virginia
Posts: 22
Likes: 0
Received 0 Likes
on
0 Posts
Ray,
The hinge comes in 4 ft or 8 ft sections and you cut it to the length you need. It doesn't have any holes in it so I'm planning to drill holes into it with the same pattern as the lid-side of the original hinge. The box-side of the hinge will probably have to be screwed directly into the old box. I may glue it as well. Total cost was about $26 for a 4 ft section (3 inch wide hinge) and that included shipping. website: http://www.mcmaster.com/ and the catalog page number was 2811.
John
09-12-05, 12:01 PM
#35
Sounds good John, using the piano hinge should keep the hinge area nice and flat, which the hardware hinges might not do as well. There isn't much room in the lid to take the screws but if you use short ones and some glue it should work nicely. I'll go to the web site and put in my order. It sure is nice having those storage compartments working and keeping all that clutter out of the hatch area.
Thanks again
Ray
Thanks again
Ray
09-12-05, 04:45 PM
#36
Rotary Enthusiast

Not intending any offense to anyone, but for my tastes, any replacement hinge--metal or otherwise--would need to allow the lid to close completely, have a very small pin diameter, be of an appropriate finish and color, and otherwise look like a "factory" installation when the bin is in either open or closed position.
A replacement hinge needs to account for the distance between the hinge's leaves when they are folded/closed. If the leaves come together flush when closed (swaged), then they would need to be recessed into the lid/bin lip. If the hinge is offset or has sufficient space between the leaves when closed to a parallel position, it can be mounted behind the lip of the bin or layers of the lid. Otherwise, there will be a gap when the lid is closed.
It is critical for the lid to lie flat when closed; with no gap. A gap will not only be unsightly, but items can get snagged in the gap and break the lid and/or bin.
Because the lip of the bin as well as the lid are flimsy plastic, using a short hinge (metal or otherwise) is problematic. The stress would be concentrated on a small area of plastic where the hinge attaches to the bin lip. (You could reinforce the bin's lip from behind, along the entire top--or make entirely new bins from sheet metal, but that's another project.)
I used a plastic replacement hinge similar to that in the McMaster Carr catalog, but from another manufacturer. In order to get a perfect fit, you might need to alter the installation method.
The stock "hinge" extends as a tab from the bin, and in the same plane as its top contact surface. It is sandwiched between the inner and outer halves of the lid, secured by five (5) screws in threaded plastic extrusions. The hinge has a "step" on its leaf between the bending portion and the screw holes so that it exits the lid in the same plane as the lid's contact surface.
I trimmed the hinge material to fit into the slot of the lid, and trimmed the upper edge of the lid's outside half to account for lack of step offset on the replacement hinge. I drilled 5 holes in the corresponding locations of the hinge material and secured it to the lid with the stock screws in the stock holes.
To attach the hinge to the bin, I used flat-bottomed (i.e. no hole in the bottom and no prongs) T-nuts, facing down, and very small machine screws with washers--I can't remember exactly how many. I ground/drilled the metal bin superstructure underneath for clearance.
If installed carefully, it should look indistinguishable from stock and be more durable, especially in cold weather. There are undoubtably many ways to fix, replace, or improve the bins, but I wanted to maintain a stock appearance and increase the strength of the hinge. It may be possible to find a small diameter continuous metal hinge with the correct spacing or offset, that would work just as well and could be powder-coated to look as if it was made for the car.
Last edited by cosmicbang; 09-12-05 at 04:52 PM.
07-02-19, 07:03 AM
#37
Junior Member

Join Date: Jun 2019
Location: Canton, Ga.
Posts: 10
Likes: 0
Received 0 Likes
on
0 Posts
Cosmic bang, could you show us a picture of the hinge arrangement you came up with. Obviously you put in some amount of time thinking this problem through to come up with your solution. Thanks!

