
Ray's Nut-Be-Gone flywheel nut removal Tool

Joined: Jun 2008
Posts: 8,376
Likes: 28
From: Chino Hills, CA
Not because I'm a fear-mongering republican (I'm not), but because like all good engineers, I'm lazy and I know that the universe is my enemy, and will side violently with any hidden flaw or sub-par component that I choose to use.
This inexpensive solution has always worked for me:
$70 from Mazdatrix for both, and between work I've done and people I've loaned it to over the years, it's probably got about a dozen tear-downs to it's credit
i try not to be too **** about minor flaws but the threads missing will relieve pressure on the ability of the nut to torque properly and possibly remain torqued, a bit of red loctite would probably let it work but i'm with DD, murphy's law. a little more care in only nicking into the threads would have worked, once you start removing 30+ degrees of friction binding surface then problems are most likely to arise.
i've cut bolts off in a similar manner before, just not as aggressively and let the results fly.
i've cut bolts off in a similar manner before, just not as aggressively and let the results fly.
Last edited by RotaryEvolution; Mar 11, 2014 at 12:28 PM.
Joined: Jun 2006
Posts: 4,815
Likes: 24
From: Columbia, Tennessee
I use a piece of chain bolted from a clutch bolt to the upper right ear of the engine as a stopper.Just make sure you have washers to spread out the force to prevent sheering. I bought my 54mm socket at sears for $50. I bought my 3/4" drive breaker at TSC for $30. I use a 4 foot metal fencing pipe for added leverage.
If your engine rolls around on the ground or engine stand I find that chaining the engine to some 2x4s kind of like your giving it skis gives added stability for no tourque loss while heave hoeing on the nut.
If your engine rolls around on the ground or engine stand I find that chaining the engine to some 2x4s kind of like your giving it skis gives added stability for no tourque loss while heave hoeing on the nut.

"Hate to have to say it, Ray... but I am an engineer, and I would never use that e-shaft.
Not because I'm a fear-mongering republican (I'm not), but because like all good engineers, I'm lazy and I know that the universe is my enemy, and will side violently with any hidden flaw or sub-par component that I choose to use."
I totally agree DD, that's why I've got 6 other eshafts extracted the "right" way stored for my first 6 rebuilds (recognizing, of course, that we all have our favorite methods).
I'd only use those shaved eshafts if I was down to my last two. (And, being a biologist and, at one with Nature, I'm sure it would work).
Also, I'm about to tear down another 12A from an '83 GSL, only 125,000 miles, on a beautiful Georgia spring day afternoon.
I'm betting at least one good rotor housing and a pair of nice rotors, if the Rotary Gods approve.
And if James stops by, maybe more 12As.
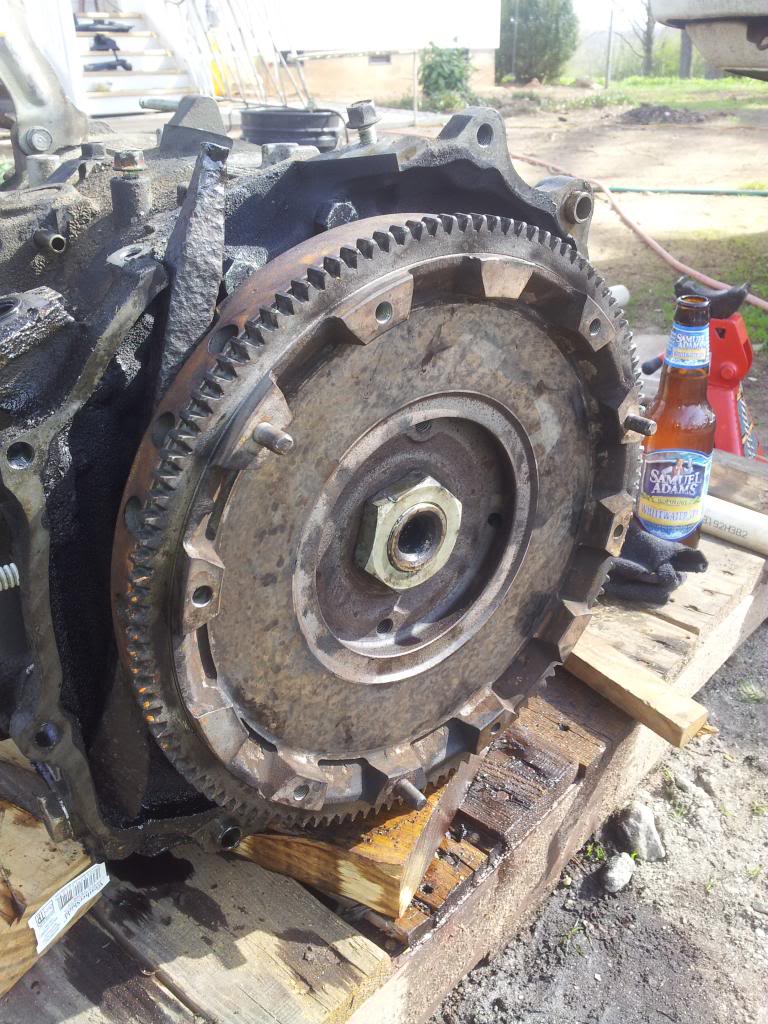
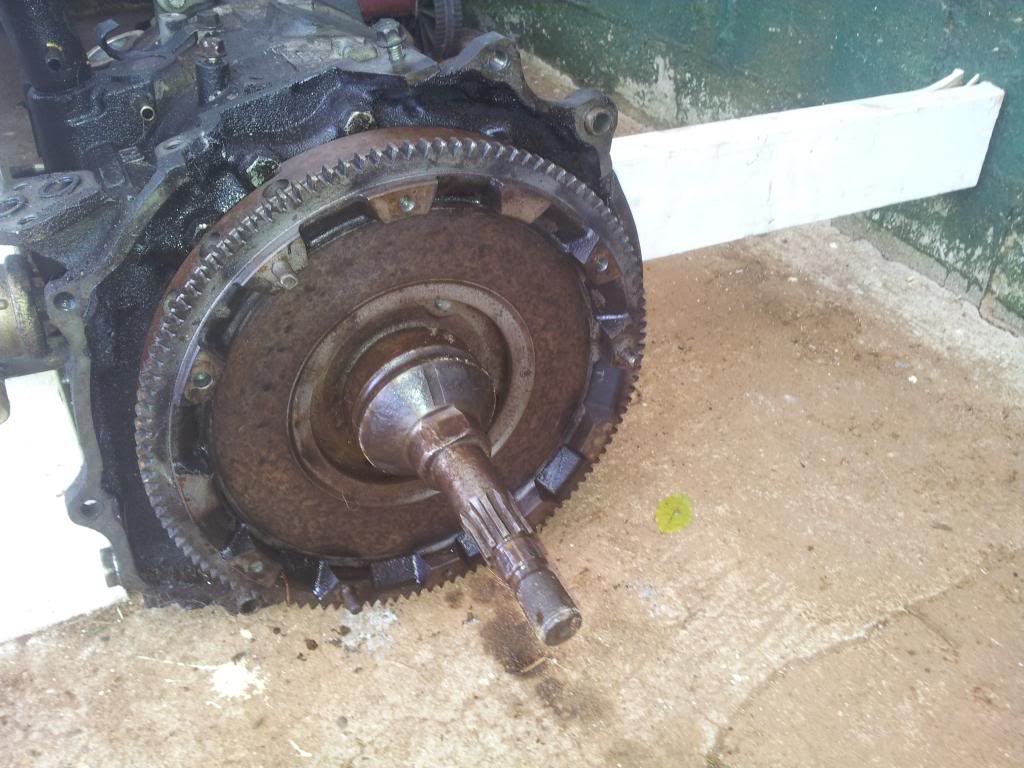
PS, what's that lumpy thing hanging off the right side of your 12A?
Not because I'm a fear-mongering republican (I'm not), but because like all good engineers, I'm lazy and I know that the universe is my enemy, and will side violently with any hidden flaw or sub-par component that I choose to use."
I totally agree DD, that's why I've got 6 other eshafts extracted the "right" way stored for my first 6 rebuilds (recognizing, of course, that we all have our favorite methods).
I'd only use those shaved eshafts if I was down to my last two. (And, being a biologist and, at one with Nature, I'm sure it would work).
Also, I'm about to tear down another 12A from an '83 GSL, only 125,000 miles, on a beautiful Georgia spring day afternoon.
I'm betting at least one good rotor housing and a pair of nice rotors, if the Rotary Gods approve.
And if James stops by, maybe more 12As.
PS, what's that lumpy thing hanging off the right side of your 12A?


I use a piece of chain bolted from a clutch bolt to the upper right ear of the engine as a stopper.Just make sure you have washers to spread out the force to prevent sheering. I bought my 54mm socket at sears for $50. I bought my 3/4" drive breaker at TSC for $30. I use a 4 foot metal fencing pipe for added leverage.
If your engine rolls around on the ground or engine stand I find that chaining the engine to some 2x4s kind of like your giving it skis gives added stability for no tourque loss while heave hoeing on the nut.
If your engine rolls around on the ground or engine stand I find that chaining the engine to some 2x4s kind of like your giving it skis gives added stability for no tourque loss while heave hoeing on the nut.
recycling and all.

nope, it would take a lot of work to break that casting. look at the 2 bosses on the 20B center thick iron and those can easily carry the side loaded weight of the whole engine even while dicking around with it.
Last edited by RotaryEvolution; Mar 12, 2014 at 04:44 PM.
I can just see DD now, imagining his thermal reactor being converted to a molten mass. Only in California.
Back to the friggin' flywheel.
NCross, those end irons will take a lot of stress, plenty for *******. Here's how I do it:
Back to the friggin' flywheel.
NCross, those end irons will take a lot of stress, plenty for *******. Here's how I do it:


The ONLY way to do it! With Sam Adams... Love it!
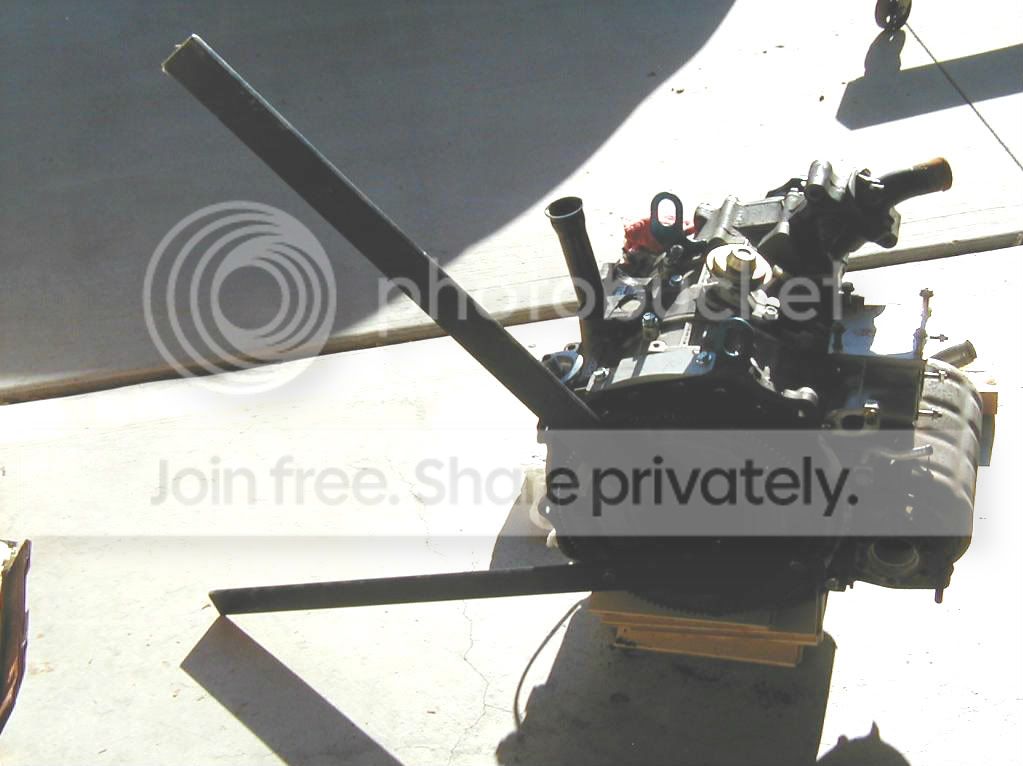
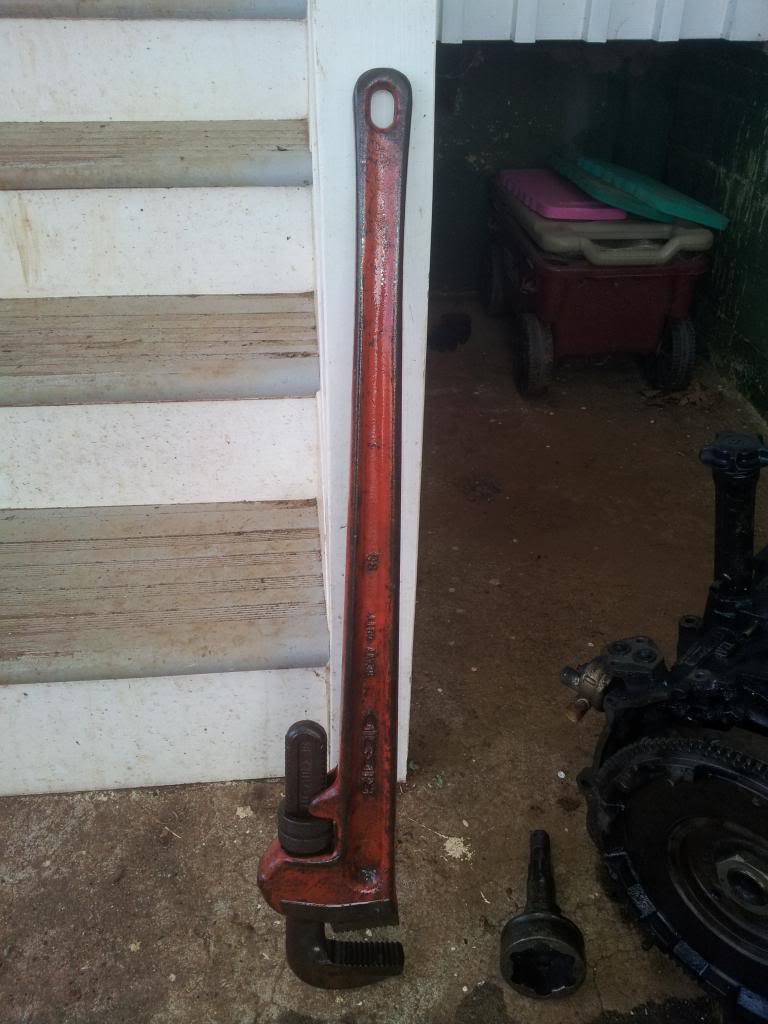
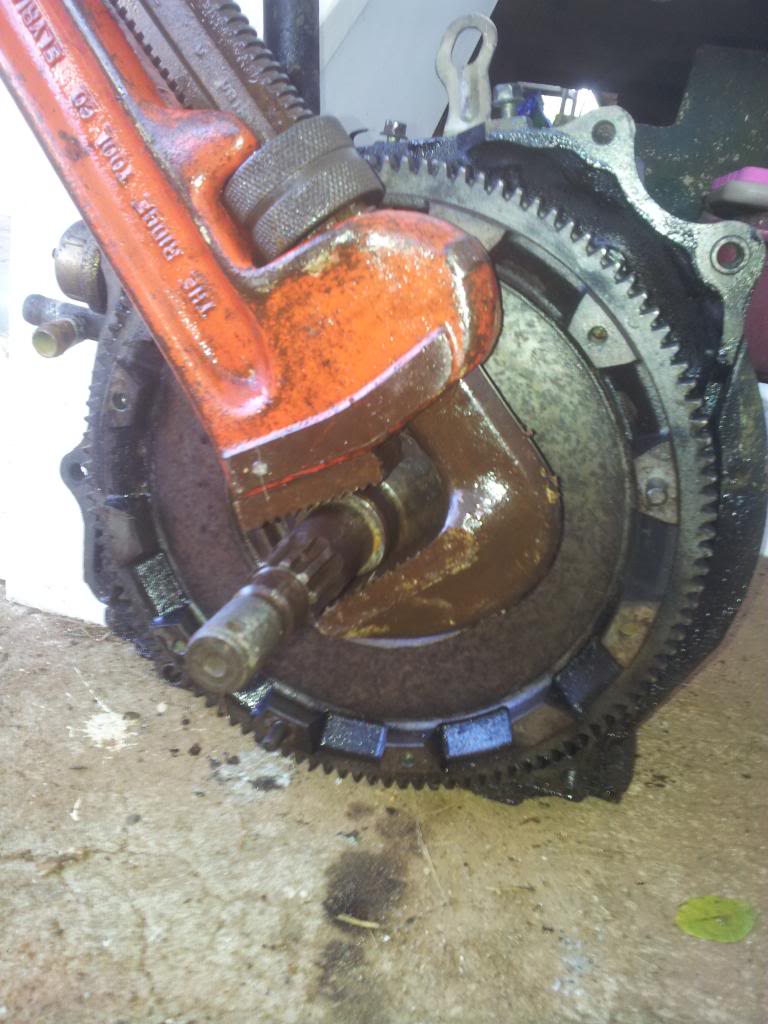
OK, for you dudes who are too squeamish to try Ray's Nut-Be-Gone flywheel removal technique, I've developed yet another original method for taking the flywheel nut off.
First, get yourself a BFMW. I borrowed this one from Robert:
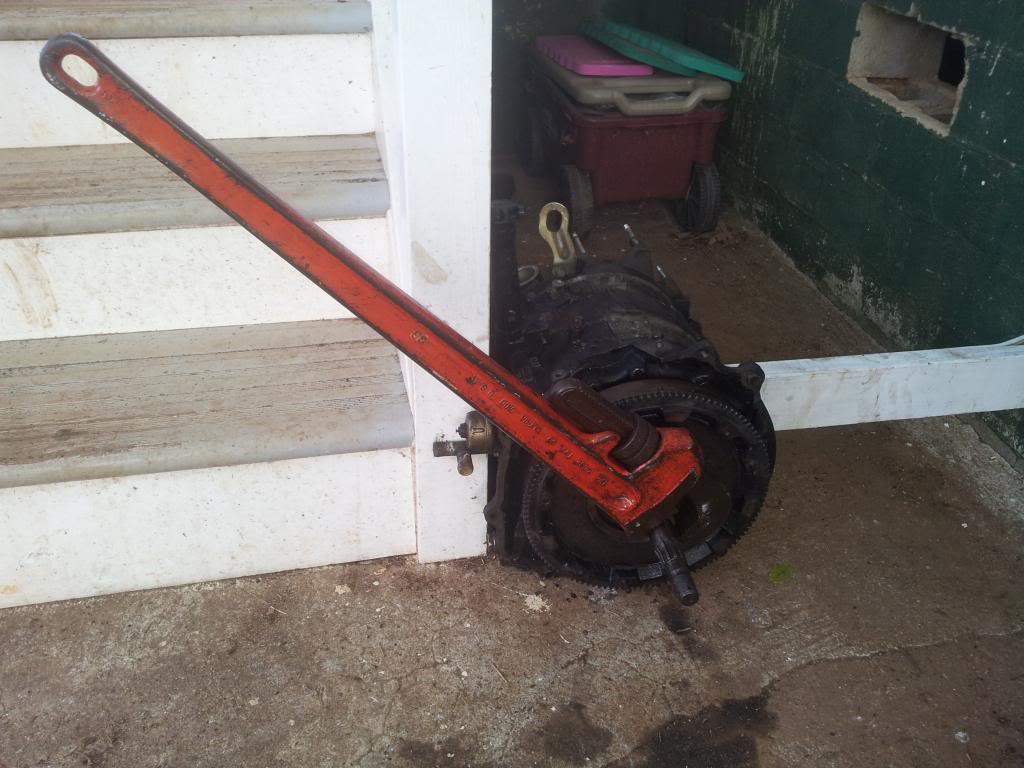
Then secure the 12A with a 2x4 wedged between your steps and the foundation:
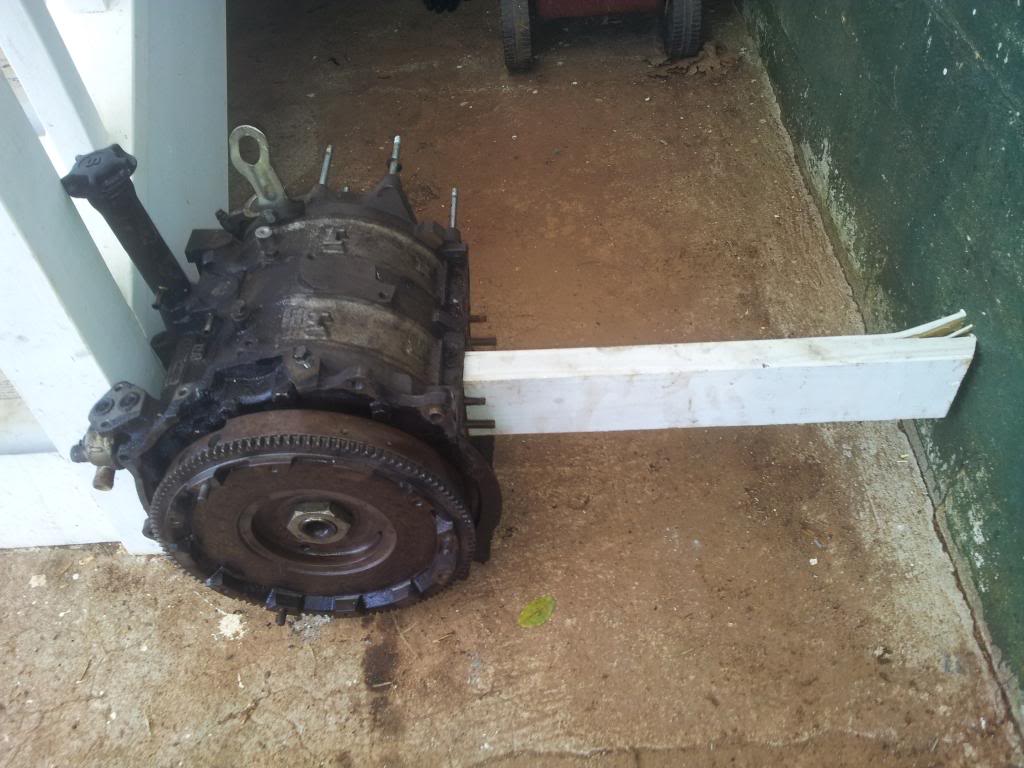
Then install the MSCVJ on the FWN:
Put a dog in between the FW and engine block to lock the FW and connect the BFMW to the MSCVJ such that you get good leverage on the FWN:
Now go up to the third step on your back porch and trounce smartly on the handle of the BFMW to break loose the FWN:
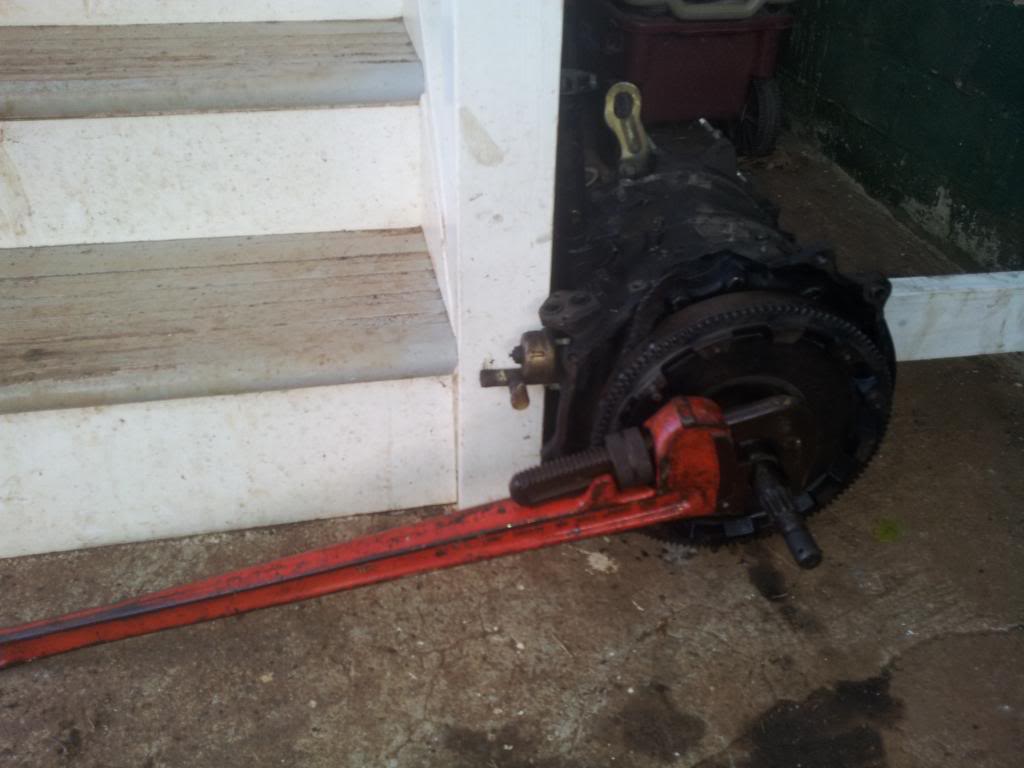
Now back off the FWN until it's about 1/8" proud of the E-shaft and install some dogs to keep the flywheel tight against the engine block:
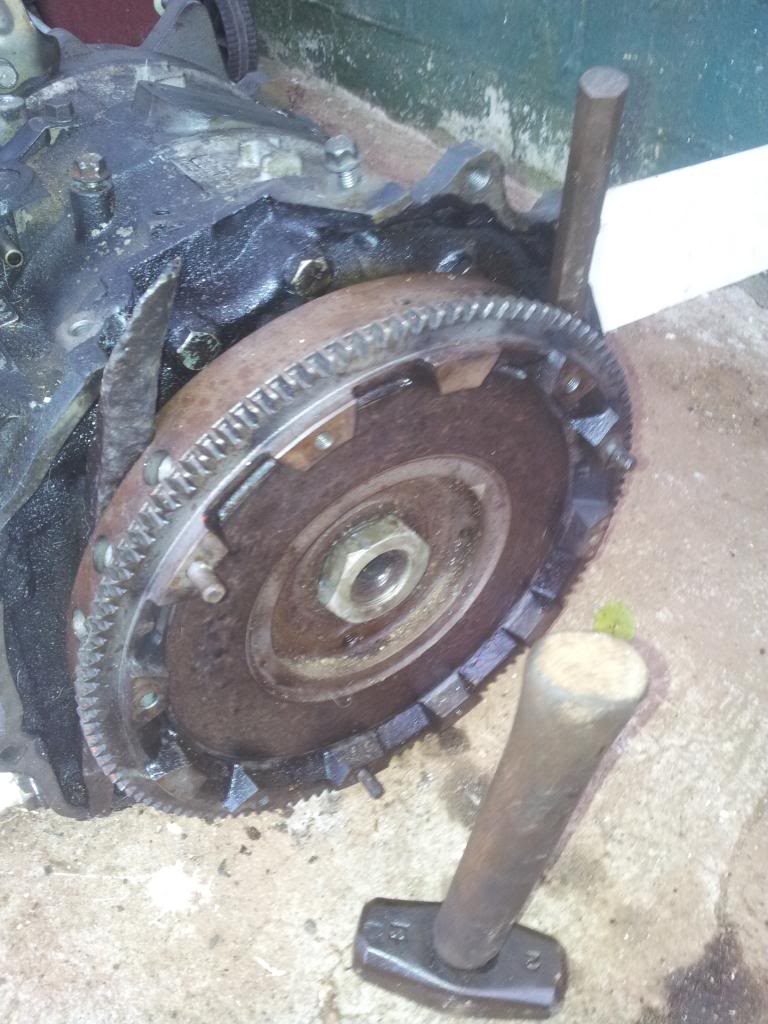
Then give the FWN a couple whacks with a 3-lb hammer and the flywheel will pop loose from the E-shaft:
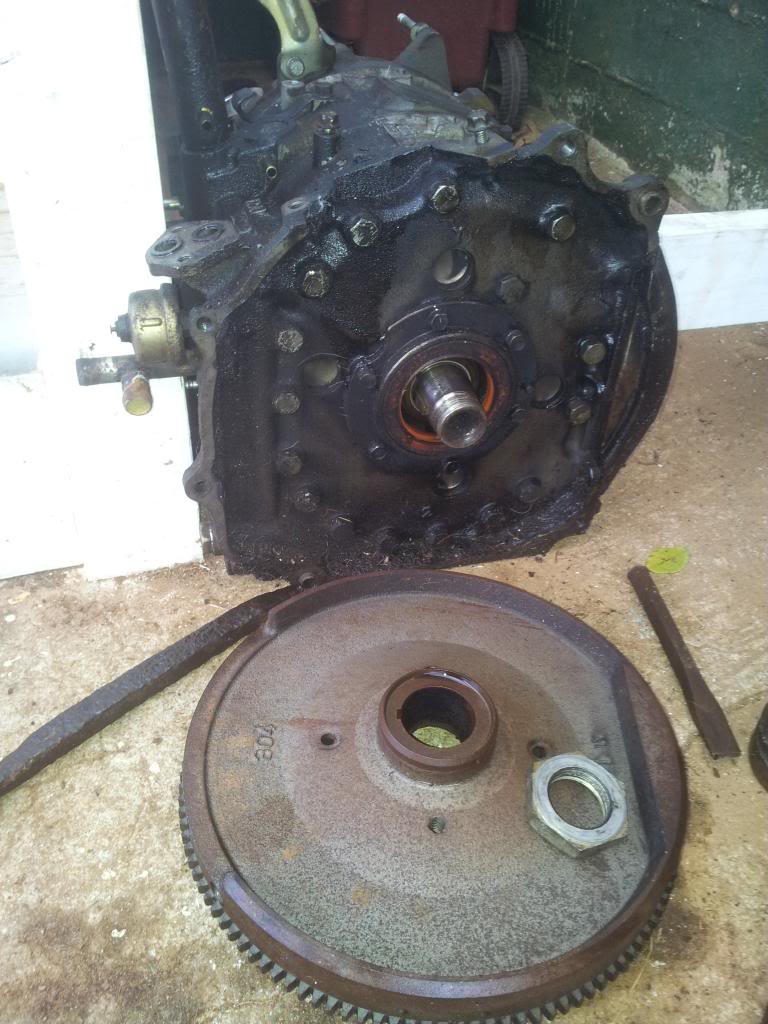
Bing Bang, you're done!
First, get yourself a BFMW. I borrowed this one from Robert:

Then secure the 12A with a 2x4 wedged between your steps and the foundation:

Then install the MSCVJ on the FWN:

Put a dog in between the FW and engine block to lock the FW and connect the BFMW to the MSCVJ such that you get good leverage on the FWN:

Now go up to the third step on your back porch and trounce smartly on the handle of the BFMW to break loose the FWN:


Now back off the FWN until it's about 1/8" proud of the E-shaft and install some dogs to keep the flywheel tight against the engine block:

Then give the FWN a couple whacks with a 3-lb hammer and the flywheel will pop loose from the E-shaft:

Bing Bang, you're done!


By gummers Jeff, that IS an SE flywheel. Good eye!
I have no idea why it's there, I picked up the car, a white 83 GSL, a few weeks ago because the price was right. The engine has a coolant problem (white smoke in the exhaust) which is why I'm tearing it down.
But it also had an odd vibration even when idling in neutral, which I figured at the time was a misfiring rear rotor. It'd been sitting for 3 years, so who knows why it got parked.
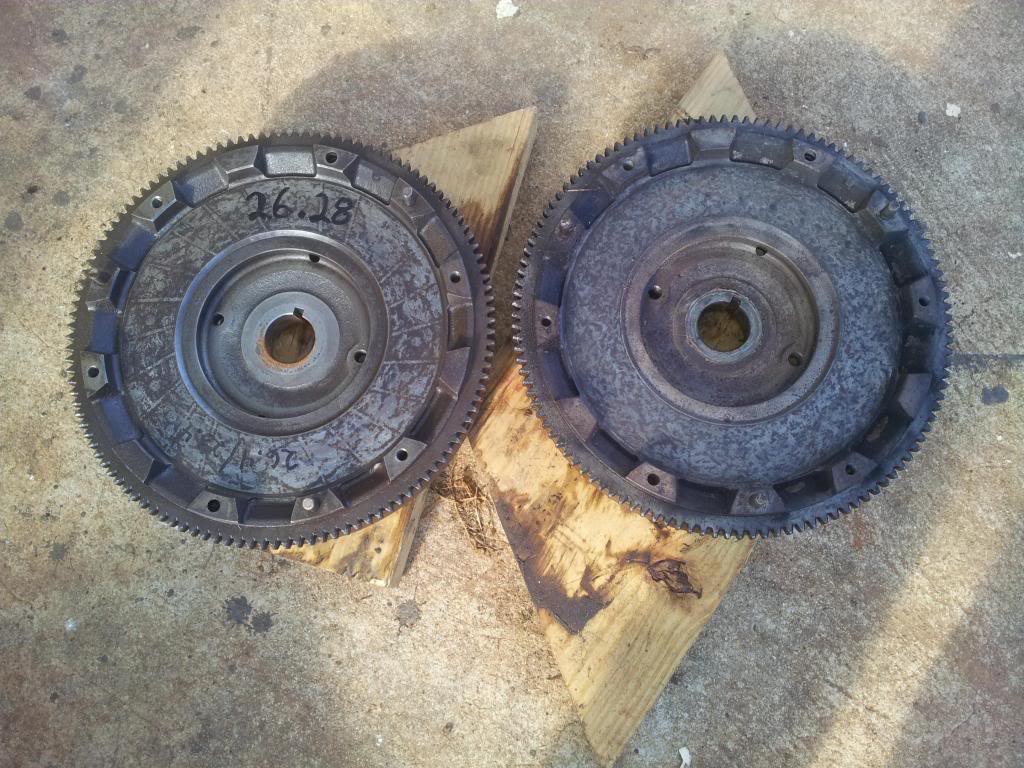
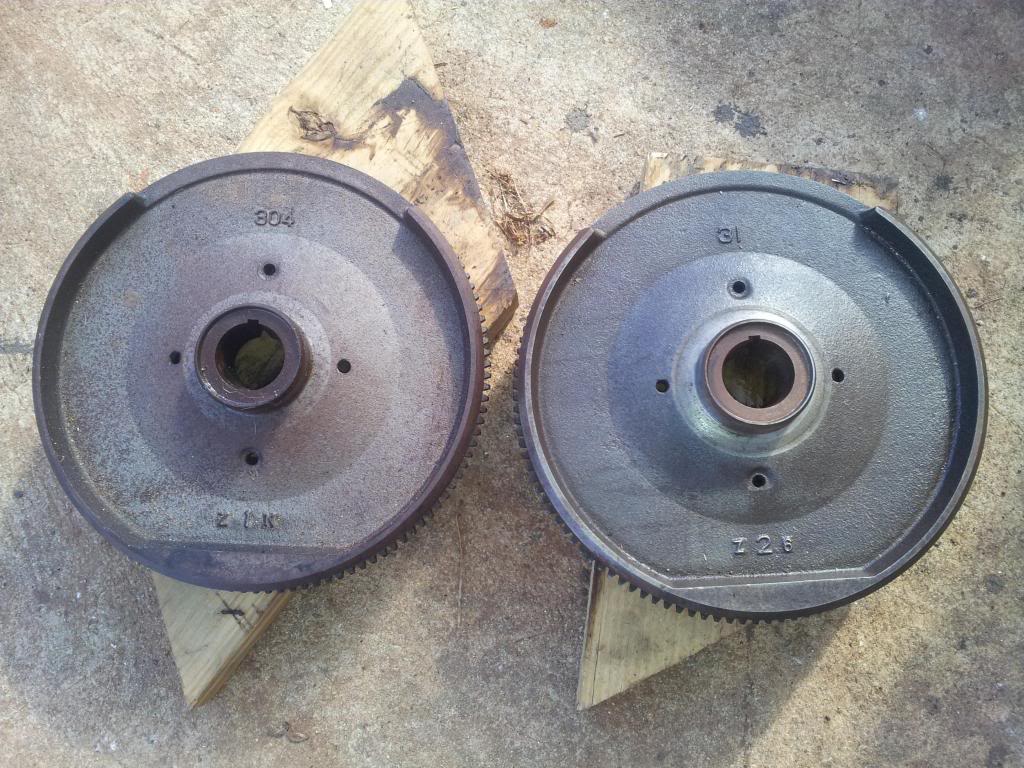
The clutch that came out of it looks practically new, so I'll bet that's when the SE flywheel got subbed in. I don't see how the SE flywheel could've caused the vibration however, since except for the number stamped on the "engine side" ("31" on the 12A unit, "304" on the SE unit; see Flywheels for reference) the flywheels appear to be identical.
Which makes me think maybe the clutch wasn't installed right (or maybe just a misfiring rear rotor). Here's a photo of the clutch and the flywheels (SE on the right). If anybody else sees anything suspicious please let me know.
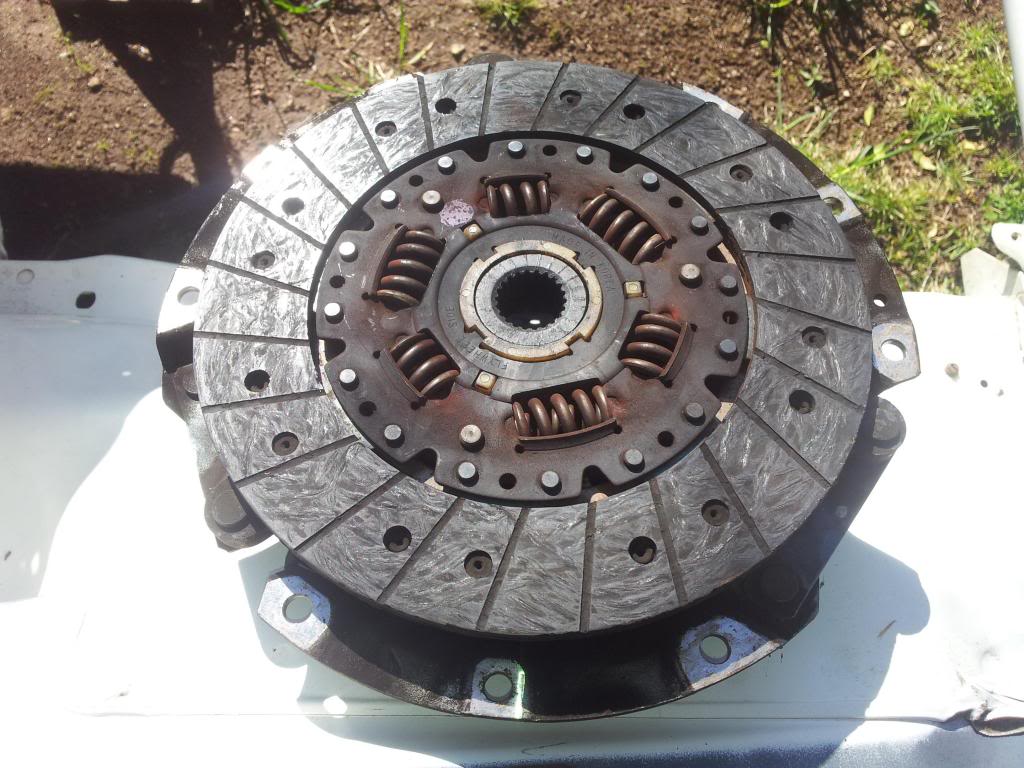
Thanks for the feedback dudes, even you guys who take life to seriously. And while the purpose of this post is to offer some alternatives for the backyard mechanic struggling to get the FW nut off late on a Sunday afternoon, I hope all will remember that SAFETY IS JOB ONE anytime you're doing your own automotive work.
I have no idea why it's there, I picked up the car, a white 83 GSL, a few weeks ago because the price was right. The engine has a coolant problem (white smoke in the exhaust) which is why I'm tearing it down.
But it also had an odd vibration even when idling in neutral, which I figured at the time was a misfiring rear rotor. It'd been sitting for 3 years, so who knows why it got parked.
The clutch that came out of it looks practically new, so I'll bet that's when the SE flywheel got subbed in. I don't see how the SE flywheel could've caused the vibration however, since except for the number stamped on the "engine side" ("31" on the 12A unit, "304" on the SE unit; see Flywheels for reference) the flywheels appear to be identical.
Which makes me think maybe the clutch wasn't installed right (or maybe just a misfiring rear rotor). Here's a photo of the clutch and the flywheels (SE on the right). If anybody else sees anything suspicious please let me know.


Thanks for the feedback dudes, even you guys who take life to seriously. And while the purpose of this post is to offer some alternatives for the backyard mechanic struggling to get the FW nut off late on a Sunday afternoon, I hope all will remember that SAFETY IS JOB ONE anytime you're doing your own automotive work.
So, it turns out the 83-85 12A and SE flywheels are NOT the same, even though they look very similar and weigh the same.
A closer look and measurement of the built-in counterweight at the bottom of the flywheels shows that the SE is thicker and wider than the 12A unit and the open part of the rim on the SE is a longer. Therefore the SE FW has more counterweight than an 83-85 FW.
The counterweight on the front of this engine is from an 83-85 12A, not an SE, so it seems likely the SE flywheel was the source of the engine vibration.
Thanks Jeff!
Yep, that's what I was thinking. Good thing I don't do that kind of stuff.
I can't believe the PO drove the car like that for 25,000 miles without complaining to the shop that installed the clutch and SE flywheel.
I can't believe the PO drove the car like that for 25,000 miles without complaining to the shop that installed the clutch and SE flywheel.
Here's a recent update on the research being done at the Rotary Institute to determine the most effective way to remove flywheel nuts from rotary engines:
https://www.youtube.com/watch?v=hYCP...ature=youtu.be
I'm pretty much convinced the BMFMW coupled with the modified Subaru CV joint is the way to go.
https://www.youtube.com/watch?v=hYCP...ature=youtu.be
I'm pretty much convinced the BMFMW coupled with the modified Subaru CV joint is the way to go.
No disrespect but a cold chisel and a hammer work very well at bone yard trips or when a 3/4 impact gun or rb flywheel socket are not available. Chisel must be grounded down to avoid slicing the flywheel nut.