
Racingbeat Holley or rotaryshack Weber or unknown 48 Ida

Thread Starter
Full Member
Joined: Sep 2012
Posts: 94
Likes: 0
From: Dalen, Netherlands
Racingbeat Holley or rotaryshack Weber or unknown 48 Ida
Carburetor almost ready to be mounted on the car I'm getting a bit exited
Also got the wide band in today. Where should I weld the bug for the best result? The manual says about 18 inches with exhaust temp no higher than 800°C. It won't go so hot, or do they?
(Edit: they do! so I have to place it a few inches further)
I'm getting a bit exitedAlso got the wide band in today. Where should I weld the bug for the best result? The manual says about 18 inches with exhaust temp no higher than 800°C. It won't go so hot, or do they?
(Edit: they do! so I have to place it a few inches further)
Last edited by klabatzie; Jun 25, 2016 at 12:03 AM.
Thread Starter
Full Member
Joined: Sep 2012
Posts: 94
Likes: 0
From: Dalen, Netherlands
Checked for fuel leaks today. No leaks found but the float level is rising after a few moments engine us not running but still it has to seal i guess. Maybe because the carb was standing dry for quite some time I think I will mount it and it will have to come apart for main jet changing and I deal with that also.
Thread Starter
Full Member
Joined: Sep 2012
Posts: 94
Likes: 0
From: Dalen, Netherlands
Racingbeat Holley or rotaryshack Weber or unknown 48 Ida
It runs! And it's idling! It seems stronger when I snap the Trottel. Float level is beautiful in the center. From idle to main jets it bogs a little bur I have to fine tune it so it will be better
Of course I couldn't resist making a test drive but that didn't go so well, on primary it runs good but on secondary it doesn't feel strong so I stopped and secondary was fully flooded. I cleared the flood and drove home on primary. Maybe the secondary airbleed to small? Or could the main jet be to big that it causes a siphon effect?
When I open the throttle when the car is stationary it doesn't flood so maybe it had to do with the high vacuum when driving.
First thing to do now is mount the wideband so I can see what happens. I think I'll place it just before the first exhaust flange it about 25 inch from the exhaustport.
Last edited by klabatzie; Jun 25, 2016 at 02:33 PM.
Congrats!!
Just so you know, I fought a secondary flood problem for a year until I figured it out. And maybe your needles just need to burnish in. I give it 50 to 100 miles.
Yeah, my O2 bung is located about 25 inches from my engine, under the car.
Just so you know, I fought a secondary flood problem for a year until I figured it out. And maybe your needles just need to burnish in. I give it 50 to 100 miles.
Yeah, my O2 bung is located about 25 inches from my engine, under the car.
Thread Starter
Full Member
Joined: Sep 2012
Posts: 94
Likes: 0
From: Dalen, Netherlands
Primary circuit seem OK now. I've changed the 120 with the 116 and it idle around 12.3 and on cruise it is around 13.5
Still problems with the flooding of the secondary.
I think it could be a problem with the secondary nr2 airbleed. It is solder filled so there is no atomising of the fuel so it Wil cause the sifon effect? I don't think is a problem with the main airbleed because when you look in the venturi it looks fully atomized and flow stops direct when the throttle closes
I first thought that the secondary slow system was under the butterfly valve but that doesn't seem to be true
You must have gotten solder into the lower section of your secondary long slows. I never fill the lower section. It needs to stay open to prevent the siphon effect. I only fill the upper section where the two sets of tiny holes are. These tiny holes allow in unwanted air from above.
Thread Starter
Full Member
Joined: Sep 2012
Posts: 94
Likes: 0
From: Dalen, Netherlands
You must have gotten solder into the lower section of your secondary long slows. I never fill the lower section. It needs to stay open to prevent the siphon effect. I only fill the upper section where the two sets of tiny holes are. These tiny holes allow in unwanted air from above.
The same thing was happening to me when I tried fully blocked short slow bleeds. The I did it was I removed the nickel plated 60s and swapped in some spare brass ones that were fully blocked by solder. It lead to flooding issues exactly as you are describing. I tried drilling a small hole in the solder around .35mm which worked fine. Then I tried the nickel plated 60s again which also worked fine.
The bottom line is you need to have a tiny hole there to break the siphon effect. It's my guess that the air from that circuit is not able to make its way past the long slows.
The bottom line is you need to have a tiny hole there to break the siphon effect. It's my guess that the air from that circuit is not able to make its way past the long slows.
Thread Starter
Full Member
Joined: Sep 2012
Posts: 94
Likes: 0
From: Dalen, Netherlands
Flooding issue is soved!
The nikkelplated airbleed was clogged so I tried to clean them but one was still not free so I replaced both.
I test drove it and it runs good but not yet the power increase I was hoping for but it is running a bit rich. Let's say about 11 so have make some more r u ns to see if it stays that way or I neet to get a smaller secondary jet
Maybe I should advance the ignition timing as well because it has more mixture to ignite? Seems plausible to me.
I don't mess with timing other than for boost. I limit my timing to 0 at idle, to only 10 degrees max. Only mechanical advance is what I use.
I guess you could try changing your timing. See what it does for you.
I guess you could try changing your timing. See what it does for you.
Thread Starter
Full Member
Joined: Sep 2012
Posts: 94
Likes: 0
From: Dalen, Netherlands
Racingbeat Holley or rotaryshack Weber or unknown 48 Ida
What a HUGE difference in power increase the engine is much more responsive and pulls hard! It seems that the mixture is also a bit leaner now on cruise will make a longer test drive to conform that.
Also the idle is much smoother but I've read that the rotary is a bit picky about the ignition timing so I retarded a bit to 6 degrees witch also works fine.
Maybe I will play a little more at different settings.
Edit:
I've read about the Paul Yaw timing and measured that on my engine to find it just a base setting at 0 degrees. Now I understand that there are 5 different types of distributors so does that mean I have the one that advances the most?
My original workshop manual says that the maximum mechanical advance is 12.5 and vacuum is 4.5 put that together and it's 17 so I lack 7 degrees... not sure what to think of this method or my math.
Last edited by klabatzie; Jul 2, 2016 at 01:46 PM.
Maybe your dizzy isn't set right with the pulley? Maybe your pulley if off by a bit? It can happen over the course of 30 years when people swap pullies without realizing the marks can be off by as many of 7 degrees. The pulley and hub are a factory matched pair.
Thread Starter
Full Member
Joined: Sep 2012
Posts: 94
Likes: 0
From: Dalen, Netherlands
I haven't had much time time to work on the car so when I had time I drove it haha.
Still need to fine tune the jets and ignition timing but it drives fine for now.
Next mod I'm looking into is replacing the ignition with an MSD 6a and directfire setup.
For now I want to thank you Jeff20B for the assistance in the setup of my nikki, it's been a lot easier with your help.
Still need to fine tune the jets and ignition timing but it drives fine for now.
Next mod I'm looking into is replacing the ignition with an MSD 6a and directfire setup.
For now I want to thank you Jeff20B for the assistance in the setup of my nikki, it's been a lot easier with your help.
Thread Starter
Full Member
Joined: Sep 2012
Posts: 94
Likes: 0
From: Dalen, Netherlands
I found a diagram from your dlidfis and I was thinking of the same setup with the difference that the leading coils get fed by the msd. that uses capacitors for a higher primary voltage even with high rpm.
Thread Starter
Full Member
Joined: Sep 2012
Posts: 94
Likes: 0
From: Dalen, Netherlands
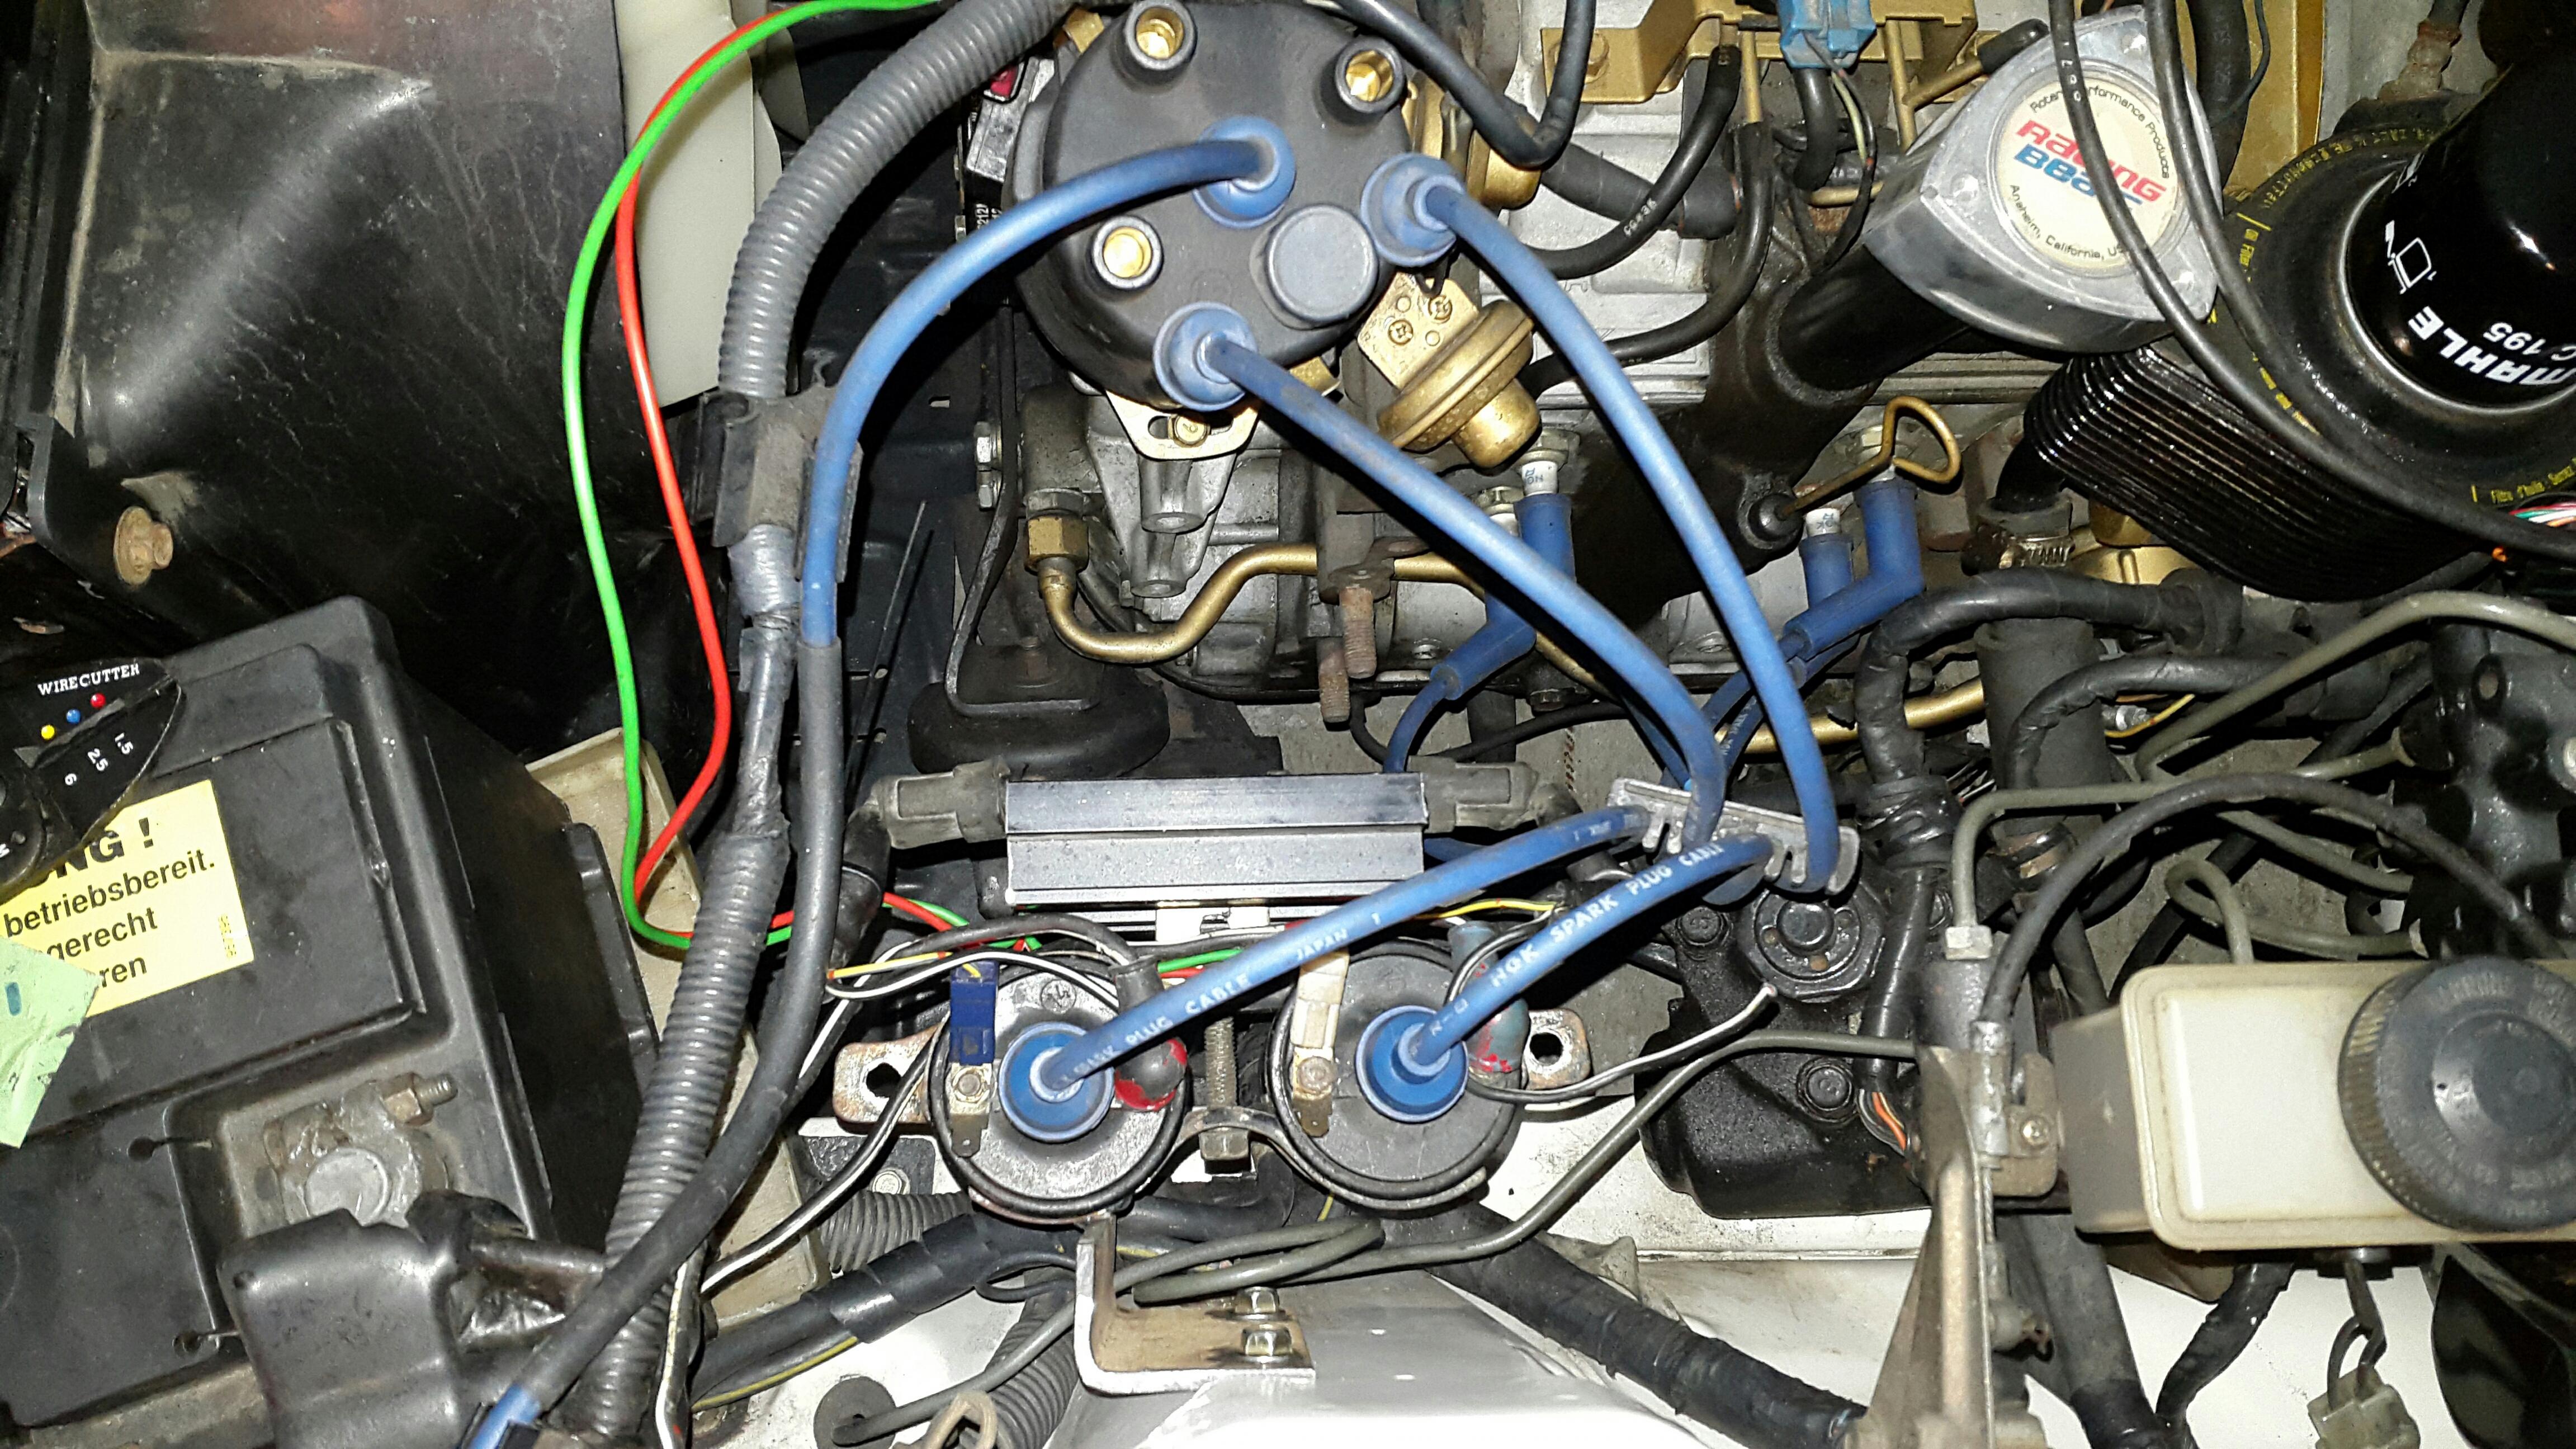
Took me a while to scavenge the cooling for the ignitors but my dad had a cool item laying around so i made this carrier for the ignitors. Pretty pleased with it.
Now I'm going to make a support on the bracket for the coils and make it fit on the struttower.
Now I'm going to make a support on the bracket for the coils and make it fit on the struttower.
Thread Starter
Full Member
Joined: Sep 2012
Posts: 94
Likes: 0
From: Dalen, Netherlands
It isn't the prettiest bracket but it will do for the time of testing.

I yet have to replace the sparkplugs but you can already see the difference with the A/F ratio it is much more stable when idling.
On power it is also a big difference I had a bit of a flatspot when the secondaries came in and it's much less noticeable now
Next thing now is to fine tune the jets of the carb but I'm pretty pleased for now.
Also on other thing I noticed that the tacho didn't work any more and when I looked at the wiring diagram it seems to go to the leading coil. I put the connector on the trailing coil and now it works again. Maybe a difference between the us spec and euro ones?
Edit:
Looks like the wiring was a bit screwed up but the right wire went to the right place so it wasn't a problem. But on the distributor the blue connector goes on the trailing ignitor while according to the wiring diagram the white connector should go on the trailing but that would make the wiling loom look odd. Strange but it works just fine like it is so it will remain this way
Last edited by klabatzie; Aug 1, 2016 at 04:08 PM.
Thread Starter
Full Member
Joined: Sep 2012
Posts: 94
Likes: 0
From: Dalen, Netherlands
So next update of my project. I've set the timing about 20/24 degrees on maximum advance without the vacuum attached. When the engine idles it is on the stock timing mark. I don't think this should be the case because when I advance the timing it runs better and on deceleration it doesn't pop as much in the exhaust. Am I doing something Wrong?
I made the timingmark on an other pulley with the tape method and measured the distance with a caliper and transferred it to the pulley on the car
I made the timingmark on an other pulley with the tape method and measured the distance with a caliper and transferred it to the pulley on the car