When you click on links to various merchants on this site and make a purchase, this can result in this site earning a commission. Affiliate programs and affiliations include, but are not limited to, the eBay Partner Network.
I've been trying to find diagrams of what's between the power steering pump and tank on my car, but haven't had much luck.
I have a leak that appears to be coming from the connection between the pump and tank for the power steering on my 84 GSL-SE (red arrow in first pic). Is there actually an o-ring or something here and do they just pressure fit together? Can I remove the tank from the pump by removing the two bolts with the green arrow in the first pic and the two bolts behind the tank in the last (I know these go through the pump, so is that ok...)?
I checked if the front pulley wobbled at all since I've heard about the c-clip, but it seems fine. It's leaking pretty bad and doesn't seem to be leaking from the pump, so is this a common place for it to leak?
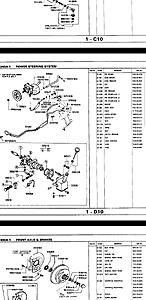
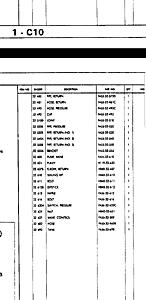
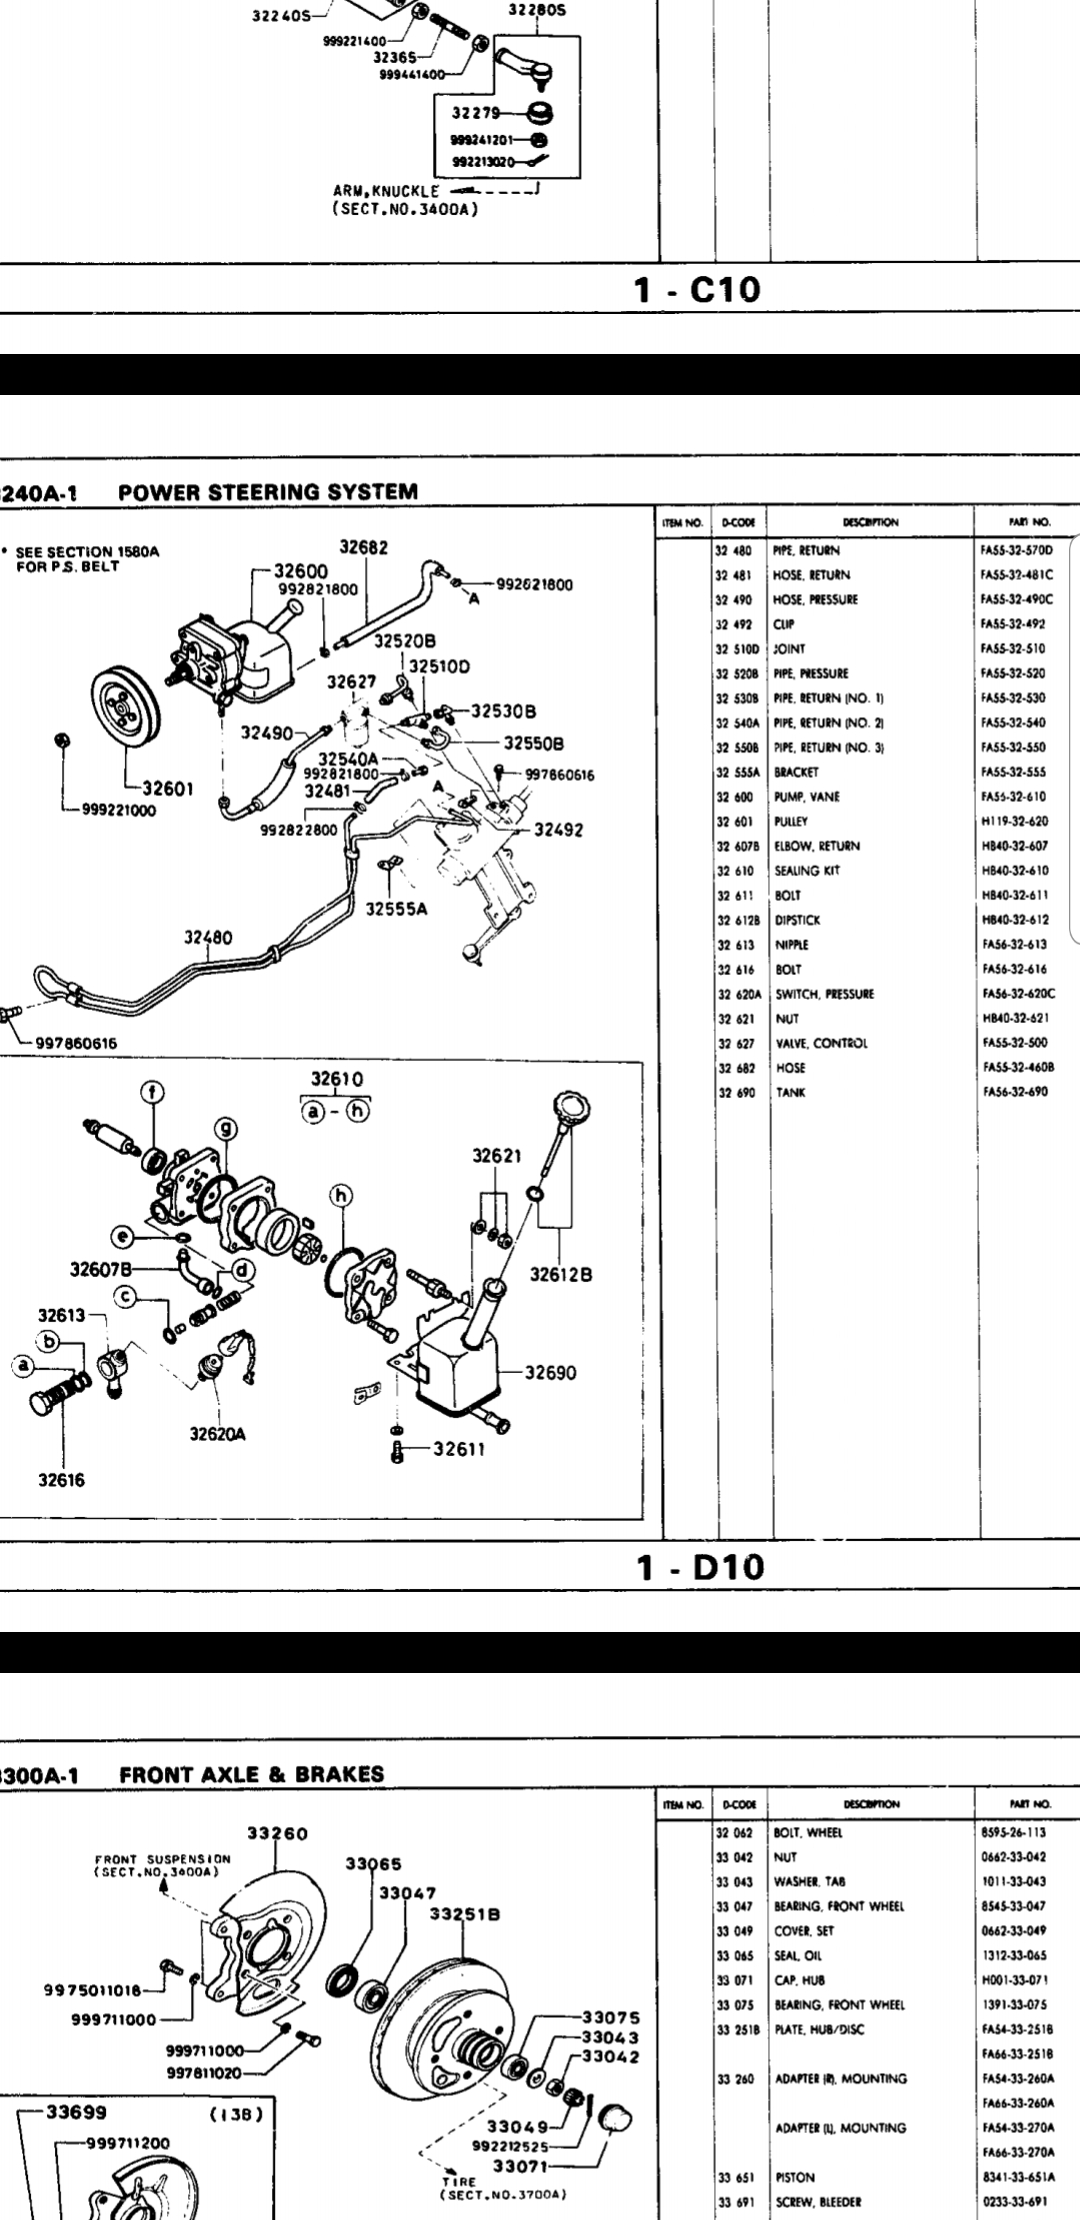
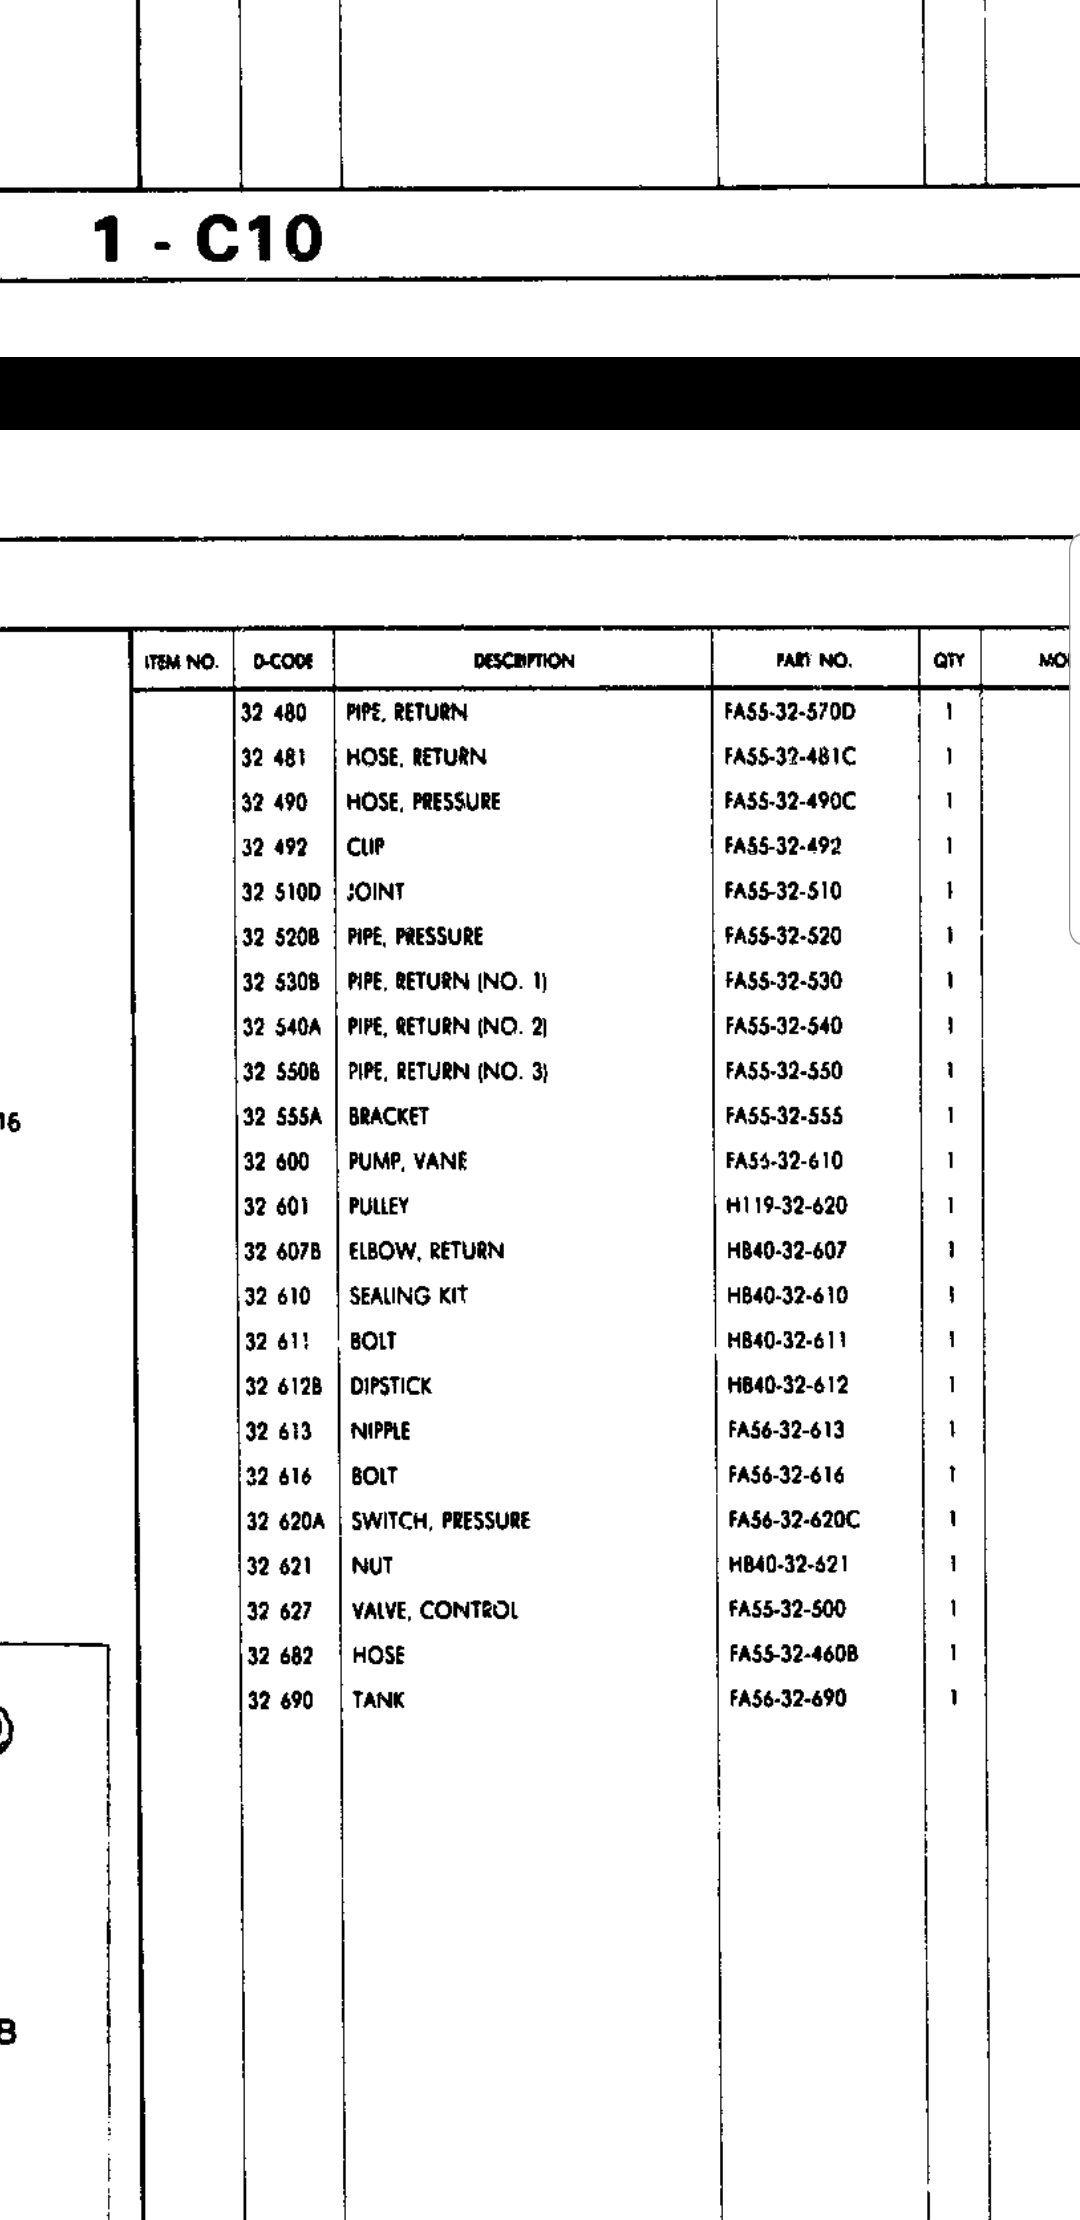
Appears there may be an o-ring there. The o-ring apparently was not sold outside of the rebuild kit for the pump which is disappointing. Here's the original parts fiche showing the system and part numbers. The rebuild kit, HB40-32-610 is NLA.
The rebuild kit I bought from rock auto came with a gasket for the shaft and an oring for that hose connector on the bottom. Plan on replacing the two low pressure lines at the same time. The high pressure line can be removed and reinstalled without risking leaks, but the low pressure line will crack as it's pulled off the barb.
Appears there may be an o-ring there. The o-ring apparently was not sold outside of the rebuild kit for the pump which is disappointing. Here's the original parts fiche showing the system and part numbers. The rebuild kit, HB40-32-610 is NLA.
Originally Posted by chuyler1
The rebuild kit I bought from rock auto came with a gasket for the shaft and an oring for that hose connector on the bottom. Plan on replacing the two low pressure lines at the same time. The high pressure line can be removed and reinstalled without risking leaks, but the low pressure line will crack as it's pulled off the barb.
Thanks for the replies! I did buy the Gates 348689, so hopefully it does have the o-ring as part of the kit (there are several included, but wasn't sure if one was for that joint). Would you happen to know what size the low pressure return hoses are? Since the pump itself is fine, is it worth trying to just pull the tank off from the back or its it better just to pull off the entire assembly?
There are few shortcuts in life. Could you just remove the reservoir and replace the oring? Yes. However, if that oring is leaking, the shaft gasket likely isn't far behind and may start leaking as soon as the reservoir starts holding fluid. Go in there once, replace everything, and be done with it. You can clean, disassemble, and reassemble the pump in an evening. The only special tool needed is a snap ring pliers.
I want to say i used 8AN steel braided hose to replace my low pressure lines. I had some extra laying around.
One other useful tool might be one of these cam holders, as it's a bit awkward trying to get a belt in there to hold it. Made taking off the pulley a breeze.
I guess you could have technically just removed the pump by taking off those two nuts, but I agree that it probably would've been more work squeezing in there just to replace that one oring. Here's a pic of it out of the car in case anyone needed a reference.
had mine rebuilt recently at a hydraulics shop in Puerto Rico for $65 with warranty. Guy told me the pump is based of an old mitsubishi pump off an early gen Montero. I did have to replace a power steering line also. But well worth it....Don't have to worry about it again....
Dang, wonder where he got a replacement for the snap ring on the shaft. Gotta love that Mazda tells you to replace the snap ring, but didn't provide a part number.
Anyone know where to pick one up or if a newer external snap rings (with the holes for pliers) will be OK instead? I still have the old ring, so am considering just bending that back into shape a bit and reusing it, since the snap rings I bought are thinner and I wasn't sure if the external tangs would interfere with anything.
any parts store like advanced, autozone, napa, o'rileys, etc should have e-clips in different sizes. just pick one that matches the size u have. with what u have being thinner, it shouldn't really matter as long as it fits the cap.
Don't forget to flip the thrust bearing over. If yours was anything like mine, that clip wore a trough in the thrust bearing creating a lot of end play, front to back. Flipping it over gives it the correct dimension and limits end play,