
My First Rebuild Thread '79 12A

Thread Starter
Full Member
Joined: Apr 2011
Posts: 46
Likes: 0
From: Bismarck
I noticed you had the irons blasted. Be very careful to ensure all the blast media is removed from every little area. I blasted my housing and irons and powercoated then only to find out I did not remove the blast media completly. The result was grit in the oil pan, brand new rotor bearings and stationary bearing ruined, and esentric shaft runied. I will never again media blast irons or housings. I found the best way to clwean them was a wire wheel. I thought I did a good job of getting the blast media out. I was wrong.
Thread Starter
Full Member
Joined: Apr 2011
Posts: 46
Likes: 0
From: Bismarck
Thanks to GySgtFrank I have all the parts now for assembly. I got everything washed real good and painted. I started assembling this morning. Everything is going smooth so far with exception of a broken oil control ring. If anyone has the outer oil control ring I will gladly by one from you. Kind of sucks because this will surely set me back some time. Those outer oil control rings are a bitch to get in. To make it even worse I had the thing in, then realized it was upside down, then it broke as I was reinstalling.
The housing I got from GySgtFrank was in real nice condtion. Better than the other one I am using. That one I am using has some corrosion close to the inner water seal but I am going to go with it.
Hopefully some one can help me out with that oil control ring. Would it be the same as the 13B? If so could I get one from the dealership?
Thanks

Thread Starter
Full Member
Joined: Apr 2011
Posts: 46
Likes: 0
From: Bismarck
I found an oil control ring and it should be here today. Hopefully have everything sealed up tonight and start putting the other componenets back onto the engine. Here's what the paint job looks like:


Thread Starter
Full Member
Joined: Apr 2011
Posts: 46
Likes: 0
From: Bismarck
I honestly wasn't even sure that I would check it. My videos all stress it but I was telling myself in my head that if it was fine before the overhaul it is fine now. I'm guessing that it is more important than I realize. I am going to give O'reilly's a call and see if they have one for rent. I'll also check with a couple coworkers who do work on vehicles. Where's the best/quickest place to find these spacers? If I have to order them and they are relatively inexpensive I would just order a couple different widths and get them on their way. During the build I've found that the most difficult part is waiting on parts to get here. Thanks Stu for calling attention to something that needed to be addressed!


I honestly wasn't even sure that I would check it. My videos all stress it but I was telling myself in my head that if it was fine before the overhaul it is fine now. I'm guessing that it is more important than I realize. I am going to give O'reilly's a call and see if they have one for rent. I'll also check with a couple coworkers who do work on vehicles. Where's the best/quickest place to find these spacers? If I have to order them and they are relatively inexpensive I would just order a couple different widths and get them on their way. During the build I've found that the most difficult part is waiting on parts to get here. Thanks Stu for calling attention to something that needed to be addressed!
Thread Starter
Full Member
Joined: Apr 2011
Posts: 46
Likes: 0
From: Bismarck
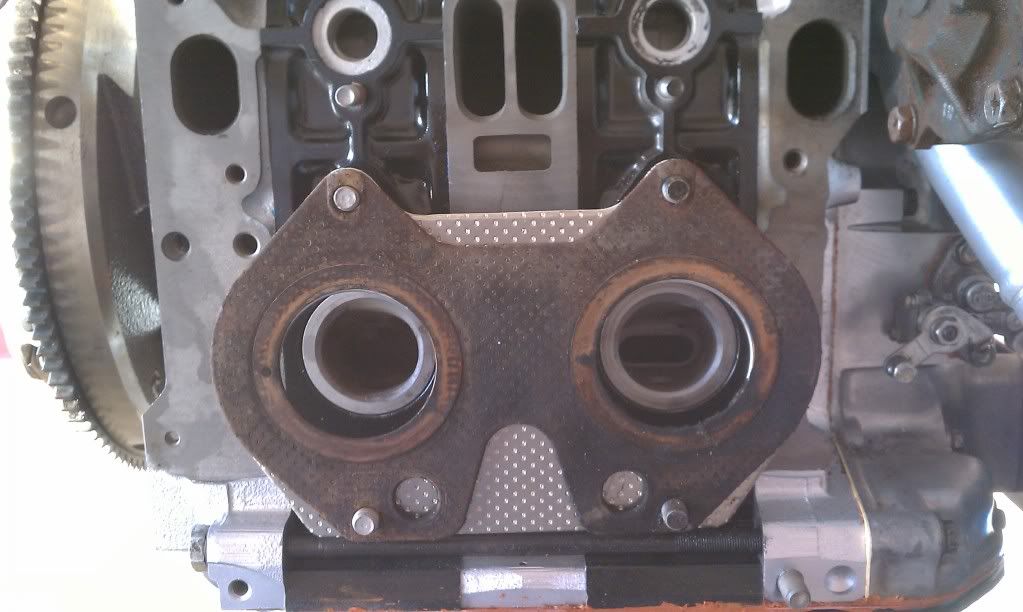
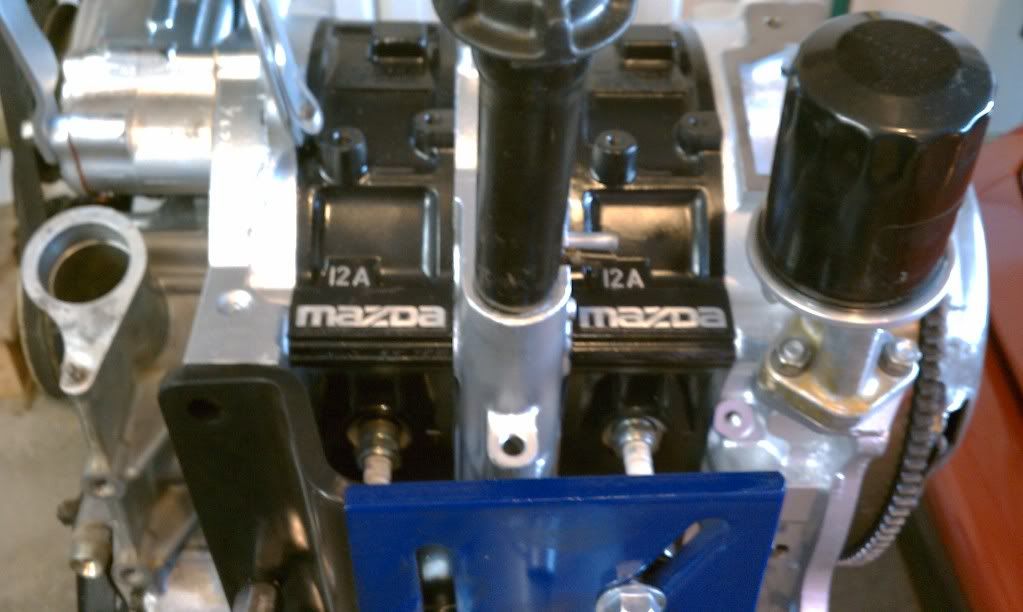
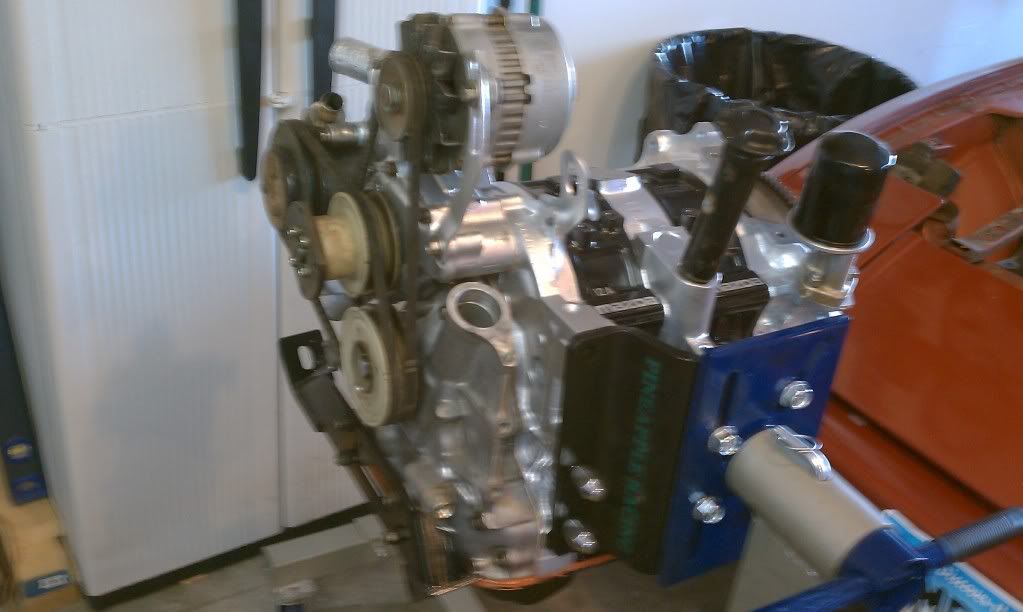
Here's an update on what I did over the weekend: Got the front end assembled, oil pan put on. Also got the alternator and air pump put back on. It was a oain in the *** but I got the old pilot bearing removed and replaced. I had to grind down the end of it because it was too wide to fit in that small of a pilot bearing. Hopefully the guys that rented it to me don't mind. I didn't take off to much. I also was able to track down a dial indicator and thankfully the end play falls smack dab within spec. Tonight I am hoping to get the thermal reactor and carb/emissions hooked up. I will review the rats nest removal document and decide if that is something I want to do. I've heard arguments for both sides. Oh and I do have a question on the thermal reactor metal gasket. Am I just supposed to drill out the two holes that are not cut into the gasket? See pic below.
This is nice work. I wouldn't put the thermal reactor on yet. I like to save it until the engine is in the car. It gives a little extra room to move around when putting the engine in. Once the engine is mounted, I put the exhaust manifold on and put the nuts on just a little. I then mount the exhaust to the manifold. This give a little wiggle room.
I also like to put the intake and carb on before installing the engine. Don't torque the intake bolt/nuts to much though. It's a bitch when you snap one off.
I also like to put the intake and carb on before installing the engine. Don't torque the intake bolt/nuts to much though. It's a bitch when you snap one off.
Nice work. When you turn the motor over by hand does each chamber make compression? Did you pack the oil pump with grease or Vaseline so it'll seal and draw oil on startup? Media blasting with baking soda is a good idea since it is water soluble and will dissolve away when cleaning.
Thread Starter
Full Member
Joined: Apr 2011
Posts: 46
Likes: 0
From: Bismarck
I was able to get it to fire today. Put in a good 6 hours on hooking everything up. Throttle cable was a bitch and I need to figure out how to get the main exhaust up to the thermal reactor. I played a little with the timing but still can't get it to idle. I'm clueless on how to go about timing. Do you think the engine not idling has to do with timing? If the car runs at a higher rpm does that mean I am close on the timing? I also need to check all my vacuum lines again. I am not sure they are 100% correct. I don't fell like messing with it anymore tonight. I'd appreciate any thoughts and I will hit it again tomorrow. Thanks
I am assuming that you kept the original nikki carb, if so did you rebuild it? Did you try adjusting the idle mix and idle speed on the carb? how high is the rpm at idle? setting the timing is simple, rotating the entire distributor controls the leading and sliding the vacuum pod in and out controls the trailing, the first mark on the pulley is the Leading mark and second mark is the Trailing.
Thread Starter
Full Member
Joined: Apr 2011
Posts: 46
Likes: 0
From: Bismarck
Yes I am using the original carb. Didn't want to attemp a rebuild until I knew that everything else was working correctly so it would be easier to troubleshoot if I had problems getting it running.
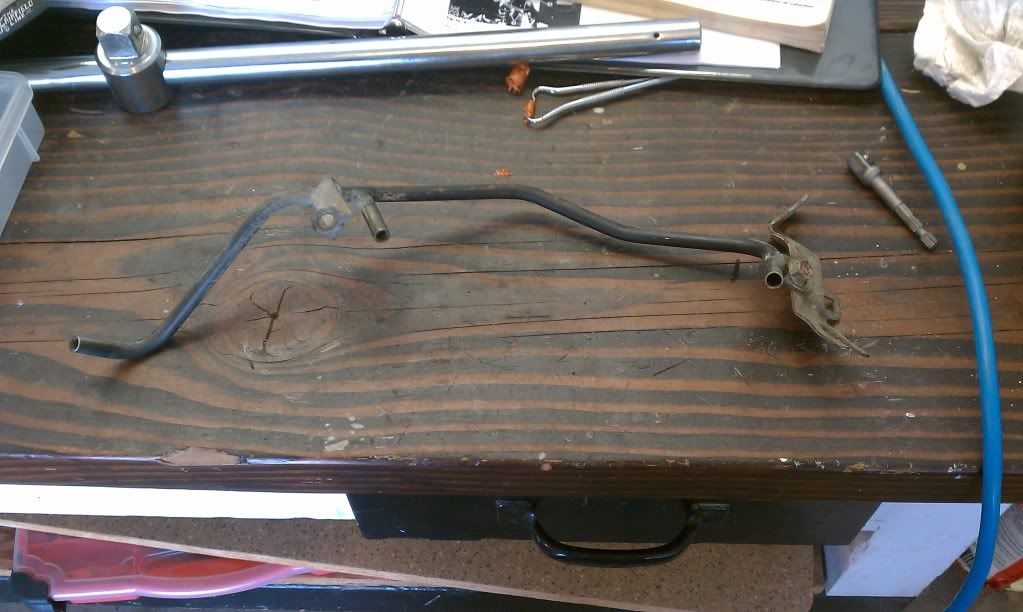
I am thinking that things aren't quite right with my vacuum hoses. I actually have an extra piece that I just realized isn't installed yet.
I am thinking that things aren't quite right with my vacuum hoses. I actually have an extra piece that I just realized isn't installed yet.
Thread Starter
Full Member
Joined: Apr 2011
Posts: 46
Likes: 0
From: Bismarck
I lost mu phone about a month ago and it had all the pictures that I had took before pulling things apart.. Would someone be willing to send me some close up pics of the rats nest/carb so that I can make sure my hoses are all going to the correct places and to help install the piece shown above? You could either post them in the thread or if your not setup to do that you could e-mail them to jason.brekke@gmail.com I would really appreciate it!
that extra piece of vacuum line is what I think connects the charcoal canister to the ventilation check valve. the top part that has the larger bracket connects the the top of the air cleaner, the middle outlet connects to the air vent solenoid which is located between the fuel inlet and omp inlet on the carb, the end of the line goes to the vent check valve.
Thread Starter
Full Member
Joined: Apr 2011
Posts: 46
Likes: 0
From: Bismarck
that extra piece of vacuum line is what I think connects the charcoal canister to the ventilation check valve. the top part that has the larger bracket connects the the top of the air cleaner, the middle outlet connects to the air vent solenoid which is located between the fuel inlet and omp inlet on the carb, the end of the line goes to the vent check valve.
I got everything hooked up and played with the timing a bunch and got it idling smooth. Went for a little spin tonight. Still got some fine tuning to do but I am happy to have the thing back in one piece and running!
Thread Starter
Full Member
Joined: Apr 2011
Posts: 46
Likes: 0
From: Bismarck
I am assuming that you kept the original nikki carb, if so did you rebuild it? Did you try adjusting the idle mix and idle speed on the carb? how high is the rpm at idle? setting the timing is simple, rotating the entire distributor controls the leading and sliding the vacuum pod in and out controls the trailing, the first mark on the pulley is the Leading mark and second mark is the Trailing.
The timing marks on the main pulley wear off as the car ages but it also has the marks cut into pulley itself, just rotate the pulley by had and feel/look for the marks and once you find both marks just paint/color them in, its best to use 2 different colors to tell the difference between the leading and trailing mark.
Here's an update on what I did over the weekend: Got the front end assembled, oil pan put on. Also got the alternator and air pump put back on. It was a oain in the *** but I got the old pilot bearing removed and replaced. I had to grind down the end of it because it was too wide to fit in that small of a pilot bearing. Hopefully the guys that rented it to me don't mind. I didn't take off to much. I also was able to track down a dial indicator and thankfully the end play falls smack dab within spec. Tonight I am hoping to get the thermal reactor and carb/emissions hooked up. I will review the rats nest removal document and decide if that is something I want to do. I've heard arguments for both sides. Oh and I do have a question on the thermal reactor metal gasket. Am I just supposed to drill out the two holes that are not cut into the gasket? See pic below.
Very nice build by the way! Can't believe how clean you got everything.
Thread Starter
Full Member
Joined: Apr 2011
Posts: 46
Likes: 0
From: Bismarck
Just changed oil tonight. Probably a good 30 minutes on the first oil I put in. I will probably do it again after the first tank of gas goes through it. Cheap insurance they way I see it.
Thread Starter
Full Member
Joined: Apr 2011
Posts: 46
Likes: 0
From: Bismarck
One more question on the timing. I was able to find the leading and trailing mark on the pulley after seeing a picture in the FSM. However, the engine would not start after following the steps in there. After pulling the distributor out and trying some other random drop ins I was able to get it running and idling. Question is, on the 12A is it possible that the timing marks on the pulley could be off say, 90, 180, or 270 degrees? I can't remember if the pulley location would be locked in due to a key or if it could be in one of four positions.