
How to install RB upholstery kit

Thread Starter

Joined: Jul 2004
Posts: 9,250
Likes: 464
From: Lake Wylie, N.C.
I finally decided to reupholster my seats after 30+ years of use and abuse.
This how to will be split into at least 4 sections; introduction (this post),
disassembly, prep, and assembly. So be patient as get this all written up.
For the last 20 or so I have had them covered in some sheep wool covers.

Pulling those off you can see the driver side is pretty ripped up and sagging a lot.

I yanked the seat and got to work on it. Whew what a mess under there.

Before I go any further, lets talk a bit about what I ordered from RB and tools I
used and so on. I ordered the black all vinyl seat covers for 79-83 highback
seats. Seems the seats are all the same dimension through those years. They
came in about 4 weeks after I ordered them, so leave some leeway in there
if you are planning to do this project.
This picture has them in the back of my pickup in the hot sun warming up before
I start the install. Always good to get them warm before trying to pull them over
the seats. The RB kit comes with a lot of hog rings, some generic instructions and
some of the cheapest, crappiest hog ring pliers ever. Why bother. Anyway, thats
the only criticism I have on the kit. Otherwise its very well made. Has extra foam
attached and all in all is very professional looking. As good or better made than
OEM.
For tools I used:
Channel locks
Rachet
Extension
One socket for the seats bolts and the bolts that fastened the seat guides to the seat. I want to say it was a 14mm socket. I'll have to double check on that.
Torx bit - you need this to take the seat adjuster off.
Needle nose pliers
Screw driver
Linemans pliers (not pictured)
Hog nose pliers from Harbor Frieght

I also got some other supplies that I will detail later in this thread when I get to
that part.
This how to will be split into at least 4 sections; introduction (this post),
disassembly, prep, and assembly. So be patient as get this all written up.
For the last 20 or so I have had them covered in some sheep wool covers.
Pulling those off you can see the driver side is pretty ripped up and sagging a lot.
I yanked the seat and got to work on it. Whew what a mess under there.
Before I go any further, lets talk a bit about what I ordered from RB and tools I
used and so on. I ordered the black all vinyl seat covers for 79-83 highback
seats. Seems the seats are all the same dimension through those years. They
came in about 4 weeks after I ordered them, so leave some leeway in there
if you are planning to do this project.
This picture has them in the back of my pickup in the hot sun warming up before
I start the install. Always good to get them warm before trying to pull them over
the seats. The RB kit comes with a lot of hog rings, some generic instructions and
some of the cheapest, crappiest hog ring pliers ever. Why bother. Anyway, thats
the only criticism I have on the kit. Otherwise its very well made. Has extra foam
attached and all in all is very professional looking. As good or better made than
OEM.
For tools I used:
Channel locks
Rachet
Extension
One socket for the seats bolts and the bolts that fastened the seat guides to the seat. I want to say it was a 14mm socket. I'll have to double check on that.
Torx bit - you need this to take the seat adjuster off.
Needle nose pliers
Screw driver
Linemans pliers (not pictured)
Hog nose pliers from Harbor Frieght
I also got some other supplies that I will detail later in this thread when I get to
that part.
Thread Starter
Joined: Jul 2004
Posts: 9,250
Likes: 464
From: Lake Wylie, N.C.
Disassembly
After getting the seats out of the car you will need to disassembly them completely
to redo the upholstery. This means you have to disconnect the seat and the back
and remove the seat rails. Keep track of your nuts and bolts and pieces or you
may get confused on reassembly. Take a lot of pictures. Saved me a number of times.
The good news is that the same socket you used for seat remove can be used for
the rail removal. Also if you don't have a torx bit set for some larger torx bolts,
go get some before you start.
First lets separate the seat from the back. You need to use the torx bit to undo the
4 bolts (2 on the seat and 2 on the back) to remove the seat back adjust mechanism.
Sorry for the fuzzy shot. I may go back and retake a few of these if I get a chance.

Then you need to undo the hinge on the opposite side from the adjuster
mechanism. It looks weird but is easy to take apart.

Pop off that top cap and under it will be a cotter pin holding a plastic guide in
place. Use a screwdriver or finger nail to pry it off. There are some slots if you
look at it closely.

Pull the cotter pin and the plastic guide out so you see this:

The back can now be pulled from the seat and set aside. Note the plastic washer
or protector left underneath. Make sure to save that and all the other peices as
you will need them on reassembly.

The seat hinge left after taking the back completely off.

Next up taking the rails off. Flip the seat over and get your rachet and socket ready to go.

Remove the two spring attached to the seat adjuster.
Here

and here
Now you can slide the rail back and forth to get access to the bolts holding the rail on. Just remove
the two bolts and the rail is off.

Remove the other rail as well.
to redo the upholstery. This means you have to disconnect the seat and the back
and remove the seat rails. Keep track of your nuts and bolts and pieces or you
may get confused on reassembly. Take a lot of pictures. Saved me a number of times.
The good news is that the same socket you used for seat remove can be used for
the rail removal. Also if you don't have a torx bit set for some larger torx bolts,
go get some before you start.
First lets separate the seat from the back. You need to use the torx bit to undo the
4 bolts (2 on the seat and 2 on the back) to remove the seat back adjust mechanism.
Sorry for the fuzzy shot. I may go back and retake a few of these if I get a chance.
Then you need to undo the hinge on the opposite side from the adjuster
mechanism. It looks weird but is easy to take apart.
Pop off that top cap and under it will be a cotter pin holding a plastic guide in
place. Use a screwdriver or finger nail to pry it off. There are some slots if you
look at it closely.
Pull the cotter pin and the plastic guide out so you see this:
The back can now be pulled from the seat and set aside. Note the plastic washer
or protector left underneath. Make sure to save that and all the other peices as
you will need them on reassembly.
The seat hinge left after taking the back completely off.
Next up taking the rails off. Flip the seat over and get your rachet and socket ready to go.
Remove the two spring attached to the seat adjuster.
Here
and here
Now you can slide the rail back and forth to get access to the bolts holding the rail on. Just remove
the two bolts and the rail is off.
Remove the other rail as well.


Good writeup so far. There was a post recently that showed these seat covers installed and the results looked great.
Thanks for taking the time to do it, should be archived later!
Thanks for taking the time to do it, should be archived later!

Thread Starter
Joined: Jul 2004
Posts: 9,250
Likes: 464
From: Lake Wylie, N.C.
Thread Starter
Joined: Jul 2004
Posts: 9,250
Likes: 464
From: Lake Wylie, N.C.
Some notes on the dis-assembly while its fresh in my head.
1. The torx screws for the seat adjuster seem to get stripped easily. Especially the
lower one on the back rest. Seems like maybe at the factory that one always went
in crooked or over torqued.
2. The seat rails can be pretty messy and usually have some rust on them. Consider
cleaning them up and regreasing while they are out.
3. Undo the adjuster first to keep from twisting and bending the plates on that
mechanism.
Trending Topics
Thread Starter
Joined: Jul 2004
Posts: 9,250
Likes: 464
From: Lake Wylie, N.C.
Ok now its time to undress these seats and pull the old nasty covers off. You will
need some good pliers to use in grabbing and twisting off the old hog rings.
I could have just slashed the old covers with a box cutter and then would just have
to pull the old hog rings off but I didn't want to damage the foam if it could be
reused.
First up the back. Place it with the bottom facing you and undo the hog rings across
the bottom. Make sure to save the wires running through the edges of the old cover.

Save the 2 wires. Heres one after it was removed.

The second wire has a bend at each end, you may need to straighten it to pull it
free from the old cover.
As you peel off the cover you will see the original foam in all its glory. Nasty!

Taking the headrest off, which just slips on, reveals the 2 wires in the upper and
middle seat back that also need to be removed. Save those wires as well, you will
need them for the new covers.

The seat back cover turned inside out. Pretty rotten looking.
Ok thats the seat back. Notice how the foam has been broken down severely on
the bolsters.
need some good pliers to use in grabbing and twisting off the old hog rings.
I could have just slashed the old covers with a box cutter and then would just have
to pull the old hog rings off but I didn't want to damage the foam if it could be
reused.
First up the back. Place it with the bottom facing you and undo the hog rings across
the bottom. Make sure to save the wires running through the edges of the old cover.
Save the 2 wires. Heres one after it was removed.
The second wire has a bend at each end, you may need to straighten it to pull it
free from the old cover.
As you peel off the cover you will see the original foam in all its glory. Nasty!
Taking the headrest off, which just slips on, reveals the 2 wires in the upper and
middle seat back that also need to be removed. Save those wires as well, you will
need them for the new covers.
The seat back cover turned inside out. Pretty rotten looking.
Ok thats the seat back. Notice how the foam has been broken down severely on
the bolsters.
Thread Starter
Joined: Jul 2004
Posts: 9,250
Likes: 464
From: Lake Wylie, N.C.
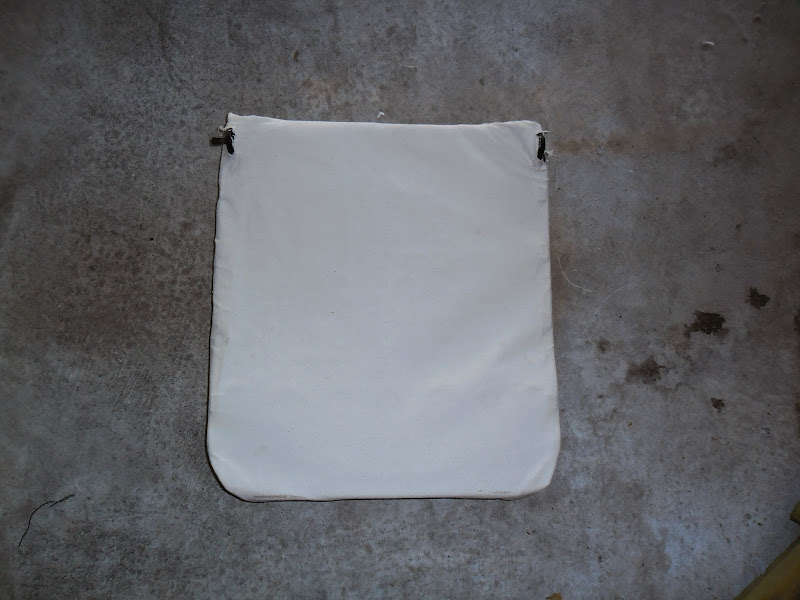
Next up pull the seat cover off the bottom of the seat. Same drill, undo
the hogs rings around the edges and fold the seat cover back and off
the seat. It may hang up on the wires that attached it to the seat springs
but its usually so far gone it just lifts right off.
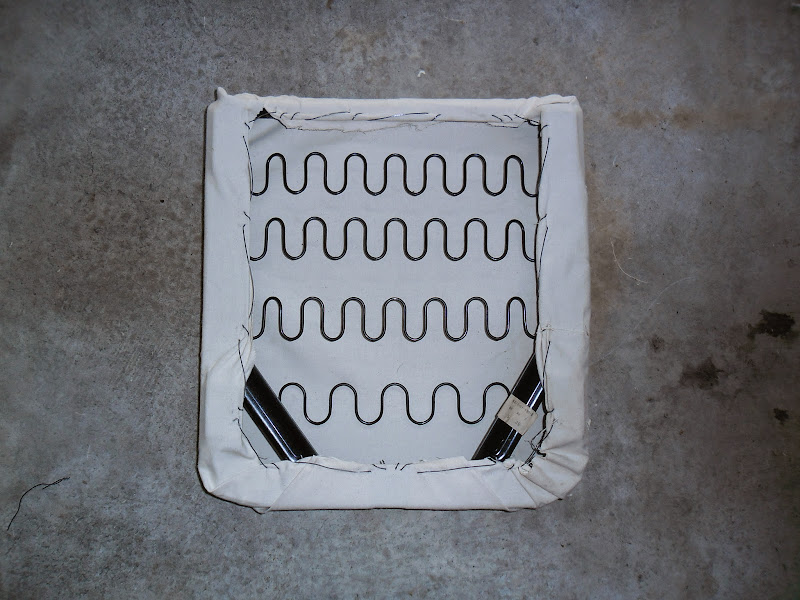
Heres the base of the seat, upside ready to be pulled off.
I bet you've seen that pic before
The seat foam removed and the 2 wires saved that were on the creases holding the
seat cover down to the foam.

The bare seat frame.
Holdl on I have to get more beer now.
the hogs rings around the edges and fold the seat cover back and off
the seat. It may hang up on the wires that attached it to the seat springs
but its usually so far gone it just lifts right off.
Heres the base of the seat, upside ready to be pulled off.
I bet you've seen that pic before
The seat foam removed and the 2 wires saved that were on the creases holding the
seat cover down to the foam.
The bare seat frame.
Holdl on I have to get more beer now.
Thread Starter
Joined: Jul 2004
Posts: 9,250
Likes: 464
From: Lake Wylie, N.C.
Decisions decisions
So I pulled the seats all apart to discover that the frames had a bit of rust on them
but not much and a lot of dirt and foam crumbs attached to the surfaces. That was
not a surprise, expected worse. So I cleaned up the frames by just wiping them
down and blowing them off. No need to repaint, the rust is very minor and not an
issue. Some would have dipped and repainted but I didn't see a need for that.
The real problem is the foam. This is the drivers side seat which I knew would be the
worst one. The back and bottom cushion foam is so far gone it almost falls to pieces
just looking at it. I pondered how to fix/reconstuct the foam but everything sounded
like a lot of fabrication work or investment in expensive foam agents to get the
cushions back in shape. I did a lot of reading and research. It could be done, others
had done similar work. I looked but couldn't find any place that made replacement
foam ( a lot old US cars do have this available). What to do, what to do.
I woke up one Thursday morning and had an epiphany. My thought was this, "I
bet the passenger seat foams in much better shape because how often do you
have a passanger in these cars. Maybe 50% or less of the time." So I look at my
own passenger seat by peering under the old seat covers. Yep they were in much
better shape.
So I pulled up the Pull-A-Part website and lo and behold I see an 83 RX7 in the
Charlotte yard. Been there for only a week or so. I hope they have the seats
in them. See the highback seats are the same shape from 79 through 83 so this
might just work. One thing I wasn't sure of at the time was if there was a left or right
hand differences in the seat cushions. So I went to the JY and pulled both seats
to the tune of about $80.00. If the cushions worked out for just the drivers seat
I considered this a bargain.
The donor seats.

The cushions from the seats.

The bottom cushions did have left and right indicators on them and looking closely
at the new covers I can see that the outside seat bottom bolster is slightly wider.
You can see the L and R in these pictures of the bottom seat cushions.

Now the seat back cushions do not appear to have any unique markings and are
identical to my untrained eye. So with the donor seats I have 1 "new" seat back
foam and 2 "new" seat bottom foams to work with. The driver side seat back foam
wasn't much better than my own. So I would use the donor passenger seat back
foam on the drivers seat and the cushions from the donors replace both seat
bottom foams
They aren't perfect and you will see I did do some prep on them but they are way
better than what I started with.
but not much and a lot of dirt and foam crumbs attached to the surfaces. That was
not a surprise, expected worse. So I cleaned up the frames by just wiping them
down and blowing them off. No need to repaint, the rust is very minor and not an
issue. Some would have dipped and repainted but I didn't see a need for that.
The real problem is the foam. This is the drivers side seat which I knew would be the
worst one. The back and bottom cushion foam is so far gone it almost falls to pieces
just looking at it. I pondered how to fix/reconstuct the foam but everything sounded
like a lot of fabrication work or investment in expensive foam agents to get the
cushions back in shape. I did a lot of reading and research. It could be done, others
had done similar work. I looked but couldn't find any place that made replacement
foam ( a lot old US cars do have this available). What to do, what to do.
I woke up one Thursday morning and had an epiphany. My thought was this, "I
bet the passenger seat foams in much better shape because how often do you
have a passanger in these cars. Maybe 50% or less of the time." So I look at my
own passenger seat by peering under the old seat covers. Yep they were in much
better shape.
So I pulled up the Pull-A-Part website and lo and behold I see an 83 RX7 in the
Charlotte yard. Been there for only a week or so. I hope they have the seats
in them. See the highback seats are the same shape from 79 through 83 so this
might just work. One thing I wasn't sure of at the time was if there was a left or right
hand differences in the seat cushions. So I went to the JY and pulled both seats
to the tune of about $80.00. If the cushions worked out for just the drivers seat
I considered this a bargain.
The donor seats.
The cushions from the seats.
The bottom cushions did have left and right indicators on them and looking closely
at the new covers I can see that the outside seat bottom bolster is slightly wider.
You can see the L and R in these pictures of the bottom seat cushions.
Now the seat back cushions do not appear to have any unique markings and are
identical to my untrained eye. So with the donor seats I have 1 "new" seat back
foam and 2 "new" seat bottom foams to work with. The driver side seat back foam
wasn't much better than my own. So I would use the donor passenger seat back
foam on the drivers seat and the cushions from the donors replace both seat
bottom foams
They aren't perfect and you will see I did do some prep on them but they are way
better than what I started with.
Thread Starter
Joined: Jul 2004
Posts: 9,250
Likes: 464
From: Lake Wylie, N.C.
Heres some pics of the old versus the "new" seat bottom cushions. Old is on the left.

The old cushion is borken down on both side bolsters and cracking apart and each
of the dividers running between the cushions. Also they are severely aged and
stained and they kind of stink actually.
One thing all of the seat cushions had was that on the outside bolster there was
this stiffer greenish foam blocks embedded that were usually about half missing.
I'll have to do something about that as well.

Next section will be the prep I do to these foams, the seat bottom frame and
the rails before I start the reassembly.
The old cushion is borken down on both side bolsters and cracking apart and each
of the dividers running between the cushions. Also they are severely aged and
stained and they kind of stink actually.
One thing all of the seat cushions had was that on the outside bolster there was
this stiffer greenish foam blocks embedded that were usually about half missing.
I'll have to do something about that as well.
Next section will be the prep I do to these foams, the seat bottom frame and
the rails before I start the reassembly.
Thread Starter
Joined: Jul 2004
Posts: 9,250
Likes: 464
From: Lake Wylie, N.C.
Some more thoughts before I forget:
1. Check your seat bolts now, all of em. A lot of the bolts holding the rails to the floor were not
real tight. Most of the bolts holding the rails to the seats were barely finger tight and some
could be removed without a wrench! Many of the torx bolts that hold the adjusters to the seats were
way loose as well.
2. I found a lot of good tips in these two links. The site is general is a great resource for how tos on restoration work.
Classic Car Upholstery 101: Seat Rebuilding - Part 1
Classic Car Upholstery 101: Re-Covering Seats - Part 2
Thread Starter
Joined: Jul 2004
Posts: 9,250
Likes: 464
From: Lake Wylie, N.C.
Prepping for installation
Ok now that I have good (servicable anyway) foam and everything torn apart its time
to do some prep work on the seat frame, foam cushions and rails.
The seat frame I basically just brushed off and cleaned up with some 409 and paper
towels. They were in pretty good shape with very little rust. This is how it looked
before the cleanup.

I then went out and purchased some heavy canvas at a sewing shop down the
street. I think it cost under 20 bucks for 2 yards of fabric. More than enough for
what I needed it for. What will I do with it you ask? Well remember those links I
posted about restoring old seats? One of the things they did was to wrap canvas
over the top of the springs in the seat. This provides a bit more support for tired
onler springs and spreads the load better across those springs. It will also help
keep the foam crumbs from falling out of the bottom of the set over the years
so the car stays neater. This is not required but I think it helps the seat feel a lot.
I no longer feel like I'm sitting in a hammock all the time.
So I took the canvas and stretched it over the sides first and sewed it on with
some hardware wirte I had. I could have used a heavy thread and needle but
the wire was there and it was its own builtin needle at the end. I then did the
same across the front and them did the back last.
Here is what it looks like from the bottom once I was done.
From the top its pretty boring.
Note I had to cut 2 slits for the standoffs at the back of the seat.
Next I needed to fixup the void in the outside bolster on the "new" seat foam I
had acquired. I did this by using some Great Stuff for filling large cracks. It is
Great Stuff. The foam void originally had a stiffer green foam in there and I figured
I would try the great stuff and see how it does. If I didn't like it, I could always rip
it out and try something else. The Great Stuff is probably firmer than what was in
there but considering its the outside bolster, the extra support is probably
warranted.
Heres the void in the side of the foam. BTW, all the seat foams had this void in
them. Seems to be a common failure point for the design of the factory foams.

I filled it with the Great Stuff:

And let it sit and dry overnight to expand.

The next day I just took the big bread knife (serrated edge) and cut off the extra
foam sticking out. It cut off very easy and I wish I had the after picture. Thought
I had one. Oh well.
Thats it for seat and foam prepping. I then took the rails and cleaned them up real good.
Don't bother cleaning them with solvent, just makes a mess and it's not really that
effective anyway. Ask me how I know. After cleaning them with paper towels and
letting them dry out, I dapped bearing grease at each end of the rails and then
proceeded to exercise them until they slid easily.
Next up putting it all together. Gotta get back to work now though.
to do some prep work on the seat frame, foam cushions and rails.
The seat frame I basically just brushed off and cleaned up with some 409 and paper
towels. They were in pretty good shape with very little rust. This is how it looked
before the cleanup.
I then went out and purchased some heavy canvas at a sewing shop down the
street. I think it cost under 20 bucks for 2 yards of fabric. More than enough for
what I needed it for. What will I do with it you ask? Well remember those links I
posted about restoring old seats? One of the things they did was to wrap canvas
over the top of the springs in the seat. This provides a bit more support for tired
onler springs and spreads the load better across those springs. It will also help
keep the foam crumbs from falling out of the bottom of the set over the years
so the car stays neater. This is not required but I think it helps the seat feel a lot.
I no longer feel like I'm sitting in a hammock all the time.
So I took the canvas and stretched it over the sides first and sewed it on with
some hardware wirte I had. I could have used a heavy thread and needle but
the wire was there and it was its own builtin needle at the end. I then did the
same across the front and them did the back last.
Here is what it looks like from the bottom once I was done.
From the top its pretty boring.
Note I had to cut 2 slits for the standoffs at the back of the seat.
Next I needed to fixup the void in the outside bolster on the "new" seat foam I
had acquired. I did this by using some Great Stuff for filling large cracks. It is
Great Stuff. The foam void originally had a stiffer green foam in there and I figured
I would try the great stuff and see how it does. If I didn't like it, I could always rip
it out and try something else. The Great Stuff is probably firmer than what was in
there but considering its the outside bolster, the extra support is probably
warranted.
Heres the void in the side of the foam. BTW, all the seat foams had this void in
them. Seems to be a common failure point for the design of the factory foams.
I filled it with the Great Stuff:
And let it sit and dry overnight to expand.
The next day I just took the big bread knife (serrated edge) and cut off the extra
foam sticking out. It cut off very easy and I wish I had the after picture. Thought
I had one. Oh well.
Thats it for seat and foam prepping. I then took the rails and cleaned them up real good.
Don't bother cleaning them with solvent, just makes a mess and it's not really that
effective anyway. Ask me how I know. After cleaning them with paper towels and
letting them dry out, I dapped bearing grease at each end of the rails and then
proceeded to exercise them until they slid easily.
Next up putting it all together. Gotta get back to work now though.

Thread Starter
Joined: Jul 2004
Posts: 9,250
Likes: 464
From: Lake Wylie, N.C.
Thanks Glenn, it means a lot to hear this from you. I've always enjoyed the projects
you write about.
Finding the time to hammer out the posts is whats hard. I should finish this up this
week hopefully. Just have the installation left really to cover.
you write about.
Finding the time to hammer out the posts is whats hard. I should finish this up this
week hopefully. Just have the installation left really to cover.
Thread Starter
Joined: Jul 2004
Posts: 9,250
Likes: 464
From: Lake Wylie, N.C.
Installation
So I'll start the installation with the seat back. I didn't really have to use any
special tools other than the hog ring pliers I picked up at Harbor Freight.
They looked like this:

Some tips for working with the covers:
1. Lay down a clean cloth to do the work on so you don't mess up the covers.
2. Get the covers heated up to about 80F or more so they are easier to pull on and
work with.
3. Practice using the hog ring pliers a little but if you have never used them before.
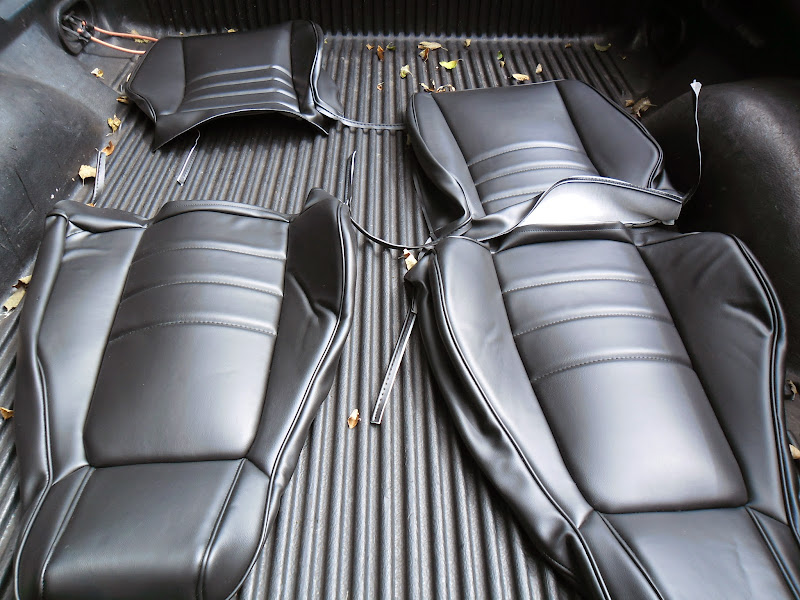
Heres my covers sunning themselves in the back of my F150. It was a 95F+ out
that day and they were hot to touch.
Take the cover and turn it inside out. You will be putting it on from the top and
rolling it down the seat back as you go. There two metal ribs you have to place in
the builtin sleeves in the front inside of the covers. The first is right below the
joint between the headrest foam and the seat back foam. It requires 2 hog rings
place thru the pushed up metal tabs sticking out from the metal plate for the
head rest.
This pic shows what I'm talking about from when I dismantled the original seat
back.

So slide the tip top of the cover over the head rest and get it started straight. You
can roll it down a bit to make sure its right and then roll it back up.

Get the first rib in the sleeve and hog ring it to the back, then roll it down and pull
it tight to do the next rib. Here you see the rib in the sleeve about to be hog ringed
into the back. For this you are hog ringing thru the foam indents to the springs
in the back of the seat.

Now roll it down all the way. Pull on it good to make sure all the slack is out. You will
be pulling it together with the 2 metal ribs in the bottom sleeves. When hog
ringing try to start from the middle and work out and from the front and work back
(which isn't an issue really with the seat back). Remember to put the bent rib into
the front seam. Pull them together and do your first hog ring. Stop there and make
sure its on straight and even.
Now just Just keep working back and forth with the hog rings.
At the end make sure the bent wires are tucking the cover inside under the
opposite cover. Then pull the long tails from the cover to make it finish up the
installation neatly and provide a good seal to the seam. I tried to make sure the
seam on the bead was tucked so it help hold and guide the bead along the seam.

Then I added a couple of extra hog rings to make sure it stayed in place.
Ok the seat back is done and should look great.
special tools other than the hog ring pliers I picked up at Harbor Freight.
They looked like this:
Some tips for working with the covers:
1. Lay down a clean cloth to do the work on so you don't mess up the covers.
2. Get the covers heated up to about 80F or more so they are easier to pull on and
work with.
3. Practice using the hog ring pliers a little but if you have never used them before.
Heres my covers sunning themselves in the back of my F150. It was a 95F+ out
that day and they were hot to touch.
Take the cover and turn it inside out. You will be putting it on from the top and
rolling it down the seat back as you go. There two metal ribs you have to place in
the builtin sleeves in the front inside of the covers. The first is right below the
joint between the headrest foam and the seat back foam. It requires 2 hog rings
place thru the pushed up metal tabs sticking out from the metal plate for the
head rest.
This pic shows what I'm talking about from when I dismantled the original seat
back.
So slide the tip top of the cover over the head rest and get it started straight. You
can roll it down a bit to make sure its right and then roll it back up.
Get the first rib in the sleeve and hog ring it to the back, then roll it down and pull
it tight to do the next rib. Here you see the rib in the sleeve about to be hog ringed
into the back. For this you are hog ringing thru the foam indents to the springs
in the back of the seat.
Now roll it down all the way. Pull on it good to make sure all the slack is out. You will
be pulling it together with the 2 metal ribs in the bottom sleeves. When hog
ringing try to start from the middle and work out and from the front and work back
(which isn't an issue really with the seat back). Remember to put the bent rib into
the front seam. Pull them together and do your first hog ring. Stop there and make
sure its on straight and even.
Now just Just keep working back and forth with the hog rings.
At the end make sure the bent wires are tucking the cover inside under the
opposite cover. Then pull the long tails from the cover to make it finish up the
installation neatly and provide a good seal to the seam. I tried to make sure the
seam on the bead was tucked so it help hold and guide the bead along the seam.
Then I added a couple of extra hog rings to make sure it stayed in place.
Ok the seat back is done and should look great.
Thread Starter
Joined: Jul 2004
Posts: 9,250
Likes: 464
From: Lake Wylie, N.C.
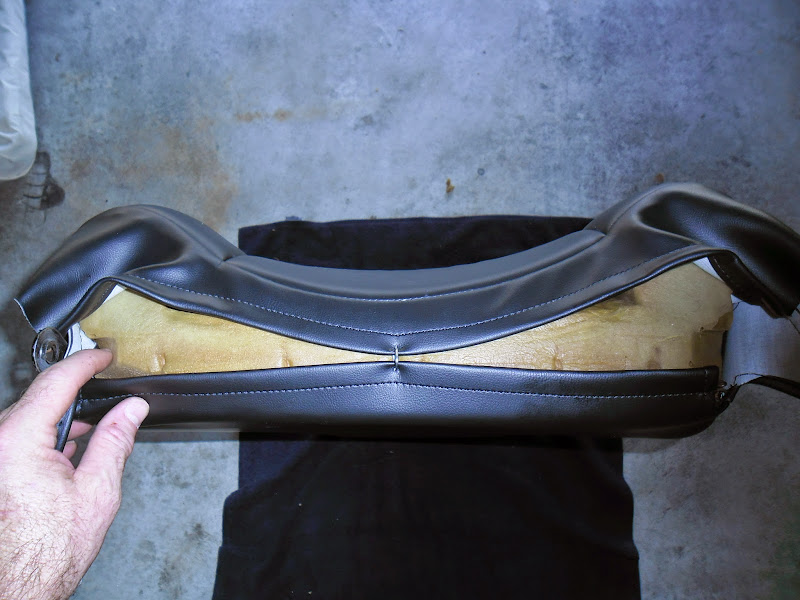
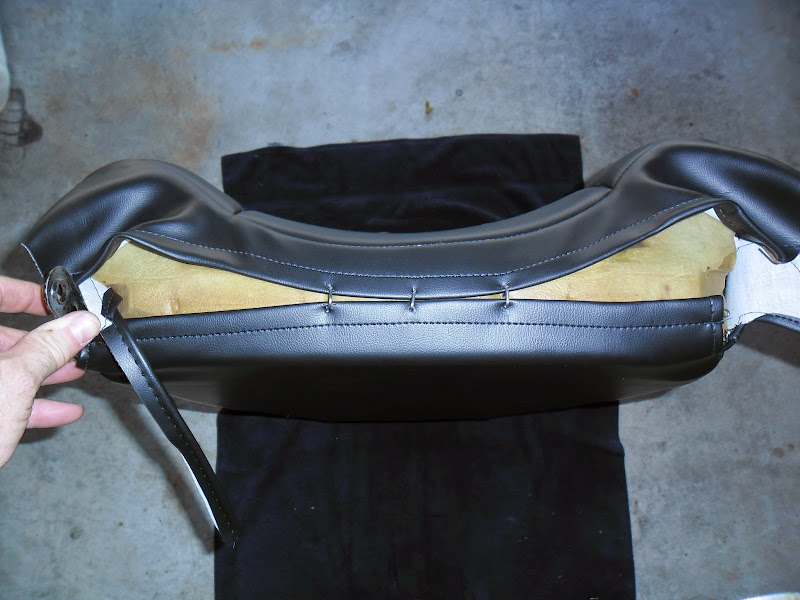
Next up the seat cushion. Its really more of the same. Turn it inside out at first. There
are 2 metal ribs to put in place. do the back rib first and them the middle rib. You are
hog ringing thru the foam to the spings in the seat frame. If you are not sure which
springs to use, refer back to your pictures and also just look at the foam and press
on it to feel the nearest spring.
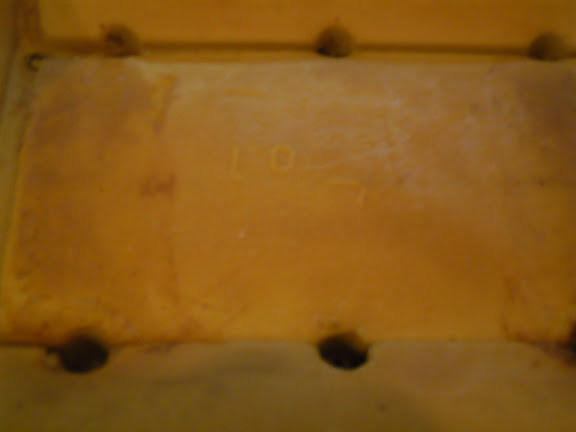
This picture of the seat foam gives you an idea of where the ribs go. The little
round indentations are where each hog ring goes.

Once you do that fold the seat back, side and front
down around the foam pulling on it to make it as tight as possible. At this point you
can still adjust it a bit so make sure its where you want it. You can always undo
the ribs and try again until you are happy with the cover fit and position on the
foam.
Start fastening with hog rings at the front bottom of the seat. Work from the middle out.

Next pull down the sides and do one side then the other. You can only fasten at
predefined spots on the frame. In my case the extra canvas made the seat a bit
more of a challenge when putting the hog rings in but I think it was worth the
effort.

Do the back last and pull the tails down tight to clean up the rear corners and
make a good fit.
Your seat should look like this:

and this:

Now you have both back and the seat done. You are almost there. We just have
to make a slit or hole to allow the inboard post to poke through the vinyl and
make 4 holes where the seat adjuster attaches. You will also need to make holes
in the bottom of the cover to attach the seat rails. To make the holes I used a fat
drill bit larger than the diameter of the threads where I need to place the bolts.
I took the drill, found the center of the nut under the cover by pressing with my
finger on the vinyl. I then gently place the dril bit square on the hole and popped
the drill a couple of times on fairly high speed. This didn't completely cut the holes
but when it didn't I ended up with a nice circular pattern on the vinyl that I could
easily cut away with a pair of scissors.
Heres the first seat fully assembled with the rails on it.
Front:

Back:

The little poofy looking areas on the front of the seat back are far less noticable in person and
I think will stretch out and go away over time. In fact I think they have now that
I have driven the car since doing this. Just like old springs, old seats have sag. I
now sit about 3/4 inch higher and the seats feel like a glove holding in the car.
Its also a much less jarring ride due to the cushions working better.
I would say this job took me a total of 2 full days to do including the disassembly,
prep and installation. The install on the second seat only took me
a couple of hours once I knew what I was doing.
are 2 metal ribs to put in place. do the back rib first and them the middle rib. You are
hog ringing thru the foam to the spings in the seat frame. If you are not sure which
springs to use, refer back to your pictures and also just look at the foam and press
on it to feel the nearest spring.
This picture of the seat foam gives you an idea of where the ribs go. The little
round indentations are where each hog ring goes.
Once you do that fold the seat back, side and front
down around the foam pulling on it to make it as tight as possible. At this point you
can still adjust it a bit so make sure its where you want it. You can always undo
the ribs and try again until you are happy with the cover fit and position on the
foam.
Start fastening with hog rings at the front bottom of the seat. Work from the middle out.
Next pull down the sides and do one side then the other. You can only fasten at
predefined spots on the frame. In my case the extra canvas made the seat a bit
more of a challenge when putting the hog rings in but I think it was worth the
effort.
Do the back last and pull the tails down tight to clean up the rear corners and
make a good fit.
Your seat should look like this:
and this:
Now you have both back and the seat done. You are almost there. We just have
to make a slit or hole to allow the inboard post to poke through the vinyl and
make 4 holes where the seat adjuster attaches. You will also need to make holes
in the bottom of the cover to attach the seat rails. To make the holes I used a fat
drill bit larger than the diameter of the threads where I need to place the bolts.
I took the drill, found the center of the nut under the cover by pressing with my
finger on the vinyl. I then gently place the dril bit square on the hole and popped
the drill a couple of times on fairly high speed. This didn't completely cut the holes
but when it didn't I ended up with a nice circular pattern on the vinyl that I could
easily cut away with a pair of scissors.
Heres the first seat fully assembled with the rails on it.
Front:
Back:
The little poofy looking areas on the front of the seat back are far less noticable in person and
I think will stretch out and go away over time. In fact I think they have now that
I have driven the car since doing this. Just like old springs, old seats have sag. I
now sit about 3/4 inch higher and the seats feel like a glove holding in the car.
Its also a much less jarring ride due to the cushions working better.
I would say this job took me a total of 2 full days to do including the disassembly,
prep and installation. The install on the second seat only took me
a couple of hours once I knew what I was doing.
Thread Starter
Joined: Jul 2004
Posts: 9,250
Likes: 464
From: Lake Wylie, N.C.
I'll grab some more pictures of the installed seats but it really makes a difference
in the look and the feel. Its like new almost.
Please feel free to ask questions or make comments here in the thread. I would
advise not sending me IMs about it. I won't answer them directly but I will copy your
IM to this thread and answer it here.
I took a lot of pictures but sadly I could have taken more. For instance, when I was
hog ringing the ribs into place I could have done another half dozen pics for that
alone. Same for whenI was making the holes at the end for the final assembly.
Oh well. If someone else does this post em up.
Joined: Oct 2005
Posts: 1,329
Likes: 8
From: SF Bay Area, California
Very cool and interesting writeup. I will definitely have a closer read when I am not at work. So auto upholstery shops do not generally take like a block of foam and shape it huh? I always thought they could do that. Hmm then I might have to find some better conditioned seats before taking it to the upholstery shop for re-leathering.
Thread Starter
Joined: Jul 2004
Posts: 9,250
Likes: 464
From: Lake Wylie, N.C.
I think a good shop can and would fab up the foam but it costs $$$. Based on some research
by asking around my seats would have cost around $400 each to get this done.
By using the RB kit and sourcing some better foam, I did it myself for less than half that amount.
by asking around my seats would have cost around $400 each to get this done.
By using the RB kit and sourcing some better foam, I did it myself for less than half that amount.
I got to see the seats in Tim's car in person at DGRR and I have to say that the pics do do them justice, not even close.
They are beautiful!!
They appear to be professionally done, nary a wrinkle to indicate a DIY job.
His results have persuaded my to do my own on my current project.
Good Job!! Thanks for the write up.
They are beautiful!!
They appear to be professionally done, nary a wrinkle to indicate a DIY job.
His results have persuaded my to do my own on my current project.
Good Job!! Thanks for the write up.
My wife bought me 2 RX-7s
Joined: Aug 2001
Posts: 2,328
Likes: 3
From: Saskatoon, Saskatchewan, Canada
I'm glad it worked out for you TG!
Here's my install thread: https://www.rx7club.com/1st-generati...-pics-1064359/
It's been a year and I'm very happy with the seats, they make a huge difference in how the car looks and feels.
Here's my install thread: https://www.rx7club.com/1st-generati...-pics-1064359/
It's been a year and I'm very happy with the seats, they make a huge difference in how the car looks and feels.

Thread
Thread Starter
Forum
Replies
Last Post