
Help on tightening the nut at the top of the strut.

Thread Starter
Joined: Jun 2005
Posts: 2,753
Likes: 5
From: Seattle, Washington
Help on tightening the nut at the top of the strut.
I have the illuminas with the ground control coil perches. The top nut is loose and it spins when I tighten it. I can't seem to find my install instructions. Any help?

I haven't actually looked at these, but I'm guessing your talking about the nut that goes on the top of the shaft at the top plate? If so, I know the factory strut has a hex on the top of the shaft to use an allen wrench to keep the shaft from spinning while you tighten the nut. From my single experience with this on these particular struts, you can't get a wrench on the nut because of how sunk in it is, but you can take a spark plug socket to fit the nut and use a wrench on the socket.
I have messed with Illumina's on a CRX I was racing once and they had a similar setup. You remove the plastic inserts out of the top of the shaft and use an allen to hold the shaft while you tighten the nut.
Again, I haven't actually seen these shocks so I don't know for sure if its the same setup, but is something there to hold the shaft to keep it from spinning while you tighten the nut.

Top of the shaft is a bit blurry where the adjustments are at, but I bet its the same as my CRX ones. The adjustments are just a plastic insert, remove those and should see a hex to use an allen wrench, pop an allen wrench on it and since you have room, grab a wrench and tighten. Could even use a regular wrench and a socket with a hex key and a ratchet.
Thread Starter
Joined: Jun 2005
Posts: 2,753
Likes: 5
From: Seattle, Washington
My air compressor is broken so I cannot use impact wrench.
Not sure I follow odditie. I'm not interested in adjusting the damping. What I would like to do is tighten the 21mm nut on top of the strut because it loose & jiggles
Not sure I follow odditie. I'm not interested in adjusting the damping. What I would like to do is tighten the 21mm nut on top of the strut because it loose & jiggles
Haha. I know your not interested in adjusting the damping. If they are like my old Illumina's, the adjustments are a plastic insert you can pop out, do so and you should see a hex. It should be 2 plastic pieces, the one you turn to adjust and the one with the markings on it.
Trending Topics

Find a way to make an impact gun work, or at the risk of blowing the seal for your shock, grab it with vice grips. If you have a bump stop you can do this at the very top of the shock safely, as the bump stop would never allow the part you mangled to enter the tube.
Stick an allen head into the shaft to keep it from moving and then tighten it. You can use an open end wrench, one of the socket/ratchet setups designed for long studs, or grind flat spots on the side of a cheap 21mm socket and use an open end wrench. Whatever works.
This method eliminates risk of damaging the shock.
Thread Starter
Joined: Jun 2005
Posts: 2,753
Likes: 5
From: Seattle, Washington
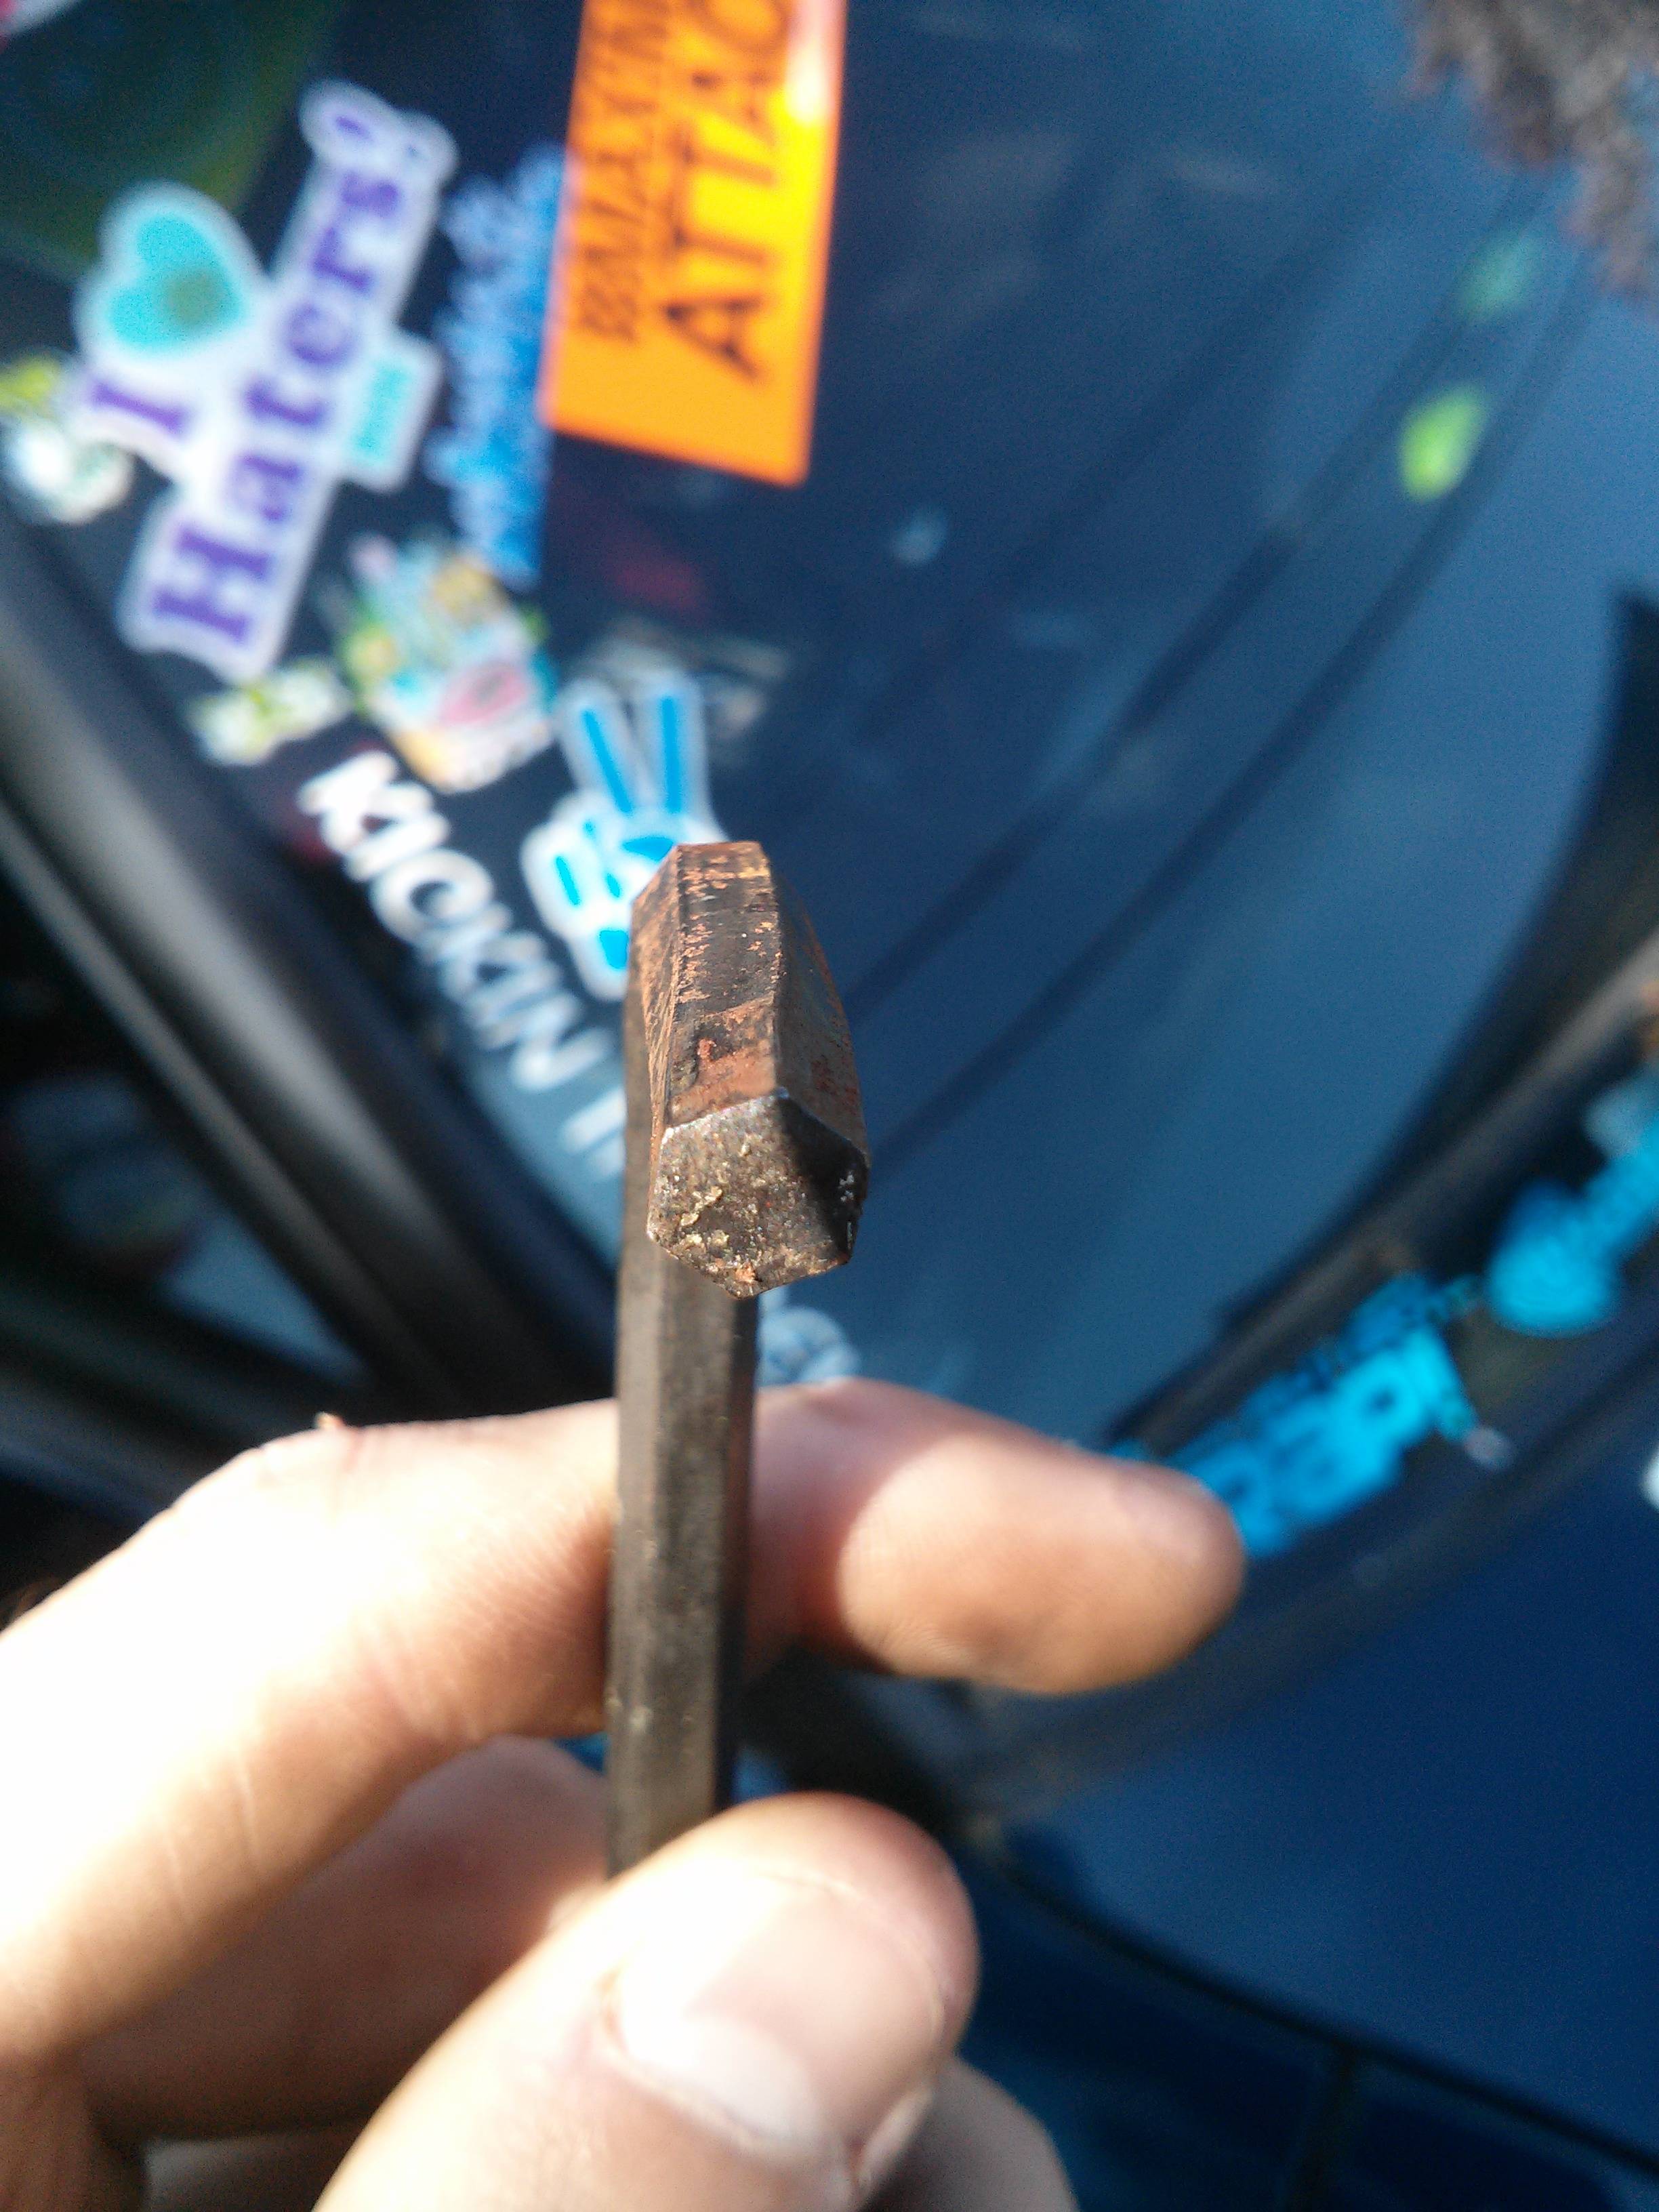
My Allen tool bent while I was trying to tighten the nut. It really will not tighten any further and the whole thing still jiggles. Any ideas why this will not tighten down?

Joined: Jun 2008
Posts: 8,376
Likes: 28
From: Chino Hills, CA
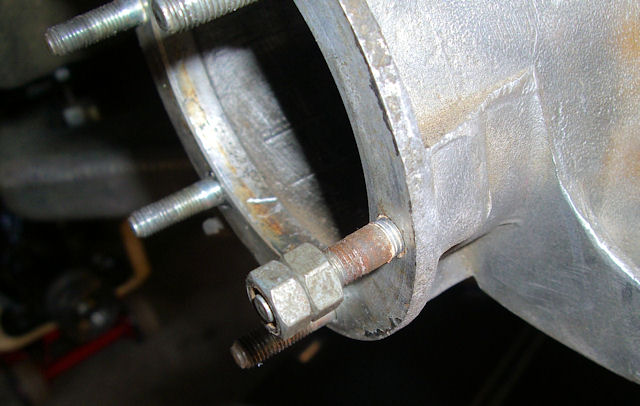
Did you maybe leave a spacer or bearing plate off when re-assembling?
It sounds almost like you are trying to tighten down on a fitting that's not thick enough for the strut top shoulder depth. As in, you've run the nut to the bottom of the threads without actually 'squeezing' the mount bearing.
It sounds almost like you are trying to tighten down on a fitting that's not thick enough for the strut top shoulder depth. As in, you've run the nut to the bottom of the threads without actually 'squeezing' the mount bearing.
^^^That's what I was going to say. It sounds like you have ran out of threads and trying to tighten down onto the shaft itself. Which way is it jiggling by the way? Is the shaft moving up and down in the bearing? If so, you are missing some hardware under the bearing to hold the shaft down and that would take up some slack on the threads and let you tighten it down all the way.

I used a pair of regular grips to hold the socket for the nut and a pair of needle nose vice grips to hold the allen key for the strut. Got it nice and tight.
Last edited by hectik1; May 21, 2013 at 09:24 AM.
I installed respeed camber plates and illumina "race"(mr2?) inserts last year...MY GOD I wish I had known about the allen wrench and shaved socket method...Why isn't this info. included from Tokico with the inserts?!? Anyway, this sounds great, but does anyone have pics of the plastic adj. inserts removed? I can't wrap my head around what it looks like in there, and how the plastic removable pieces allow adjusting anything if there's a "socket" in there meant for the allen wrench to hold the piston? ALSO, if you "pop" these plastic pcs out, do they ONLY fit back in one way so you can't lose your position 1, etc? I'd like to know before removing mine to take a look...
I installed respeed camber plates and illumina "race"(mr2?) inserts last year...MY GOD I wish I had known about the allen wrench and shaved socket method...Why isn't this info. included from Tokico with the inserts?!? Anyway, this sounds great, but does anyone have pics of the plastic adj. inserts removed? I can't wrap my head around what it looks like in there, and how the plastic removable pieces allow adjusting anything if there's a "socket" in there meant for the allen wrench to hold the piston? ALSO, if you "pop" these plastic pcs out, do they ONLY fit back in one way so you can't lose your position 1, etc? I'd like to know before removing mine to take a look...
I don't think anyone supplies this information, its just something you pick up from doing them.
The Illumina inserts are a 2 piece insert. The one with your numbers on it fits in the hex part of the shaft that you use to keep the shaft from turning. The inner piece with the marker fits in that and makes an adjustment through the inner shaft. I haven't seen one taken apart so I couldn't tell you the details, but I would venture to say its similar to our bleed adjustable shocks where the adjustment changes how much fluid moves past the needle inside the shaft. Its the most basic way to get an adjustment out of a shock without tearing it apart.
I can't really draw anything up for you, but just picture the shaft of the shock being hollow inside with a rod that makes adjustments depending how far down its pushed.
Now, its been too long for me to comment on if they are indexed or not, but I believe they are so they only actually fit one way, but I could be mistaken.
I installed respeed camber plates and illumina "race"(mr2?) inserts last year...MY GOD I wish I had known about the allen wrench and shaved socket method...Why isn't this info. included from Tokico with the inserts?!? Anyway, this sounds great, but does anyone have pics of the plastic adj. inserts removed? I can't wrap my head around what it looks like in there, and how the plastic removable pieces allow adjusting anything if there's a "socket" in there meant for the allen wrench to hold the piston? ALSO, if you "pop" these plastic pcs out, do they ONLY fit back in one way so you can't lose your position 1, etc? I'd like to know before removing mine to take a look...
Joined: Jun 2006
Posts: 4,815
Likes: 24
From: Columbia, Tennessee
Use the double nut method. Take 2 nuts, put them on the remaining bit of threads above the main strut top nut. Tighten those into each other with open ended wrenches. Then put an open end wrench on the top nut and the main bottom strut nut. Use the top nut as leverage to keep the shaft from spinning. You could also just clamp some vice grips on there..., but the double nut prevents marred up threads.
[QUOTE=NCross;11527004]Use the double nut method. Take 2 nuts, put them on the remaining bit of threads above the main strut top nut. Tighten those into each other with open ended wrenches. Then put an open end wrench on the top nut and the main bottom strut nut. Use the top nut as leverage to keep the shaft from spinning. You could also just clamp some vice grips on there..., but the double nut prevents marred up threads.
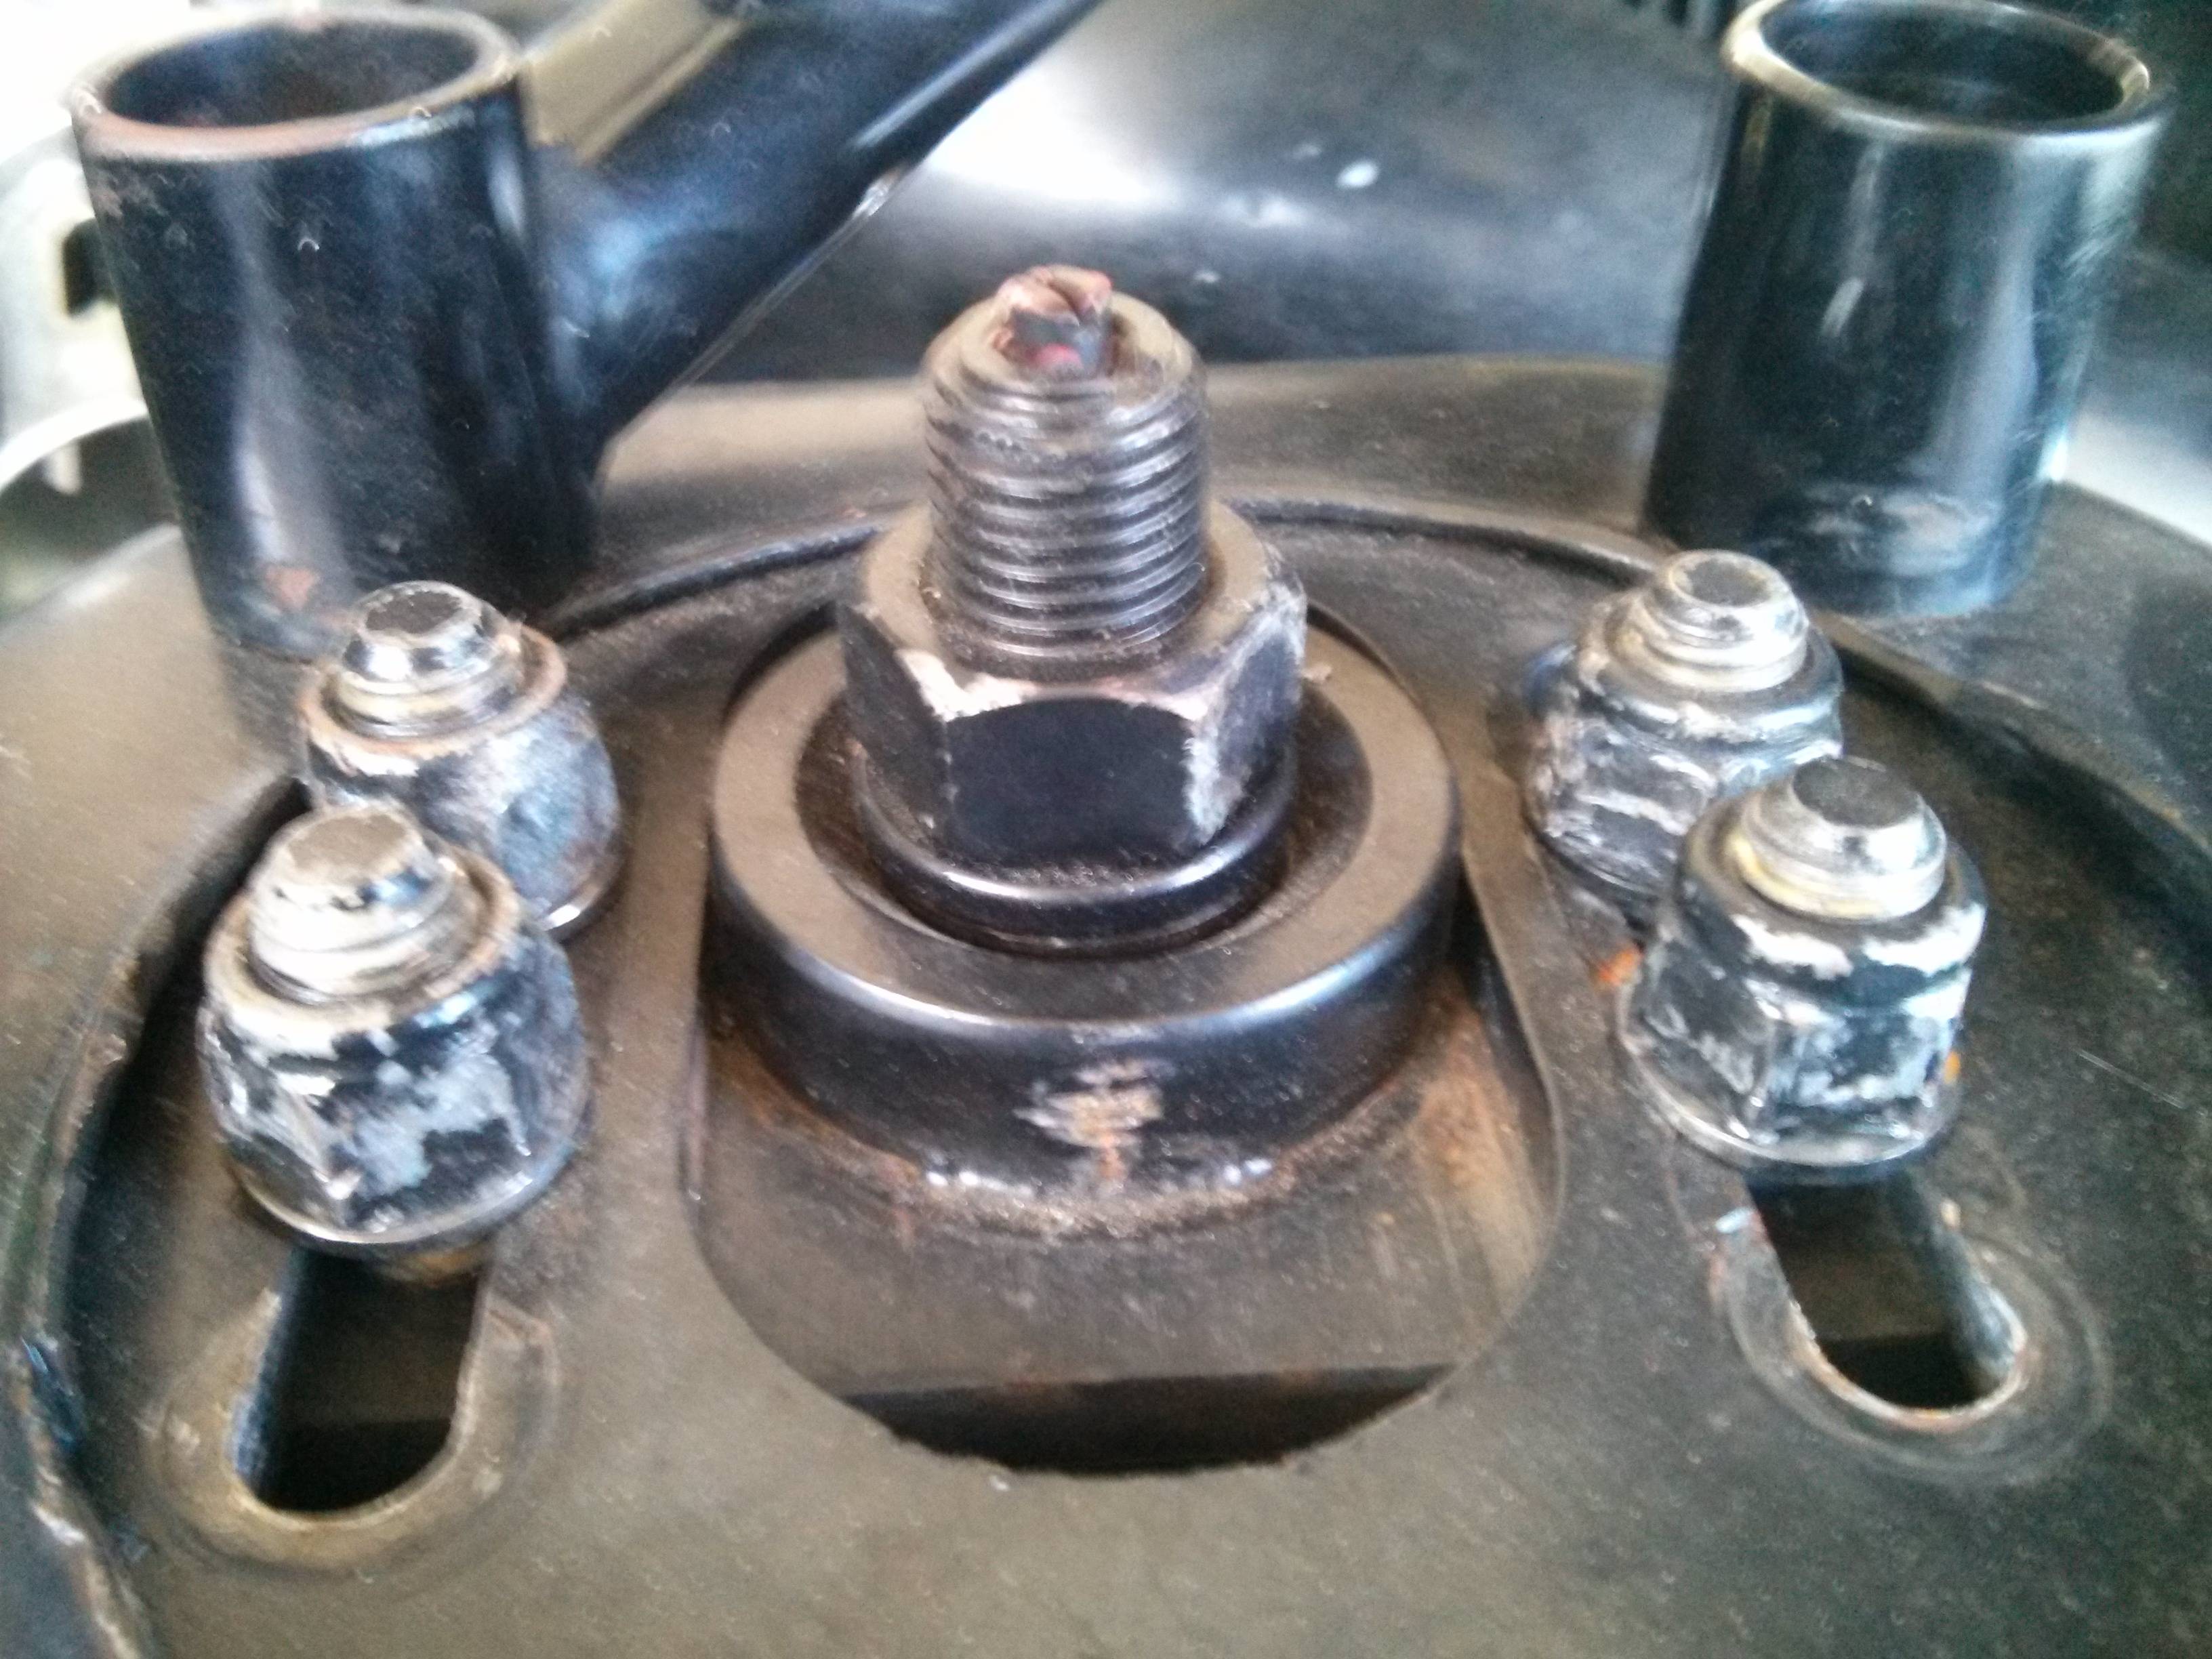
That ain't happenin'. It looks like he's only got about half a thread showing on the top of those struts. I like the idea though. If he had enough threads this would be perfect.
That ain't happenin'. It looks like he's only got about half a thread showing on the top of those struts. I like the idea though. If he had enough threads this would be perfect.

Thread
Thread Starter
Forum
Replies
Last Post
Donald Hampton
2nd Generation Specific (1986-1992)
16
Nov 23, 2022 06:38 PM
toplessFC3Sman
2nd Generation Specific (1986-1992)
6
Mar 20, 2018 01:54 PM