
Help Removing Emmision Wire mess


Thread Starter
Banned. I got OWNED!!!
iTrader: (2)
Joined: Oct 2004
Posts: 6,122
Likes: 1
From: London, Ontario
Help Removing Emmision Wire mess
Alright,
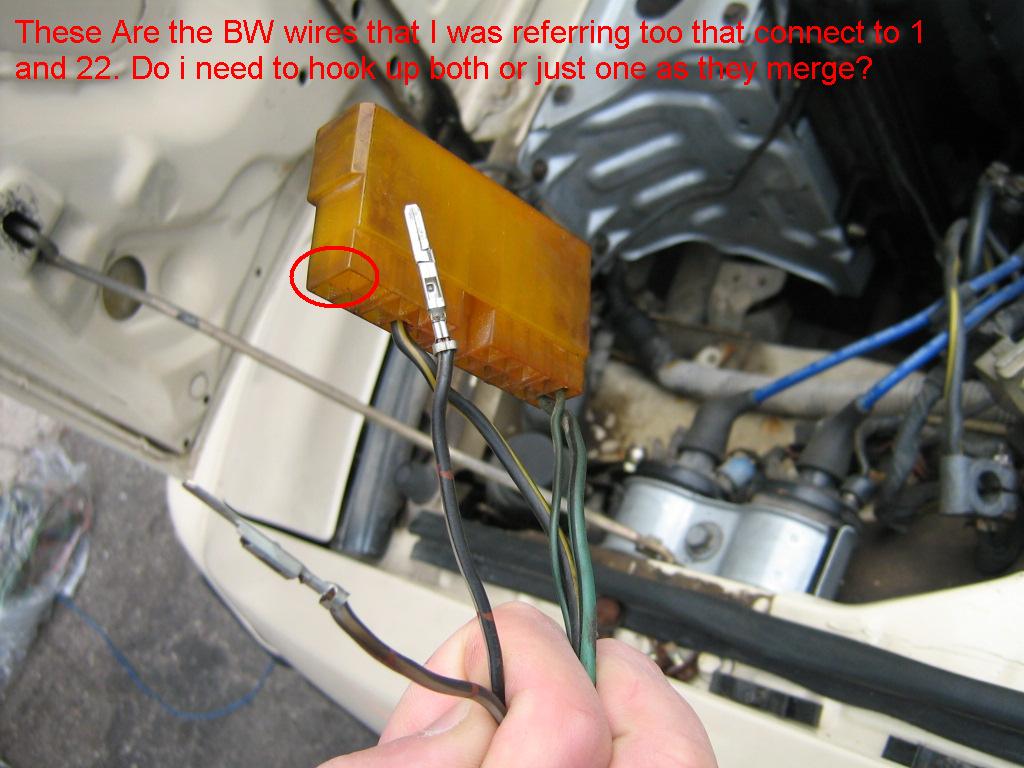
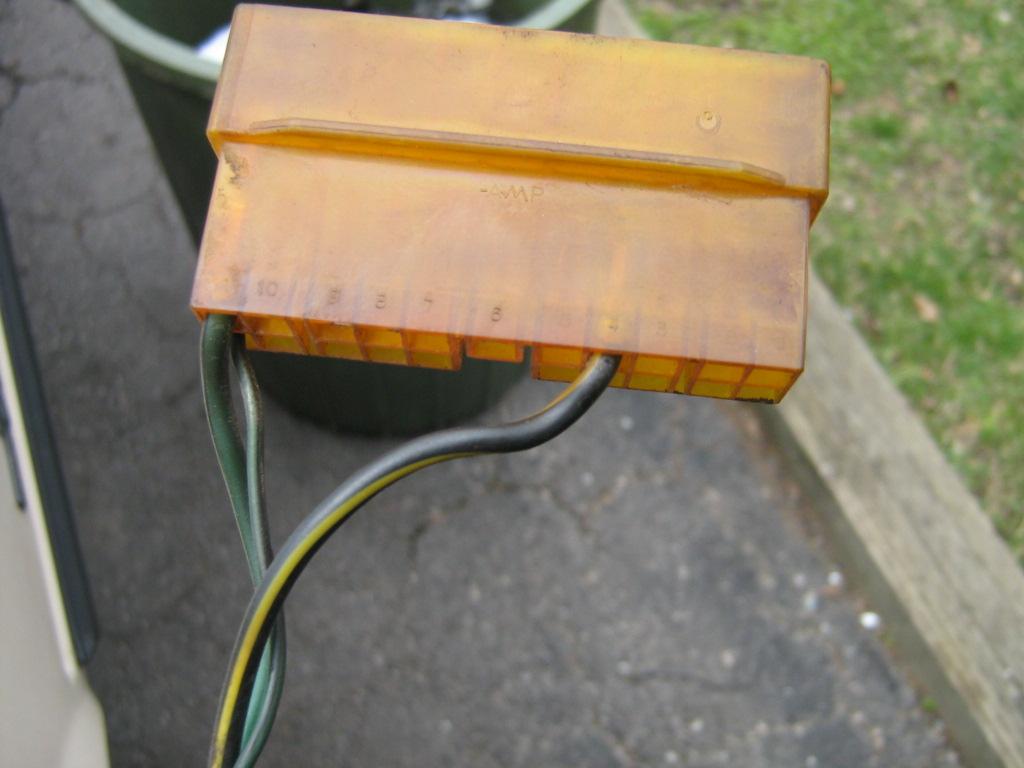
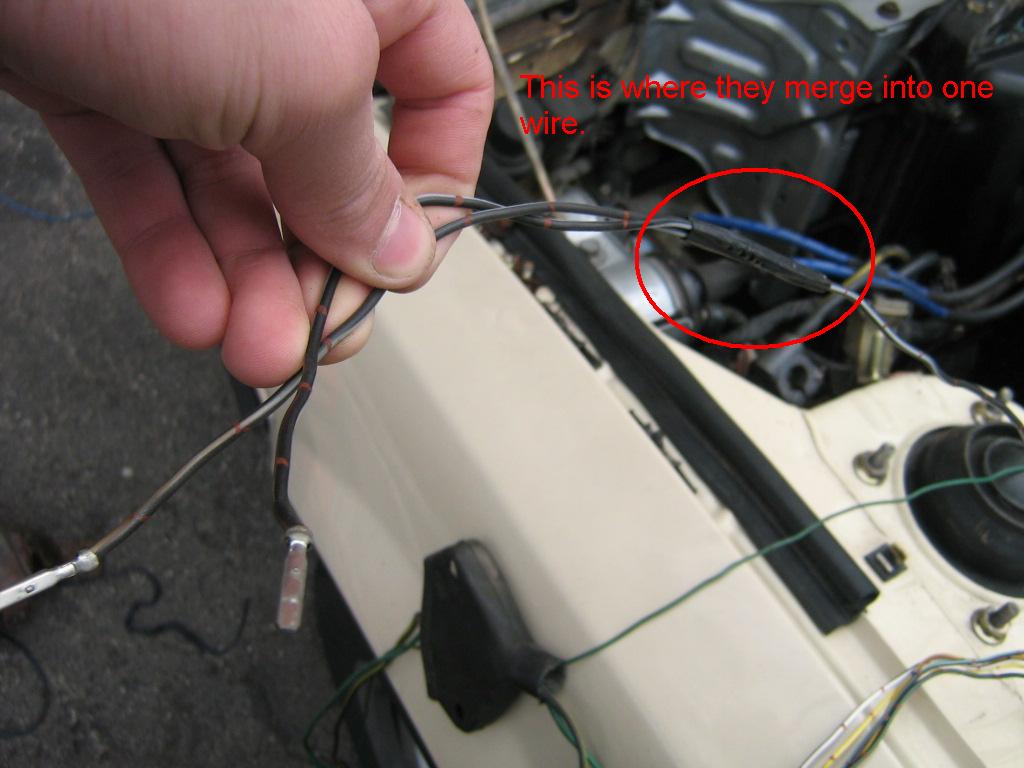
So i have most fo the stuff already removed (this is the harnessthat branches off from the passenger side). I think that I removed everything that I could. I only have 3 wires left on there, but i think that i have to put one back in, on pin#1 & pin#22 there are 2 BW wires.Abouce 2 inches into each they merge into one and then branch back off to multiple connections, I've already cut a fe of the connections (at the part they branch off), but I was woundering if I still need to hook up both of them as they merge together anyhow. The BW color is just a ground lead right? (If I recall correctly this is what i based it on when installing the fuel pump).
So technically I can just cut them and make new one at what ever lenght needed and what not and just ground to chassis? I'm just trying to go with the cleanest look in the engine way.
I went to try to snap some pictures but only to find out my batteries are dead now, so we'll have to suffer till tomorrow for pictures now.
Thanks in advance for the help
if im not mistakin the bw wire is a positive so dont ground it lol
if i rember right u only need it for the thingy that is below the fuel lines on the nikki so u probaly dont need it
also there should of been a wire that was long and all it did was loop did u pull it or what?
i went by the fsm wire diagram tricky thing to read and understand lol
if i rember right u only need it for the thingy that is below the fuel lines on the nikki so u probaly dont need it
also there should of been a wire that was long and all it did was loop did u pull it or what?
i went by the fsm wire diagram tricky thing to read and understand lol
Thread Starter
Banned. I got OWNED!!!
iTrader: (2)
Joined: Oct 2004
Posts: 6,122
Likes: 1
From: London, Ontario
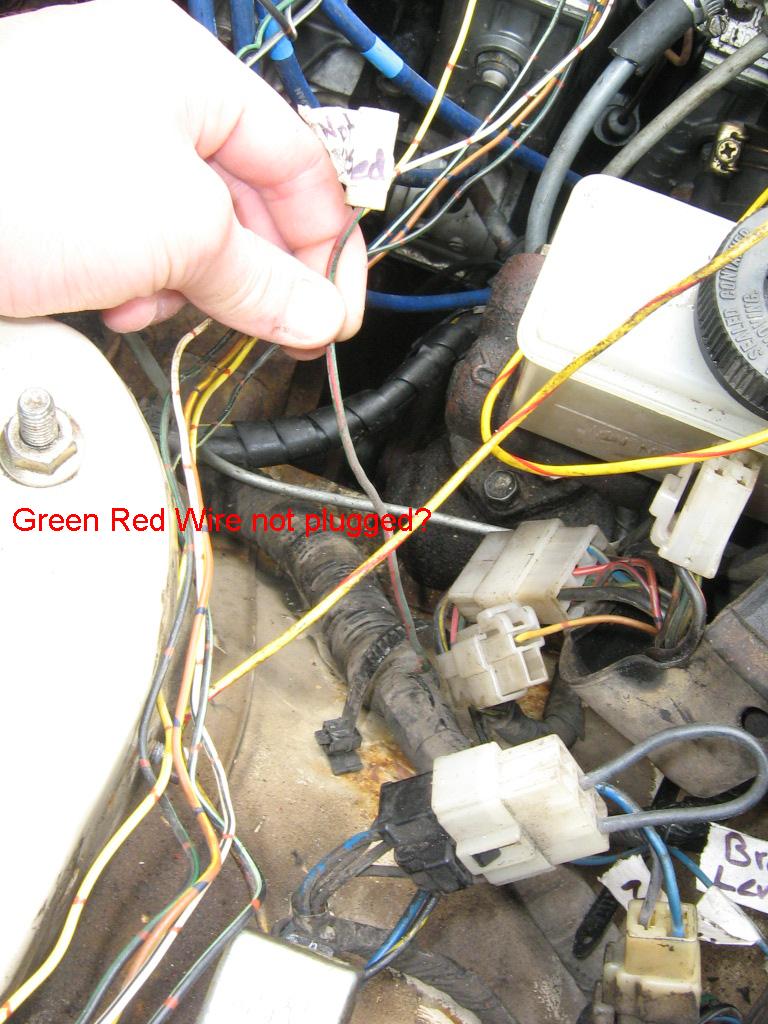
The one that loops ... I think that I just left on, also the BW wire hookd up to several things that are still attached, some going down by where the oil sensor is, one going straight to the alternator I think, one going to the water pump housgin right on the top of the neck, there's one more i think but can't remember...
I didn't really read the FSM at first, I just took out all the tape (why couldn't mazda use something else??) and then I start by back tracking all the ends that were not in use.
I wish I could post up some pictures, but I think that my brother who went to some conference, took my rechargeable batteries
So i'll have to suffer till tomorrow to find out ...


Trending Topics
Thread Starter
Banned. I got OWNED!!!
iTrader: (2)
Joined: Oct 2004
Posts: 6,122
Likes: 1
From: London, Ontario
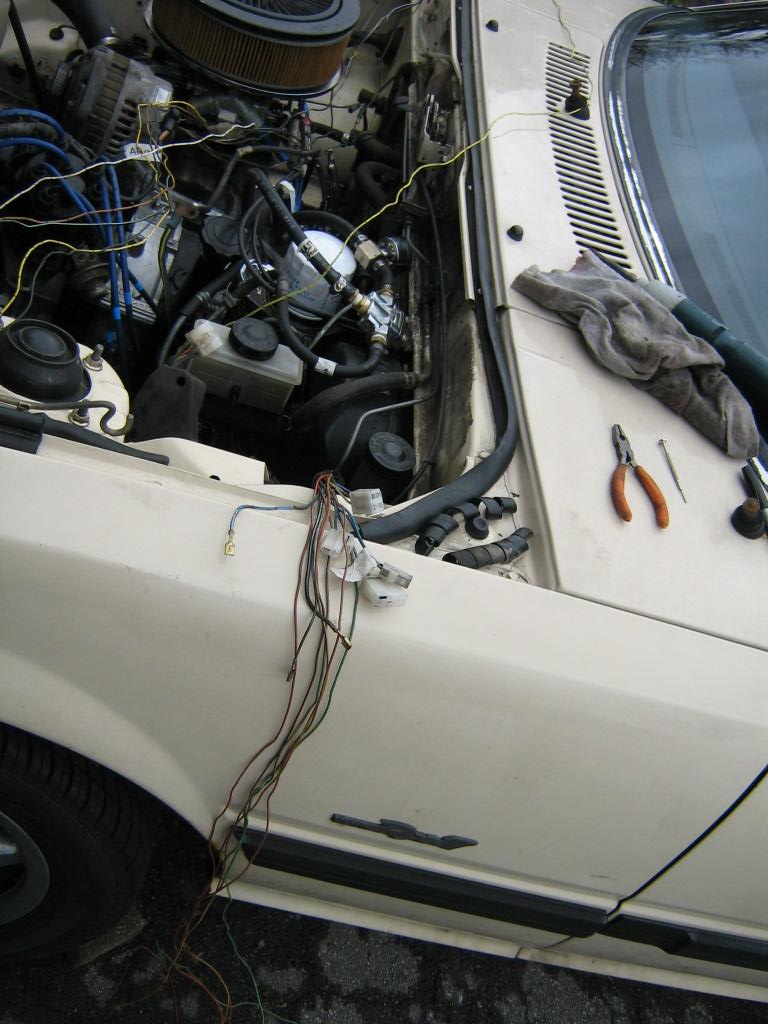
I have vise grips on there, because i'm getting trochoid to powder coat those parts for me while the car is down. The hose balck hose with the vise drip is the one off the oil cooler (the dreaded behive which will be gone soon too, I have another one by the orange hose down in the radiator.
So i hope the picture help me and you to communicate more
So i hope the picture help me and you to communicate more
Thread Starter
Banned. I got OWNED!!!
iTrader: (2)
Joined: Oct 2004
Posts: 6,122
Likes: 1
From: London, Ontario
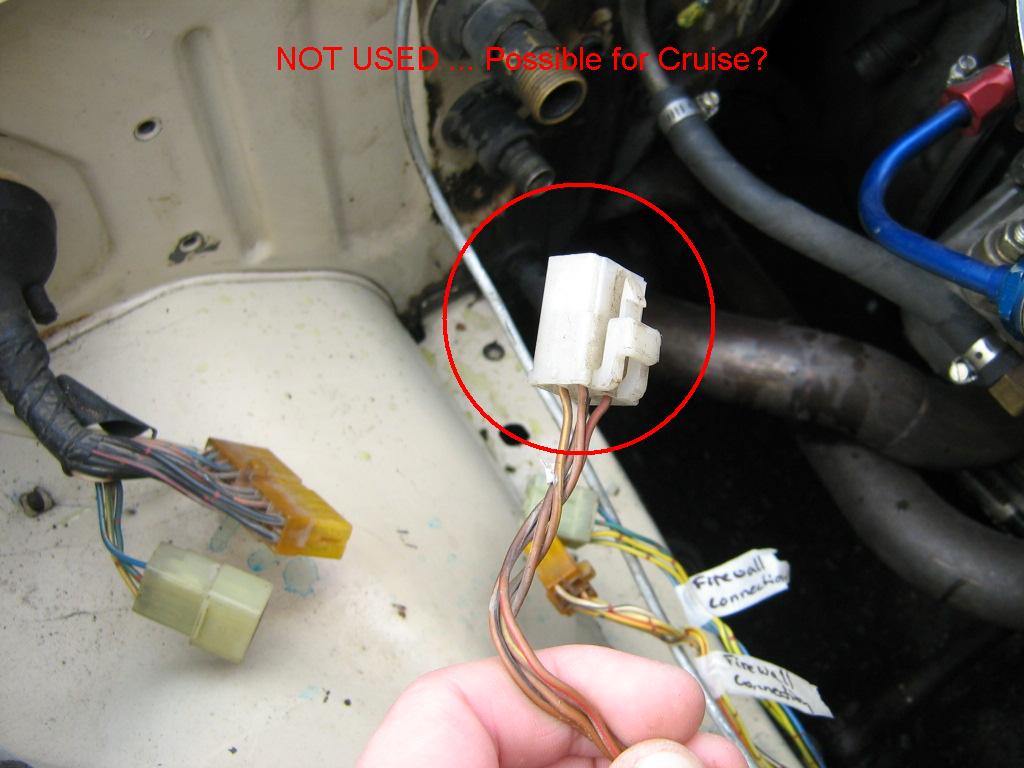
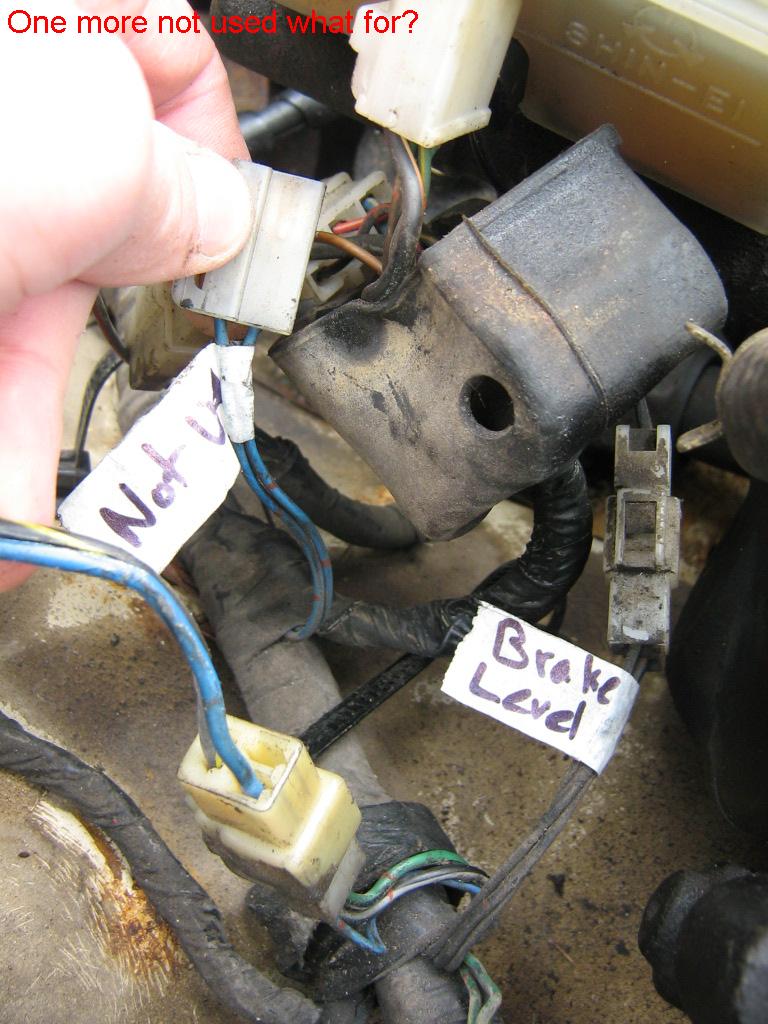
For for that long looped wire (first what is it for anyway?) but i just plan on cutting the black wire (that is if I still need it) and uncrimp the connector off the green on and do stick the new short black one instead.
Pic 4 is AC thermostatic switch, which you apparently don't need.
Pic 5 is cruise.
I have only done the engine harness. Too lazy to do the drivers side.
I started with the connectors I was keeping and worked my way back to the pin connector.
I kept:
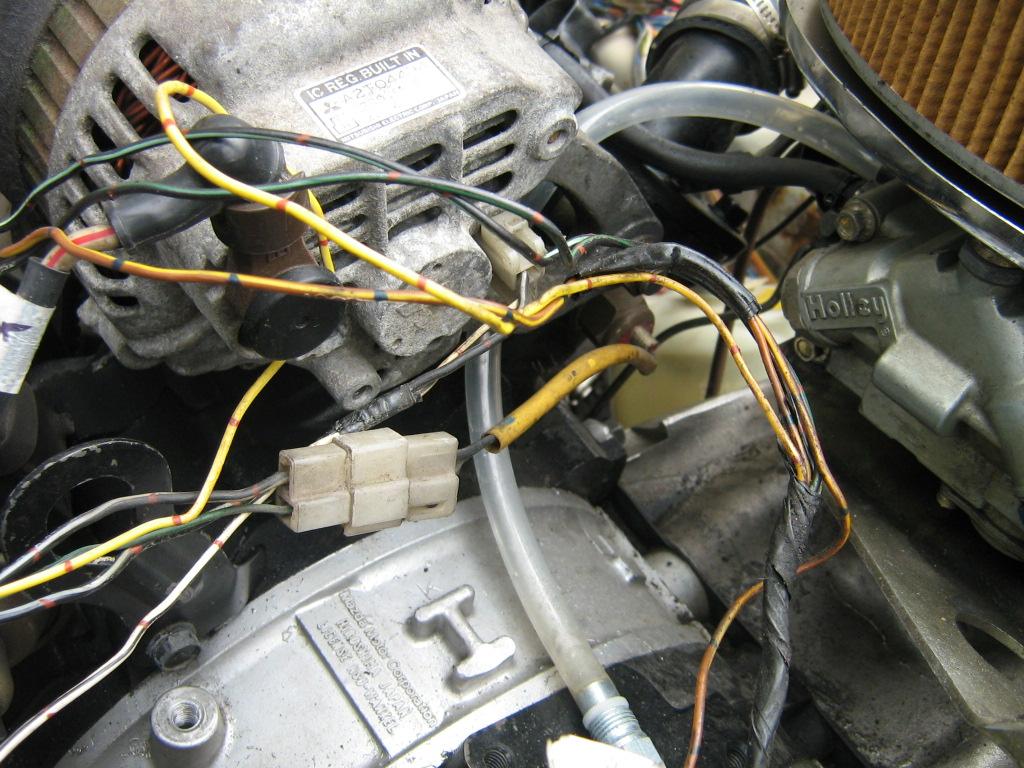
Alt. conn.
Temp sensor on back waterpump houseing.
Bowl vent on carb, Holley probably does not have.
AC solenoid, you won't need.
Oil pressure.
Oil level sender.
Water temp sender.
Not all of those are in that one connector.
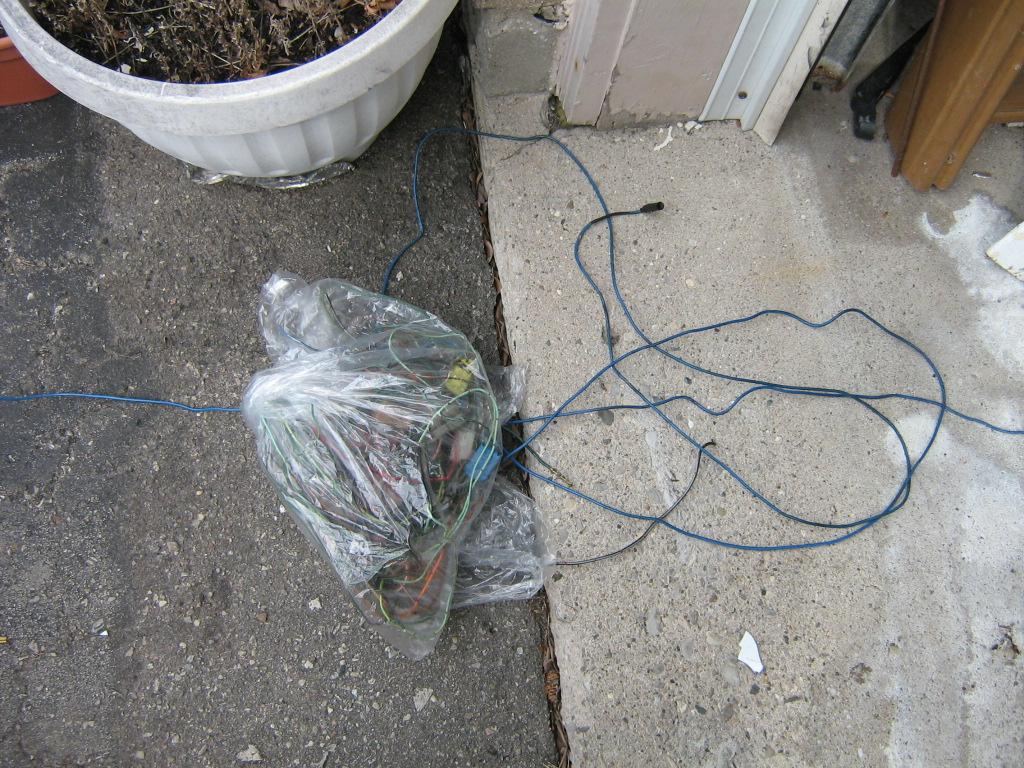
This is what I ended up with, kinda strange, I have those other 2 wires butt connected, I did it some time ago.
Notice somthing funny in the 2nd pic?
Pic 5 is cruise.
I have only done the engine harness. Too lazy to do the drivers side.
I started with the connectors I was keeping and worked my way back to the pin connector.
I kept:
Alt. conn.
Temp sensor on back waterpump houseing.
Bowl vent on carb, Holley probably does not have.
AC solenoid, you won't need.
Oil pressure.
Oil level sender.
Water temp sender.
Not all of those are in that one connector.
This is what I ended up with, kinda strange, I have those other 2 wires butt connected, I did it some time ago.
Notice somthing funny in the 2nd pic?
Thread Starter
Banned. I got OWNED!!!
iTrader: (2)
Joined: Oct 2004
Posts: 6,122
Likes: 1
From: London, Ontario
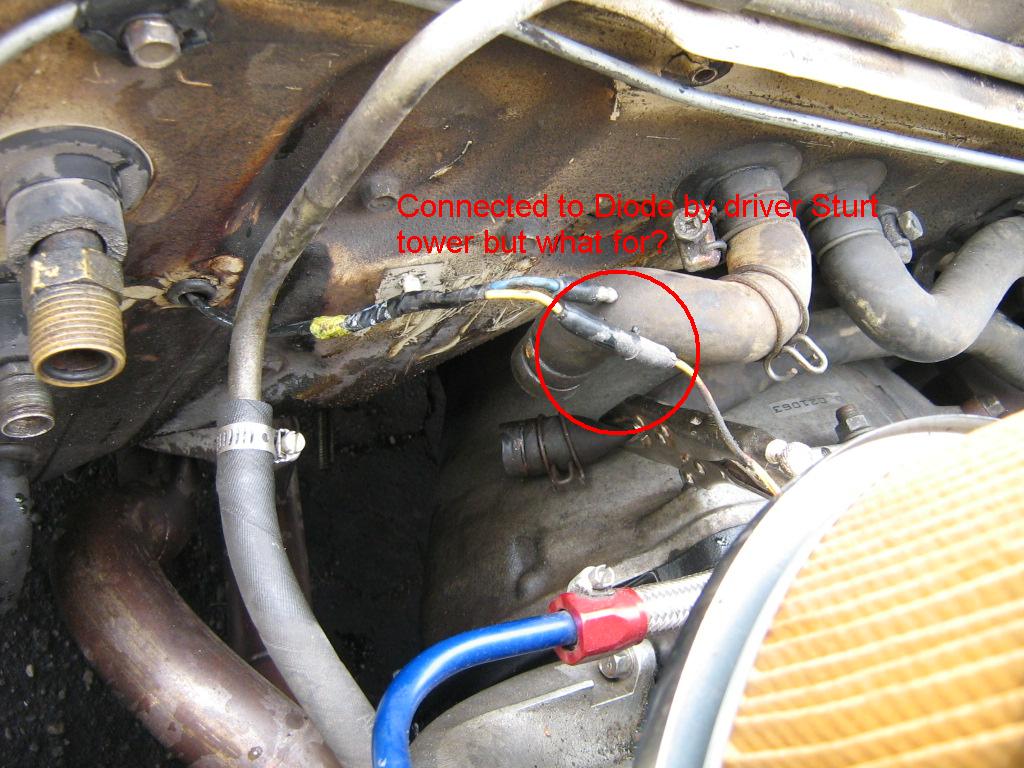
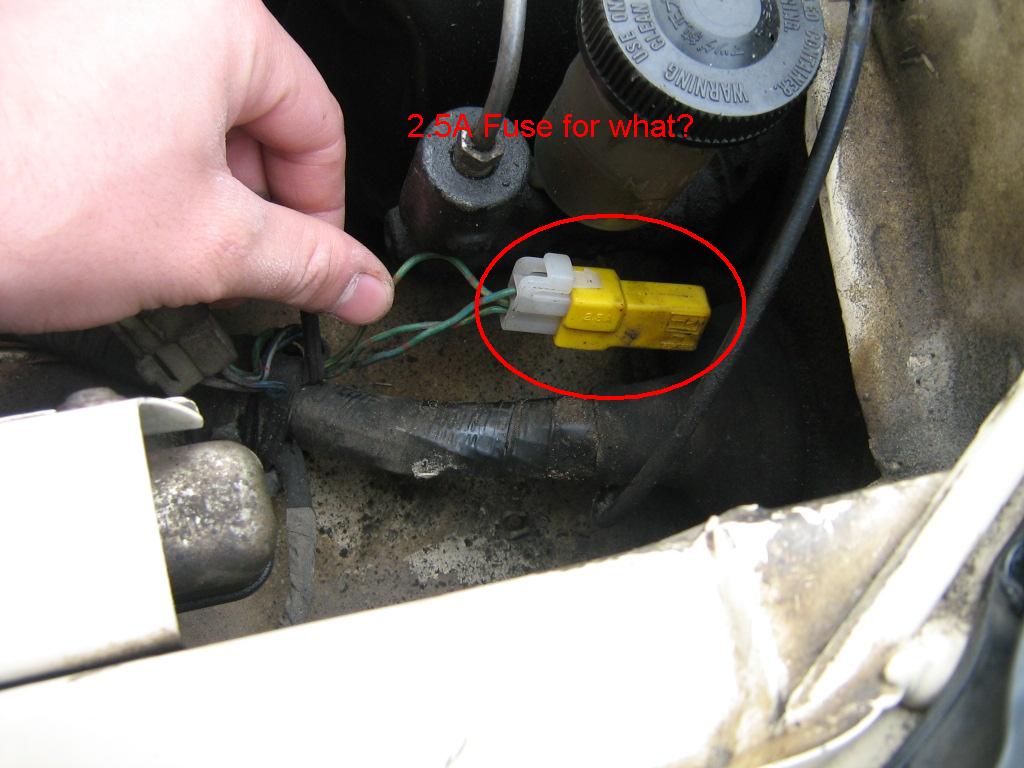
Thanks thats 2 knocked down. I thought pic 4 might be for the AC so that diode is probably for that AC too and can just take it off and all the other associated wires.
As for your pictures 2 are you refering to the silver radiator shroud piece . I Painted those afew weeks back with POR-15. look great and should look even better in the new shell that has a black engine compartment.
As for your pictures 2 are you refering to the silver radiator shroud piece
. I Painted those afew weeks back with POR-15. look great and should look even better in the new shell that has a black engine compartment.
Originally Posted by Stevan
Pic 4 is AC thermostatic switch, which you apparently don't need.
Pic 5 is cruise.
I have only done the engine harness. Too lazy to do the drivers side.
I started with the connectors I was keeping and worked my way back to the pin connector.
I kept:
Alt. conn.
Temp sensor on back waterpump houseing.
Bowl vent on carb, Holley probably does not have.
AC solenoid, you won't need.
Oil pressure.
Oil level sender.
Water temp sender.
Not all of those are in that one connector.
This is what I ended up with, kinda strange, I have those other 2 wires butt connected, I did it some time ago.
Notice somthing funny in the 2nd pic?
I'll see if I can get a pic of mine tomorrow. I'm down to 5-6 wires, but 2 of them can still come out because I never figured out what they went to and are just hanging around.
Originally Posted by dj55b
As for your pictures 2 are you refering to the silver radiator shroud piece . I Painted those afew weeks back with POR-15. look great and should look even better in the new shell that has a black engine compartment.
. I Painted those afew weeks back with POR-15. look great and should look even better in the new shell that has a black engine compartment.That drivers side harness would be a bear, so many wires and no connector to de-pin.
Thread Starter
Banned. I got OWNED!!!
iTrader: (2)
Joined: Oct 2004
Posts: 6,122
Likes: 1
From: London, Ontario
Ya that silver really brings a cleaner look to the over all engine bay,
as for the driver side engine harness, my plan is to basically take out the dashboard and also remove all the components from behind that are no longer in use. The more weight removed the better. The spot where the 2 wires for the AC are on the firewall, looks like a good candidate spot to have the positive wire hooked up to. But will see once the new shell gets here and I'll strip the whole interior. I'll make sure to save up all the wires and see how many pounds it sheds off ... I know it won't be anything big but every bit counts.
And today because i have a day off, it decides to rain to I can't really do any kind of work.
Would a simpler process be to take all the plugs that are not hooked into anything and to just track it back to the main harness in the engine bay and remove the pins? I dont want to go to hardcore into this but there are like 20 plugs not used cause of the removed emmissions that I just want off the top of my engine.
Thread Starter
Banned. I got OWNED!!!
iTrader: (2)
Joined: Oct 2004
Posts: 6,122
Likes: 1
From: London, Ontario
thats what I basically did ... I found it alot better and easier. either way you're removing all the tape so you can just see them. You'll need it more if you want to do the driver side, that is the harness that is a bigger PITA. I cna't belive how much tape they use. Like today I sat there for about 45 minutes just removing tape.
Thread Starter
Banned. I got OWNED!!!
iTrader: (2)
Joined: Oct 2004
Posts: 6,122
Likes: 1
From: London, Ontario
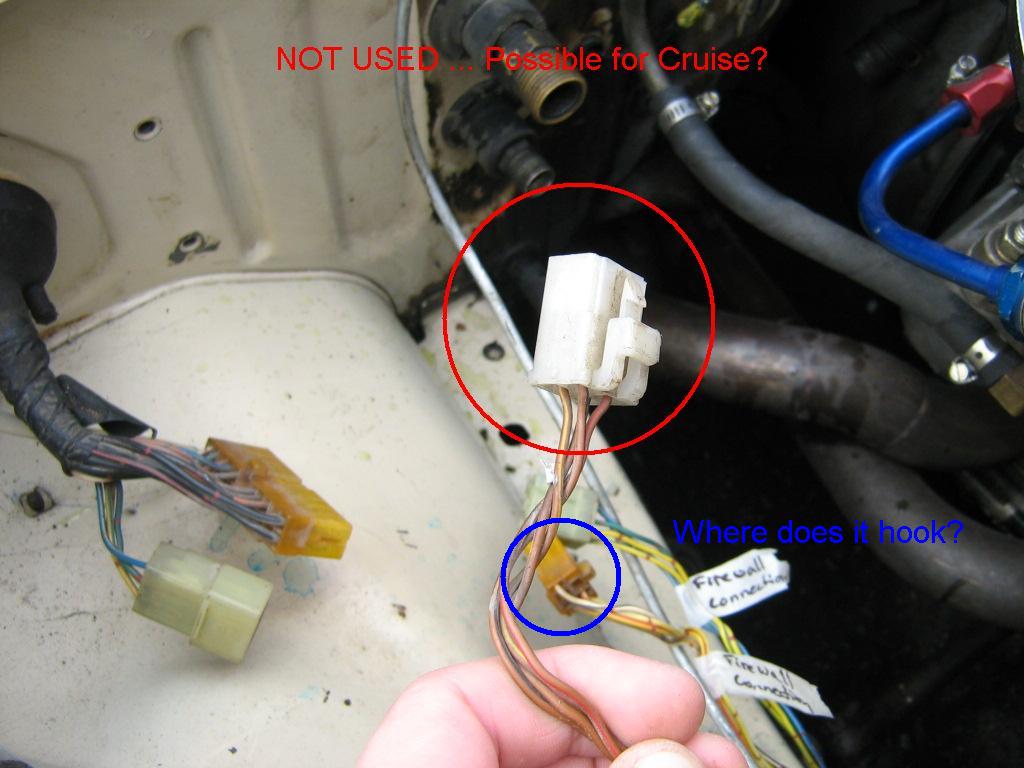
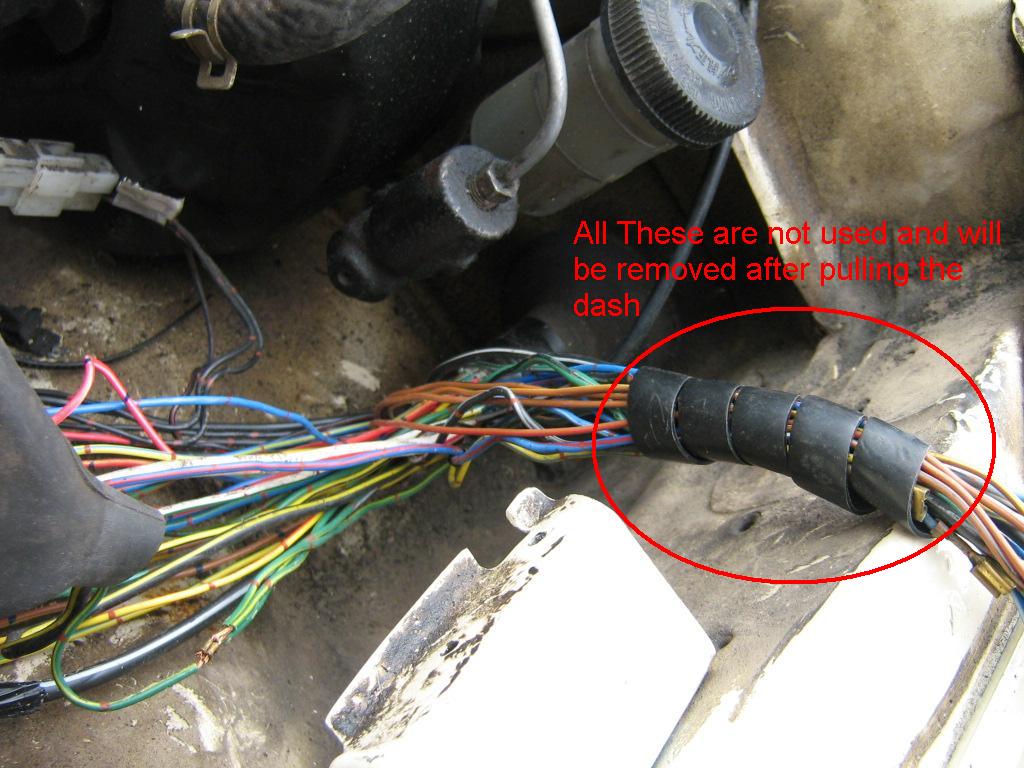
alright .. need a little help putting back a wire ... If someone can take a picture of this plug for me it would be great. The white wire off this orange plug goe eventually to the alternator, but I need to know where the other end goes to. Its the one circled in blue:
Here's some more pictures of updates. also
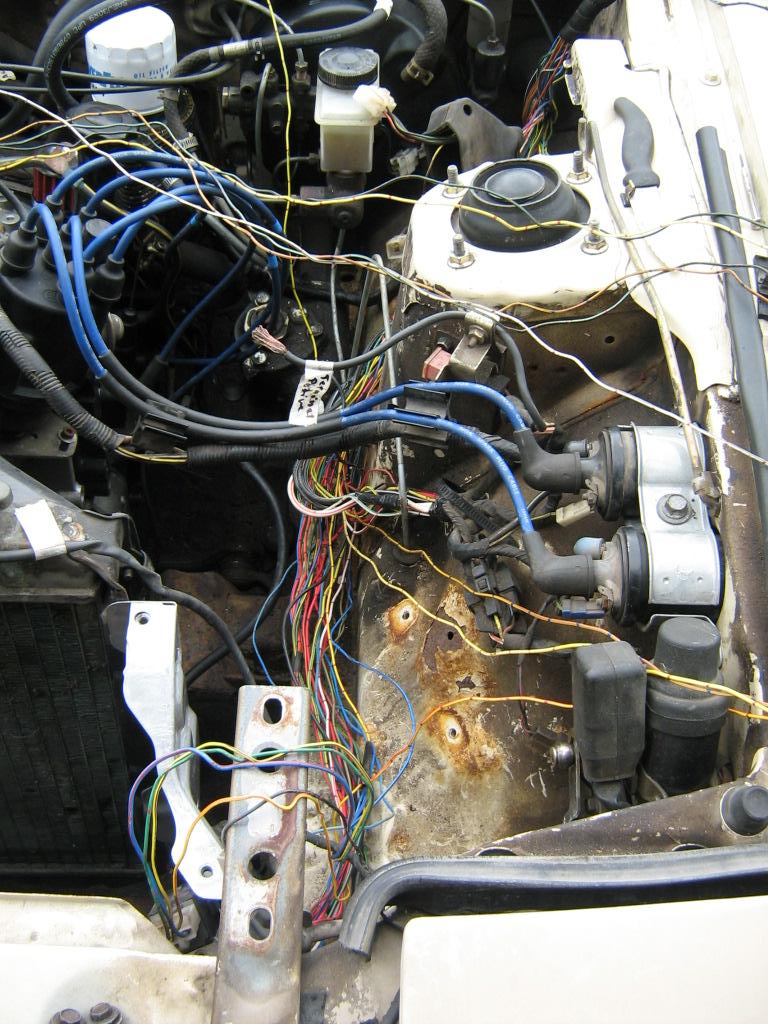
Here's some more pictures of updates. also
Thread Starter
Banned. I got OWNED!!!
iTrader: (2)
Joined: Oct 2004
Posts: 6,122
Likes: 1
From: London, Ontario
Also just noted refering the the diagrams that I need 4 wires for a MT harness... apperently I disconnected one of them the blue white one? What is it for and where did it go  I think that I might be going in a little it too wire happy right now. I might of disconnected other related wire too.
I think that I might be going in a little it too wire happy right now. I might of disconnected other related wire too.
Last edited by dj55b; Apr 17, 2007 at 12:30 PM.
Thread Starter
Banned. I got OWNED!!!
iTrader: (2)
Joined: Oct 2004
Posts: 6,122
Likes: 1
From: London, Ontario
alright so looking some more at the alternator wire, the WB one goes to the choke and check relay. which I took out anyway, so would I still need it?
Thread Starter
Banned. I got OWNED!!!
iTrader: (2)
Joined: Oct 2004
Posts: 6,122
Likes: 1
From: London, Ontario
alright, Snapped some shots of how the wiring will be. I've marked it in red line.
So as you can tell the whole thing would "T" from the center of the engine. THe main reason for this is when I run the ITB later on, all the wireing can go through the center section and then to the passenger side where the computer will be installed. The headlight will remain in the same position though. just tidy it up a little more and not share so many ground together.
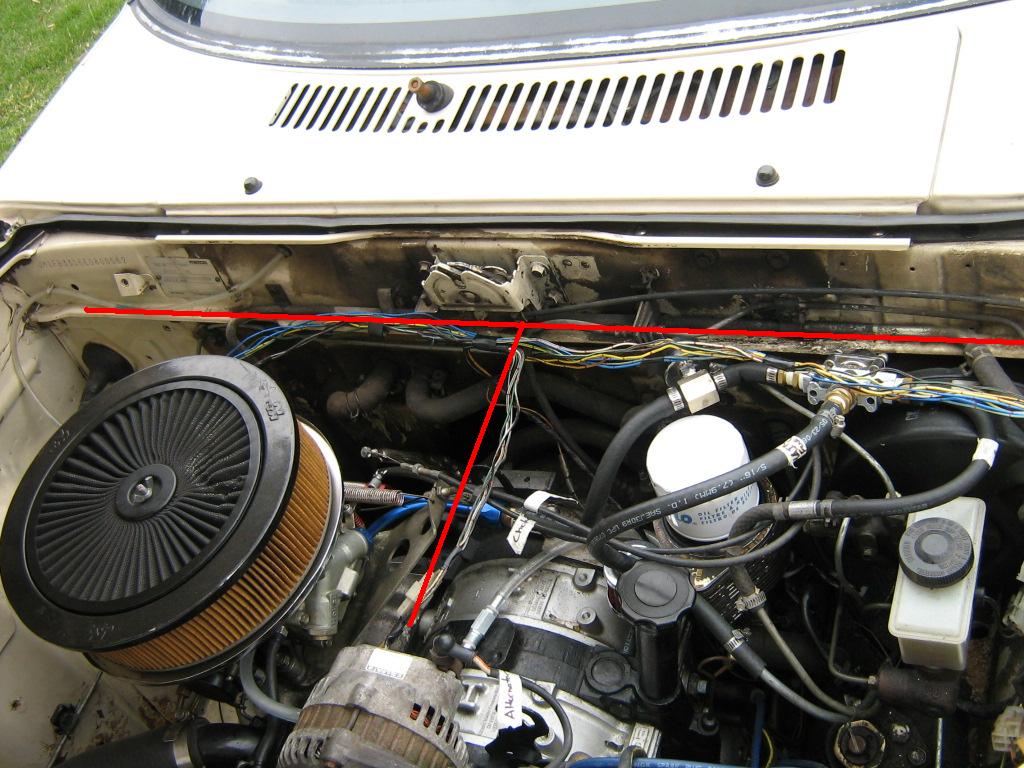
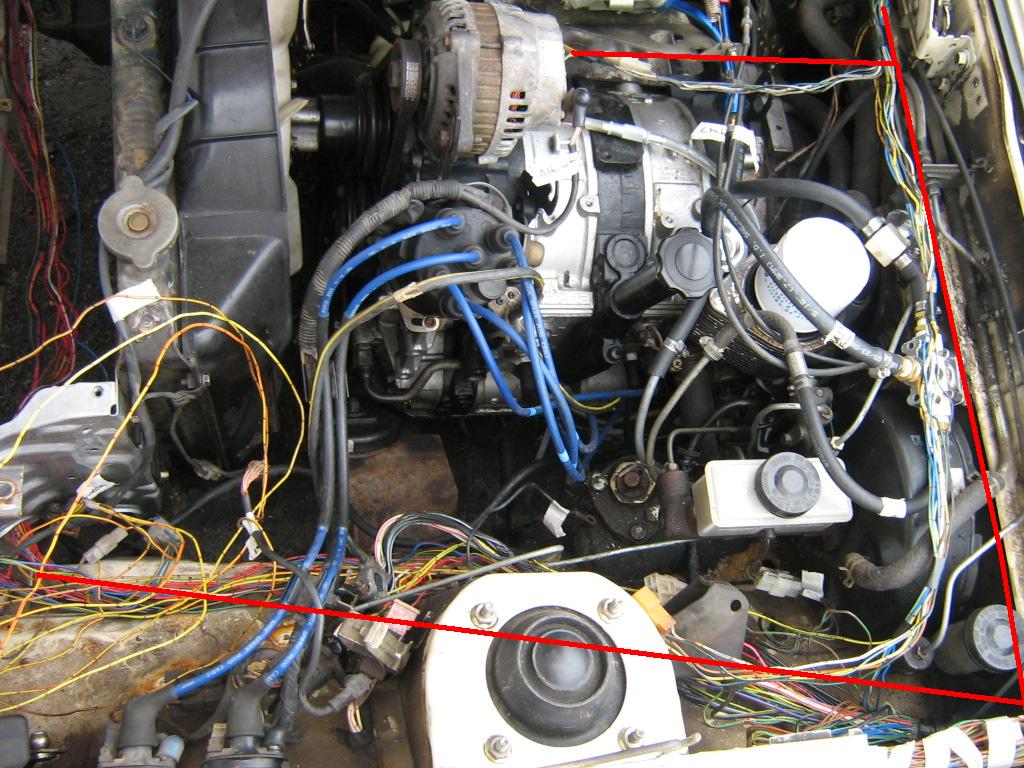
So as you can tell the whole thing would "T" from the center of the engine. THe main reason for this is when I run the ITB later on, all the wireing can go through the center section and then to the passenger side where the computer will be installed. The headlight will remain in the same position though. just tidy it up a little more and not share so many ground together.
Last edited by dj55b; Apr 18, 2007 at 01:26 PM.
Thread Starter
Banned. I got OWNED!!!
iTrader: (2)
Joined: Oct 2004
Posts: 6,122
Likes: 1
From: London, Ontario
Just wanted to update this, there is a diode that is show in a white connector kinda like Fuse in the yellow enlcoser in one of my earlier pictures is related to the Cruise Control, Also the the 4 bung connector that has 2 brown wires behind the wiper/headlight cluster is for the cruise set controls.