
Hard question to ask - Odometer

Thread Starter
Joined: May 2002
Posts: 5,972
Likes: 37
From: Ottawa, Soviet Canuckistan
When I get the car back tomorrow I'm going to try troubleshooting the three issues with the gauge cluster from the assumption that the cluster is good and the problems are elsewhere.
So for the tach, I'll thoroughly test the trailing ignition since the signal for the tach comes from the trailing ignition coil.
For the speedo, I'm not sure what could cause it to "bounce", but worst case I can just swap the speedo from the old cluster now that I know it's possible to swap that and leave the rest alone (that was the only thing on the old cluster that worked perfectly)
And for the fuel gauge, I'll first use a spare level sender I have laying around to see if it's that, and if that comes back inconclusive then I'll find the actual procedure for testing the gauge and sender.
Anybody know what could make the speedo jump? Or what the proper procedure is for testing the fuel gauge and fuel level sender?
Jon


1. A kinked speedometer cable will cause the pointer to bounce.
To determine if the cable is kinked, pull it from the cable housing (from the transmission end) and rotate it with your fingers. The best way is grasp the cable at each end and allow it to droop to the floor in the middle. Then slowing rotate it back and forth with your fingers on both hands. The cable should move smoothly with no jumping or binding. If the cable doesn't rotate evenly - replace the cable and housing with a new one from Mazda or an aftermarket supplier. You can't fix a kinked cable.
2. A bad or dry bearing in the speedometer head. Usually a bad speedo is worse when the weather is cold.
The speedometer sould rotate freely and and make no noise. If you hear a ringing noise when you spin the speedometer or it feels notchy then it is bad and will soon fail completely. There is no real repair for a Mazda speedometer - no parts. A speedometer shop may be help you here if the instrument isn't too far gone.
3. Speedometer drive gears that are worn or damages - these are on the trans output shaft. The drive gear is the one one the shaft and the driven gear is the one that the cable connect to.
The gears should not be worn or have any teeth missing. Visually the driven gear teeth should appear straight accross their face with no dip or worn portion in the middle. The drive gear should not feel worn to the touch. You can more easily change the driven gear. To replace the drive gear you have to pull the transmission tail shaft housing.
Hope this helps
Thread Starter
Joined: May 2002
Posts: 5,972
Likes: 37
From: Ottawa, Soviet Canuckistan
Several things can cause a speedo to jump:
1. A kinked speedometer cable will cause the pointer to bounce.
To determine if the cable is kinked, pull it from the cable housing (from the transmission end) and rotate it with your fingers. The best way is grasp the cable at each end and allow it to droop to the floor in the middle. Then slowing rotate it back and forth with your fingers on both hands. The cable should move smoothly with no jumping or binding. If the cable doesn't rotate evenly - replace the cable and housing with a new one from Mazda or an aftermarket supplier. You can't fix a kinked cable.
2. A bad or dry bearing in the speedometer head. Usually a bad speedo is worse when the weather is cold.
The speedometer sould rotate freely and and make no noise. If you hear a ringing noise when you spin the speedometer or it feels notchy then it is bad and will soon fail completely. There is no real repair for a Mazda speedometer - no parts. A speedometer shop may be help you here if the instrument isn't too far gone.
3. Speedometer drive gears that are worn or damages - these are on the trans output shaft. The drive gear is the one one the shaft and the driven gear is the one that the cable connect to.
The gears should not be worn or have any teeth missing. Visually the driven gear teeth should appear straight accross their face with no dip or worn portion in the middle. The drive gear should not feel worn to the touch. You can more easily change the driven gear. To replace the drive gear you have to pull the transmission tail shaft housing.
Hope this helps
It does help...
Well for the moment I'm going to discount the kinked cable and speedo cable drive gear - my old speedo worked perfectly before swapping clusters. So unless my mechanic somehow managed to kink the speedo cable in the process of swapping clusters, it's probably the speedometer itself that's going
In that case, it should be a simple fix - swap just the speedometer from my original gauge cluster to the new one.
Jon
Thread Starter
Joined: May 2002
Posts: 5,972
Likes: 37
From: Ottawa, Soviet Canuckistan
Alrighty! So I got the car back today and here's what we've got :
1. Timing light revealed that the trailing ignition coil is indeed not giving off spark. So that explains the tach. I'll grab parts off Keiko to fix that
2. The Fuel gauge may not be "dead"... I may just be out of fuel. It sounds stupid but I put a bit in and the needle rose.. not as much as I expected (I put in like 1/3 of a tank and it barely registered 1/4) but we'll see what happens when next I fill it. Worse case, it is getting *some* signal, so I can probably just clean the contacts
3. Speedometer is busted tho. Doesn't even move.
The good news is that Glen (my mechanic) showed me the easier way of getting that gauge cluster out. Apparently if you take the plastic covers off from under the steering wheel and the dash just below it, you can access two 12mm bolts that lets you drop the steering wheel and column out of the way. Once that's out of the way (which saves you from having to remove the steering wheel, requiring new locknuts) you can remove the gauge cluster with 4 screws and it pulls out far enough for you to actually see the connectors to remove them. He says you have to move the rubber boot on the speedo cable way down the cable though so you can pull enough slack in.
That sounds encouraging, so this weekend I'm going to give that a try, get the gauge cluster out, swap my old speedo back in, and re-install it, cleaning the contacts well. Then I'll clean the contacts on the fuel level sender and fill the tank and see what happens.
Hopefully I'll get good pictures of both the process of getting the cluster out and swapping the speedo for anyone interested in doing it Wish me luck (and good weather)
Jon
1. Timing light revealed that the trailing ignition coil is indeed not giving off spark. So that explains the tach. I'll grab parts off Keiko to fix that
2. The Fuel gauge may not be "dead"... I may just be out of fuel. It sounds stupid but I put a bit in and the needle rose.. not as much as I expected (I put in like 1/3 of a tank and it barely registered 1/4) but we'll see what happens when next I fill it. Worse case, it is getting *some* signal, so I can probably just clean the contacts
3. Speedometer is busted tho. Doesn't even move.
The good news is that Glen (my mechanic) showed me the easier way of getting that gauge cluster out. Apparently if you take the plastic covers off from under the steering wheel and the dash just below it, you can access two 12mm bolts that lets you drop the steering wheel and column out of the way. Once that's out of the way (which saves you from having to remove the steering wheel, requiring new locknuts) you can remove the gauge cluster with 4 screws and it pulls out far enough for you to actually see the connectors to remove them. He says you have to move the rubber boot on the speedo cable way down the cable though so you can pull enough slack in.
That sounds encouraging, so this weekend I'm going to give that a try, get the gauge cluster out, swap my old speedo back in, and re-install it, cleaning the contacts well. Then I'll clean the contacts on the fuel level sender and fill the tank and see what happens.
Hopefully I'll get good pictures of both the process of getting the cluster out and swapping the speedo for anyone interested in doing it
Wish me luck (and good weather)Jon
Last edited by vipernicus42; Apr 21, 2009 at 11:41 PM.

Good luck Jon, that's a great tip on lowering the steering column first, I'll try that next time (I hate taking the cluster out!). By the way I have a couple spare clusters in the parts shed if you need them, might even have one with the mileage you are looking for.
Good luck with the snow too, hope it lets up a little for you this weekend.
Good luck with the snow too, hope it lets up a little for you this weekend.
Joined: Jun 2008
Posts: 8,376
Likes: 30
From: Chino Hills, CA
While you've got the cluster out, you might want to check/replace the guage illumination bulbs. They "plate up" on the inside over time as metal evaporates off the filament, and get dim.
Never easier to deal with than when the cluster's out.
Never easier to deal with than when the cluster's out.
Thread Starter
Joined: May 2002
Posts: 5,972
Likes: 37
From: Ottawa, Soviet Canuckistan
Good luck Jon, that's a great tip on lowering the steering column first, I'll try that next time (I hate taking the cluster out!). By the way I have a couple spare clusters in the parts shed if you need them, might even have one with the mileage you are looking for.
Good luck with the snow too, hope it lets up a little for you this weekend.
Good luck with the snow too, hope it lets up a little for you this weekend.
It's going to be 24C this weekend.. thanks tho!
Thanks for the offer with the clusters, I'll shoot you a PM if I still need something after this weekend.
Jon
Thread Starter
Joined: May 2002
Posts: 5,972
Likes: 37
From: Ottawa, Soviet Canuckistan
Lol as far as I'm concerned your current post is post #33 of page 1... out of a possible 50. I just don't know the answer to the question you asked 
I keep my posts-per-page setting maxed.
Jon
I keep my posts-per-page setting maxed.
Jon
Joined: Jun 2008
Posts: 8,376
Likes: 30
From: Chino Hills, CA

Thread Starter
Joined: May 2002
Posts: 5,972
Likes: 37
From: Ottawa, Soviet Canuckistan
Hey Guys,
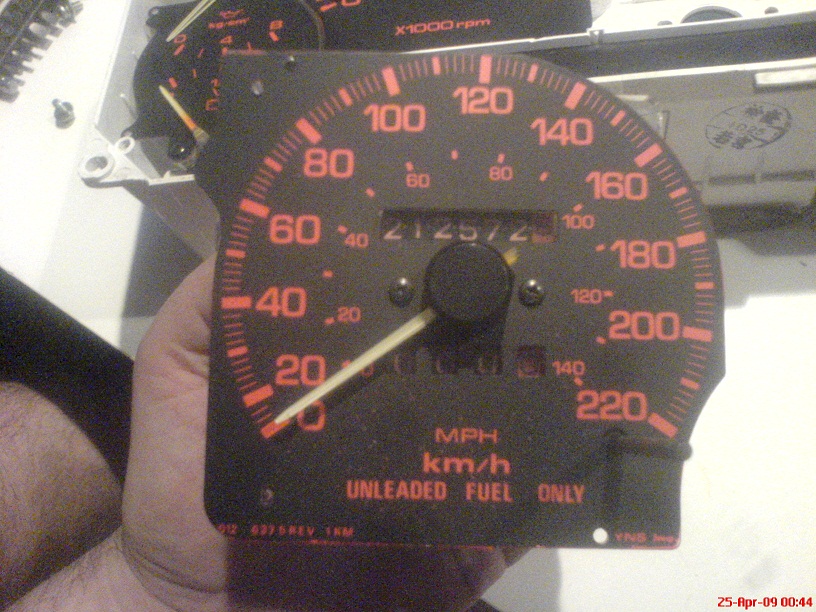
Well I got the speedometer out of the old Gauge Cluster. I took a bunch of pics so here we go.
Once the console is out of the car, start by removing the clear plastic front cover.
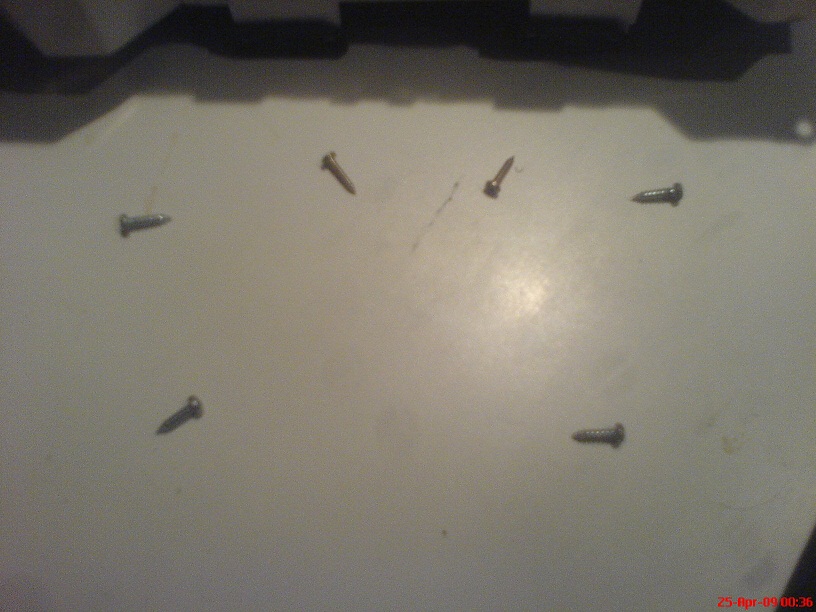
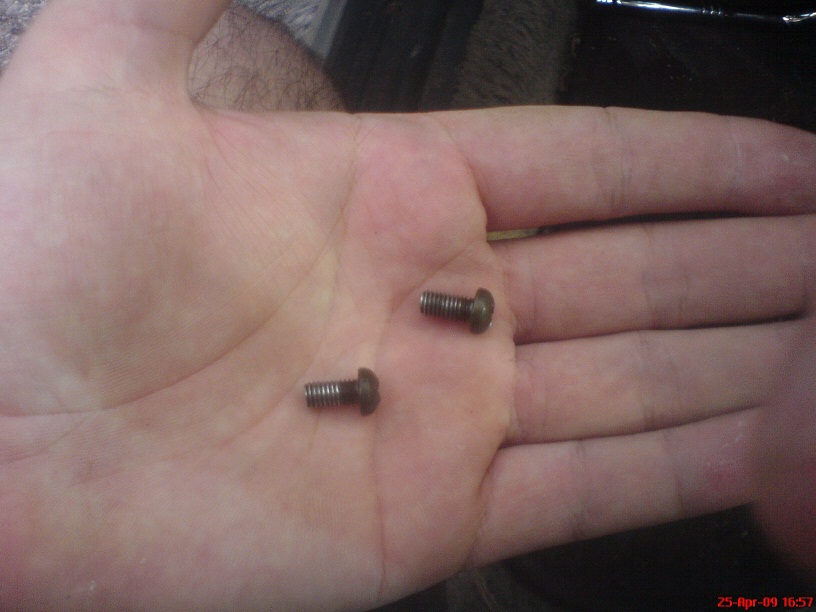
The cover is held in place with six screws. Two thin brass screws, and four fatter steel screws.
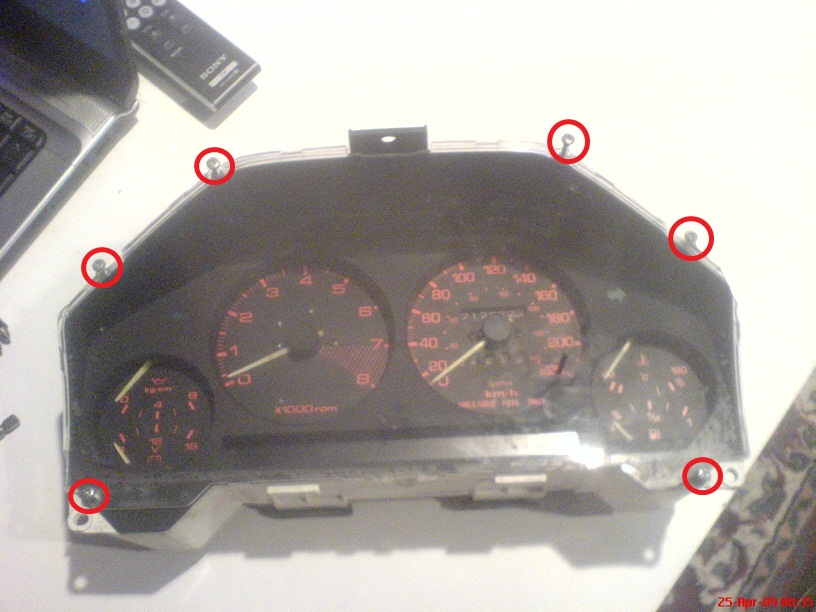
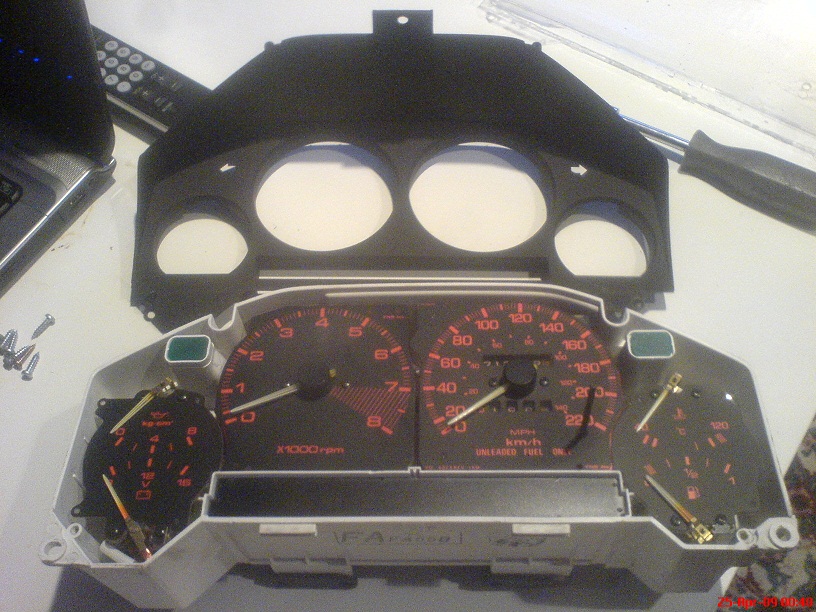
That takes the clear plastic cover off. Now we want to remove the black plastic piece that goes around all the gauges. If you flip it over you'll find two more of the fatter steel screws at the top:
Once those are out, the black plastic piece separates from the front revealing the gauges
(another post to come in a moment)
Well I got the speedometer out of the old Gauge Cluster. I took a bunch of pics so here we go.
Once the console is out of the car, start by removing the clear plastic front cover.
The cover is held in place with six screws. Two thin brass screws, and four fatter steel screws.
That takes the clear plastic cover off. Now we want to remove the black plastic piece that goes around all the gauges. If you flip it over you'll find two more of the fatter steel screws at the top:
Once those are out, the black plastic piece separates from the front revealing the gauges
(another post to come in a moment)
Thread Starter
Joined: May 2002
Posts: 5,972
Likes: 37
From: Ottawa, Soviet Canuckistan
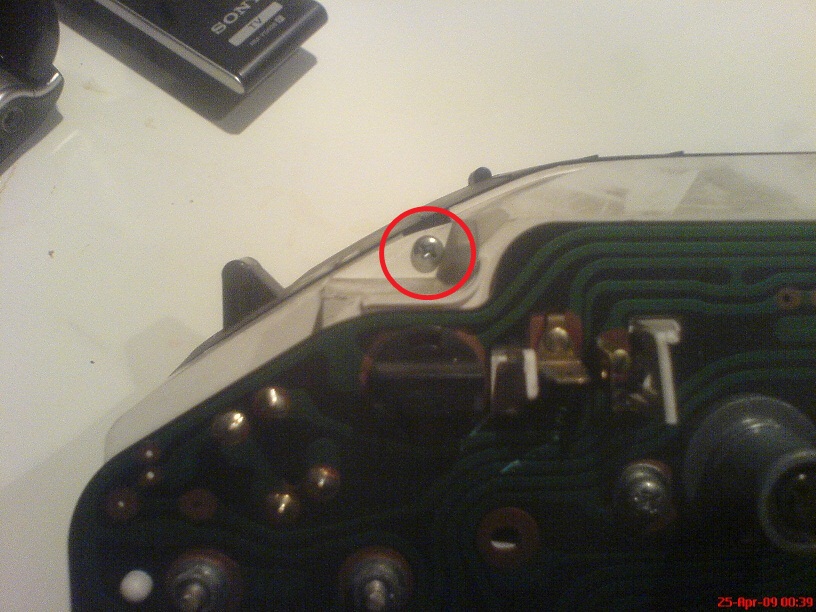
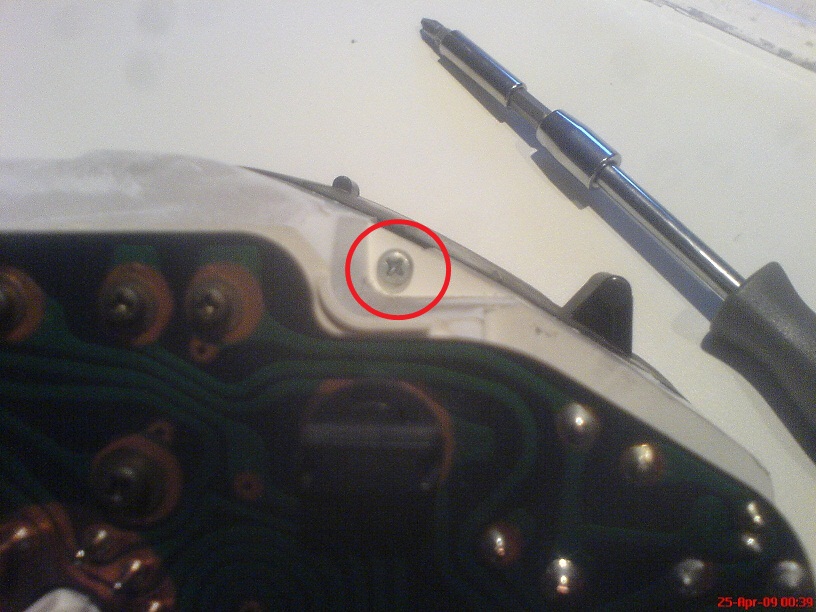
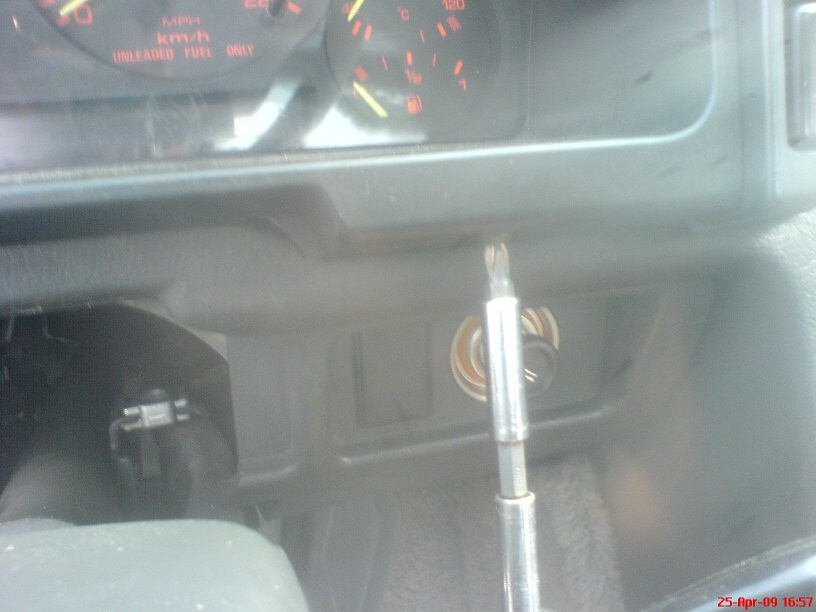
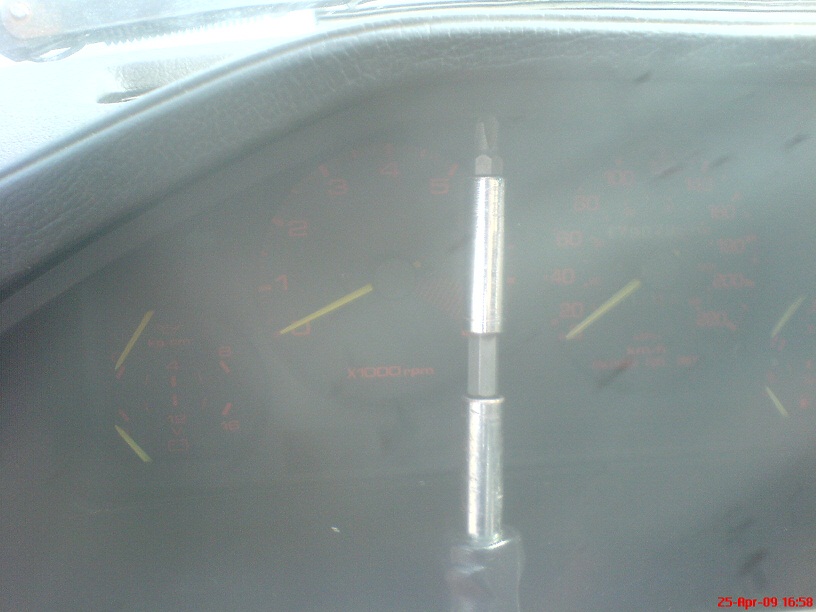
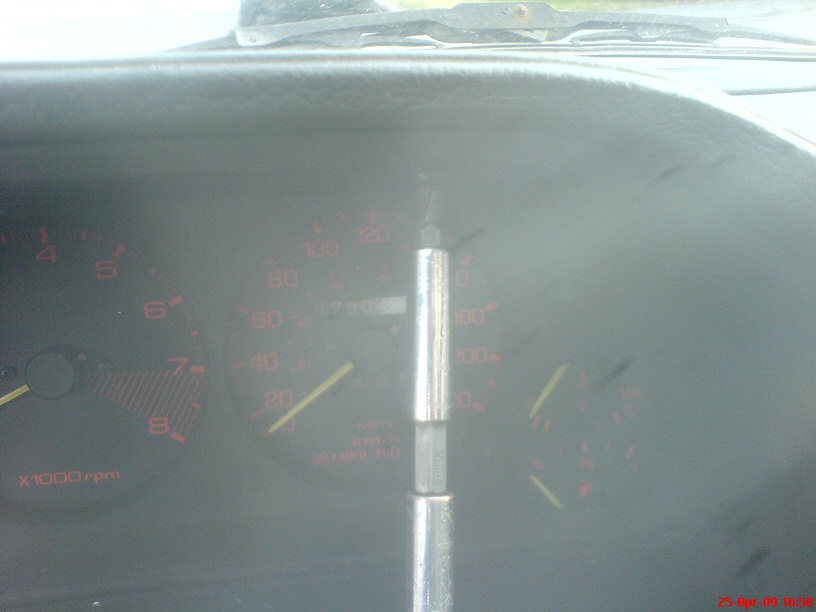
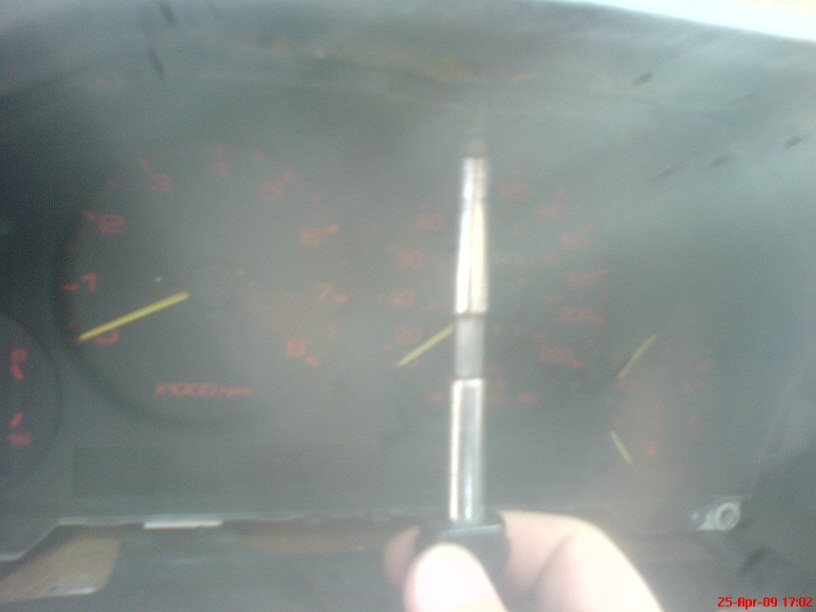
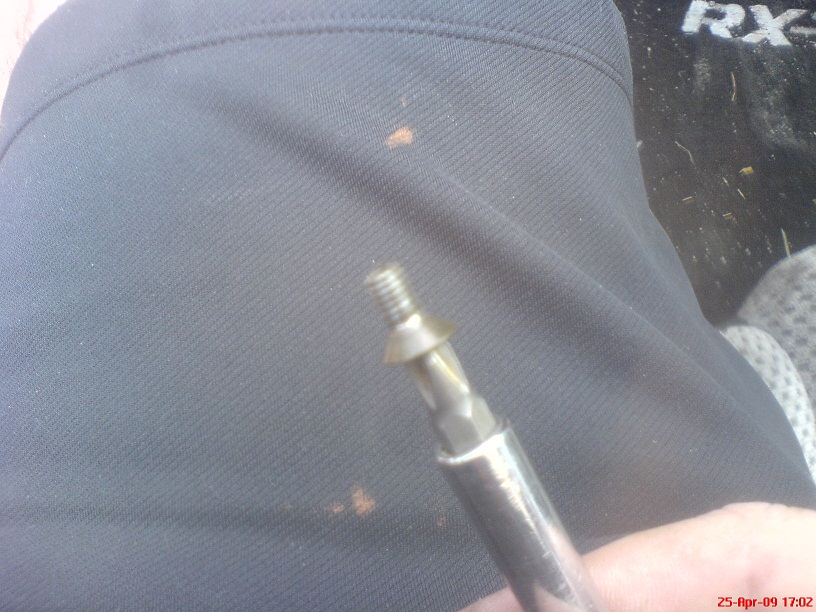
So now that we've got the front disassembled, we can flip it over and remove the four screws holding the speedometer in place.
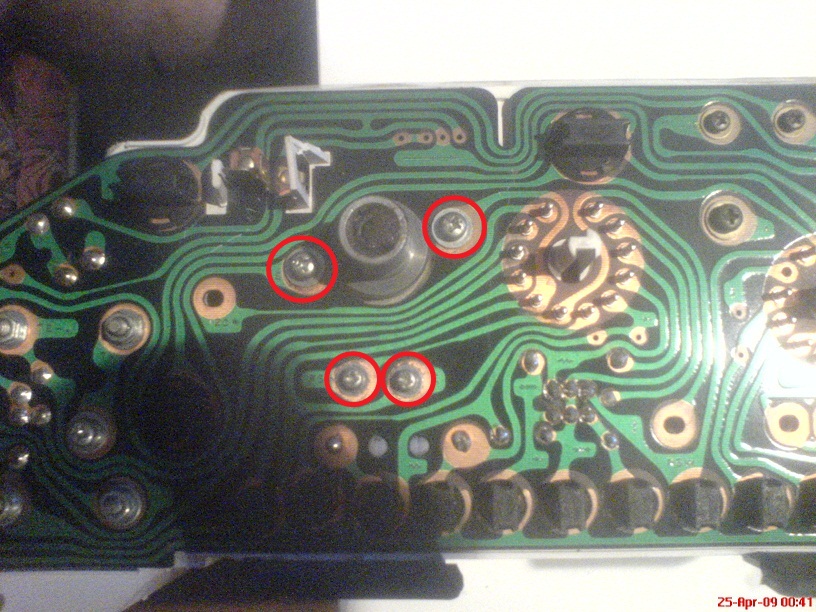
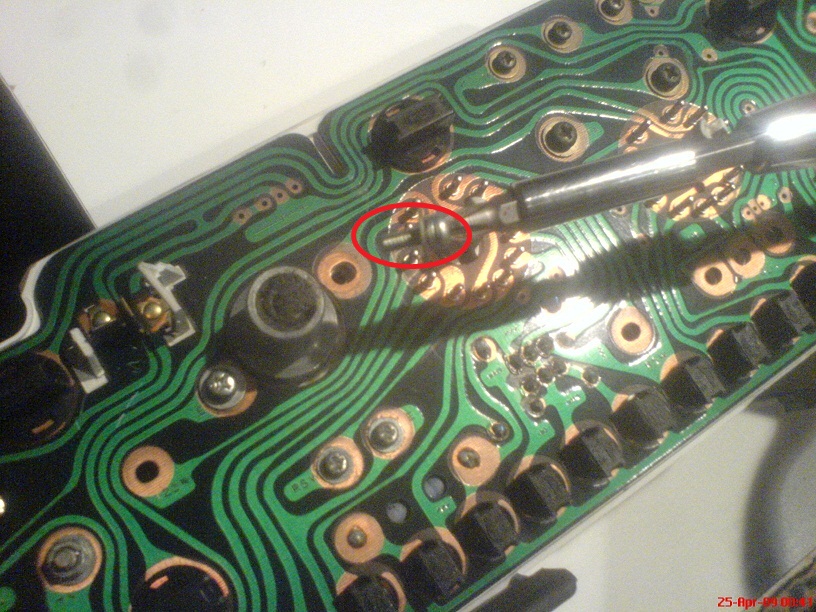
Be careful when removing these screws. They're the only thing holding the speedometre in place, and with the odo reset pin being so long, it doesn't sit flat, so it might fall out kind of awkwardly. But basically, once those four screws are removed the speedo drops free and you're done

And as the shop manual always says - Installation is the reverse of removal!
I'll try to grab some pics of how to actually get the gauge cluster out of the car tomorrow when I pull the "new" gauge cluster out to put the "old" speedometre into it.
Jon
Be careful when removing these screws. They're the only thing holding the speedometre in place, and with the odo reset pin being so long, it doesn't sit flat, so it might fall out kind of awkwardly. But basically, once those four screws are removed the speedo drops free and you're done
And as the shop manual always says - Installation is the reverse of removal!
I'll try to grab some pics of how to actually get the gauge cluster out of the car tomorrow when I pull the "new" gauge cluster out to put the "old" speedometre into it.
Jon
Joined: Jun 2008
Posts: 8,376
Likes: 30
From: Chino Hills, CA
That's how ya do it, yup.
Only material differences with the SA are:
1) The front clear cover is bonded to the black plastic surround; they come off together with 4 steel screws from the rear
2) The SA speedo is only held in by 2 screws
Only material differences with the SA are:
1) The front clear cover is bonded to the black plastic surround; they come off together with 4 steel screws from the rear
2) The SA speedo is only held in by 2 screws
Thread Starter
Joined: May 2002
Posts: 5,972
Likes: 37
From: Ottawa, Soviet Canuckistan
Hey Guys,
So I finally got around to removing the gauge cluster and swapping the old speedometer into the new cluster so that everything works. I grabbed pics of the process so everyone can get an idea of how the gauge cluster comes out. It's not actually as scary or difficult as I thought it was going to be.
Forgive the quality of the pics. My camera does not do well in bright light and it was a beautiful day out so most of the pics are bleached quite heavily.
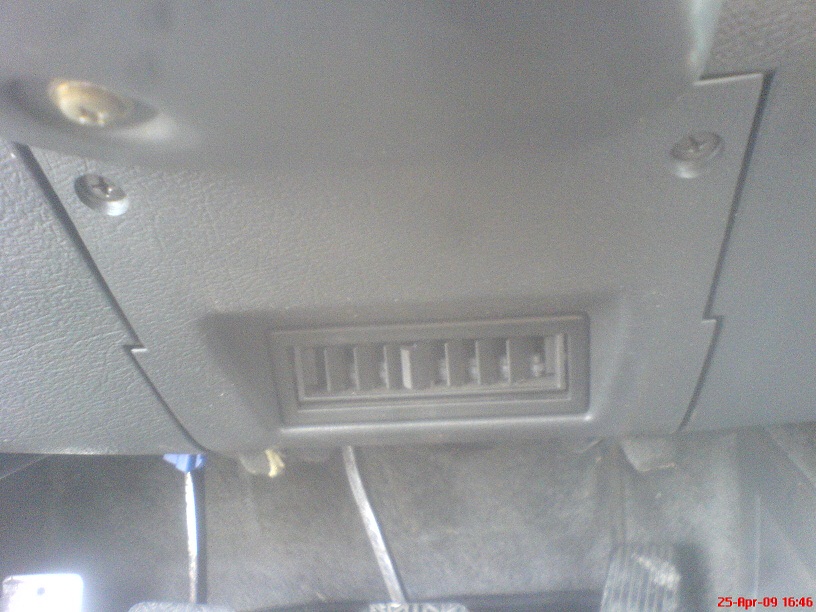
To start off with, two things need to be removed: The dash panel under the steering wheel containing a small air vent, and the bottom half of the steering column surround.
There are five brass screws holding the piece under the steering wheel, one of which is shaped differently from the other four so take note of it.
And the other panel is held in place with two dark coloured screws.
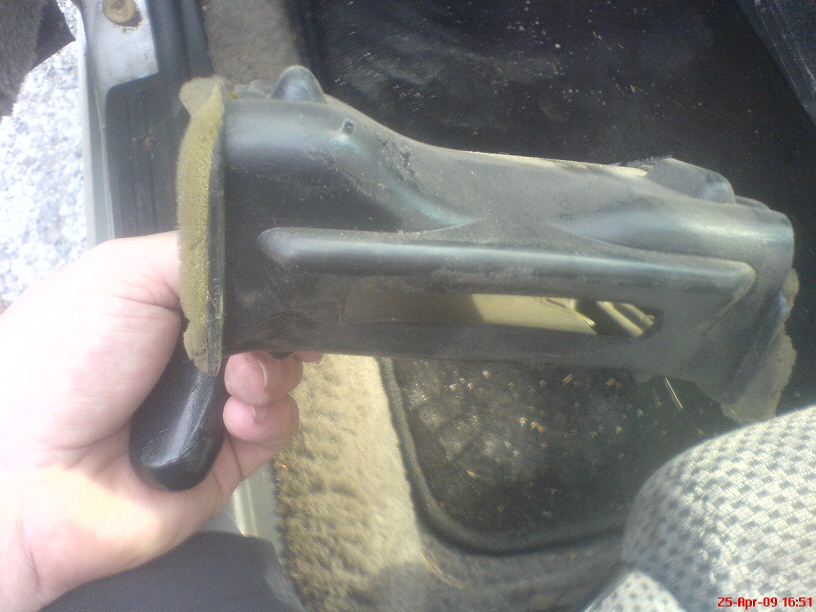
Once the lower panel is out of the way, you'll find a short piece of ducting that can just pull free, revealing the bottom of the steering column.
(a few more posts to come shortly)
So I finally got around to removing the gauge cluster and swapping the old speedometer into the new cluster so that everything works. I grabbed pics of the process so everyone can get an idea of how the gauge cluster comes out. It's not actually as scary or difficult as I thought it was going to be.
Forgive the quality of the pics. My camera does not do well in bright light and it was a beautiful day out so most of the pics are bleached quite heavily.
To start off with, two things need to be removed: The dash panel under the steering wheel containing a small air vent, and the bottom half of the steering column surround.
There are five brass screws holding the piece under the steering wheel, one of which is shaped differently from the other four so take note of it.
And the other panel is held in place with two dark coloured screws.
Once the lower panel is out of the way, you'll find a short piece of ducting that can just pull free, revealing the bottom of the steering column.
(a few more posts to come shortly)
Thread Starter
Joined: May 2002
Posts: 5,972
Likes: 37
From: Ottawa, Soviet Canuckistan
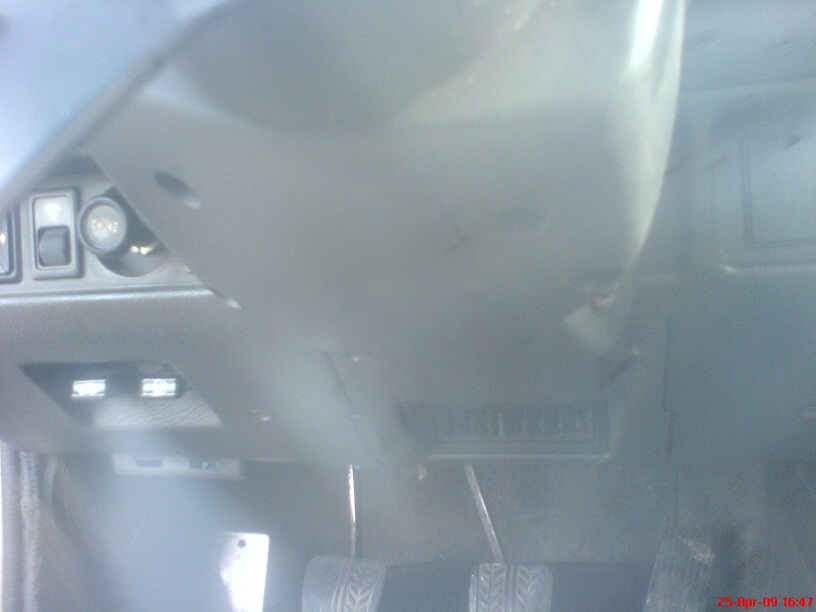
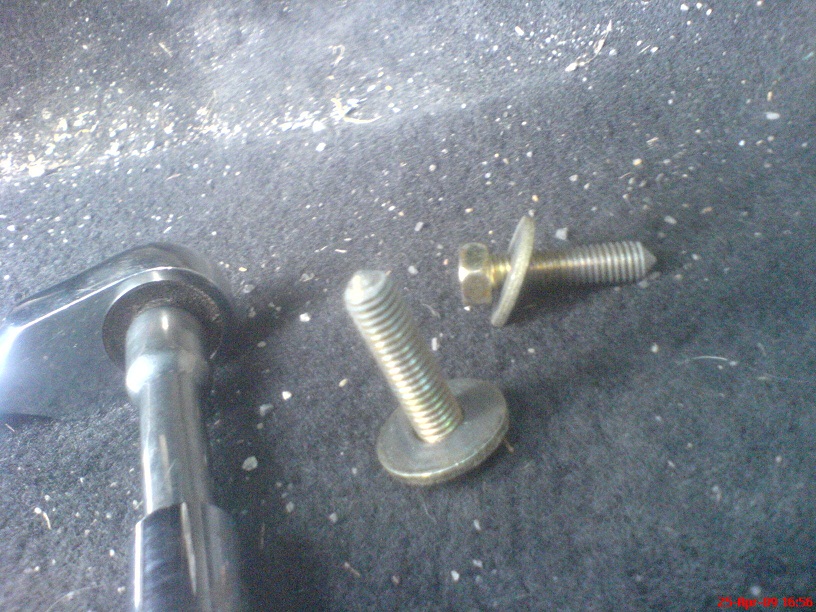
There are four bolts on the bottom of the steering column which you can ignore.
Why am I talking about and posting a pic of something you can ignore? Because the first time I was under there I took them out thinking it'd be useful. It's not.

The two bolts you really want are deeper in, on either side of the steering column. They're 12mm. Remove both of these and the steering column will drop.
Disclaimer : I have a ReSpeed steering rack. I don't know if this works with a stock steering box. It's possible that with the stock steering box the column won't be able to move, someone will have to chime in and tell us.
So with my ReSpeed rack, there is enough slack that the steering wheel drops almost all the way down to the seat - just enough to get clearance to take the console out without having to remove the steering wheel.
[img]https://www.rx7club.com/attachment.php?attachmentid=341231&stc=1&d=1240764 479[img]
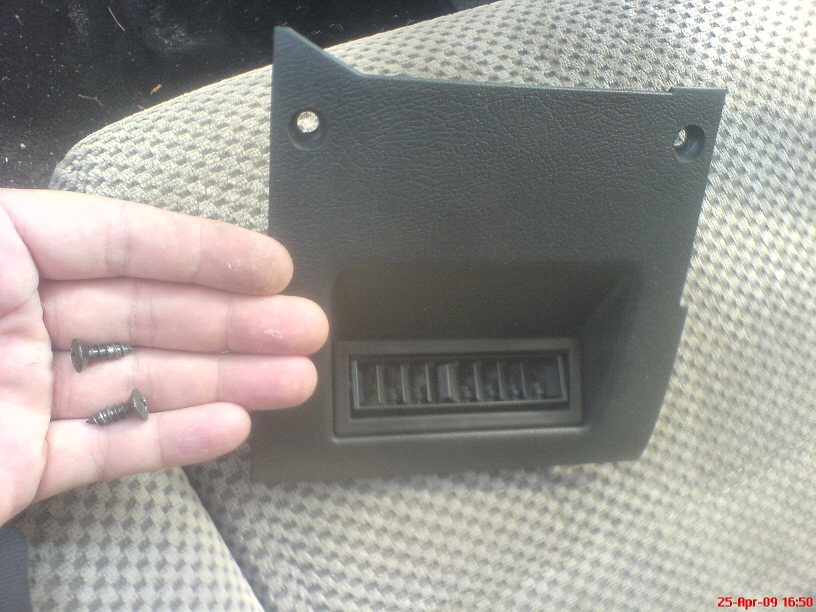
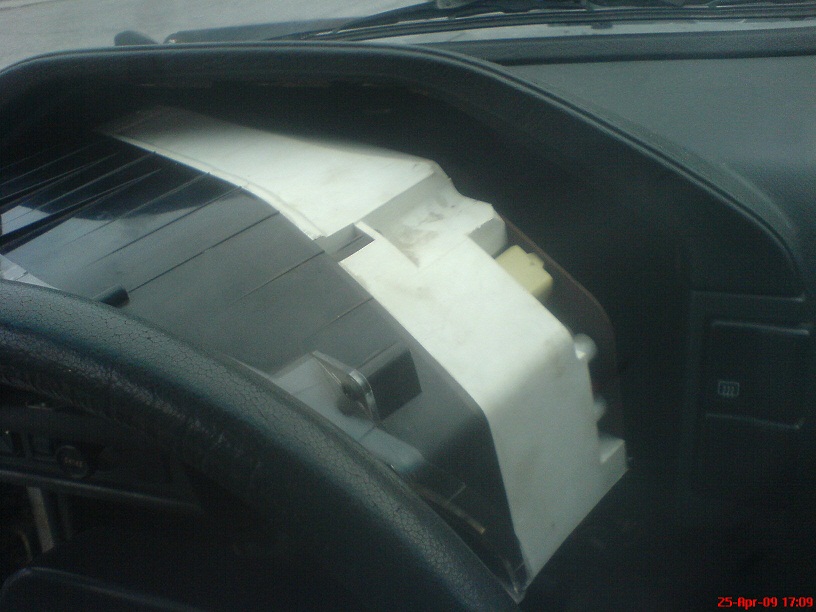
So now that we've got enough clearance, we can start to remove the black plastic cover that sits around the gauge cluster opening to make it look presentable.
There are two screws on the bottom.....
Why am I talking about and posting a pic of something you can ignore? Because the first time I was under there I took them out thinking it'd be useful. It's not.
The two bolts you really want are deeper in, on either side of the steering column. They're 12mm. Remove both of these and the steering column will drop.
Disclaimer : I have a ReSpeed steering rack. I don't know if this works with a stock steering box. It's possible that with the stock steering box the column won't be able to move, someone will have to chime in and tell us.
So with my ReSpeed rack, there is enough slack that the steering wheel drops almost all the way down to the seat - just enough to get clearance to take the console out without having to remove the steering wheel.
[img]https://www.rx7club.com/attachment.php?attachmentid=341231&stc=1&d=1240764 479[img]
So now that we've got enough clearance, we can start to remove the black plastic cover that sits around the gauge cluster opening to make it look presentable.
There are two screws on the bottom.....
Thread Starter
Joined: May 2002
Posts: 5,972
Likes: 37
From: Ottawa, Soviet Canuckistan
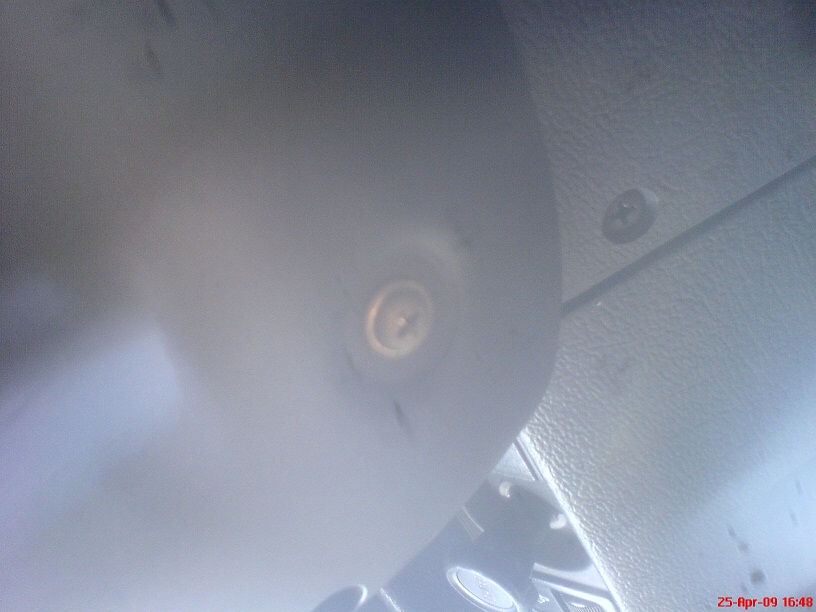
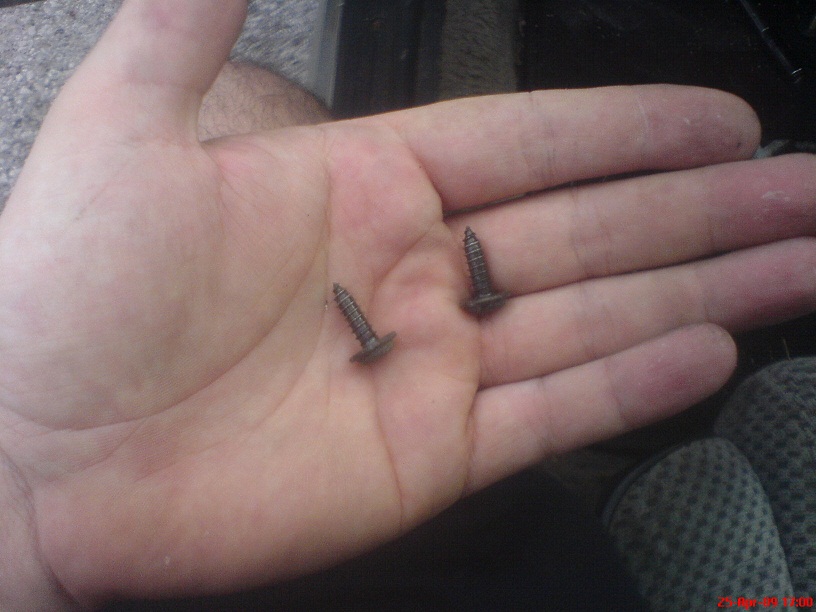
... and two more on top
and the screws look like this
What's nice about the cluster removal is that almost all the screws look different in some way, so it's easy to identify the ones that went with each step of the process.
At this point you can pull the black plastic trim piece free, giving us access to the screws holding the gauge cluster in place
Last edited by vipernicus42; Apr 26, 2009 at 12:13 PM.
Thread Starter
Joined: May 2002
Posts: 5,972
Likes: 37
From: Ottawa, Soviet Canuckistan
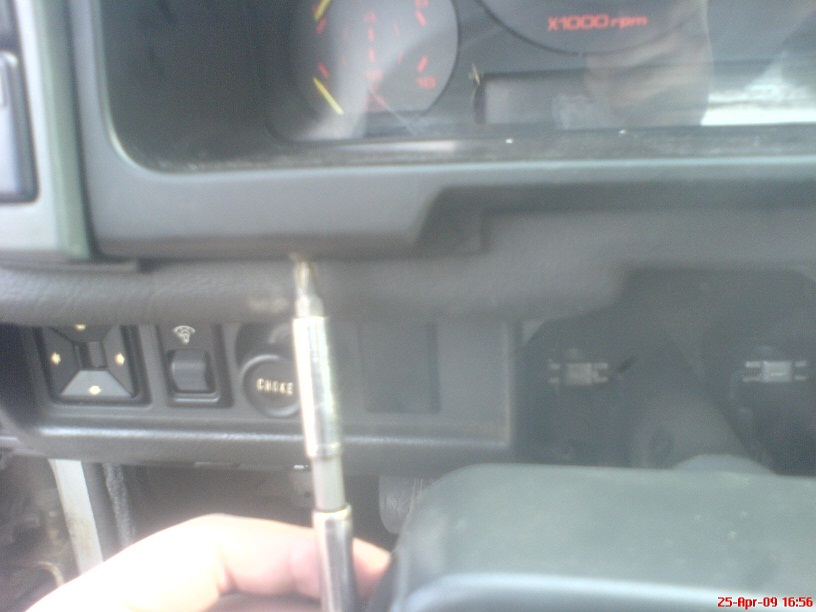
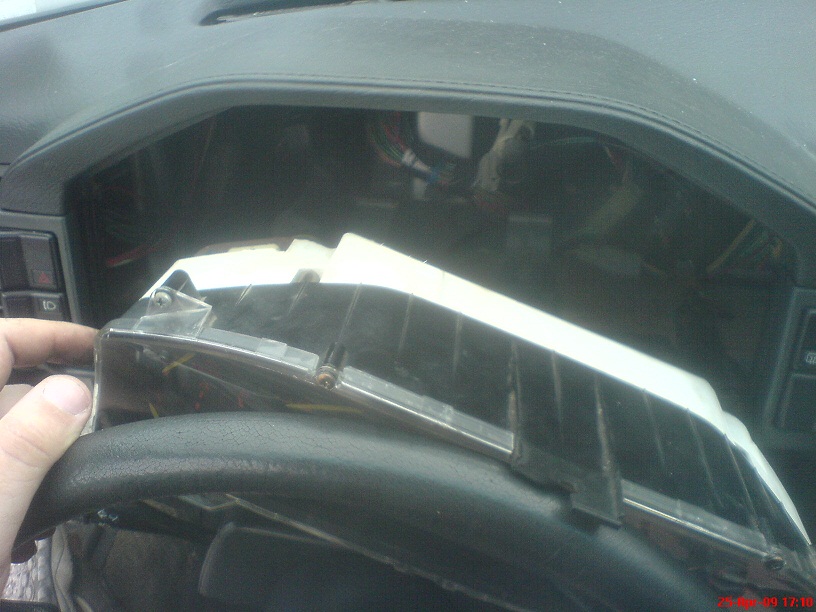
There are two screws at the bottom, and one at the top in the centre.
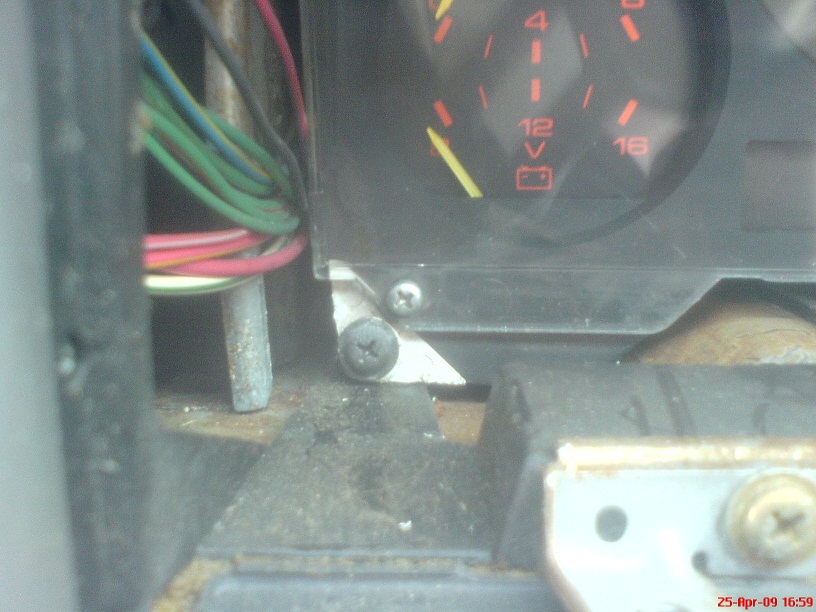
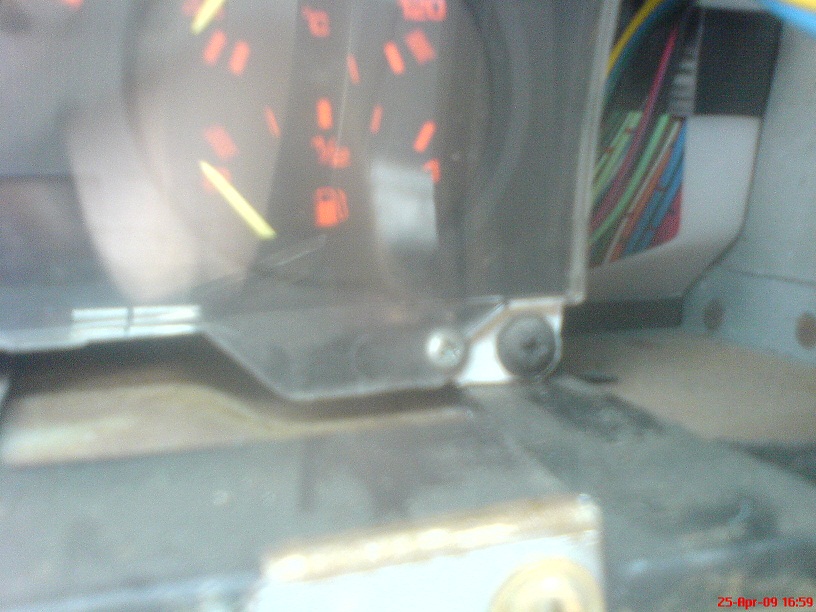
At this point, pop the hood and get out of the car. You need to slide the boot which seals the hole around the speedo cable down far enough that you get enough slack in the cable to pull the gauge cluster out.
At this point, pop the hood and get out of the car. You need to slide the boot which seals the hole around the speedo cable down far enough that you get enough slack in the cable to pull the gauge cluster out.
Thread Starter
Joined: May 2002
Posts: 5,972
Likes: 37
From: Ottawa, Soviet Canuckistan
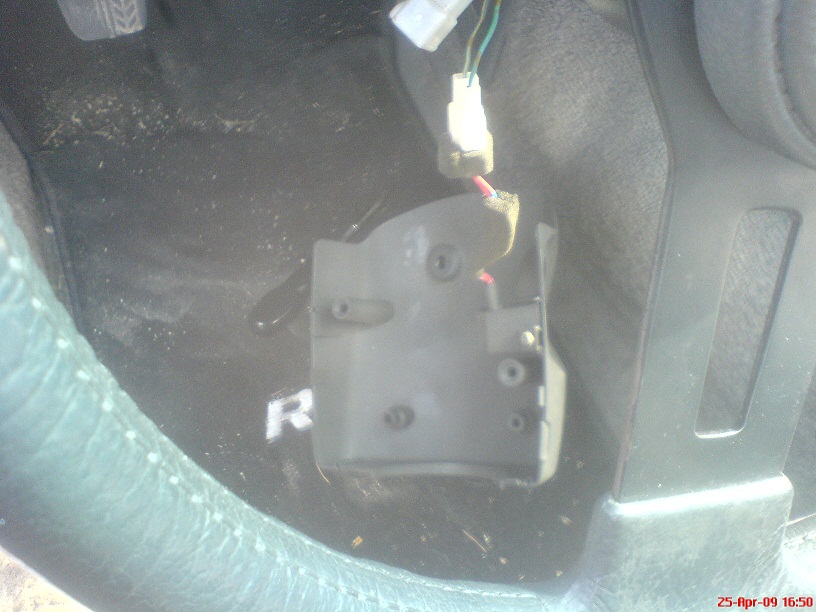
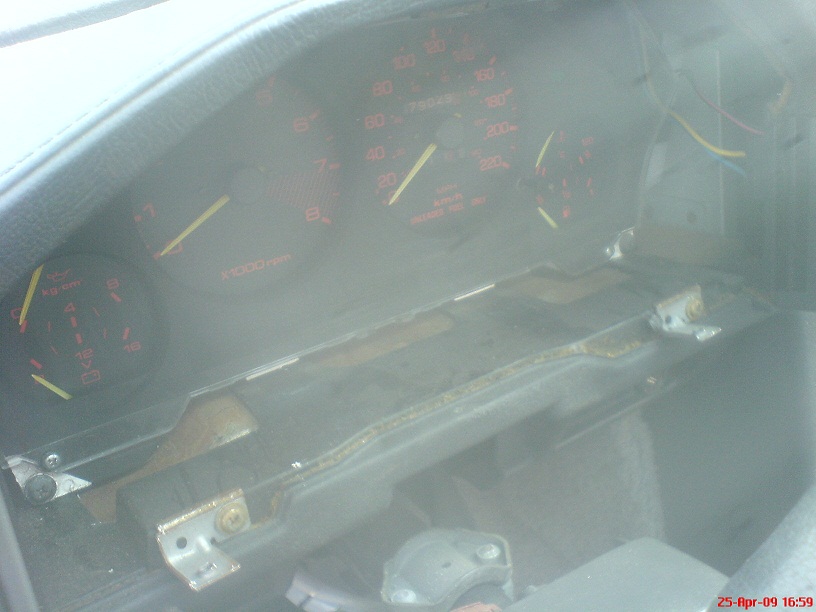
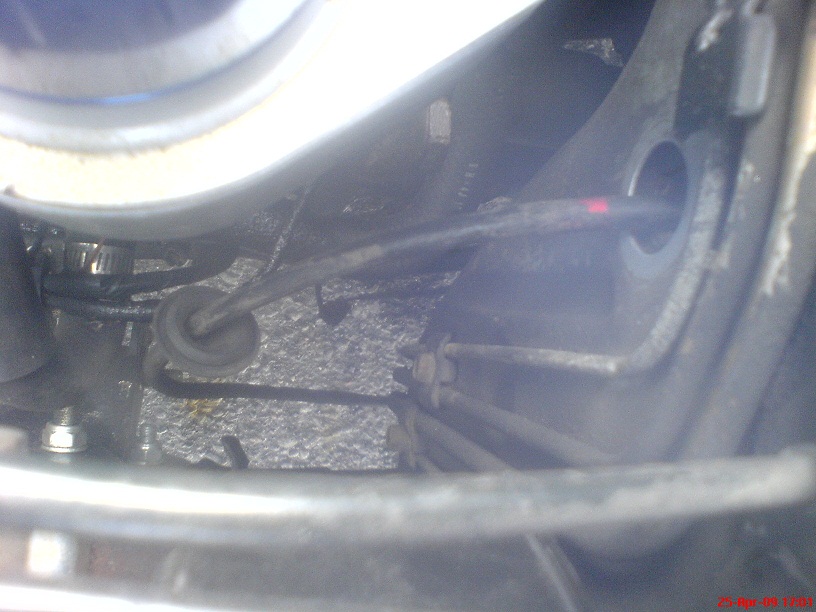
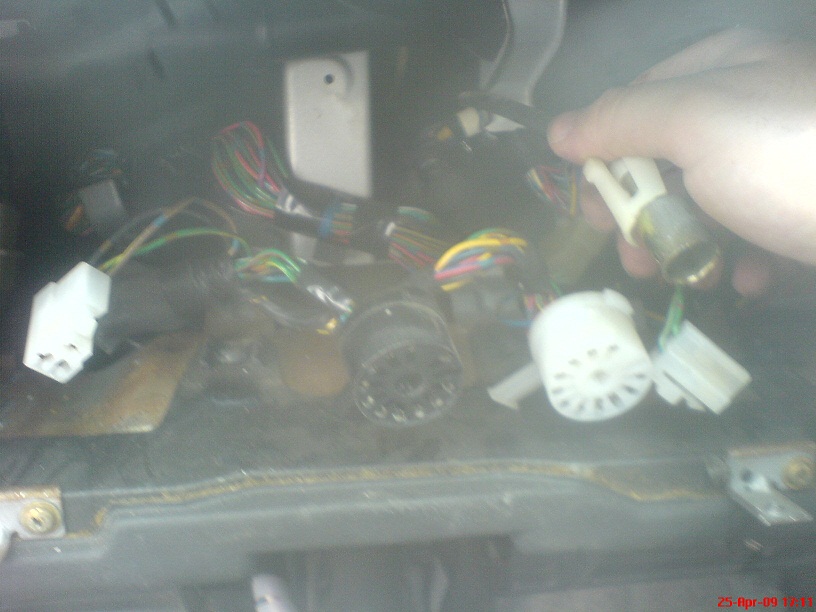
You should now be able to tilt the cluster forward enough to give you access to remove the various connectors.

There are two 2-pin plastic connectors, two large round multi-pin connectors and the speedometer cable. The speedo cable isn't held in place by anything (at least it wasn't on mine) so it can just pull straight out, as can the rest of the electrical connectors. Many of them looked like they had tabs that would hold them in place but the tabs didn't attach to anything.
The gauge cluster can't come straight out, so you'll need to play with it. Tilt it forward, push it back into it's recess, then pull one side out. It comes out kind of tilted and sideways. Play with it, you'll figure it out, just be slow and careful so you don't break anything or hurt your fingers in the process.
And that's it. Your gauge cluster is now removed. Here's a good pic which also shows the connectors and speedo cable so you can get an idea of how they look.
Remember kids, installation is the reverse of removal... and don't worry if getting the gauge cluster in and out of its recess is difficult. The pics make it look easy... it's not particularly *hard* but it does take a bit of fiddling around to get it in and out.
Have fun guys,
Jon
Thread Starter
Joined: May 2002
Posts: 5,972
Likes: 37
From: Ottawa, Soviet Canuckistan
.... Now that I think about it... I don't think there was actually a need to remove the cover underneath the steering wheel... I don't think it got in the way of anything. Oh well, it's not hard to remove and put back, so I did it anyway.
Someone will need to chime in with the answer to whether or not the steering column has that much slack with the stock steering box in place. If not, you'll probably have to remove the steering wheel which IMHO is more of a pain in the ***. The nylock nuts that hold the steering wheel on should be replaced every time you remove the steering wheel, and getting it back on in exactly the right place is never an easy task.
Jon
Thread Starter
Joined: May 2002
Posts: 5,972
Likes: 37
From: Ottawa, Soviet Canuckistan
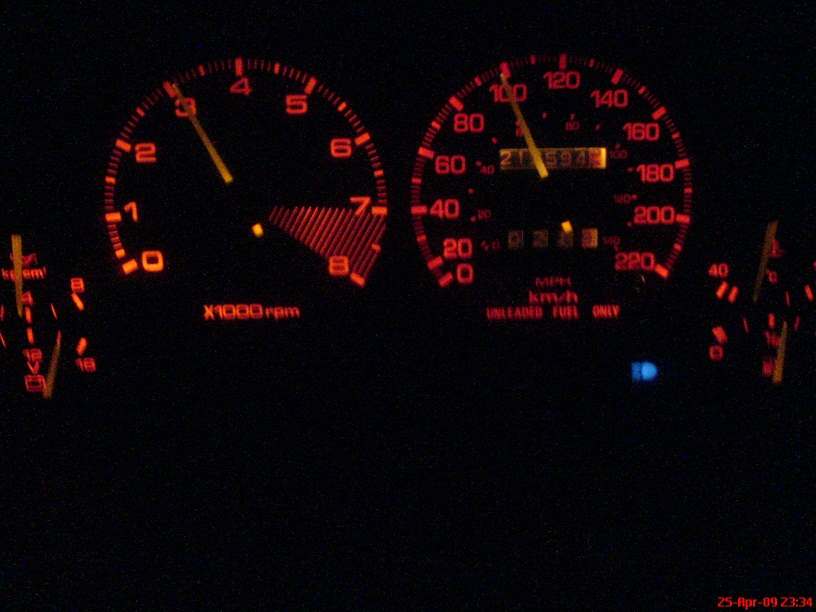
So finally, after all is said and done I have my original speedometer, with it's original odometer reading, sitting in the replacement gauge cluster where all the other gauges work.
- The "broken tach" on the new cluster was actually a dead trailing ignitor, which I replaced.
- The "broken fuel gauge" on the new cluster was actually my tank being empty of fuel (go figure!)
- and the broken speedometer on the new cluster was *actually* broken, but since I wanted my old one anyway, it worked out in the end.
So here's a pic of what everything looks like now, taken at about 3am this morning. It's tough to take a pic and drive at the same time, especially considering how bumpy the roads are here.... but you get the idea. I'm a happy camper indeed!
Thanks for the tutorial Jon, that would be a nice one to have in the archive for the next time I have to get that bugger out.
It's strange seeing the speedo marked off in Canuckistanian units instead of American units

It's strange seeing the speedo marked off in Canuckistanian units instead of American units
Thread Starter
Joined: May 2002
Posts: 5,972
Likes: 37
From: Ottawa, Soviet Canuckistan
Lol I knew someone was going to mention that!
And it's not just the speedo....
The speedometer is in km/h
The temp gauge is in degrees C
The Fuel gauge goes from 0 to 1/2 to 1
The oil pressure gauge is in kg/cm2
The way it *should* be. So basically the only things that are the same are the voltage gauge and tach!
You Americans are so freakin' weird, lol.
I'll copy the thread to the archive and clean it up tonight.
Jon
Thread Starter
Joined: May 2002
Posts: 5,972
Likes: 37
From: Ottawa, Soviet Canuckistan
There is *one* metric measurement that bothers me. L/100km, the standard measurement of fuel efficiency. To me it seems more informative to know how far you're going on a litre of gas, rather than how many litres it takes to go a hundred clicks... So whenever I do gas mileage comparisons I always switch it over to km/L, the way MPG works. It just makes more sense in my head.
Jon

Thread
Thread Starter
Forum
Replies
Last Post
maikelc
3rd Generation Specific (1993-2002)
8
Aug 24, 2015 11:04 AM
bad, bumpy, car, cluster, discrepancies, discrepancy, instrument, malfunction, mo, odometer, ohio, parkville, replacement, roads, rx7, speedometer