
getting ready to replace my fuel pump

Thread Starter
Junior Member
Joined: May 2010
Posts: 21
Likes: 0
From: Tennessee
getting ready to replace my fuel pump
I have taken the old fuel pump out of my 1984 12A. I ordered the replacement and it should be on its way. I was going to drain my gas tank or at least fill it up with a little gas, slosh it around and drain it through the drain plug. Problem is, my car has a black tar-type rust protectant underneath. I am afraid to break that plug loose. Is there any other way to get the possible rust and other stuff out of the tank? I wouldn't want to run it through the new pump and filter. Or maybe its fine to try and pry that drian-plug free? Anyone else deal with that black rust proofer?


Already IS one. Change it now. Check it again after the new pump is in and been running a while.
If your tank has issues internally, it should be drained, dropped and cleaned professionally at a good radiator shop. Just "sloshing it around" will likely cause MORE problems if something is going to get loosened up doing this.
Stu Aull
80GS
Alaska


just remove the drain plug. it won't hurt anything to break the sealant around the plug. you can always use some spray type undercoating once you are finished with the tank and recoat the plug if you're worried about it.
here's some info and my writeup on dropping the tank should you need to do that. others may do it differently, but this is what i've found works. dropping the tank is no big feat. just make sure you drain all of the gas first. it makes a big difference when removing and reinstalling the tank. pop open the filler door and remove the three 8mm bolts holding the filler neck on. push the filler neck through the opening. it may be a little tough at first but the seal will unstick and it will push through.
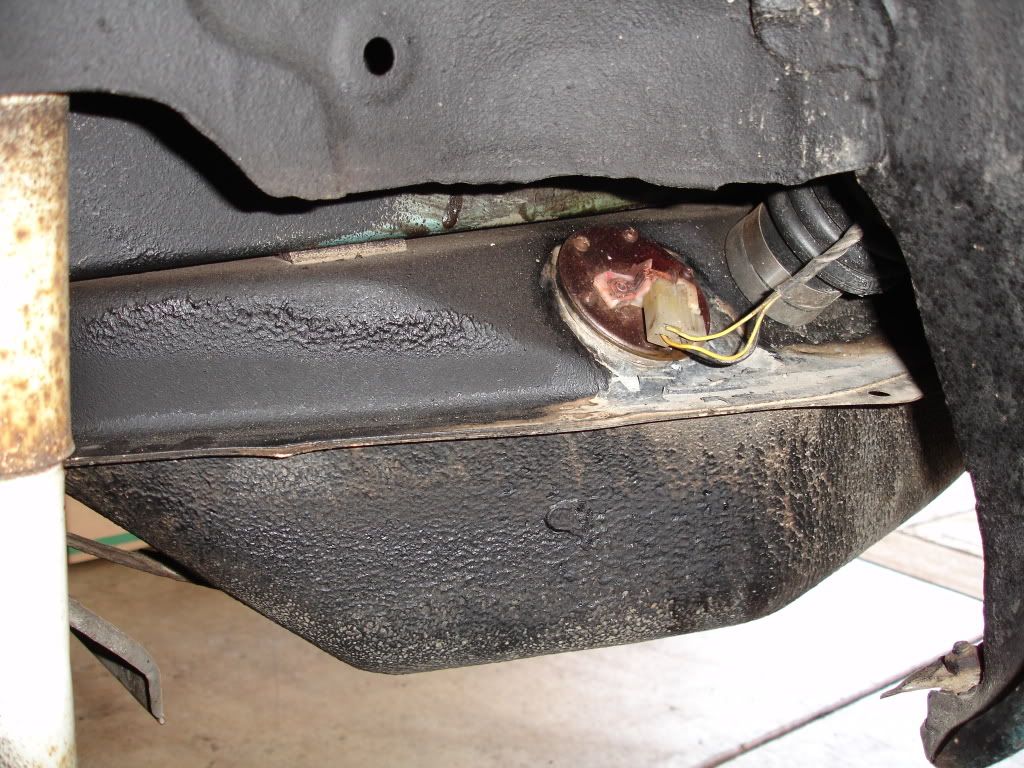
next, get under the car and remove the three lines ahead of the fuel tank. eaiser to do this now rather than when the tank is coming down. then you'll want to remove the small plastic splash guard in the left wheel well. this will give you access to the sending unit. unplug it. chances are the connector will fight you a bit coming off and will be stiff. be patient with it.
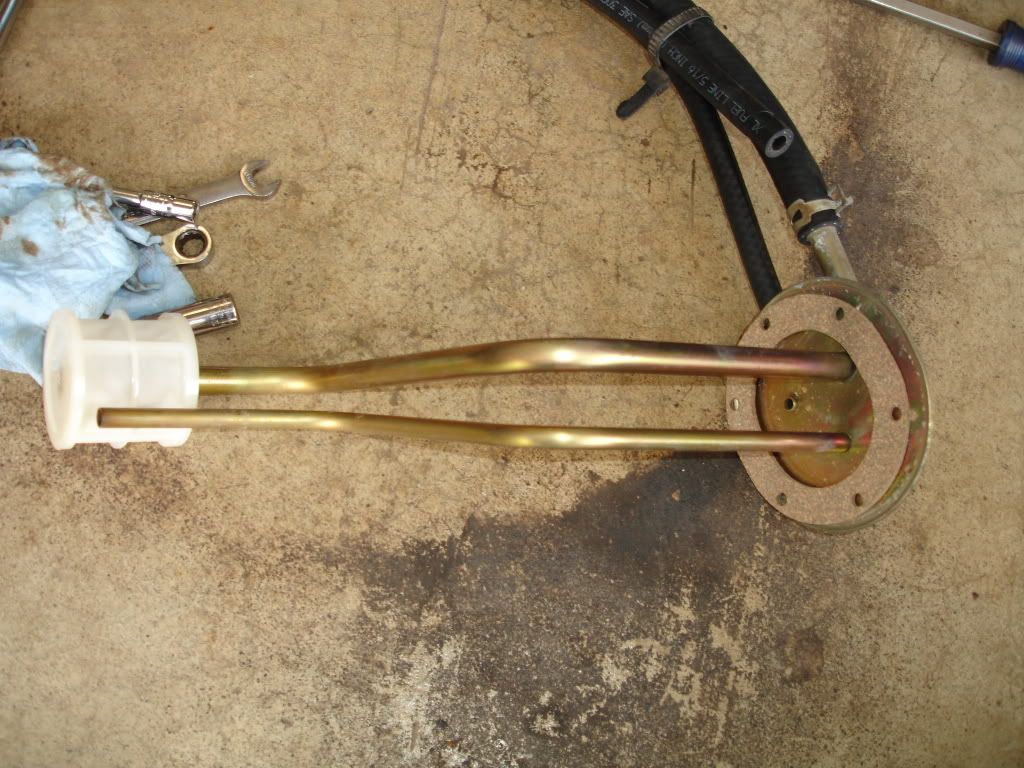
you will then want to remove the two 14mm bolts holding the tank up, move the straps down, and work the tank down. get the tank on the ground and remove the pickup lines and the fuel level sender. you may find the screws for the fuel level sender very rusty and difficult to remove..of course you are in NC so i doubt that thats the case... you can now look in the tank and make a determination of where you want to go from there. when the tank is clean you will want to replace the gasket for the fuel level sender and the gasket for the pickup lines. you may also want to replace the pickup screen that attatches to the pickup lines. this can be clogged or ripped or otherwise in poor condition. the part numbers for replacement parts from mazda are as follows:
pickup/return line gasket: FA54-42-182
fuel level sender gasket: 8871-60-962A
pickup screen: GA97-42-113
fuel tank pad: 8871-42-761
fuel level sender (if yours is bad. new sender comes with gasket): FA54-60-960
next, get under the car and remove the three lines ahead of the fuel tank. eaiser to do this now rather than when the tank is coming down. then you'll want to remove the small plastic splash guard in the left wheel well. this will give you access to the sending unit. unplug it. chances are the connector will fight you a bit coming off and will be stiff. be patient with it.
you will then want to remove the two 14mm bolts holding the tank up, move the straps down, and work the tank down. get the tank on the ground and remove the pickup lines and the fuel level sender. you may find the screws for the fuel level sender very rusty and difficult to remove..of course you are in NC so i doubt that thats the case... you can now look in the tank and make a determination of where you want to go from there. when the tank is clean you will want to replace the gasket for the fuel level sender and the gasket for the pickup lines. you may also want to replace the pickup screen that attatches to the pickup lines. this can be clogged or ripped or otherwise in poor condition. the part numbers for replacement parts from mazda are as follows:
pickup/return line gasket: FA54-42-182
fuel level sender gasket: 8871-60-962A
pickup screen: GA97-42-113
fuel tank pad: 8871-42-761
fuel level sender (if yours is bad. new sender comes with gasket): FA54-60-960
here are the instructions with pics for the tank removal:
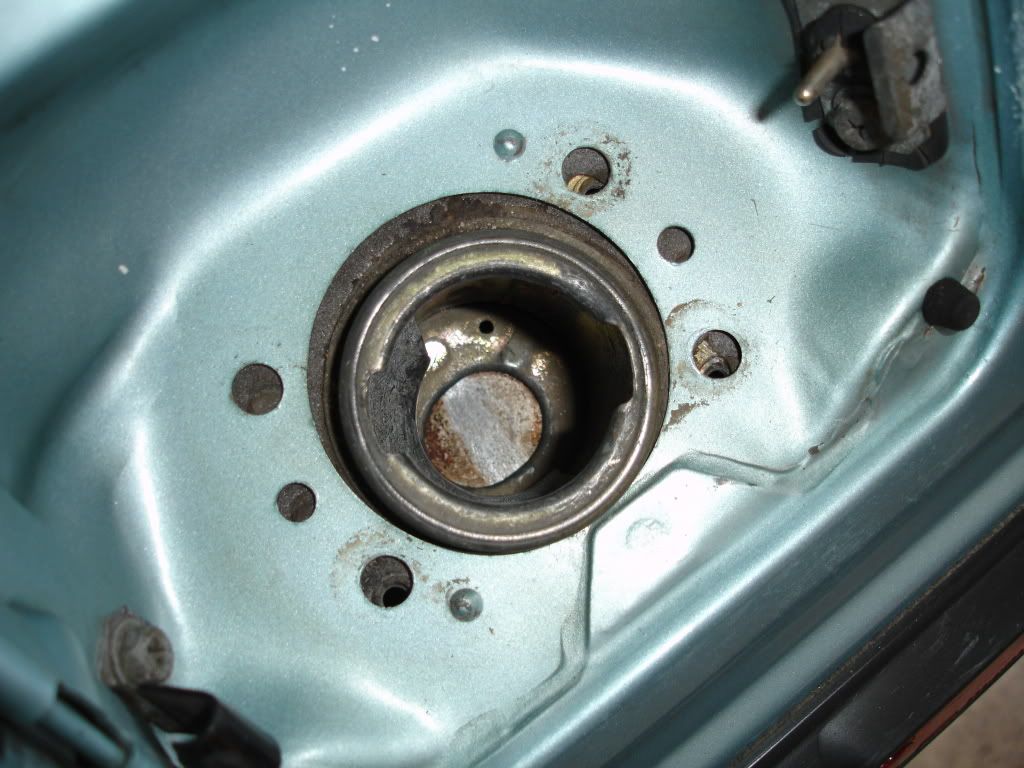
first, jack the car up, put it on stands, remove the left rear wheel, remove the plastic splash shield in the left wheel well. it is held on by two 10mm bolts and a 10mm nut. this will expose the fuel level sender which needs to be unplugged at this step:
next, open the filler door, remove the gas cap and the three 8mm bolts, lift off the plate and push the neck down until it breaks away from the body:
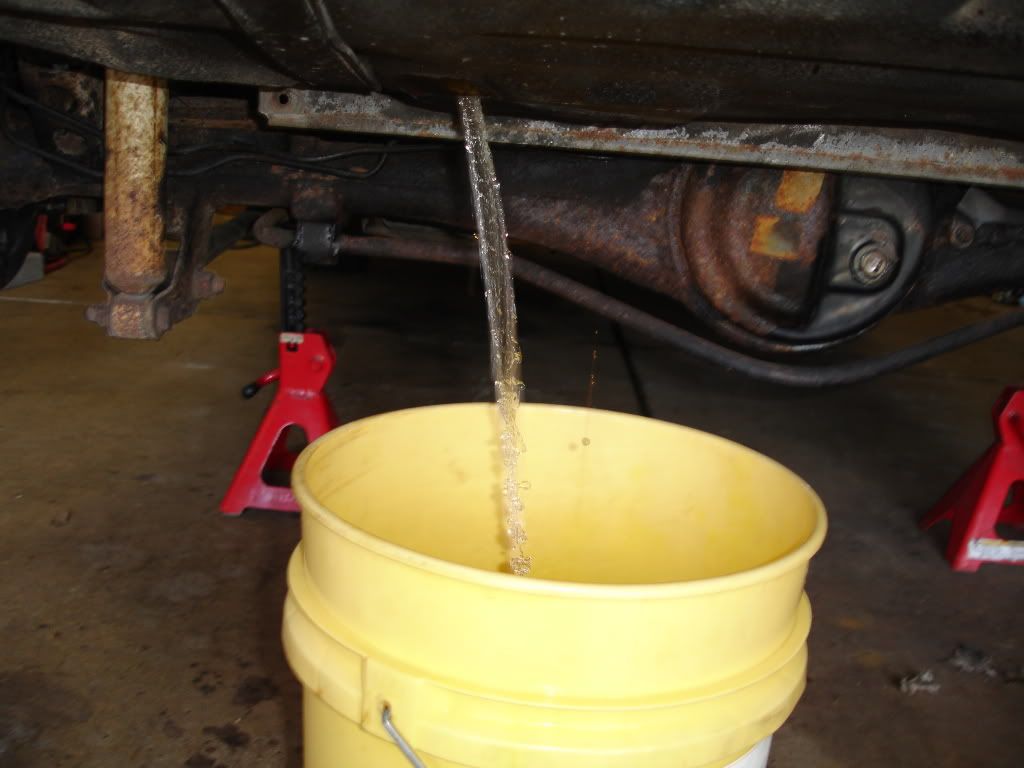
now is a good time to drain the gas. place a suitable bucket under the drain plug and remove the drain plug. a clean 5 gallon bucket works great and you can empty the bucket into a 5 gallon gas can or cans:
after the tank is drained, reinstall the drain plug and remove the clamps from the feed, return, and vent lines and slide the hoses off:

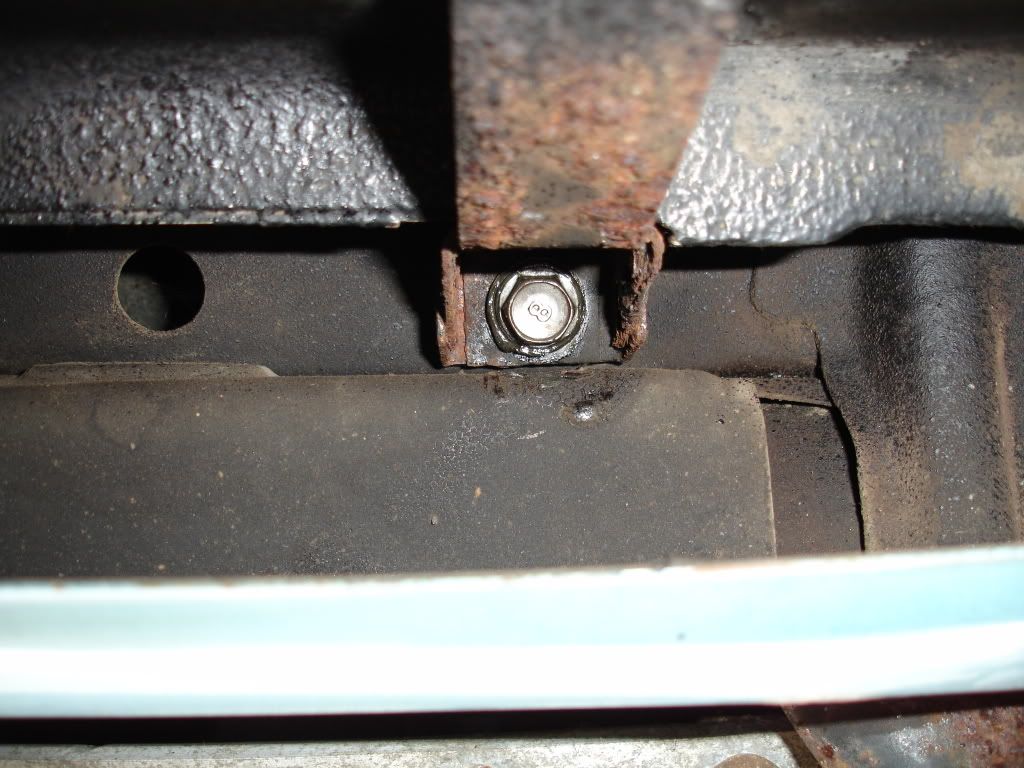
once thats done, remove the 14mm bolt from from each tank strap, they'll be in the front of the straps towards the rear bumper and you'll want to swing the straps down:
when the tank starts coming down, wiggle the filler neck out of its opening. once you do this, the tank will finish coming down (all the while you are supporting the tank with your leg or suitable support)

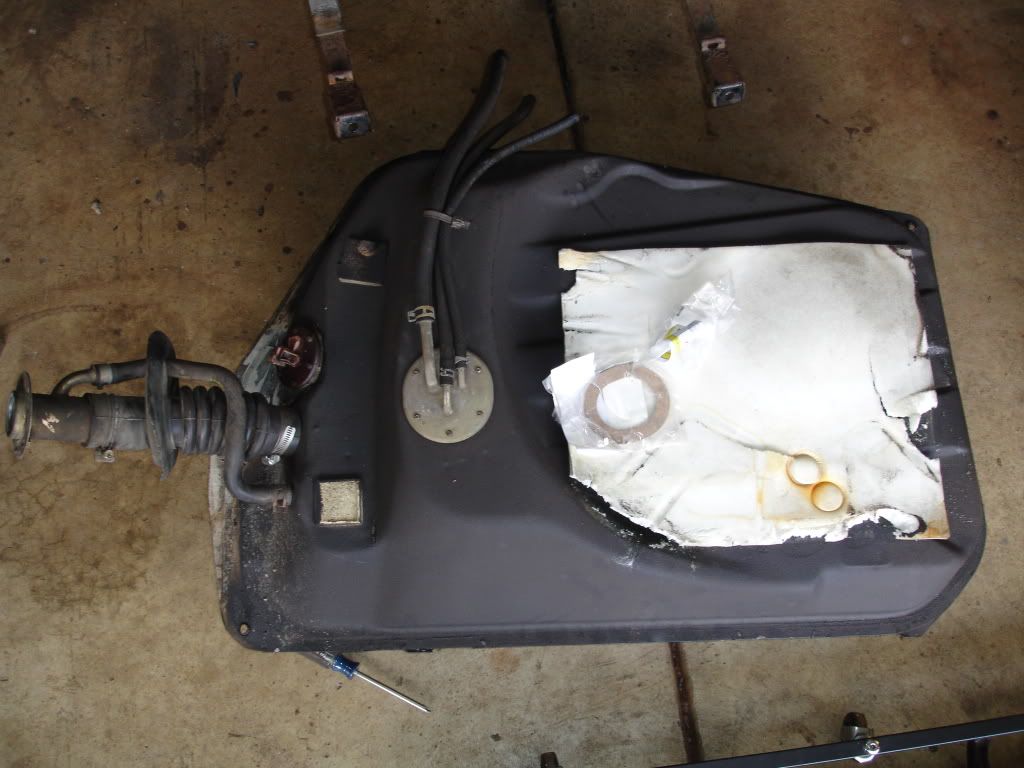
the tank will be down and ready for service:
once you are satisfied with the tank, install is the reverse of removal. wiggling the filler neck into its opening while installing the tank at an angle is the toughest part. once everything is set in place, you'll bolt the straps up, install the lines, install the filler hose and cap, connect the sender connector, install the splash shield, install the tire, lower the car down, fill the tank with gas, start, and check for leaks.
here is the new pickup gasket and fuel level sender with screws installed
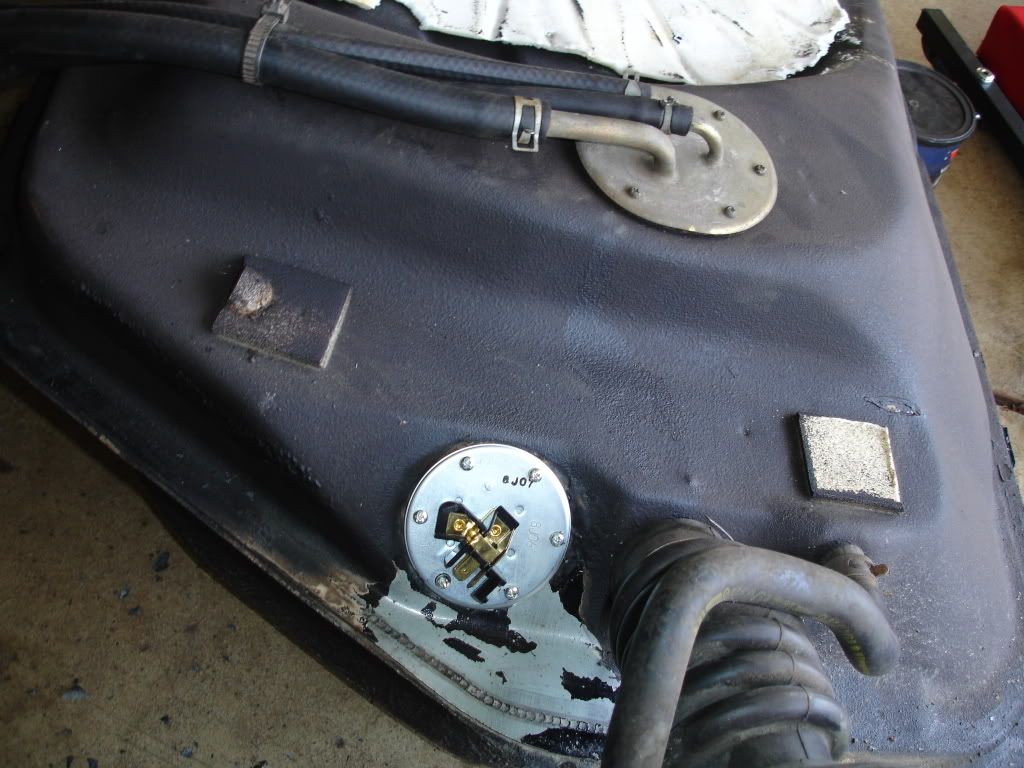
reinstall the tank and add a coat of undercoating to preserve the sender and protect it and the screws from rust. you may also want to clean and undercoat the entire top of the tank while it out to preserve it:
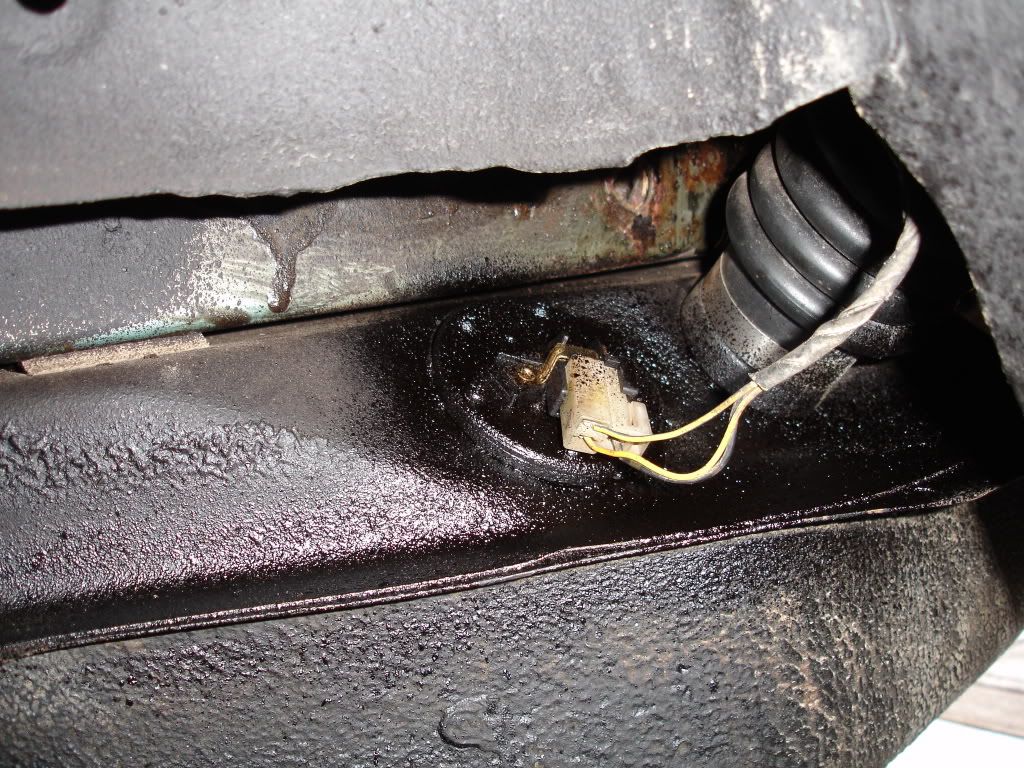
first, jack the car up, put it on stands, remove the left rear wheel, remove the plastic splash shield in the left wheel well. it is held on by two 10mm bolts and a 10mm nut. this will expose the fuel level sender which needs to be unplugged at this step:
next, open the filler door, remove the gas cap and the three 8mm bolts, lift off the plate and push the neck down until it breaks away from the body:
now is a good time to drain the gas. place a suitable bucket under the drain plug and remove the drain plug. a clean 5 gallon bucket works great and you can empty the bucket into a 5 gallon gas can or cans:
after the tank is drained, reinstall the drain plug and remove the clamps from the feed, return, and vent lines and slide the hoses off:
once thats done, remove the 14mm bolt from from each tank strap, they'll be in the front of the straps towards the rear bumper and you'll want to swing the straps down:
when the tank starts coming down, wiggle the filler neck out of its opening. once you do this, the tank will finish coming down (all the while you are supporting the tank with your leg or suitable support)
the tank will be down and ready for service:
once you are satisfied with the tank, install is the reverse of removal. wiggling the filler neck into its opening while installing the tank at an angle is the toughest part. once everything is set in place, you'll bolt the straps up, install the lines, install the filler hose and cap, connect the sender connector, install the splash shield, install the tire, lower the car down, fill the tank with gas, start, and check for leaks.
here is the new pickup gasket and fuel level sender with screws installed
reinstall the tank and add a coat of undercoating to preserve the sender and protect it and the screws from rust. you may also want to clean and undercoat the entire top of the tank while it out to preserve it:
Trending Topics
Thread Starter
Junior Member
Joined: May 2010
Posts: 21
Likes: 0
From: Tennessee
Hey, great pictures! I am going to pour a little gas in it, drain it, and see what it looks like. Its been empty for at least 2 years. When I took the old pump off, some rusty water/ gas dripped out, but only a few drips. If its chunky, I will drop the tank and see what I can do with it.
Thread Starter
Junior Member
Joined: May 2010
Posts: 21
Likes: 0
From: Tennessee
Ok... this project too a slight turn for the worse. But better I find out now than later. The fuel tank has obvious rust inside around the dran plug area. As I put torque on the drain plug the tank was spongy around it. I can see the ring of rust through the spray on protectant. If I remove that plug, it will rip a hole in the tank.
That leads me to this. Since I have rust damage in the tank, can I take it somewhere to be repaired? I saw radiator shop above, but dont know if that means they can weld / braze pieces to replace rust. There may be a few rusty spots along the bottom of the tank. I am going to no doubt be dropping the tank. Thanks for the pictures abve.
That leads me to this. Since I have rust damage in the tank, can I take it somewhere to be repaired? I saw radiator shop above, but dont know if that means they can weld / braze pieces to replace rust. There may be a few rusty spots along the bottom of the tank. I am going to no doubt be dropping the tank. Thanks for the pictures abve.
if the tank is as bad as you say it is then its time to replace the tank. you may however just be seeing the undercoating breaking apart. i havent seen many southern 7's with rotten tanks that bad....and for that matter i have never seen a 7 with a tank that rotten that would hold gas in the first place. even in ohio the bottoms never rust out..its usually the top and the seam. i would go ahead and remove the drain plug, especially if you plan on dropping the tank anyways.
Thread Starter
Junior Member
Joined: May 2010
Posts: 21
Likes: 0
From: Tennessee
Its rotten, but only in the little valley that the plug is in (maybe 3in x 5in) . I am guessing there was a little pool of water and gas sitting in there for years. You can see a discolored ring where the gas slowly seeped through, like a roof leak stained ceiling. Since it isnt actually broken through yet, I am thinking an epoxy based sealer can fill in the rusted valley. If I go that route, the drain plug will be permanently sealed in. If I remove it, it will rip a hole in the tank.
Thread Starter
Junior Member
Joined: May 2010
Posts: 21
Likes: 0
From: Tennessee
Yep... my tank is toast. Tons of rust inside, flaking away and filling my tank. The pictures above were spot on!
Any tips on finding one locally? I posted to parts wanted on this site for starters.
Any tips on finding one locally? I posted to parts wanted on this site for starters.
Thread Starter
Junior Member
Joined: May 2010
Posts: 21
Likes: 0
From: Tennessee
Update... its been a while but I put the new fuel pump in and replaced the hoses from the tank to the filter to the pump to the steel line that goes to the carb. (Basically all of them except the returns). I just need to attach the tank hoses, raise and install the tank, and attach the level sender.
Quick question: Do I want to unhook the fuel line from the carb and let the pump push a little fuel through there before I try to start this thing? The gas that dripped out of that line, under the car) was yellow like pee and smelled like turpentine.
Quick question: Do I want to unhook the fuel line from the carb and let the pump push a little fuel through there before I try to start this thing? The gas that dripped out of that line, under the car) was yellow like pee and smelled like turpentine.
Thread Starter
Junior Member
Joined: May 2010
Posts: 21
Likes: 0
From: Tennessee
Thanks for the tip about the quart container. I have plenty of those laying around. Since this car has been sitting for a few years, is it a good idea to run carb cleaner (gasoline additive) through this first batch of gas? I have no idea how well this carb operates at this time. I may need to tap on it a little to free it up inside. But does the fuel additive really clean it up at all?
Thread Starter
Junior Member
Joined: May 2010
Posts: 21
Likes: 0
From: Tennessee
Alright... Tank is replaced along with the pump and hoses. Since this project has been sitting for a few years I had another question. I have seen here and there that people dress the rotors with various things like oil and ATF to lube and moisten the seals. Does this seem like something I should try before I start this thing? How do you recommend I do this? I am excited that I am making progress on this car.
you have an electric fuel pump. you dont need to do anything. just turn on the key, let the fuel bowl fill up for about 10 seconds, pump the pedal to prime the carb and start away.
but if your motor has been sitting for quite sometime, add a cap full of regular oil on his barrel (thru the carb of course), handcrankk 5 full revs, install new plugs or clean dry plugs and start.
but if your motor has been sitting for quite sometime, add a cap full of regular oil on his barrel (thru the carb of course), handcrankk 5 full revs, install new plugs or clean dry plugs and start.
Thread Starter
Junior Member
Joined: May 2010
Posts: 21
Likes: 0
From: Tennessee
I have good news and bad news. First the good news... it started! The bad news... it looks like my fuel pump cant keep up. I purchased a Carter 4 psi pump just to get this thing running but either its defective, or it cant keep up because my car isnt stock and I dont know it. It starts by itself after letting the pump run for a a minute or two to fill the reservoirs then turning the key. But after about 25 seconds at idle it seems to use up all the gas and dies. I have to let it pump again to fill the carb, then the same thing happens. It runs for about 5 seconds if I am on the throttle. I disconnected the main fuel line to let it pump into an empty oil quart and its a trickle at best. I am guessing I need a beefier fuel pump. Does it sound like I am in the ballpark?
Thread Starter
Junior Member
Joined: May 2010
Posts: 21
Likes: 0
From: Tennessee
Yes, it is a stock carb. I dont think the fuel is the problem anymore. I can get it to run for a minute or two but then the same thing keeps happening. The top two plugs foul out with a gray goop. When it rub it between my fingers it seems like oil, and dirt or carbon, and maybe very fine metal. Its a dark gray paste. Maybe the trailing ignitor? Maybe I have have too much sludge or carbon in the engine?

