
first tear down

Thread Starter
Joined: Nov 2005
Posts: 3,423
Likes: 5
From: springfield,oregon
first tear down
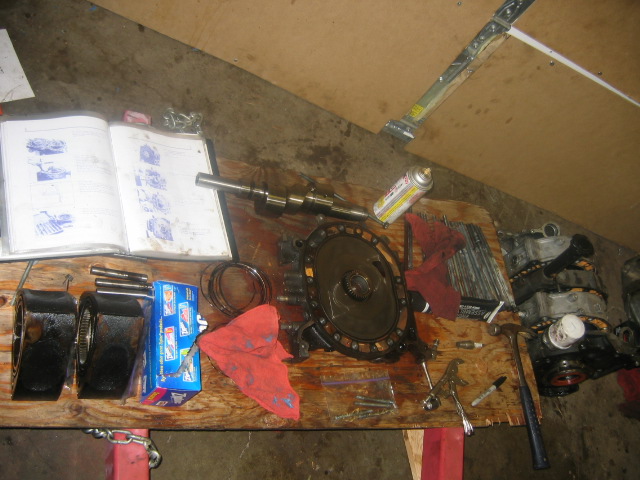
i took the leap and tore into a 12a motor was a great experince
it is rather simple i locked the flywheel with an old alternator bracket and atempted the e shaft nut. Iv read its quite hard so i tryed a few things used my 1/2" air gun wouldnt budge tryed heating it then tryed the gun again still no go. but i ended up puttin a ratchent on and jumped up and down on it worked like a charm. thanks doc
now i didnt have an engine stand so i got some 1/4" plywood put it between my engine lifter legs.And drilled a big whole for the eshaft .
i took all components off the front labeling bolts and oranising which way things went.
continued to take all front stat bolts off and left one on to hold it in place while teardown.flipped the engine on its face to tear her down from the rear.
the hardest part of the whole exercise i would say was taking the long tension bolts out none of my air guns would work.i ended up using a small strong bar and a rather large sledge hammer.
even then it took alot of hits to break any of them lose i did follow the bolt pattern instructions which made sence.. I wont go in to detail but this engines seem rather good there is no chrome flaking or chatter marks in the housings as well as exsesive step wear in the irons im yet to buy tools to messure the tollerances and clean the whole lot up.
i just would like to encourage more people to pick up there ***** and have a go
this will be the first engine i have done and i have four more to do im hoping to pick the best of the litter and build a strong reused 12a
the rebuild is to come but after iv torn down the rest i reckon i will become very familiar with parts and how things work ill allso have alota spare part to practise doing hald brigys
Good job Chris. Jumping in with both feet and no life preserver is often the best way to learn. With practice, each engine wil get easier and quicker to tear down. Have fun.

POWERED BY DINOJUICE
Joined: Nov 2004
Posts: 244
Likes: 0
From: vancouver wa
id love to jump in and do my own rebuild i just lack a garage to do it in{my 62falcon project lives there at the moment}. i was thinking the motor isnt all that heavy so maybe id drag it down into the basement and do it in there
Way to go Blwfly. I sometimes have more fun tearing things apart then putting them back together,lol. Recommendation on your Air gun, make sure you are using a small amount of air tool oil each time you use her. Also sounds like your compressor may not be giving enough air. The tension bolts with a 1/2 impact should come right off. I took the last 2 motors apart where I am without my Air tools(eveythings at home) with simple hand tools. The tension bolts just need a quick snap to break them free.
Don't forget to post up some pics of the housings. What shape did the apex seals look in?
Don't forget to post up some pics of the housings. What shape did the apex seals look in?
Trending Topics
Thread Starter
Joined: Nov 2005
Posts: 3,423
Likes: 5
From: springfield,oregon
the compressor was adjusted to max which is 140 psi
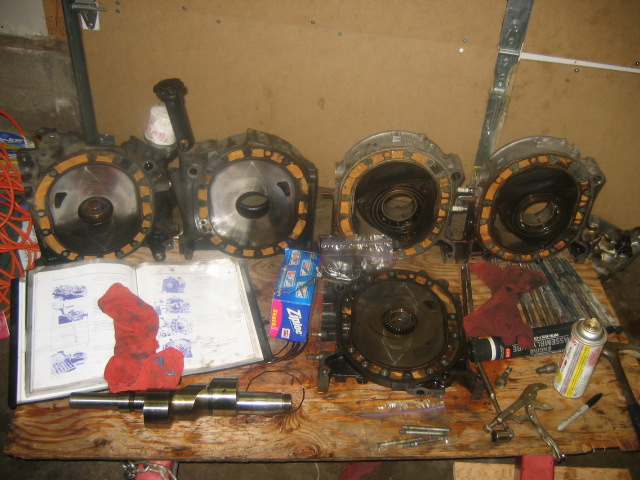
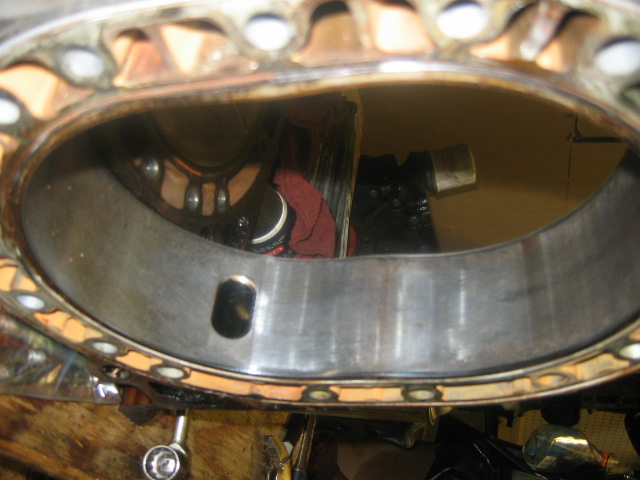
heres some internal pics
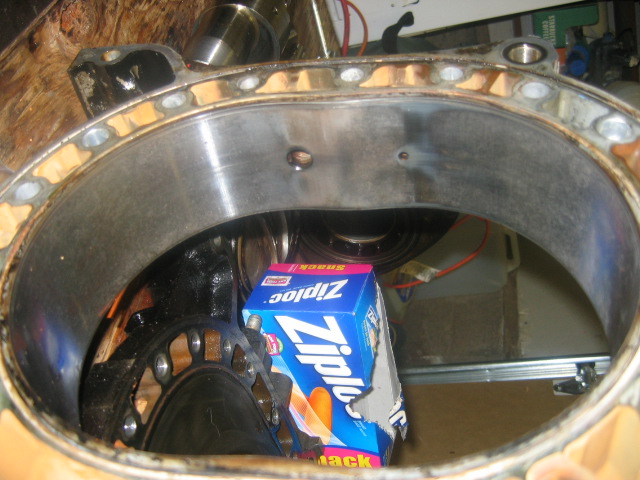
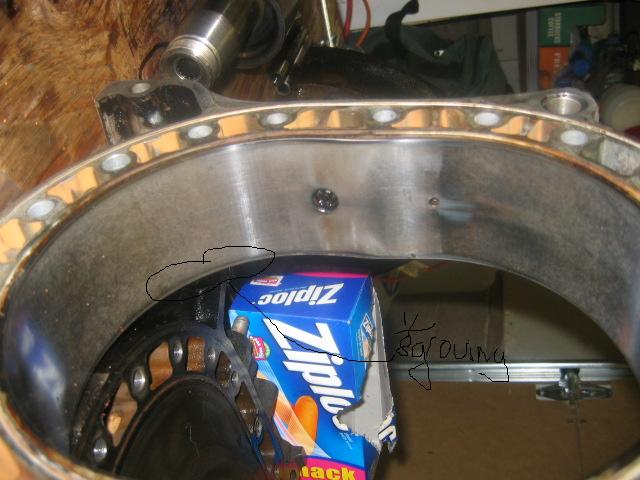
first off is the front housing i can notice about 1/8 of wear which is aperntly normal but may cause lower compression its caussed by the corner apex seal.. correct me if im wrong.
front housing

rear housing
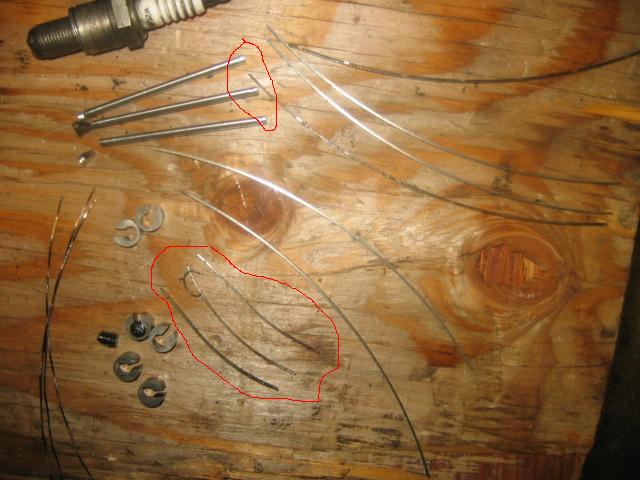
one rotors apex seal etc notices how two of the springs are missshapen
and on the end of all three apex seals theres a tiny scuff in each
heres some internal pics
first off is the front housing i can notice about 1/8 of wear which is aperntly normal but may cause lower compression its caussed by the corner apex seal.. correct me if im wrong.
front housing
rear housing
one rotors apex seal etc notices how two of the springs are missshapen
and on the end of all three apex seals theres a tiny scuff in each
Housings look to be in great shape. If the groove from the apex corner piece isn't too deep, they are definitely reuseable. As far as the springs, that can be caused from overheating or over reving. Knowing you, I'd say the later, lol. You should always replace the springs during a rebuild anyway, so no loss there.

Thread
Thread Starter
Forum
Replies
Last Post
Turblown
Vendor Classifieds
12
Oct 17, 2020 03:25 PM
Jeff20B
1st Generation Specific (1979-1985)
73
Sep 16, 2018 07:16 PM