
Complete Restoration Every Nut, Every Bolt.

Thread Starter
Joined: Sep 2003
Posts: 7,252
Likes: 2
From: Spring Hill TN 37174
Complete Restoration Every Nut, Every Bolt.
Well I am shifting gears with my "Mr.Hankey" project. I was just going to slap on a turbo and run this S4 13b into the ground.. Well Through devine intervention I aquired a 1988 Convertable that is in need of a motor. So I am going to pull the motor out of my GSL-SE and plop it in the vert. THEN the fun will begin!
I am starting a GROUND UP resoration on my GSL-SE removing every nut bolt ect and making it my dream car. I will start by stripping it all the way down to the bare chassis with all the glass/sheetmetal/suspension interior removed and sandblast and undercoat the frame. I will then buy the paint that I will be using (tender blue) and paint the whole frame/ interior chassis tender blue. At the same time I will Paint the fenders, doors,hood, header pannel, headlight buckets and sunroof while they are off the car.
Once the Chassis is painted I will reinstal the windshield and rear glass as well as the doors. I am going to refrain from installing the fenders and header pannel untill the motor is rebuilt and installed. The car is going to be an N/A turbo project and will be a Blowthrough setup with the stock GSL-SE ECU and a 2nd gen Manifold set. I am using a stock intercooler mounted up front.
While the suspension is removed it will be sandblasted and undercoated Black. At that point I will replace the springs up front with a coil over set and the springs in the rear with a set of road race racing beat springs. THe sway bars will then be replaced with the racing beat units. I will replace the front brakes with slotted rotors from powerslot. I will also rebuild all the calipers and replace all the lines. THe master cyl and clutch master will be replaced with rebuilt units. Everything will be new or rebuilt....
I am figuring it will take approximately 200+ hours of work to complete the project all by myself. I think that this will be the only way I can build the car that I will be happy with. Anyways I will post pictures and progress on this thread in the future. WISH ME LUCK!!!

Joined: May 2002
Posts: 5,972
Likes: 37
From: Ottawa, Soviet Canuckistan
I've always wanted to do that.... but you'll need some luck, some help and LOTS of money.
Just to replace every bolt on the car with brand new replacements would be a well over a hundred bucks (you wouldn't believe how many bolts there are and how expensive they can be to get new!)
And it'll be tough work... but worth it.
Personally I'd strip the car to the shell, get a professional restoration shop to do the sandblasting/painting/undercoating. That way I knew it was done right and professionally and I'd never have to worry about it again.
Jon
Edit: Should we start posting our wishlist for the perfect car broken down by category? Because *everything* has room for improvement!
Thread Starter
Joined: Sep 2003
Posts: 7,252
Likes: 2
From: Spring Hill TN 37174
I figured it out by the book used by the Mazda dealer. Basically 200 hours of work including body work and paint. I have torn so many cars apart now that most of the estimates from the service book don't apply to me. I am very knowlageable in sandblasting and painting so I would not pay anyone to do this type of work for me. PLUS I really want to build the car myself. The only thing I am going to pay someone else to do will be the Rebuild on the motor..

Trending Topics

Function > Form
Joined: Nov 2002
Posts: 10,890
Likes: 3
From: Catonsville MD (baltimore suburb)
I'm somewhat doing the same. After I get the current engine swap sorted, everything will be pulled back out for full sand blasting R&R of rusty metal. I don't have much of an issue considering I plan to keep both of my 7's until they just fall apart. I don't think that going to happen so long as I have 'em though.
Thread Starter
Joined: Sep 2003
Posts: 7,252
Likes: 2
From: Spring Hill TN 37174
My car is rust free, but VERY HIGH MILES (244k) so I figured a complete Overhaul is in order. Considering the car is ODOMETER EXempt I may even roll that bad boy back to 0 miles when I am done...
ground ZERO
I am in the middle of that process now. I took all the bolts that were rust free and deeped them in solvent for a couple of days. Now they look like new, (save quite a few bucks).
Make sure that is the only project you work on, because it is going to take some time to put it back together. I have done quite a few tear downs and assemblies and when you start swaping new parts in it takes a bit longer, especially rubber parts. I have about fifty hrs into it, without the paint job, since I have no skills on that department , and all I have completed is the rear end with brake assembly and the electric fan assembly. I will do my own motor since I have done about ten already. Good luck.
Make sure that is the only project you work on, because it is going to take some time to put it back together. I have done quite a few tear downs and assemblies and when you start swaping new parts in it takes a bit longer, especially rubber parts. I have about fifty hrs into it, without the paint job, since I have no skills on that department
, and all I have completed is the rear end with brake assembly and the electric fan assembly. I will do my own motor since I have done about ten already. Good luck.
I did pretty much the same thing with the widebody. I left the dash and wiring harnesses in, but absolutely everthing else came off of the car and was replaced, refurbished or restored. My timeline was 3 months, full time. 9 months later the car was on the street, with a few little interior things still left to do.
I did all of my own work, from the stripping, sanding, sandblasting, fiberglass, priming painting, engine build (twice), and reassembly. The only things I didn't do was set the fixed glass and tint the windows. I did tint the door glass and it shows, the hatch and 1/4 glass was done elsewhere.
I can strip a fully stock 1st or 2nd gen down to little pieces, including the body sawn into pieces that I can load by myself in 2-1/2 days. That is the easy part. To properly diassemble one for restoration takes twice as long. Have a magic marker and 3 different sizes of baggies for parts. Bag and label EVERYTHING that comes off the car. Especially nuts, bolts and fasteners. It took me 45 minutes to drop in the engine and tranny after the first rebuild. It took me 5 hours to find the the correct bolts to mate the engine to the tranny. Which were supposed to be bagged, which I still haven't found to this day.
What i found that took a large block of my time was detailing all of the small parts that come off of the car. I have 3 different sandblasters. I built a sandblast cabinet that is big enough to handle a rear end, I have a pressure pot for outdoor blasting, (which the city dislikes), and i have a siphon blaster for small spot jobs done outside. Of course most of these parts need to be degreased first, more work.
Sand blasting is just the first step. Then the parts need to be re-cleaned and prepped for the coating, wheather it be paint, polish or powdercoat. Most everything in my engine bay is powdercoated. I don't have the patience for polish.
I am certainly not trying to discourage you from your endeavor. I have great admiration for anyone who can take on a job such as this and complete it successusfully. It becomes a labor of love and a great skill building adventure.
I had done some painting before this car, (2 others), and I still need to improve that skill. I had never done any serious fiberglass work and that came out much better than I had hoped. My welding skills are still rusty, but the cage is in and should do it's job, if needed. I can port and rebuild an engine. Final tuning is 500 miles away on the odometer. Now I need to get out my Grandmothers sewing maching and relearn how to sew so I can finish my door panels.
A project of the scope you are about to enter into takes a great deal of tenacity and I wish all the success and satisfaction you will enjoy when it is completed.
Take it from someone who has been there. If you think a particular task will take a day, plan on at least 2. Don't rush a particular task because you are tired of it or don't want to do it. You have many other things you can do instead, then come back to it when you are in a better frame of mind. Try to do most of the things you dislike doing early in the project and get them out of the way. If you begin to get discouraged, go do something that you prefer doing or are better at, but keep whittling away at those pita tasks.
I don't know what you have for tools, but one of the most important ones is a digital camera. Take a full series of before pics. Everytime you start a paticular task, get the camera out and take before, during and after pics. This will help in re-assembly and you will have a record of all of your hard labor that you can look back with satisfaction.
I personally think the forum needs a good restoration sub-forum, broken down into differnt areas of restoration work. When you get started on yours, get a thread going on the different areas of your project, others can chime in on thiers and how they did that particular sub-task. If we can get het some HOW To's going, with extensive pics, the quality and scope of repairs and restorations should greatly improve.
I do have one suggestion on your painting schedule. Since you will be using a metallic paint, assemble all of the body parts on the car, except the bumpers, and shoot it all at the same time. I did what you are proposing and even with the matte black single stage paint I used, the shading does not match. Very slight variations in temperature, humidity and air pressure will change the shade of the paint and orientation of the metalflake. The entire front wrap only needs to be bolted loosely to the body for the final coats, then remove it for the engine install.
Good luck and keep us posted with lots of progress pics.
Stay away from my CT!!!
Joined: Apr 2005
Posts: 1,120
Likes: 0
From: Giddings, Texas
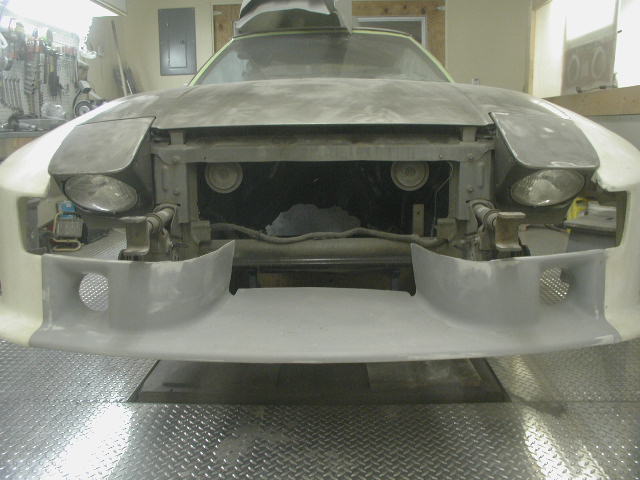
Man, good luck on it, can't wait to see it done. I to am in the process of that just not as deep,ie, sand blasting, every bolt, but replacing interior, paint, body parts, etc. Its almost ready for paint, i got it all almost all the jambs painted right not, everything else id primered, just got some more body work on the roof, then that will be primed,then the cage, engine bay(under coat) interior metal(undercoat), sub box, tht sort of thing, then fix the undercarriage, the prwvious owner went threw a ditch, or 6(gonna be a bitch to fix), but it needs to be done, it will be done by December when i get my license.

As of Saturday:
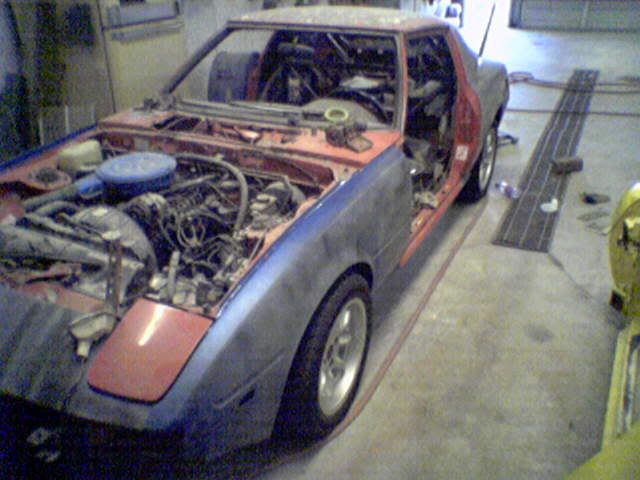
Looks funny because i got the front wheels on the back,visa versa, because i need skinnier tires for the front, they dont fit, and im not getting rid of my pana's.
As of Saturday:
Looks funny because i got the front wheels on the back,visa versa, because i need skinnier tires for the front, they dont fit, and im not getting rid of my pana's.
Last edited by 1985_RX-7; Oct 11, 2005 at 05:19 PM.
Originally Posted by 1985_RX-7
Man, good luck on it, can't wait to see it done. I to am in the process of that just not as deep,ie, sand blasting, every bolt, but replacing interior, paint, body parts, etc. Its almost ready for paint, i got it all almost all the jambs painted right not, everything else id primered, just got some more body work on the roof, then that will be primed,then the cage, engine bay(under coat) interior metal(undercoat), sub box, tht sort of thing, then fix the undercarriage, the prwvious owner went threw a ditch, or 6(gonna be a bitch to fix), but it needs to be done, it will be done by December when i get my license.
When I went to prep for the topcoat, I had welding slag/sparks, burnt into the primer all over the rear fenders and around the hatch. Had to sand it all down and start over. I was not happy that day.
Anti-rice Superstar
Joined: Sep 2002
Posts: 949
Likes: 0
From: huntsville,alabama
good luck trevor and keep us updated with pics. i remember seeing a write-up where a guy did the same thing your doing with a caprice and i think he had over 1000 hours into it and it cost somewhere around $15-20k
EliteHardcoreCannuckSquad
Joined: May 2001
Posts: 4,126
Likes: 4
From: Acton, Ontario, Canada
I'm in the midst of planning somthing similar for my -SE.
I will also be doing a complete tear-down and re-build from the ground-up, but I'll be going one step further. I will also be designing a completely new wiring harness, and upgrading everything I consider less than perfect.
I'm planning on doing everything other than the bodywork and painting myself.
I'm looking at about 250 hours of my own time on the build, not counting my engine rebuild I'll be doing over the winter and all the planning I'm doing now.
I did a ground up, every nut and bolt restoration on my MGB I didn't replace every nut and bolt, just those that needed it...I restored a lot of them). VERY time consuming, VERY expensive, and VERY rewarding. I figure I'd be lucky to get half of what I have in the restoration if I tried to sell it, but I've never regreted it.
I put the body on a rotisserie and did all the teardown and cleanup, then shipped it off for sandblasting and bodywork. Everything else I did myself with a lot of help from my brother.
I found it invaluable to take a lot of pictures and document the restoration on the web, mainly for my own use when it was time to put things back together, but also so others could see my progress. Here's my restoration site:
http://64mgb.home.mchsi.com/
Good luck!
Rich

1983 GSL, 1987 323 "GX"
Joined: Jun 2004
Posts: 2,265
Likes: 0
From: Las Cruces, NM
Well, I met that challenge half way. Every bolt or nut that I've taken off, I've replaced (with the exception of the carb nuts. They seem to hold up impeccably well throughout the ages).
In all, I've also purposely broken a couple of bolts head's off in their hole. Stuff that used to be held on (resevoirs, Cruise unit) now had holes that I didn't want to fill in, so the solution was to break a head off. Then sand it. Perfect solution (although I pity the person that tries to figure out what the hell happened in those places if someone else tries to get their hands on my car. Missing parts with no visible holes to bolt them on?!)
In all, I've also purposely broken a couple of bolts head's off in their hole. Stuff that used to be held on (resevoirs, Cruise unit) now had holes that I didn't want to fill in, so the solution was to break a head off. Then sand it. Perfect solution (although I pity the person that tries to figure out what the hell happened in those places if someone else tries to get their hands on my car. Missing parts with no visible holes to bolt them on?!)
Couple of thoughts-
1) I replaced (on-going process) every fastener I could with STAINLESS STEEL nuts and bolts. This does NOT include load-bearing/stress bearing components (like steering, exhaust), since SS fasteners don't take the sheer and torque like the standard bits (so I was told). But attaching fenders, brackets, shielding etc. with SS means they should stay rust-free pretty well forever....and look really swanky too.
Someone commented about buying NEW bolts, etc from Mazda for $100. hell, just the EXHAUST attaching hardware costs that!! Some of these things are $2-3 each!
2) rather than paint your suspension, have you considered powdercoating? I have done this for all my engine bracketry, rad supports, gravel pan, fuel pump cover, exhaust shielding, etc. and plan to do my front end too. pricy compared to paint, but much more durable! I mean, you only want to do this ONCE
Stu Aull
80GS
Alaska
Full Member
Joined: Mar 2001
Posts: 141
Likes: 0
From: Austin, TX