
Air Cleaner Options for the Nikki Carb

Ok guys, I'm bringing this thread back to life. I did some searching on the K&N website and came up with a couple of other possible ideas. I was kicking around some ideas out in the garage and thought, "Why do I even need an airbox at all? Why not just stick a filter right on top of the carb like the Weber/Dell guys do?"
So I started searching the K&N website for possible filters to fit on top of the carb. The flange on the Nikki carb is approximately 3.95", so I looked for filters with a 4" ID opening. I came up with two good matches. Here is the first one. It's a round cone filter with a very slight taper. Price is $34 from Summit. I figured I could put a hole in the top rubber part and use a washer and wing nut to hold it on just like an air cleaner.
http://www.summitracing.com/parts/KNN-RU-2510/
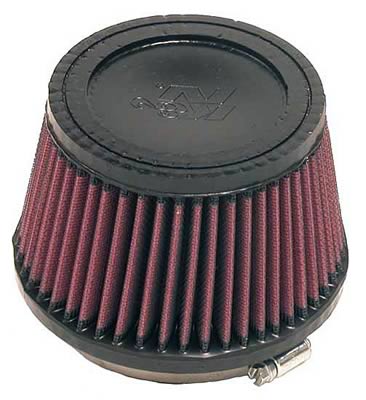
Here is the second option. It would probably look a little bit nicer under the hood. It is a tapered oval filter with a nice polished top. I planned to mount this the same way, by drilling a hole in the top plate and putting a washer and wingnut on to hold it down tight. Price for this one is a little bit higher at $48. Either filter would come in cheaper than the Racing Beat air cleaner ($75) with a K&N stock sized filter ($40). So I would look to save about $70-$80 this way. Thoughts guys?
http://www.summitracing.com/parts/KNN-RC-5148/

So I started searching the K&N website for possible filters to fit on top of the carb. The flange on the Nikki carb is approximately 3.95", so I looked for filters with a 4" ID opening. I came up with two good matches. Here is the first one. It's a round cone filter with a very slight taper. Price is $34 from Summit. I figured I could put a hole in the top rubber part and use a washer and wing nut to hold it on just like an air cleaner.
http://www.summitracing.com/parts/KNN-RU-2510/
Here is the second option. It would probably look a little bit nicer under the hood. It is a tapered oval filter with a nice polished top. I planned to mount this the same way, by drilling a hole in the top plate and putting a washer and wingnut on to hold it down tight. Price for this one is a little bit higher at $48. Either filter would come in cheaper than the Racing Beat air cleaner ($75) with a K&N stock sized filter ($40). So I would look to save about $70-$80 this way. Thoughts guys?
http://www.summitracing.com/parts/KNN-RC-5148/
My idea is use the top one and make a top piece for it that is same size as the black top piece. Then paint or polish for a lil bit o' bling. Either one would be cool but too bad you would have to drill a hole in the top (especially the bottom one).
Okay, quick update. I started mocking up both of the air filters on the car to get an idea of what they will look like and how they will fit. The first air cleaner that I posted, the round one, WILL NOT WORK. The mounting flange on the bottom of it is too short. The flange is only 0.625" tall. You need a flange that is somewhere between 1" and 1.5" to get the filter up above the fuel rail on the Nikki. That top filter would hit the fuel rail.
The second filter will fit NICELY. I'll post pics of my mockup in a few minutes.
Jamie
The second filter will fit NICELY. I'll post pics of my mockup in a few minutes.
Jamie

Senior Member
Joined: Nov 2009
Posts: 346
Likes: 3
From: Australia
that looks pretty good actually... you know you could skip the wing nut and just tighten that hose clamp around the small lip on the air horn. I've done this with a PVC fitting when trying out a CAI idea, and it held well enough. or you could even extend the lip with a bit of 4" aluminium pipe, you guys in the US have lots of stuff that will join aluminium together (e.g. super alloy 5) without having to TIG weld. just throwing some ideas around anyway.
i'd be keen to see if that K&N filter shows any noticeable difference over the blue thing.. let us know!
i'd be keen to see if that K&N filter shows any noticeable difference over the blue thing.. let us know!
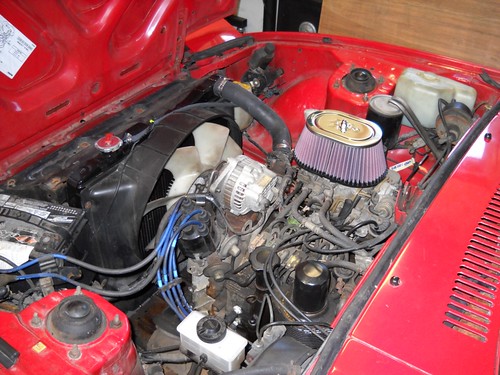
Okay, sorry I didn't get around to posting my results last night. I was having clearance issues with the hood and air filter. The filter is a little bit taller than I was expecting, but it should work out fine. If you get the air filter pictured below and cut off half of the bottom 1.5" riser (trim 0.75" off) it will work great on a stripped carburetor. This filter won't work on a stock Nikki because all the emissions crap gets in the way. If you strip down the carb it will work nicely though. I'll put up some pictures of my mockup when I get home today.
Lives on the Forum
Joined: Jun 2004
Posts: 11,359
Likes: 14
From: Grand Rapids Michigan
Very interesting idea if you can:
a. Get it to fit on the carb
b. Get it to fit under the hood
c. Don't intend to go the route of CAI
But this idea gets huge props for it's originality.
btw, I'm currently using the RB filter housing with the foam air cleaner and it does the job nicely. The best thing about it, in my opinion, is that it adds a nice bass roar when you open up the secondaries. That thing is damn near louder than my exhaust is!
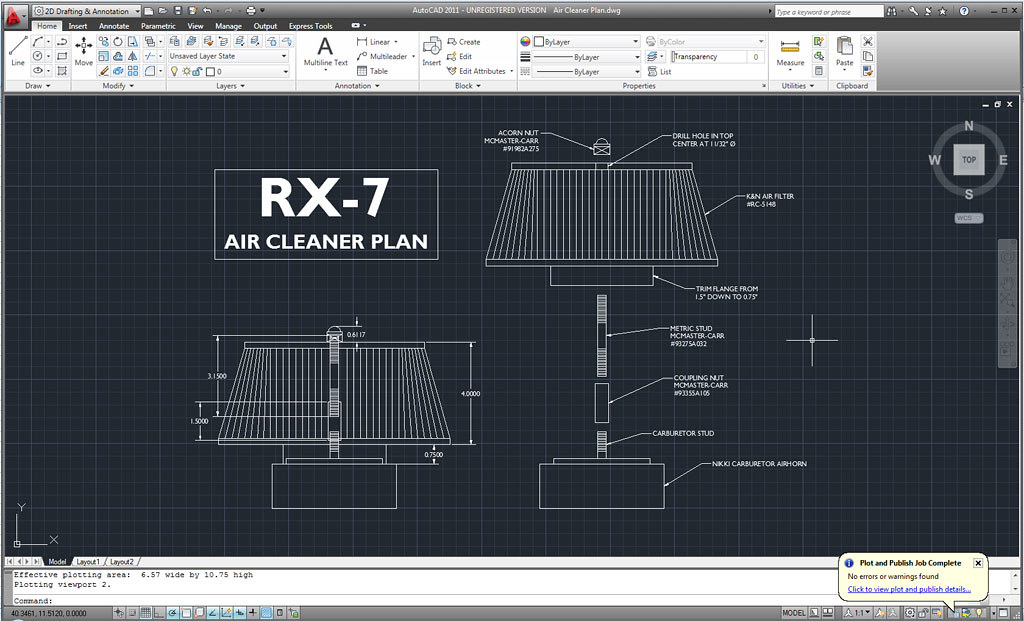
Alright gents, I believe that I've got this just about knocked out. Short of actually trying the parts on the car, everything looks to be a success. I need to strip down the Nikki carburetor and get all the emissions crap off of it. I went ahead and ordered all my supplies. The grand total cost was $60, including shipping. So if you compare the Racing Beat / K&N setup I probably saved about $50. I included a diagram with all the parts numbers below if anyone wants to replicate this setup. I attached a PDF so you can read it easier.
Here are some pictures of the paper mockup that I did to test fit the clearances. This is how I determined that the filter flange needs to be trimmed down 0.75".
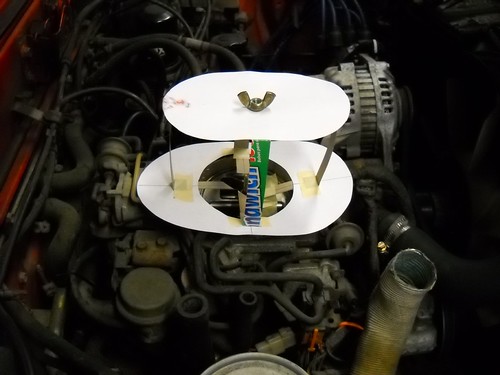
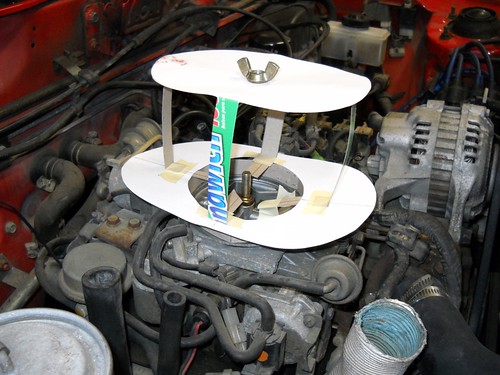

Here are some pictures of the paper mockup that I did to test fit the clearances. This is how I determined that the filter flange needs to be trimmed down 0.75".
I forgot to mention that this won't work unless you strip the emissions off of the Nikki carburetor. The emissions crap will get in the way of the bottom part of the filter. If you strip down the carb everything will be smoothe sailing. Don't expect this to work on the stock emissions laden rat's nest setup though. There isn't enough room for the filter.
Senior Member
Joined: Nov 2009
Posts: 346
Likes: 3
From: Australia
cool beans... very keen to see how it looks on there... i'm definitely going to get one of those filters!
strangely enough on the k&n site it says the filter is 4" total height, but it looks like that's the height of the element without the flange from your draft... i was a bit puzzled as to why you'd need to cut the flange down as the blue thing is more than 4" high from memory.
strangely enough on the k&n site it says the filter is 4" total height, but it looks like that's the height of the element without the flange from your draft... i was a bit puzzled as to why you'd need to cut the flange down as the blue thing is more than 4" high from memory.

Senior Member
Joined: Sep 2008
Posts: 543
Likes: 0
From: Glen Burnie, Maryland
http://www.rotaryshack.com/images/big/nikki-Hat-01.jpg ive been thinking about getting this and pretty much making a CAI for the moment as ill be using this when i go turbo. But as of right now I took the air cleaner assebly off and im running no air cleaner. I know its not good as i could suck down a small child if they got to close. But hey ive seem to have gotten much better MPGS like this.
I was assuming that the filter was a total of 4" of height at first too. However, upon closer examination K&N lists the filter length, and the flange length separately. I'm not sure why they do this, because it seems like it would lead to a lot of mistakes. Mainly people thinking the same thing I did, that the total filter height was 4". See the diagram below.

L = 4"
FL = 1.5"
Jamie
L = 4"
FL = 1.5"
Jamie
I've also thought about putting some kind of an upside down funnel shape inside the top of the air filter to direct air down into the carb. You could easily mount it on the carburetor stud and secure it to the top of the air filter from the inside. I'll post more info as I brainstorm on this....
Senior Member
Joined: Nov 2009
Posts: 346
Likes: 3
From: Australia
I've also thought about putting some kind of an upside down funnel shape inside the top of the air filter to direct air down into the carb. You could easily mount it on the carburetor stud and secure it to the top of the air filter from the inside. I'll post more info as I brainstorm on this....
Hey guys,
I got the filter all installed and it looks great. I didn't have any problems, and the carb looks way better. No more dorky air cleaners for my Nikki. The K&N filter makes the Nikki almost look like a Weber or Dellorto now when you pop the hood open. I like it alot. The only thing you need to do to make this work is:
1) Drill a hole DIRECTLY in the top of the filter. Measure 3 or 4 times to make sure you got it right. Remember that this is a $45 filter that you are drilling into so TAKE YOUR TIME. When you are ready to drill, get a VERY small drill bit and make a pilot hole. Make sure that you have a sharp, sharp drill bit since you have to drill through some rubber. You don't want to use a crappy old bit that's been laying around your garage forever. Keep the filter straight on its base while you are drilling so that any material removed falls under the table beneath, and doesn't get stuck inside the filter media. After you have your pilot hole drilled, enlarge it with a GOOD SHARP 5/16" drill bit. I show 11/32" on the CAD drawing above, but I would use 5/16". It worked VERY well.
2) Trim down the flange at the bottom of the filter. The starting height is 1.5". You need to remove 0.75" so that the final height is also 0.75". The K&N filters are very nice for this step because they have raised rubber rings inside the mounting flange that are probably there to help the filter grip onto whatever you mount it on. However, they are also very handy when you want to trim down the bottom of the filter. Measure off 0.75" and use a razor blade to trim the flange. I found that the 3rd ring up from the bottom of the filter worked out perfectly to 0.75". I just used my razor blade to follow it all the way around the circumference of the filter flange. If it sounds confusing, it's not. You'll see what I mean when you get your filter.
3) Install the filter using the coupling nut, stud, and acorn nut from McMaster Carr. All the part numbers that I list in the CAD drawing above are correct, and worked out great. Just use the CAD drawing as your shopping list. I had NO HOOD CLEARANCE PROBLEMS. Just follow the CAD drawing and you'll be in good shape.
4) Enjoy!
I posted some pictures of the finished product. below. I like it alot. It really makes the Nikki look much more aggressive. Time for me to start ripping out the emissions crap now. Next up on the list is a full rat's nest removal, carburetor rebuild, and mechanical secondaries. It should make a world of difference in the car once that I get that stuff done. It's running pretty lousy right now.
Jamie
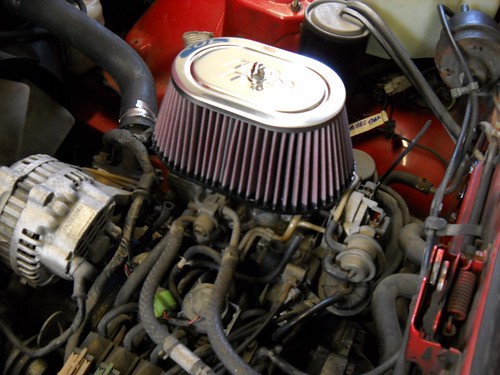

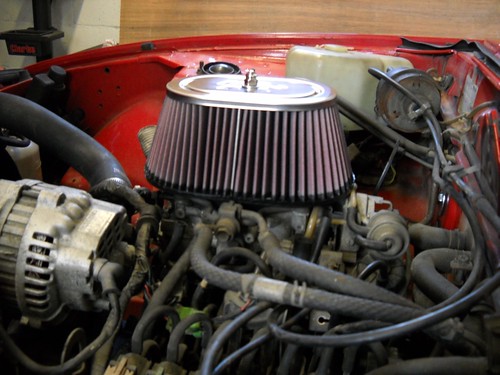
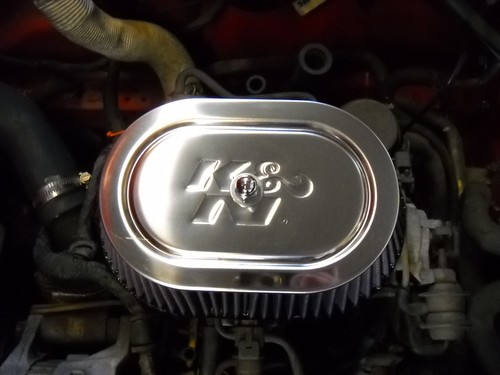
I got the filter all installed and it looks great. I didn't have any problems, and the carb looks way better. No more dorky air cleaners for my Nikki.
The K&N filter makes the Nikki almost look like a Weber or Dellorto now when you pop the hood open. I like it alot. The only thing you need to do to make this work is:1) Drill a hole DIRECTLY in the top of the filter. Measure 3 or 4 times to make sure you got it right. Remember that this is a $45 filter that you are drilling into so TAKE YOUR TIME. When you are ready to drill, get a VERY small drill bit and make a pilot hole. Make sure that you have a sharp, sharp drill bit since you have to drill through some rubber. You don't want to use a crappy old bit that's been laying around your garage forever. Keep the filter straight on its base while you are drilling so that any material removed falls under the table beneath, and doesn't get stuck inside the filter media. After you have your pilot hole drilled, enlarge it with a GOOD SHARP 5/16" drill bit. I show 11/32" on the CAD drawing above, but I would use 5/16". It worked VERY well.
2) Trim down the flange at the bottom of the filter. The starting height is 1.5". You need to remove 0.75" so that the final height is also 0.75". The K&N filters are very nice for this step because they have raised rubber rings inside the mounting flange that are probably there to help the filter grip onto whatever you mount it on. However, they are also very handy when you want to trim down the bottom of the filter. Measure off 0.75" and use a razor blade to trim the flange. I found that the 3rd ring up from the bottom of the filter worked out perfectly to 0.75". I just used my razor blade to follow it all the way around the circumference of the filter flange. If it sounds confusing, it's not. You'll see what I mean when you get your filter.
3) Install the filter using the coupling nut, stud, and acorn nut from McMaster Carr. All the part numbers that I list in the CAD drawing above are correct, and worked out great. Just use the CAD drawing as your shopping list. I had NO HOOD CLEARANCE PROBLEMS. Just follow the CAD drawing and you'll be in good shape.
4) Enjoy!
I posted some pictures of the finished product. below. I like it alot. It really makes the Nikki look much more aggressive. Time for me to start ripping out the emissions crap now. Next up on the list is a full rat's nest removal, carburetor rebuild, and mechanical secondaries. It should make a world of difference in the car once that I get that stuff done. It's running pretty lousy right now.
Jamie
Thanks for the compliment! It actually turned out a little better than I expected it to also. I thought it may look weird, especially if the filter was bigger or smaller than I expected. The size is pretty much perfect though. It doesn't look out of place in the engine bay at all. The chrome acorn nut really makes a big difference too. It gives it a nice finished look.
A small correction to my description above. I said to "Drill a hole DIRECTLY in the top of the filter." What I should have said was, "Drill a hole DIRECTLY in the center of the top of the filter." Just wanted to clear up any confusion for someone else wanting to do this.
Jamie
A small correction to my description above. I said to "Drill a hole DIRECTLY in the top of the filter." What I should have said was, "Drill a hole DIRECTLY in the center of the top of the filter." Just wanted to clear up any confusion for someone else wanting to do this.
Jamie
Senior Member
Joined: Nov 2009
Posts: 346
Likes: 3
From: Australia
two thumbs up, top stuff!
i'm definitely getting one of these, but instead of using the nut on top i'll extend the lip at the carby with some 4" pipe and use the hose clamp to secure the filter. will add a pic when done
cant wait to see how it looks with a cleaned up carby...
i'm definitely getting one of these, but instead of using the nut on top i'll extend the lip at the carby with some 4" pipe and use the hose clamp to secure the filter. will add a pic when done
cant wait to see how it looks with a cleaned up carby...
Last edited by Oneiros; Jun 15, 2010 at 10:22 PM.
Senior Member
Joined: Nov 2009
Posts: 346
Likes: 3
From: Australia
Finally received my filter today. Making the adapter was easier than I thought, the bottom of the blue thing fits really well, just cut it off with a grinder, then added a bit of cloth tape around it to make the filter fit more snugly.


and boy does this thing roar..
and boy does this thing roar..