(INTERIOR) How to: Repaint your stereo surround/center console pieces.

Thread Starter
Joined: Sep 2002
Posts: 2,932
Likes: 6
From: Surrounded by Sebey parts, Rhode Island
That's what I was thinking too... Maybe he used some sort of epoxy or filler or something to attach it. If I can find a panel like that, I'll do the same thing to mine. Right now, I have that blank panel under the stereo, it looks like crap... I'm either going to fab a gauge panel out of a piece of mdf and cover the mdf and stereo panel with a piece of painted ABS, or go with the heater section off another cover piece.
Admitted Sevenaholic
Joined: Feb 2001
Posts: 1,910
Likes: 0
From: Ashland, OH
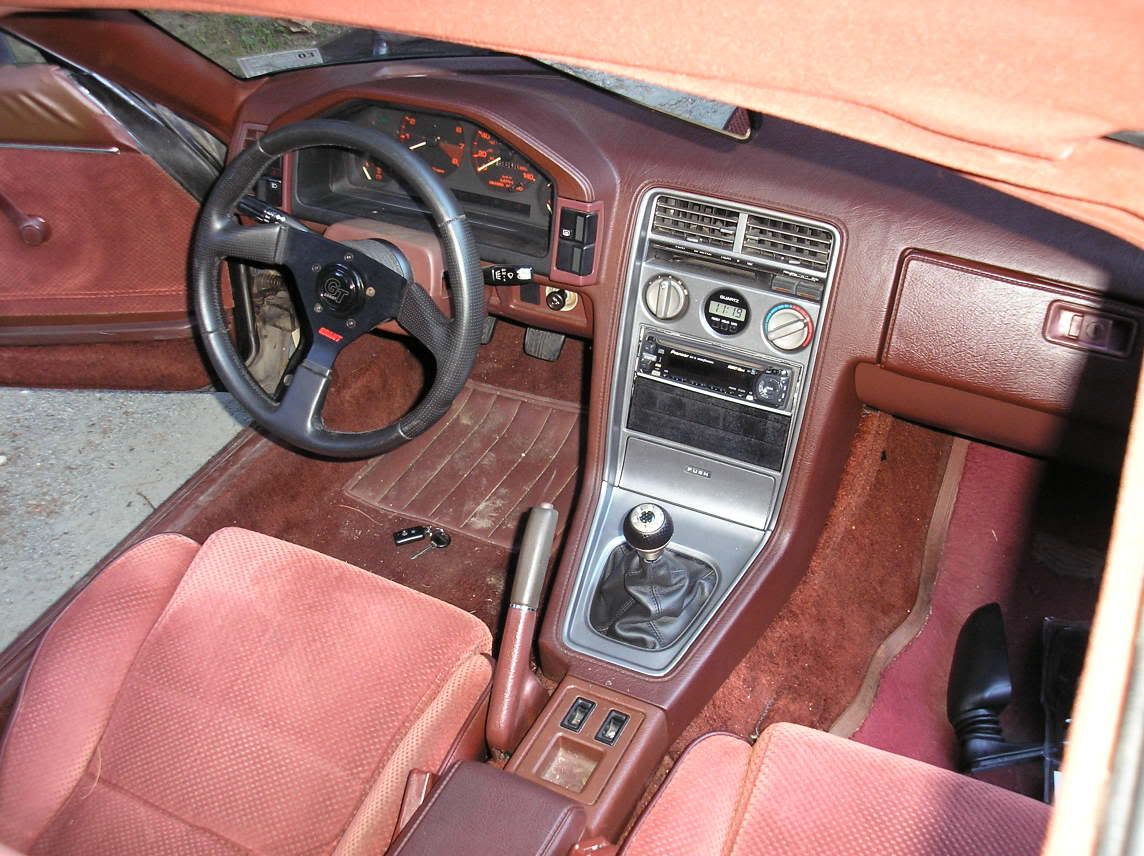
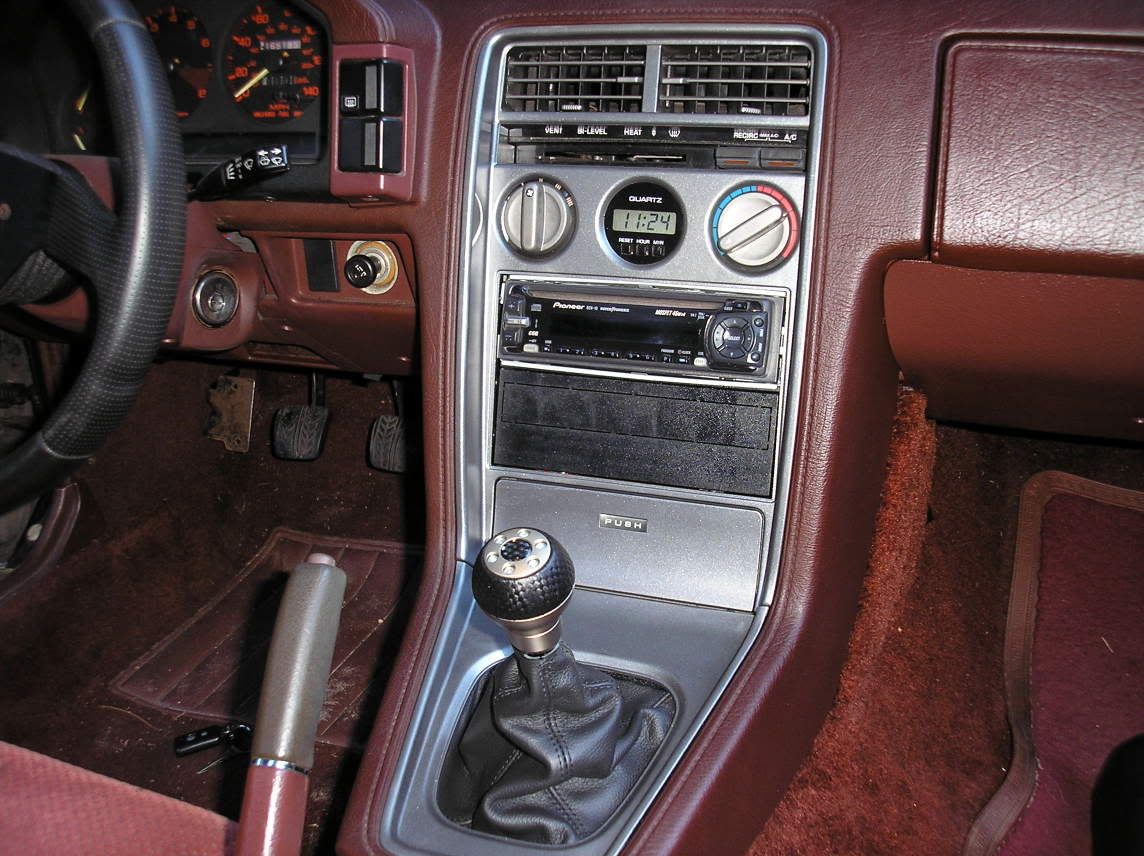
Well after having this idea for 4 years I did it.
I took the upper 3 hole part and blended a spare I had into the lower deck area so the gauges are set back in the dash and kind of give a factory look, I then molded in the CD Player surround also, plastic cement some bondo and sanded it all, then shot it with primer and the gun metal I did the rest of the console in.
This is just a trail run to see if every thing works before I spend the time to make a better looking one. This one has some imperfections and blemishes.
Originally Posted by z-beater
how did you do the lower section to accomodate gauges?
Thread Starter
Joined: Sep 2002
Posts: 2,932
Likes: 6
From: Surrounded by Sebey parts, Rhode Island
Here's the after pic:
Yes, that is a $9.99 ricer shift ****... Just until my other one arrives. I gave my dogs the tan/red one to chew on.
Yes, that is a $9.99 ricer shift ****... Just until my other one arrives. I gave my dogs the tan/red one to chew on.
REW'd FB
Joined: Dec 2004
Posts: 2,685
Likes: 1
From: WA
Man that look really good. Can't even tell that you painted it. I understand what you mean about the black block plate. Why don't you take that out and paint it too? I don't know if it would give your car a rice look though.
Any ways nice job!
Any ways nice job!
Thread Starter
Joined: Sep 2002
Posts: 2,932
Likes: 6
From: Surrounded by Sebey parts, Rhode Island
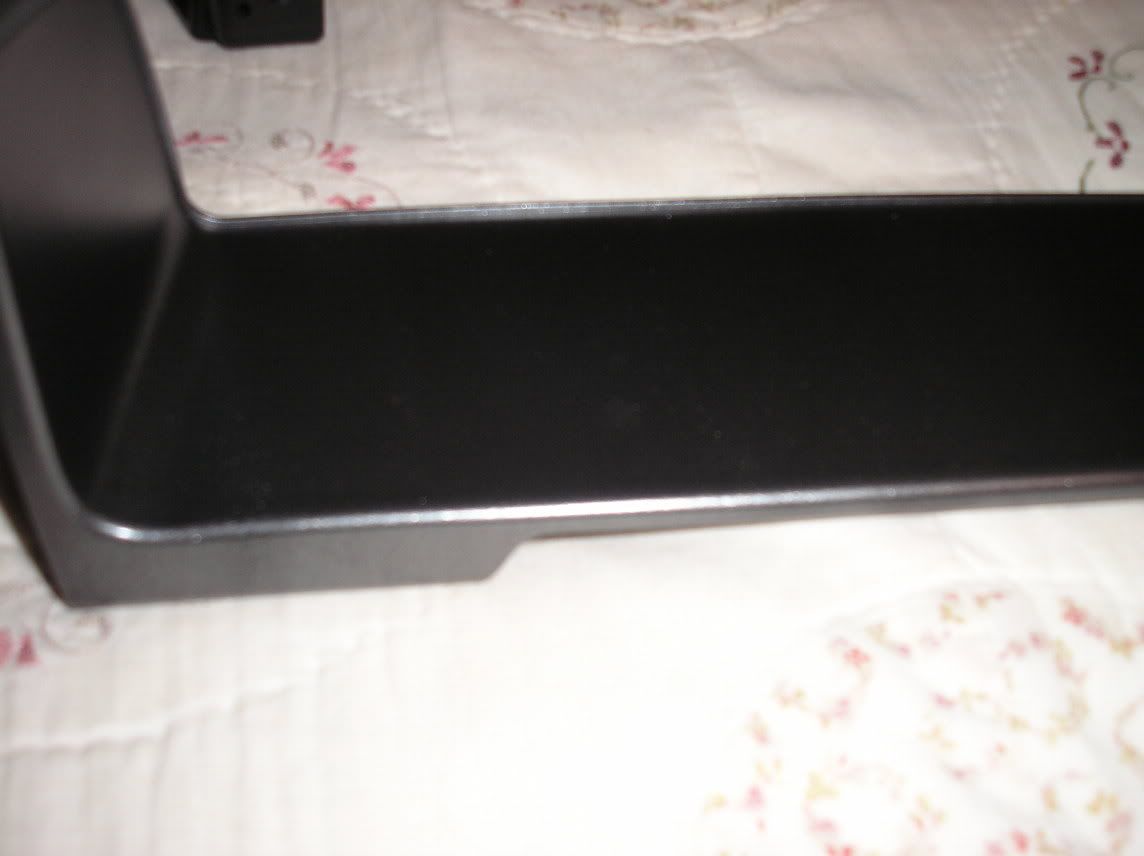
That's why I'm going to go with Max's gauges using the heater panel... It just looks so clean. I realized today that my radio doesn't have the trim panel, which is also an eyesore. Here's today's project...
From this:

To this:

I have the interior about 1/2 stripped now. Once I get the dash out as well as the headliner, I'm masking everything off on the inside, cleaning the **** out of it, and painting it black. I also found a spot of rust that I need to repair, so that will be a good time to try out my bondo skills, especially because it will be hidden under the carpet.
I already have black replacement pieces for the big speaker covers/wheel covers, so I am going to try out that vinyl paint on 'em. I'm also thinking about going two-tone on the interior, black on the lower stuff, grey on the top... It's how my Audi's interior is, and it looks very classy.
From this:
To this:
I have the interior about 1/2 stripped now. Once I get the dash out as well as the headliner, I'm masking everything off on the inside, cleaning the **** out of it, and painting it black. I also found a spot of rust that I need to repair, so that will be a good time to try out my bondo skills, especially because it will be hidden under the carpet.
I already have black replacement pieces for the big speaker covers/wheel covers, so I am going to try out that vinyl paint on 'em. I'm also thinking about going two-tone on the interior, black on the lower stuff, grey on the top... It's how my Audi's interior is, and it looks very classy.
I like it alot! Are you willing to make them and sell them?
Or when you make your new onw will you sell me this one?
THis is what I am looking for so I can add guages so when the factory ones decide to act up I know I am still good.
Or when you make your new onw will you sell me this one?
THis is what I am looking for so I can add guages so when the factory ones decide to act up I know I am still good.
Originally Posted by Max7
Well after having this idea for 4 years I did it.
I took the upper 3 hole part and blended a spare I had into the lower deck area so the gauges are set back in the dash and kind of give a factory look, I then molded in the CD Player surround also, plastic cement some bondo and sanded it all, then shot it with primer and the gun metal I did the rest of the console in.
This is just a trail run to see if every thing works before I spend the time to make a better looking one. This one has some imperfections and blemishes.
I took the upper 3 hole part and blended a spare I had into the lower deck area so the gauges are set back in the dash and kind of give a factory look, I then molded in the CD Player surround also, plastic cement some bondo and sanded it all, then shot it with primer and the gun metal I did the rest of the console in.
This is just a trail run to see if every thing works before I spend the time to make a better looking one. This one has some imperfections and blemishes.
REW'd FB
Joined: Dec 2004
Posts: 2,685
Likes: 1
From: WA
100 if you are taking the dash out make sure it is what you really want to do...it is a little pain in the butt. Are you switching colors? If so what color? There is a great write up that felixwankel did a while ago. If you do a search in the archives I am sure that you can find it...I did. The pictures will not show up but the explanations are pretty good.
Paradox that looks pretty good. I would fab my own but I am just going to have one made. Is it falling in towards the center though?
Paradox that looks pretty good. I would fab my own but I am just going to have one made. Is it falling in towards the center though?
Banned. I got OWNED!!!
Joined: Nov 2002
Posts: 4,980
Likes: 0
From: KING COUNTY, WA
100, use krylon fusion, its specifically made for plastics and sticks like no other with no prepping  i painted my a pillar trims gloss black on my old black interiro conversion gsl-se and it was so clean i contemplated doing the rest with the fusion paint
i painted my a pillar trims gloss black on my old black interiro conversion gsl-se and it was so clean i contemplated doing the rest with the fusion paint
Thread Starter
Joined: Sep 2002
Posts: 2,932
Likes: 6
From: Surrounded by Sebey parts, Rhode Island
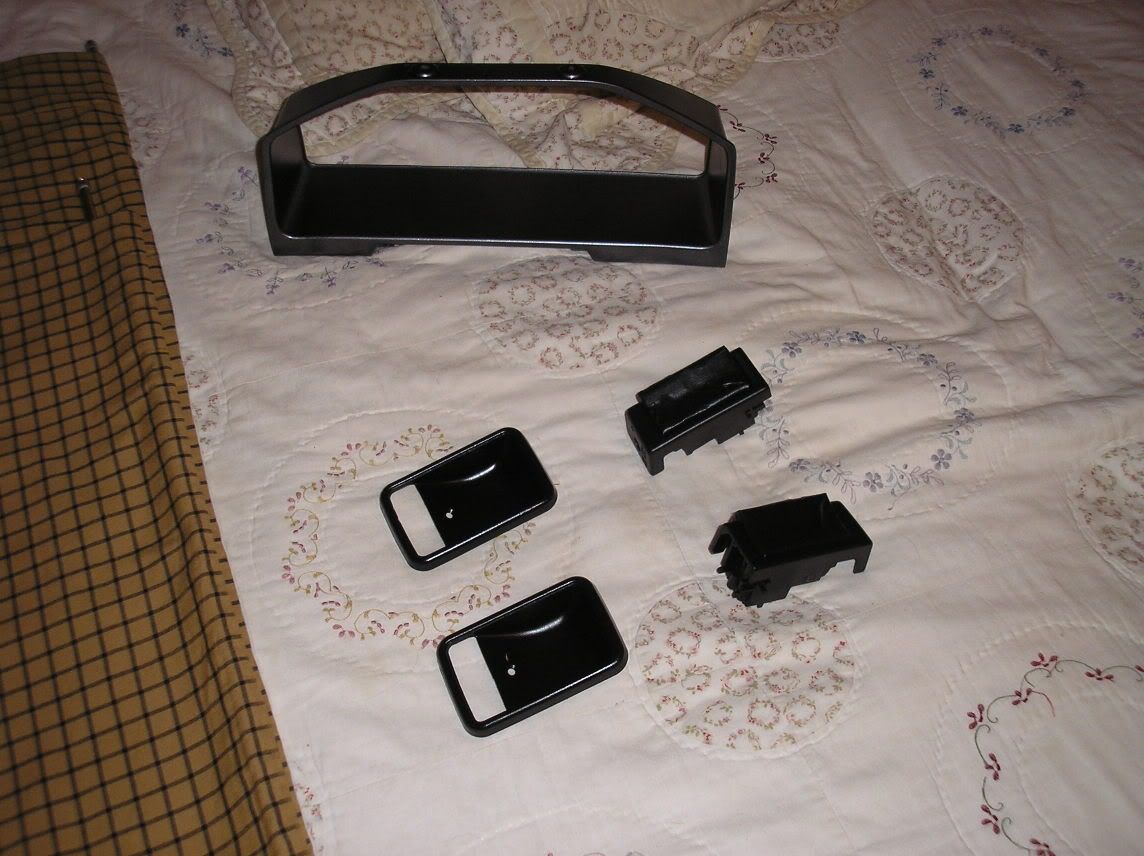
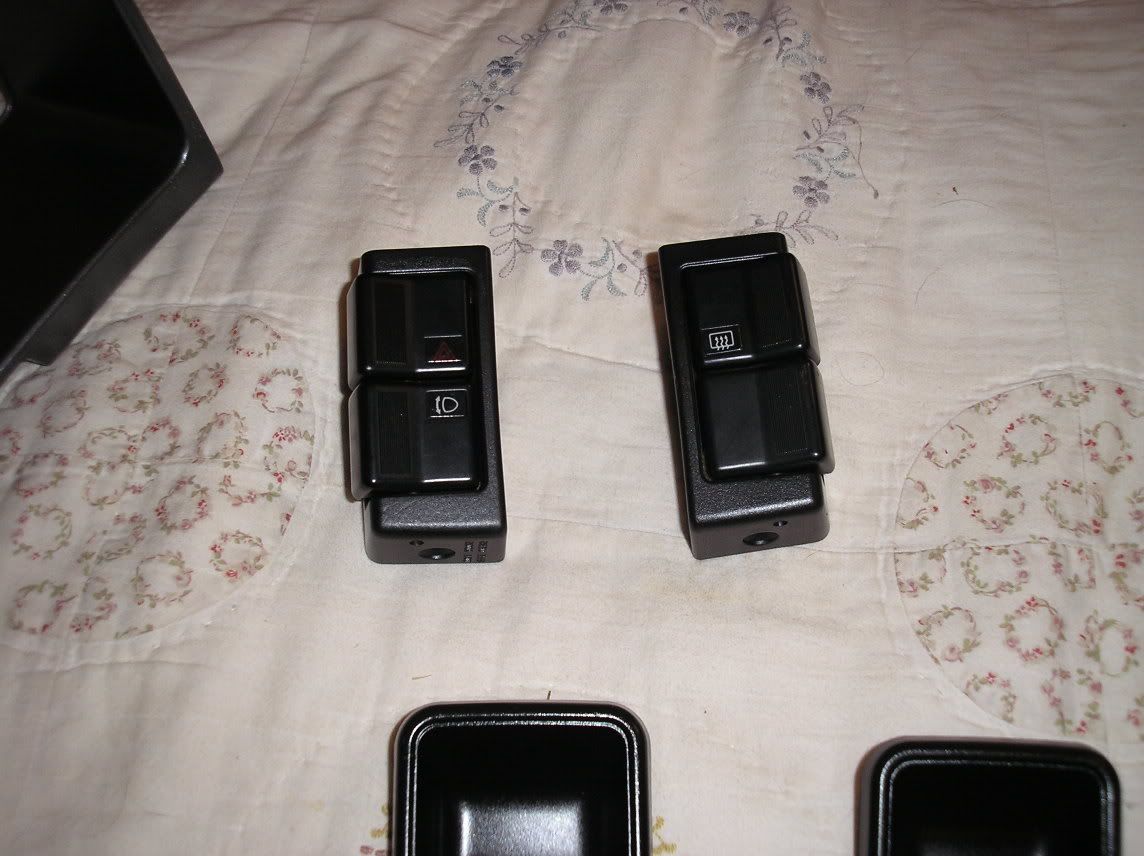
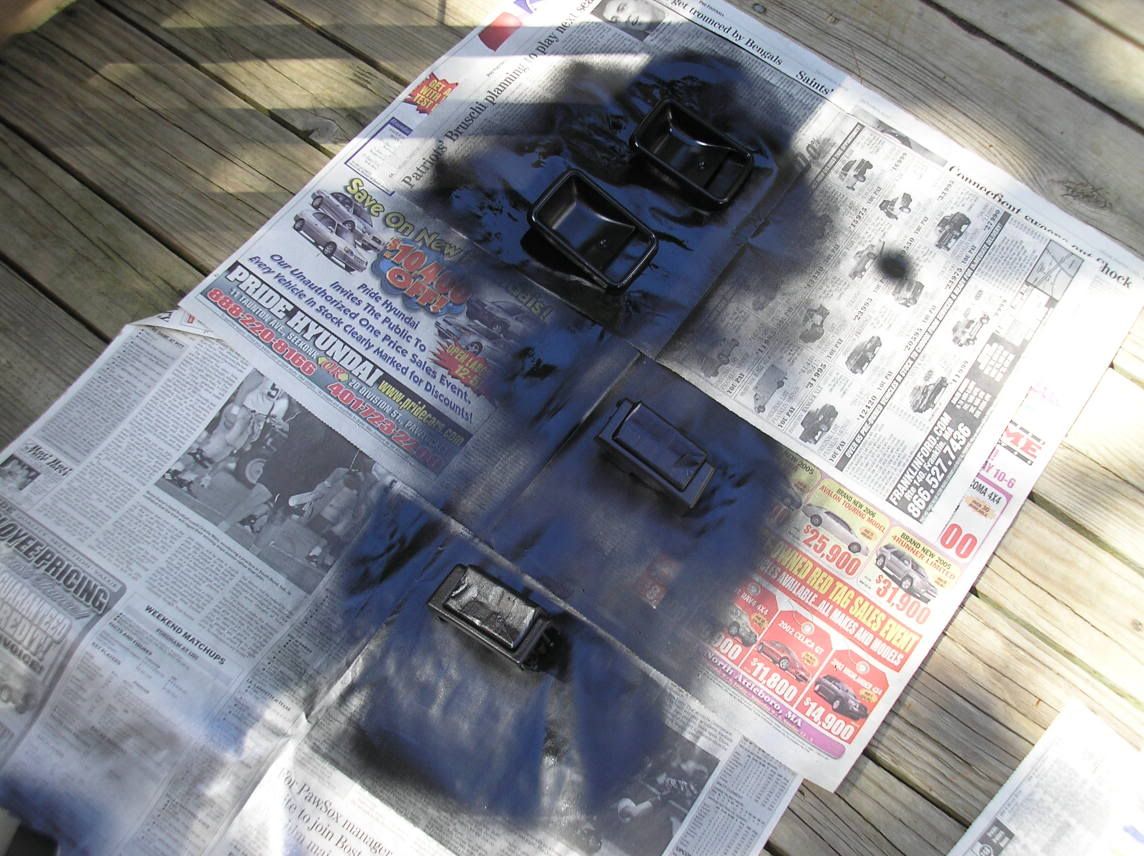
Here's how I painted the switches and gauge surround. I went with a satin black for the switches, and did the gauge surround in the same dark metallic silver as the center console... I am going with a black and gray interior, and wanted the dark metallic silver to break up the black a little bit.
Start with masking off the buttons. I used blue painters tape. It's important to wrap all the way around, so you don't paint anything you don't want to paint:
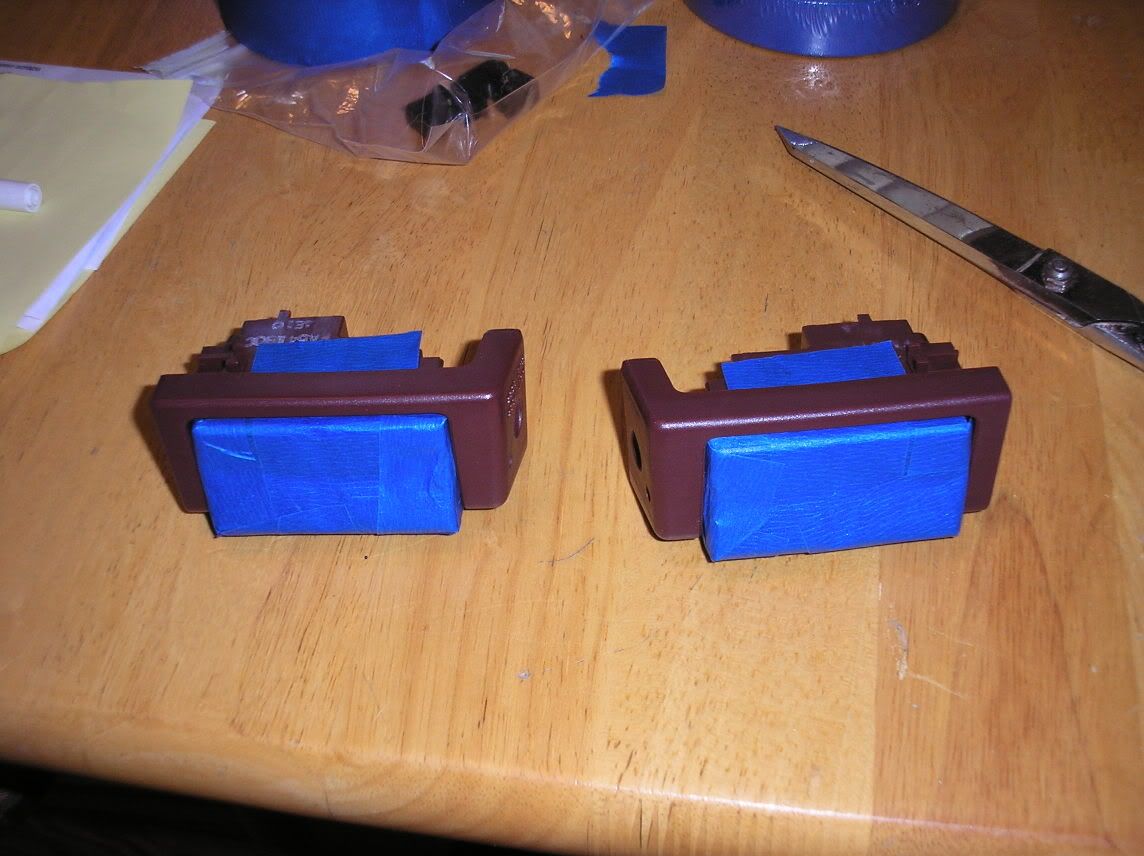
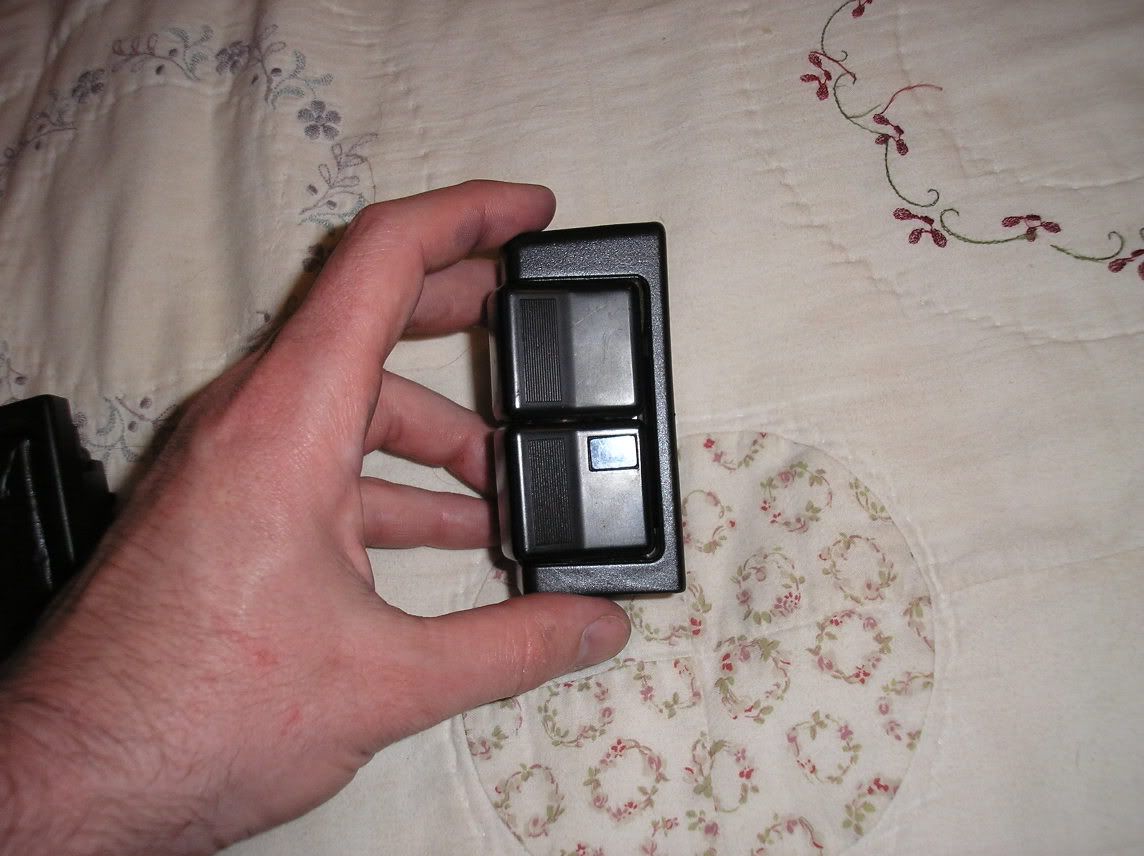
Spray with the plastic adhesion promoter:
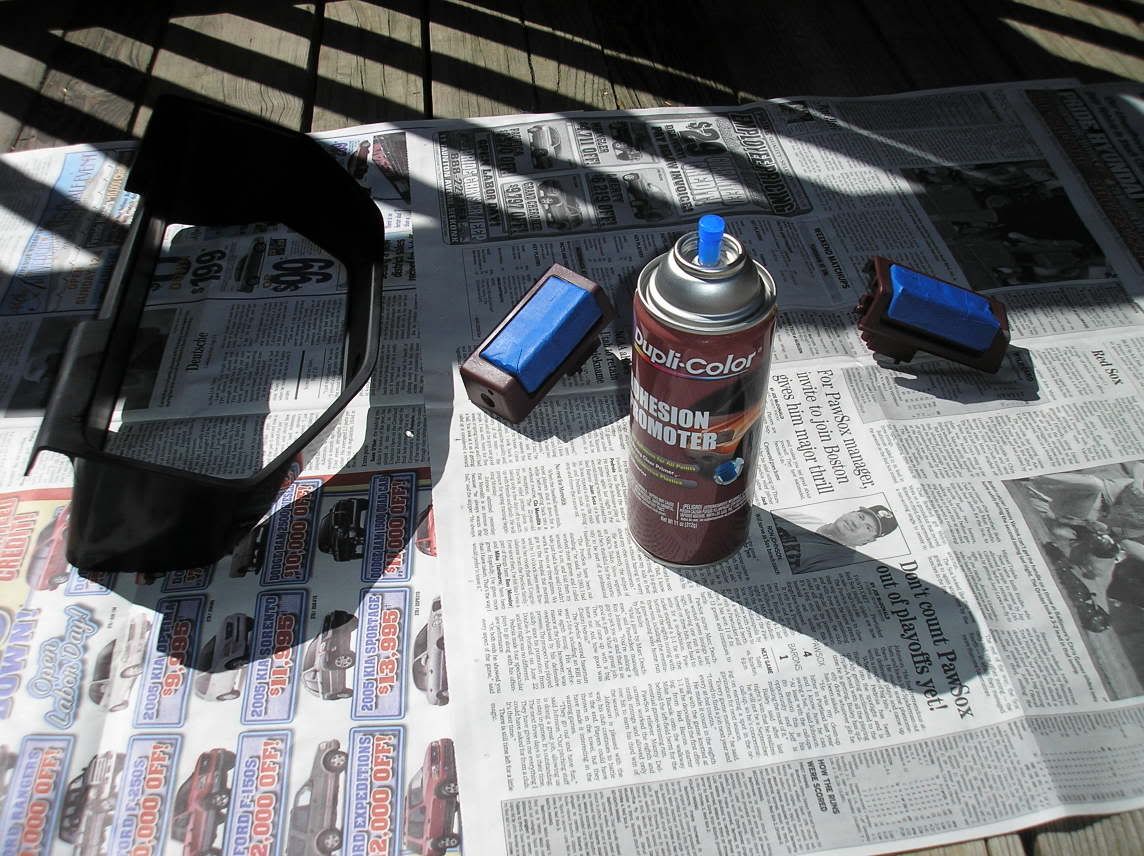
Next up, paint!
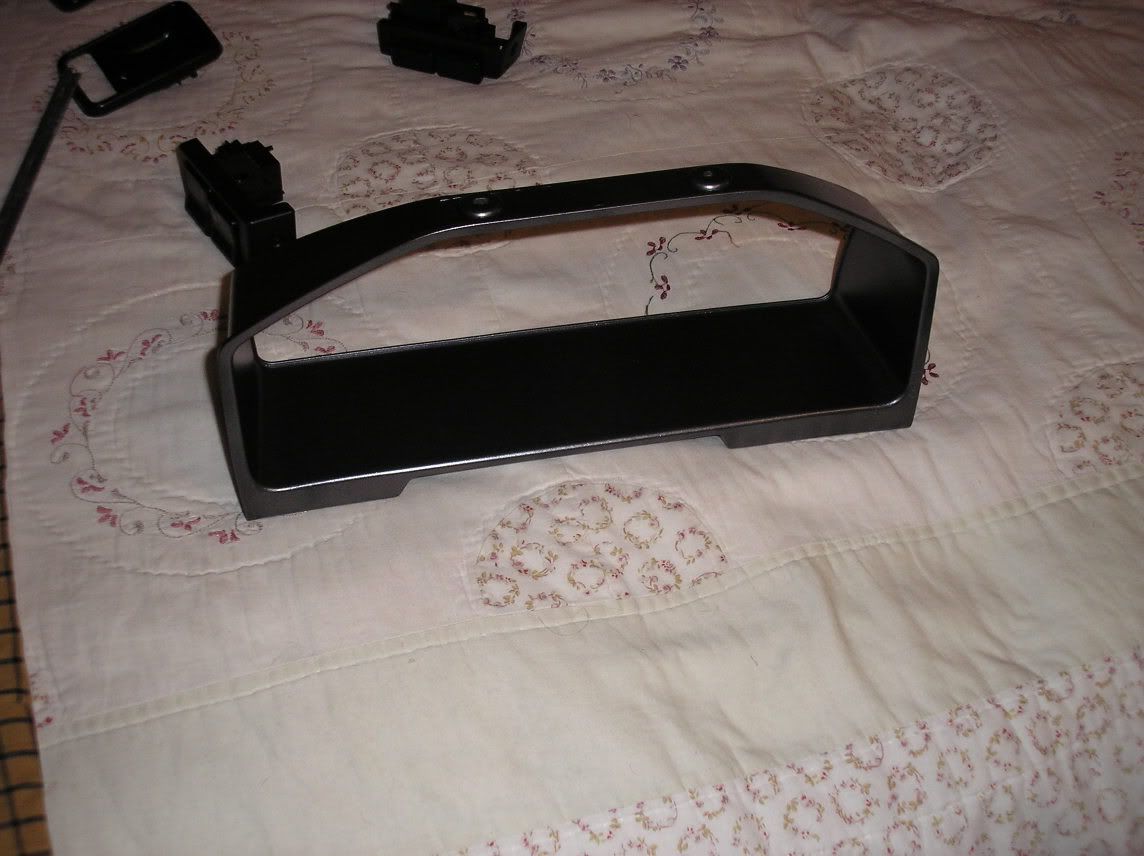
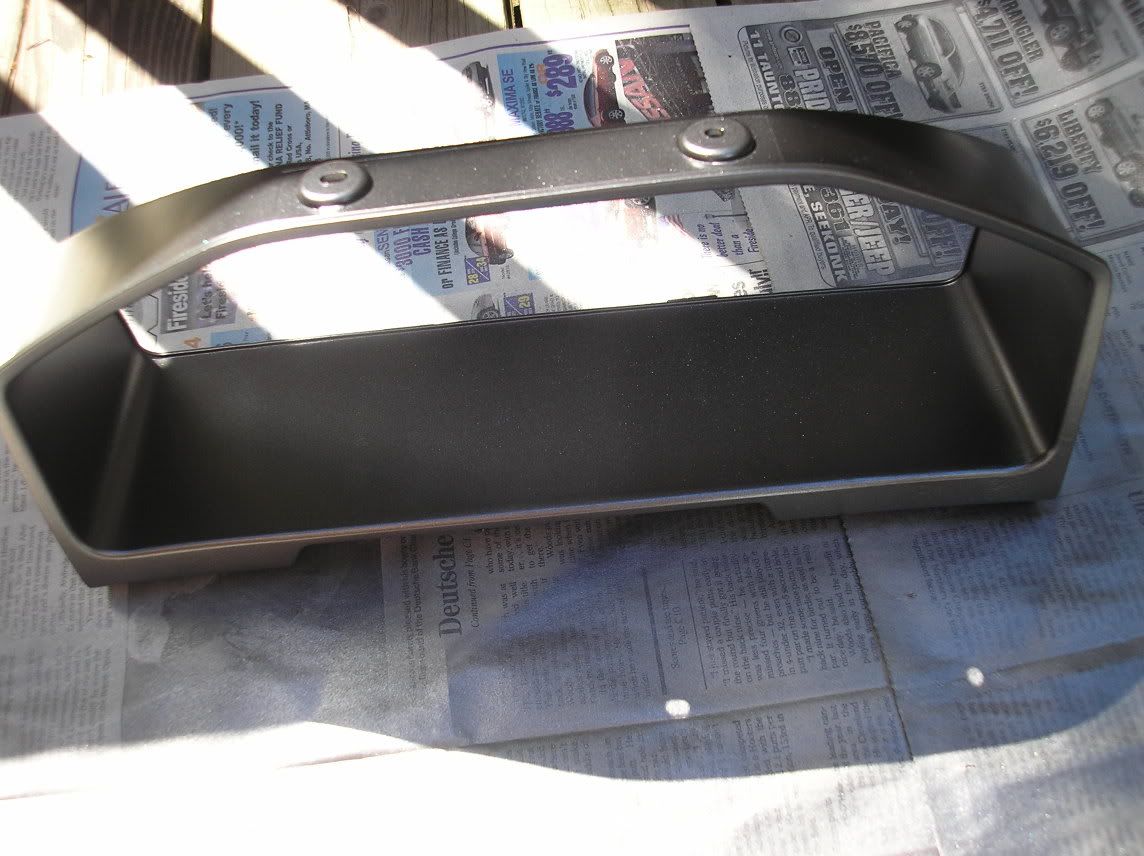
And, here's the gauge surround. Again, 2 to 3 coats of adhesion promoter, followed by the dark mettalic silver.
I'll put up the finished pics tomorrow.
Start with masking off the buttons. I used blue painters tape. It's important to wrap all the way around, so you don't paint anything you don't want to paint:
Spray with the plastic adhesion promoter:
Next up, paint!
And, here's the gauge surround. Again, 2 to 3 coats of adhesion promoter, followed by the dark mettalic silver.
I'll put up the finished pics tomorrow.