
(INTERIOR) How to: Re-upholster your doors.

Thread Starter
Joined: Sep 2002
Posts: 2,932
Likes: 6
From: Surrounded by Sebey parts, Rhode Island
(INTERIOR) How to: Re-upholster your doors.
This thread is going to take me a week or more to finish, because I'm not doing all the actual work. It helps to have someone who can run a sewing machine, and luckily, I've got a beautiful woman who can.
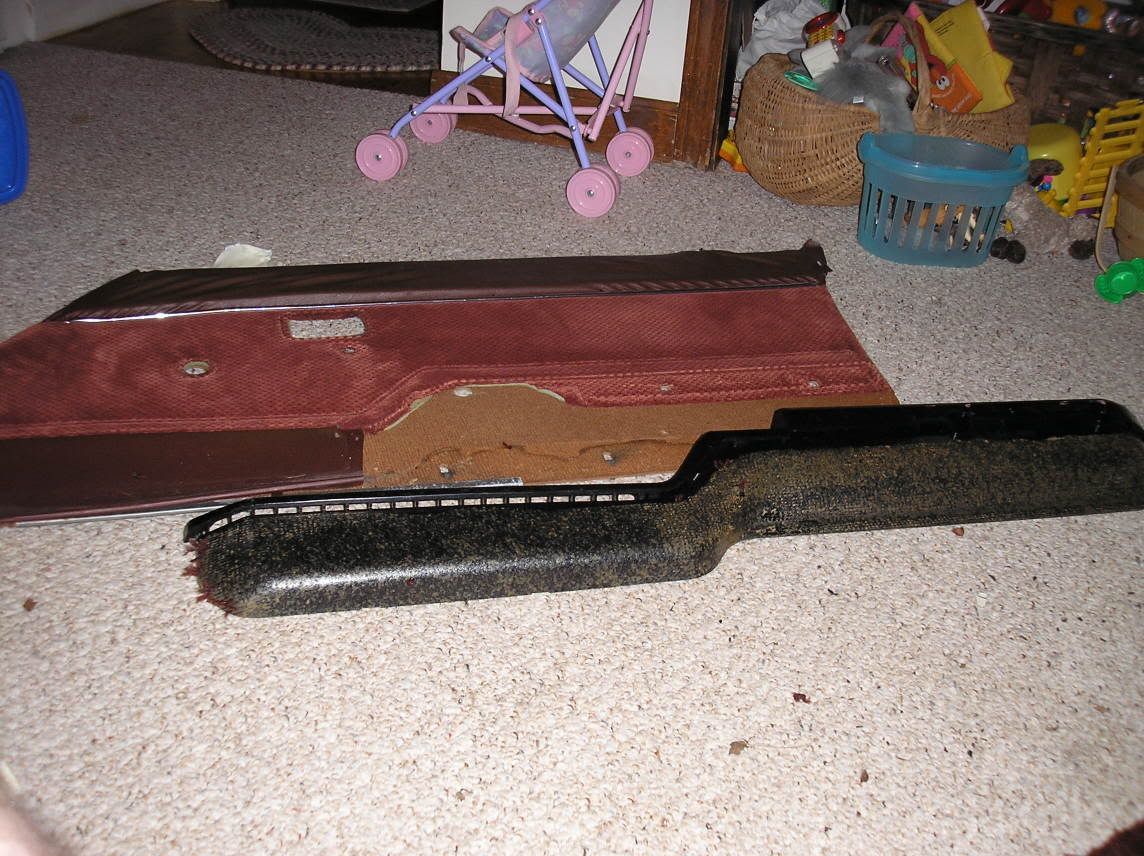
This is what I'm starting with... Ugly maroon:
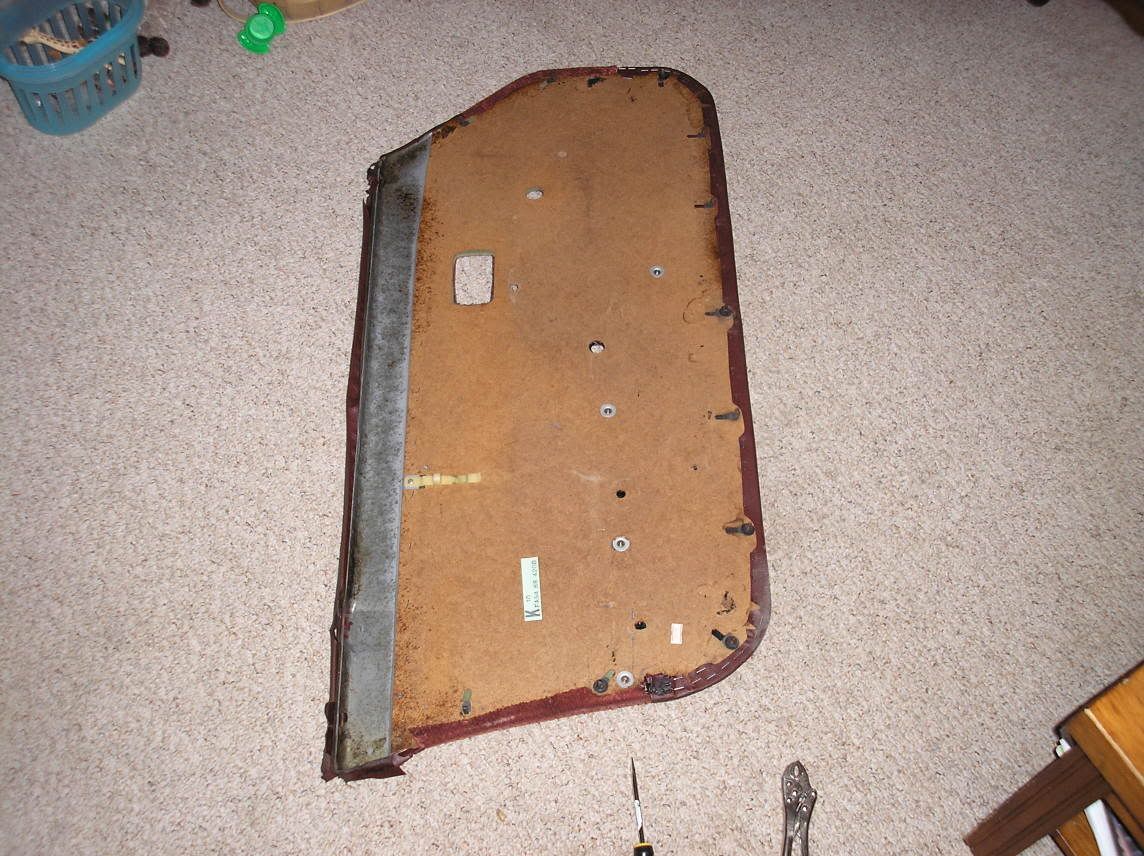
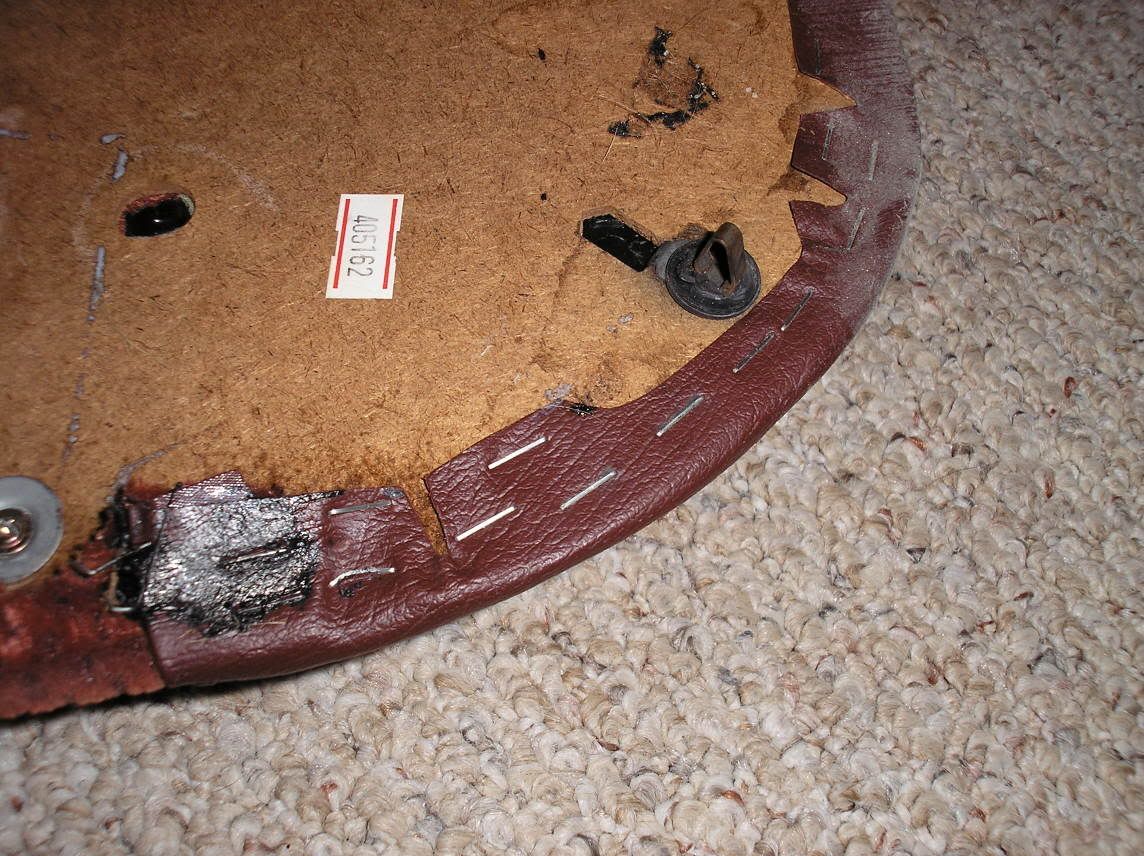
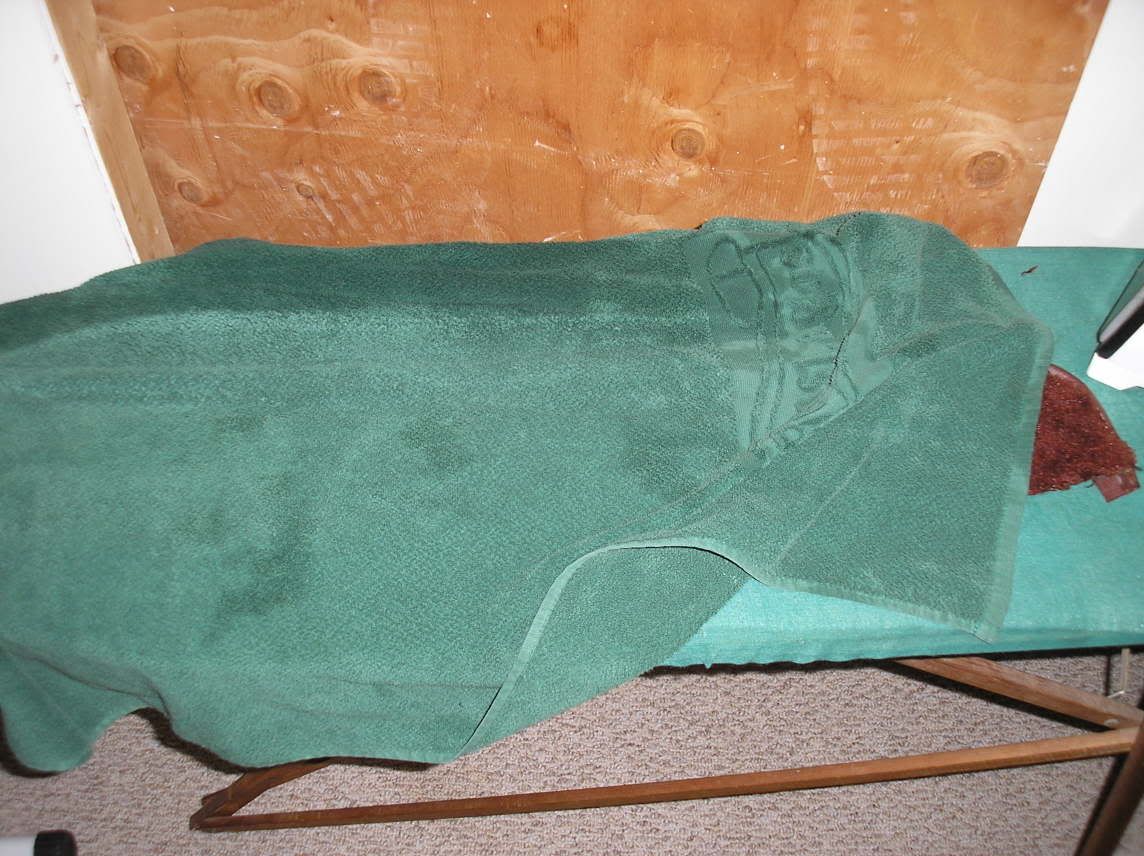
Start by removing all the staples at the bottom that hold the vinyl in place. I just popped 'em out with a flat head screwdriver. I thought it would be tougher, but the staples are actually really small. It only took a couple minutes to remove all of them.
After you're done with that, remove the five screws that hold the armrest in place. Put them in a ziplock bag so you don't lose them, because you aren't putting it back together anytime soon. Pull off the armrest. The nasty carpet at the bottom of the door peels right off. Trash it. It's disgusting, and we're not putting carpet there.
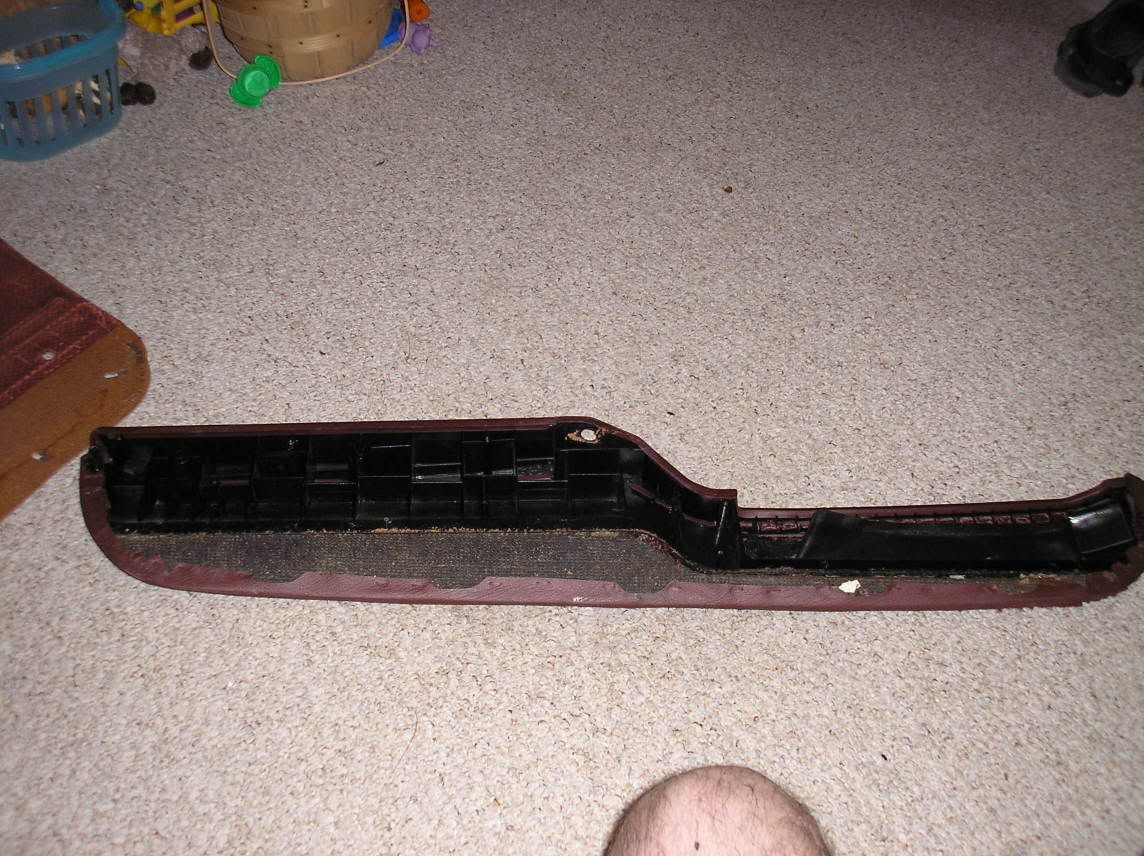
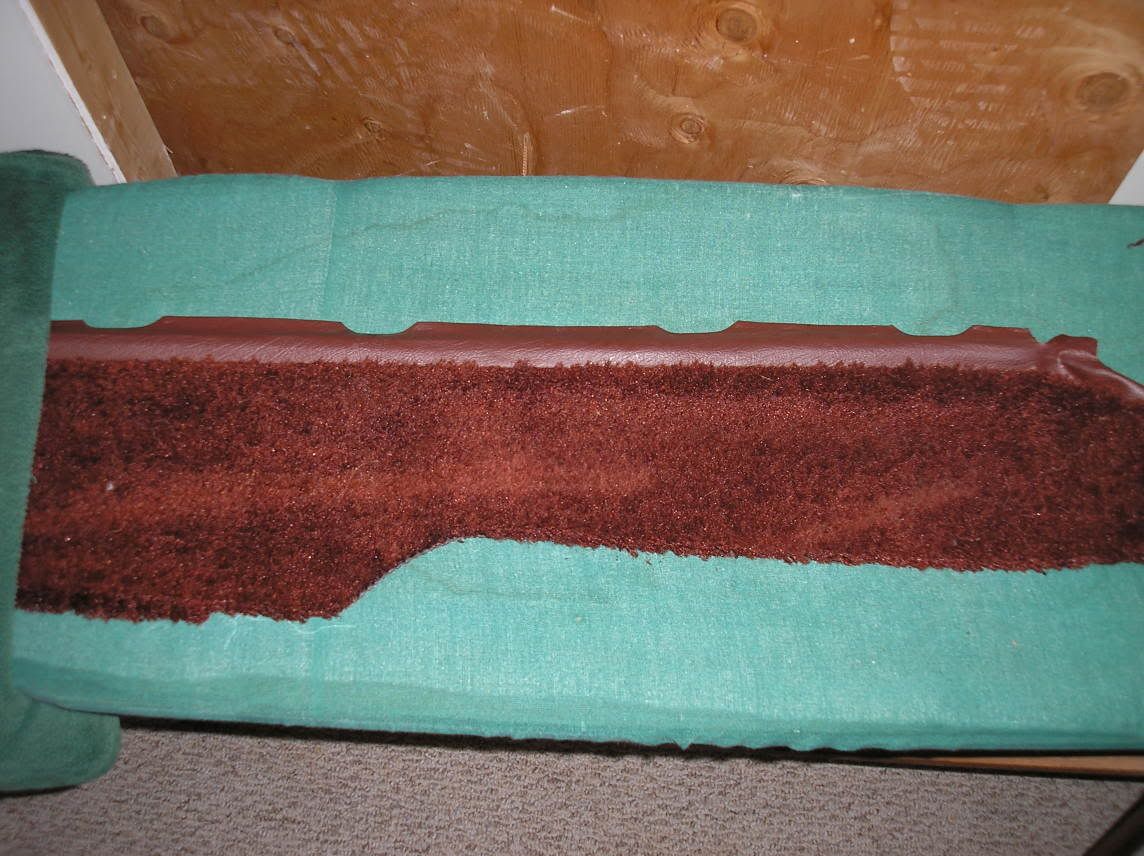
Now that you have the armrest off, you need to remove the rubber/vinyl/whatever this thing is made out of cover off the plastic piece of the armrest. You'll notice it's held on by an *** load of these tabs:
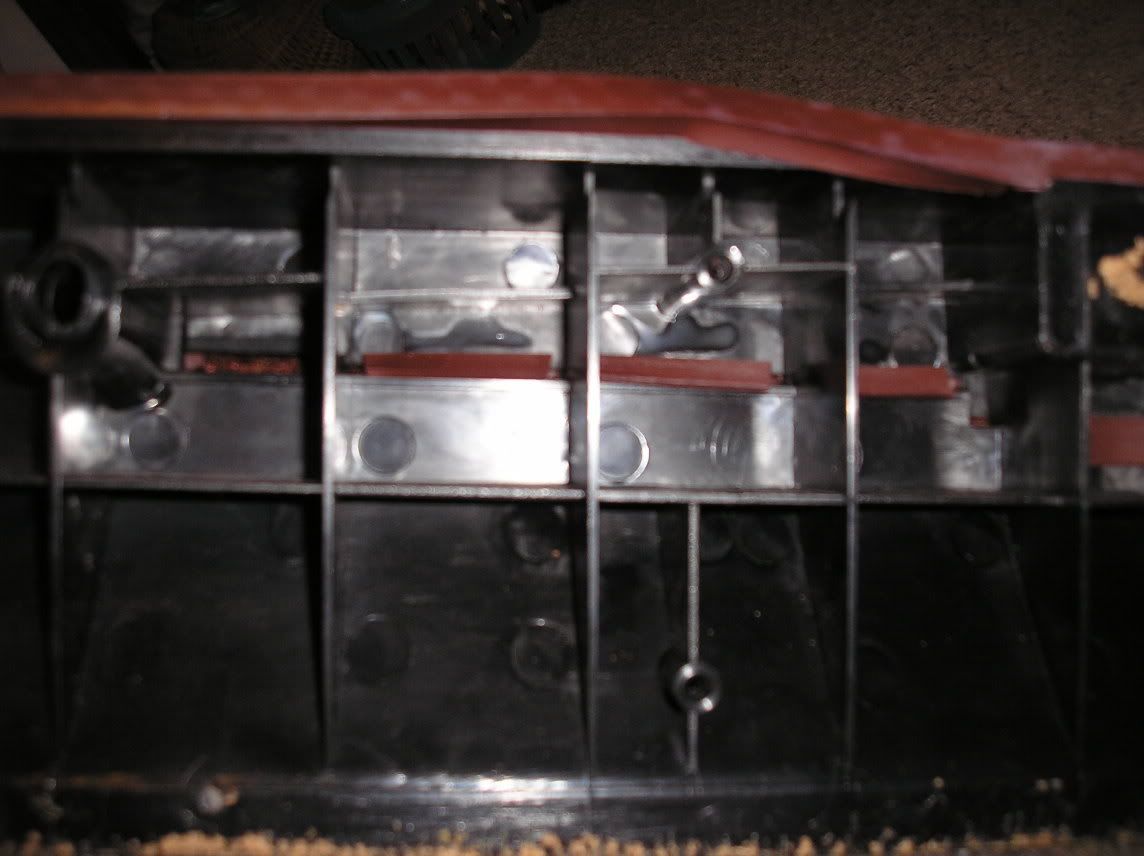
Easiest way to remove them? Pull the cover away from the plastic armrest, and take that same flathead screwdriver and give them a little push. They will pop right out. You're now left with this:
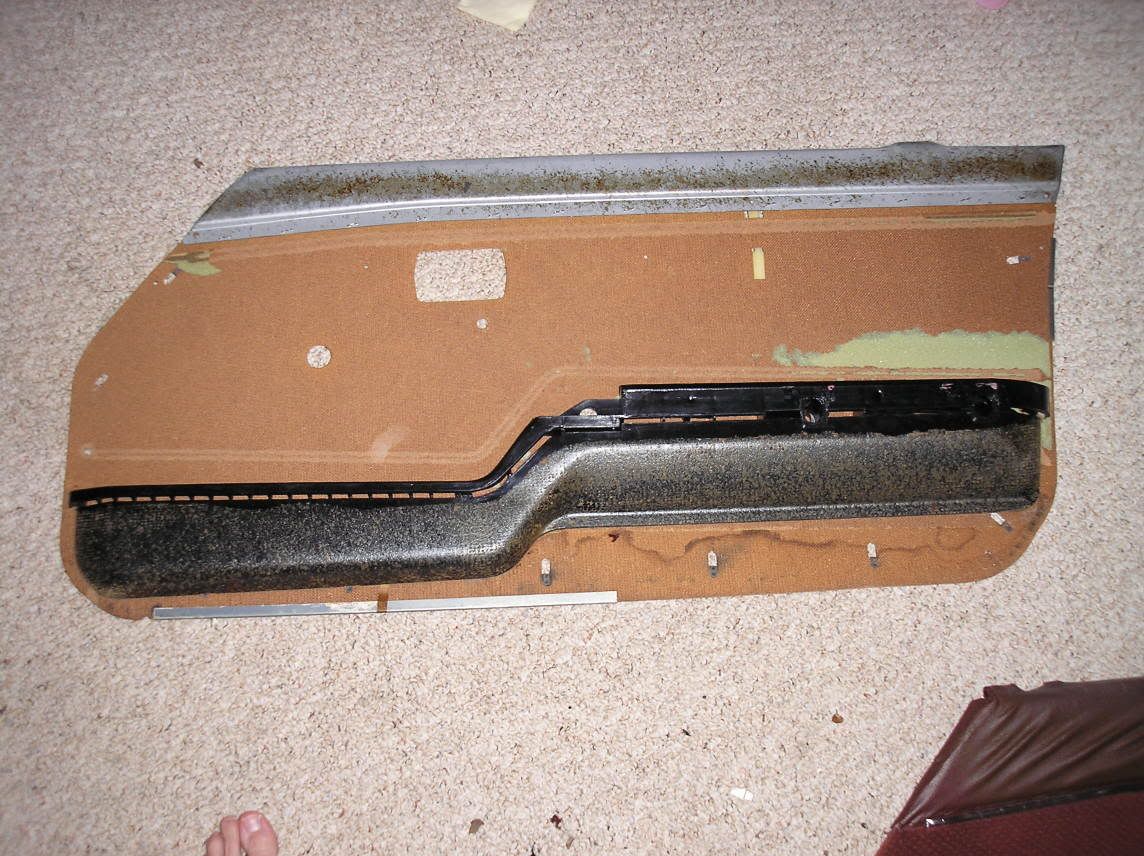
Removing the remaining fabric on the door panel is simple. Just pull up and away. There is some rubber padding and some foam padding that I'm going to replace, because it's A) old, and B) smells like ****. You can re-use yours if you want to, but just be very, very careful separating it from the fabric because it's going to tear.
This is what's left now:
I'm taking some adhesive remover to mine to completely clean it up, then I'm going to prime and paint it. Yes, I'm going to prime and paint it even though I'm re-covering it. Why? Because I can. And, I need something to do while the door panels are being remade.
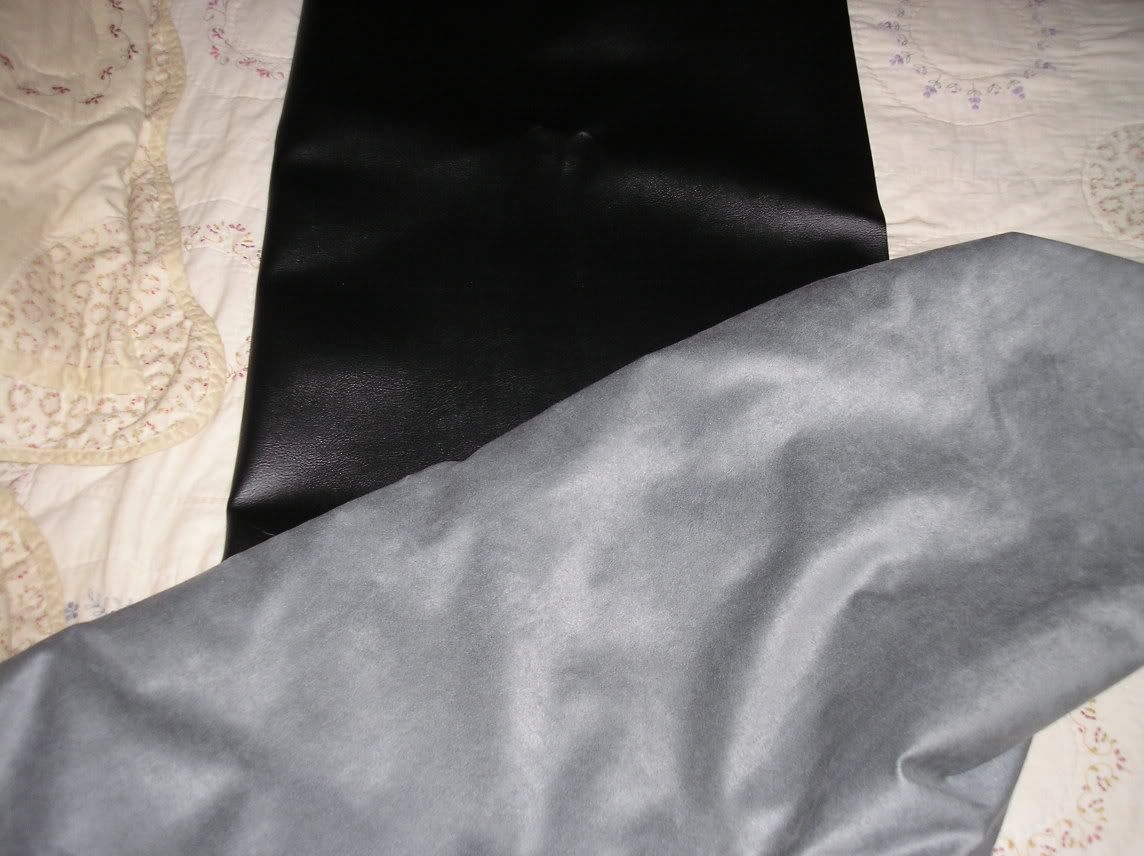
Later tonight: Measuring out the new door panels. Here's the material I'm using on mine. I bought black leather looking material (which Lynn calls "Pleather") and some grey fabric. It's all upholstery quality, and ran about $8 a yard. BUY MORE THAN ENOUGH, and make sure you buy UPHOLSTERY QUALITY. Remember, these are your door panels, they are going to take a beating. You want something that's going to last, so don't be cheap. I bought 2 yards of the black leather stuff, which is going to do the tops and bottoms of my door panels (to replace the current vinyl and the shitty carpet), the little wheelwell covers, the tiny section of paneling in the hatch, and to cover my new custom kickpanels I'm building. I bought 3 yards of the gray material, which is doing the center of the door panels, and my all new headliner.
This is what I'm starting with... Ugly maroon:
Start by removing all the staples at the bottom that hold the vinyl in place. I just popped 'em out with a flat head screwdriver. I thought it would be tougher, but the staples are actually really small. It only took a couple minutes to remove all of them.
After you're done with that, remove the five screws that hold the armrest in place. Put them in a ziplock bag so you don't lose them, because you aren't putting it back together anytime soon. Pull off the armrest. The nasty carpet at the bottom of the door peels right off. Trash it. It's disgusting, and we're not putting carpet there.
Now that you have the armrest off, you need to remove the rubber/vinyl/whatever this thing is made out of cover off the plastic piece of the armrest. You'll notice it's held on by an *** load of these tabs:
Easiest way to remove them? Pull the cover away from the plastic armrest, and take that same flathead screwdriver and give them a little push. They will pop right out. You're now left with this:
Removing the remaining fabric on the door panel is simple. Just pull up and away. There is some rubber padding and some foam padding that I'm going to replace, because it's A) old, and B) smells like ****. You can re-use yours if you want to, but just be very, very careful separating it from the fabric because it's going to tear.
This is what's left now:
I'm taking some adhesive remover to mine to completely clean it up, then I'm going to prime and paint it. Yes, I'm going to prime and paint it even though I'm re-covering it. Why? Because I can. And, I need something to do while the door panels are being remade.
Later tonight: Measuring out the new door panels. Here's the material I'm using on mine. I bought black leather looking material (which Lynn calls "Pleather") and some grey fabric. It's all upholstery quality, and ran about $8 a yard. BUY MORE THAN ENOUGH, and make sure you buy UPHOLSTERY QUALITY. Remember, these are your door panels, they are going to take a beating. You want something that's going to last, so don't be cheap. I bought 2 yards of the black leather stuff, which is going to do the tops and bottoms of my door panels (to replace the current vinyl and the shitty carpet), the little wheelwell covers, the tiny section of paneling in the hatch, and to cover my new custom kickpanels I'm building. I bought 3 yards of the gray material, which is doing the center of the door panels, and my all new headliner.

REW'd FB
Joined: Dec 2004
Posts: 2,685
Likes: 1
From: WA
I have to admit that is one thing that I would not want to try and tackle! But it looks like you have it undercontrol.
I have always wondered if you could put some sort of paddinf behins the vinyl so that it would have more of a plush look/feel. Not just cold hard cardbord. Nothing too cushy though...don't wanna look like a 90's playa.
It is invaluable to have someone that can sew nearby...they always come in handy!
Thread Starter
Joined: Sep 2002
Posts: 2,932
Likes: 6
From: Surrounded by Sebey parts, Rhode Island
Next step:
Take the removed material, and iron it flat. You are going to use it to help make the patterns for your new panels. Set your iron on medium heat, put a damp (damp, not wet) towel on top of it, and iron it flat. You want to get all the "wrap-arounds" flat, so you know how to cut your material.
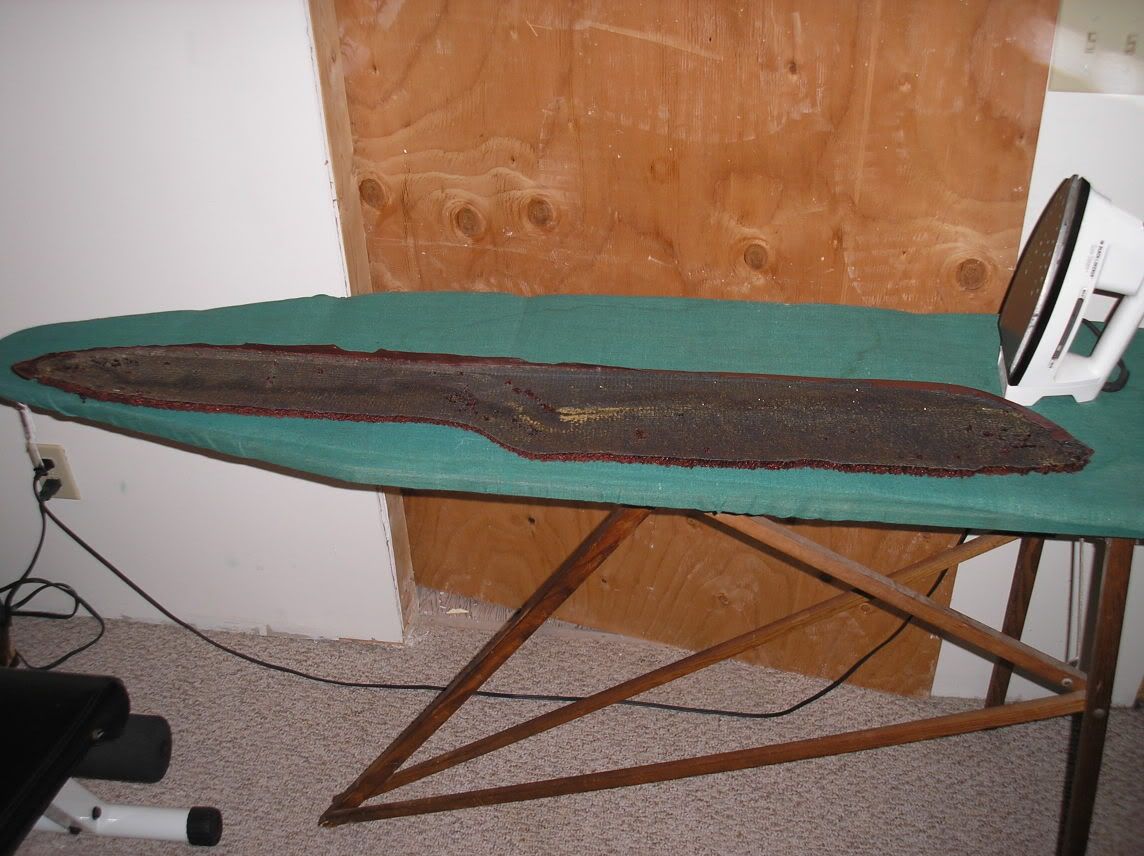

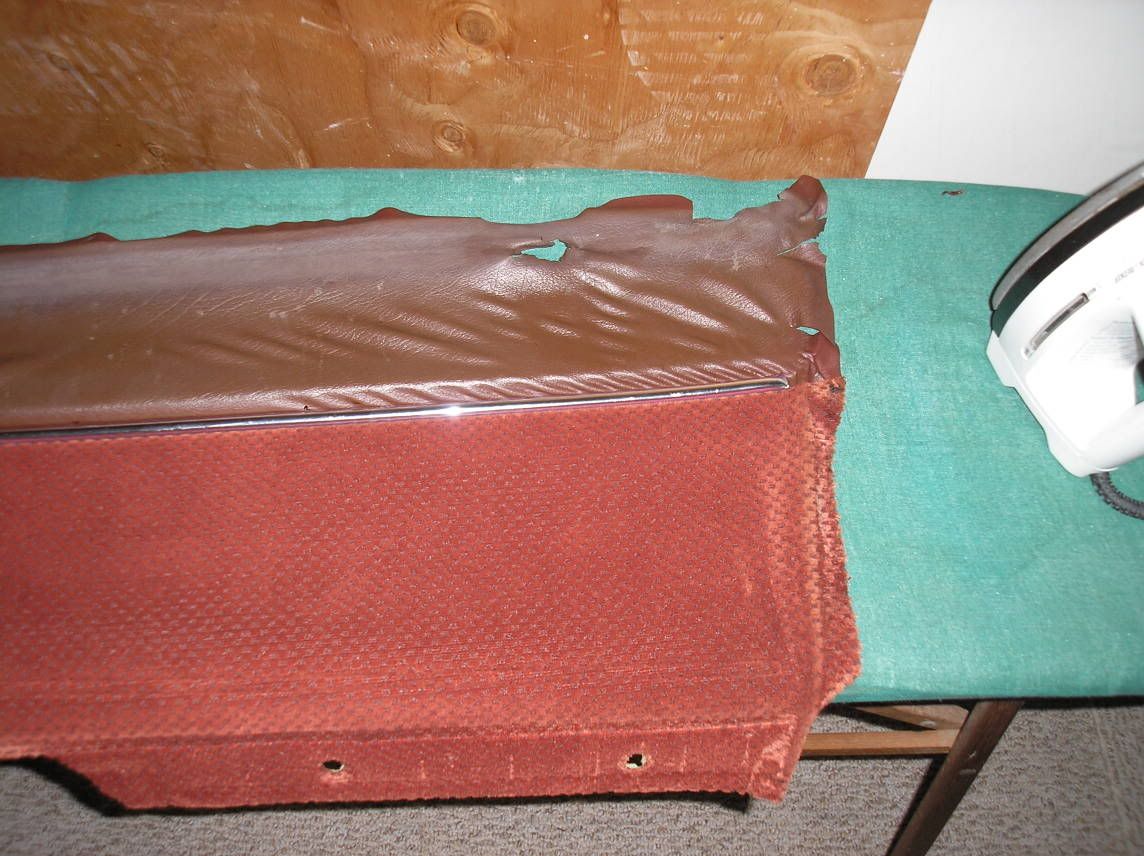
Hint: When ironing the vinyl flat, let it cool with the towel on top of it before you move it. You want the pieces to stay flat. The vinyl is basically plastic, meaning the heat makes it malleable, and when it cools, it will stay in the shape in which it cools. Follow me?
Take the removed material, and iron it flat. You are going to use it to help make the patterns for your new panels. Set your iron on medium heat, put a damp (damp, not wet) towel on top of it, and iron it flat. You want to get all the "wrap-arounds" flat, so you know how to cut your material.
Hint: When ironing the vinyl flat, let it cool with the towel on top of it before you move it. You want the pieces to stay flat. The vinyl is basically plastic, meaning the heat makes it malleable, and when it cools, it will stay in the shape in which it cools. Follow me?
Thread Starter
Joined: Sep 2002
Posts: 2,932
Likes: 6
From: Surrounded by Sebey parts, Rhode Island
Originally Posted by z-beater
I have to admit that is one thing that I would not want to try and tackle! But it looks like you have it undercontrol.
I have always wondered if you could put some sort of paddinf behins the vinyl so that it would have more of a plush look/feel. Not just cold hard cardbord. Nothing too cushy though...don't wanna look like a 90's playa.
It is invaluable to have someone that can sew nearby...they always come in handy!
I have always wondered if you could put some sort of paddinf behins the vinyl so that it would have more of a plush look/feel. Not just cold hard cardbord. Nothing too cushy though...don't wanna look like a 90's playa.
It is invaluable to have someone that can sew nearby...they always come in handy!
And, yeah, we're beefing up the padding. That was my first idea yesterday at the fabric store. I'm also having her put some "decorative" stitching (just slightly diagonal lines) in the center section to break up the gray... It will just be double stitched lines about 3 inches apart in black thread to make it kinda classy.
Senior Member
Joined: Mar 2004
Posts: 589
Likes: 3
From: Coastal
I found a very cool website that addresses door panel re-do tricks:
www.roddoors.com
I am working on a design for mine, now.
www.roddoors.com
I am working on a design for mine, now.
Trending Topics
love the braaaap
Joined: Jul 2003
Posts: 3,771
Likes: 5
From: Bognor, Ontario
I was just thinking about doing this today actually. I have already repainted most of my interior trim to make it look like new, and I've remade some of my panels in the hatch area. The originals were starting to look, well, ugly because they were curling at the edges, as was my headliner. I kept the headliner from my 84 parts car to put in my 82, but nothing else was kept.
Anyway, so far I've remade and upholstered some panels out of 1/4" hardboard. I don't know the exact name of the board I used, but its basically the same as stock, just twice as thick. Anyway, the two panels I made so far look great. They are the ones just behind the driver and passenger up near the ceiling (B pillar I think its called). Making the panels wasn't hard, just use the old ones as a template, cut them out with a jig saw, then you need to put a bend in them. To put a permanant bend in the panel, you need to heat it up then bend it a little more than the desired curve. Let it cool in this possition, then it should be the right curve once your done.
I covered mine in a high quality, rubber like "pleather", using foam as a backing. The hardest part was attaching the steel mounting plate for the plastic trim thats attached to this panel. Other than that, it was an easy job.
My doors are going to have a reletively simple design. The top section is going to be the same pleather I used on the above said panels, then the rest is going to be a dense carpetlike material. Very durable stuff. The lower panels below the "B pillar" panels are going to carry this theme into the hatch area. I'll post pics when its all done.
Thread Starter
Joined: Sep 2002
Posts: 2,932
Likes: 6
From: Surrounded by Sebey parts, Rhode Island
Lynn will make the patterns tomorrow, and hopefully on Tuesday or Wednesday, she'll have them all sewn up and I can start reassembling them.
I am pulling the two smaller trim pieces tomorrow so they will match the rest of the car. Then, I'll start pulling the headliner and the dash. I still have no idea how I'm going to do the dash... It will all depend on whether or not it will accept the dye.
I am pulling the two smaller trim pieces tomorrow so they will match the rest of the car. Then, I'll start pulling the headliner and the dash. I still have no idea how I'm going to do the dash... It will all depend on whether or not it will accept the dye.
Senior Member
Joined: Mar 2004
Posts: 589
Likes: 3
From: Coastal
I am curious to see the headliner progress photo series. I need to tuck mine up abit at the front. I've noticed abit of a sag near the visors.
BTW, here's my temporary door panels I made while cutting new patterns. The pull handle came from an '80 limited RX7 that my friend totaled.
I have almost convinced myself to give a red / black weave carbon fiber panel a try. I have no exp in doing carbon fiber, but I've read alot! I have carbon fiber materials on order eady for delivery by Tuesday. I'll need to fab up a mold, though, yet.
Thread Starter
Joined: Sep 2002
Posts: 2,932
Likes: 6
From: Surrounded by Sebey parts, Rhode Island
Lynn is doing the patterns for the new door panels right now... Hopefully she'll have them sewn up tomorrow. I am going to be cutting the new foam and molding it to the doors, as well as removing the rest of the dash tomorrow. At our current rate of progress, my interior *could* be done by Monday night.

Thread Starter
Joined: Sep 2002
Posts: 2,932
Likes: 6
From: Surrounded by Sebey parts, Rhode Island
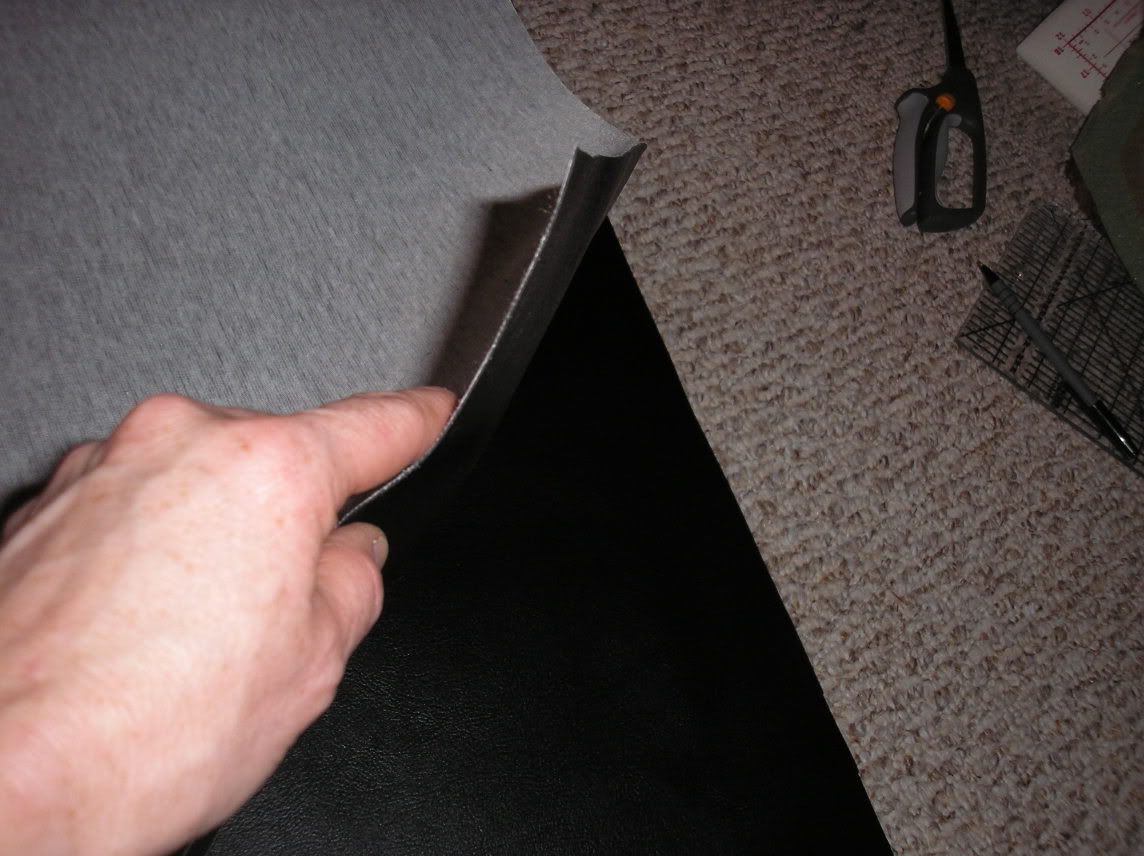
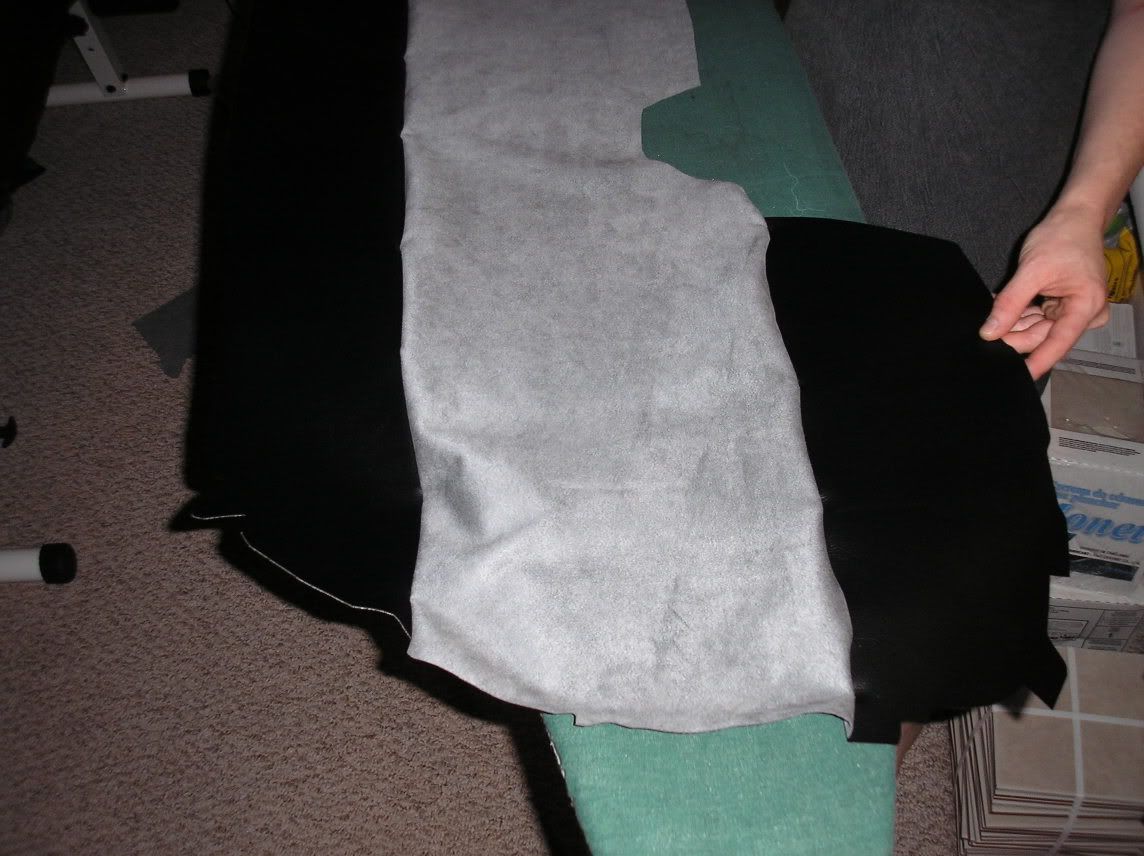
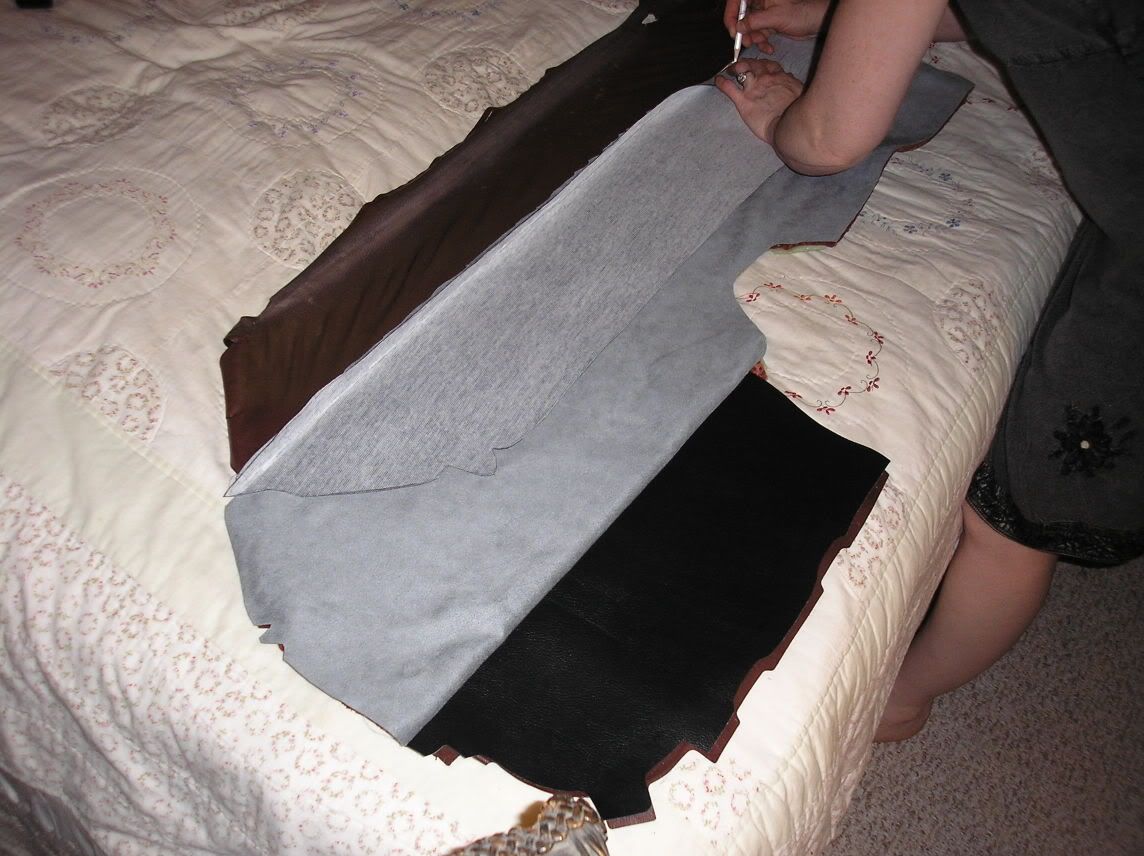
Since we are making two identical door panels, the first thing you do is, lay the fabric surface to surface. This is the artificial leather:
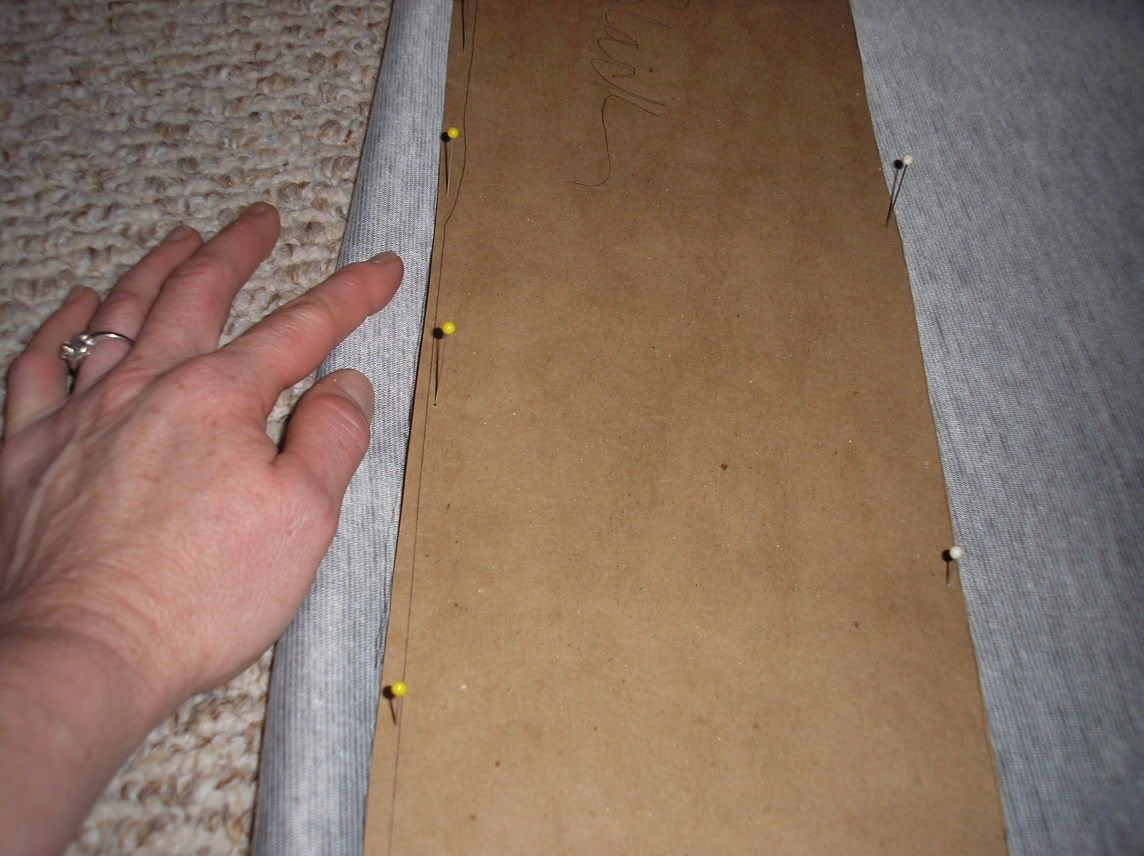
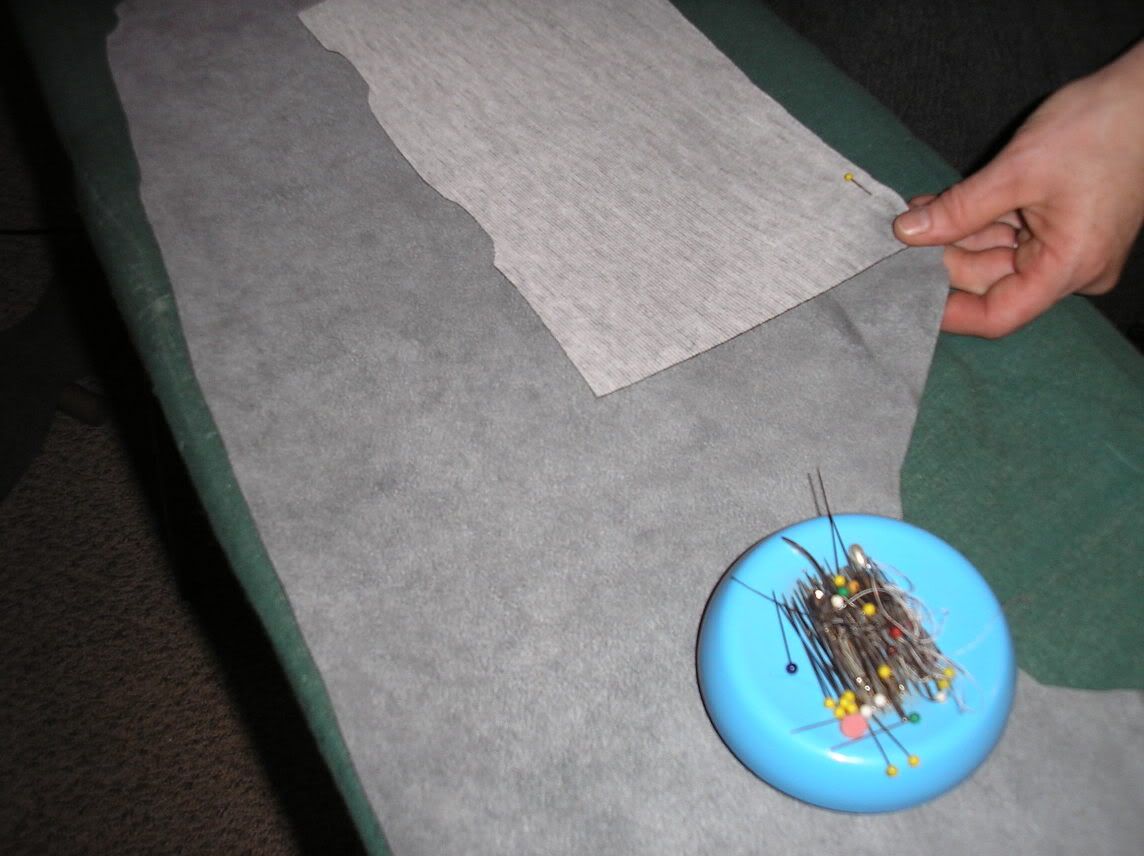
Next, Lynn took a pattern she made on plain brown paper and laid it down on the fabric. Once she was happy with it's position, she pinned it in place:
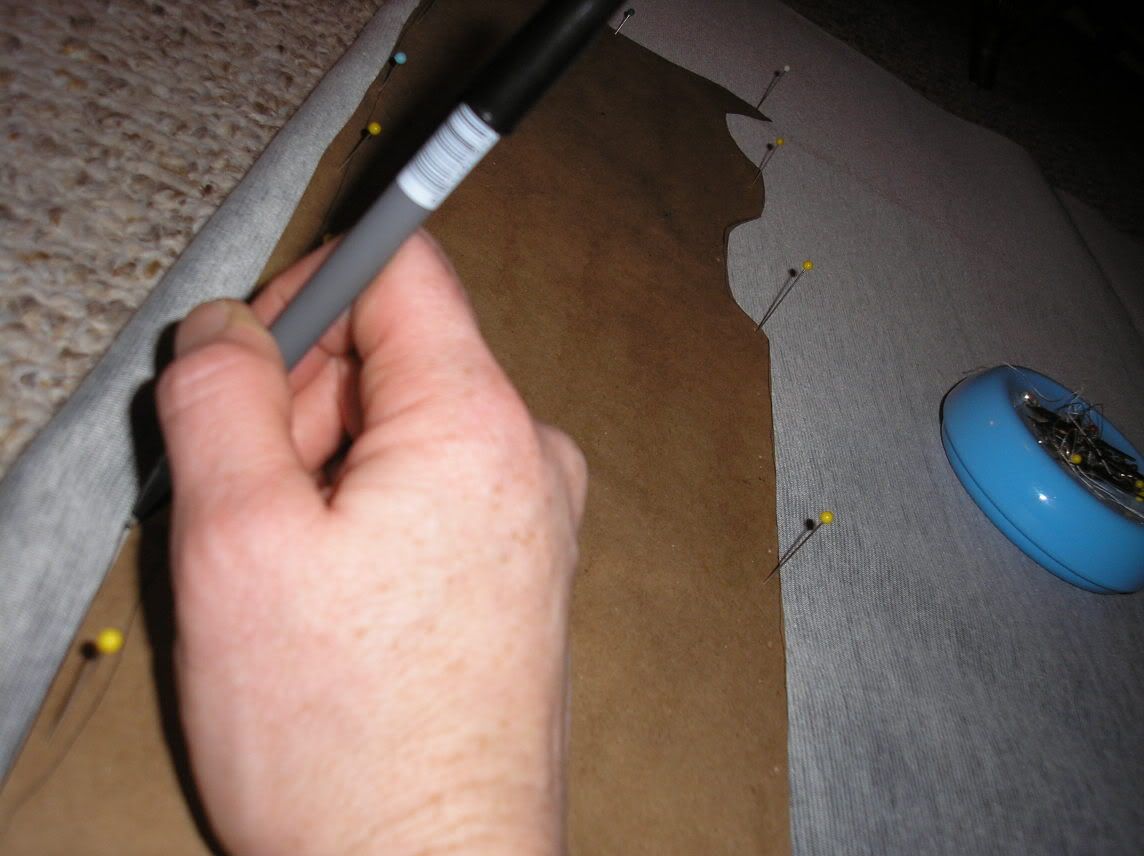
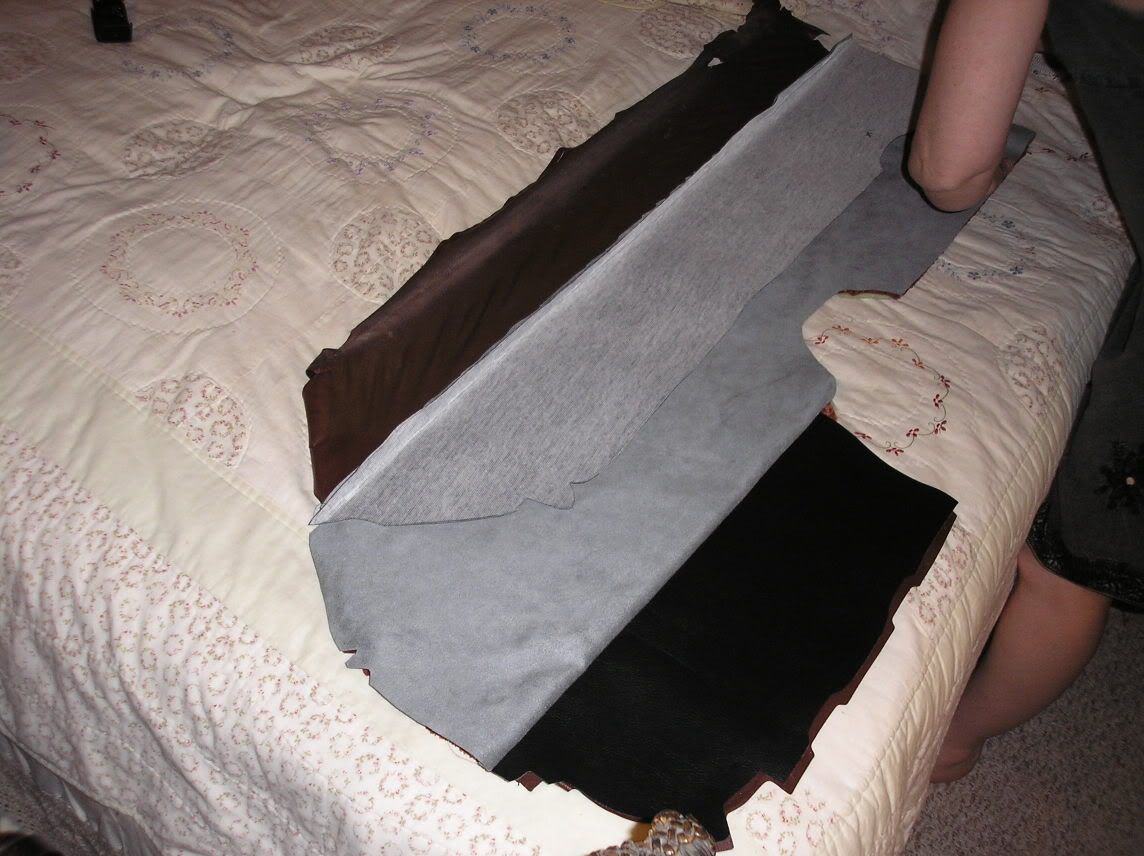
Then, she traced the pattern onto the fabric:
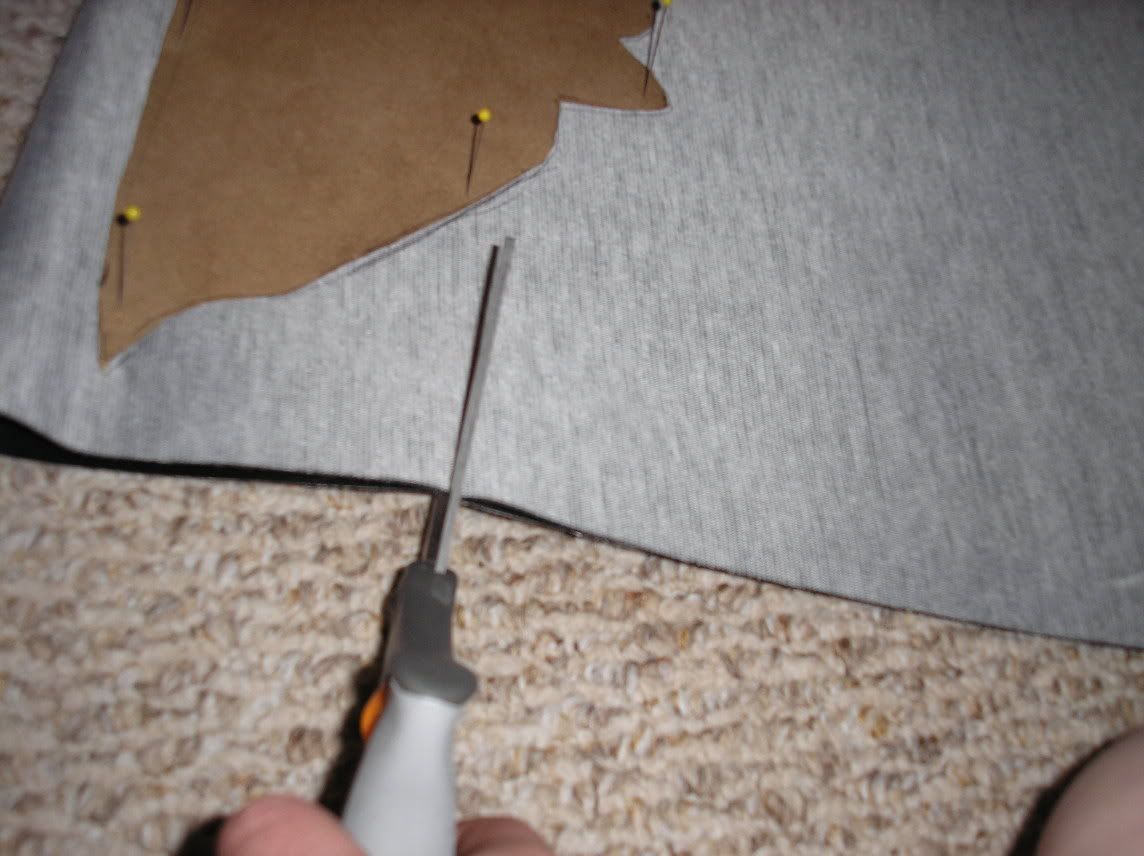
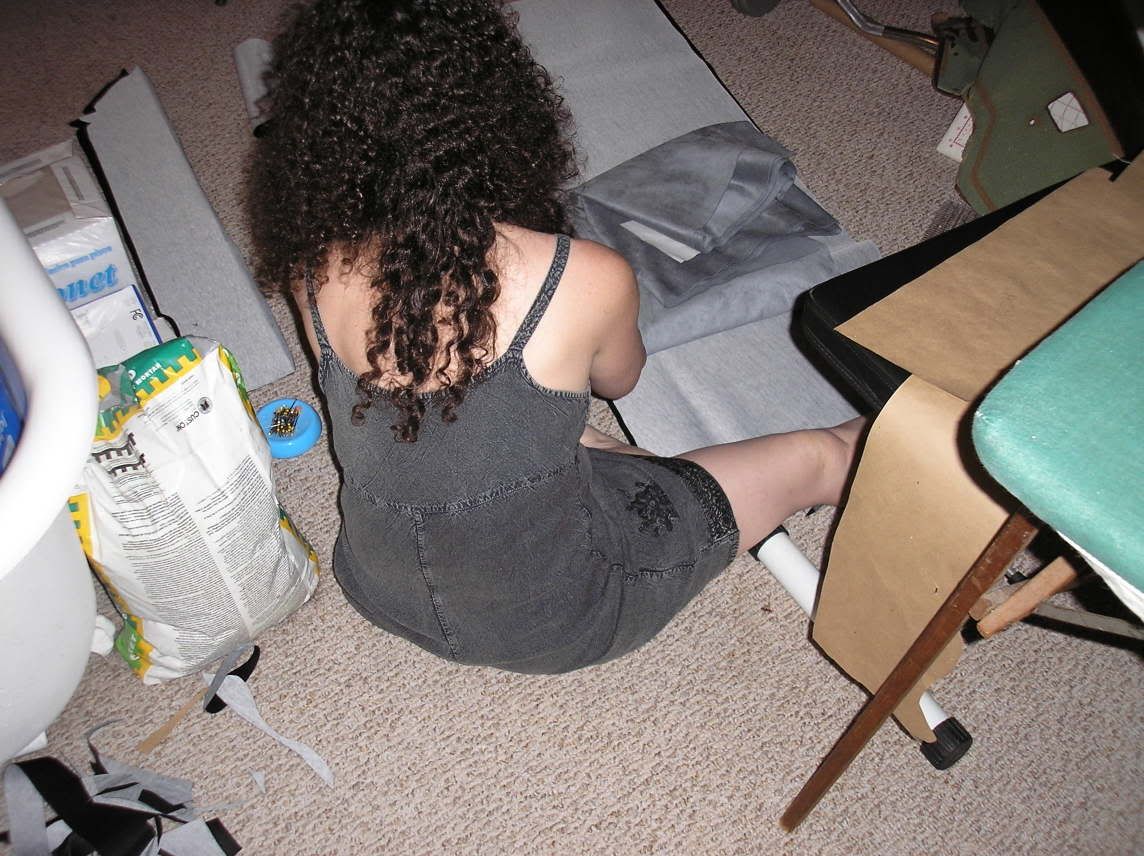
Cutting out the pattern. I told her to take pics step-by-step:
Here she is, working on the gray suede part:
Yes, I'm hittin' that tonight... And every night, thanks!
Now that she got all the pieces cut out, it's time to pin them together. Since we're hiding the seams, you will notice that the back of the artificial leather is what's showing. We just matched 'em up the way Mazda did theirs.
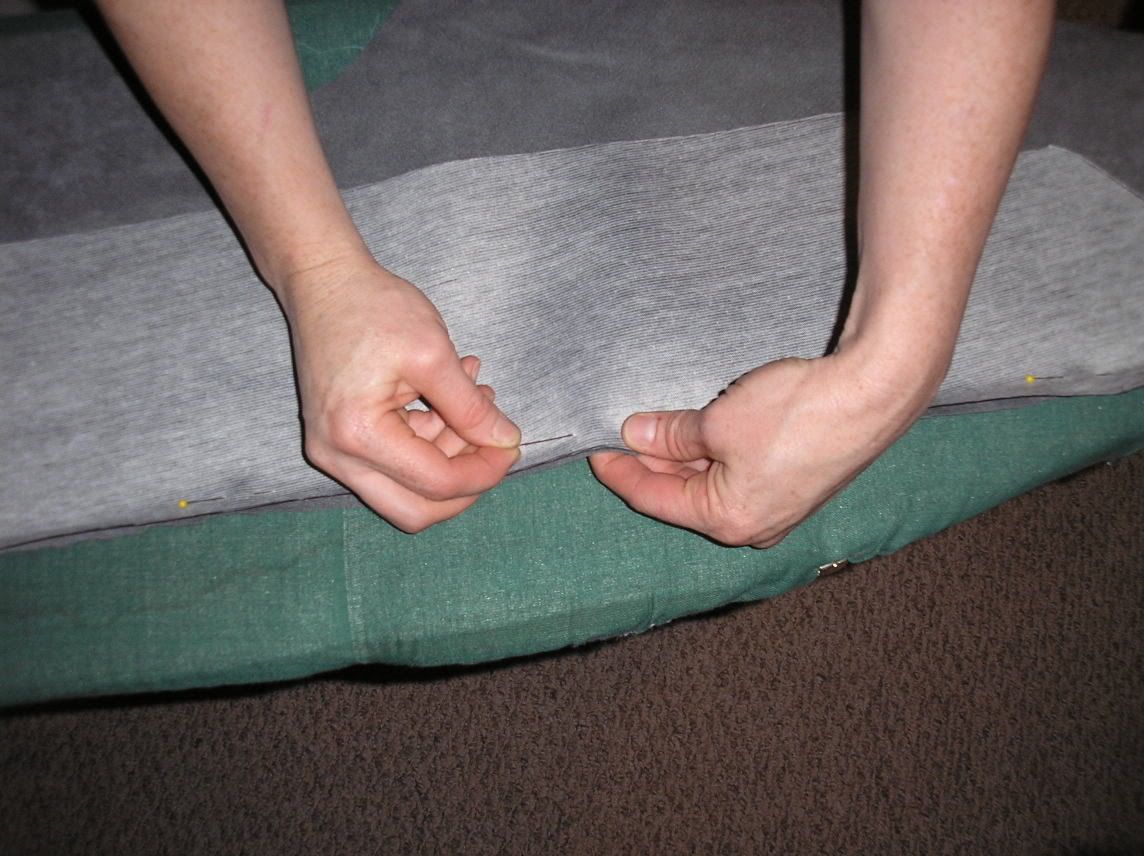
Here it is all pinned together... Is that just hot sex on a platter, or what?
Here's the other side being pinned:
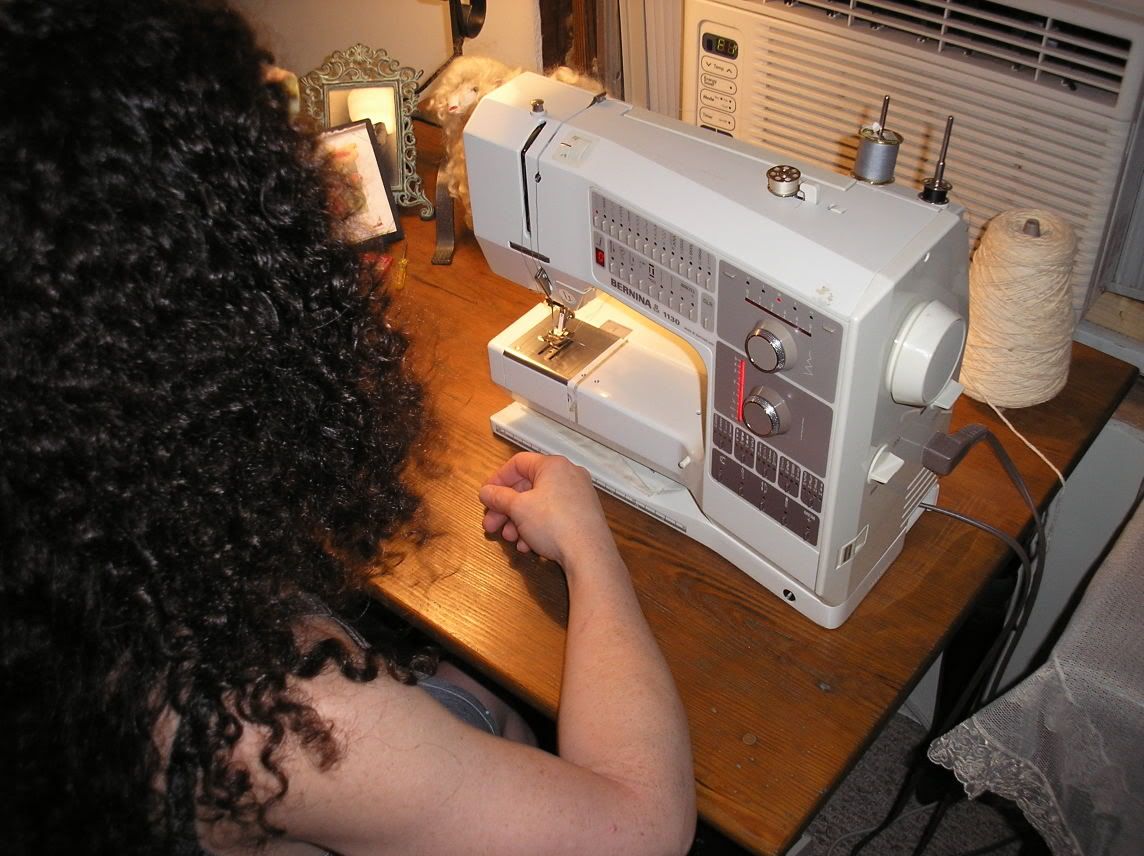
She's sewing them up right now after a couple practice runs. Now, remember, she has a hardcore sewing machine... It's a Bernina... It's no ******' Singer that your Grandma has in her closet, these are a couple grand a pop.
Next, Lynn took a pattern she made on plain brown paper and laid it down on the fabric. Once she was happy with it's position, she pinned it in place:
Then, she traced the pattern onto the fabric:
Cutting out the pattern. I told her to take pics step-by-step:
Here she is, working on the gray suede part:
Yes, I'm hittin' that tonight... And every night, thanks!
Now that she got all the pieces cut out, it's time to pin them together. Since we're hiding the seams, you will notice that the back of the artificial leather is what's showing. We just matched 'em up the way Mazda did theirs.
Here it is all pinned together... Is that just hot sex on a platter, or what?
Here's the other side being pinned:
She's sewing them up right now after a couple practice runs. Now, remember, she has a hardcore sewing machine... It's a Bernina... It's no ******' Singer that your Grandma has in her closet, these are a couple grand a pop.
Thread Starter
Joined: Sep 2002
Posts: 2,932
Likes: 6
From: Surrounded by Sebey parts, Rhode Island
Here's the killer machine:
Here's a practice piece:
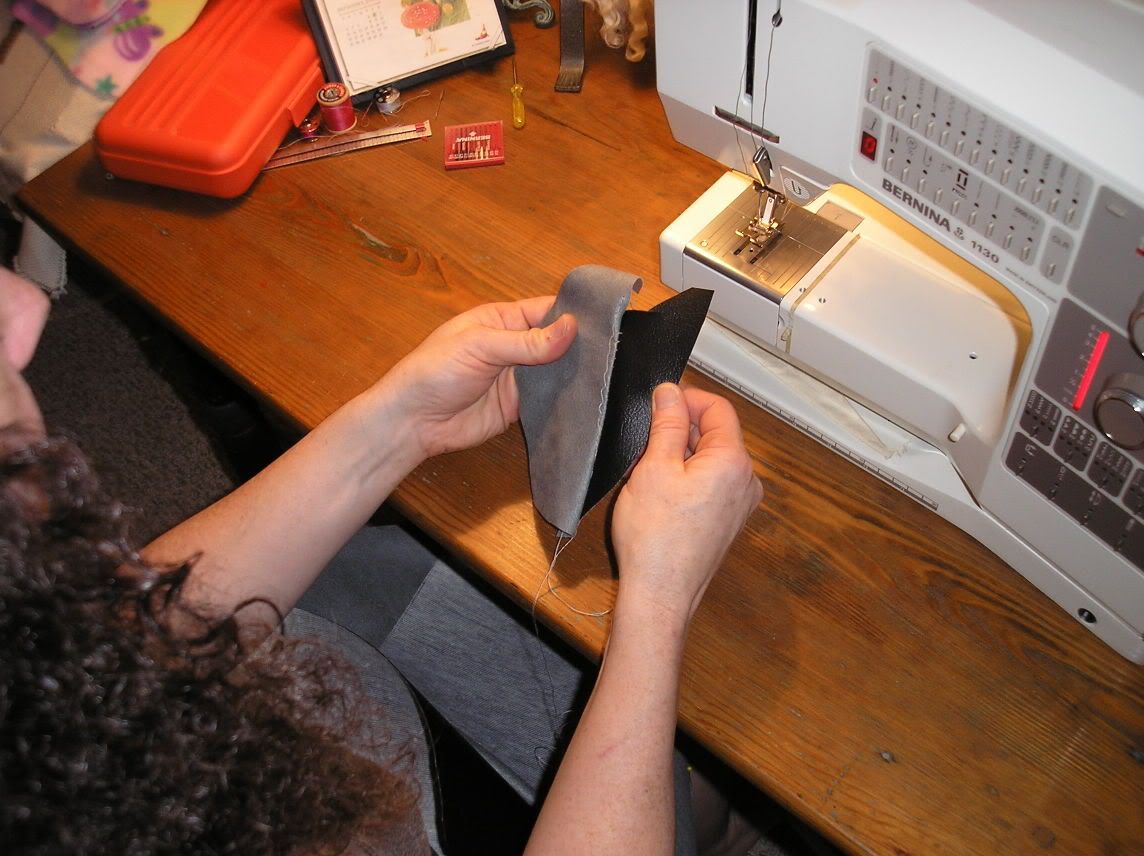
She did a plain, simple stitch just to make sure it's sized up right:
Now, she's doing a little adjustment to the piece to make sure it lines up just like the OEM part:
Her words: "Holy ****, this machine is going through this fabric like buttah!!!"
Here's a practice piece:
She did a plain, simple stitch just to make sure it's sized up right:
Now, she's doing a little adjustment to the piece to make sure it lines up just like the OEM part:
Her words: "Holy ****, this machine is going through this fabric like buttah!!!"

Thread
Thread Starter
Forum
Replies
Last Post
Mrmatt3465
Interior / Exterior / Audio
8
Sep 17, 2015 01:28 PM
car, door, double, interior, leather, panels, pleather, reupholster, rx7, stitch, tips, upholster, upholstered, upholstering, upholstery, uphoster