
(ENGINE) Pilot bearing removal with pix

Thread Starter
Onward thru the fog!
Joined: Feb 2006
Posts: 317
Likes: 1
From: On the couch
Pilot bearing removal with pix
Based on all the "searched" help and info found here for Pilot Bearing removal and installation I took a few pix to help other noobs (who may never have seen or heard of a pilot bearing before). Feel free to make corrections or comments. I learn as I go.
This is not a complete "How to", just a familiarization of the components.
Here's a clutch alignment tool, a new pilot bearing, and an old one. The rollers and cage fell out of the old "race" or casing on the right. (There's an extra new one there too with a yardstick to show the size.)
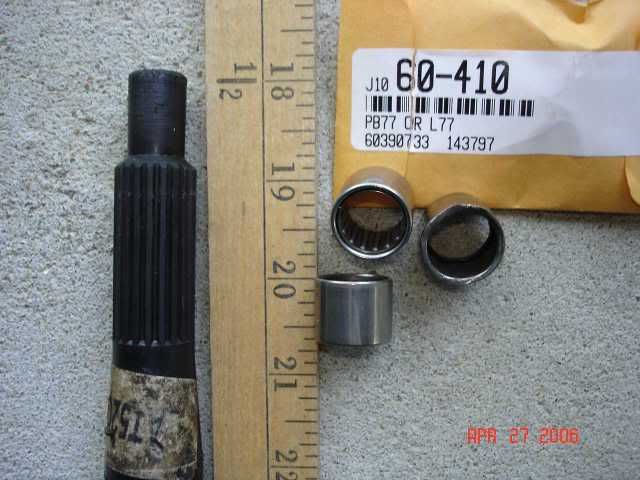
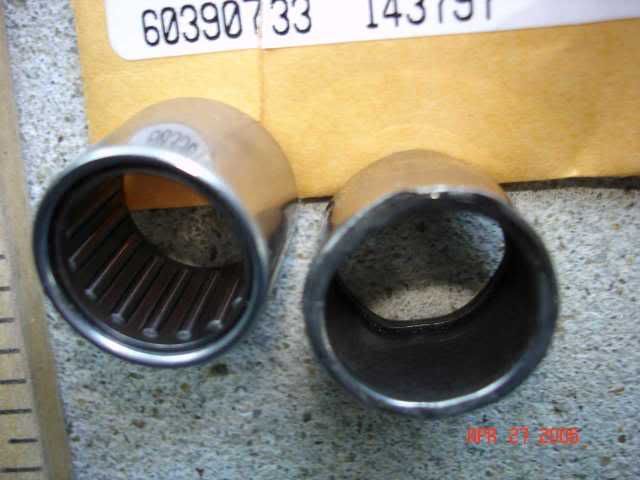
New (on the left) and old. You can see those important rollers better.
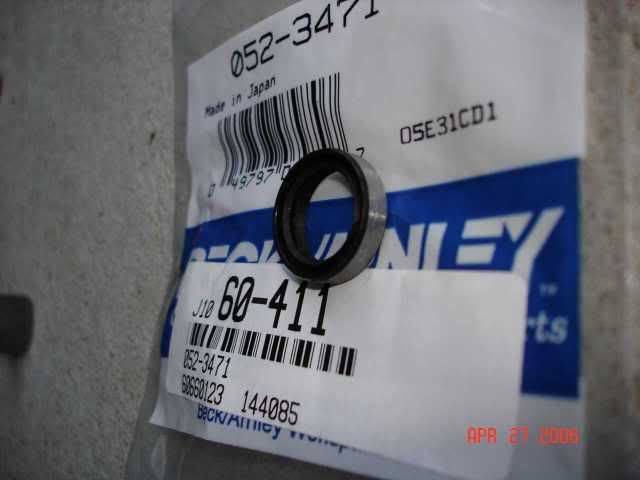
Here's the pilot bearing seal.
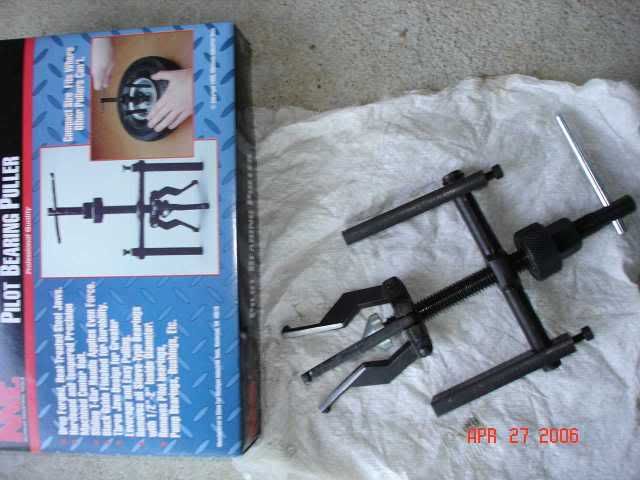
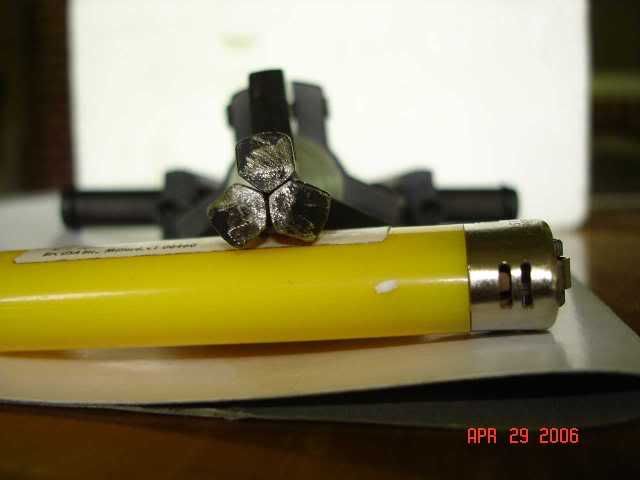
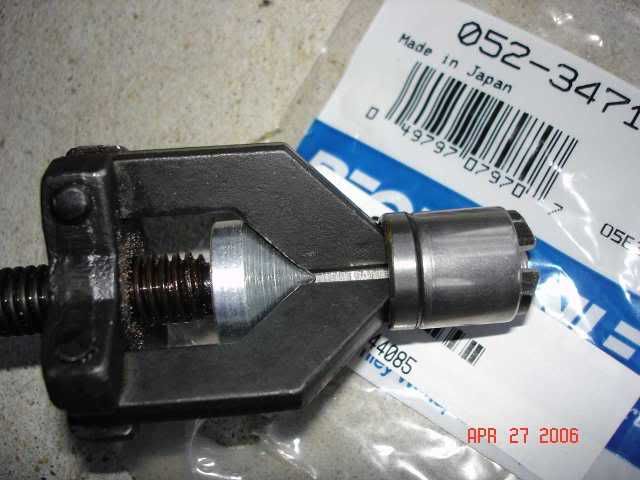
A pilot bearing removal tool from JC Whitney for $17.99
I filed the inside edge of the three jaws from flat into sort of a V so the jaws will fit snugly together and fit inside the new pilot bearing. It was too large otherwise and I didn't file the outside of the jaws 'cause I didn't want to lose the "edge grippers".
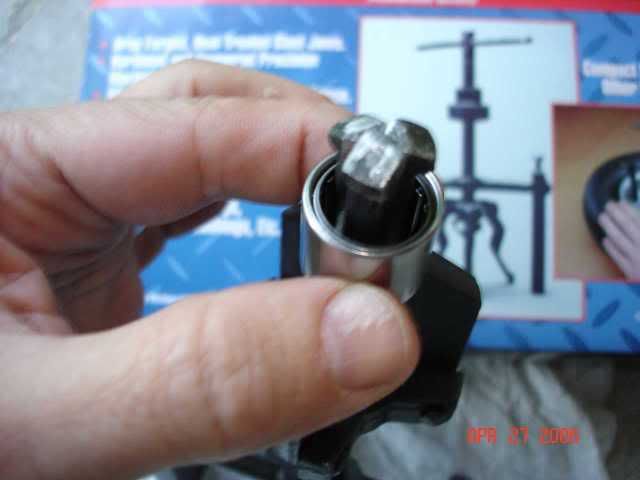
You can see how they fit in the closed position.
Inserted as if in an intact pilot bearing.
Jaws tightened.
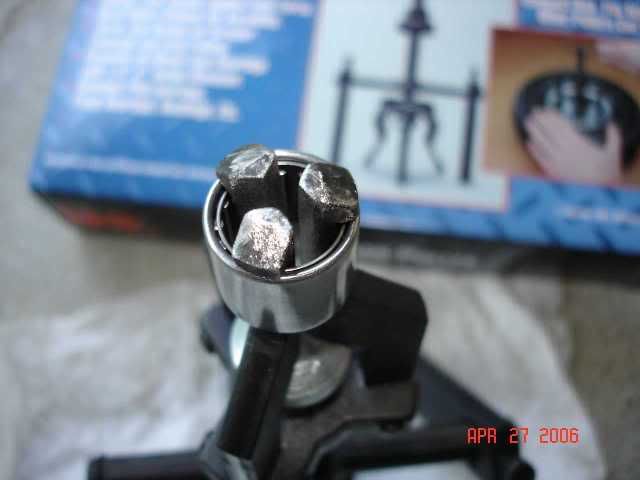
Jaws tightened, side view.
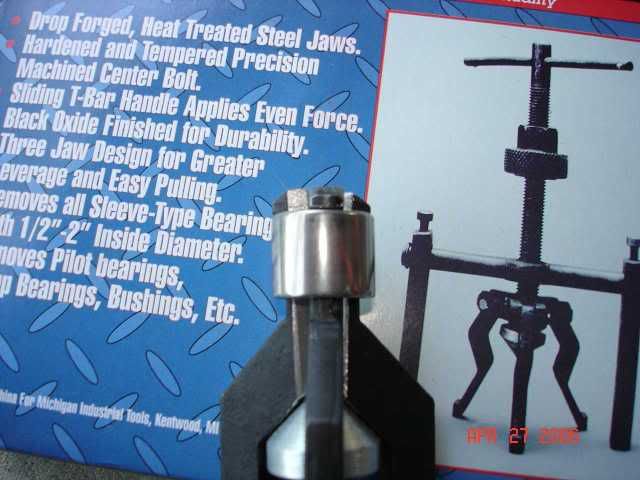
This is what it would look like if you pulled the seal along with the bearing.
Lightly grease the bearing and seal, toss 'em in the freezer in a sealed baggie, and install using a 14mm deep socket and small hammer to tap them into place (first the bearing, then the seal).
DD
This is not a complete "How to", just a familiarization of the components.
Here's a clutch alignment tool, a new pilot bearing, and an old one. The rollers and cage fell out of the old "race" or casing on the right. (There's an extra new one there too with a yardstick to show the size.)
New (on the left) and old. You can see those important rollers better.
Here's the pilot bearing seal.
A pilot bearing removal tool from JC Whitney for $17.99
I filed the inside edge of the three jaws from flat into sort of a V so the jaws will fit snugly together and fit inside the new pilot bearing. It was too large otherwise and I didn't file the outside of the jaws 'cause I didn't want to lose the "edge grippers".
You can see how they fit in the closed position.
Inserted as if in an intact pilot bearing.
Jaws tightened.
Jaws tightened, side view.
This is what it would look like if you pulled the seal along with the bearing.
Lightly grease the bearing and seal, toss 'em in the freezer in a sealed baggie, and install using a 14mm deep socket and small hammer to tap them into place (first the bearing, then the seal).
DD
Slayer of Apex Seals
Joined: Jan 2004
Posts: 15
Likes: 0
From: Snohomish County, WA
Excellent write-up!
The last time I did the clutch on my 84, I totally shreded the pilot bearing getting it out. I had no
tool like the one you show, and had to get back on the road by the end of the weekend. All of
the rollers came out, but the race was stuck good'n'tight inside the E-shaft. I ended up using a
Dremel to grind through the race (careful not to dig too deep and score the inside of the bore!)
The lesson here: Get the right tools before you start!

Thread
Thread Starter
Forum
Replies
Last Post
trickster
2nd Generation Specific (1986-1992)
25
Jul 1, 2023 04:40 PM
KAL797
Test Area 51
0
Aug 11, 2015 03:47 PM