
My 1985 Rx-7 GS: Project "Gus"

Not sure if I'll be able to make it or not. It's looking about 50/50 right now. If I do come I'll be driving the Protege up and spectating/shooting the bull with everyone. Gus isn't ready for a trip that long yet. Don't count me out though!
Jamie
Jamie
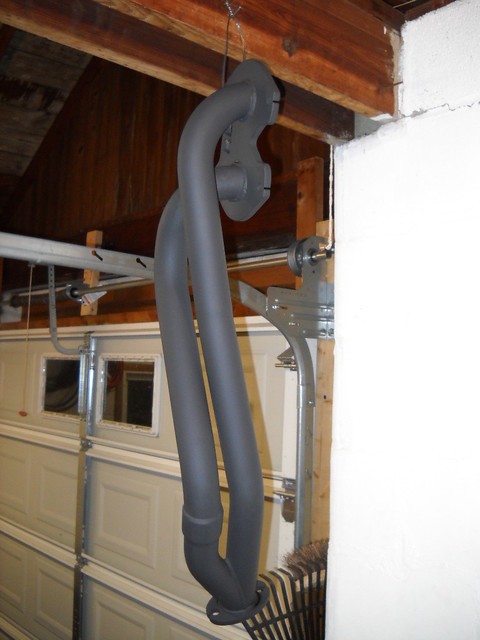
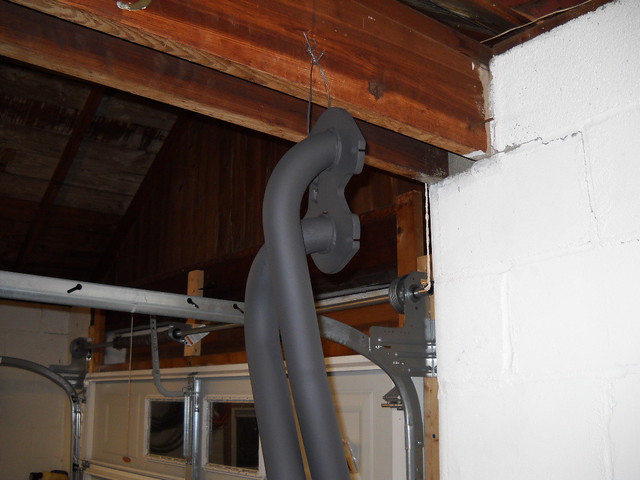
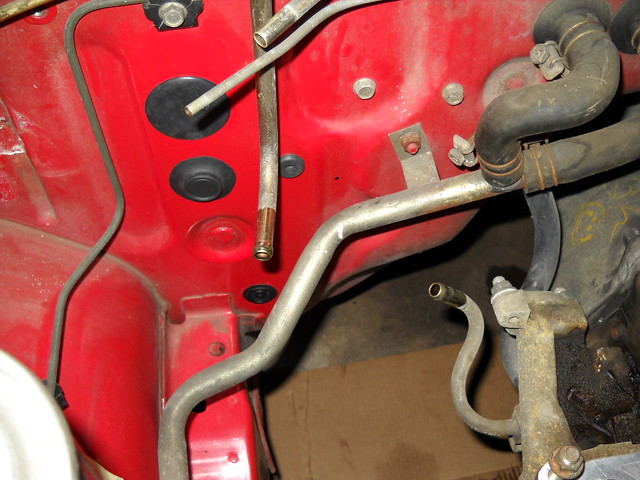
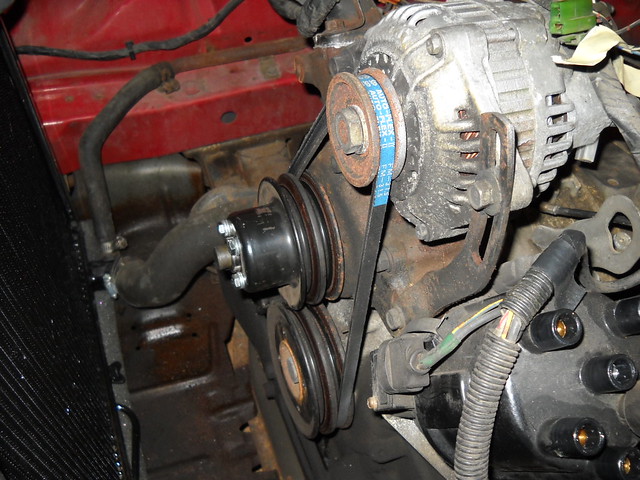
Ok, I removed the studs that the AC compressor bracket was mounted on as Kentetsu suggested. They popped right out of there with my vice grips. Thanks for the tip! There were three of them and it went very smoothly. However, I have a question about one other stud that is down there. What is it for? Can I remove it? See the picture below. Does anyone know what this thing is? Is it removable?

Joined: Feb 2006
Posts: 3,162
Likes: 1
From: London, Ontario, Canada
If you do make it and still want to race I'm sure one of us will let you co-drive one of our cars. Mine will likely be on horrible all season rubber, but it will also have a ton of new parts (see sig) so that should make it tons of fun.
Lives on the Forum
Joined: Jun 2004
Posts: 11,359
Likes: 14
From: Grand Rapids Michigan
Sorry, I can't view your pic due to internet filtering. I'll try to remember to take a look when I get home (on lunch break now).
Definitely consider co-driving with somebody if you can make it up but can't bring your 7. I already have someone co-driving, but between Orion and dj55b or maybe even Whitey85mtu we ought to be able to get you a ride.
Chris- I might have a set of wheels/tires lined up for you for this event (stock wheels 4x110 with highly used Sumitomos).
Maybe I'll start a thread in the non-tech section for this event so we don't clutter up your thread with any more unrelated BS.


i think that stud is used for the GSL with power steering. i'll check on my spare SE engine that had power steering and see if that stud is still cadmium plated and shiney where the nut would be. if it is i'm sure its for power steering when. i just took that power steering bracket and pump off last year and the engine has been in the garage since.
i looked on my SE engine and no nut has ever been threaded on that particular stud. that engine had A/C and power steering and the stud was not used for either. maybe it was used at the assembly plant for something.

Alright thread followers its time for another update. It's been a long time since I posted anything, and I have made some good progress. Here are the pics! I'll give descriptions as we scroll through them...
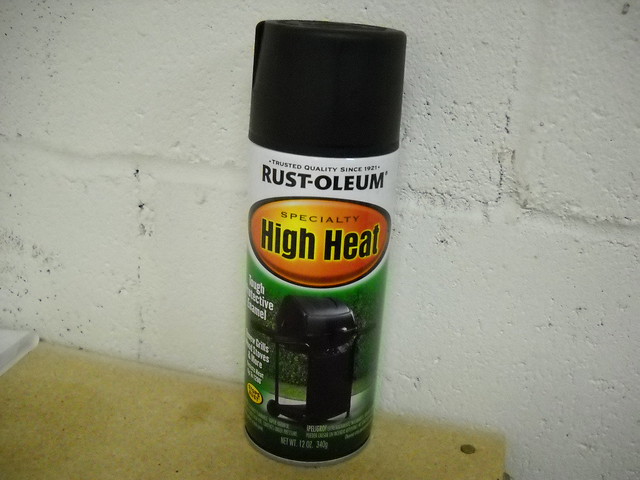
Here is the 12A RB header that I picked up used for about $100. It has some light flaking right where the tubes are welded onto the engine flange, but other than that it was in great shape. The chrome was pretty much gone so I decided to use the BBQ paint on it. I have tried several kinds over the past couple of years but have only had success with the Rustoleum paint. I tried some Krylon stuff once, but it was really high gloss and kept flaking off. It took forever for it to dry too. I wasn't impressed. The Rustoleum has never flaked off, or burned off. It also dries REALLY fast. I took these pictures about 10 minutes after I painted the header. It was already dry to the touch.
I think I'm probably going to use header wrap on this thing and see how it holds up. I didn't spend a whole lot on it, and the Rustoleum may help it stay in fairly decent shape. I think I'm going to give it a shot. I'll report back on my results after some test time on the 12A.

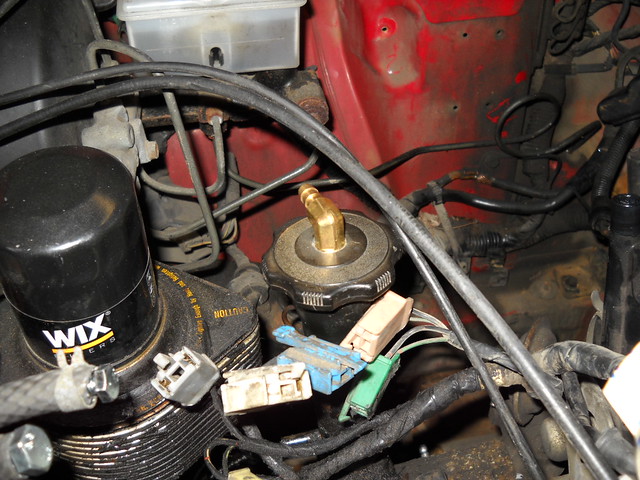
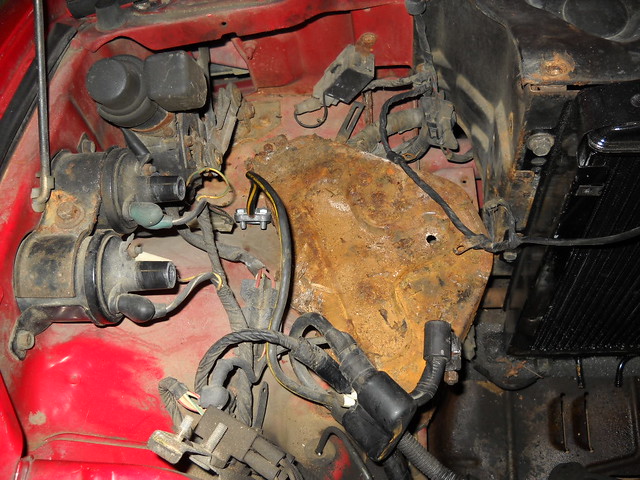
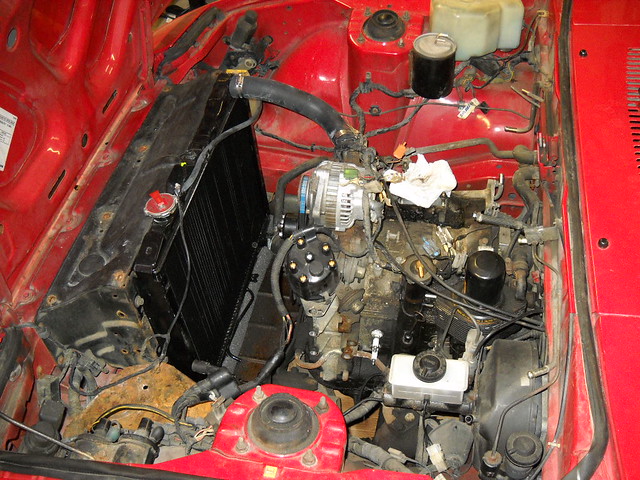
I've been working on stripping out the extra crap from the engine bay. I like to get all the extra junk out of there before I pull the engine so I can label what stays and what goes. So far I have removed the complete AC system, hot start assist, subzero start tank, cruise control, rat's nest, air pump, clutch fan, 3 catalytic converters, and probably some more that I'm forgetting. I'm trying to get this car as light as I can. I'm going to weigh it when I'm done with it to see how I did.
My goal is to shed at least 250-300 lbs from the stock weight. I'm also planning on using a Miata battery instead of the stock sized Rx7 battery. Based on the battery data on Autozone.com it should save me 10-15 pounds. I don't want to use an Oddyssey battery because they have practically no reserve. The Miata battery will be small enough to shed some weight, but big enough to be forgiving. You'll also see that I'm planning on using Wacky's PCV method of putting a brass elbow in the oil cap. I've always been a big supporter of using a PCV valve and hooking it into the carb base. However, I'd like to get the engine bay as bare as possible, so I'm going to give his method a try. He swears by it, so I'll trust him enough to give it a shot. Here's what the engine bay looks like so far.
Here is the 12A RB header that I picked up used for about $100. It has some light flaking right where the tubes are welded onto the engine flange, but other than that it was in great shape. The chrome was pretty much gone so I decided to use the BBQ paint on it. I have tried several kinds over the past couple of years but have only had success with the Rustoleum paint. I tried some Krylon stuff once, but it was really high gloss and kept flaking off. It took forever for it to dry too. I wasn't impressed. The Rustoleum has never flaked off, or burned off. It also dries REALLY fast. I took these pictures about 10 minutes after I painted the header. It was already dry to the touch.
I think I'm probably going to use header wrap on this thing and see how it holds up. I didn't spend a whole lot on it, and the Rustoleum may help it stay in fairly decent shape. I think I'm going to give it a shot. I'll report back on my results after some test time on the 12A.
I've been working on stripping out the extra crap from the engine bay. I like to get all the extra junk out of there before I pull the engine so I can label what stays and what goes. So far I have removed the complete AC system, hot start assist, subzero start tank, cruise control, rat's nest, air pump, clutch fan, 3 catalytic converters, and probably some more that I'm forgetting. I'm trying to get this car as light as I can. I'm going to weigh it when I'm done with it to see how I did.
My goal is to shed at least 250-300 lbs from the stock weight. I'm also planning on using a Miata battery instead of the stock sized Rx7 battery. Based on the battery data on Autozone.com it should save me 10-15 pounds. I don't want to use an Oddyssey battery because they have practically no reserve. The Miata battery will be small enough to shed some weight, but big enough to be forgiving. You'll also see that I'm planning on using Wacky's PCV method of putting a brass elbow in the oil cap. I've always been a big supporter of using a PCV valve and hooking it into the carb base. However, I'd like to get the engine bay as bare as possible, so I'm going to give his method a try. He swears by it, so I'll trust him enough to give it a shot. Here's what the engine bay looks like so far.
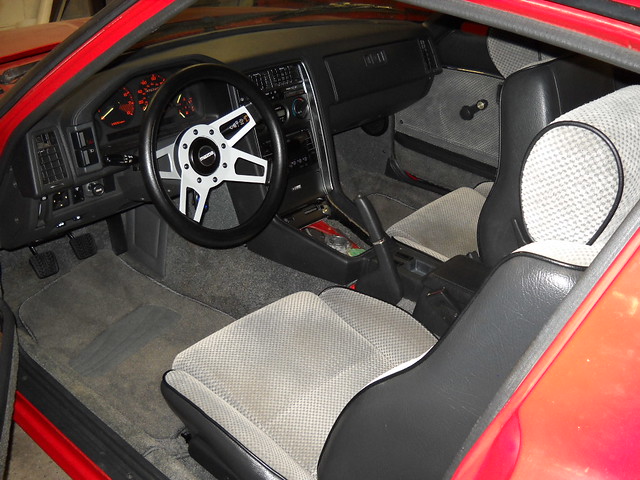
Here are some updates on the interior. I used my patented carpet cleaning method of pressure washing at the DIY car wash. They came out pretty good and I got a lot of dirt out of the carpets. I followed it up with a new set of gray floor mats from Walmart. I didn't want to spend a bunch of money on factory style floor mats, because lets face it, they are there to get dirty.
I also added a Grant Challenger wheel with a custom Mazda horn button that I made. I can finally get my long legs under the steering wheel now. I can't fit in the car very good with the stock steering wheel, so I usually take it out and keep it in case I ever want to put it back in for some reason. I really like the Grant wheel though. It was pretty cheap too.
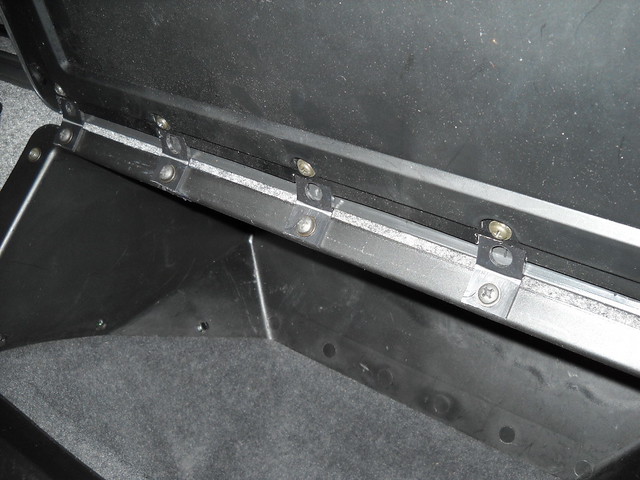
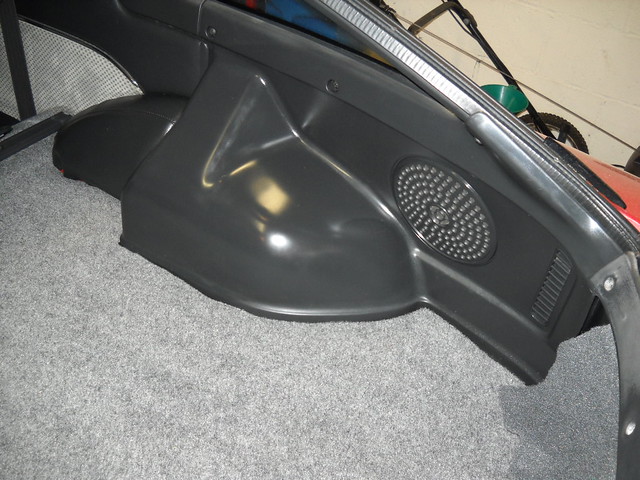
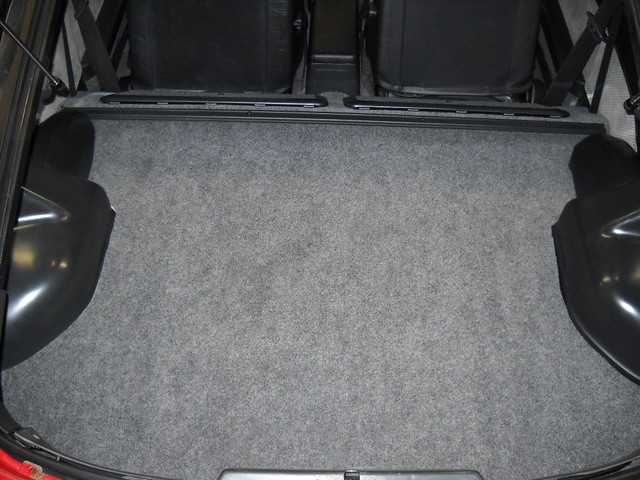
Also did some extensive work in the hatch area. I recovered the storage bin lids with new carpet from the local carpet store. I decided to sew the new carpet on by hand instead of using glue. I hate to use chemical fastening methods because they almost never work. I prefer to fasten things mechanically if at all possible. So I took the black plastic back off of the storage bin lids and drilled a whole bunch of holes in the storage bin lid. I sewed the carpet to the lid using all the tiny holes that I drilled. It worked great. I also came up with a solution for the plastic piano hinges that are always breaking. I got these black plastic hinges from McMaster Carr and modified them to work. They are very sturdy and should last for a long long time. They close nice and flat just like the stock hinge also.
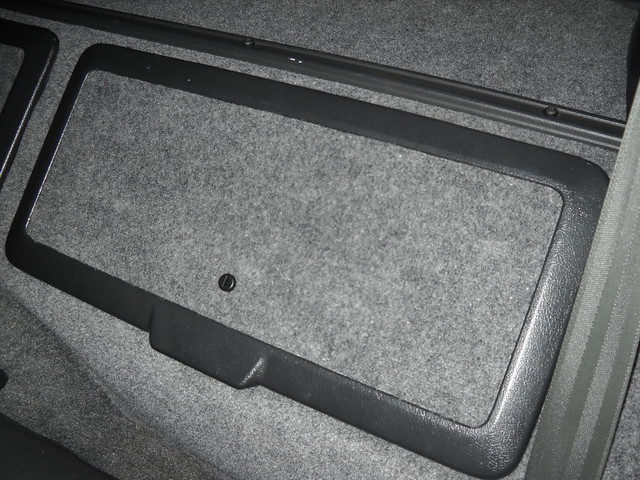
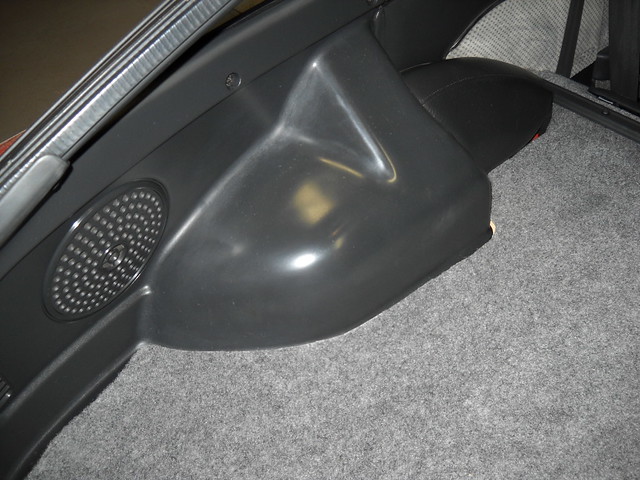
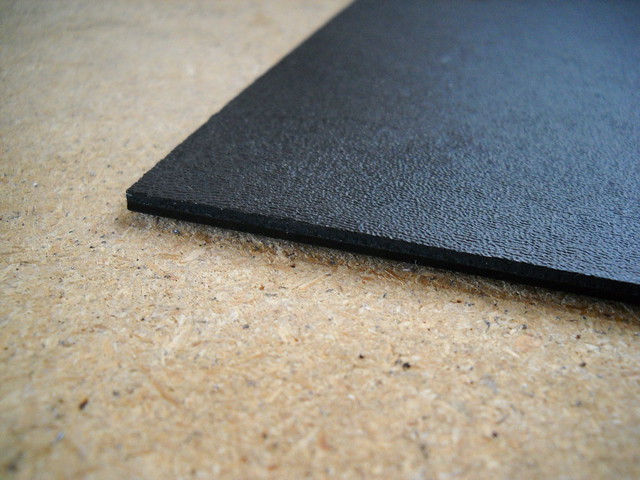
To finish off the hatch area I put down a piece of 5mm underlayment to replace the black rubber mat. I covered that with new gray carpet. I finished up with a Ray Green based restoration of the hatch plastics. Ray uses steel wool I think, but mine were too far gone. I ended up just plain wet sanding them. I got a bucket of water and some fine wet sanding paper (1000 - 1500 - 2000) and just went to town until all the oxidized plastic was gone. They no longer have the fake leather grain pattern in them, but you really don't notice. To give them a nice shine I finished with some of that liquid scratch out stuff, and then a coat of Meguiar's cleaner wax, followed by Armorall. It sounds like a weird combination but it really looks great.
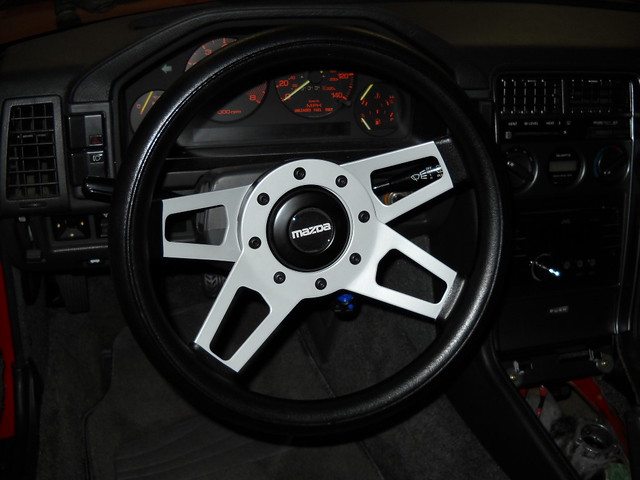
I also added a Grant Challenger wheel with a custom Mazda horn button that I made. I can finally get my long legs under the steering wheel now. I can't fit in the car very good with the stock steering wheel, so I usually take it out and keep it in case I ever want to put it back in for some reason. I really like the Grant wheel though. It was pretty cheap too.
Also did some extensive work in the hatch area. I recovered the storage bin lids with new carpet from the local carpet store. I decided to sew the new carpet on by hand instead of using glue. I hate to use chemical fastening methods because they almost never work. I prefer to fasten things mechanically if at all possible. So I took the black plastic back off of the storage bin lids and drilled a whole bunch of holes in the storage bin lid. I sewed the carpet to the lid using all the tiny holes that I drilled. It worked great. I also came up with a solution for the plastic piano hinges that are always breaking. I got these black plastic hinges from McMaster Carr and modified them to work. They are very sturdy and should last for a long long time. They close nice and flat just like the stock hinge also.
To finish off the hatch area I put down a piece of 5mm underlayment to replace the black rubber mat. I covered that with new gray carpet. I finished up with a Ray Green based restoration of the hatch plastics. Ray uses steel wool I think, but mine were too far gone. I ended up just plain wet sanding them. I got a bucket of water and some fine wet sanding paper (1000 - 1500 - 2000) and just went to town until all the oxidized plastic was gone. They no longer have the fake leather grain pattern in them, but you really don't notice. To give them a nice shine I finished with some of that liquid scratch out stuff, and then a coat of Meguiar's cleaner wax, followed by Armorall. It sounds like a weird combination but it really looks great.
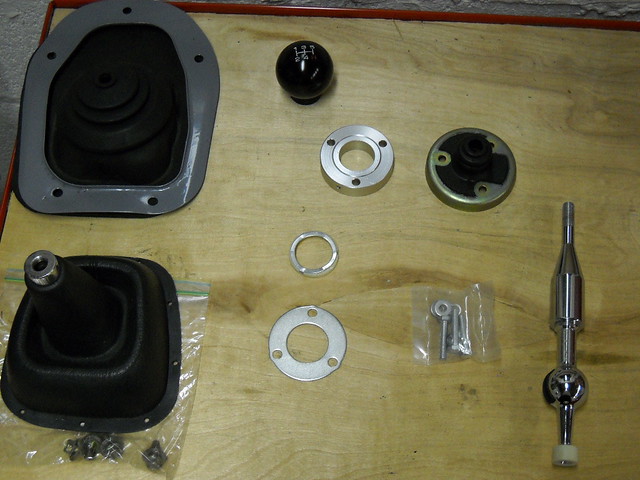
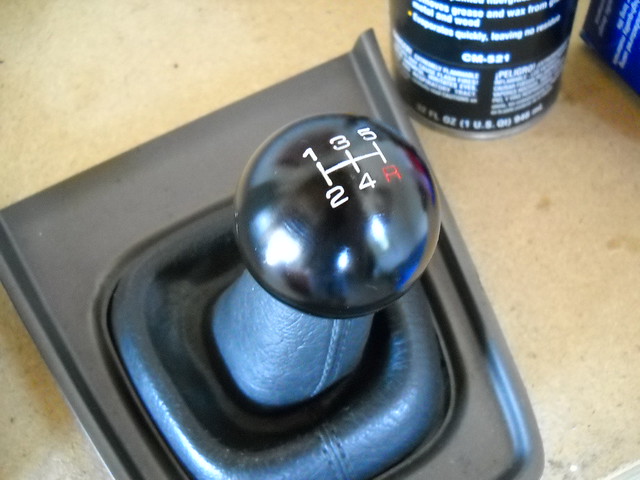
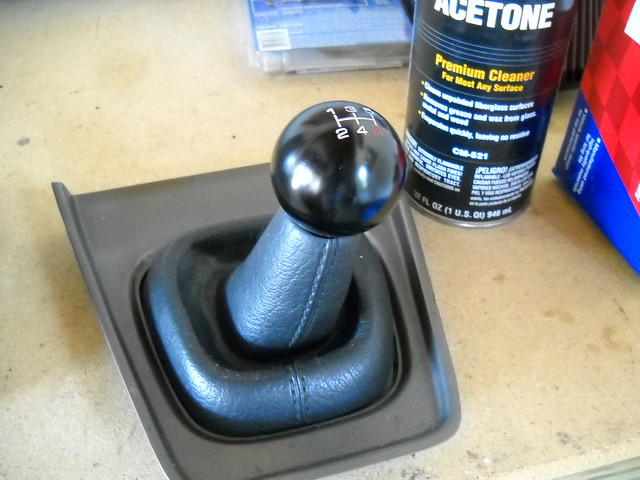
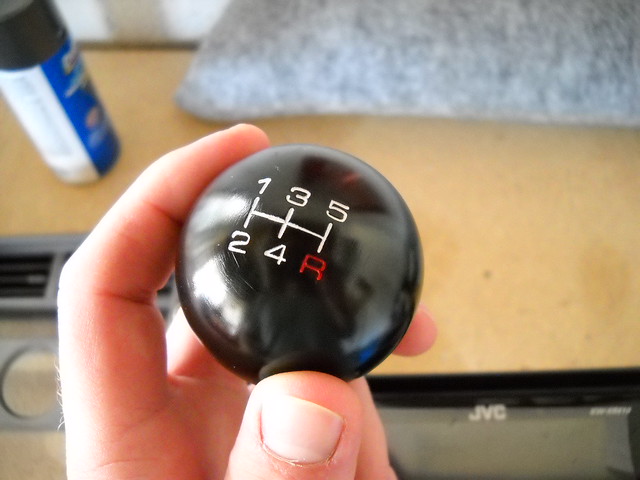
I've also got a little Miata short shifter project in the works. I found a cool Miata shift **** on ebay to complete the look too. The text on the shift **** was originally all white, which looked weird to me. I like the shift ***** that have the R in red. So I got a red sharpie and colored it red.  You can't even tell, and it makes the shifter look a little more OEM I think. The total cost of the shifter was about $40. Unfortunately, my shift boots were all torn and dry rotted so I had to replace those. That ended up costing twice as much as the short shifter.
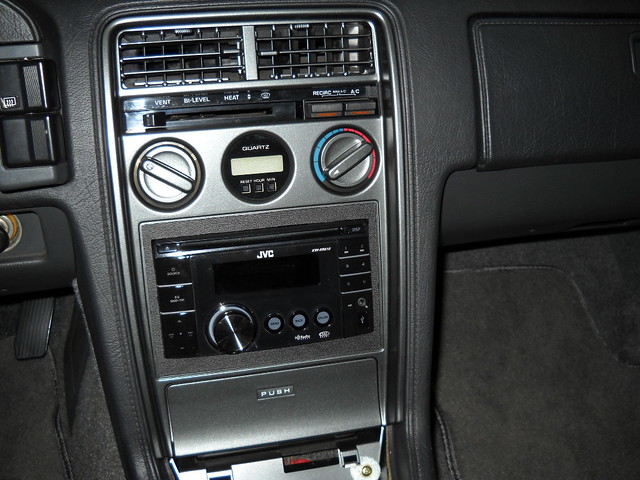
I also got rid of the old Clarion radio/cassette since it sounded like total crap. I hated to change the look of the dash that drastically, but I really wanted to have a quality stereo in this car. It was very important to me that the illumination of the radio match the red orange backlighting of the Rx7 dash. The 84-85 dash has always been my favorite, mainly because of the cool red orange color at night. I just really like it. I don't know why.
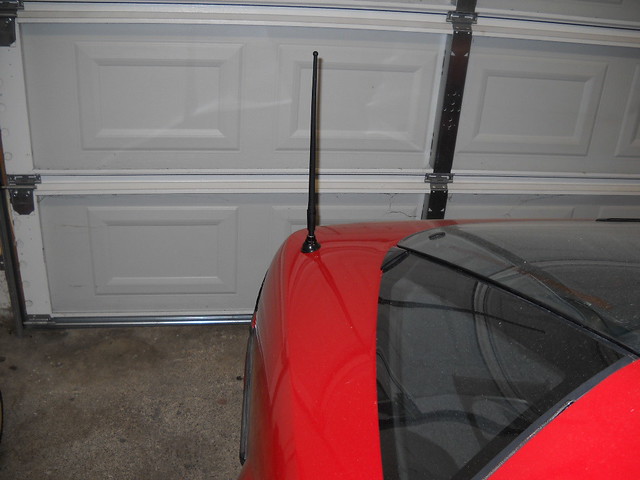
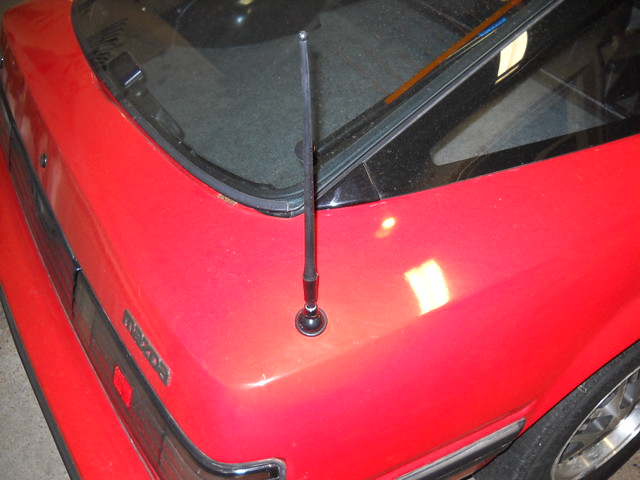
My solution was to get a JVC vario-color double-DIN stereo. It is nearly the same size as the stock stereo, and the difference was made up with a piece of ABS plastic from McMaster Carr. I was able to reuse the factory radio bracket after some VERY careful hammering and drilling. Since I was able to reuse that bracket, this stereo is mounted in there like a rock. It's not going anywhere. I don't like to use the aftermarket install kits because they always feel flimsy to me. Like the radio is just sitting in the whole. Because of this I went to great lengths to make sure that I could reuse the original mounting bracket. I also ditched the power antenna for the sake of cost, weight, and simplicity. I got one of the shorty rubber antennas from Autozone. It fit in the hole nicely, and looks pretty good too.
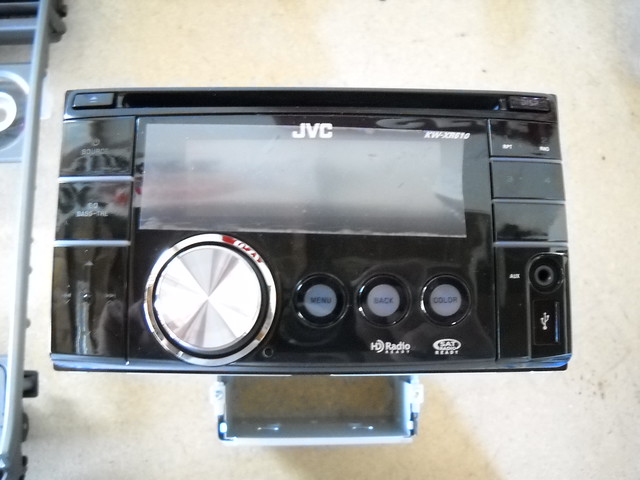
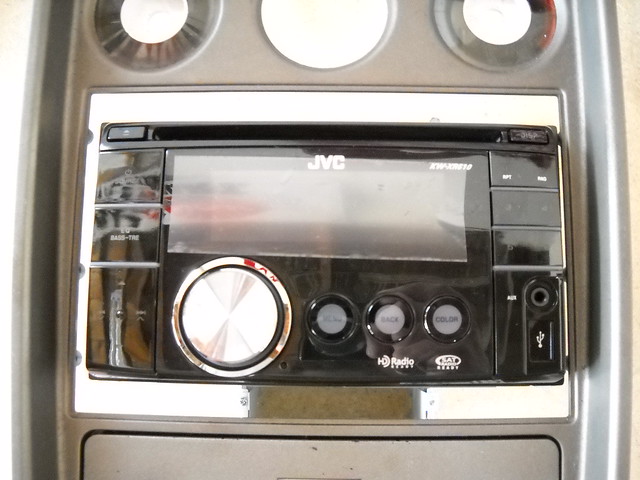
You can't even tell, and it makes the shifter look a little more OEM I think. The total cost of the shifter was about $40. Unfortunately, my shift boots were all torn and dry rotted so I had to replace those. That ended up costing twice as much as the short shifter. I also got rid of the old Clarion radio/cassette since it sounded like total crap. I hated to change the look of the dash that drastically, but I really wanted to have a quality stereo in this car. It was very important to me that the illumination of the radio match the red orange backlighting of the Rx7 dash. The 84-85 dash has always been my favorite, mainly because of the cool red orange color at night. I just really like it. I don't know why.
My solution was to get a JVC vario-color double-DIN stereo. It is nearly the same size as the stock stereo, and the difference was made up with a piece of ABS plastic from McMaster Carr. I was able to reuse the factory radio bracket after some VERY careful hammering and drilling. Since I was able to reuse that bracket, this stereo is mounted in there like a rock. It's not going anywhere. I don't like to use the aftermarket install kits because they always feel flimsy to me. Like the radio is just sitting in the whole. Because of this I went to great lengths to make sure that I could reuse the original mounting bracket. I also ditched the power antenna for the sake of cost, weight, and simplicity. I got one of the shorty rubber antennas from Autozone. It fit in the hole nicely, and looks pretty good too.
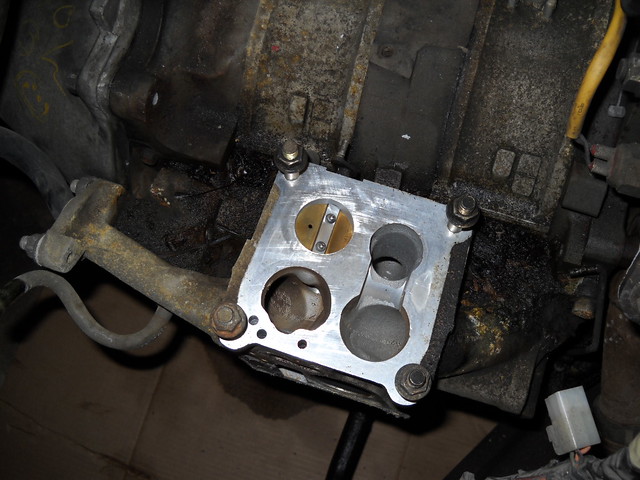
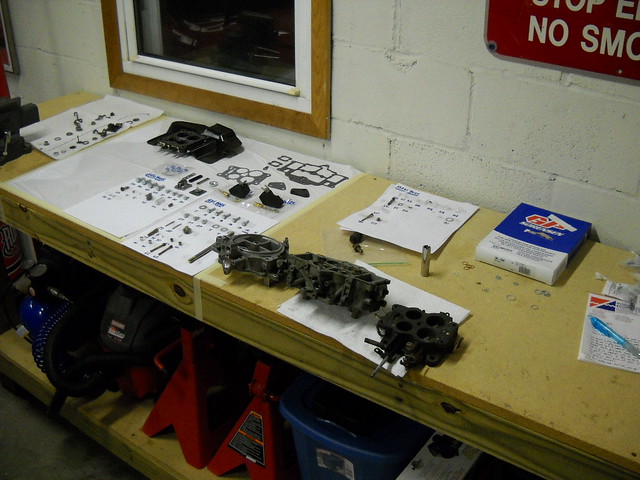
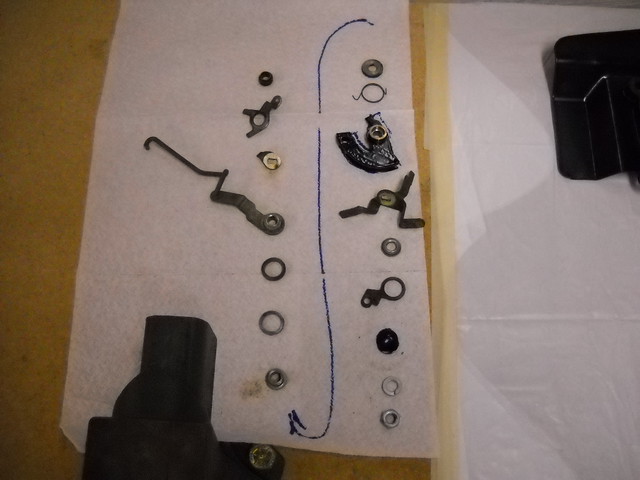
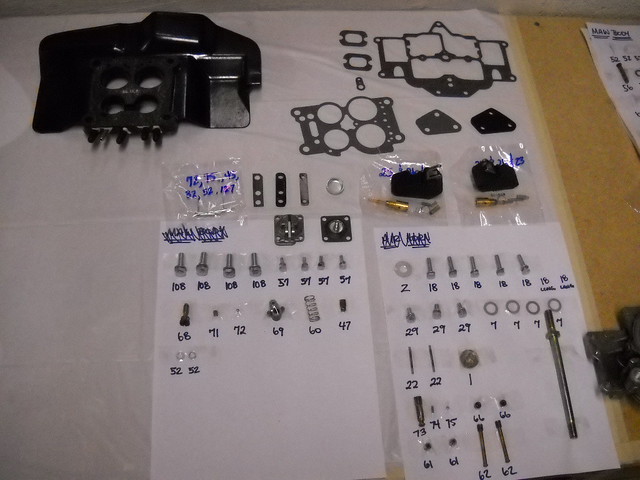
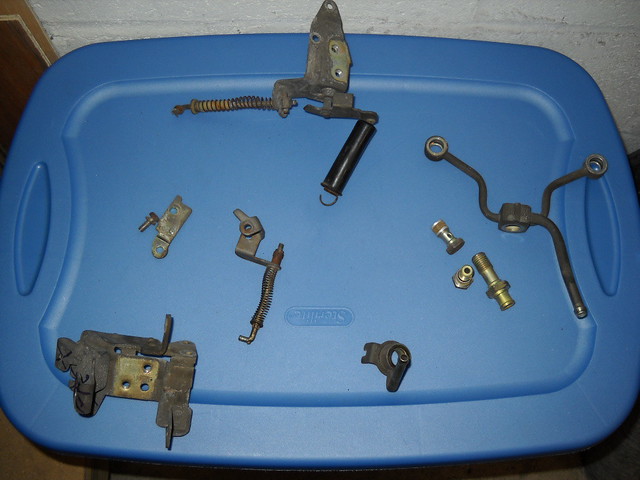
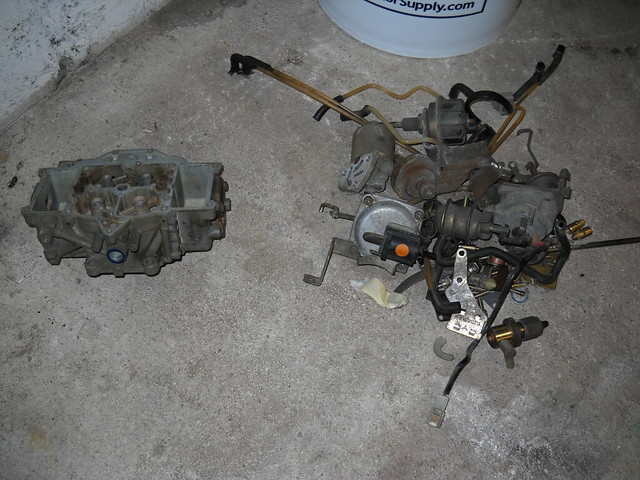
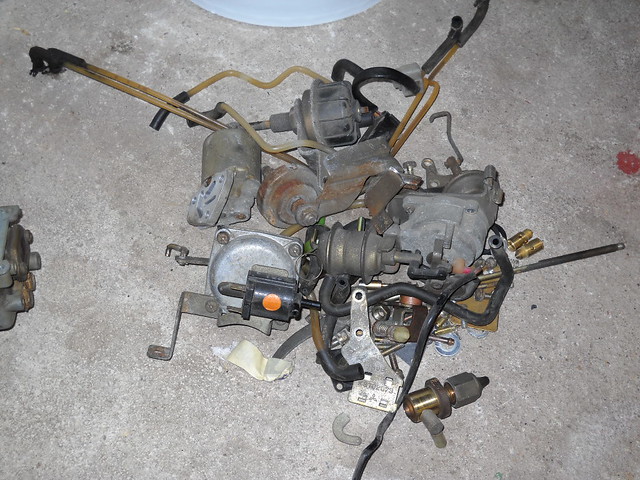
Finally, I am in the middle of a rather extensive carburetor and intake manifold modification. With the help of Sterling's website, and stuff posted on here I have managed to figure out 99% of the stuff that can be removed from the Nikki carb. I am going to strip this thing down to the absolute bare bones. It will be running premix with mechanical secondaries, no choke just fast idle linkage, and pretty much everything else blocked off. It's going to be a stripped Nikki for sure. I'm even diving into the linkage on the throttle body for the first time. I removed all the unnecessary linkage arms like the cruise control and hot start assist.
You can see a picture below that shows the pile of crap I have been able to eliminate from the carburetor. I put the main body next to it just so you can get a frame of reference on how big the pile of stuff it. There is probably 5 pounds of weight savings right there!
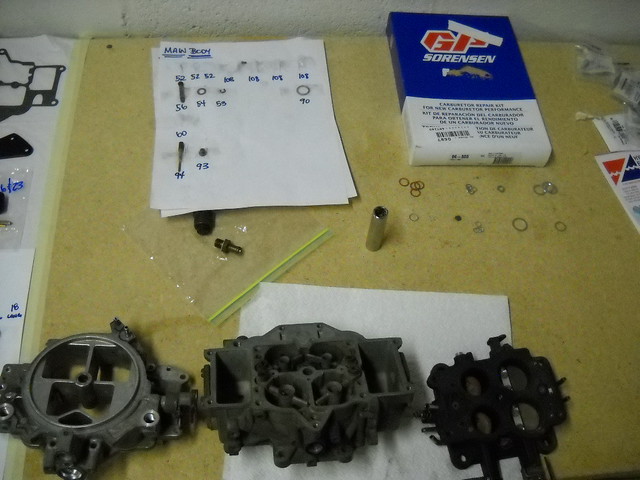
That's it for now! Stay tuned for more. I'll try to update the thread on a more regular basis for a while. Jeff20B hooked me up with another parts carburetor, so I should have a finished carb rebuild to show you guys soon! I may have some more information about the Miata battery swap soon too.
Jamie


Joined: Mar 2001
Posts: 31,796
Likes: 3,210
From: https://www2.mazda.com/en/100th/
miata battery works great, we used to love the sealed panasonics, they make great jumpers, you just flip it upside down....
although..... having raced a honda, i notice that the honda batteries are small too, AND the little tray and hold down stuff is modular, so it would all move really easily.
i'm planning a battery move too, but its probably going in the right rear of the engine bay, its the lightest corner. weight distribution matters too
Looking really good! At 6'-3" I totally hear you on the steering wheel. I have momo's on both my FB's with a 60mm OMP (the brand not the rotary engine part lol) spacer between the wheel and hub to bring it closer to me and give me even more leg room.
Keep up the good work!
Keep up the good work!

Full Member
Joined: Mar 2010
Posts: 111
Likes: 0
From: MN
How did you make the sticker or whatever on the steering wheel? Oh, and and when you say you pressure washed the carpet, did you stick the hose IN your car and actually spray the carpet? Didn't soap get everywhere? Thanks, and great job, that looks like a very nice car.
After I got the carpet out I took it up to the DIY car wash, and put in about $10 worth of quarters. Turned the pressure washer onto the soap setting and let it rip. The hot soapy water really gets the dirt out well. Spray the carpets until the soap comes out clean. The switch the pressure washer over to rinse and spray them until the soap stops coming out. Take them home and hang them out in the sun somewhere to dry. After they are dry you can shop vac them to bring the fluff back.
The sticker is sort of a trick that I figured out after some research. I wanted a domed resin style sticker to put in the middle of the steering wheel instead of just printing one out on paper. However, they are very hard to make. But I found out that people who make jewelry have these things called "epoxy stickers" or "resin stickers." They are basically the domed part with an adhesive backing. So you can make your own resin stickers by putting them on top of anything you want.
http://cgi.ebay.com/ws/eBayISAPI.dll...=STRK:MEWNX:IT
I got some sticker paper for my printer at Office Max. I printed out the Mazda logo on a black background and cut it out. Then I just put one of the epoxy circle stickers on top. Presto, instant resin sticker!
Jamie
The GSL rear is definitely on my to do list. The car is way underpowered for my taste though. When I drove it home I thought, "People thought this thing was fast in 1985?" I realize that it has been poorly maintained, but it was still really slow.
 that 12a port it, use 3gen corner spring and boost it .
Lives on the Forum
Joined: Jun 2004
Posts: 11,359
Likes: 14
From: Grand Rapids Michigan
You already have a Sterling, don't you? Probably just need to tune it, then clear the carbon out of the motor. Properly tuned, you will be surprised at how quick she'll be. When I took Duffman for a ride down at the tail of the dragon, he asked what size turbo I had.