When engines break (with pics)....
 04-05-05, 02:04 PM
#1
When engines break (with pics)....
Well, some of you know that I lost my engine at my track outting back in September. I've had a lot of things going on (and my car is not my life) so I've been moving on it slowing. I get a quite a few PM's asking about "what would you do xxxxx", I'm going to start this thread and showing what I'm doing for a rebuild.
For starters, the original setup of the car (just basic engine area stuff):
Stock reman installed June '99 (by Mazda)
Engine had about 27k on it over the years until failure (yes, track time too)
Stock Twin Turbos (sequential)
Pettit Limited ECU
Pettit Coolcharge II SMIC (old style)
Pettit Power Pulley Kit
HKS Intake
Bonez DP
Bonez Hi-Flo Cat
GReddy Power Extreme Catback
Racing Beat 9lb Lightweight Flywheel
ACT Street/Strip Clutch
Here's a pic of the old setup:
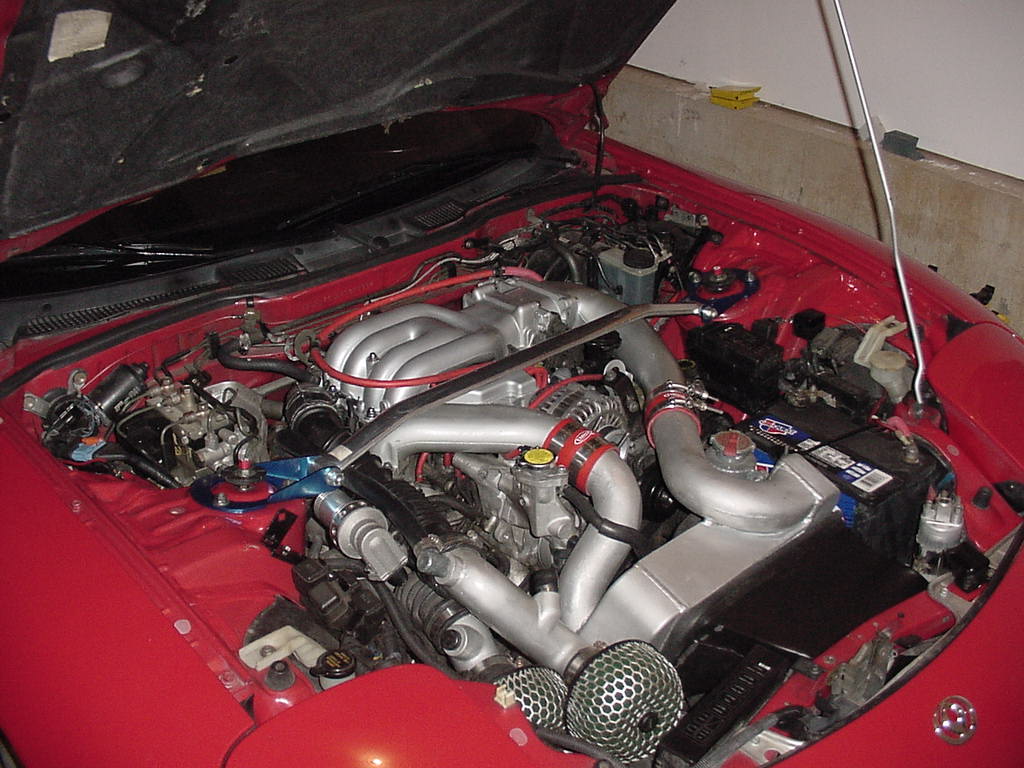
Here's a shot taken 2 sessions before my motor went:
http://mahjik.homestead.com/files/FD...0040911_04.jpg
The motor went on the track during the session. I didn't notice anything while on the track. I noticed my temps began to get a little high so I backed off the car for a few laps to cool down. The session was almost over so I pulled off the track to the cool down area. After a few laps in the cool down area, I drove over to the RX-7 trailer area. Upon slowing down enough to where the car was at idle speed, I could feel the engine shaking from inside the cockpit. It was doing the "paint shaker dance of death". After letting it cool down, we checked the few normal things which could give that type of problem, but to no avail. When we started the car again, it was shaking however once above idle rpms it evened out. Oh well, at least I could drive it home. Compression test was done the next day (thanks ebb for being over the tester) which revealed a blown seal in the front rotor.
Here are the pics of the damage:
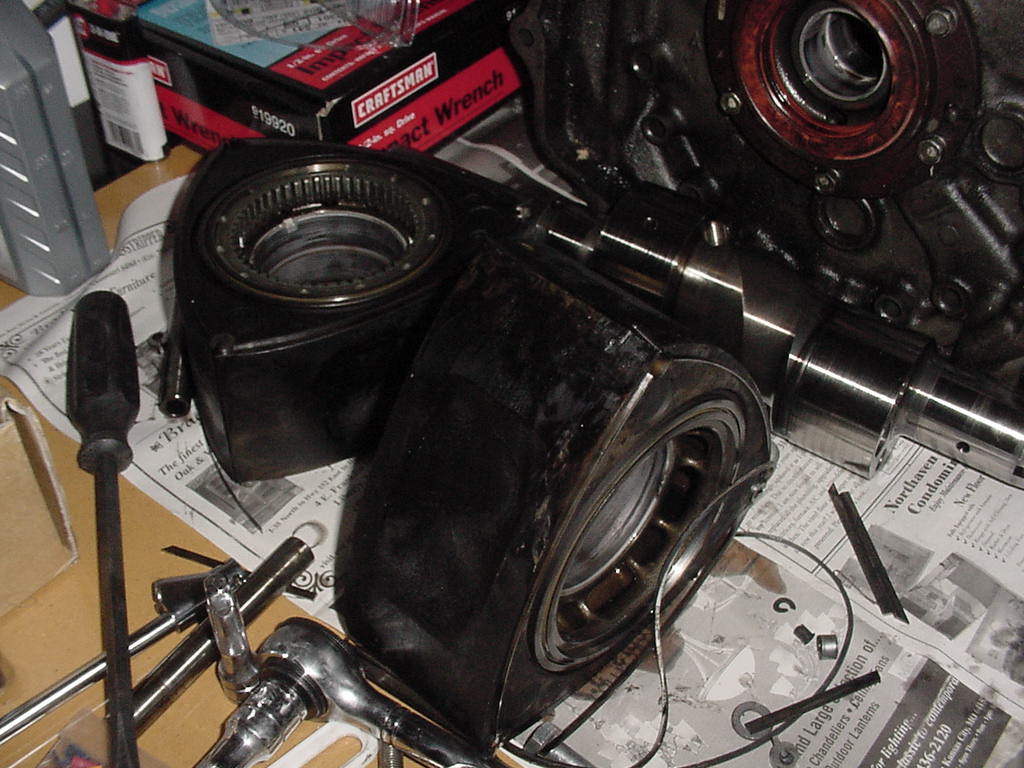
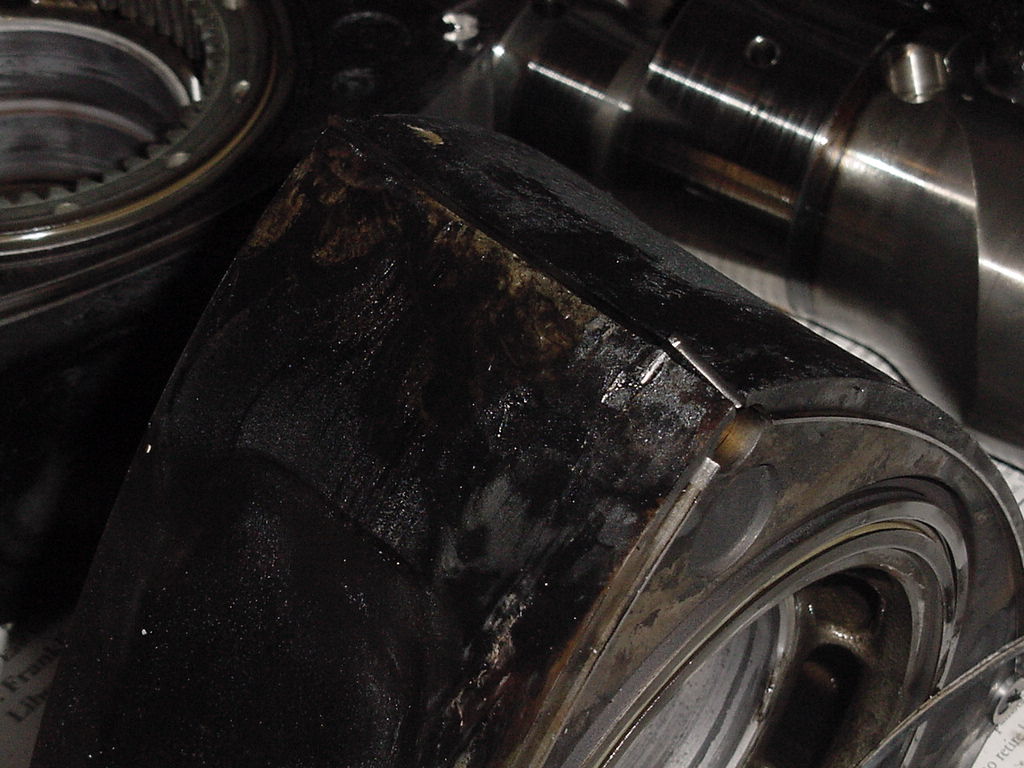
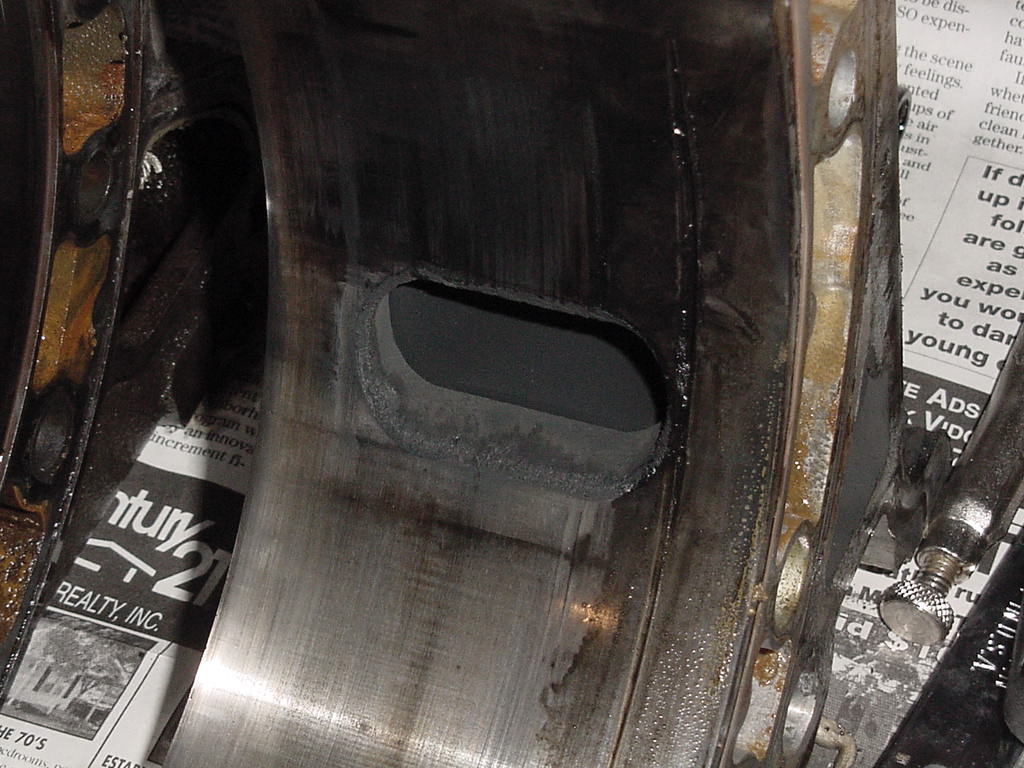
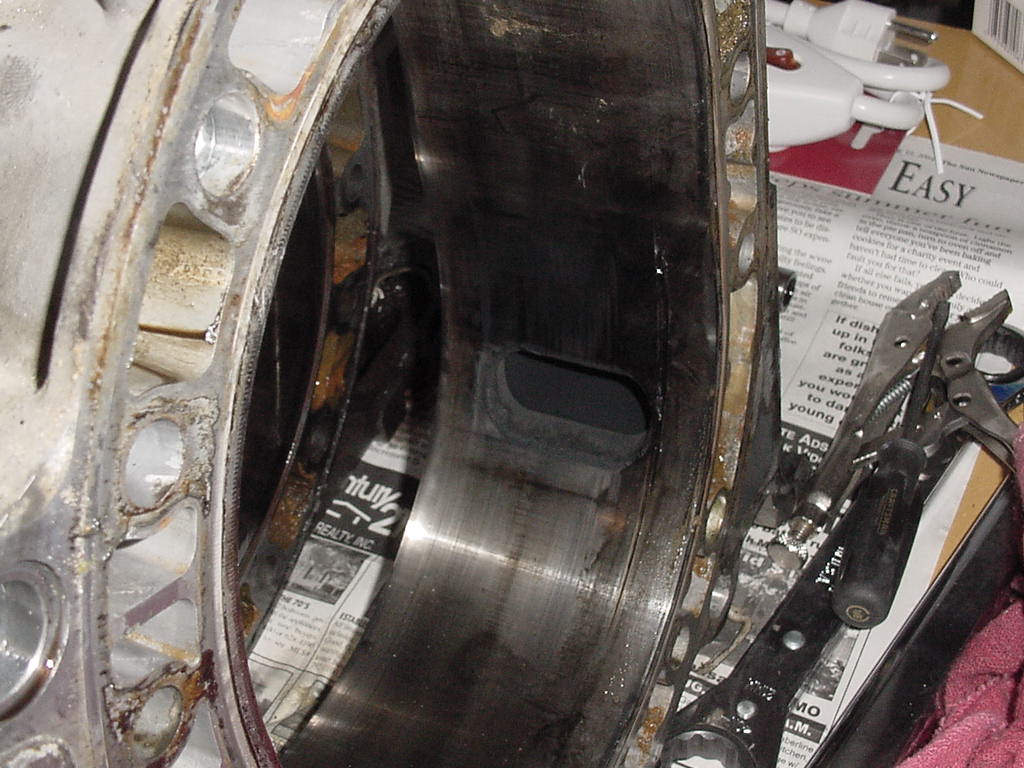
Front rotor and housing were trashed....
As I go through the thread, I'll update the prices so people can get an idea what they would be spending to have things like this done.
For starters, the original setup of the car (just basic engine area stuff):
Stock reman installed June '99 (by Mazda)
Engine had about 27k on it over the years until failure (yes, track time too)
Stock Twin Turbos (sequential)
Pettit Limited ECU
Pettit Coolcharge II SMIC (old style)
Pettit Power Pulley Kit
HKS Intake
Bonez DP
Bonez Hi-Flo Cat
GReddy Power Extreme Catback
Racing Beat 9lb Lightweight Flywheel
ACT Street/Strip Clutch
Here's a pic of the old setup:
Here's a shot taken 2 sessions before my motor went:
http://mahjik.homestead.com/files/FD...0040911_04.jpg
The motor went on the track during the session. I didn't notice anything while on the track. I noticed my temps began to get a little high so I backed off the car for a few laps to cool down. The session was almost over so I pulled off the track to the cool down area. After a few laps in the cool down area, I drove over to the RX-7 trailer area. Upon slowing down enough to where the car was at idle speed, I could feel the engine shaking from inside the cockpit. It was doing the "paint shaker dance of death". After letting it cool down, we checked the few normal things which could give that type of problem, but to no avail. When we started the car again, it was shaking however once above idle rpms it evened out. Oh well, at least I could drive it home. Compression test was done the next day (thanks ebb for being over the tester) which revealed a blown seal in the front rotor.
Here are the pics of the damage:
Front rotor and housing were trashed....
As I go through the thread, I'll update the prices so people can get an idea what they would be spending to have things like this done.
 04-05-05, 02:13 PM
#2
While searching for a replacement rotor and housing, I decided to clean up the engine bay just a little:
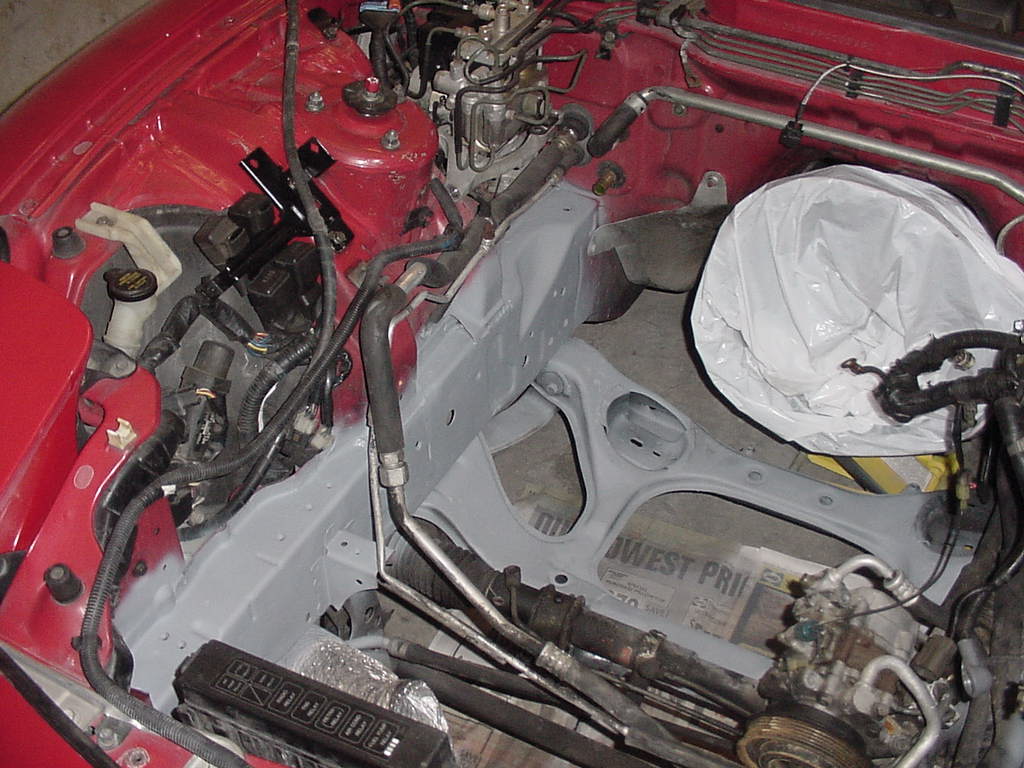
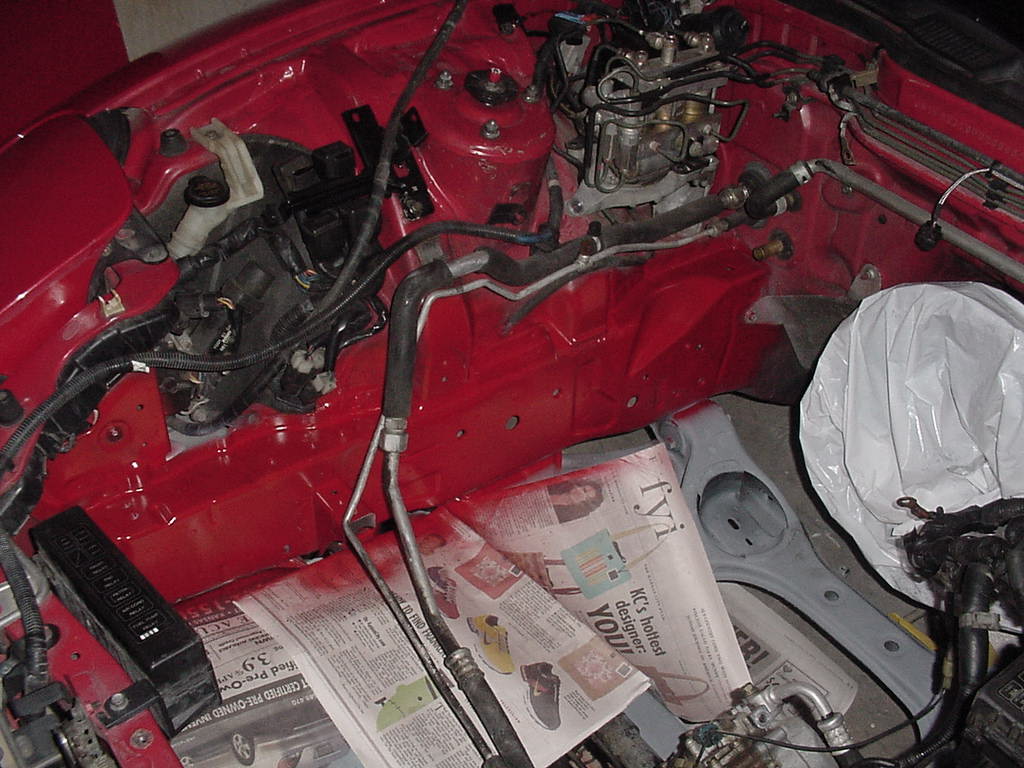
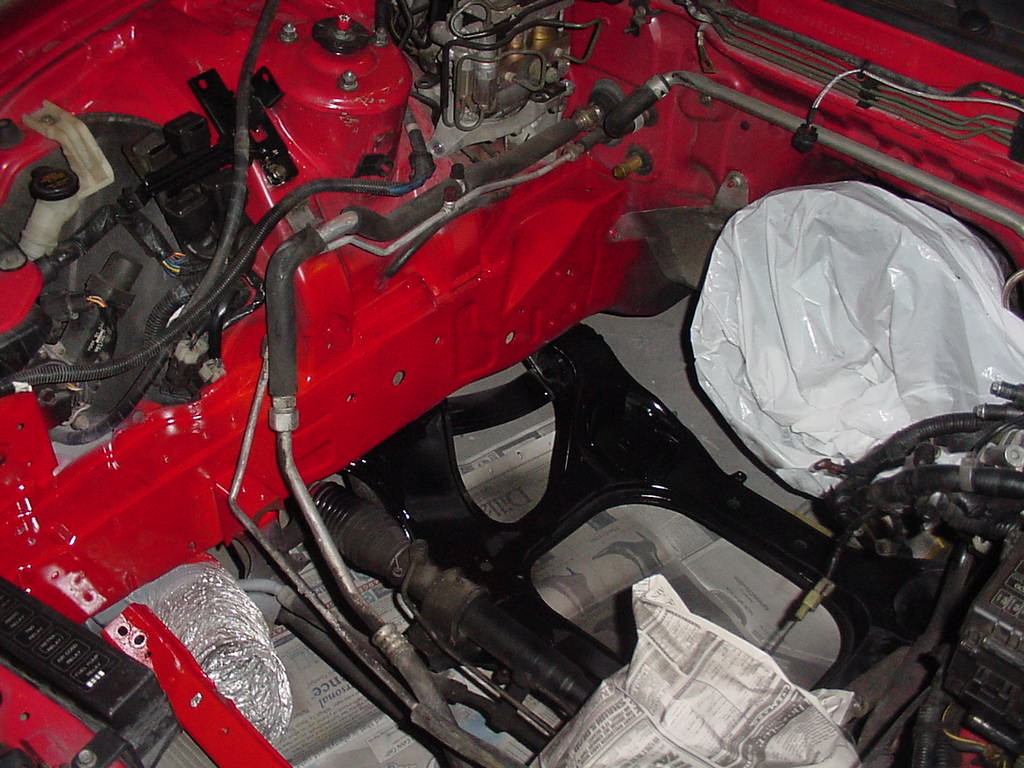
If you are going to do this, I recommend finding "Plastic-Kote" brand engine paint. The Dupi-Color brand sucks.
After this, I was able to find a some good condition engine parts. Used rotor and housing were found and bought for $450 (thanks herblenny).
Injectors were sent out to RC Engineering:
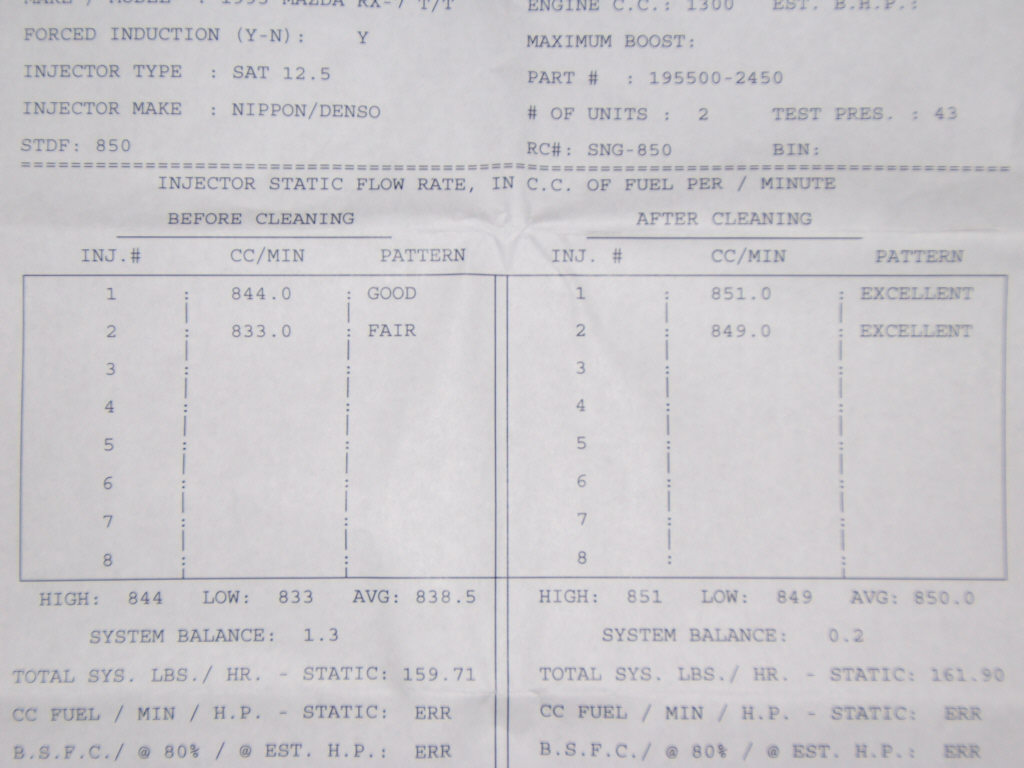
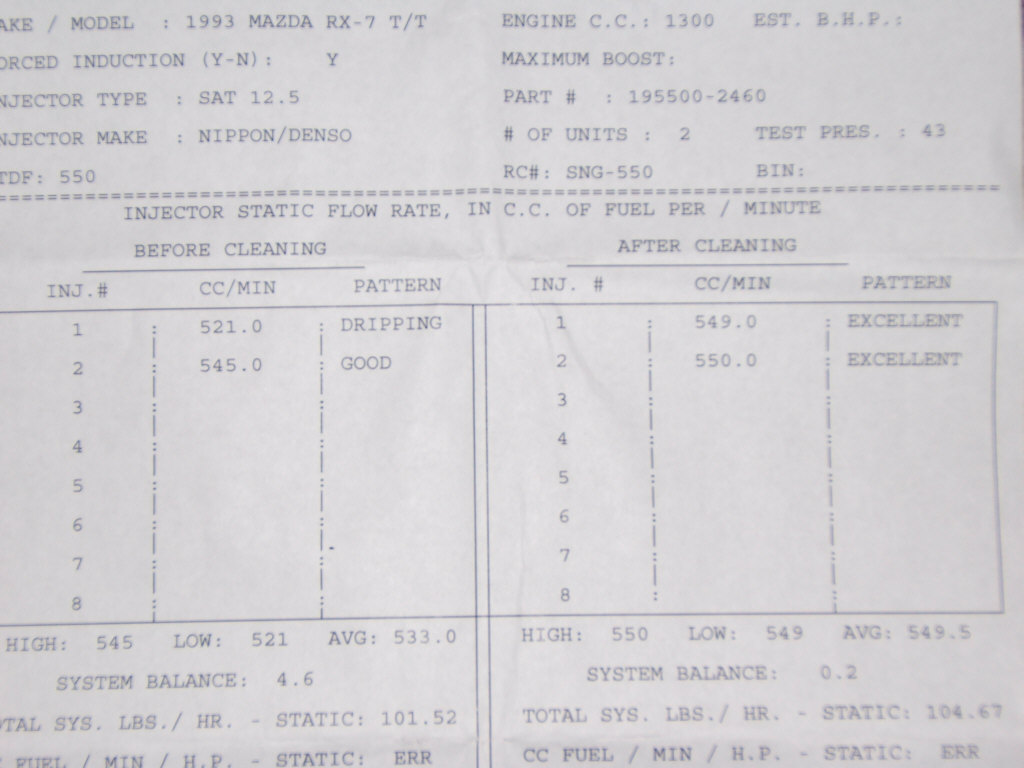
I'm not sure which one was in which position, but I'm assuming the "not so good flowing" ones were on the front side. Either way, they are good to go now. Price was about $130 for the injector cleaning.
If you are going to do this, I recommend finding "Plastic-Kote" brand engine paint. The Dupi-Color brand sucks.
After this, I was able to find a some good condition engine parts. Used rotor and housing were found and bought for $450 (thanks herblenny).
Injectors were sent out to RC Engineering:
I'm not sure which one was in which position, but I'm assuming the "not so good flowing" ones were on the front side. Either way, they are good to go now.
Price was about $130 for the injector cleaning.
04-05-05, 02:20 PM
#3
The next thing that was purchased was a Ceramic Coated sequential manifold from Goodfellas (which is good for up to 3600F):
I then contacted the person that did the coating for Rich to see about getting some more done. Here's what was getting done:
LIM - Chrome ceramic
Front Cover - Chrome ceramic
Water Pump Housing - Chrome ceramic
Alt - Polished with Red internals
UIM - Polished
TB - Polished
T-Stat Housing - Polished
Turbos - Polished
Secondary Turbo Inlet - Polished
Y-Pipe - Polished
DP - Ceramic coated
Here are some pics of the first back which just came back a few days ago:
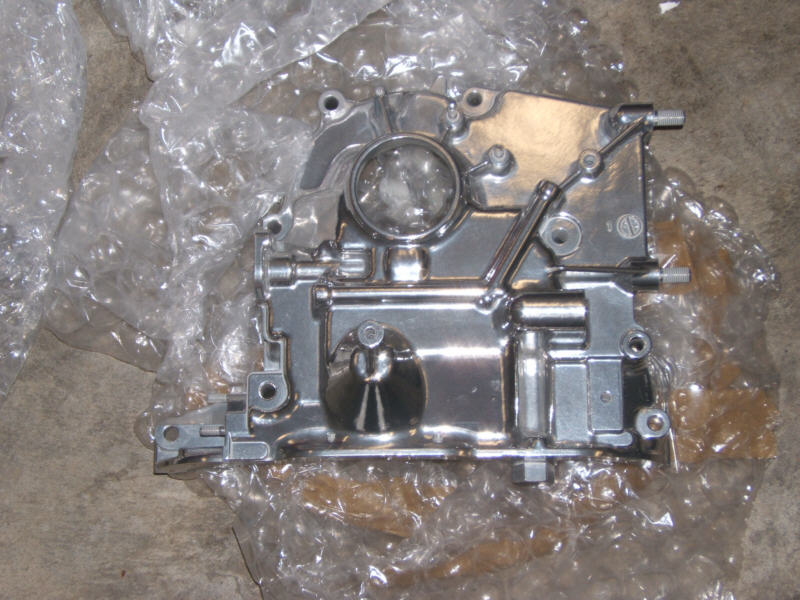
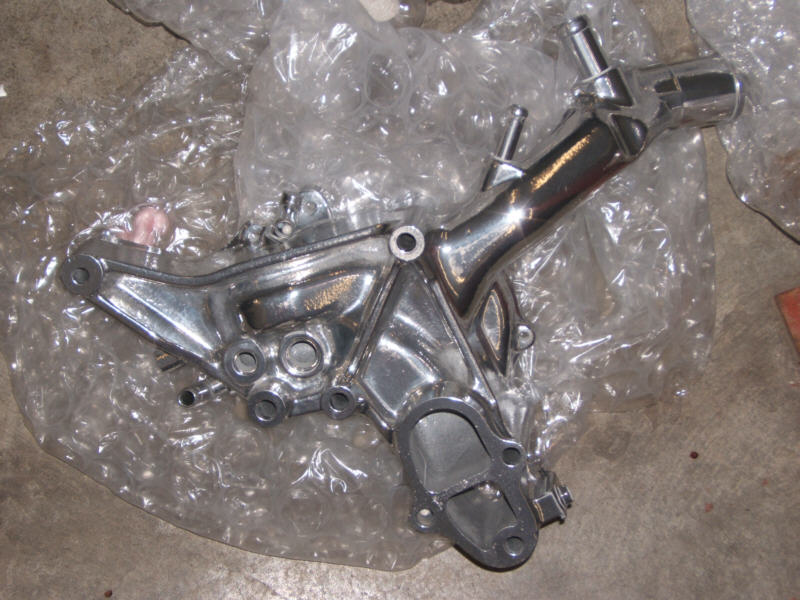
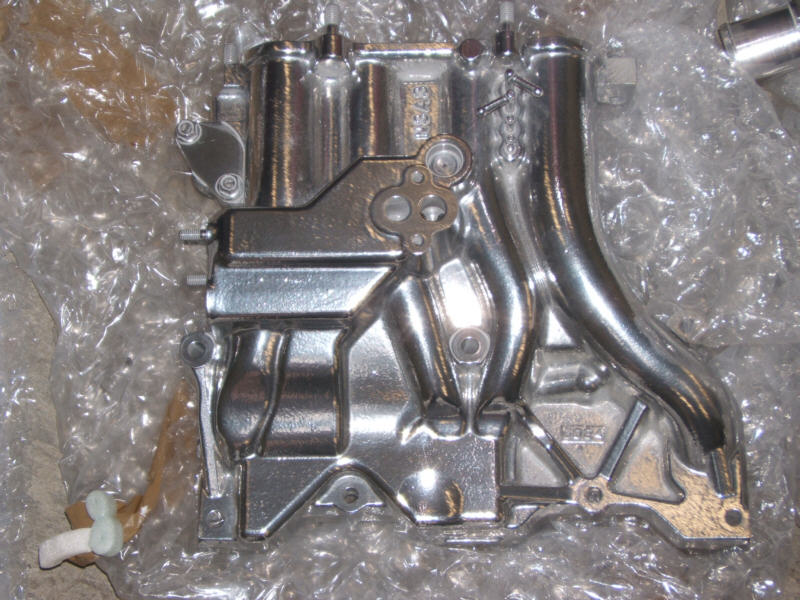
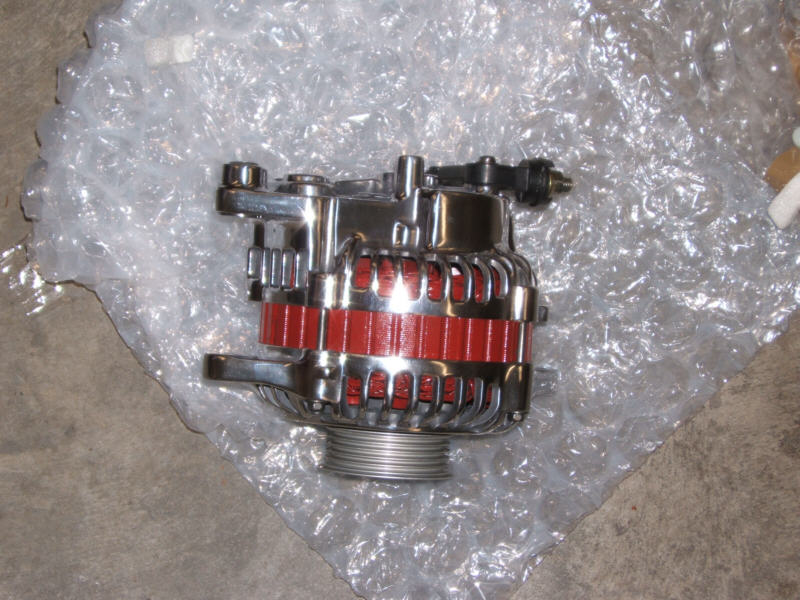
I'll post the pricing information a little later.
I then contacted the person that did the coating for Rich to see about getting some more done. Here's what was getting done:
LIM - Chrome ceramic
Front Cover - Chrome ceramic
Water Pump Housing - Chrome ceramic
Alt - Polished with Red internals
UIM - Polished
TB - Polished
T-Stat Housing - Polished
Turbos - Polished
Secondary Turbo Inlet - Polished
Y-Pipe - Polished
DP - Ceramic coated
Here are some pics of the first back which just came back a few days ago:
I'll post the pricing information a little later.
04-05-05, 02:21 PM
#4
Eye In The Sky
iTrader: (2)
Join Date: Feb 2001
Location: In A Disfunctional World
Posts: 7,893
Likes: 0
Received 114 Likes
on
66 Posts
From looking at your rotor surfaces, and mainly at the exhaust port; you have an extreme amount of carbon buildup. I have never seen so much carbon in an exhaust port.
You were obviously have been running way too rich for a long time. I bet it was the Pettie ECU as they are known for this. The carbon buildup might have been the indirect cause of your failure.
Time to move up tp a better ECU.
You were obviously have been running way too rich for a long time. I bet it was the Pettie ECU as they are known for this. The carbon buildup might have been the indirect cause of your failure.
Time to move up tp a better ECU.
Last edited by cewrx7r1; 04-05-05 at 02:25 PM.
04-05-05, 02:25 PM
#6
Originally Posted by cewrx7r1
You were obviously either having a bad misfire or running way too rich for a long time. I bet it was the Pettie ECU as thet are known for this. The carbon buildup might have been the indirect cause of your failure.
04-05-05, 02:30 PM
#7
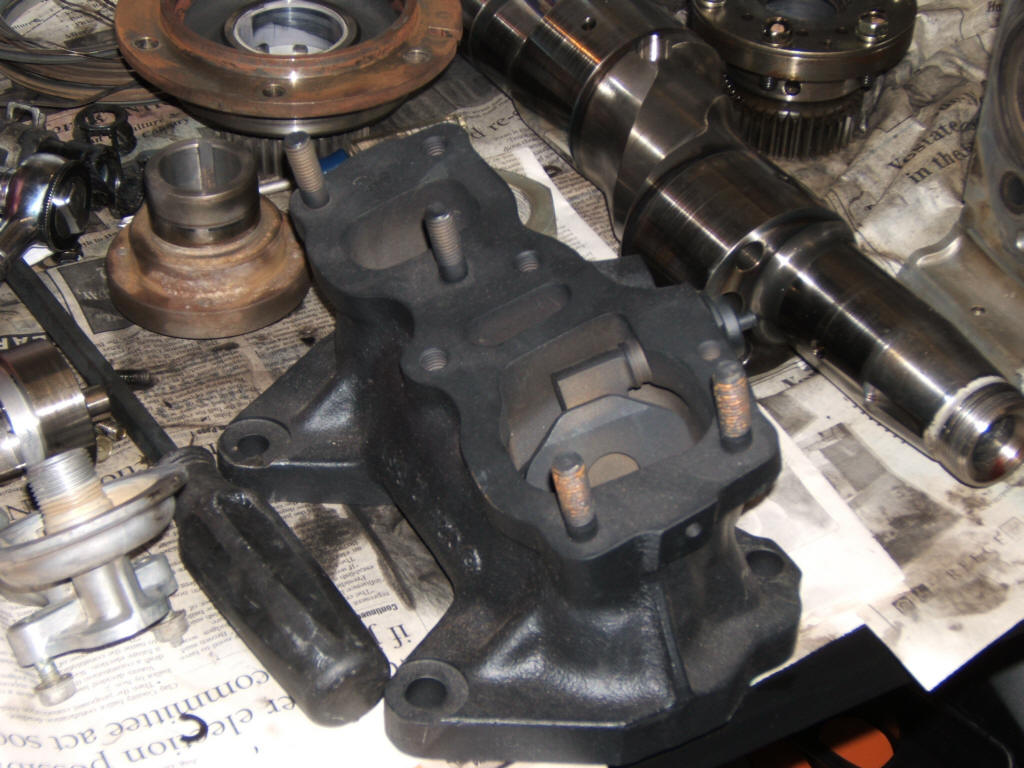
New things going into the new motor:
SwainTech ceramic coated rotors ($300):
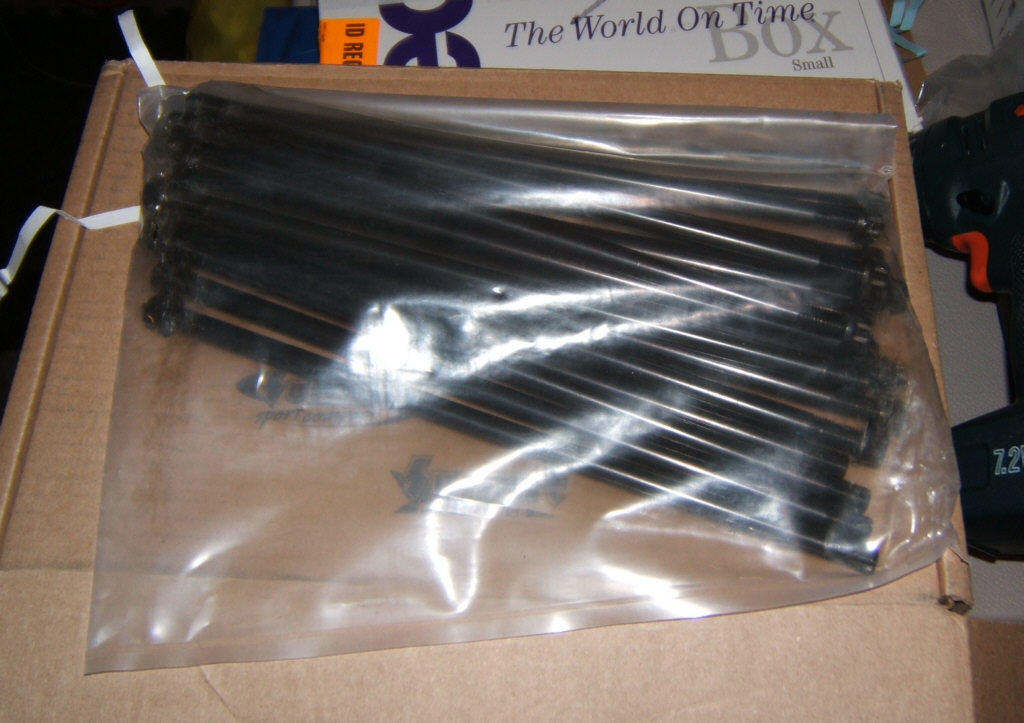
10mm Racing Engine Stud kit ($400):
This is by no means a replacement for dowel pinning. However, I believe it's a good alternative to add some additional strength without having any machining work done.
Also done:
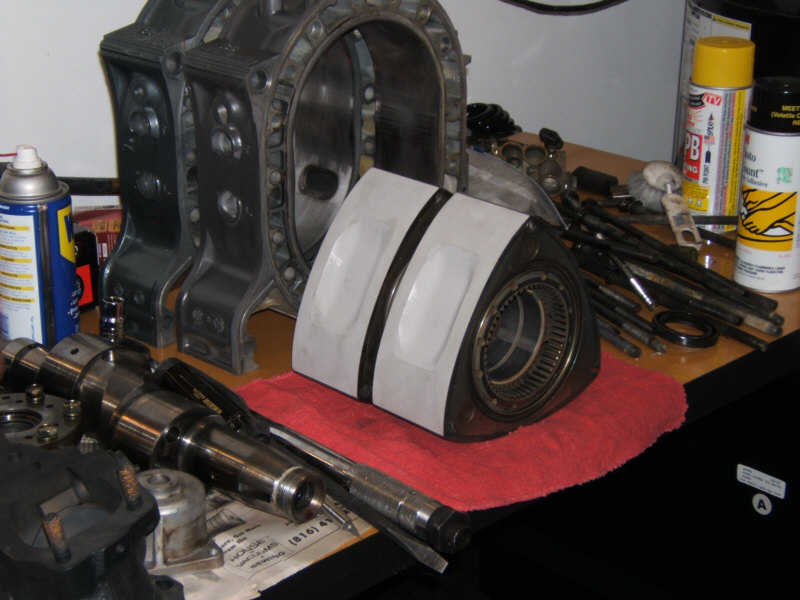
Side housings lapped and streetported by MazdaTrix ($600).
BTW, I'm rounding some of these numbers to make it easier on me than to dig up all my receipts; they aren't exact as printed here.
SwainTech ceramic coated rotors ($300):
10mm Racing Engine Stud kit ($400):
This is by no means a replacement for dowel pinning. However, I believe it's a good alternative to add some additional strength without having any machining work done.
Also done:
Side housings lapped and streetported by MazdaTrix ($600).
BTW, I'm rounding some of these numbers to make it easier on me than to dig up all my receipts; they aren't exact as printed here.
Trending Topics
04-05-05, 02:42 PM
#8
Eye In The Sky
iTrader: (2)
Join Date: Feb 2001
Location: In A Disfunctional World
Posts: 7,893
Likes: 0
Received 114 Likes
on
66 Posts
Originally Posted by Mahjik
I don't necessarily believe it was the ECU in this case. I know several people who have been using this ECU for more years than myself and put their car on the track a lot more than I do. IMO, this was just time bomb waiting to happen. Dripping injectors and one rotor was a B the other was an E.
Klye ran an unlimited Pettit on a stock port engine with a large IC, cold air intake, and larger radiator. His engine failed from stuck side seals caused by too much carbon caused by the ecu.
The evidence is there. Spend more money for improved funtioning, instead of looks.
04-05-05, 02:46 PM
#9
RX-7 Bad Ass
iTrader: (55)
Looks real good! The paint on the frame rails/subframe turned out nicely as well.
Did you get used rotors or what's the story there? Were you able to reuse the rear rotor?
Dale
Did you get used rotors or what's the story there? Were you able to reuse the rear rotor?
Dale
04-05-05, 02:49 PM
#10
RX-7 Bad Ass
iTrader: (55)
Oh, one thing I recommend that's not well known (yet) - Moroso makes a rotary oil pan stud kit. Summit has it for $20 or so - comes with plenty of studs and nuts, and the studs have Allen heads so you can torque them down. IMHO that's a REAL good idea on any FD that has the oil pan off.
Dale
Dale
04-05-05, 02:52 PM
#11
Originally Posted by cewrx7r1
Klye ran an unlimited Pettit on a stock port engine with a large IC, cold air intake, and larger radiator. His engine failed from stuck side seals caused by too much carbon caused by the ecu.
The evidence is there. Spend more money for improved funtioning, instead of looks.
The evidence is there. Spend more money for improved funtioning, instead of looks.
04-05-05, 02:56 PM
#12
Originally Posted by DaleClark
Did you get used rotors or what's the story there? Were you able to reuse the rear rotor?
Originally Posted by DaleClark
Oh, one thing I recommend that's not well known (yet) - Moroso makes a rotary oil pan stud kit. Summit has it for $20 or so - comes with plenty of studs and nuts, and the studs have Allen heads so you can torque them down. IMHO that's a REAL good idea on any FD that has the oil pan off.
Dale
Dale
04-05-05, 03:22 PM
#13
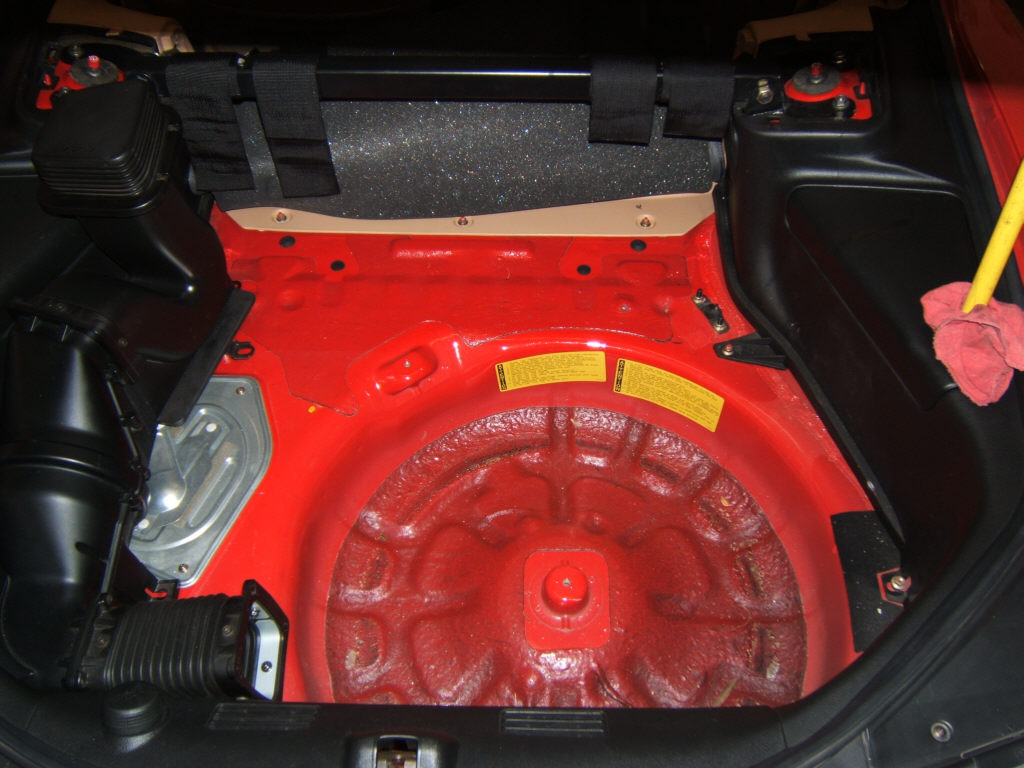
I will be going with a new exhaust setup. In preparation for additional noise and droning, I added some sound dampening to the trunk area:
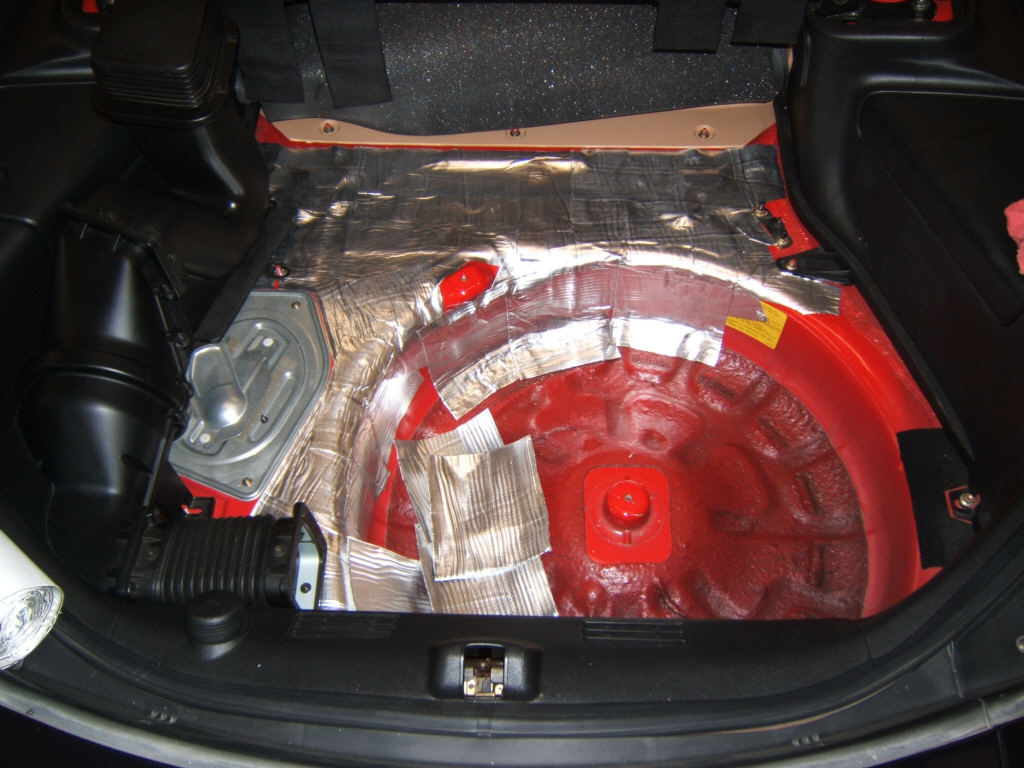
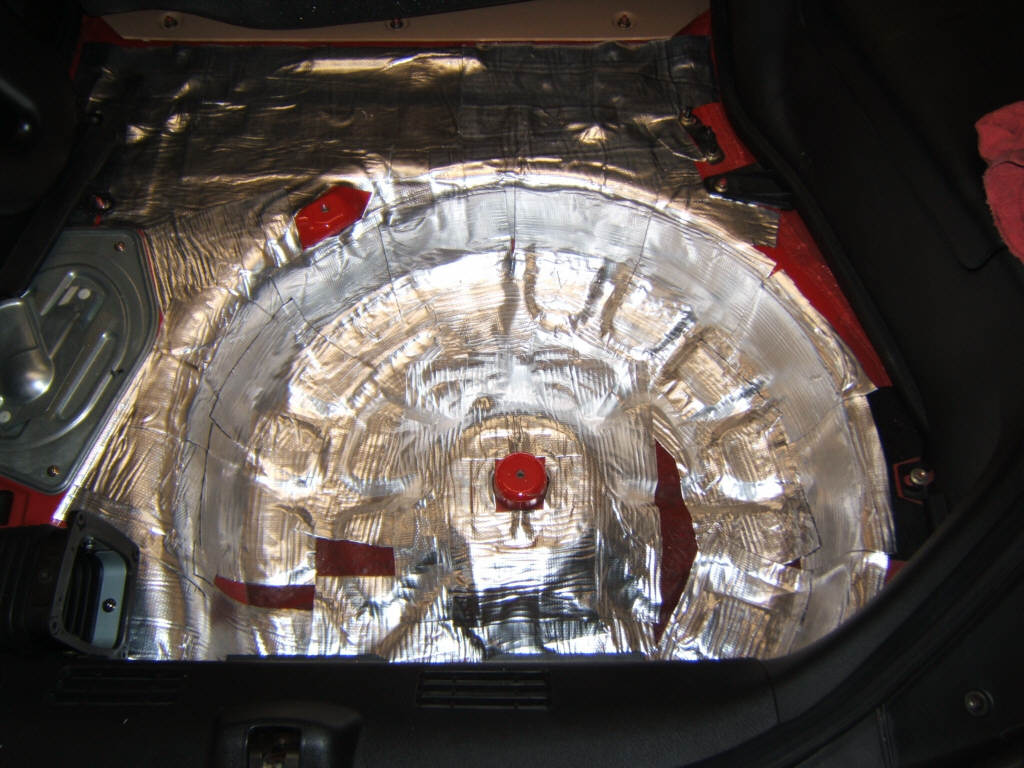
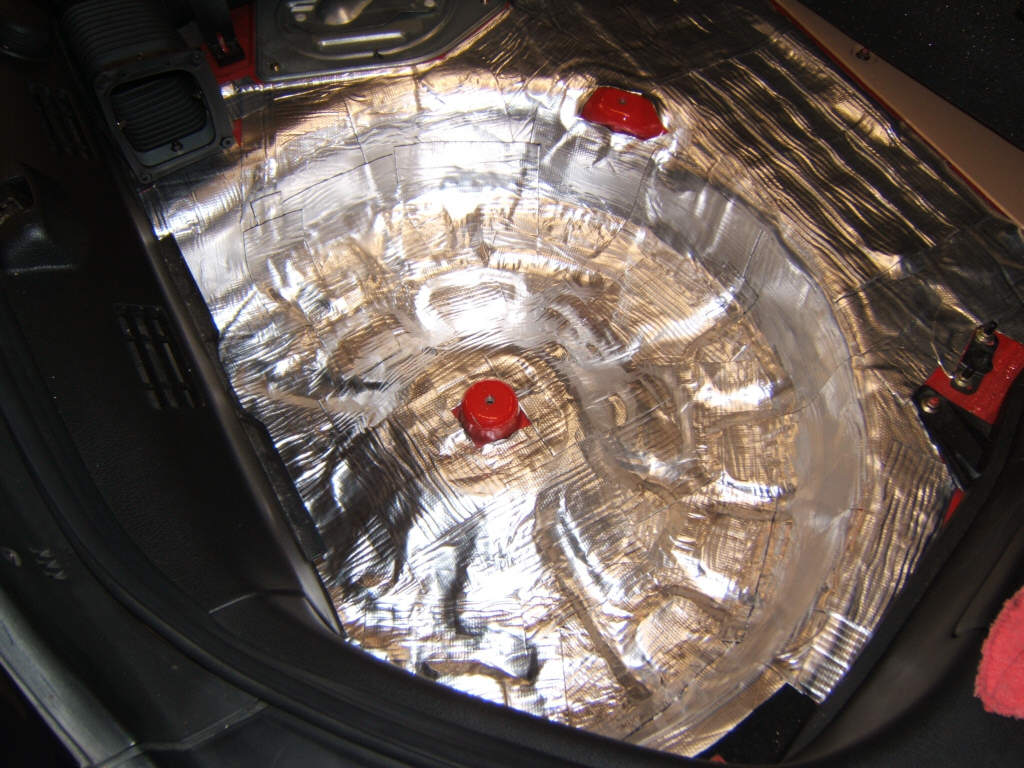
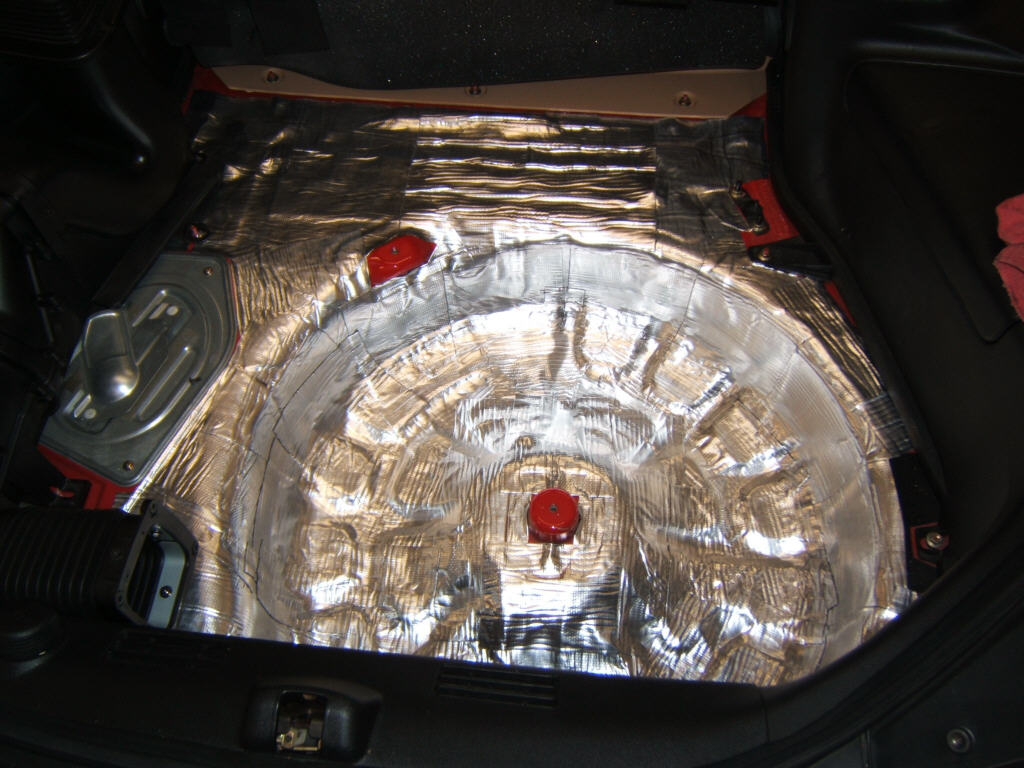
This was the B-Quiet Extreme (12 ft at $40.. I had some additional material left over from my doors that I did a few years ago).
This was the B-Quiet Extreme (12 ft at $40.. I had some additional material left over from my doors that I did a few years ago).
 04-05-05, 04:09 PM
#17
RX-7 Bad Ass
iTrader: (55)
Originally Posted by Mahjik
I'll be getting to the oil pan later this month. I'm looking at making an oil pan baffle similar to what Crispy has displayed on his site. I'll definitely check into the stud kit as well as I'm looking at the Gotham oil pan brace as well.
The studs have plenty of length, so if you go with a baffle plate or a brace you'll still have plenty of threads.
Dale
04-05-05, 04:51 PM
#20
Additionally, there will be a few more things added to this project:
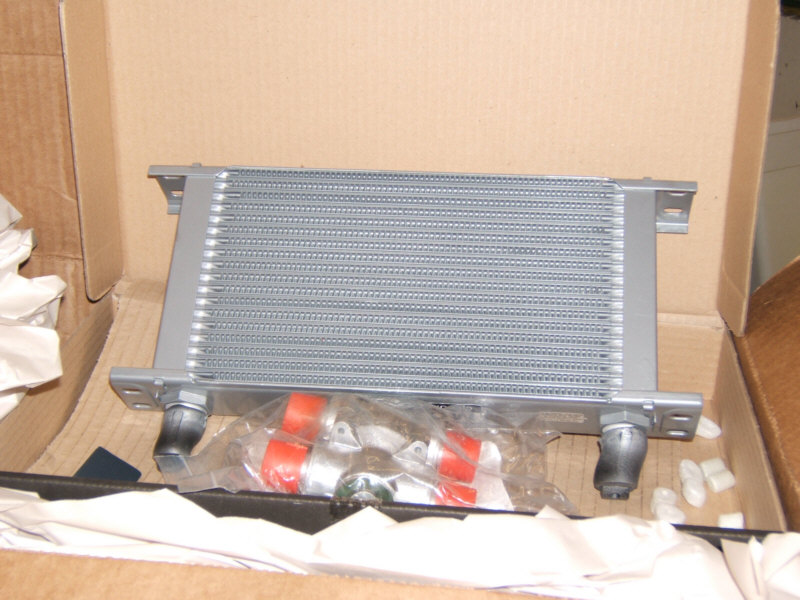
Mocal 19-Row oil cooler and t-stat ($300). Once I get the mounting brackets created, I'll post the layout of the brackets that I used. They won't be the type of quality you would expect from RE or some other kit, but I'll at least post what I did in case someone else is interested in doing it.
Minor things to be added as they come in:
Knightsports headlight kit (I don't care too much about the light pattern, I just like the look of them) - $900
Kirk Racing 4pt Roll bar - $325
I still have yet to order the rebuild kit. I'll most likely use Rotary Aviation's kit, but I'm not 100% decided on that yet. It will definitely be 2mm seals and I'll see if the Viton coolant o-rings really make a difference.
I'll get the pricing on the polishing and coatings this evening.
04-05-05, 04:54 PM
#22
Originally Posted by DaleClark
Just FYI, the Summit part number is MOR-38366. $19.95, in stock.
The studs have plenty of length, so if you go with a baffle plate or a brace you'll still have plenty of threads.
Dale
The studs have plenty of length, so if you go with a baffle plate or a brace you'll still have plenty of threads.
Dale
04-05-05, 04:56 PM
#23
Tenseiga
iTrader: (1)
Join Date: Apr 2003
Location: Iowa
Posts: 2,252
Likes: 0
Received 0 Likes
on
0 Posts
That is alot of carbon for a 27k motor.
You run OMP correct?
3 sizes is a bit far for rotor weight but I don't think that had anything to do with busting an apex seal. I would be interested in looking at the bearings though.
I've been happy with the RA kits.
You run OMP correct?
3 sizes is a bit far for rotor weight but I don't think that had anything to do with busting an apex seal. I would be interested in looking at the bearings though.
I've been happy with the RA kits.
Last edited by Sesshoumaru; 04-05-05 at 04:59 PM.
04-05-05, 05:08 PM
#24
Senior Member
Join Date: Jul 2002
Location: NJ
Posts: 496
Likes: 0
Received 0 Likes
on
0 Posts
Originally Posted by Mahjik
The huge big gash on the housing chrome.
(Trying to learn a little bit here...
 )
04-05-05, 05:19 PM
)
04-05-05, 05:19 PM
#25
Senior Member
Join Date: Feb 2002
Location: Austin, TX
Posts: 258
Likes: 0
Received 0 Likes
on
0 Posts
I think the pictures are sufficiently lighted. I have no problems viewing them on a monitor or an LCD.
Do you have specific pics in mind that you need brightened? I say adjust your monitors brightness and contrast.
-Joseph
Do you have specific pics in mind that you need brightened? I say adjust your monitors brightness and contrast.
-Joseph