Build Threads
Sponsored by:

1989 FC Build

Thread Tools
 
Search this Thread
 
Old 09-18-12, 09:26 PM
  #1  
Full Member
Thread Starter
iTrader: (2)
 
Colin81RX7's Avatar
 
Join Date: Jun 2009
Location: Pickering, Ontario
Posts: 160
Likes: 0
Received 0 Likes on 0 Posts
1989 FC Build


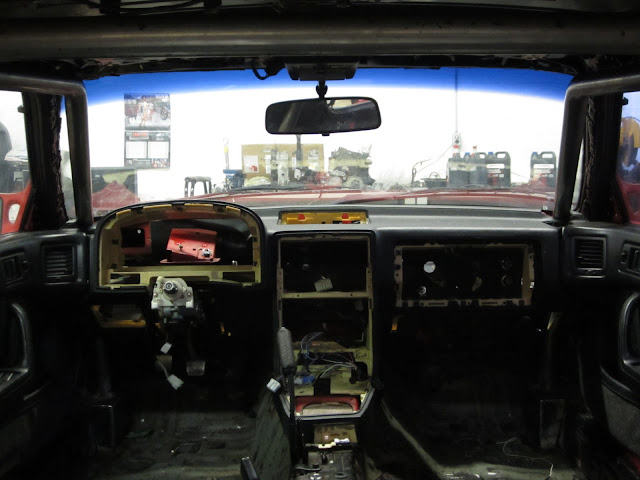
Hey guys my car is almost finished so i thought i would post my build on the forum. I used to have an '81 FB after selling that i had to come back to a rotary and i got my '89 for $700 with the intention of fixing it up to be a nice street track car.


When i first got it home it was covered in cobwebs from sitting for a few years needed a bit to get it started. I replaced the mass air flow sensor, spark plugs, a TPS and a new battery. Got the car running and only had a few electrical issues.
Old 09-18-12, 09:30 PM
  #2  
OMG a Chupacabra!

iTrader: (26)
 
Broke_A_Baller's Avatar
 
Join Date: May 2012
Location: Florida
Posts: 1,359
Received 7 Likes on 7 Posts
damn $700...thats a good deal
Old 09-18-12, 09:38 PM
  #3  
Full Member
Thread Starter
iTrader: (2)
 
Colin81RX7's Avatar
 
Join Date: Jun 2009
Location: Pickering, Ontario
Posts: 160
Likes: 0
Received 0 Likes on 0 Posts
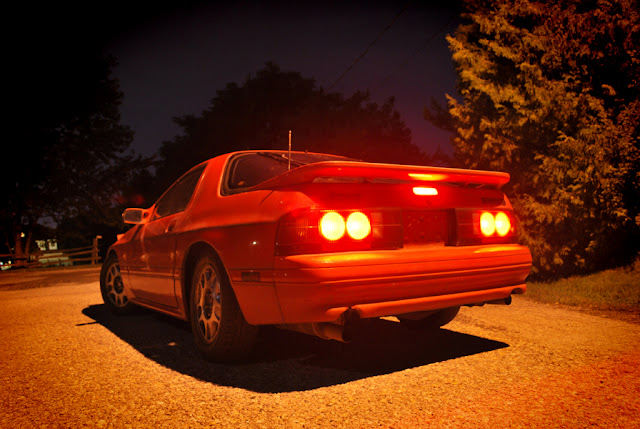
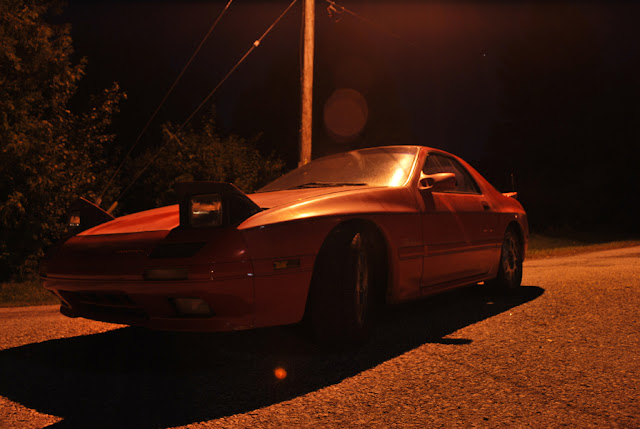
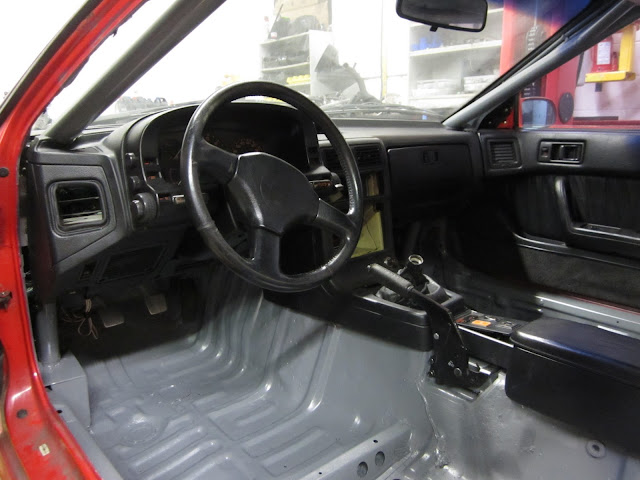
I buffed and waxed the paint it came out alot better and most of the fading had been brought back to life. I installed HSD coilovers, lowered it and got Falken Azenis 205/50/15 on Kosei K1 15x7 +38.


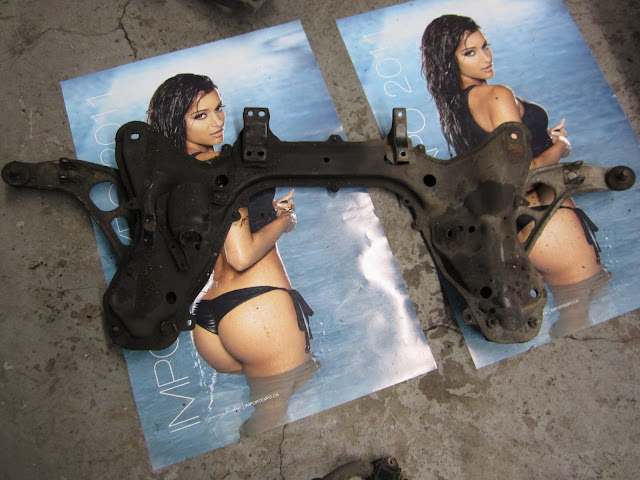
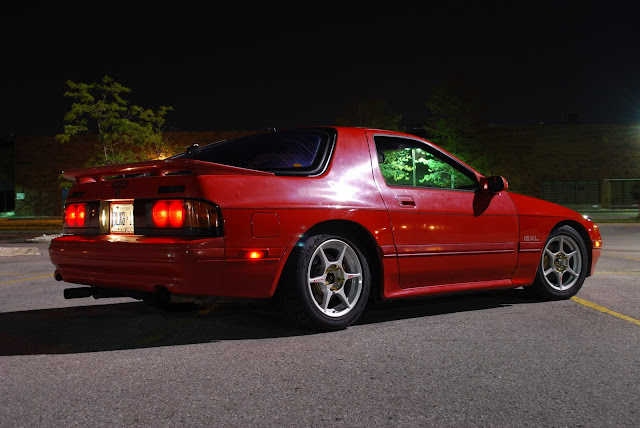
I replaced the brakes with Powerslot vented rotors with hawk HP Plus and painted my calipers gold. The rear wheel bearings were makeing alot of noise so i replaced those with new OEM and got the Racing Beat DTSS Eliminater bushings.


Old 09-18-12, 09:41 PM
  #4  
OMG a Chupacabra!

iTrader: (26)
 
Broke_A_Baller's Avatar
 
Join Date: May 2012
Location: Florida
Posts: 1,359
Received 7 Likes on 7 Posts
you should rock spacers in the back to get it flush :-p

how you liking the powerslot rotors?

I was thinking of going with the stoptech drilled/slotted or ebc ones
Old 09-18-12, 09:44 PM
  #5  
Full Member
Thread Starter
iTrader: (2)
 
Colin81RX7's Avatar
 
Join Date: Jun 2009
Location: Pickering, Ontario
Posts: 160
Likes: 0
Received 0 Likes on 0 Posts
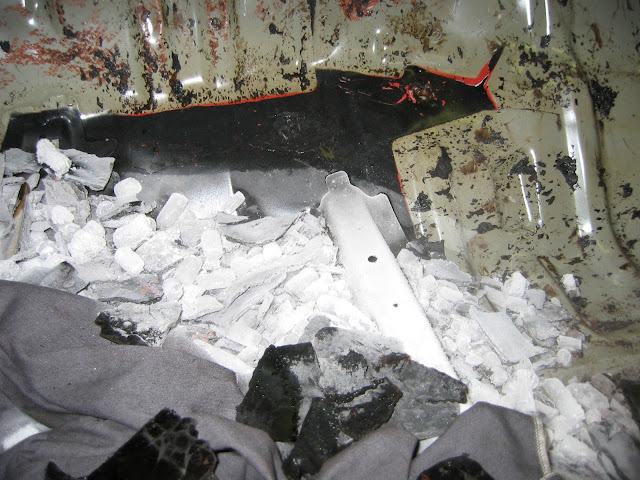
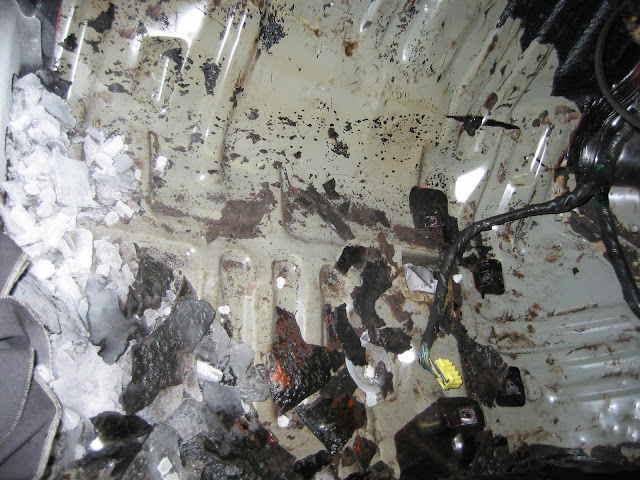
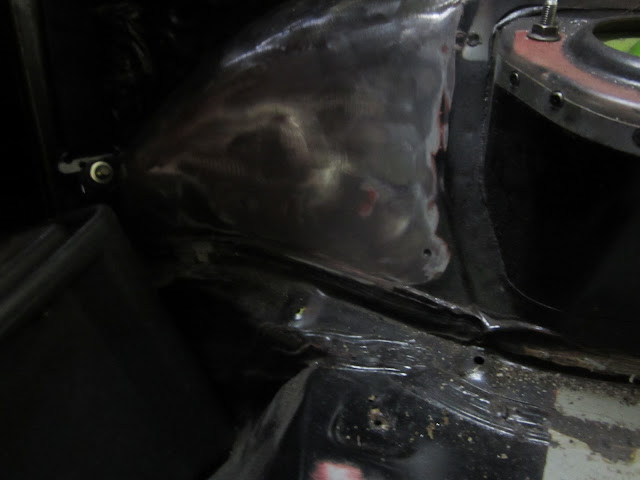
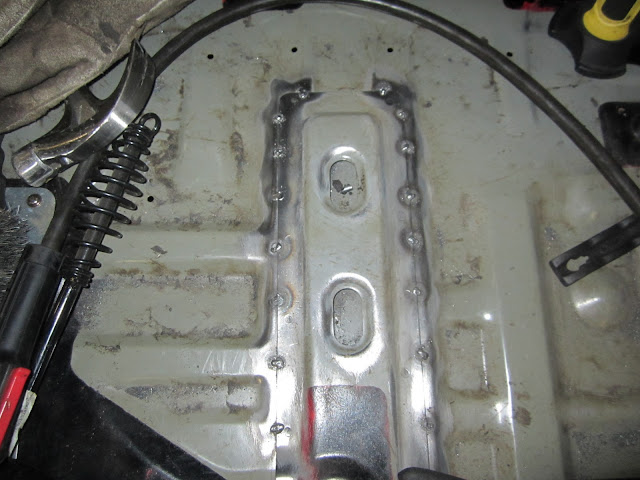
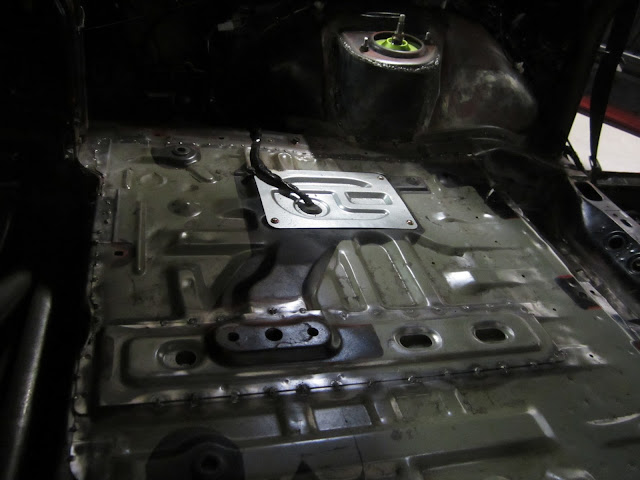
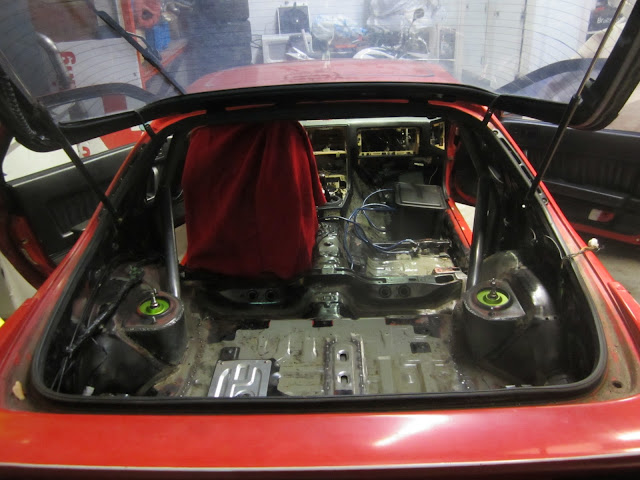
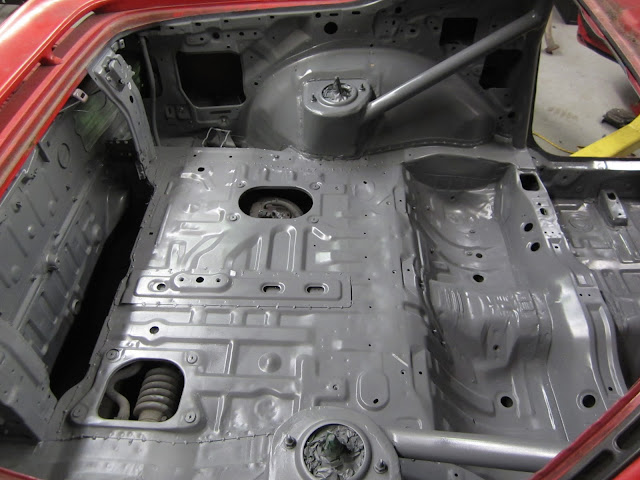
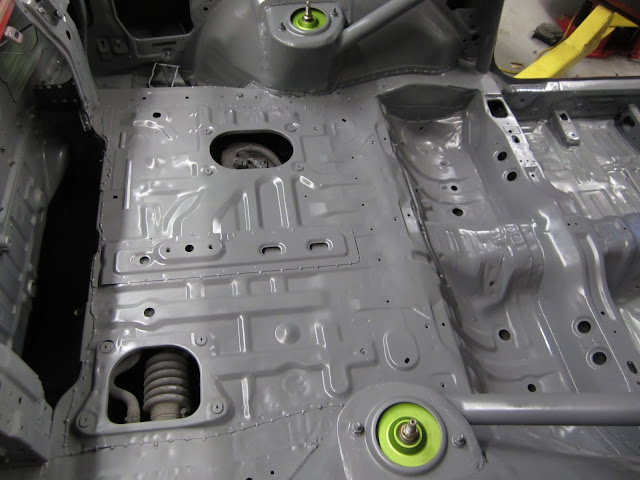
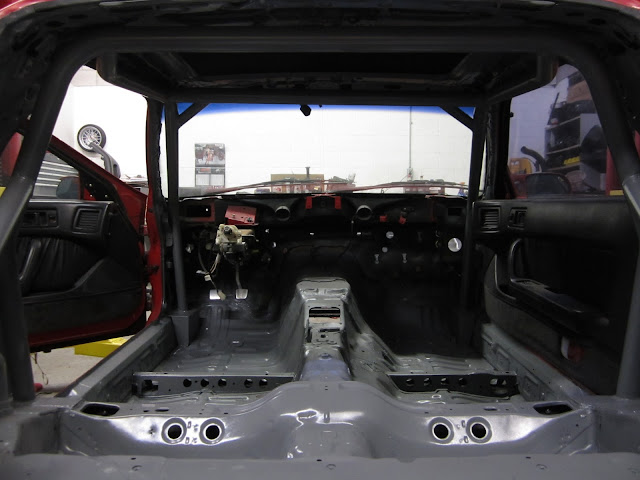
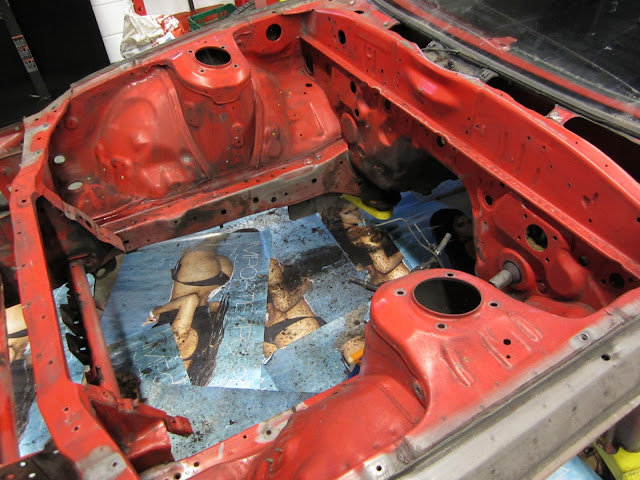
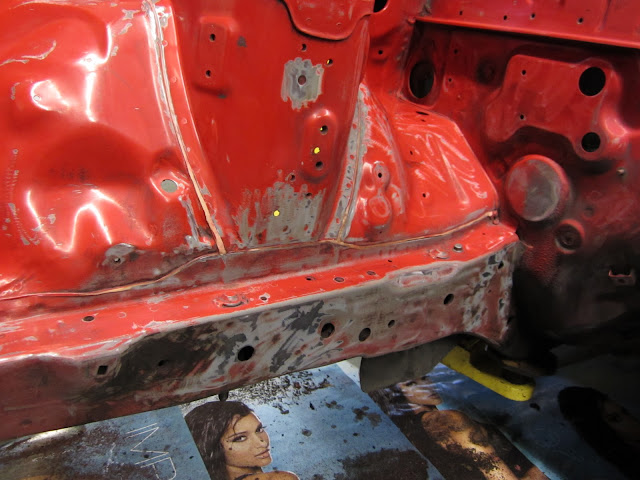
I used the dry ice technique of removing the sound deadening material that is bonded to the floor. I bought 60lbs of it but i had alot left over. After the ice goes to work i hammered the floor to chip away the material.


Old 09-18-12, 09:54 PM
  #6  
Full Member
Thread Starter
iTrader: (2)
 
Colin81RX7's Avatar
 
Join Date: Jun 2009
Location: Pickering, Ontario
Posts: 160
Likes: 0
Received 0 Likes on 0 Posts
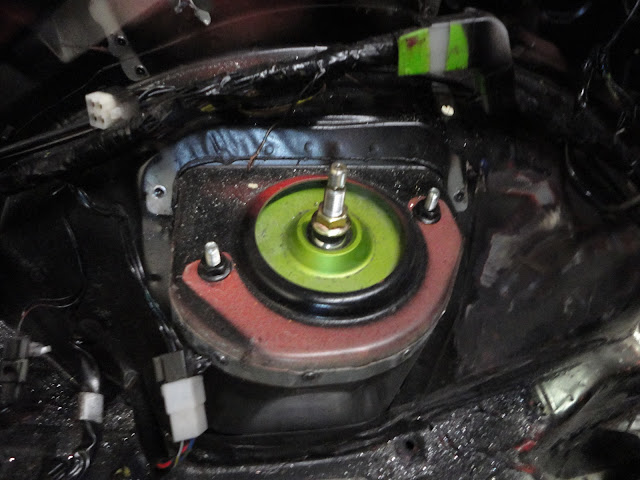
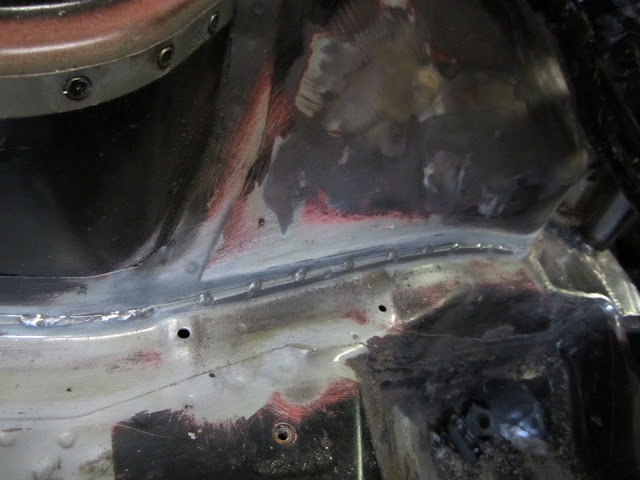
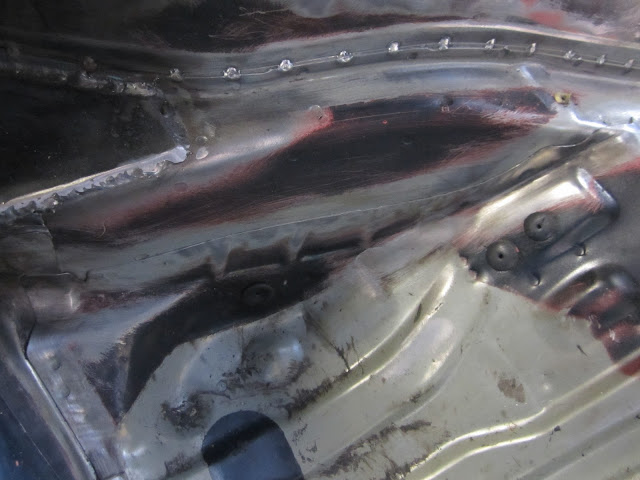
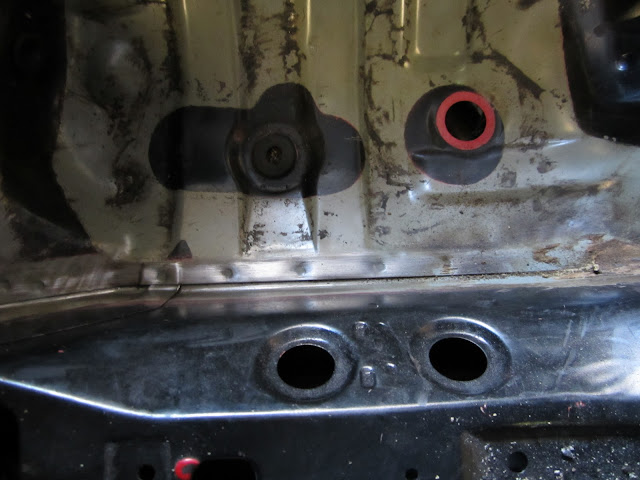
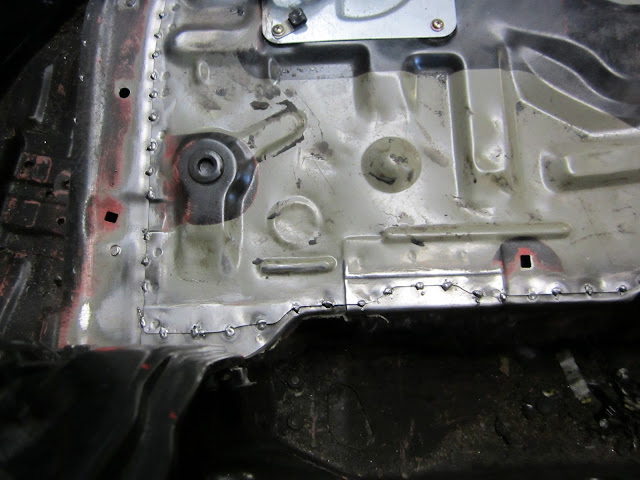
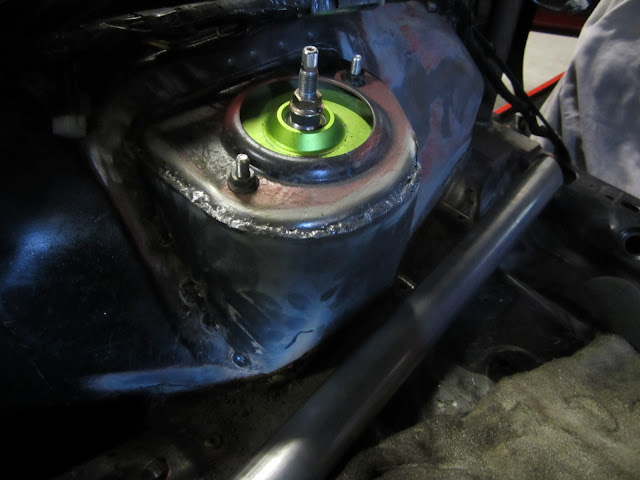
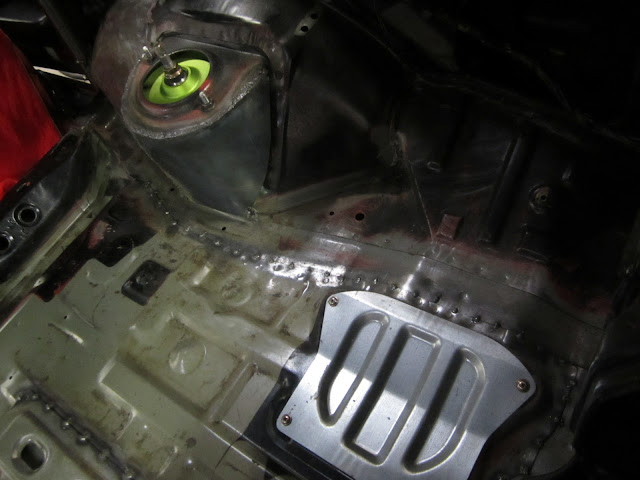
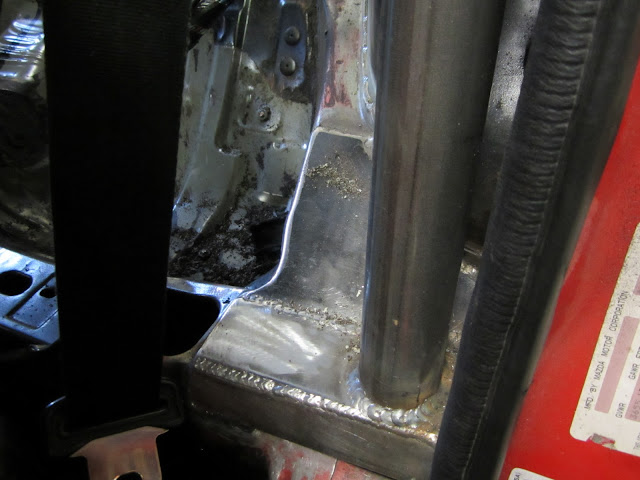
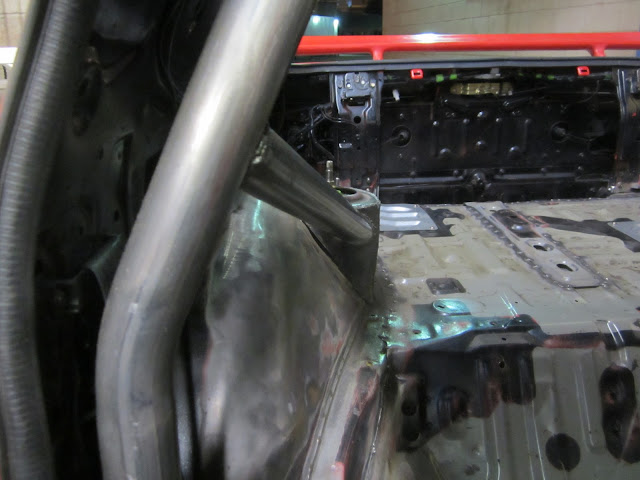
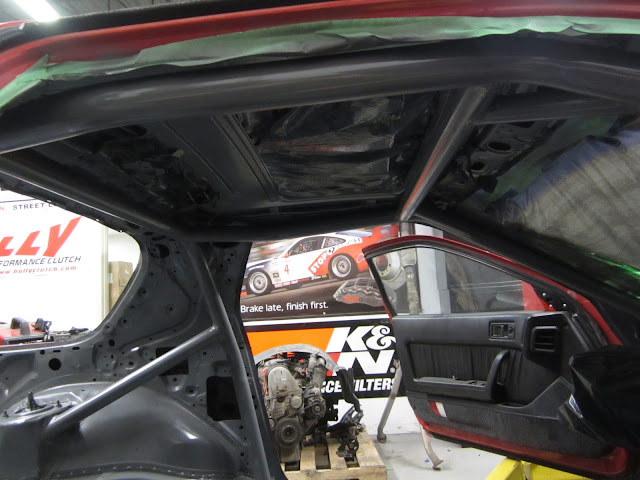
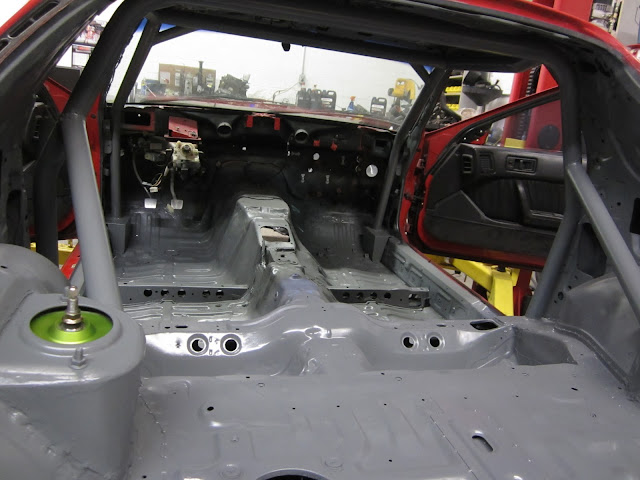
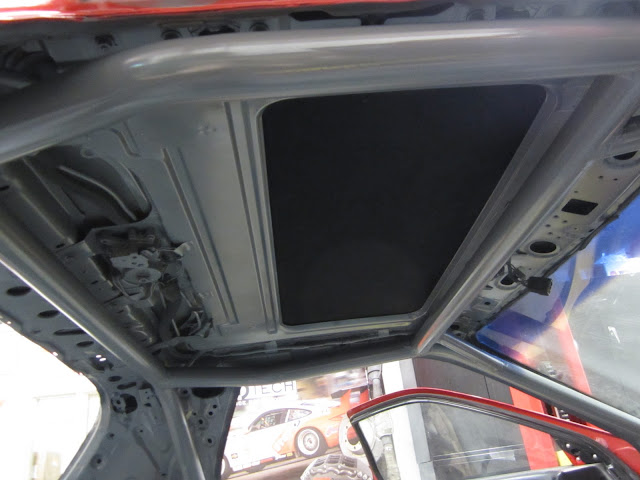
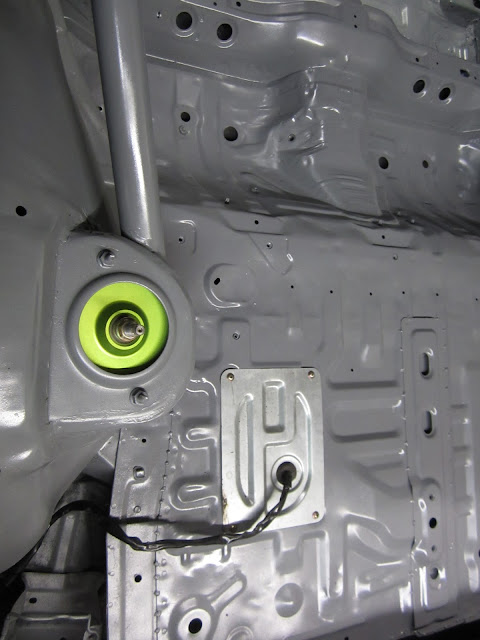
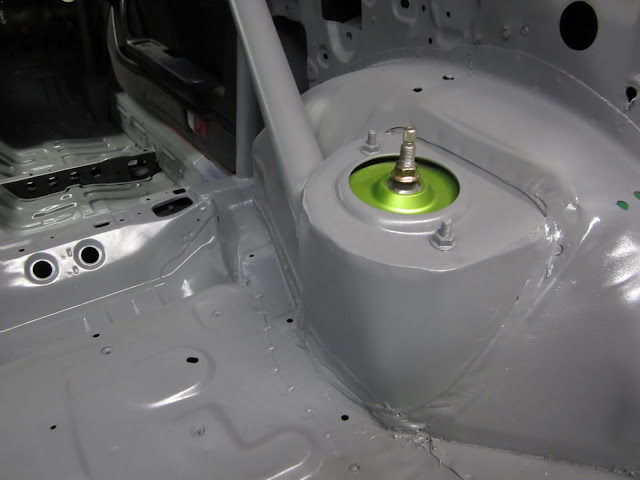
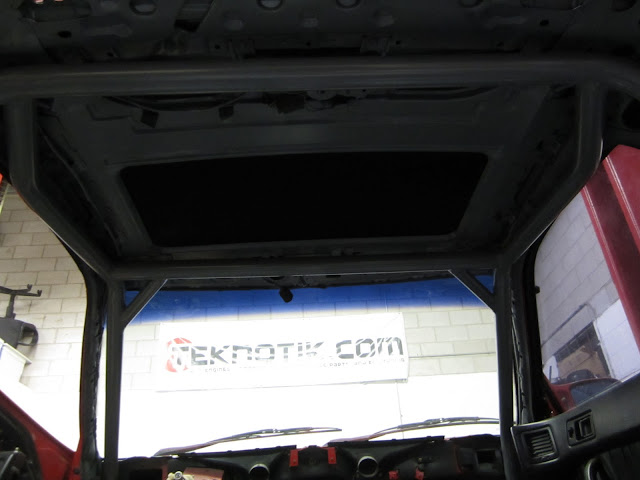
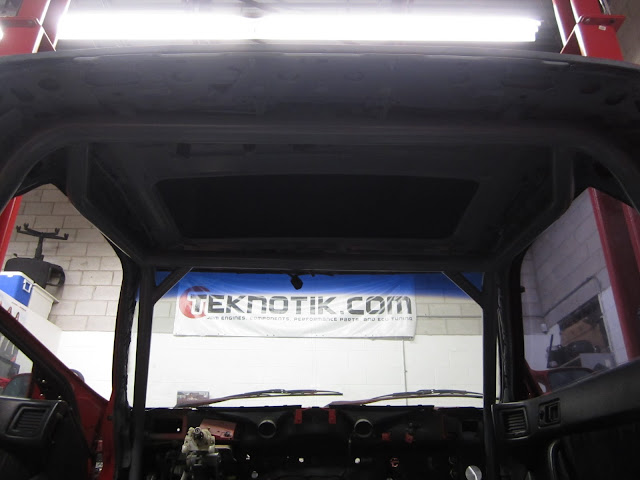
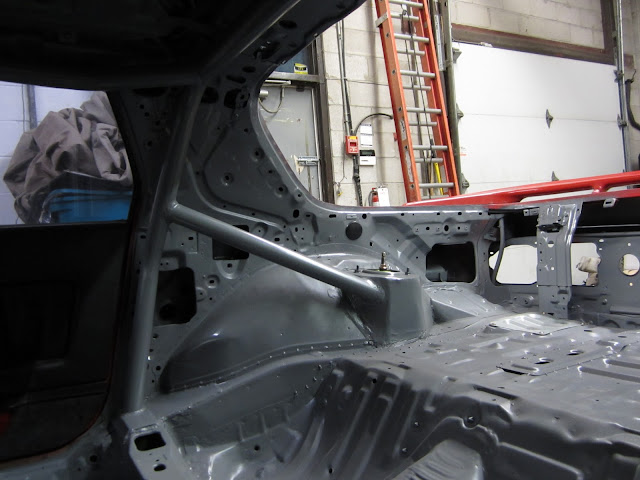
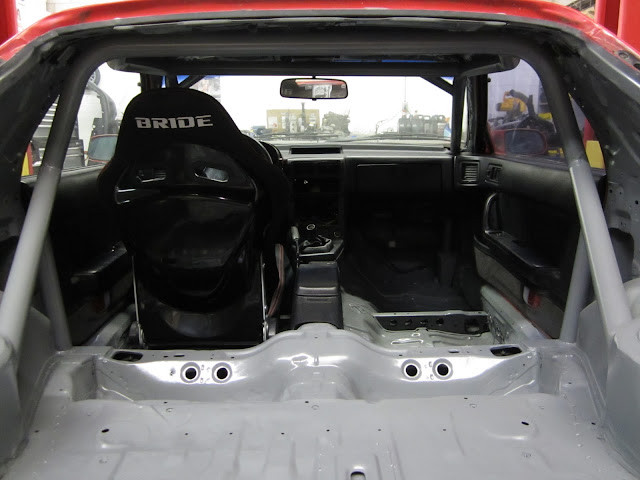
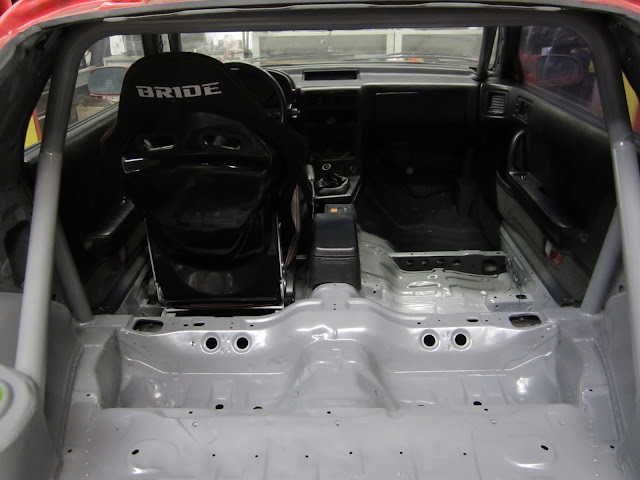
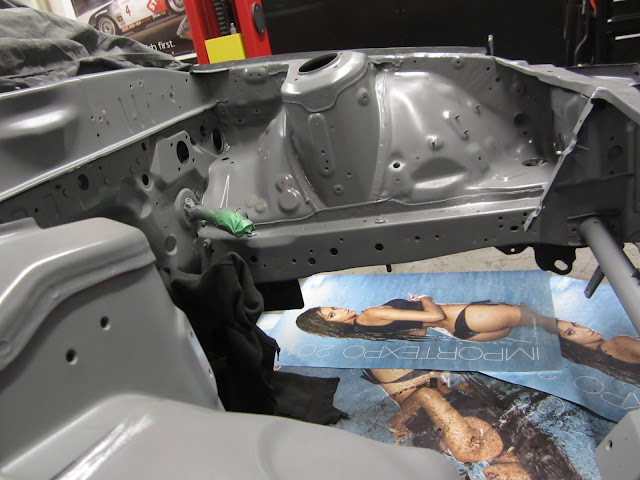
First thing I did when the sound deadening was out was melt off all the seam sealer and stitch weld the floor pan. This took alot of time to get everything cleaned out of the inside. I also reinforced the rear strut towers to tie the cage into it.


Old 09-18-12, 09:55 PM
  #7  
Full Member
Thread Starter
iTrader: (2)
 
Colin81RX7's Avatar
 
Join Date: Jun 2009
Location: Pickering, Ontario
Posts: 160
Likes: 0
Received 0 Likes on 0 Posts


Old 09-18-12, 09:57 PM
  #8  
OMG a Chupacabra!

iTrader: (26)
 
Broke_A_Baller's Avatar
 
Join Date: May 2012
Location: Florida
Posts: 1,359
Received 7 Likes on 7 Posts
what welder did you use to spot weld?
Old 09-18-12, 10:01 PM
  #9  
Full Member
Thread Starter
iTrader: (2)
 
Colin81RX7's Avatar
 
Join Date: Jun 2009
Location: Pickering, Ontario
Posts: 160
Likes: 0
Received 0 Likes on 0 Posts
After all the seam sealer was removed and the larger sections of the floor were stitch welded the cage was bent up, notched and welded in place.


Old 09-18-12, 10:05 PM
  #10  
Full Member
Thread Starter
iTrader: (2)
 
Colin81RX7's Avatar
 
Join Date: Jun 2009
Location: Pickering, Ontario
Posts: 160
Likes: 0
Received 0 Likes on 0 Posts


Old 09-18-12, 10:09 PM
  #11  
Full Member
Thread Starter
iTrader: (2)
 
Colin81RX7's Avatar
 
Join Date: Jun 2009
Location: Pickering, Ontario
Posts: 160
Likes: 0
Received 0 Likes on 0 Posts
Originally Posted by Broke_A_Baller
what welder did you use to spot weld?
i was using a gasless mig for the stitch welding its all i had but i think it should be strong enough.
Old 09-18-12, 10:24 PM
  #12  
Full Member
Thread Starter
iTrader: (2)
 
Colin81RX7's Avatar
 
Join Date: Jun 2009
Location: Pickering, Ontario
Posts: 160
Likes: 0
Received 0 Likes on 0 Posts
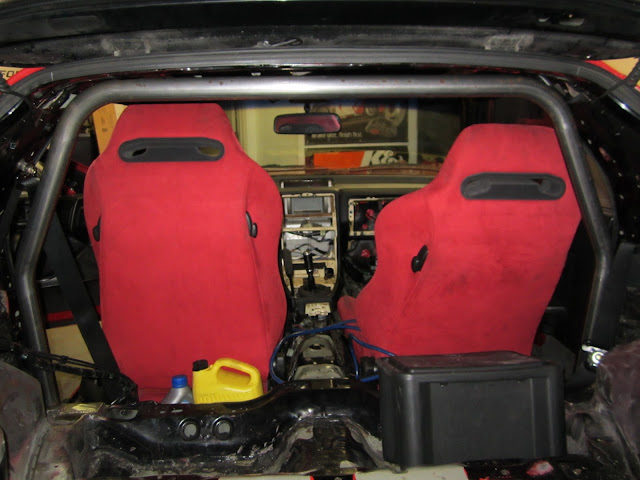
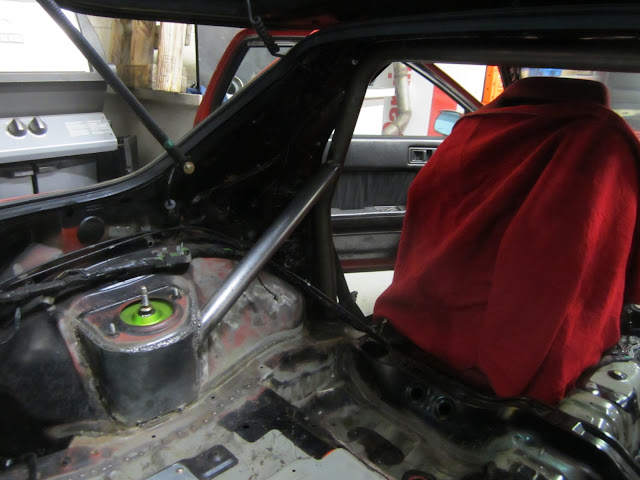
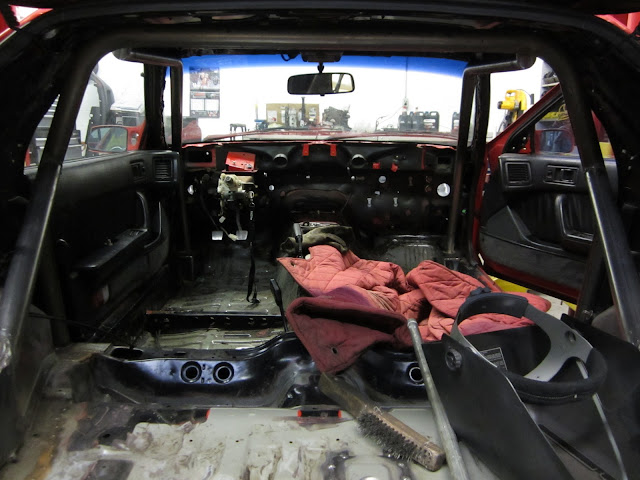
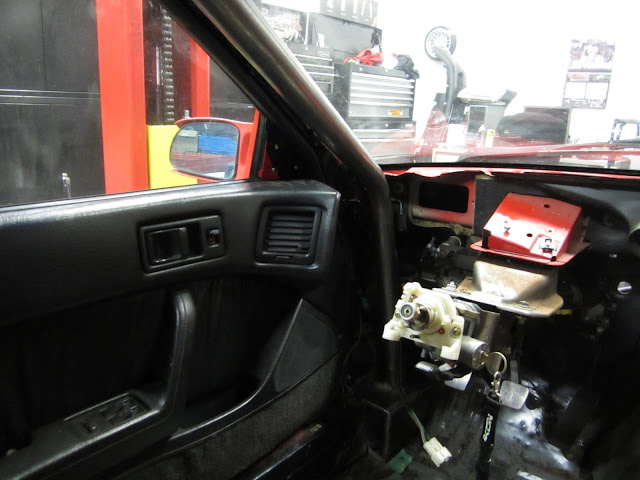
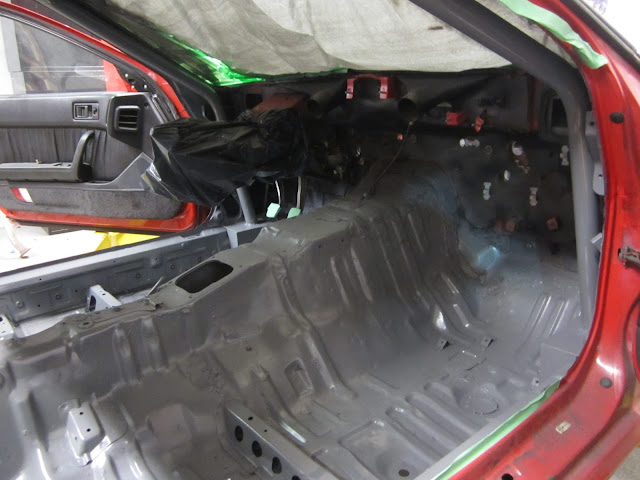
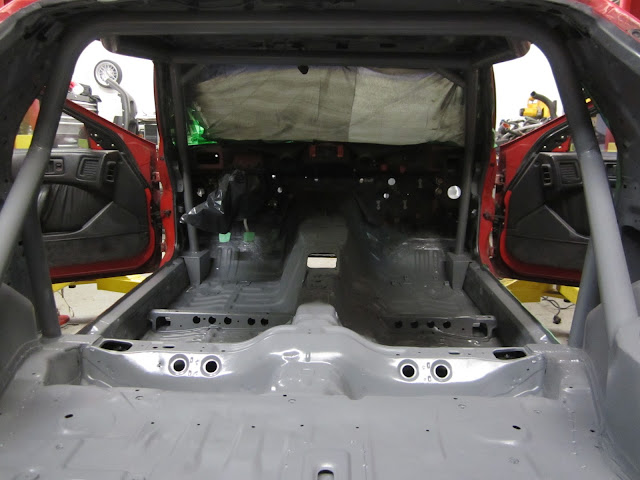
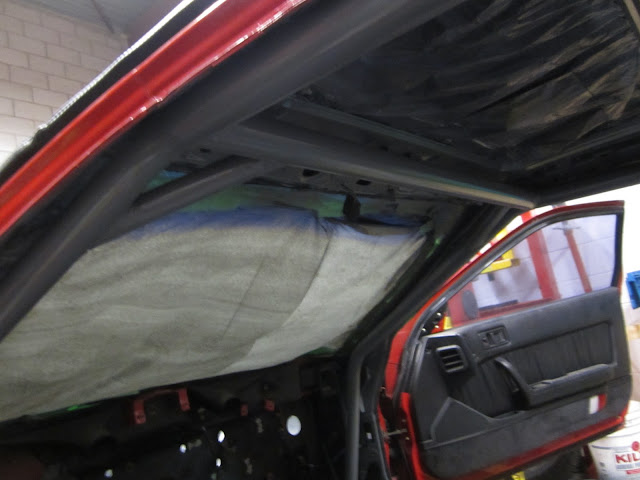
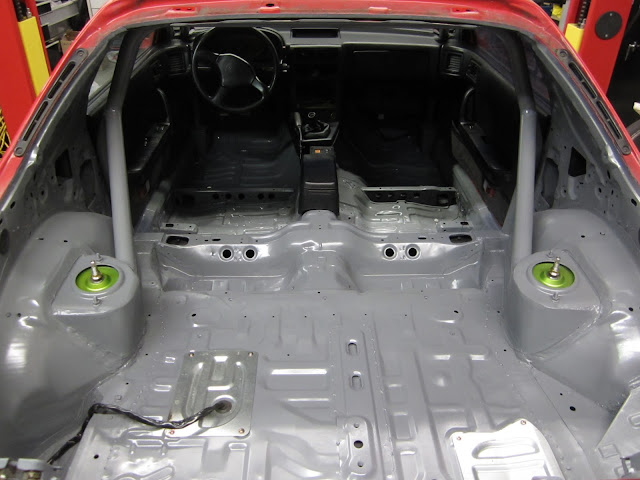
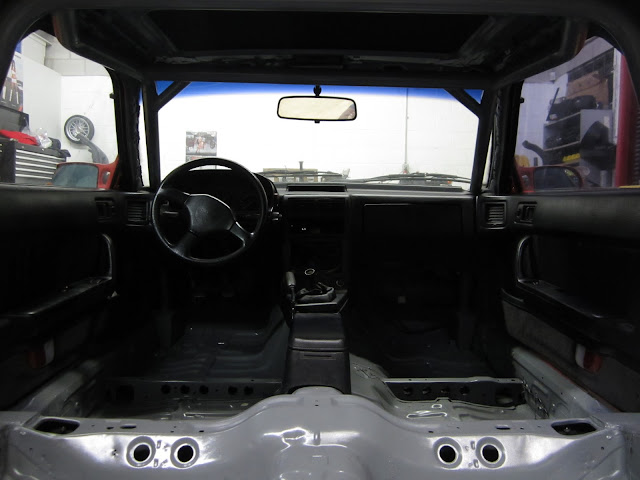
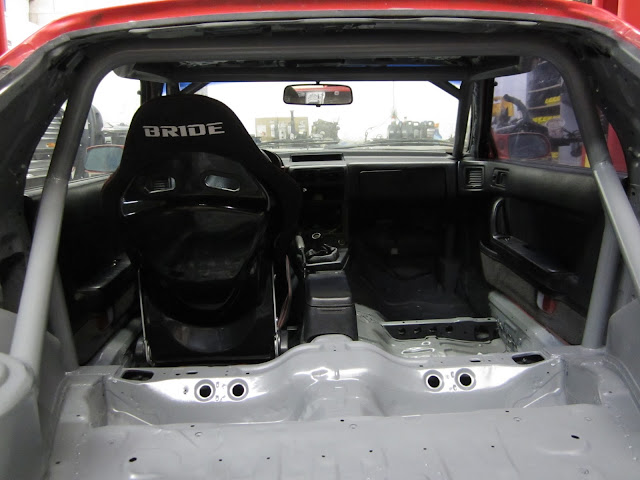
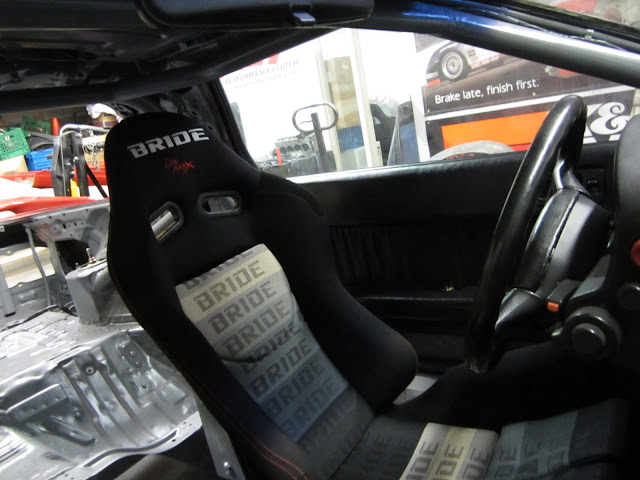
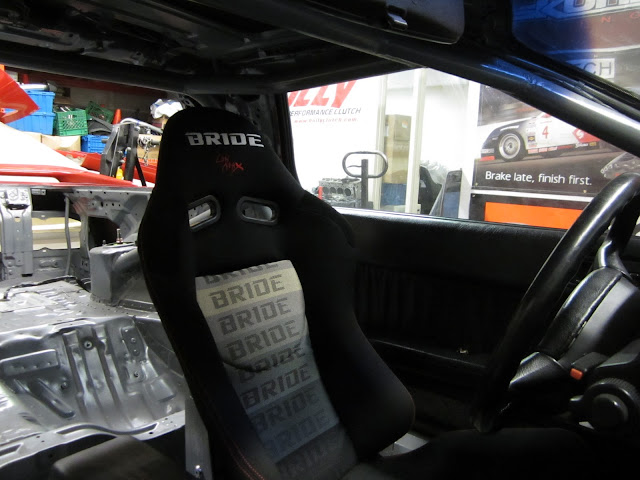
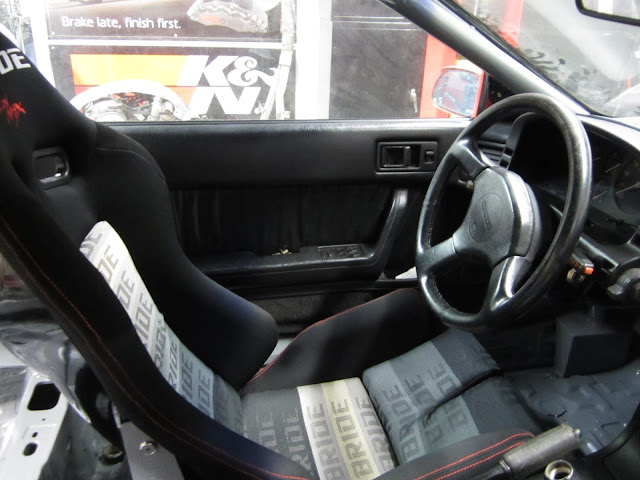
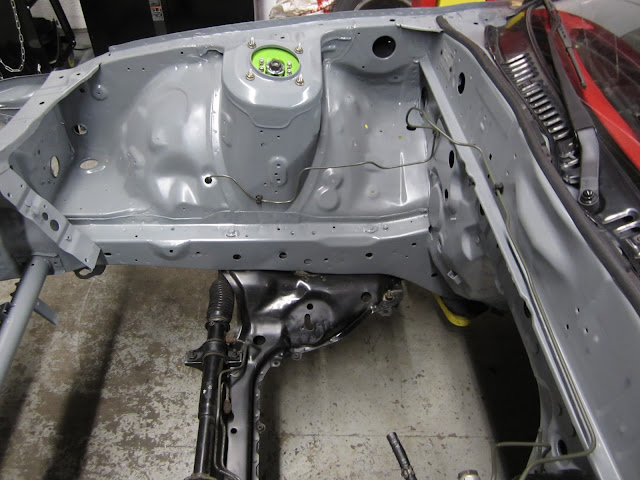
After the cage was finished i sanded down everything and primed and painted the interior Machinist Grey. Im really happy with the way the colour came out i also started putting whats left of the interior back together and mocked up one of my seats.


Old 09-18-12, 10:26 PM
  #13  
Full Member
Thread Starter
iTrader: (2)
 
Colin81RX7's Avatar
 
Join Date: Jun 2009
Location: Pickering, Ontario
Posts: 160
Likes: 0
Received 0 Likes on 0 Posts


Old 09-18-12, 10:27 PM
  #14  
Full Member
Thread Starter
iTrader: (2)
 
Colin81RX7's Avatar
 
Join Date: Jun 2009
Location: Pickering, Ontario
Posts: 160
Likes: 0
Received 0 Likes on 0 Posts


Old 09-18-12, 10:28 PM
  #15  
Full Member
Thread Starter
iTrader: (2)
 
Colin81RX7's Avatar
 
Join Date: Jun 2009
Location: Pickering, Ontario
Posts: 160
Likes: 0
Received 0 Likes on 0 Posts


Old 09-19-12, 04:44 AM
  #16  
The Shadetree Project

iTrader: (40)
 
Hyper4mance2k's Avatar
 
Join Date: Jul 2002
Location: District of Columbia
Posts: 7,301
Received 3 Likes on 3 Posts
ill
Old 09-19-12, 08:08 AM
  #17  
Full Member
Thread Starter
iTrader: (2)
 
Colin81RX7's Avatar
 
Join Date: Jun 2009
Location: Pickering, Ontario
Posts: 160
Likes: 0
Received 0 Likes on 0 Posts
Originally Posted by Broke_A_Baller
you should rock spacers in the back to get it flush :-p

how you liking the powerslot rotors?

I was thinking of going with the stoptech drilled/slotted or ebc ones
I ordered custom TE37s in white just showed up yesterday the car is in the body shop right now getting a fresh red shine aero kit and custom rear fender flares
Old 09-19-12, 09:35 PM
  #18  
Full Member
Thread Starter
iTrader: (2)
 
Colin81RX7's Avatar
 
Join Date: Jun 2009
Location: Pickering, Ontario
Posts: 160
Likes: 0
Received 0 Likes on 0 Posts
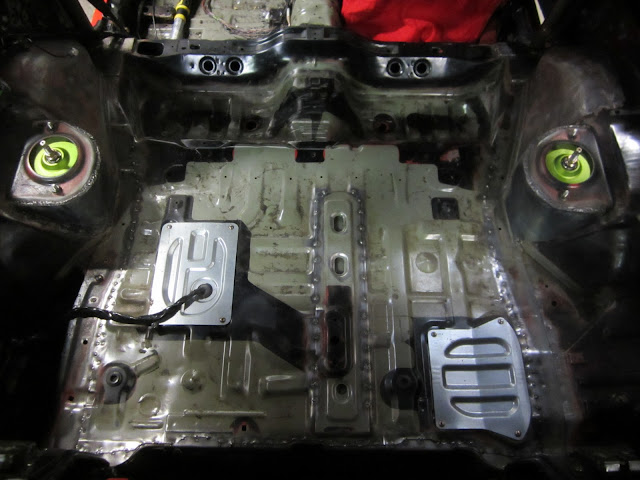
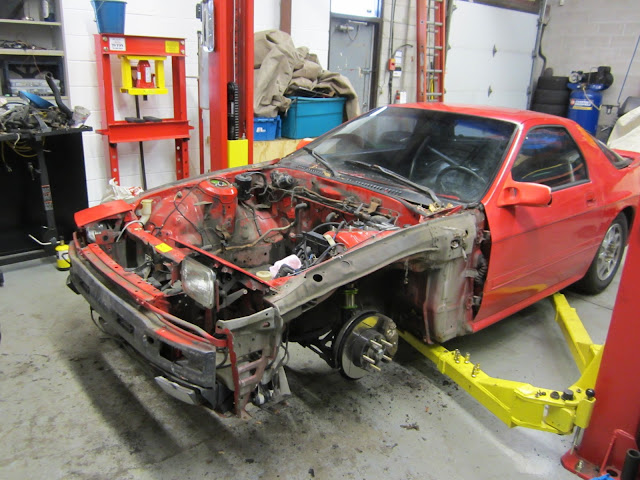
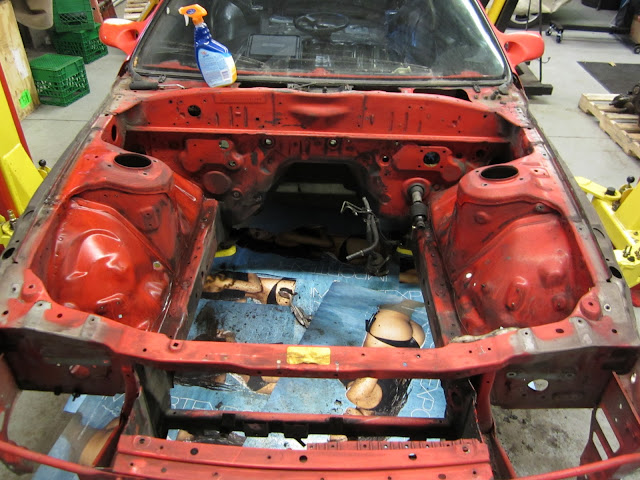
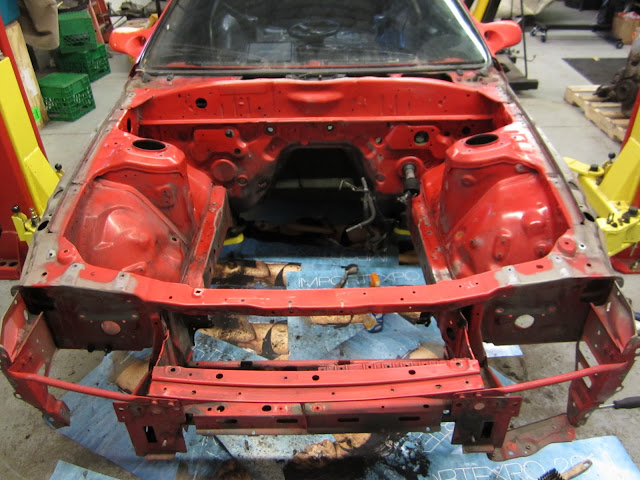
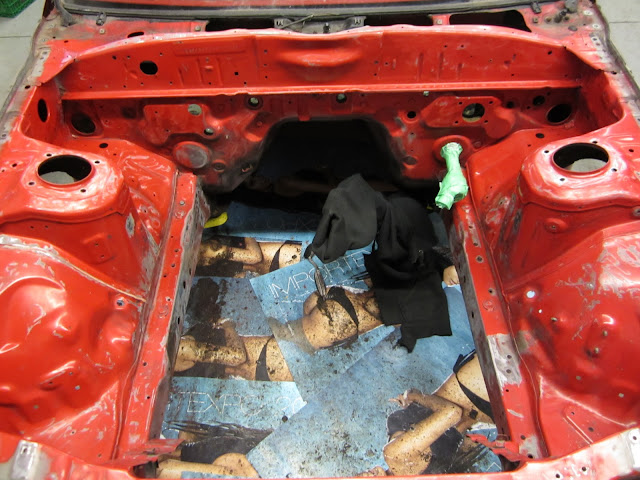
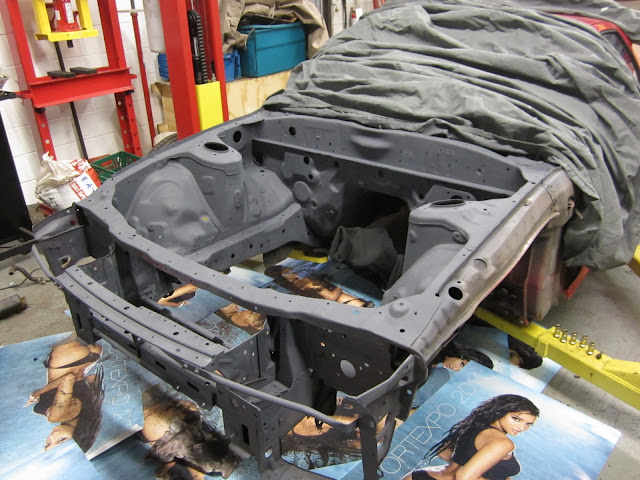
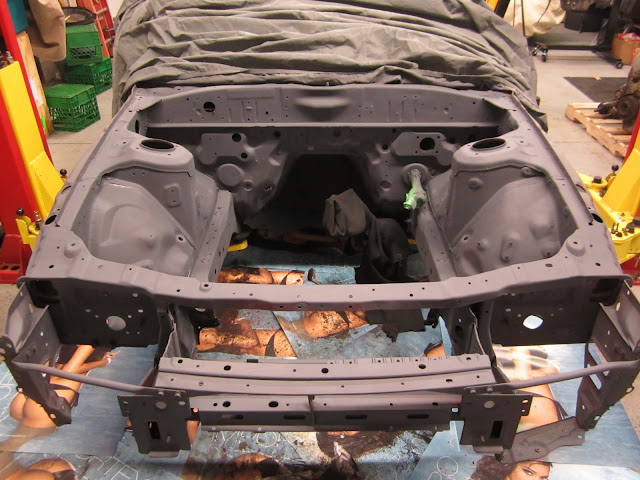
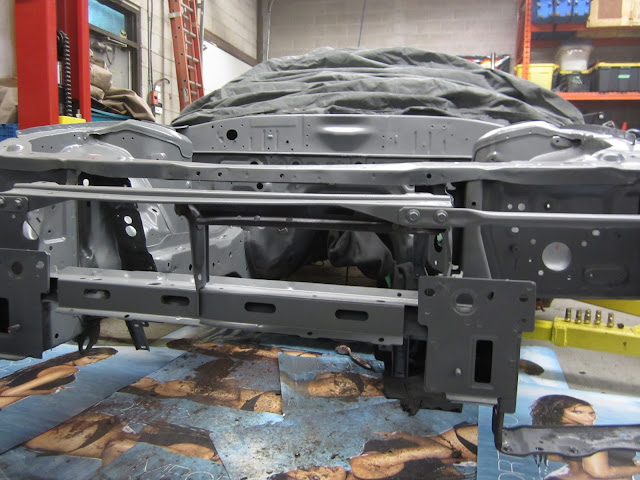
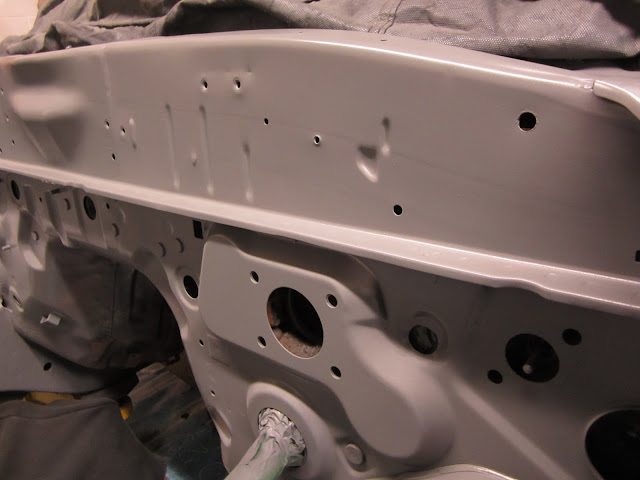
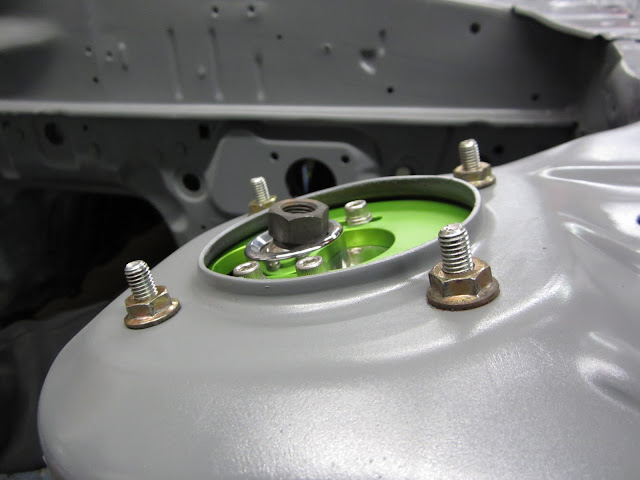
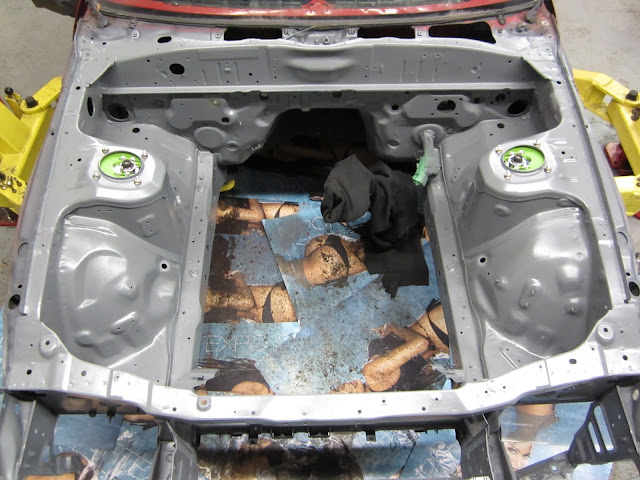
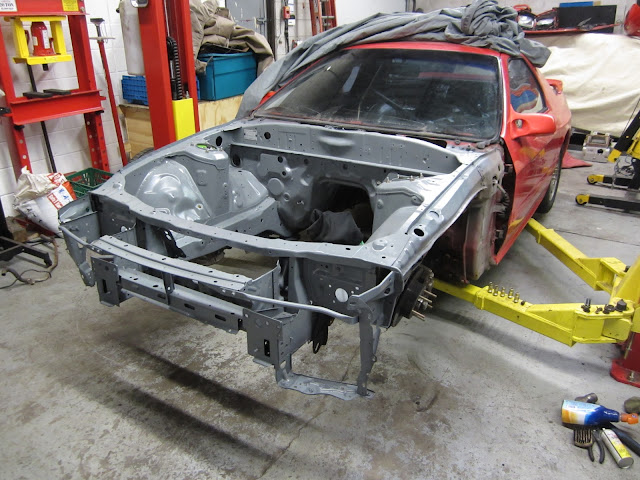
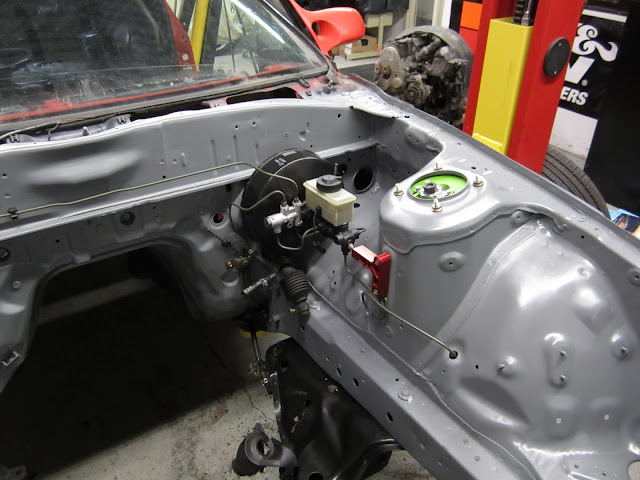
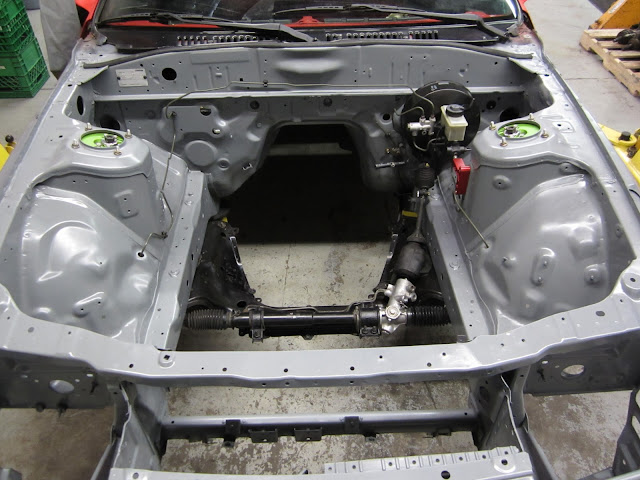
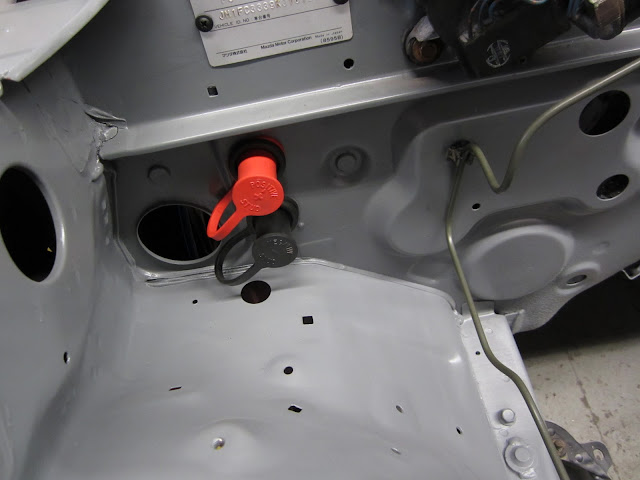
I stripped the hole engine bay down and cleaned all the rustproofing off and sanded the bay down. After that i primed and painted the bay the same grey as the interior. All the parts that get reinstalled are being cleaned up or replaced. I will also be doing a full engine bay wire tuck.


Old 09-19-12, 09:35 PM
  #19  
OMG a Chupacabra!

iTrader: (26)
 
Broke_A_Baller's Avatar
 
Join Date: May 2012
Location: Florida
Posts: 1,359
Received 7 Likes on 7 Posts
Originally Posted by Colin81RX7
I ordered custom TE37s in white just showed up yesterday the car is in the body shop right now getting a fresh red shine aero kit and custom rear fender flares
what size and how much u pick them up for?
Old 09-19-12, 09:36 PM
  #20  
Full Member
Thread Starter
iTrader: (2)
 
Colin81RX7's Avatar
 
Join Date: Jun 2009
Location: Pickering, Ontario
Posts: 160
Likes: 0
Received 0 Likes on 0 Posts


Old 09-19-12, 09:37 PM
  #21  
Full Member
Thread Starter
iTrader: (2)
 
Colin81RX7's Avatar
 
Join Date: Jun 2009
Location: Pickering, Ontario
Posts: 160
Likes: 0
Received 0 Likes on 0 Posts


Old 09-20-12, 03:04 PM
  #22  
OMG a Chupacabra!

iTrader: (26)
 
Broke_A_Baller's Avatar
 
Join Date: May 2012
Location: Florida
Posts: 1,359
Received 7 Likes on 7 Posts
i take it your leaving it the primer color?
Old 09-20-12, 03:52 PM
  #23  
version 2.0

iTrader: (17)
 
texFCturboII's Avatar
 
Join Date: Mar 2007
Location: Fort Worth, TX
Posts: 3,590
Received 1 Like on 1 Post
No cross bars for ze roll cage? Looks real good so far!
Old 09-20-12, 04:39 PM
  #24  
Senior Member

iTrader: (1)
 
John Huijben's Avatar
 
Join Date: Oct 2010
Location: The Netherlands
Posts: 605
Likes: 0
Received 13 Likes on 10 Posts
Nice job! No problems with head to rollcage clearance with the top bar welded in like that? You got to have a good few inches of room if your going to track it because you need to wrap the cage in foam and wear a helmet. Also maybe add a few gussets here and there next time, it really helps making the chassis stiffer. But apart from that it's looking pretty good!
Old 09-20-12, 08:17 PM
  #25  
Full Member
Thread Starter
iTrader: (2)
 
Colin81RX7's Avatar
 
Join Date: Jun 2009
Location: Pickering, Ontario
Posts: 160
Likes: 0
Received 0 Likes on 0 Posts
Originally Posted by Broke_A_Baller
i take it your leaving it the primer color?
Its actually a paint i first primered everything and then painted it in a gloss grey. AS for the cage this was my first tome doing something like this so eventually when i get a better welder i will change things a bit, i also have a rear strut tower bar to stiffen things up.


Quick Reply: 1989 FC Build


All times are GMT -5. The time now is 01:46 PM.