When you click on links to various merchants on this site and make a purchase, this can result in this site earning a commission. Affiliate programs and affiliations include, but are not limited to, the eBay Partner Network.
So my love affair with RX7's began in 1995 when I bought a 1985 S model. Beige paint with brown interior. That car was so much fun to drive and the smoothest running and sounding engine I had ever experienced. I had to sell her when I was in college and regretted it ever since.
Two years ago I came across a lonely 1985 GSL-SE here on the forum. The same color combination as my first RX7 but the fuel injected version. A fine young gentleman in Tennessee had the Texas-born car in his garage. His plan was to race it but it was having rusty fuel pump issues. I made the drive from Cleveland with a pickup truck and dolly and brought her home. I immediately dropped the tank and did the POR-15 treatment to the inside, replaced the fuel pump, sent the injectors to be cleaned and she started right up. Sort of.
She never quite ran perfectly, however. Sometimes flooding, pulsating idle issues, loud exhaust, slipping clutch, etc. And of course the horrible Wonder-Steer from a bad steering gear box. I did what I could but it was evident she needed more love and money than I had available at the time. Especially since my wife and I were expecting twins and my wife wanted a new house. I told her I wouldn't spend any more time or money on the 7 until she had her house. So I drove her off and on for the rest of the summer and then she has sat in my driveway ever since.
http://www.flickr.com/photos/112702939@N03/11651613574/
Well two years later I have finally finished renovating every room in the new home we bought a year and a half ago. My first request of my wife was to make room in the garage and start working on my 7. She agreed and I have been a kid in a candy store the last week.
I started but gutting the interior that now had a horrible smell of mildew and mold. There are obviously some leaking seals. I also removed the tar (still in the process of the small bits and pieces) and I've removed most of the engine bay items. I need to borrow my brother's lift to get the engine out.
http://www.flickr.com/photos/112702939@N03/11651246295/
http://www.flickr.com/photos/112702939@N03/11651242325/
http://www.flickr.com/photos/112702939@N03/11651620314/
And here is how she sits now�.
http://www.flickr.com/photos/112702939@N03/11651510733/
My next step is to finish removing all the tar, weld new sections on the floor board and wheel wells that have rust damage and then coat the entire metal interior with QuietCoat. Then I can move on to removing, tearing-down, porting and re-building the engine.
My end goal is to bring her back to like-new condition with a few extras. Not a big powerhouse or race car or anything fancy, but I am considering a color change and maybe a body kit. I will street-port the engine and update the interior a bit. I want a fun and peppy daily driver like I had back in 1995.
So that's it. Hopefully she lives up to her name without getting too close to the sun.
lol, yeah the more I think about, maybe I should give it an extra year and do forced induction… The problem is I really want to drive it sooner than later but acquiring funds to go all-out turbo will take me longer than I want.
I'm pretty much of the same mindset with my 79 and at the same stage with the interior - removing the tar/sound proofing, cutting out rusty metal and replacing. I'll be following along with your build closely. Nice to see another good car coming back to life. Good luck with the build!
I'm pretty much of the same mindset with my 79 and at the same stage with the interior - removing the tar/sound proofing, cutting out rusty metal and replacing. I'll be following along with your build closely. Nice to see another good car coming back to life. Good luck with the build!
Do you have a thread for your build? That way I can follow you as well. I agree, it's always good to see people keeping these cars looking good and running like new.
Today I got the engine and transmission and exhaust pulled out. I will probably have to wait a few weeks before I can save up enough money to get a decent welder to start working on the body.
Do you have a thread for your build? That way I can follow you as well. I agree, it's always good to see people keeping these cars looking good and running like new.
Page 11 is where I have some pics of the rusty floor. It was a NY car so I have some rust issues to deal with. I haven't had a chance to work on it in over a month and it's killin' me.
I picked up a cheapo welder from HF on sale - just a small 90 AMP flux core welder. I won't be able to build a bridge with it, but it should weld up floors and sheet metal just fine.
As for removing the tar/sound proofing, Aaron Cake showed us on his Cosmo build that using dry ice will make it brittle and easily removed with a paint scraper. If you haven't already seen it he has like a 24 part series on YT. Great stuff on there.
That is a nice clean engine! Did it come out that clean or did you have to spend some time degreasing and cleaning it?
Wow, you have been really busy on your car. I'll reply to your thread as well but I can see you have a lot more work to do with rust than I do.
Let me know how that welder works for you. I was just at HF yesterday and was considering either that same model or the 170amp version.
I actually pulled the engine and cleaned it and painted it 2 years ago. This time I'm going to actually disassemble and port the engine before rebuild.
I stripped down the engine and removed the front cover today. Everything looked so perfect and brand new inside. I know it will be a while before I will be able to afford the rebuild kit so I decided to keep all of the parts covered in oil and placed into shrink wrap bags and shrunk em. Hopefully it will provide a safe, air-tight way to store them until the spring when I can re-install. And it insures all the pieces are kept together…
+1. I think I bought some stuff from you a couple years ago but had no idea you and your dad were so talented. Are you on the west side? You should host an OHR meet sometime. I know I would love to see your collection.
Can't wait to see the FC when it's finished as well!
+1. I think I bought some stuff from you a couple years ago but had no idea you and your dad were so talented. Are you on the west side? You should host an OHR meet sometime. I know I would love to see your collection.
Can't wait to see the FC when it's finished as well!
You probably have, I buy and sell quite a bit of stuff. Yes westsideish. I want to host a meet. Not just for OHR but multiple multiple car clubs. When my car is finished I will get others involved and host a large meet. Welcome over anytime.
Well I'm finally getting some time and good weather to make a little progress. Mostly cleaning parts and repainting them until I can get my air compressor and welder working.
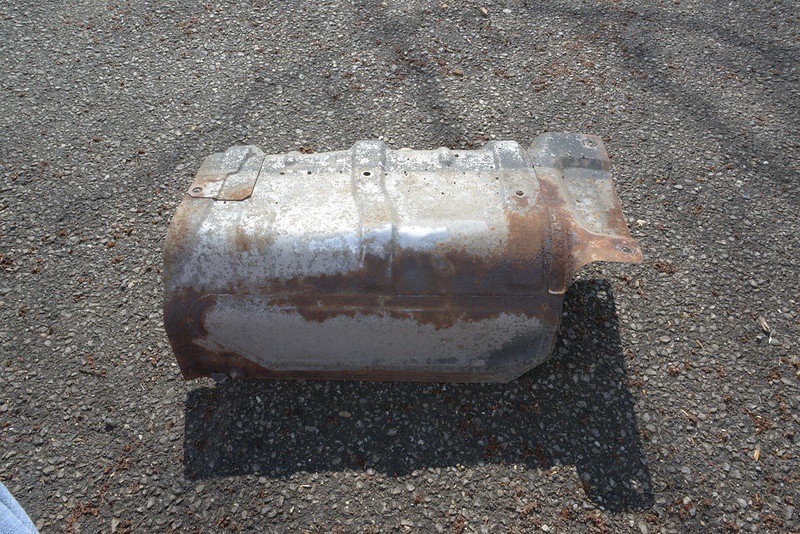
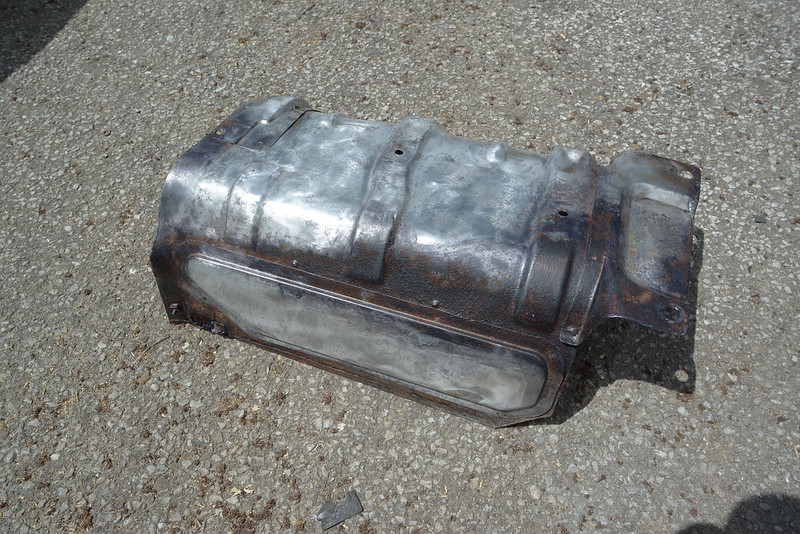
So this weekend I focused on the heat shields that were actually in very good shape to begin with. The only bad rust was on the portion above the muffler and some surface stuff on the mid-pipe area.
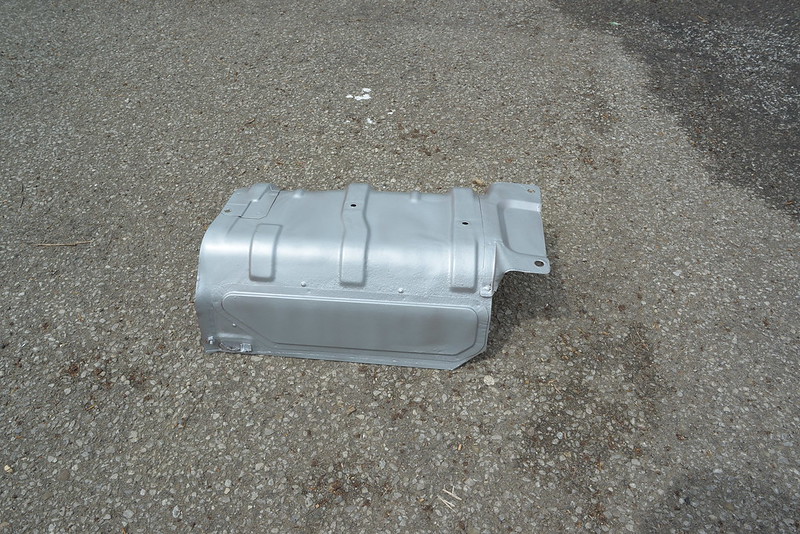
I took my grinder with a wire wheel and took off all the rust I could, then went over it all again with some 60 grit sandpaper and then after an acetone wipe down, I used the Permatex Rust Treatment on any remaining visible rust and then Rustoleum high temp spray paint. They almost look new again.
So I finally got around to doing some work. I cut out and welded a patch on the rusty floor board. I removed the axles, fuel tank and started to drop the rear end. As before, I took lots of pics and video to not only document the project but help me keep track of what goes where and how to put it all together. Then, I walked in the house to transfer the files to my master folder from the previous 12 months of parts removal.
That's when I realized, the hard drive that crashed 4 months ago is the drive that had ALL my photos! I have zero images, other than what are in this post, to help me put everything back together. This project just got exponentially longer.
Bummer! The foxed.ca factory service manual will be your best friend! Looking great, good luck!
Well it took 17 months but I'm finally making a little progress. I have the fuel tank repaired and I started putting the rear end back together. The under body has been sanded, rust treated and re-coated with rubberized undercoating. New fuel pump, filter, lines. New end links and sway bar bushings. This weekend I'll get the axles back in, brakes and fuel tank.
Need any parts? I have a nice running Rx7 GS 5-Spd I posted it on Ebay... my username is Satrecords check it out if you want sometime. Mazda RX 7 | eBay
Need any parts? I have a nice running Rx7 GS 5-Spd I posted it on Ebay... my username is Satrecords check it out if you want sometime. Mazda RX 7 | eBay
Thanks for the heads-up, but so far I think I have all the parts I need. I guess we will find out as I start putting her back together.
That looks terrific. What did u use to "treat and coat"
After making sure I removed 99% of the rust with sandpaper and a wire wheel, I coated everything with two coats of Permatex Rust Treatment from Napa. Then I gave everything 2 coats of Rustoleum Rubberized Undercoating.
 12-30-13, 01:22 PM


 This project just got exponentially longer.