
Video: Fabricating A 13B Turbo Manifold

Thread Starter
Joined: Feb 2001
Posts: 29,798
Likes: 128
From: London, Ontario, Canada
Video: Fabricating A 13B Turbo Manifold
As part of my '76 RX-5 Cosmo restoration I just completed fabricating an exhaust manifold for the GSL-SE/Cosmo based 13B. Constructed out of 1.5" SCH40 304 stainless steel pipe, it was fully TIG welded with an argon back purge. I wanted to show the manifold fabrication process in glorious detail so that this video would be a useful resource for anyone wanting to build a custom turbo manifold. You'll see the whole process start to finish including: fabricating a 13B exhaust flange, fabbing a merge collector, positioning a turbo in the engine bay, measuring, cutting and fitting stainless pipe and els, tacking in position, setting up a back purge, final welding, port matching, custom heat shields.
Hopefully this will be a useful resource as I often see people in the Single Turbo forum asking about manifold fabrication.
Hopefully this will be a useful resource as I often see people in the Single Turbo forum asking about manifold fabrication.
Very cool and thorough video. I'm still learning the tig machine that I picked up in January for my build (just finished up my first 90cf tank of argon), but I figure I'll be using it to build a manifold sometime down the road on a future build.
I liked the no filler rod tack weld you did on the second runner while supporting it with your other hand .
.
I liked the no filler rod tack weld you did on the second runner while supporting it with your other hand
.

Thread Starter
Joined: Feb 2001
Posts: 29,798
Likes: 128
From: London, Ontario, Canada
Very cool and thorough video. I'm still learning the tig machine that I picked up in January for my build (just finished up my first 90cf tank of argon), but I figure I'll be using it to build a manifold sometime down the road on a future build.
I liked the no filler rod tack weld you did on the second runner while supporting it with your other hand.
I liked the no filler rod tack weld you did on the second runner while supporting it with your other hand
.Tht's what's nice about steel vs aluminum; fusion tacks. Still very awkward to hold the runner, keep the torch steady, use one foot on the pedal and direct the puddle. A bit like the reverse spider monkey (see Kama Sutra).
AutoRestoMod. They're a car show on YouTube concentrating mostly on muscle cars. A very good show, so I don't know why they don't get more viewers.
Trending Topics
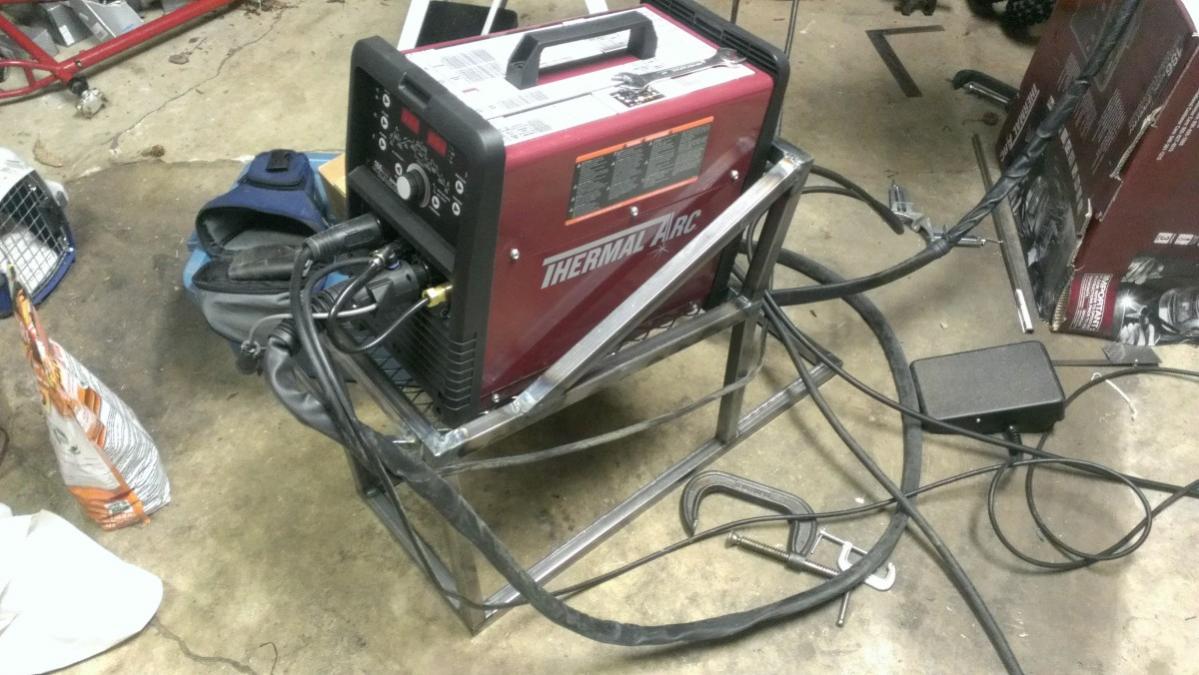
Picked up a new Thermal Arc 186. Not the best machine out there...but for the money it has been great.
I'm in the middle of fabricating a welding cart for it as practice/learning tig (using mostly 1/16" wall, 1" square steel tubing and 1/8" steel strip). I designed in a ton of butt joints, inside corner joints, outside corner joints, lap joints, etc to make it as difficult as possible.
Here is the design....and the fabrication as of last week.
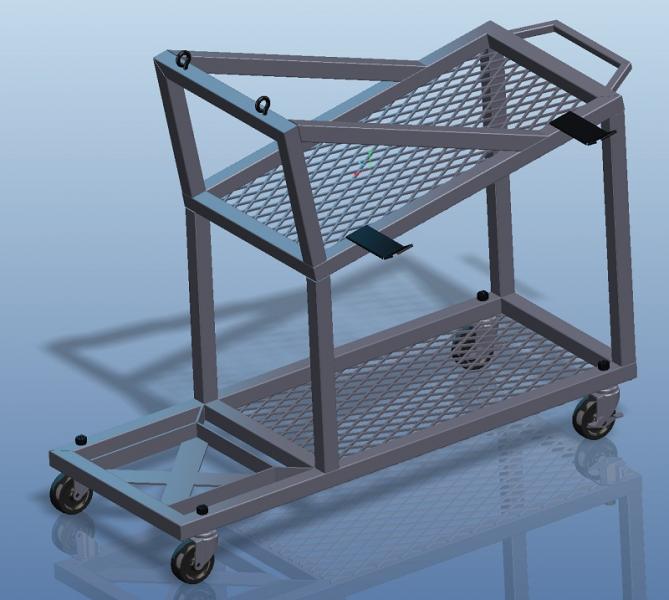
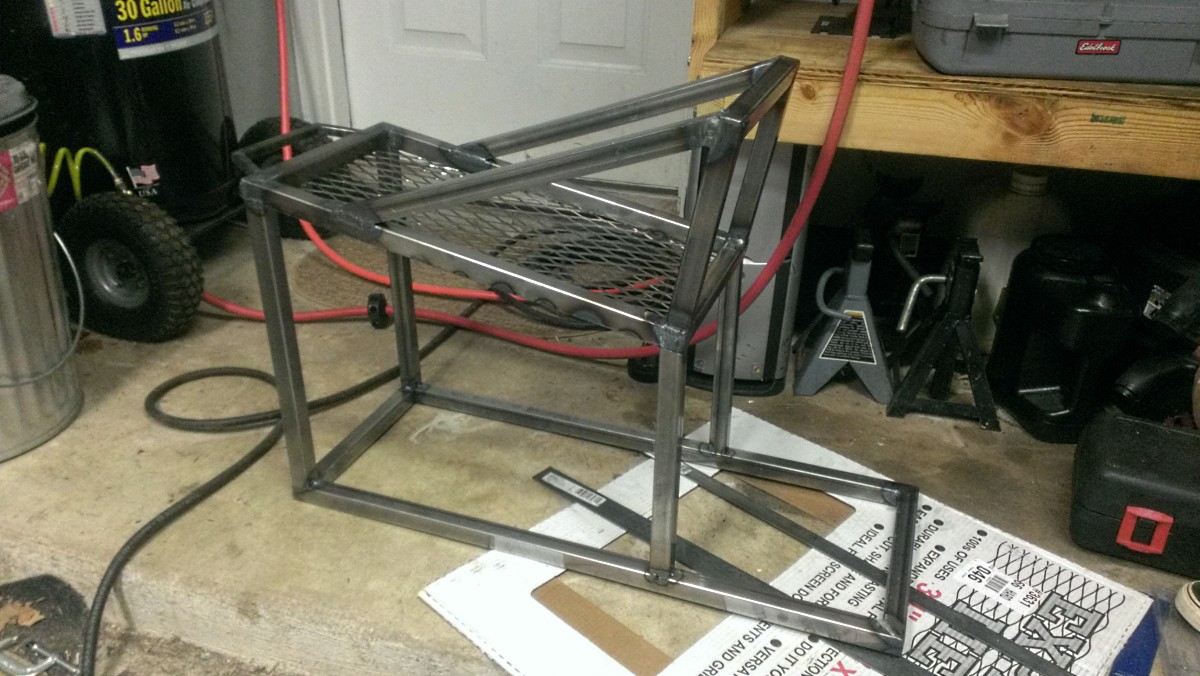

Rotary Enthusiast
Joined: Jan 2005
Posts: 846
Likes: 14
From: hsv al
Picked up a new Thermal Arc 186. Not the best machine out there...but for the money it has been great.
I'm in the middle of fabricating a welding cart for it as practice/learning tig (using mostly 1/16" wall, 1" square steel tubing and 1/8" steel strip). I designed in a ton of butt joints, inside corner joints, outside corner joints, lap joints, etc to make it as difficult as possible.
Here is the design....and the fabrication as of last week.
now your ready to build a LOCOST kit car... because in reality that's all it is.
amazing video, this will help me alot. but when i was watching it all i got out of it was.... I need a horizontal/vertical band saw. peroid.
i had the same revelation.
I use a hobart ez-tig 165i (miller diversion), and hobart handler 190. i wish the tig had a pulse, but it works well for most of what i do.
I really do need a band saw of some sort.
Thanks for the video!
I use a hobart ez-tig 165i (miller diversion), and hobart handler 190. i wish the tig had a pulse, but it works well for most of what i do.
I really do need a band saw of some sort.
Thanks for the video!
Last edited by socks; Apr 23, 2013 at 04:31 PM.
Cool video. Just curious why you didn't just mock up where you wanted it, use a steel rod to join the two flanges, and then build it outside of the car? Whatever works for sure, but I hate working in or under tight spaces, especially with a welder.
Thread Starter
Joined: Feb 2001
Posts: 29,798
Likes: 128
From: London, Ontario, Canada
Picked up a new Thermal Arc 186. Not the best machine out there...but for the money it has been great.
I'm in the middle of fabricating a welding cart for it as practice/learning tig (using mostly 1/16" wall, 1" square steel tubing and 1/8" steel strip). I designed in a ton of butt joints, inside corner joints, outside corner joints, lap joints, etc to make it as difficult as possible.
I'm in the middle of fabricating a welding cart for it as practice/learning tig (using mostly 1/16" wall, 1" square steel tubing and 1/8" steel strip). I designed in a ton of butt joints, inside corner joints, outside corner joints, lap joints, etc to make it as difficult as possible.
A welding cart was my first real TIG project on my EconoTIG as well, except I chose to use aluminum for the practice:
Aluminum TIG Welding Cart
Normally I would do that, however in this case I had to snake the runners around the large 6 port lower intake and actuators. In most cases with the TII/FD lower intake there is a load more space so it's much harder to build a runner that interferes. Otherwise yep, building the manifold outside of the engine bay is much easier. Even this manifold is VERY close to the front port actuator as there is't much space available.


I don't want to lie, but I think this may mark the first time something this significant has actually come along at a convenient time for me. i just bought a welder with the intention of teaching myself to weld and then doing some exhaust work, too. as always, this was some great stuff Aaron and while i might have a miserable time when i begin working, you have definitely helped me conceptualize a lot and see how things should be.
on sort of a simultaneously high and sour note, i see that i'm going to probably need more tools (saws and such).
on sort of a simultaneously high and sour note, i see that i'm going to probably need more tools (saws and such).
That's quite a nice machine. More capable than my EconoTIG for sure. Pulse is very nice to have when working with stainless on a manifold since it means far less pedal work to control the heat. And lift arc...having used a lift arc machine before it is so awesome when doing things like tacking under the car. I wouldn't suggest using it for final welding or anything but steel however.
Thread Starter
Joined: Feb 2001
Posts: 29,798
Likes: 128
From: London, Ontario, Canada
I haven't used lift tig yet (haven't tacked anything on the car) and have barely played with pulse. I'm trying to dial in my fundamentals using standard hf, fixed current, foot pedal tig first on mild steel. After this welding cart is done, I'm going to start playing with pulse on some stainless scraps I have before tackling my new downpipe/wastegate plumbing. Then it is on to aluminum...probably going to go straight to pulse for the aluminum.
Personally I prefer the manual pulse...that is, using the foot pedal. Maybe I just can't get used to the welder doing something for me but I find it hard to get into the rhythm of the pulse.
The times that I have played with pulse, I have liked it because I feel like I can be more consistent...kind of like using a metronome when playing music. However, I had issues with how fast I needed to move and exact filler dab timing during each pulse...most likely issues due to not enough practice.
Thread Starter
Joined: Feb 2001
Posts: 29,798
Likes: 128
From: London, Ontario, Canada
The times that I have played with pulse, I have liked it because I feel like I can be more consistent...kind of like using a metronome when playing music. However, I had issues with how fast I needed to move and exact filler dab timing during each pulse...most likely issues due to not enough practice.
I actually have though of it, though I suspect my methods would be incompatible with most educational systems.
I was never very good at using a slow pulse rate. I could never get the hang of it. Instead I crank the pulse freq way up run with it. That was on the machines at school though. I just have an eastwood unit, and it gets the job done. I just setup my back purge and a gas lens kit so I can build my manifold too.
awesome video, thanks for making it! me and a buddy made a manifold recently and it is a lot more work than you would think.. it took a good 8 hours to finish. i have an appreciation for those who charge $1k+ for them now.
i also used a T3 stage III hotside, but fully divided with 1.38" ID runners, twin 38mm wastegates.. spool is so good it will surge a v-trim coldside at 0 psi!
i also used a T3 stage III hotside, but fully divided with 1.38" ID runners, twin 38mm wastegates.. spool is so good it will surge a v-trim coldside at 0 psi!
Thread Starter
Joined: Feb 2001
Posts: 29,798
Likes: 128
From: London, Ontario, Canada
It's also worth mentioning that this manifold was the first thing I ever welded with E3 tungstens ( Home ). The welding store recommended them as the replacement for the old thoriated style when I was shopping a few months ago. I dislike how the E3s aren't radioactive but aside from that they seem to do a great job. The hold a point better, work better with minor contamination and I'm fairly sure took less current to do the same job.
What's a "stage 3" in real terms?
Originally Posted by Aaron Cake
I dislike how the E3s aren't radioactive but aside from that they seem to do a great job.
