When you click on links to various merchants on this site and make a purchase, this can result in this site earning a commission. Affiliate programs and affiliations include, but are not limited to, the eBay Partner Network.
Thanks! I have actually been able to drive it to work all this week. I am getting more confident in the thing. Still has a bunch of issues.
Biggest issue right now is I think I have a problem with my wiring. My charging voltage is not stable. It fades when warm. I will try a larger charge wire to the battery, but I am not sure if I am getting competition with the car's original voltage regulator. I don't even know where it is located on the car or if it is even there anymore. I heard it is on the upper left side of the firewall in the engine bay.
Biggest issue right now is I think I have a problem with my wiring. My charging voltage is not stable. It fades when warm. I will try a larger charge wire to the battery, but I am not sure if I am getting competition with the car's original voltage regulator. I don't even know where it is located on the car or if it is even there anymore. I heard it is on the upper left side of the firewall in the engine bay.
Replaced the corroded 10Ga charge wire with two fresh 8Ga wires. So much voltage now. Went from ~13V to 14.6. The Microtech is way off now. It has no voltage correction, so stable voltage is imperative. It went from 14.2 A/F at idle to 12.8 A/F; like 11% richer. An across the board adjustment may take care of it for now, but I have to start tuning all over again. It should work much better though. Ignition should be stronger now too.
OK. It's running pretty good now. Definitely needs more tuning, but it starts, idles, and cruises with AFR in the 14s and dips into the 11s with boost. I have a direct dump from the wastegate and it lets you know when you are on boost. Sounds good.
The big A/R on the turbine has the waste gate fully open at a bit before 5000rpm. It's a little laggy, but it's very drivable. There is plenty of torque to putt around and it didn't go instantly sideways when I squeezed the throttle in second.
I am solo today, so I stopped tunning as soon as I got it going around pretty well. It is hard to drive and look at the LM1 and the PC at the same time. I need to get the AUX out of the LM1 and the AUX in of the Microtech talking so I can just log, recap, and adjust.
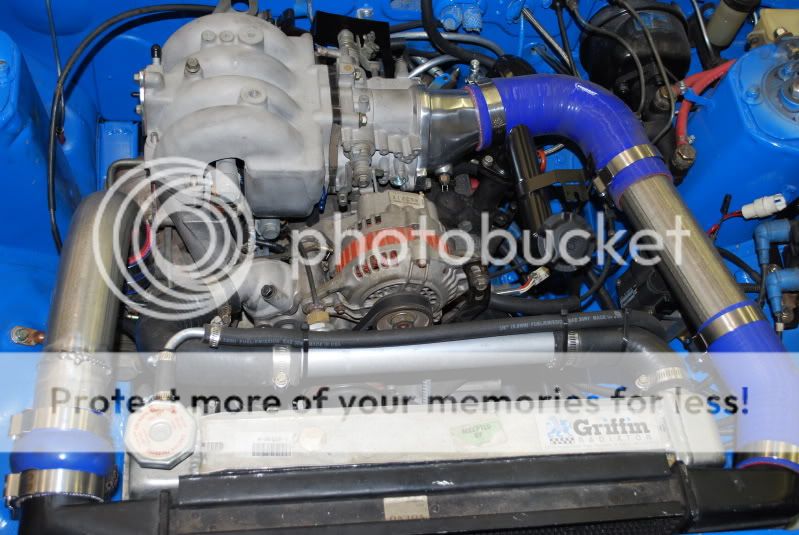
here is my old engine bay set up with the volvo intercooler and stock turbo of course.
and an idea of the new
but not running that manifold anymore... it was ebay and un divided. i bought schedule 10 piping to make a divided T4
** edit you can clearly see the modified front mount that is causing some turbo fitment issues.
Very nice. Are you planning on changing out the intercooler for something different? Half bridge with a big turbo should get an RX-3 moving pretty good. At around 2000#s these things are so light. A 13B in our cars is pretty much like having a 20B in a 3000#.
I have always been partial to bridgeports despite what the police have shared as their opinions. I think they make great noises. Loud, but so right. My block is all stock for now. Still debating on what port is right for the car. The engine can wait since I still need to fully shake down the suspension. My turbo Bridgeport motor bent my leaf springs leaving my pinion pointing noticeably upwards so I fixated on beefing up the rear suspension and built a 3-link. Seems to have a lot of grip, maybe too much. I am catious since traction tends to break things. I did a skid pad test this weekend and had understeer and some momentary rear tire rubs. I may need to bump up the rear spring rates a bit. I've got 250# springs with a 1" bar in front and 150# no bar in the rear. I may try binding some rear coils to push the rate up and see what happens to balance and ride quality. Rear suspension is very comfortable currently. The front alignment could be improved, not much camber with the RX7 struts despite the camber plates, about 1*. Ackerman is stock and caster is unknown for now I think it is 3-4*.
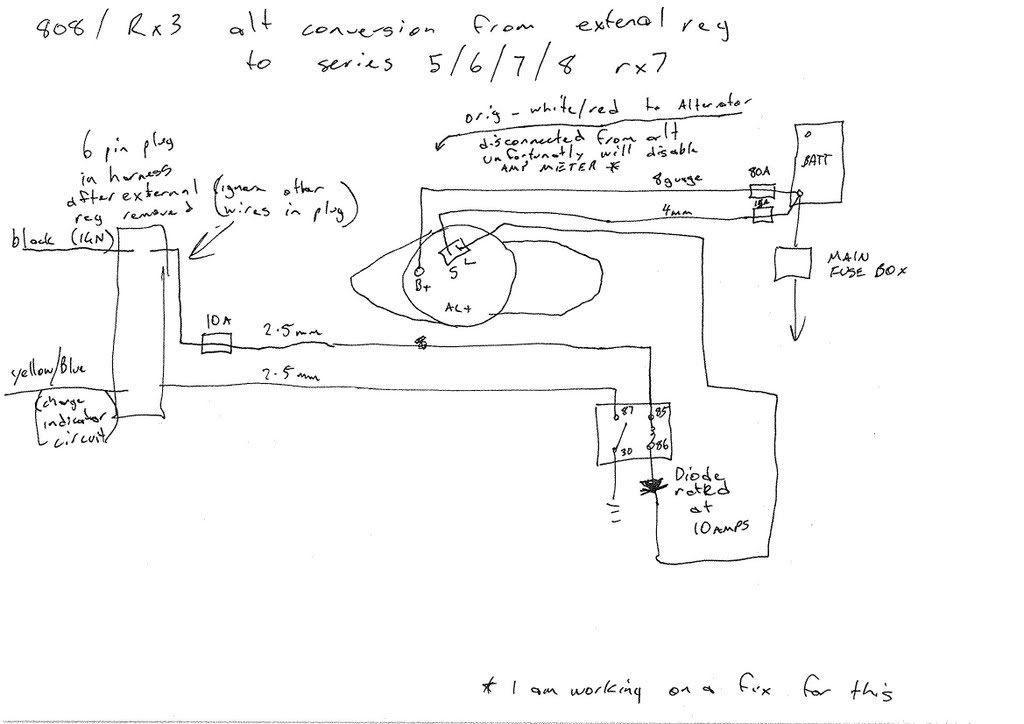
Here's some details of how I finally fixed the charge system.
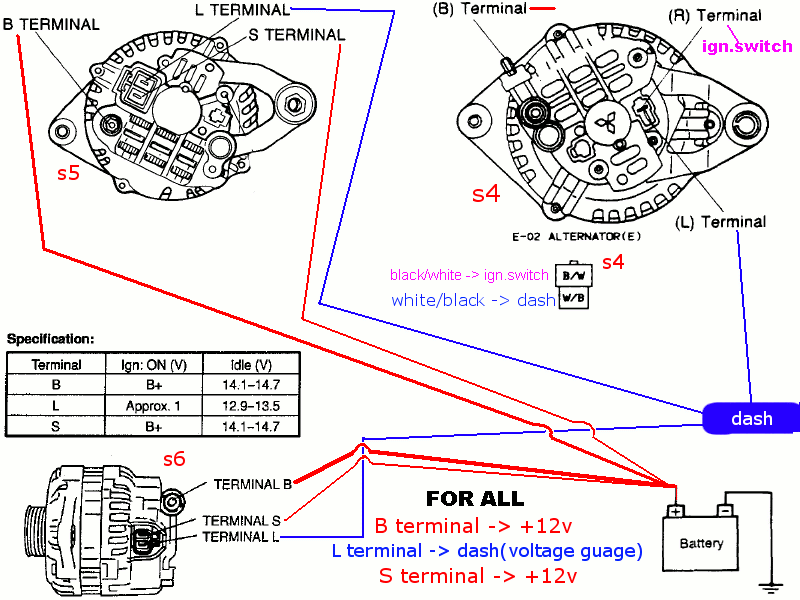
I originally wired my alternator using the following diagram. I was confused as to what gets connected to the "L" wire. I had it connected to nothing because I didn't think I needed the warning light.
They insist there should be keyed power and a diode to the "L". I tried it and it seems to have worked.
"L" voltage reads 0v key off, 1.8v key on engine off, 12.9v key on engine on. Apparently these numbers meet spec. No more overcharge and no need to rev the engine past 3k rpm to start the charge.
Lately? Just more basic old car maintanance.
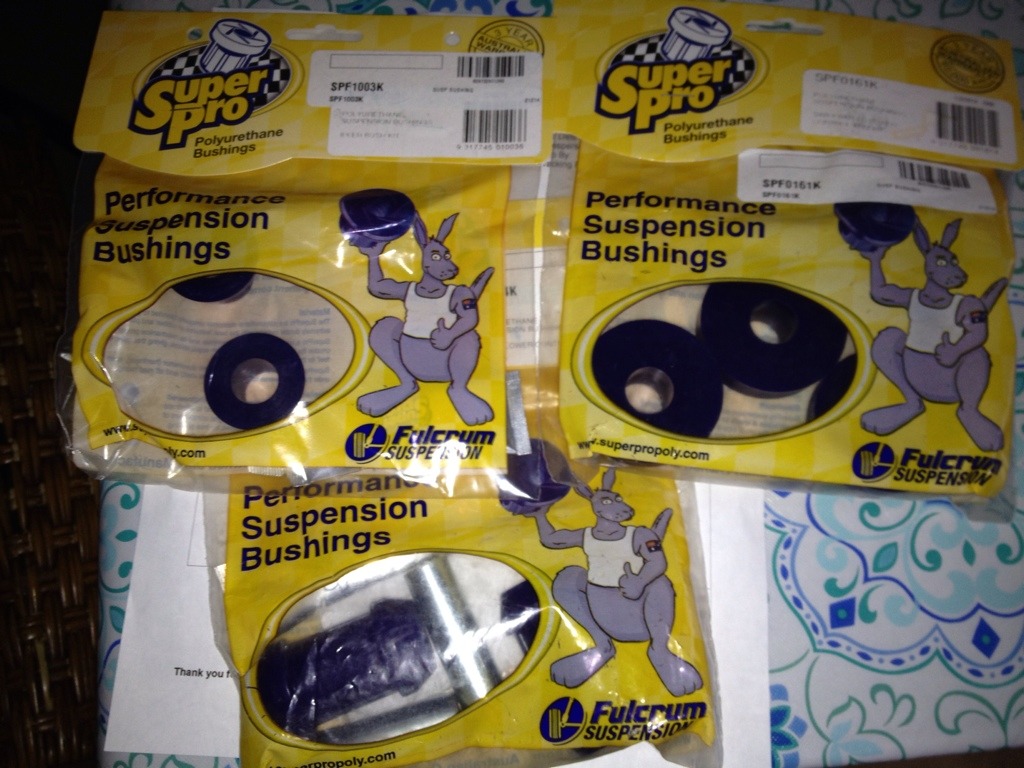
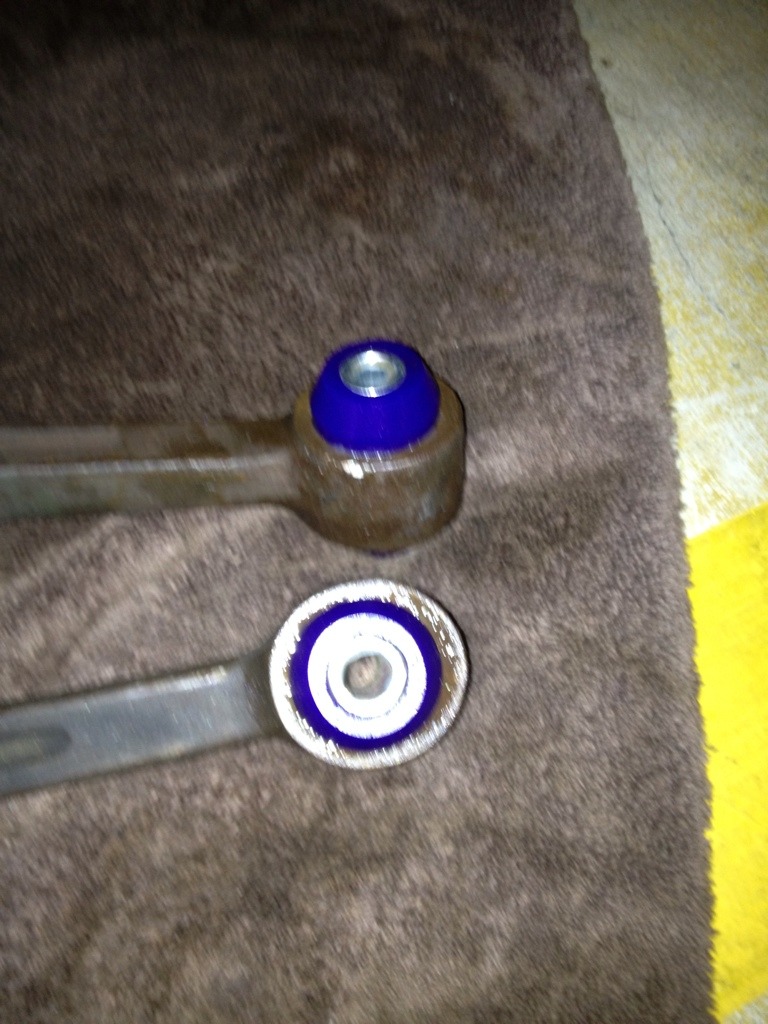
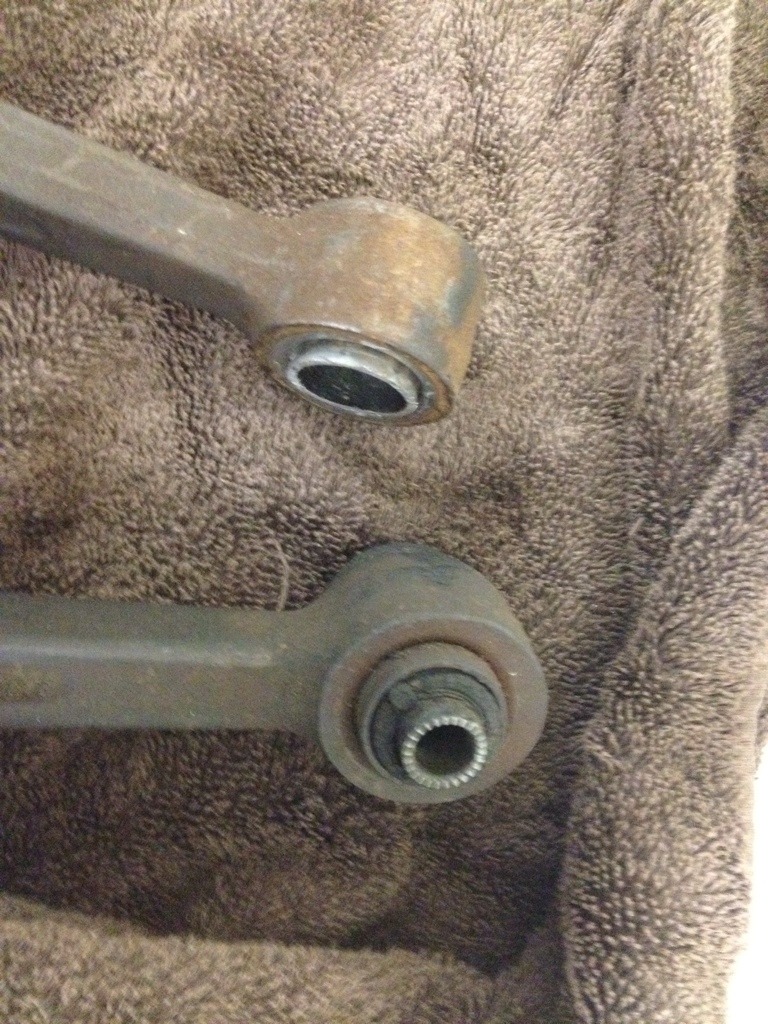
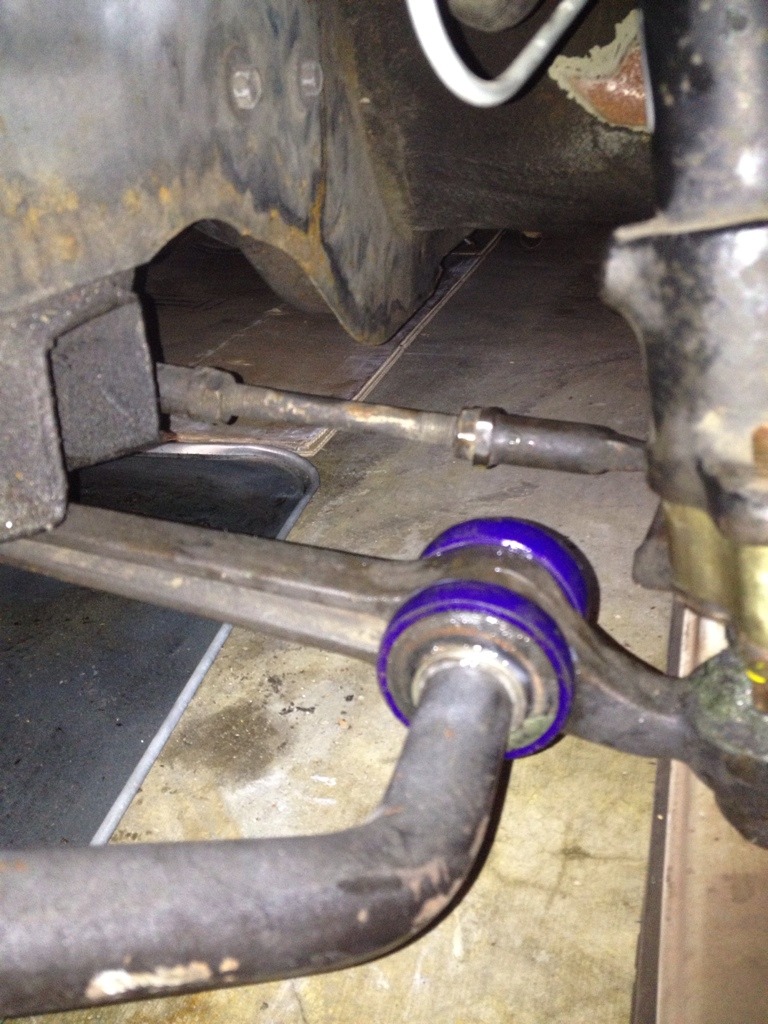
� New inner and outer Control arm bushings
� New Brake Master Cylinder
� New Brake Booster
� Unseized the Rear Caliper Slide
� New Rear Pads
� Replaced Transmission
� New Rear Axle Bearings
� Installed Redesigned 3rd Link - 1.5" Diameter 0.19" Wall 4130 Steel
Man I cant wait to start on mine , Mine is really going to be a money pit. I was going to start this year but I needed a rotary daily and purchased a rx8 with bad engine rebuild and spend a good amount to get it done right, I dont regreat but I think I would of been very ahead this year if I didnt get it but I like my rotary daily I was tired of driving Hondas LOL. next year will start and this threads are what keep me in the game,.
lol,thanks for the reminder. I also purchased 2 complete bushing kits along with 2 sets of tie rod ends and ball joints from Rock Auto.
btw, with the S5 wiring. did you install the diode directly between L and B terminals
Nice! You are getting ready to fix your front end up right. I left my tie rod ends and ball joints in. They are still nice and tight. They are a little stiff to turn though, so they are on the to do list, but behind paint.
10A rated diode is between "L" and "Keyed Power" pointing to "L".
Will try to put in this �88 T-II transmission as well. I�ve got the starter and a 590 lb-ft rated OS Giken Twin Disc (complete overkill). Still need to find a compatible yoke. Anyone have a donor driveshaft or yoke?
I will start off with seeing how much I need to move the shifter forward on the trans to fit the shifter hole on the car.
Just got started on my TII trans shifter relocation. Cleaned the trans first, so I could stand working on it. Pulled the shifters off the two trannies I have... �88 TII & �85 RX7. Shifters are very similar. May modify the �85 shifter so it is moved about an inch further forward. I will also need to find the right speedo gears to work with my 225/45-16 tires and 3.90 rear end.
Just did the speedo math and it looks like the stock TII speedo gears are gonna be less than 1% off.
TII final drive is 4.10 vs my 3.909.
Factory TII tires are 205/55r16 ~24.9� OD vs 23.9� for my 225/45-16.
Say the speedo was reading 100mph the actual speed would be 100mph x 23.9/24.9 x 4.10/3.909 = 100.67mph.
Working on an in-tank fuel pump setup for the RX3. Found that an FC3S fuel pump mounting plate will fit nicely on the Rx3 tank. Drew up a mounting flange to build. Got a Walbro TIA-450-2 450lph pump coupled to a Holley 16-111 3� x 15� HydraMat inlet.
many many yrs ago i shortened everything necessary to move the shifter up about 4" to install an '83 trans into a '75 808 when converting it over to rotary.
My fuel sender is not working anymore. Tried cleaning it up, but not getting a reliable signal. The RX7 sender has the same height of travel, but empty ohms reading was higher than the Rx3 spec. I was able to adjust the RX7 sender to match RX3 specs, 0-7.5ohm full & 87-89ohm empty. It would swing the wrong way in my tank if mounted to the RX7 fuel flange, but it will fit in the original Rx3 level sender hole with a custom flange and swing without interference.
 11-18-11, 10:28 AM