
FC window fix write up


Thread Starter
Junior Member
Joined: Mar 2016
Posts: 9
Likes: 1
From: Seattle area
FC window fix write up
Hey guys so I'm posting this here because I don't believe I can post this anywhere else and I will try to ad pictures but since I never have before we will see how it works. Hopefully the mods can see this and place it in the correct section.
I had an issue where my drivers side window would roll up and down but very choppy and would need a lot of help. once it was up you could hear the gear spinning but not grabbing to hold the window up so after every drive I would have to physically pull the window up higher so it wasn't cracked open.
This is how I fixed it.
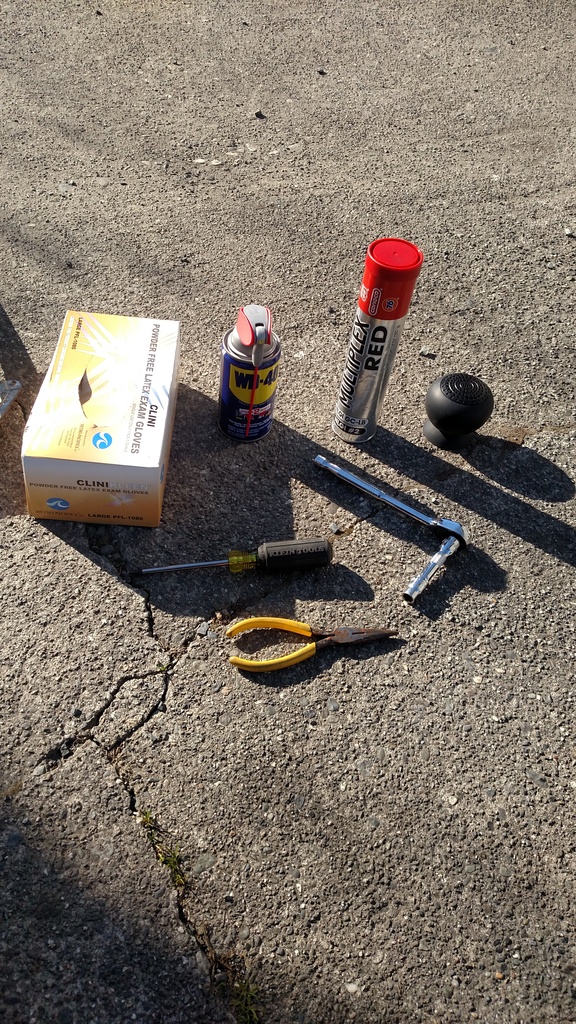
Supplies
Phillips screw driver
10mm socket
7mm socket
3" extension
ratchet
needle nose pliers
snap ring pliers (optional I used a putty knife to get the snap ring off)
WD40 or brakleen or any degreaser
paper towels, an old toothbrush would be nice to but I didn't use one
multi purpose grease
latex gloves
Most importantly music of some sort
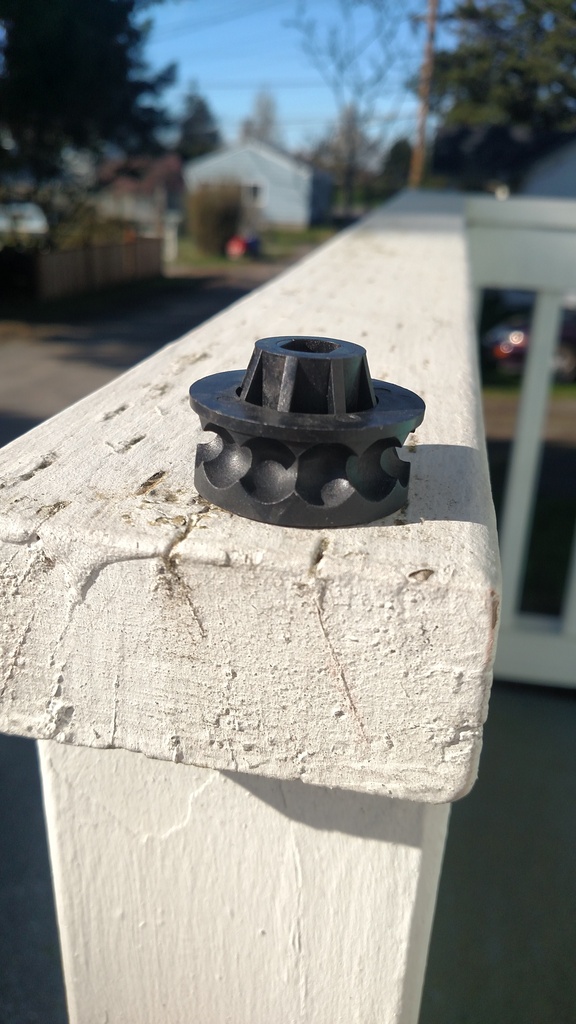
Parts
FB05-58-581
This is the part number for the window regulator sprocket should be the same for both the driver and passenger sides. The part is actually for a Mazda MPV and is not listed for the RX7 but it does fit. I found it for 11$ and 2$ shipping on Mazda parts online it was at least twice as expensive everywhere else I looked
NEW
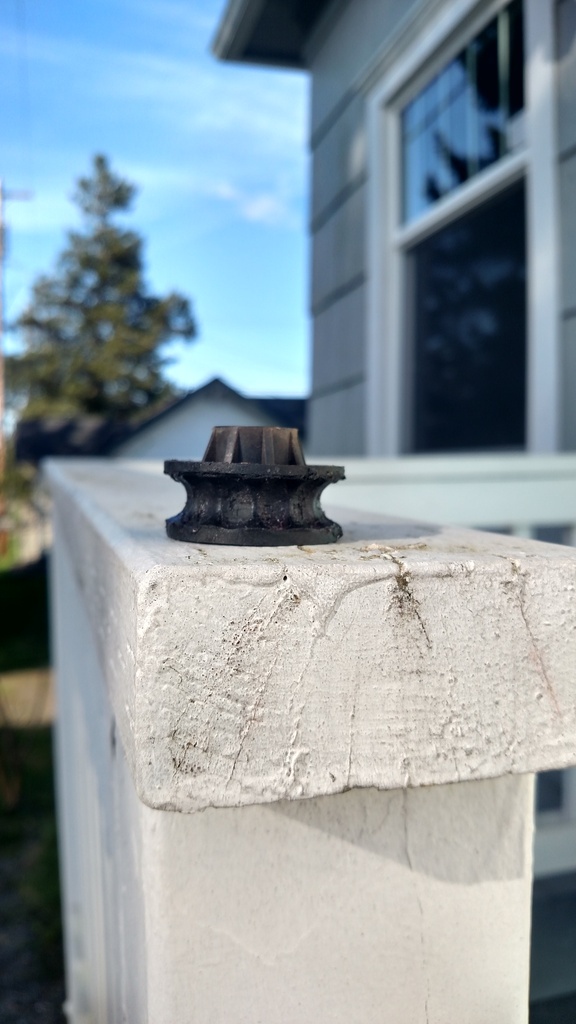
OLD
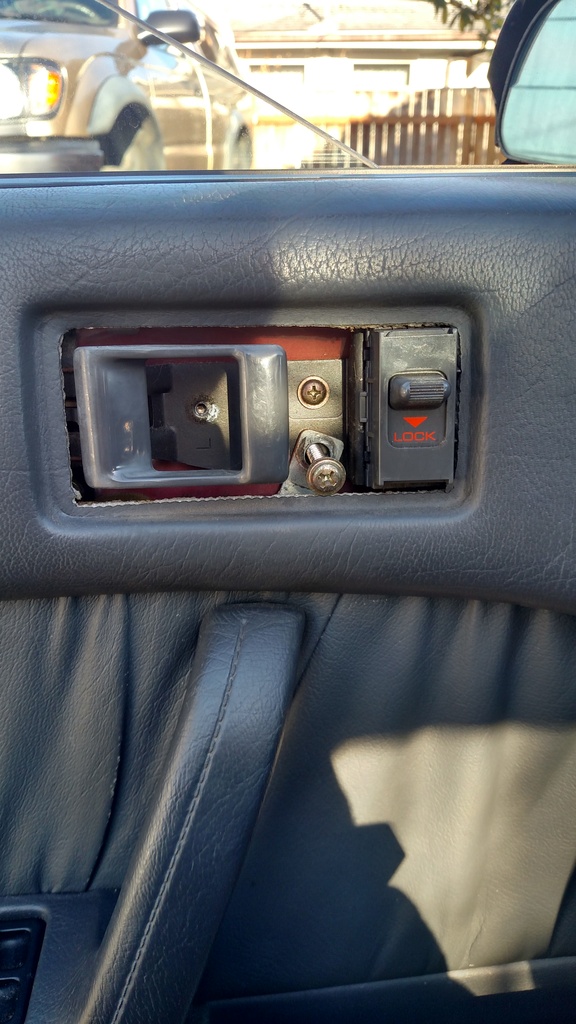
First step take off the door panel
Make sure the window is about halfway down before you do this it will help later
To get to the window regulator you have to take off the door panel there are 10 Phillips head screws that you have to take off one is hidden under the door handle and lock cover. Then on the backside there are clips I got lucky and none of mine broke by just pulling on the panel. Once all the screws are out and clips disconnected the panel will still hang down you need to lift up and pull away from the car a part of the panel is tucked underneath some window trim in the top right(drivers side top left on passengers side). Once the panel is off unplug the electrical connectors on the backside. it may help you later to take out the window switch so that you can plug it in and roll the window up and down without having to lug around the entire door panel
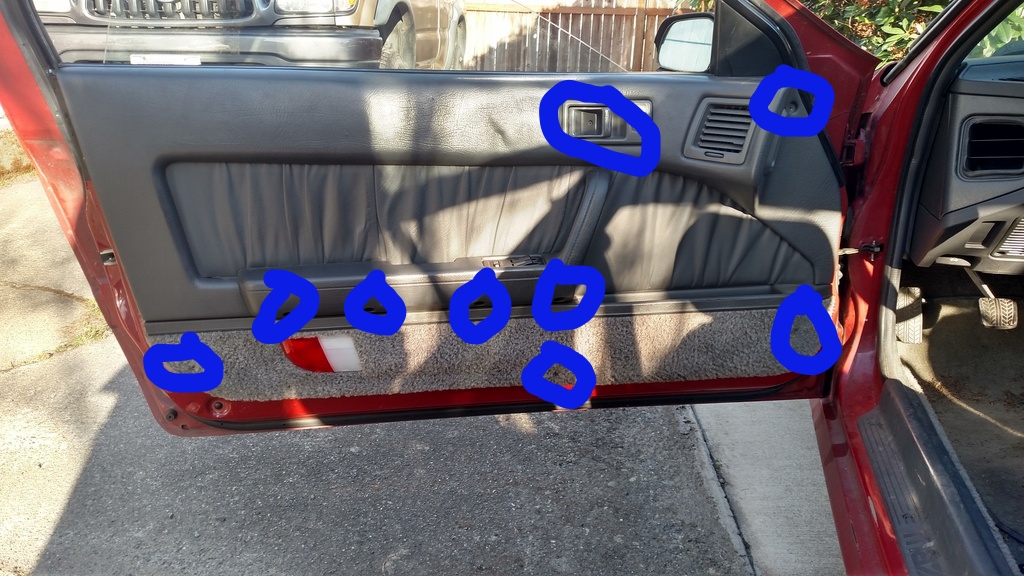
hidden screw
second step is to take out the window
to take the window out you need to have it halfway rolled down there are 2 10mm bolts holding it onto the regulator take those out. the easiest way I have found to get the window out is to tilt the front of the window down inside the door and pull the back up and out.
sorry guys I got a bad picture for this but I hope it helps
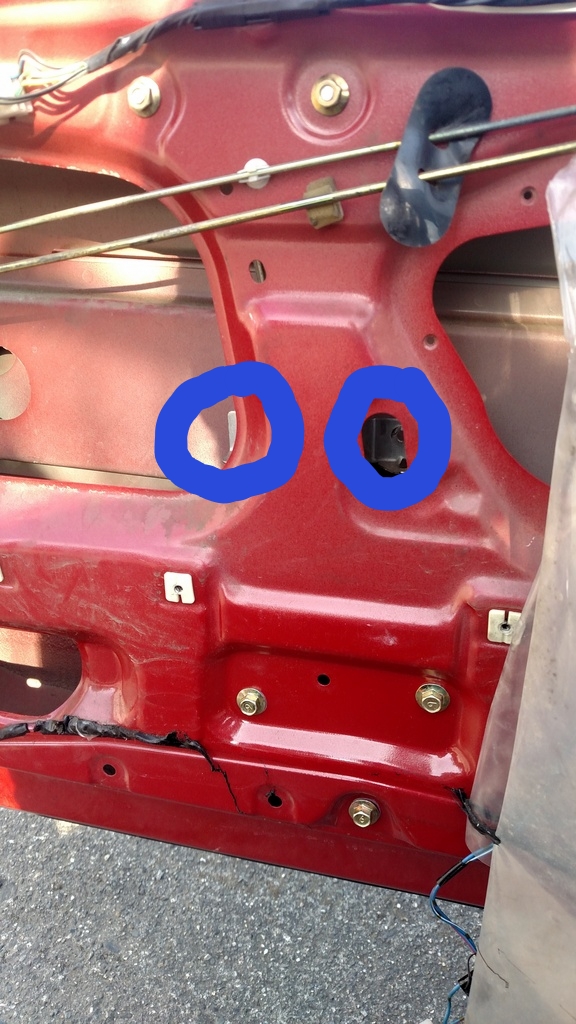
third step is to actually take out the regulator
to take out the regulator there will be 2 10mm nuts and 3 10mm bolts take those out.

once those are out there will be 3 little plastic tie things and the electrical connector for the window motor
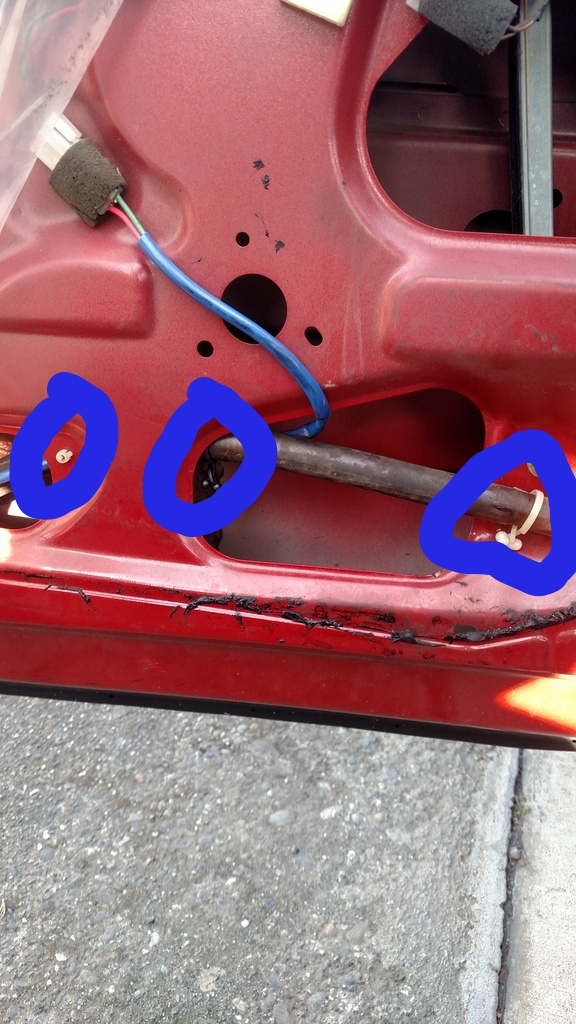
tilt the top of the regulator towards the car and pull the bottom of the regulator out first that is the easiest way I have found to get it out.
fourth step is to clean lube and replace the sprocket
start off by taking off the metal clip holding on the plastic tube and then pull off the tube. be careful as it is old and brittle it cracks easily. take out the 7mm bolt holding on the metal bracket that guides the beads. next take out the snap ring holding in the black plastic sprocket. I used a putty knife but snap ring pliers would have been nice.
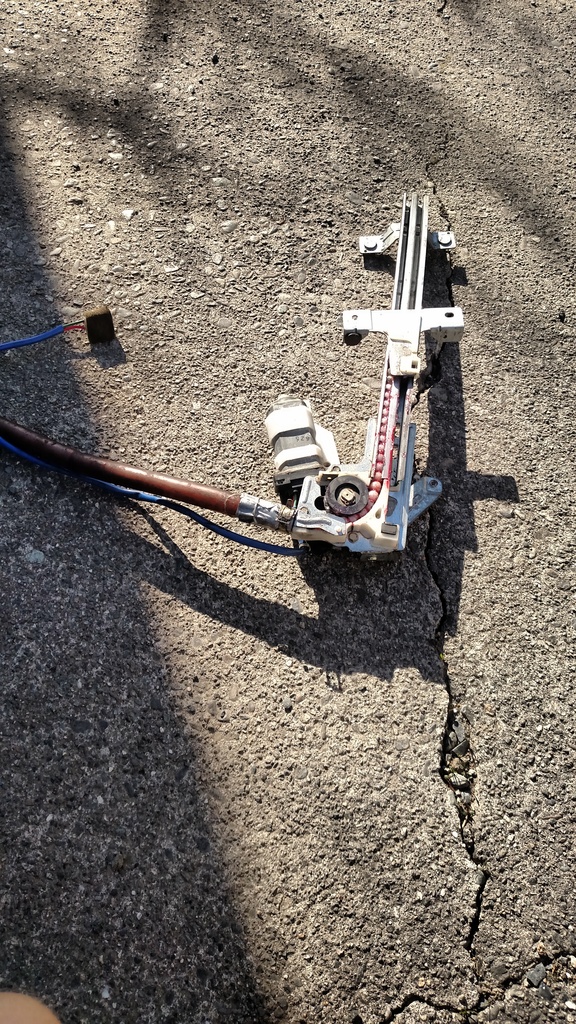
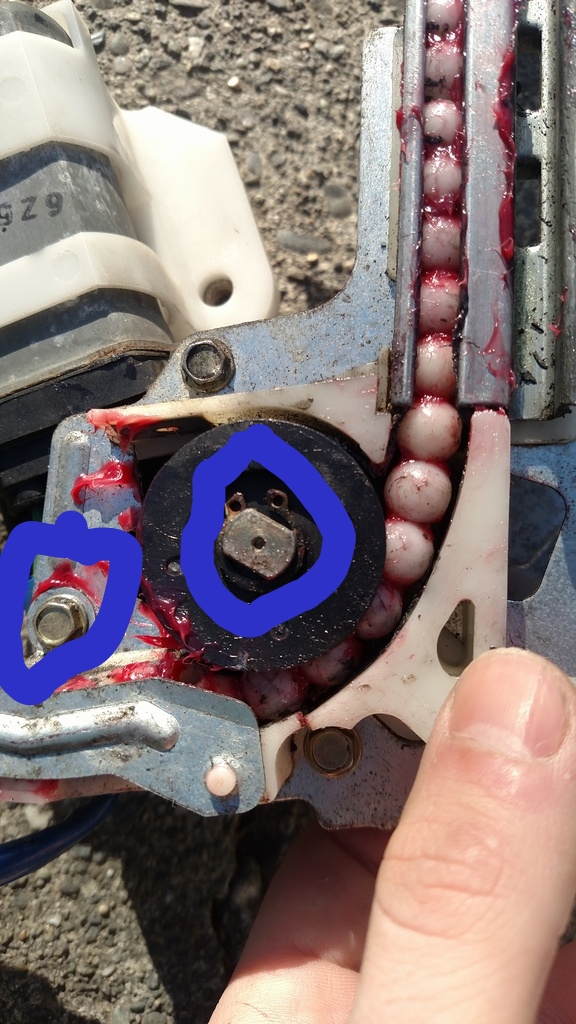
sorry I don't have any pictures of me actually cleaning everything but I just used some WD40 and paper towels. an old toothbrush would have been really helpful at this point. I lubed everything with some red multipurpose grease that we have laying around at work. WD40 should not be used to lubricate the regulator as it will not last. be fairly generous with the grease make sure to coat all of the beads and the new sprocket before install and try to lubricate the track it maybe be a little difficult but it will help in the long run.
fifth reinstall everything
put the plastic sprocket back in the regulator flat side up install the snap ring throw on the guide and install the plastic tube I had to use some duct tape as mine cracked a little bit but hey it works great. before you reinstall the regulator I would suggest plugging it in, plugging in the window switch and turning the key to on. run the regulator up and down a few times to make sure everything works to your liking and is well lubed. Install the regulator and plug in the connectors. I cleaned my window before I reinstalled it. Gotta love Windex.
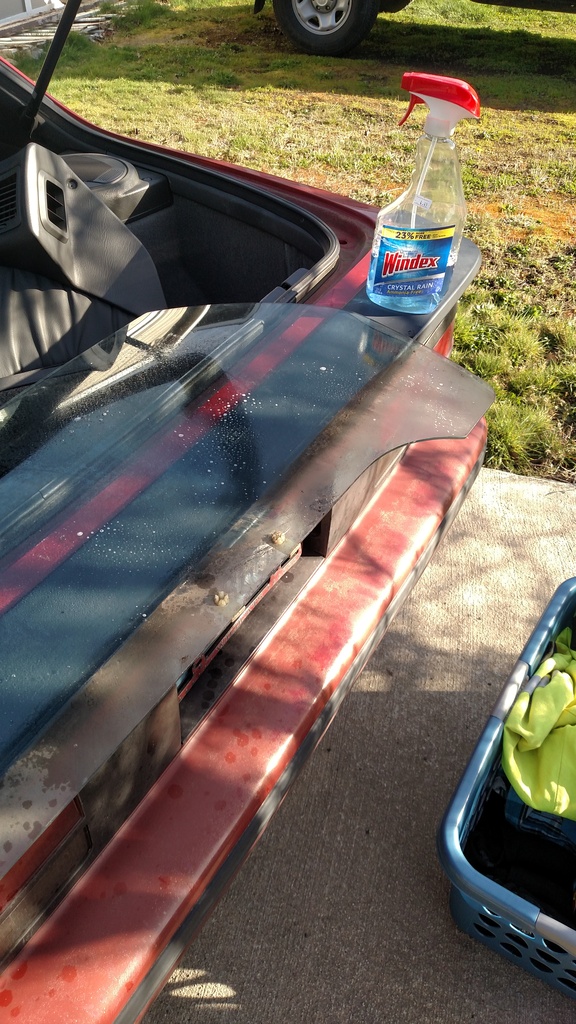
once the window is back in and the door panel back on run it a couple times just to double check your work. Enjoy
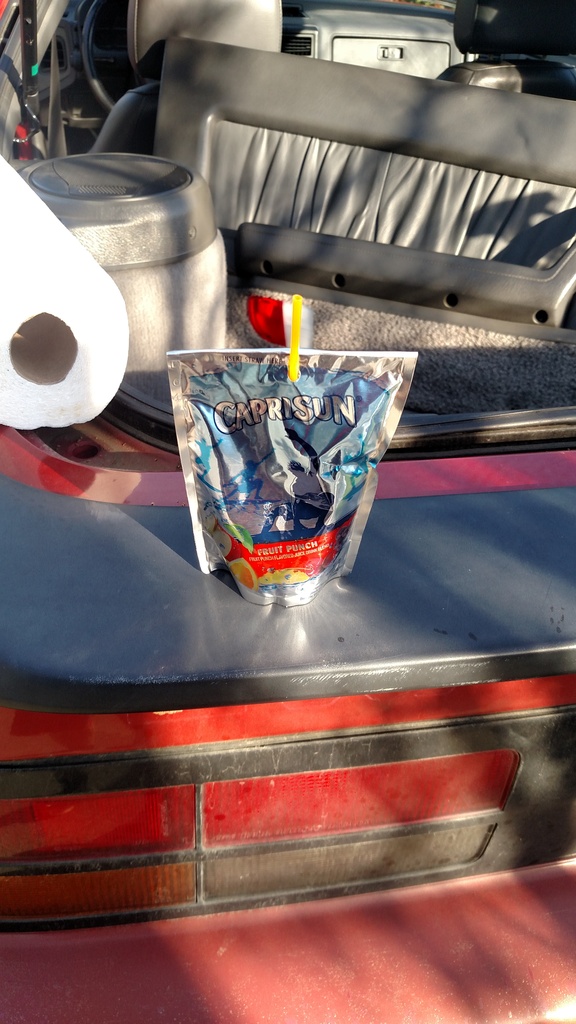
Celebrate with a... Juice box? lol I'm too young to drink so my coworkers call me juice box I'm at least 10 years younger than the next guy and around 20-30 years younger than most of the guys I work with.
I hope this will help someone out. I just wanted to do my part to give back to the forum as I have searched and gained a ton of knowledge without ever posting. I realize now that a good write up is Hard Work. Thank you to everyone on here.
I had an issue where my drivers side window would roll up and down but very choppy and would need a lot of help. once it was up you could hear the gear spinning but not grabbing to hold the window up so after every drive I would have to physically pull the window up higher so it wasn't cracked open.
This is how I fixed it.
Supplies
Phillips screw driver
10mm socket
7mm socket
3" extension
ratchet
needle nose pliers
snap ring pliers (optional I used a putty knife to get the snap ring off)
WD40 or brakleen or any degreaser
paper towels, an old toothbrush would be nice to but I didn't use one
multi purpose grease
latex gloves
Most importantly music of some sort

Parts
FB05-58-581
This is the part number for the window regulator sprocket should be the same for both the driver and passenger sides. The part is actually for a Mazda MPV and is not listed for the RX7 but it does fit. I found it for 11$ and 2$ shipping on Mazda parts online it was at least twice as expensive everywhere else I looked
NEW

OLD

First step take off the door panel
Make sure the window is about halfway down before you do this it will help later
To get to the window regulator you have to take off the door panel there are 10 Phillips head screws that you have to take off one is hidden under the door handle and lock cover. Then on the backside there are clips I got lucky and none of mine broke by just pulling on the panel. Once all the screws are out and clips disconnected the panel will still hang down you need to lift up and pull away from the car a part of the panel is tucked underneath some window trim in the top right(drivers side top left on passengers side). Once the panel is off unplug the electrical connectors on the backside. it may help you later to take out the window switch so that you can plug it in and roll the window up and down without having to lug around the entire door panel

hidden screw

second step is to take out the window
to take the window out you need to have it halfway rolled down there are 2 10mm bolts holding it onto the regulator take those out. the easiest way I have found to get the window out is to tilt the front of the window down inside the door and pull the back up and out.
sorry guys I got a bad picture for this but I hope it helps

third step is to actually take out the regulator
to take out the regulator there will be 2 10mm nuts and 3 10mm bolts take those out.

once those are out there will be 3 little plastic tie things and the electrical connector for the window motor

tilt the top of the regulator towards the car and pull the bottom of the regulator out first that is the easiest way I have found to get it out.
fourth step is to clean lube and replace the sprocket
start off by taking off the metal clip holding on the plastic tube and then pull off the tube. be careful as it is old and brittle it cracks easily. take out the 7mm bolt holding on the metal bracket that guides the beads. next take out the snap ring holding in the black plastic sprocket. I used a putty knife but snap ring pliers would have been nice.


sorry I don't have any pictures of me actually cleaning everything but I just used some WD40 and paper towels. an old toothbrush would have been really helpful at this point. I lubed everything with some red multipurpose grease that we have laying around at work. WD40 should not be used to lubricate the regulator as it will not last. be fairly generous with the grease make sure to coat all of the beads and the new sprocket before install and try to lubricate the track it maybe be a little difficult but it will help in the long run.
fifth reinstall everything
put the plastic sprocket back in the regulator flat side up install the snap ring throw on the guide and install the plastic tube I had to use some duct tape as mine cracked a little bit but hey it works great. before you reinstall the regulator I would suggest plugging it in, plugging in the window switch and turning the key to on. run the regulator up and down a few times to make sure everything works to your liking and is well lubed. Install the regulator and plug in the connectors. I cleaned my window before I reinstalled it. Gotta love Windex.

once the window is back in and the door panel back on run it a couple times just to double check your work. Enjoy
Celebrate with a... Juice box? lol I'm too young to drink so my coworkers call me juice box I'm at least 10 years younger than the next guy and around 20-30 years younger than most of the guys I work with.

I hope this will help someone out. I just wanted to do my part to give back to the forum as I have searched and gained a ton of knowledge without ever posting. I realize now that a good write up is Hard Work. Thank you to everyone on here.
Thank you for making a contribution to the forum.
The only thing I will challenge is your grease choice. I too used synthetic multipurpose when I did this a few years ago, but read more and more that white lithium was the correct choice. They say the multipurpose is more prone to hold dirt and contaminants, eventually nullifying your excellent results right now. Just food for thought.
The only thing I will challenge is your grease choice. I too used synthetic multipurpose when I did this a few years ago, but read more and more that white lithium was the correct choice. They say the multipurpose is more prone to hold dirt and contaminants, eventually nullifying your excellent results right now. Just food for thought.
Joined: Sep 2005
Posts: 25,581
Likes: 136
From: Smiths Falls.(near Ottawa!.Mapquest IT!)
Great Write up!
I'll transfer this over to SEC GEN SPECIFIC or even the Archives at a later date.
On the other hand ..Thanks..I think.
You just brought back ALL the nightmares of my Window/door/door handle/interior/door speaker wiring Jobs that I ever did!..
..I got a headache now..save me....hhahahhaha!
I'll transfer this over to SEC GEN SPECIFIC or even the Archives at a later date.
On the other hand ..Thanks..I think.
You just brought back ALL the nightmares of my Window/door/door handle/interior/door speaker wiring Jobs that I ever did!..
..I got a headache now..save me....hhahahhaha!
Thread Starter
Junior Member
Joined: Mar 2016
Posts: 9
Likes: 1
From: Seattle area
Thank you for making a contribution to the forum.
The only thing I will challenge is your grease choice. I too used synthetic multipurpose when I did this a few years ago, but read more and more that white lithium was the correct choice. They say the multipurpose is more prone to hold dirt and contaminants, eventually nullifying your excellent results right now. Just food for thought.
The only thing I will challenge is your grease choice. I too used synthetic multipurpose when I did this a few years ago, but read more and more that white lithium was the correct choice. They say the multipurpose is more prone to hold dirt and contaminants, eventually nullifying your excellent results right now. Just food for thought.
Thread Starter
Junior Member
Joined: Mar 2016
Posts: 9
Likes: 1
From: Seattle area
Great Write up!
I'll transfer this over to SEC GEN SPECIFIC or even the Archives at a later date.
On the other hand ..Thanks..I think.
You just brought back ALL the nightmares of my Window/door/door handle/interior/door speaker wiring Jobs that I ever did!..
..I got a headache now..save me....hhahahhaha!
I'll transfer this over to SEC GEN SPECIFIC or even the Archives at a later date.
On the other hand ..Thanks..I think.
You just brought back ALL the nightmares of my Window/door/door handle/interior/door speaker wiring Jobs that I ever did!..
..I got a headache now..save me....hhahahhaha!
 thank you very much for swapping it over hopefully I'll be able to continue making write-ups as I work on my car.
