
Redline Goods Center Console Install

Thread Starter
Senior Member
Joined: Dec 2004
Posts: 502
Likes: 0
From: In your wheelhouse
Redline Goods Center Console Install
If your shift boot and ebrake boot are looking worn out, you should consider taking a look at the products sold by Redline Goods. After seeing a lot of positive feedback on this site from other members that shopped with Redline, I decided to make a purchase. Everything showed up on time and the quality was superior.
I have no affiliation with Redline - but here's their site if you want to look:
http://www.redlinegoods.com/FDshiftboot.shtm
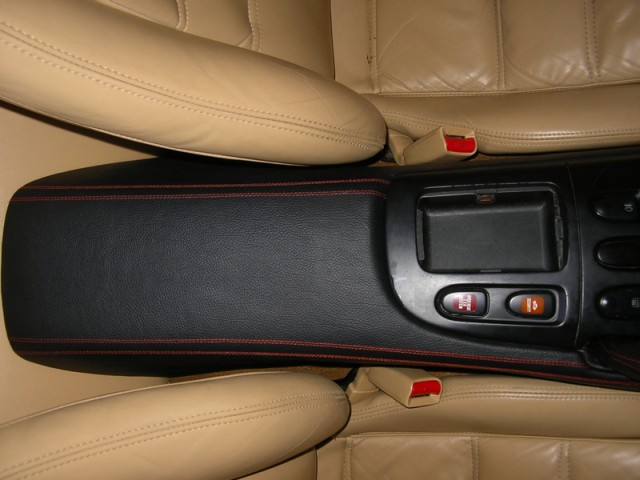
They have a really nice product that is a leather overlay to the center console in the 93-95 FD. There's a package deal they set you up with if you buy all 3 pieces (I swear I don't work there). Problem is that they have no install instructions for this console piece. I'm a do-it-yourselfer (as most of us are), so I decided to make a contribution to the site here and show you all how it's done. FYI - I am doing another project and have the seats out of the car in these pictures. There's no need for you to remove the seats for this install.
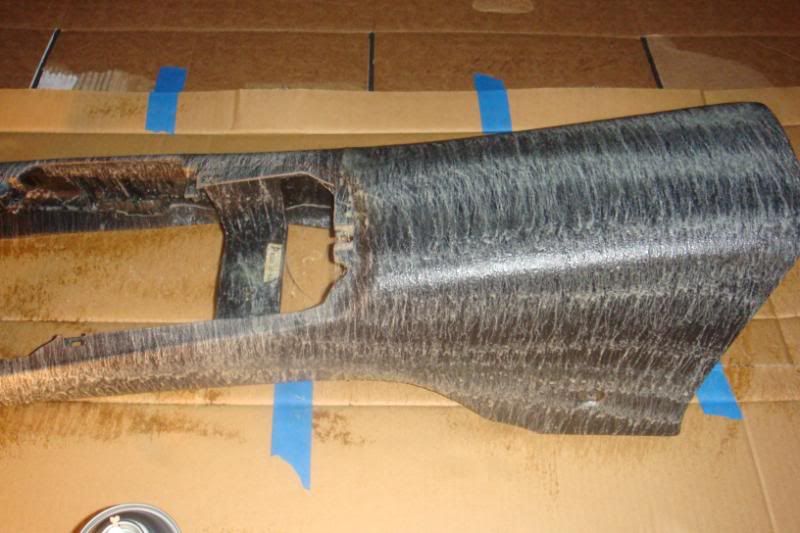
1) Start by removing the plastic panel that holds your ashtray, shifter boot, etc. There are 5 clips that hold it in place. FYI - if you are missing these metal clips, Malloy Mazda sells them for $0.85 each.
2) There's a phillips head screw on each side of the panel at the bottom around where the seat back rests. Remove each. You'll see the screw hole in the bottom portion of the panel.
3) Next remove the two screws from the bracket that attaches to the transmission tunnel.
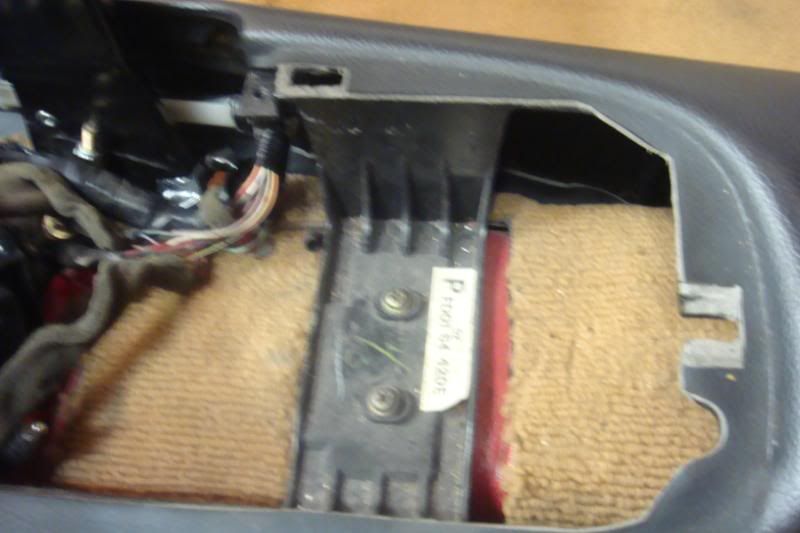
4) There is a bundle of wires that runs from behind the stereo.
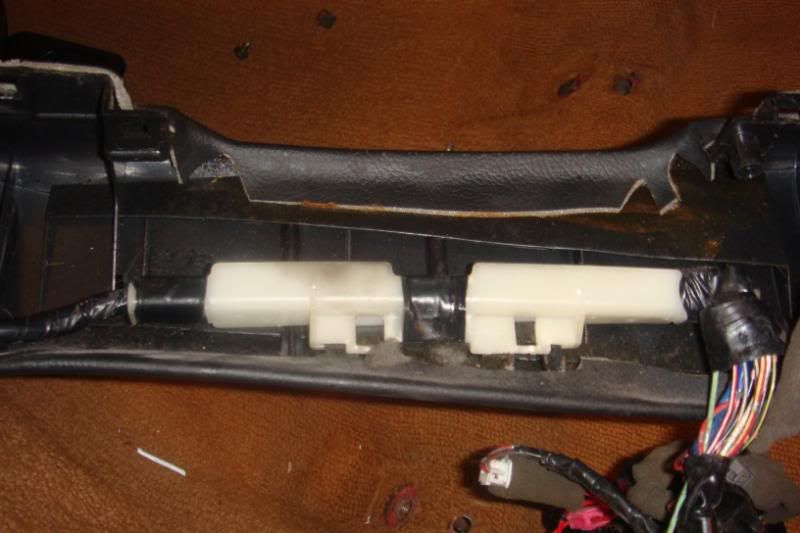
5) The wires are attached to the console with this white clip. Slide the clip off and you should now have the console free from the car.
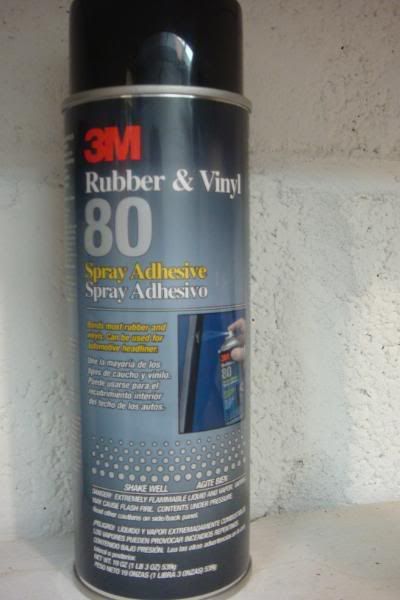
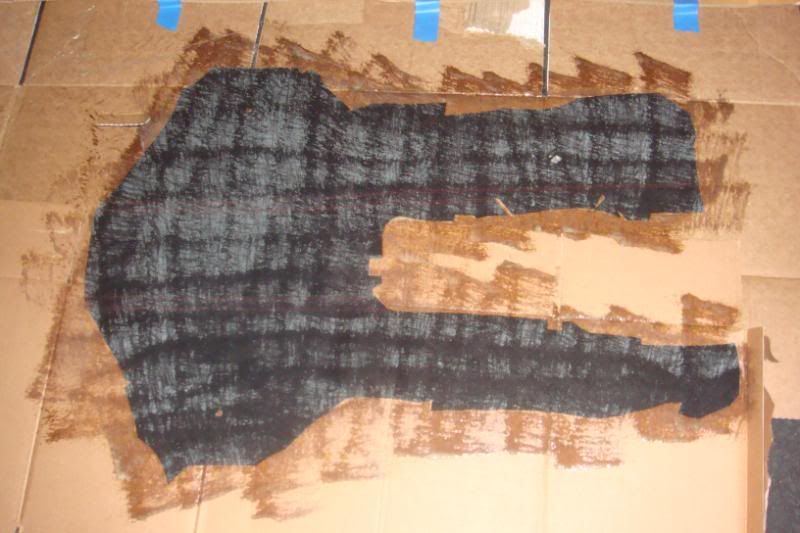
6) Set up a staging area because the adhesive sprays pretty well out of the can.
7) The adhesive is made by 3M and I bought it at Home Depot for $11.00. There are a few varieties. Make sure you get the #80 can that is made for headliners (for rubber and vinyl).
8) Clean the console with a little soap and water to ensure that nothing interferes with the adhesive.
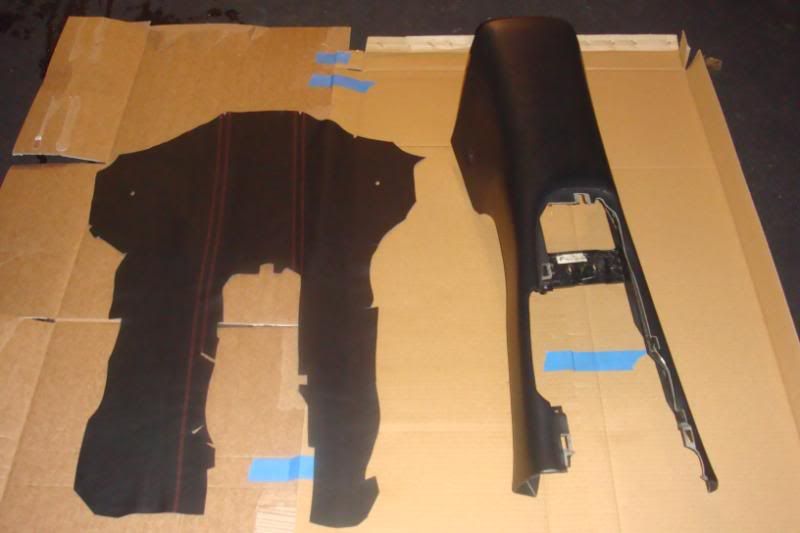
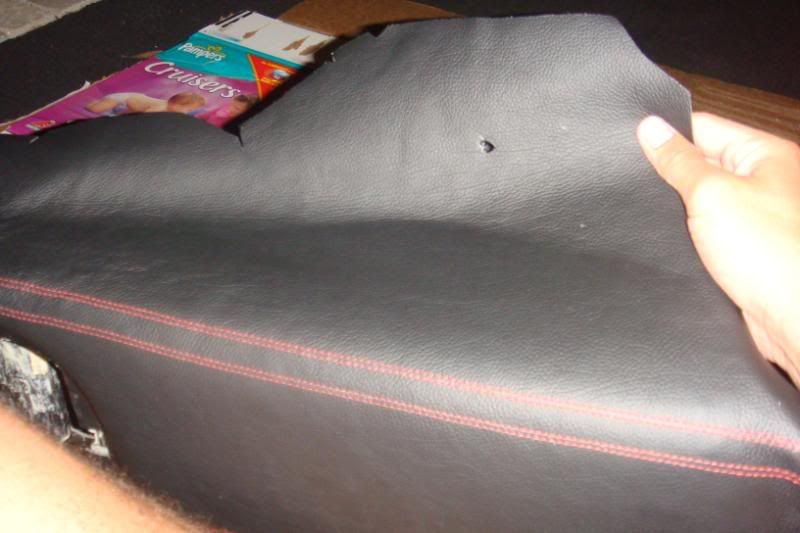
9) PRACTICE lining the leather up on the console. Decide where you are going to lay the leather on the console after the adhesive has been applied. Once you have sprayed this stuff and put the parts together, it's very tough to pull apart. The leather pattern is cut precisely. I felt the best place to begin is at the area in the middle - think about where your elbow rests. I have clothespins in this picture because I thought I would need them to hold the leather while the adhesive dries. They are not neded - this stuff is very tacky.
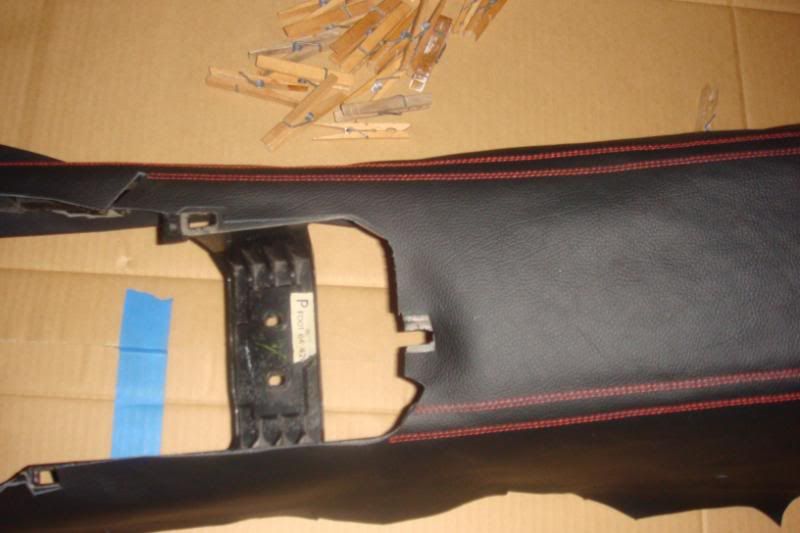
10) Spray the adhesive on the console and the back of the leather. Follow the directions on the can. Be careful that you don't get any on the front of the leather. Don't worry if it looks like the adhesive seeps through to the finished side of the leather. It does leave some marks on the good side while it's wet, but that goes completely away when this dries in about an hour.
11) Line up the notches in the leather with the corresponding area on the console (what you practiced). Begin smoothing the leather from the edge and working your way toward the back of the console.
Smooth back and forth with one hand while holding the leather in the other. You don't want to drop the whole leather cover on the console because the alignment won't work. You'll have to press and smooth - but occasionally peel it back to keep it lined up. Use the red stitching as a guide - it should run along the edges of the console.
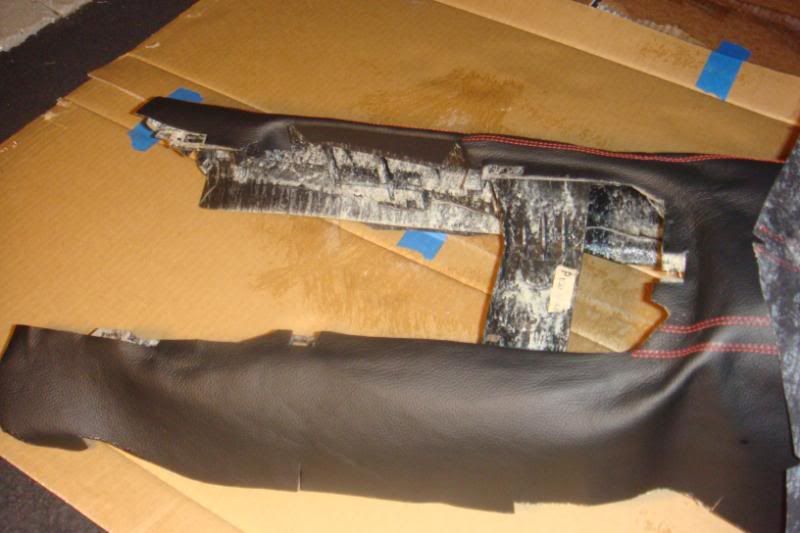
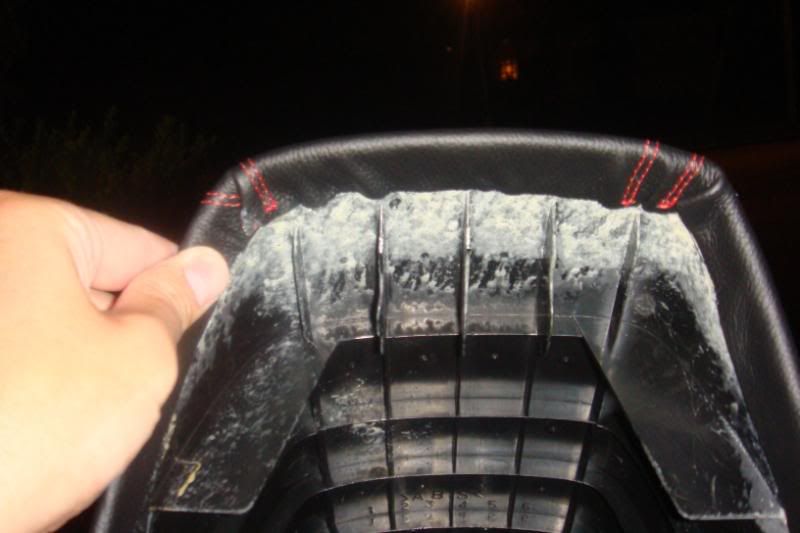
12) Once the top is done begin smoothing the sides. If the holes in the leather for the two screws don't quite line up - it's no big deal. Pay more attention to the red stitching lining up on the edges. You can punch a new hole for the screw if needed and you'll never see that area because the seat covers it.
13) Finally - work your way around the edge of the console and just fold the leather. The adhesive is tacky enough that it will hold just fine.
Let it dry for a few hours or a day and then reinstall the same way you took it out.
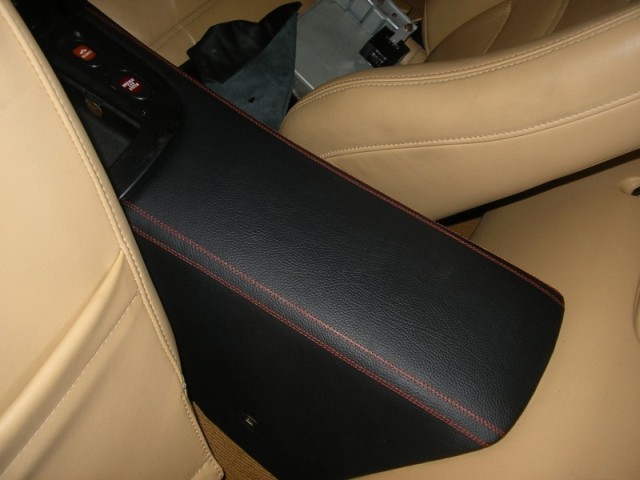
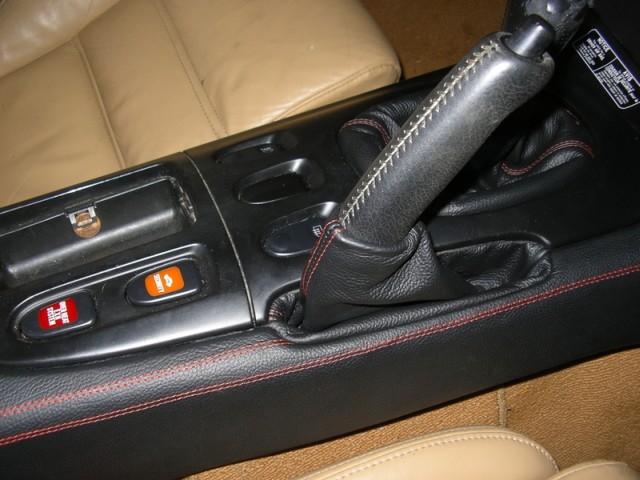
The finished product is really impressive and, in my opinion, classes up the interior. The quality is really good and service was great too.
Dave
I have no affiliation with Redline - but here's their site if you want to look:
http://www.redlinegoods.com/FDshiftboot.shtm
They have a really nice product that is a leather overlay to the center console in the 93-95 FD. There's a package deal they set you up with if you buy all 3 pieces (I swear I don't work there). Problem is that they have no install instructions for this console piece. I'm a do-it-yourselfer (as most of us are), so I decided to make a contribution to the site here and show you all how it's done. FYI - I am doing another project and have the seats out of the car in these pictures. There's no need for you to remove the seats for this install.
1) Start by removing the plastic panel that holds your ashtray, shifter boot, etc. There are 5 clips that hold it in place. FYI - if you are missing these metal clips, Malloy Mazda sells them for $0.85 each.
2) There's a phillips head screw on each side of the panel at the bottom around where the seat back rests. Remove each. You'll see the screw hole in the bottom portion of the panel.
3) Next remove the two screws from the bracket that attaches to the transmission tunnel.
4) There is a bundle of wires that runs from behind the stereo.
5) The wires are attached to the console with this white clip. Slide the clip off and you should now have the console free from the car.
6) Set up a staging area because the adhesive sprays pretty well out of the can.
7) The adhesive is made by 3M and I bought it at Home Depot for $11.00. There are a few varieties. Make sure you get the #80 can that is made for headliners (for rubber and vinyl).
8) Clean the console with a little soap and water to ensure that nothing interferes with the adhesive.
9) PRACTICE lining the leather up on the console. Decide where you are going to lay the leather on the console after the adhesive has been applied. Once you have sprayed this stuff and put the parts together, it's very tough to pull apart. The leather pattern is cut precisely. I felt the best place to begin is at the area in the middle - think about where your elbow rests. I have clothespins in this picture because I thought I would need them to hold the leather while the adhesive dries. They are not neded - this stuff is very tacky.
10) Spray the adhesive on the console and the back of the leather. Follow the directions on the can. Be careful that you don't get any on the front of the leather. Don't worry if it looks like the adhesive seeps through to the finished side of the leather. It does leave some marks on the good side while it's wet, but that goes completely away when this dries in about an hour.
11) Line up the notches in the leather with the corresponding area on the console (what you practiced). Begin smoothing the leather from the edge and working your way toward the back of the console.
Smooth back and forth with one hand while holding the leather in the other. You don't want to drop the whole leather cover on the console because the alignment won't work. You'll have to press and smooth - but occasionally peel it back to keep it lined up. Use the red stitching as a guide - it should run along the edges of the console.
12) Once the top is done begin smoothing the sides. If the holes in the leather for the two screws don't quite line up - it's no big deal. Pay more attention to the red stitching lining up on the edges. You can punch a new hole for the screw if needed and you'll never see that area because the seat covers it.
13) Finally - work your way around the edge of the console and just fold the leather. The adhesive is tacky enough that it will hold just fine.
Let it dry for a few hours or a day and then reinstall the same way you took it out.
The finished product is really impressive and, in my opinion, classes up the interior. The quality is really good and service was great too.
Dave
Last edited by DGblk93; Aug 29, 2008 at 06:12 PM.


Thread Starter
Senior Member
Joined: Dec 2004
Posts: 502
Likes: 0
From: In your wheelhouse
I was looking at this product for a while but couldn't find any writeups. So - being on this site for a few years, I decided it was time to give back 
I am putting the car back together over the next couple of days and I'll provide my pictures of this installed. I also re-did my leather seats with the leatherseats.com kit. Oh - and painted all my plastic pieces. I definetly got involved in a pretty big project.
If I could do this all over again - I would follow my own advice and make sure I lined up all the red stiching perfectly. I feel like I let it get a little off course - and it's not as dead-on as the picture Natey put up there. Oh well.
Trending Topics

Joined: Aug 2004
Posts: 4,496
Likes: 1,484
From: West Coast
Those are the pics off of Redline's site, and the install was probably done by a pro. I'll bet yours looks 100% better than the 15 year old stock one did, even if the stitching's not absolutely perfect.
The ones off of their site was installed by a pro, I talked to them about it. I did mine on my own pretty much in the same method but with a different glue, it was a leather specific adhesive.
If you start on the center pieces that get covered first and then stretch and pull it tight for the rest it turns out really nice. I will get some pics up of mine next time I'm working on the car.
Its a great update to the interior of our cars that compared to even mid range modern cars, looks super dated as far as materials.
Just a thought. Do you have to spray adhesive on the leather itself as well? seems like a risk. Another thing, Could you spray adhesive starting at the hole, line up your edges, then spray more adhesive as you work your way out, making sure everything is aligned? wouldn't that work out easier?
Just a thought. Do you have to spray adhesive on the leather itself as well? seems like a risk. Another thing, Could you spray adhesive starting at the hole, line up your edges, then spray more adhesive as you work your way out, making sure everything is aligned? wouldn't that work out easier?
If you don't spray the leather as well, you will not get a great bond. It seems like a big risk, but it's more of a medium risk. Takes some real caution to get right. But, not nearly that hard.


Maybe we can garner some interst and get a GB going.
I was talking to them last year about making overlays for all of the interior panels. I wasn't willing to follow through with the measurements, and since they are located in poland, I couldn't exactly run the car up there for them to take measurements.
Maybe we can garner some interst and get a GB going.
Maybe we can garner some interst and get a GB going.
I found this in the FS section. Looks like there is a alcantara center console already.
https://www.rx7club.com/showthread.p...ight=alcantara
https://www.rx7club.com/showthread.p...ight=alcantara
I may be willing to ship my door panels to Polland for them to get a template made for our door panels. Maybe we should get a GB interest thread going. I'll take donations to fund the shipping to and from Redline.