
How to make your horn work after a aftermarket wheel install.


How to make your horn work after a aftermarket wheel install.
This write up is to help those of you who have installed an aftermarket steering wheel and no longer have a working horn. After much searching I found a link to NRG where they made the horn work with Honda. Keep in mind it�s not all peachy. On the third gen RX7 it�s a PITA because the area to do this mod is totally different. No special tools needed to make this work.
Things needed for Mod.
-Hair clip
-a couple male to female connectors
-misc tools (screw driver, crimps, snips, pliers, )
-light tester
-electrical tape
- soldering iron with heat wraps(if you have them)
- 21mm socket and ratchet
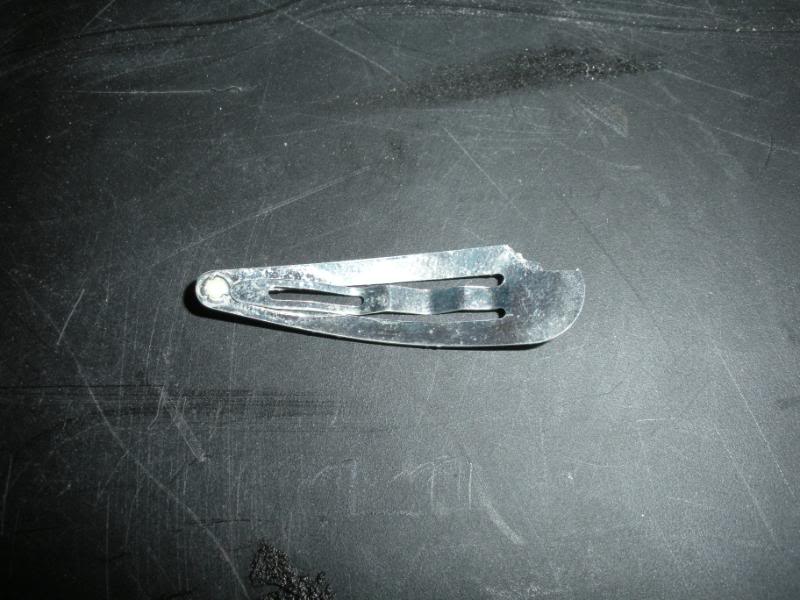
First thing you do is grab the hair clip and snip it so the female connector can fit tight. Then get a small nail and tape the area the connector will slide on. This is so it doesn�t slide out in the future .I used this because it has a unique bend that it comes back to its original bend even if you bend it.
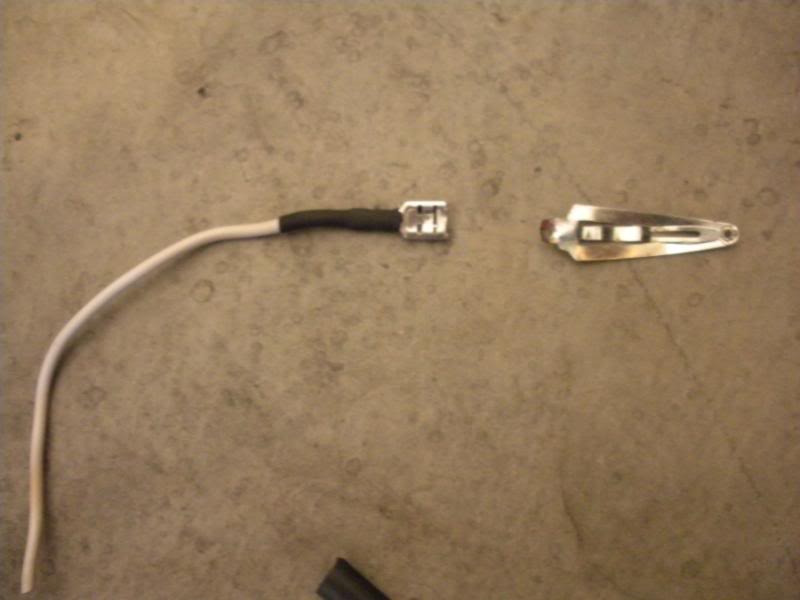
Next connect get wire and crimp the female end to it . You can wrap this with tape if you want. I used heat wraps for this. Just a extra precaution so if it ever falls it doesn�t set off the horn like crazy.
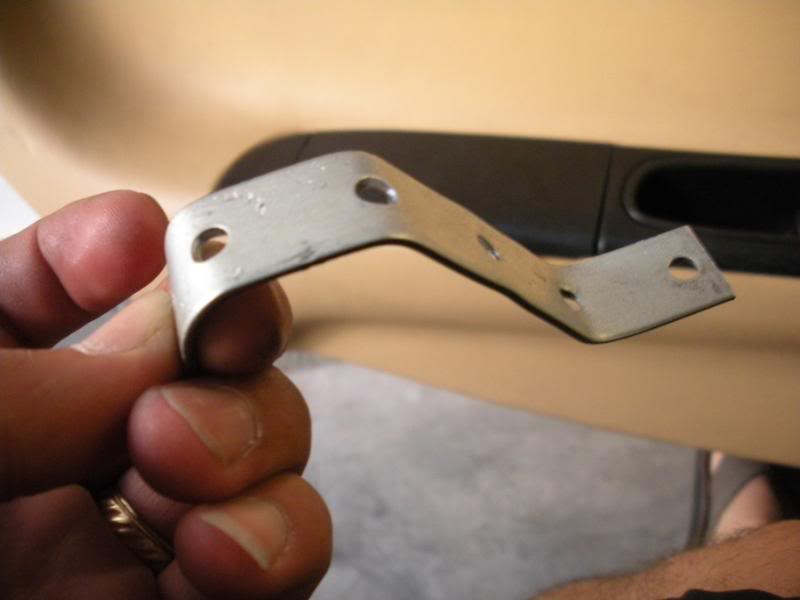
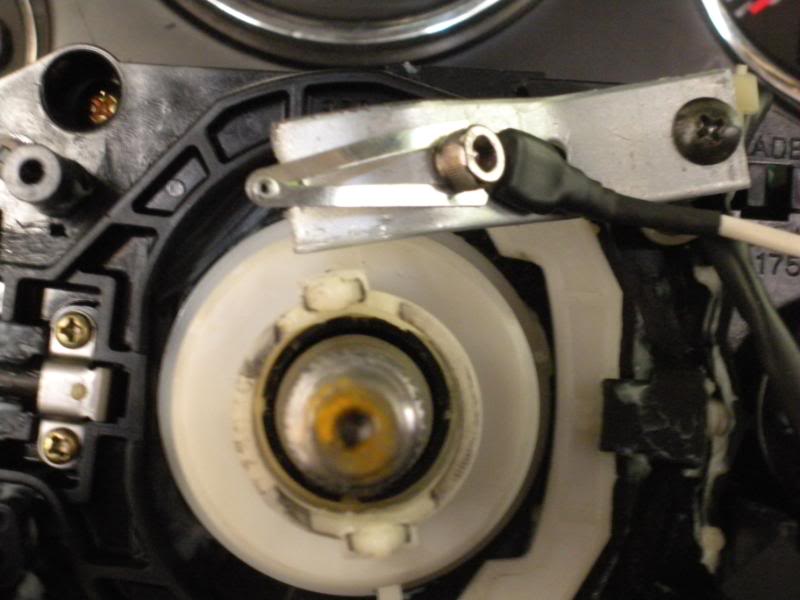
You will need to make a bracket of some sort. I used nice gauge bracket I had laying around bend it to form like this and test fit it on the mount . Look for the other pics for reference
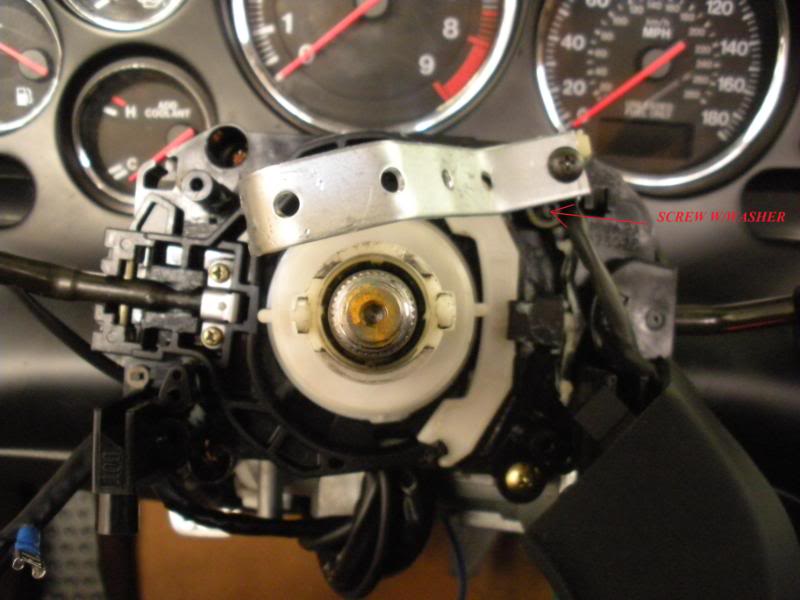
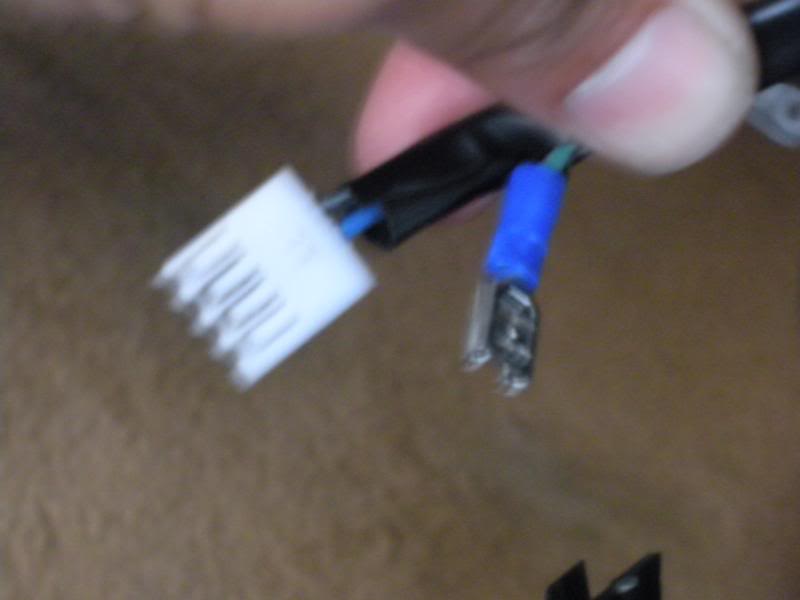
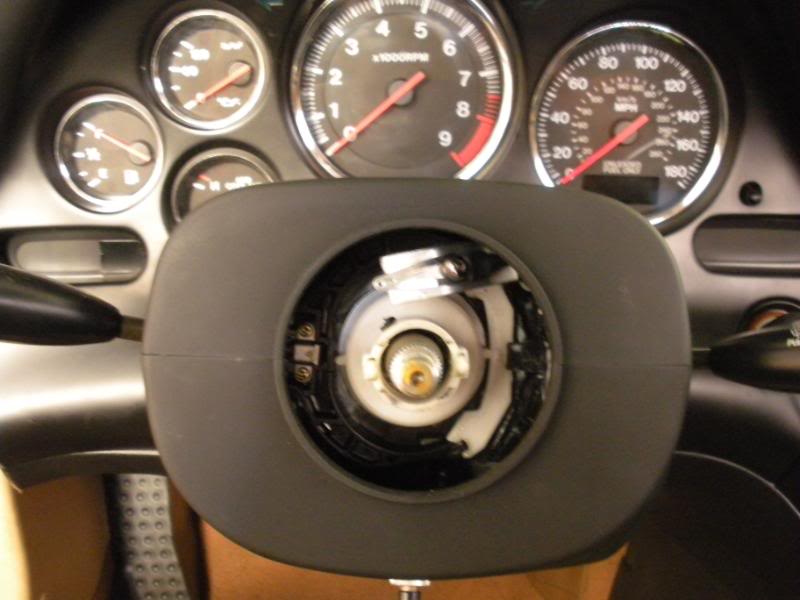
Look under the dash column area and look for this clip. It should have been connected to your factory clock spring. Locate the green wire and push it out of itsconnector pin. After that get a female connector and crimp that sucker on there. Again use tape or heat wrap when you make your final connection on this area because this wire is HOT.
Hers how it looks installed on the factory screm mounts.
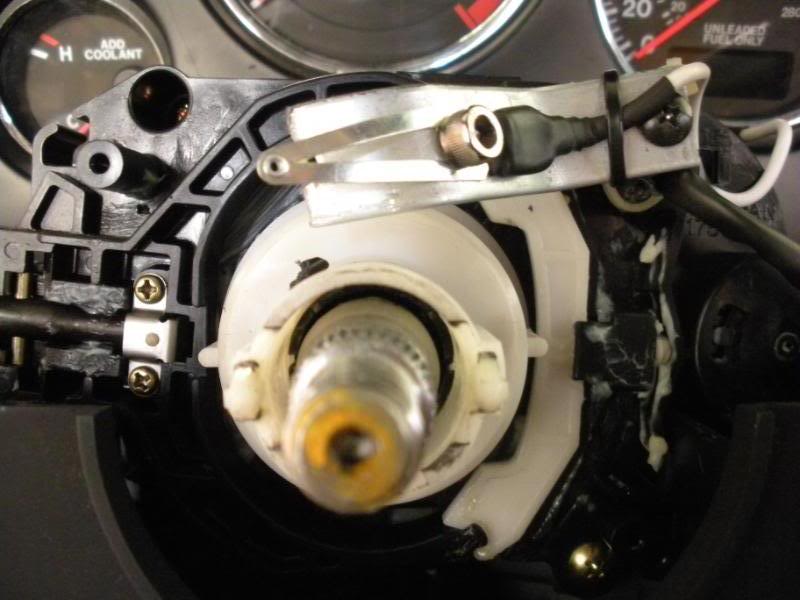
Here is the set-up mounted with the steering wheel so you can see where the clip makes it connection . This will keep the clip pushed up on the base of the hub adapter creating the circuit.
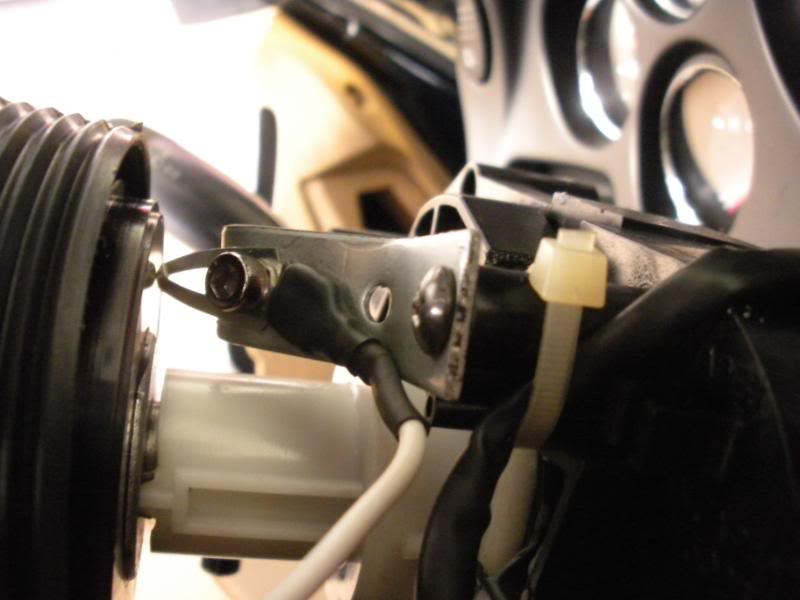
The bracket is super sturdy as is but I added more precautions . I ziptied the braket to the mount and installed another screw so it doesnt slid down.
Final thing to do is wrap the whole set up with electrical tape minus the hairclip. Just to be safe and zip tie in each ends of the tape. install your plastics
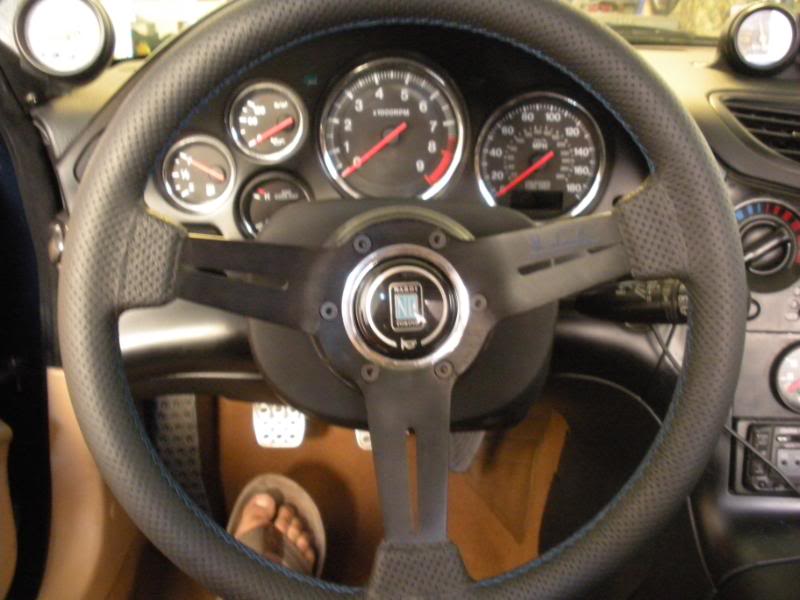
Install your wheel w/ quick relase . And you are DONE! now you have a working horn. with your aftermarket steering wheel set up.
Things needed for Mod.
-Hair clip
-a couple male to female connectors
-misc tools (screw driver, crimps, snips, pliers, )
-light tester
-electrical tape
- soldering iron with heat wraps(if you have them)
- 21mm socket and ratchet
First thing you do is grab the hair clip and snip it so the female connector can fit tight. Then get a small nail and tape the area the connector will slide on. This is so it doesn�t slide out in the future .I used this because it has a unique bend that it comes back to its original bend even if you bend it.
Next connect get wire and crimp the female end to it . You can wrap this with tape if you want. I used heat wraps for this. Just a extra precaution so if it ever falls it doesn�t set off the horn like crazy.
You will need to make a bracket of some sort. I used nice gauge bracket I had laying around bend it to form like this and test fit it on the mount . Look for the other pics for reference
Look under the dash column area and look for this clip. It should have been connected to your factory clock spring. Locate the green wire and push it out of itsconnector pin. After that get a female connector and crimp that sucker on there. Again use tape or heat wrap when you make your final connection on this area because this wire is HOT.
Hers how it looks installed on the factory screm mounts.
Here is the set-up mounted with the steering wheel so you can see where the clip makes it connection . This will keep the clip pushed up on the base of the hub adapter creating the circuit.
The bracket is super sturdy as is but I added more precautions . I ziptied the braket to the mount and installed another screw so it doesnt slid down.
Final thing to do is wrap the whole set up with electrical tape minus the hairclip. Just to be safe and zip tie in each ends of the tape. install your plastics
Install your wheel w/ quick relase . And you are DONE! now you have a working horn. with your aftermarket steering wheel set up.
I need to join the marines. lol, jk simple outside the box thinking common sense. NICE NICE job, I think this is cool.
(I have an FC though.) Ill remember this thread for THAT day, though.
(I have an FC though.) Ill remember this thread for THAT day, though.

Thread
Thread Starter
Forum
Replies
Last Post
Rx7_brad
3rd Generation Specific (1993-2002)
0
Aug 15, 2015 09:57 AM