
Hacked Up My Center Console!

Thread Starter
NA2 Pilot
Joined: Feb 2001
Posts: 712
Likes: 0
From: NY
Hacked Up My Center Console!
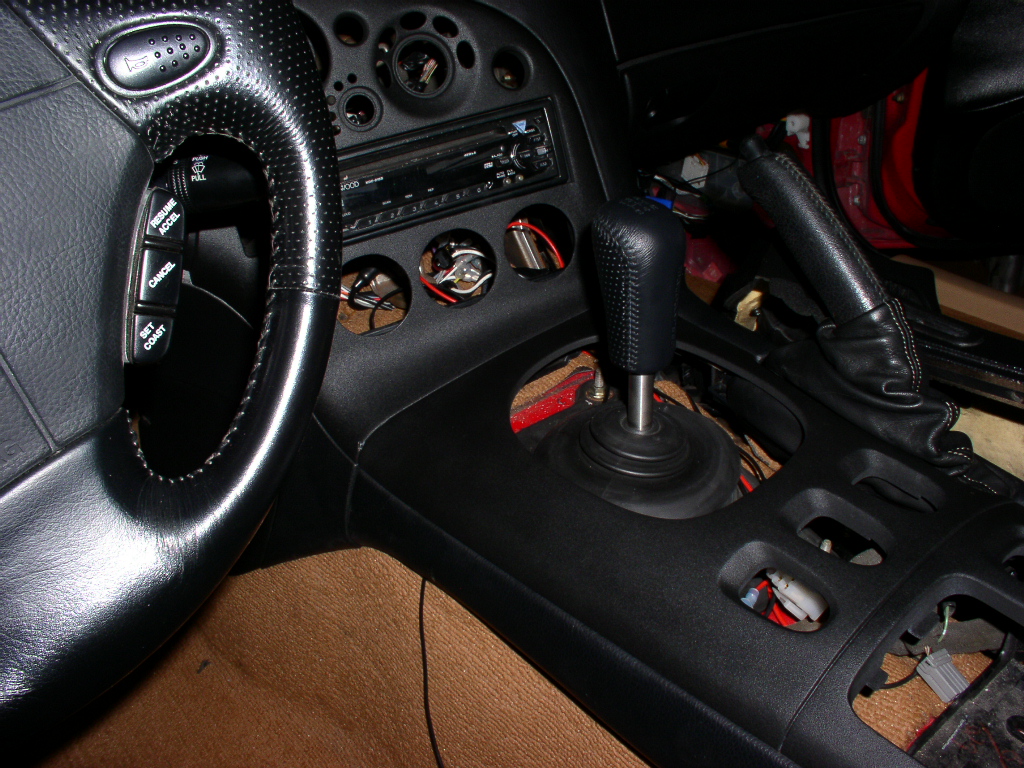
hehe... Still in the works... I'm in the process of molding my commander controls in the shifter panel...
first pic.. cut the hole and crazy glued the half commander in place for fitment

second pic... used fiberglass resin to hold into place and bondo'd the top.. also some sanding... I still need to sand this a lot more to get it to look like it's a part of the console...

I should have more pics of the project soon...
first pic.. cut the hole and crazy glued the half commander in place for fitment
second pic... used fiberglass resin to hold into place and bondo'd the top.. also some sanding... I still need to sand this a lot more to get it to look like it's a part of the console...
I should have more pics of the project soon...


Thread Starter
NA2 Pilot
Joined: Feb 2001
Posts: 712
Likes: 0
From: NY
I'm still in the sanding phase as of now... I'm going to sand it to try to get it to look as smooth as possible and then texture it...
I'm also working on the display right now... I'll post pics soon..
I'm also working on the display right now... I'll post pics soon..
Trending Topics
Belligerent Security
Joined: Jul 2003
Posts: 70
Likes: 0
From: Pulling you over
Any Home Depot or Lowe's. Kragen even has it. If you want rellay nice stuff, have to find a industrial supply company around you. IMO the Home Depot stuff works good for most applications.


Glug Glug Glug Burp
Joined: Jan 2002
Posts: 3,819
Likes: 0
From: Scott AFB, IL
I bit off of Jays style with the textured 94 look when I molded my DIN panel... Might have to get silly with the PFC controls too... Not sure where I'll put 'em though.
Have you finished the display mount yet Jay?
Thread Starter
NA2 Pilot
Joined: Feb 2001
Posts: 712
Likes: 0
From: NY
Thanks guys...
I'm using SEMs Textured paint and SEMs Satin black plastic paint....
I'm sanding everything down even more right now and trying to get the display done... I should have pics real soon...
Banana can I have your front undersweep!!?? LOL
I'm using SEMs Textured paint and SEMs Satin black plastic paint....
I'm sanding everything down even more right now and trying to get the display done... I should have pics real soon...
Banana can I have your front undersweep!!?? LOL
Thread Starter
NA2 Pilot
Joined: Feb 2001
Posts: 712
Likes: 0
From: NY
Ok... here are some pics...
I can't take credit for the rewiring of the power fc... my friend did it for me... i was NOT goin to mess with that... LOL There are 20 solder points... the 2 boards where connected by soldered pins at each point... you have to unsolder all 20 at the same time and pull the boards apart.. unless you have a better way of doing it... here are some pics...


Here at the materials I used... including the Texture and satin black paint...

I'll post more pics of the panels in a couple of mins.. it's cold here, so it take time for things to dry...
I can't take credit for the rewiring of the power fc... my friend did it for me... i was NOT goin to mess with that... LOL There are 20 solder points... the 2 boards where connected by soldered pins at each point... you have to unsolder all 20 at the same time and pull the boards apart.. unless you have a better way of doing it... here are some pics...
Here at the materials I used... including the Texture and satin black paint...
I'll post more pics of the panels in a couple of mins.. it's cold here, so it take time for things to dry...


Still on 1st engine
Joined: Jun 2003
Posts: 1,176
Likes: 1
From: SoCal
Looks great! The PFC button frame blended in pretty well!
Personally, I would've used a ribbon cable. You can get them with wirespacing that'll match the spacing of the LCD header.
Are you going to use the back of the PFC commander case to protect the mainboard, or do you have some other means worked out? My shifting console was pretty damn dusty last time I checked.
Thread Starter
NA2 Pilot
Joined: Feb 2001
Posts: 712
Likes: 0
From: NY
I actually lost the back side of the commander... I swear, I looked everywhere!!! I have to figure out what I can use to protect the back side... i might just leave it since it's hidden inside anyway.. a little dust won't hurt it.. 
Originally posted by InsaneGideon
Are you going to use the back of the PFC commander case to protect the mainboard, or do you have some other means worked out? My shifting console was pretty damn dusty last time I checked.
Are you going to use the back of the PFC commander case to protect the mainboard, or do you have some other means worked out? My shifting console was pretty damn dusty last time I checked.