
FD interior remodling project

Thread Starter

Joined: May 2008
Posts: 4,389
Likes: 964
From: Stamford, CT
I realized I have to drain the radiator fluid in order to get the heater unit out before taking the carpet out. So I'll be doing that tomorrow.
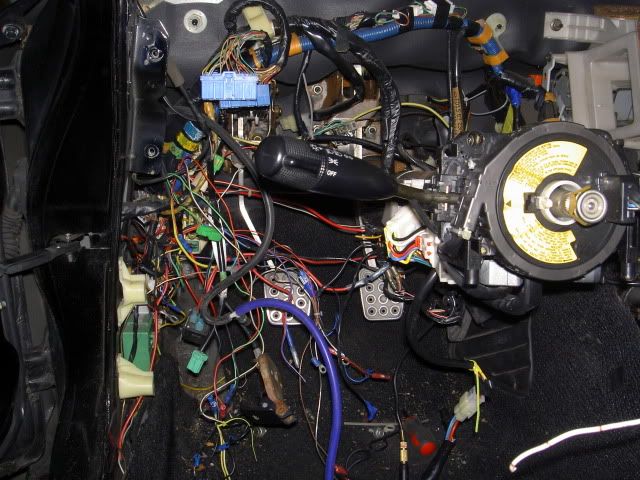
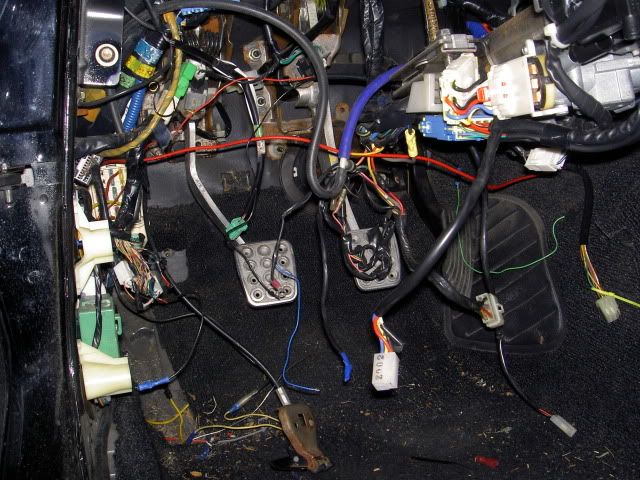
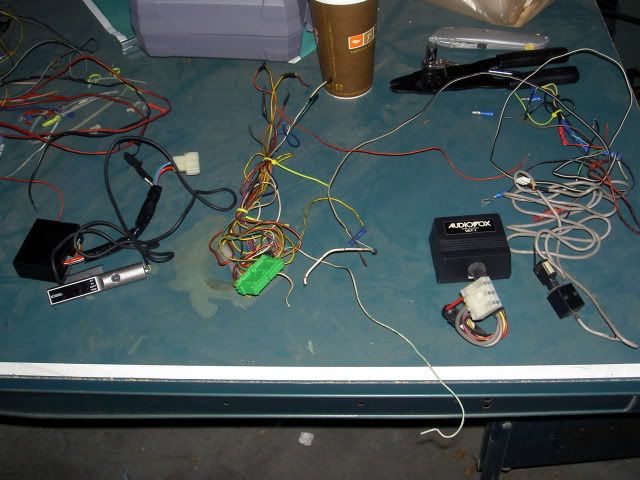
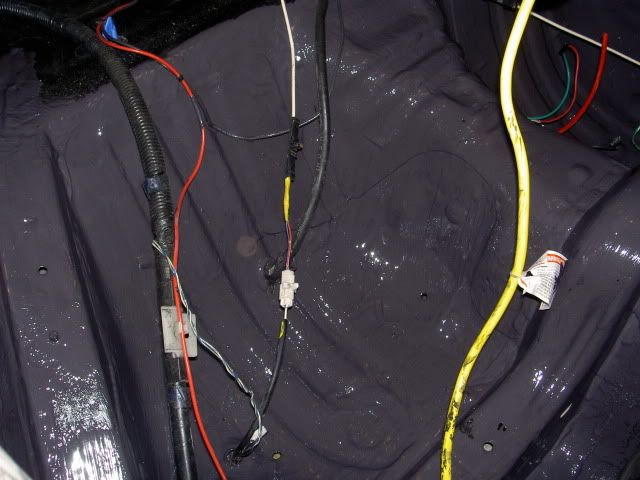
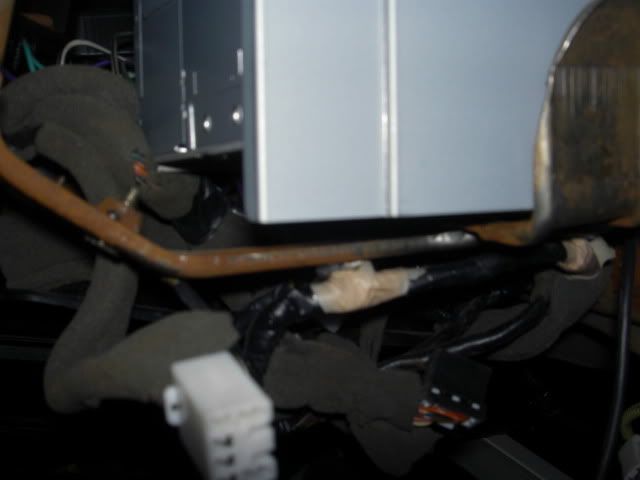
Today I spent a lot of time cleaning up the wiring mess. Turns out, most of the wires ended up in a dead end in what looks to be a stock wiring plug (green). It wasn't plugged in, so I guess I don't need it haha. I'm pretty sure its mostly for the stock alarm system. I still have a few wires that I need to cap off, but now there is a lot less wiring.
Before:
After:
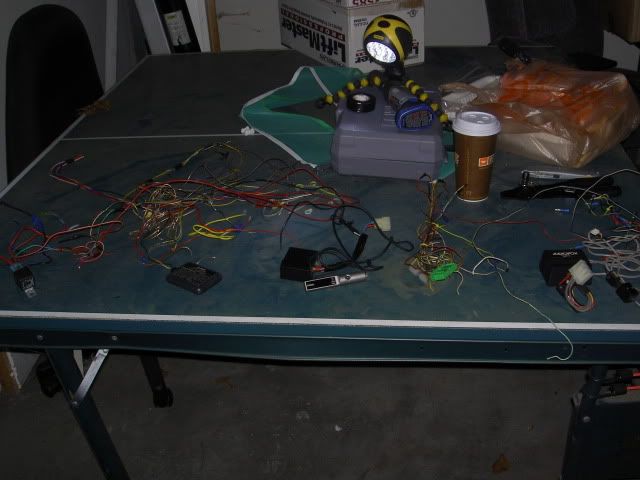
Removed components and wires:

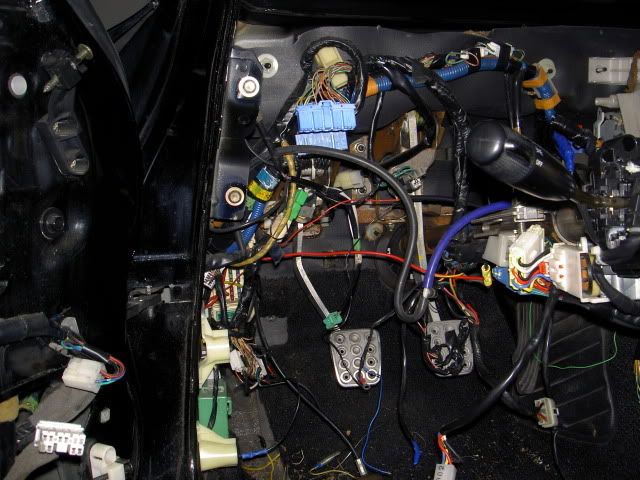
There are still a few wires on the steering column that I'm unsure of, but the worst of it is over now.
Tomorrow I'll drain the radiator fluid, get the heater unit out, remove the carpet, clean, and finally be ready for quiet car.
Today I spent a lot of time cleaning up the wiring mess. Turns out, most of the wires ended up in a dead end in what looks to be a stock wiring plug (green). It wasn't plugged in, so I guess I don't need it haha. I'm pretty sure its mostly for the stock alarm system. I still have a few wires that I need to cap off, but now there is a lot less wiring.
Before:
After:
Removed components and wires:
There are still a few wires on the steering column that I'm unsure of, but the worst of it is over now.
Tomorrow I'll drain the radiator fluid, get the heater unit out, remove the carpet, clean, and finally be ready for quiet car.


Thread Starter
Joined: May 2008
Posts: 4,389
Likes: 964
From: Stamford, CT
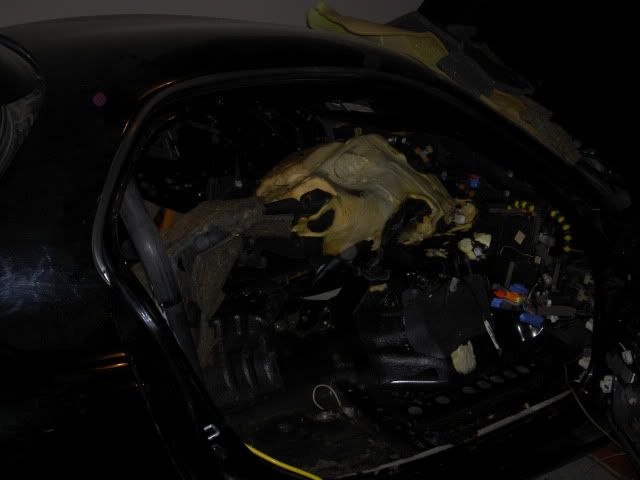
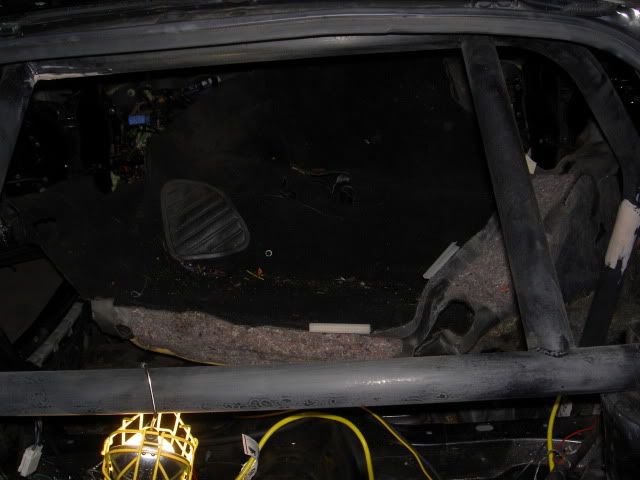
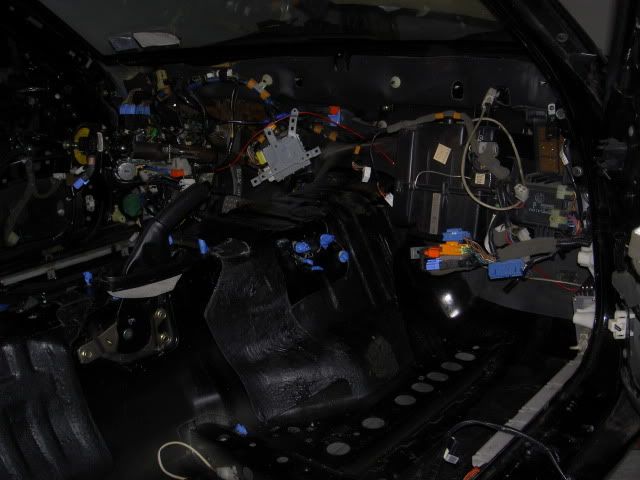
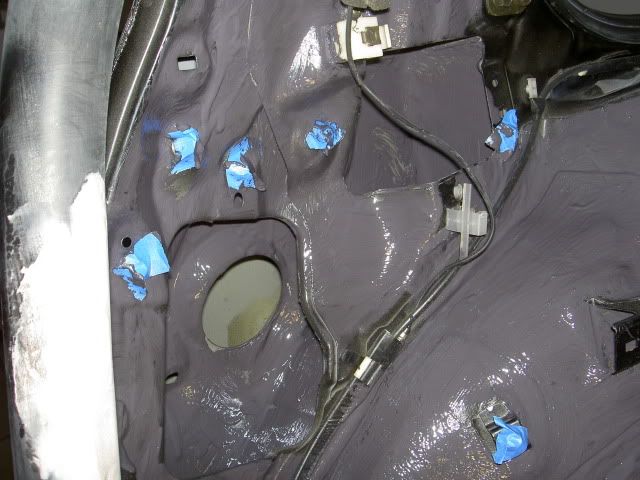
I finally got the carpet out !!!
Anyone that has managed to get it out in one piece without removing the dash & heating unit must be a magician.
I never would have thought it'd be glued to the floor so well.
Here are the pics:
Half way there:
Fully detached:
The driver side padding stuck the the floor pretty bad:
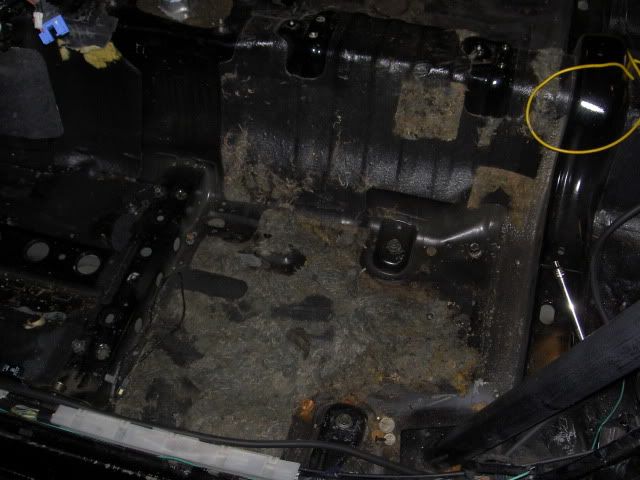
glued padding:
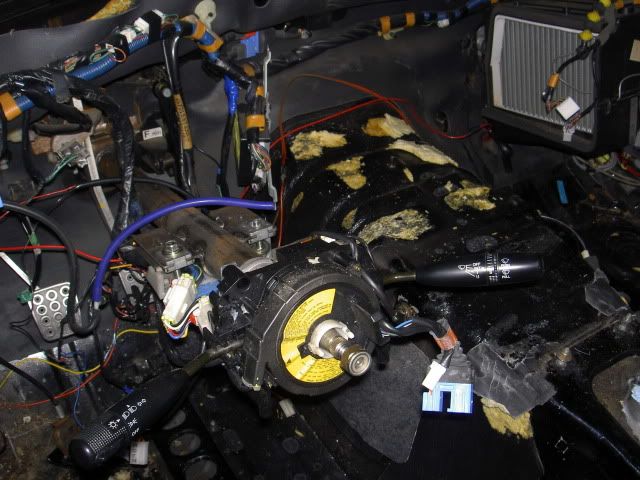
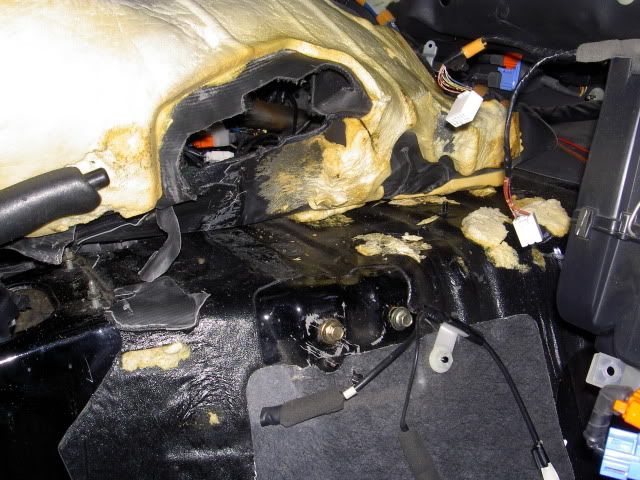
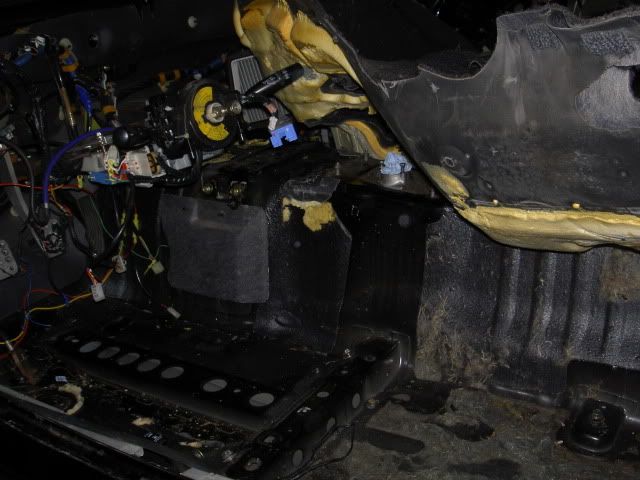
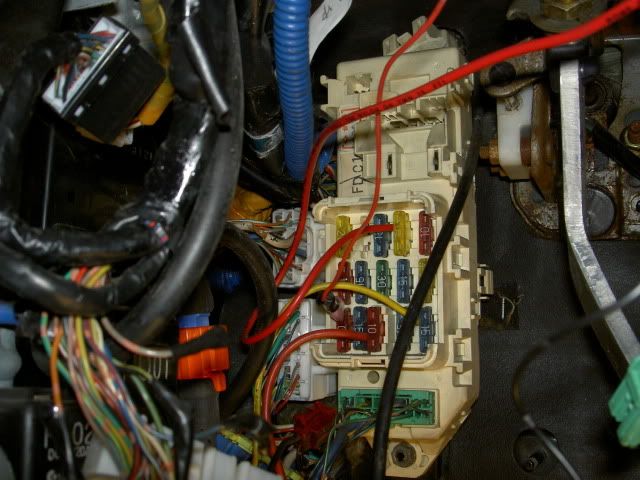
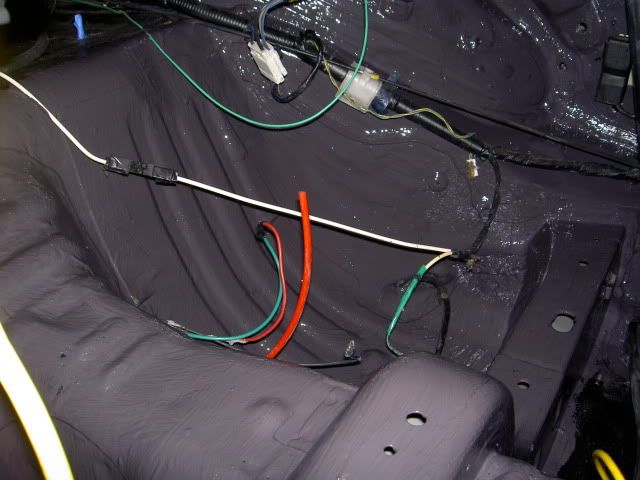
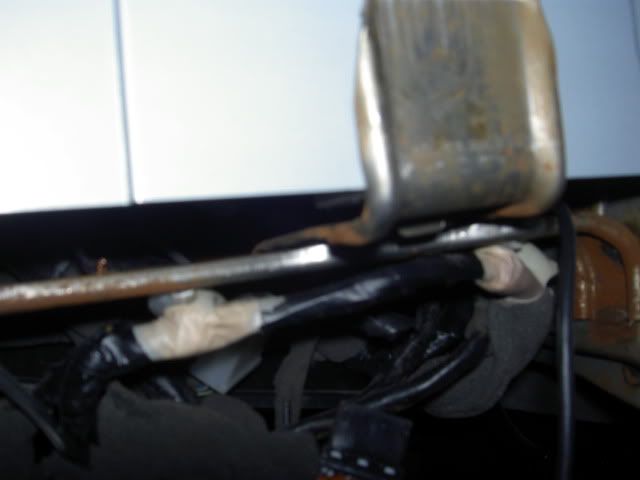
You guessed it, more dead end wires
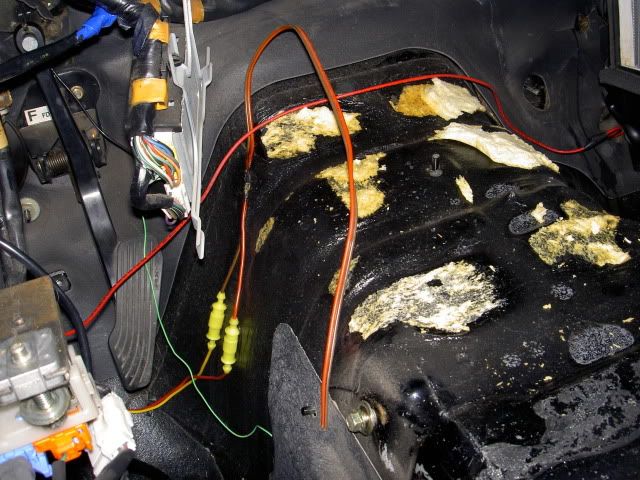
And whats even worse, these wires are "wired" right into the fuse box (well wrapped around a fuse and then wedged into the fuse box, I wouldn't recommend doing that) Powered wires just hanging there and not capped off are NOT good!!!
And she decided to start paying me back for all the work (I guess I work pretty cheap haha)
Now the stuck padding is soaking in Goo Gone, tomorrow night I'll scrub it down and vacuum it. I also noticed a few spots with a bit of rust, I'll spray some rust converter on those before the Quiet Car goes on.
Its not going to be fun getting the carpet back in haha. After looking it over I'm not going to get a new carpet, I think a good steam clean will fix it right up.
Anyone that has managed to get it out in one piece without removing the dash & heating unit must be a magician.
I never would have thought it'd be glued to the floor so well.
Here are the pics:
Half way there:
Fully detached:
The driver side padding stuck the the floor pretty bad:
glued padding:
You guessed it, more dead end wires
And whats even worse, these wires are "wired" right into the fuse box (well wrapped around a fuse and then wedged into the fuse box, I wouldn't recommend doing that) Powered wires just hanging there and not capped off are NOT good!!!
And she decided to start paying me back for all the work (I guess I work pretty cheap haha)
Now the stuck padding is soaking in Goo Gone, tomorrow night I'll scrub it down and vacuum it. I also noticed a few spots with a bit of rust, I'll spray some rust converter on those before the Quiet Car goes on.
Its not going to be fun getting the carpet back in haha. After looking it over I'm not going to get a new carpet, I think a good steam clean will fix it right up.
Thread Starter
Joined: May 2008
Posts: 4,389
Likes: 964
From: Stamford, CT
Some more goodies came today.
My new 5 channel amp:

- 50 watts RMS x 4 + 150 watts RMS x 1 at 4 ohms (60 watts RMS x 4 + 300 watts RMS x 1 at 2 ohms)
- 120 watts RMS x 2 at 4-ohms + 150 watts RMS x 1 at 4 ohms in 3-channel mode
- variable high- and low-pass filters (32-320 Hz, 12 dB/octave)
- variable bass boost (0-6 dB at 50 Hz)
- MOSFET power supply
- preamp-level inputs and outputs
This will receive RCA's from the Pioneer unit for front, rear, and a sub. Then speaker wires will run to all the speakers from the amp. I'll run the wires for the sub under the carpet and plastics, but I don't think I'll add a sub until summer time.
A rear view camera also came today and I'll hook that up to the pioneer unit.
My new 5 channel amp:
- 50 watts RMS x 4 + 150 watts RMS x 1 at 4 ohms (60 watts RMS x 4 + 300 watts RMS x 1 at 2 ohms)
- 120 watts RMS x 2 at 4-ohms + 150 watts RMS x 1 at 4 ohms in 3-channel mode
- variable high- and low-pass filters (32-320 Hz, 12 dB/octave)
- variable bass boost (0-6 dB at 50 Hz)
- MOSFET power supply
- preamp-level inputs and outputs
This will receive RCA's from the Pioneer unit for front, rear, and a sub. Then speaker wires will run to all the speakers from the amp. I'll run the wires for the sub under the carpet and plastics, but I don't think I'll add a sub until summer time.
A rear view camera also came today and I'll hook that up to the pioneer unit.
Nice work. I like that you are taking your time and doing it right. The end result will be well worth it. On a side note, I didn't realize how tiny the PLX AIT module was. Was worried about were to mount it but I can put it anyway around the other sensor modules given it's size.
Thread Starter
Joined: May 2008
Posts: 4,389
Likes: 964
From: Stamford, CT
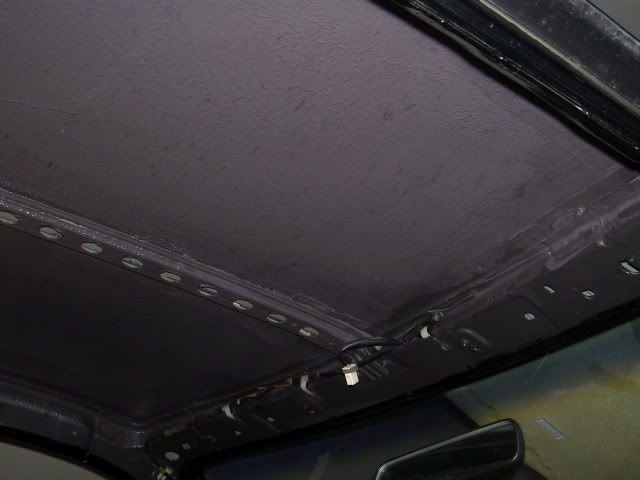
I got the first coat of Quiet Car on last night. I did the roof, the bins, forward section of the wheel wells, and everything forward of the bins. Then it was getting close to UFC time so I stopped, leaving 1 door, and the rear hatch area left to do.
I really liked how the Quiet Car went on. It’s nice and thick, doesn’t drip, and spreads out nice and easy. I just used a cheap $1 brush from home depot, and then a roller for the roof.
It went on really easy, but just as with any other paint/coating project, the key to success is all in the prep work.
First, I cleaned up all of the stuck padding remaining from the carpet, vacuumed, and then rubbed it down with mineral spirits. I noticed a few spots of surface rust, mainly where the cage was welded to the floor, and also a little bit by the front of the floor. I sanded and then sprayed it with Rustomleum brand Rust Converter.
Once I had it all clean, then I went to work with the Quiet Car.
I put it on just like you would paint a house. Cut in all the edges, then laid it on as heavy as I could.
Here are the Pics:
All Clean:
Cutting in the roof:
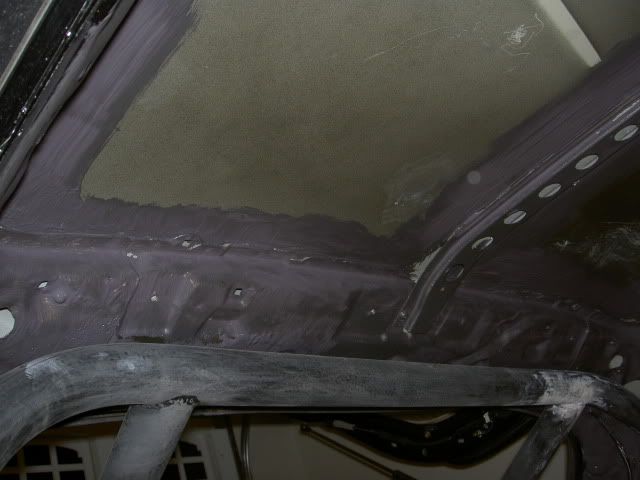
Used the Roller: And now that its dry, I tapped on the top of the roof, and doesn't have the tinny ring to it anymore.
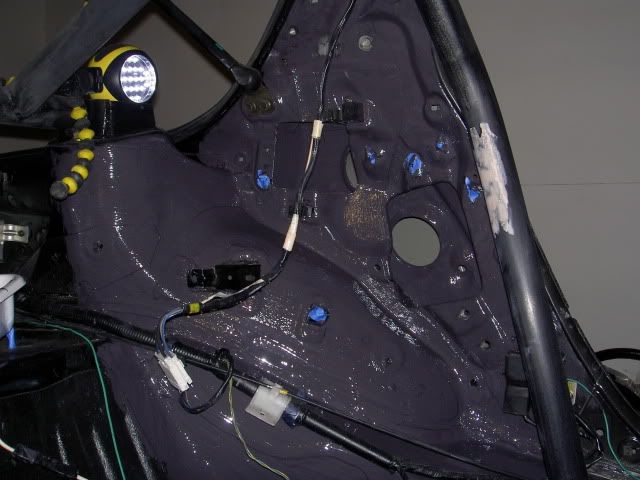
Floor, Bins, Wheel Wells:
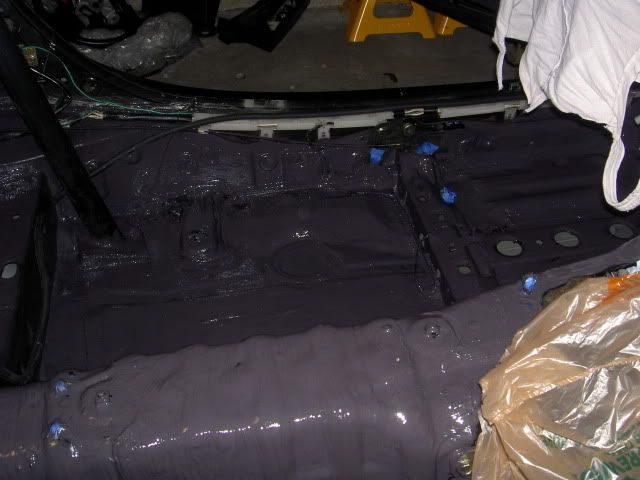
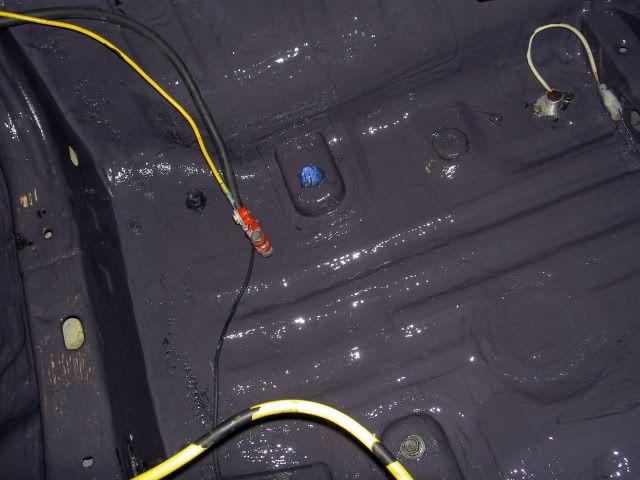

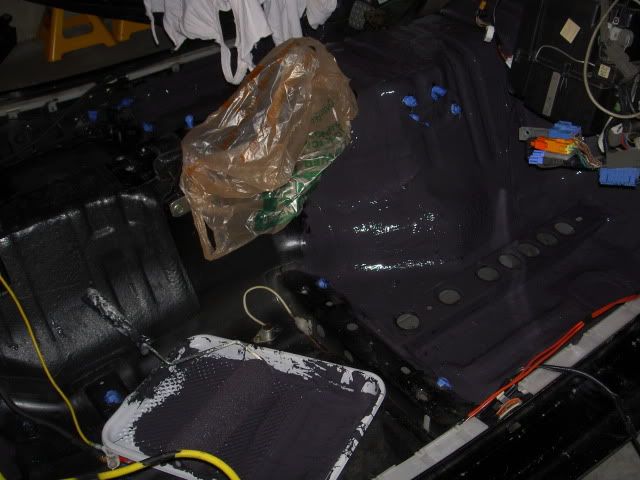
In these two pics, you can see how I pained inside of every open hole, You can easily get to a lot of the metal behind the seat belt and speaker cut outs with a small brush, I think this will help quiet the car down a ton.
I really liked how the Quiet Car went on. It’s nice and thick, doesn’t drip, and spreads out nice and easy. I just used a cheap $1 brush from home depot, and then a roller for the roof.
It went on really easy, but just as with any other paint/coating project, the key to success is all in the prep work.
First, I cleaned up all of the stuck padding remaining from the carpet, vacuumed, and then rubbed it down with mineral spirits. I noticed a few spots of surface rust, mainly where the cage was welded to the floor, and also a little bit by the front of the floor. I sanded and then sprayed it with Rustomleum brand Rust Converter.
Once I had it all clean, then I went to work with the Quiet Car.
I put it on just like you would paint a house. Cut in all the edges, then laid it on as heavy as I could.
Here are the Pics:
All Clean:
Cutting in the roof:
Used the Roller: And now that its dry, I tapped on the top of the roof, and doesn't have the tinny ring to it anymore.
Floor, Bins, Wheel Wells:
In these two pics, you can see how I pained inside of every open hole, You can easily get to a lot of the metal behind the seat belt and speaker cut outs with a small brush, I think this will help quiet the car down a ton.
Last edited by TwinCharged RX7; Feb 21, 2010 at 10:29 AM.
Thread Starter
Joined: May 2008
Posts: 4,389
Likes: 964
From: Stamford, CT
Here are the supplies:
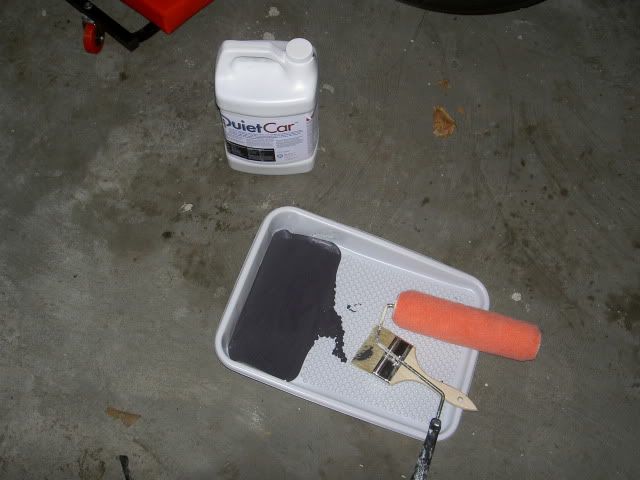
Hopefully this helps give you a feel for how thick the stuff actually is:
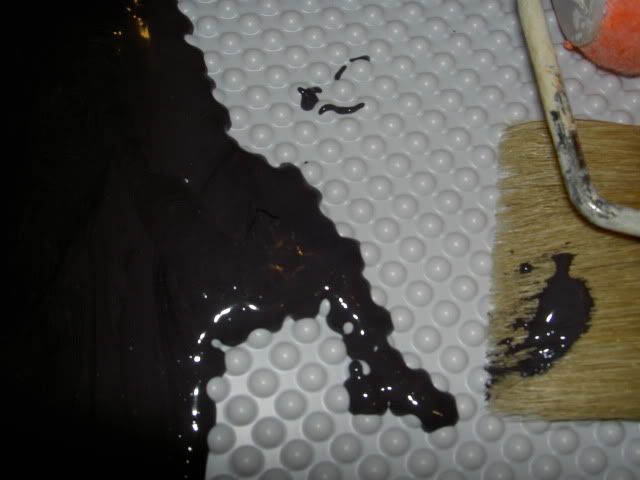
I think 3 gallons is going to be the perfect amount for the FD. 2 more coats to go, I'm going to wait 2 days in between coats because its a little cold here, and especially on the floor where i have to walk in order to do the roof and rest of the interior, i don't want my shoes tearing it up.
Then I'll remove the hood and do 3 coats on the underside of that.
Hopefully this helps give you a feel for how thick the stuff actually is:
I think 3 gallons is going to be the perfect amount for the FD. 2 more coats to go, I'm going to wait 2 days in between coats because its a little cold here, and especially on the floor where i have to walk in order to do the roof and rest of the interior, i don't want my shoes tearing it up.
Then I'll remove the hood and do 3 coats on the underside of that.
Nice job! Remember, it takes about one week after the last coat for everything to bond up so you'll then notice the noise reduction. Do you have a decibel tester to see how much noise you've eliminated? If not, I can send you mine. It's always good to show the actual results and I would be curious to see how much more noise you've eliminated than me as I did not do the floors or roof of my car.
Nice build, coming along nicely! I put quietcar on my black car, but it's not on the road yet so I can't really give any results.
As for your dry ice question. The dry ice will make the tar hard and not as tacky. After you let the dry ice sit on the sound deadening for 10 minutes or so it comes off very easily; however for vertical surfaces dry ice is useless lol. I guess everyone has their own methods.
As for your dry ice question. The dry ice will make the tar hard and not as tacky. After you let the dry ice sit on the sound deadening for 10 minutes or so it comes off very easily; however for vertical surfaces dry ice is useless lol. I guess everyone has their own methods.
Thread Starter
Joined: May 2008
Posts: 4,389
Likes: 964
From: Stamford, CT
I just finished the rear and the doors, coat 1 is complete
I really wish I had taken a decibel reading before I had taken it apart, I had planned on it, then just started working on it and forgot to do it.
I'll definitely get a reading when its done, and maybe I can determine an average decibel reading from a few other FD's with a single turbo, 3" exhaust, and stock interior fora comparison.
Nice job! Remember, it takes about one week after the last coat for everything to bond up so you'll then notice the noise reduction. Do you have a decibel tester to see how much noise you've eliminated? If not, I can send you mine. It's always good to show the actual results and I would be curious to see how much more noise you've eliminated than me as I did not do the floors or roof of my car.
I'll definitely get a reading when its done, and maybe I can determine an average decibel reading from a few other FD's with a single turbo, 3" exhaust, and stock interior fora comparison.
Thread Starter
Joined: May 2008
Posts: 4,389
Likes: 964
From: Stamford, CT
Nice build, coming along nicely! I put quietcar on my black car, but it's not on the road yet so I can't really give any results.
As for your dry ice question. The dry ice will make the tar hard and not as tacky. After you let the dry ice sit on the sound deadening for 10 minutes or so it comes off very easily; however for vertical surfaces dry ice is useless lol. I guess everyone has their own methods.
As for your dry ice question. The dry ice will make the tar hard and not as tacky. After you let the dry ice sit on the sound deadening for 10 minutes or so it comes off very easily; however for vertical surfaces dry ice is useless lol. I guess everyone has their own methods.

Thread Starter
Joined: May 2008
Posts: 4,389
Likes: 964
From: Stamford, CT
Yes that is true. But that is just one of its benefits. Bonding to the metal reduces the vibrations and sound frequencies that travel through the metal. But the Quiet Car material itself also has sound dampening properties.
So I think I may have lost a little by not removing the tar, but the combination of the tar and quiet car should still be doing quite a bit of work (plus that's a pretty small portion of the car anyways, and will be covered by a padded carpet).
I think having the quiet car in the doors and roof is going to make the biggest difference.
For example, you can't reach all of the insides of the doors so I would estimate I got maybe 75% of the surface coated but the noise reduction from the doors was fantastic.
I also concur the biggest bang for the buck will be the doors and I am curious to see if you are correct about the roof. If so, I might just prep mine and coat the surface.
I think I'll take my decibel reader to DGRRX and see if we can get a single turbo guy to take readings to compare it against your car.
How so? I was able to get nearly all of the inside of my door covered, more like 95 percent. What were you not able to reach?
Thread Starter
Joined: May 2008
Posts: 4,389
Likes: 964
From: Stamford, CT
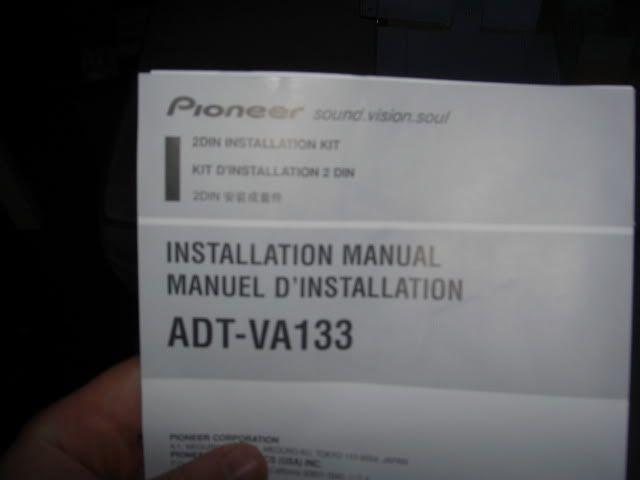
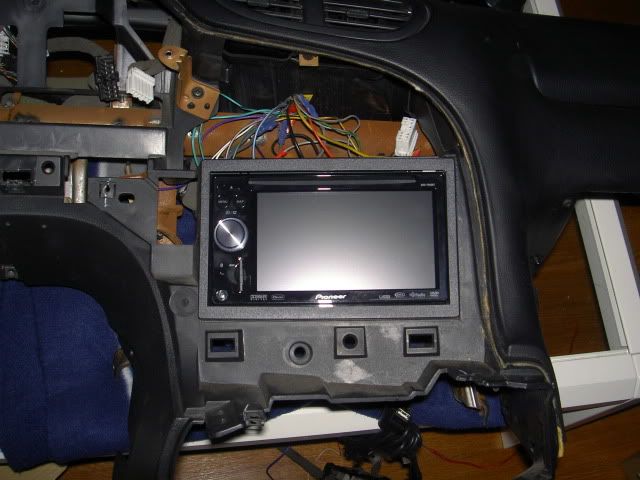
Pioneer Double Din Mock-Up
So I'm letting the first coat of Quiet Car sit another day. I'll put the second coat on tomorrow night.
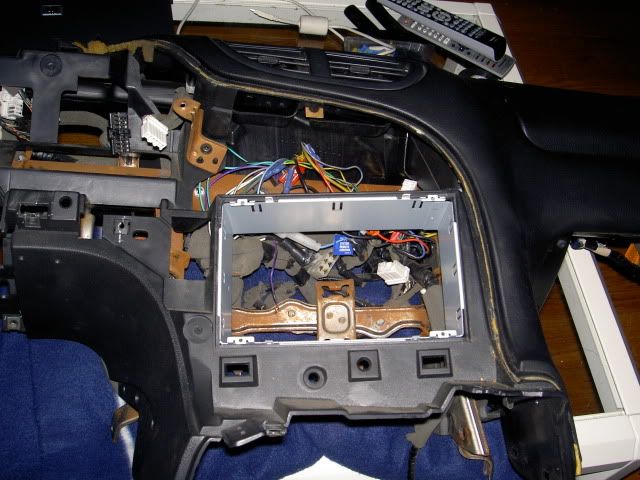
Tonight I decided to mock up the head unit and make sure it fits nicely before I go wiring it in. Here are the pics:
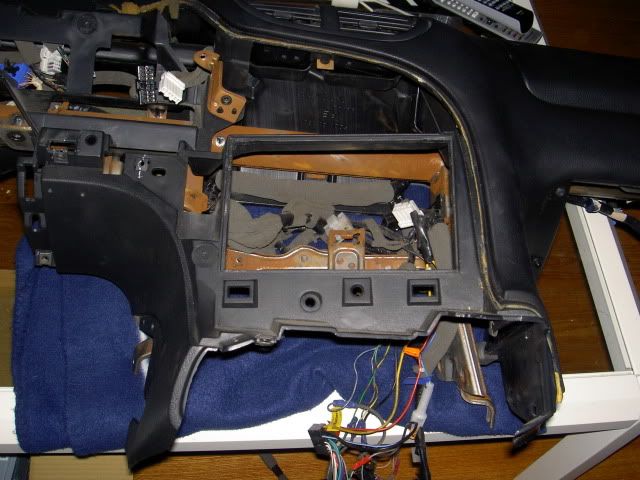
First attempt: Uh Oh!!! big gaps, not good...
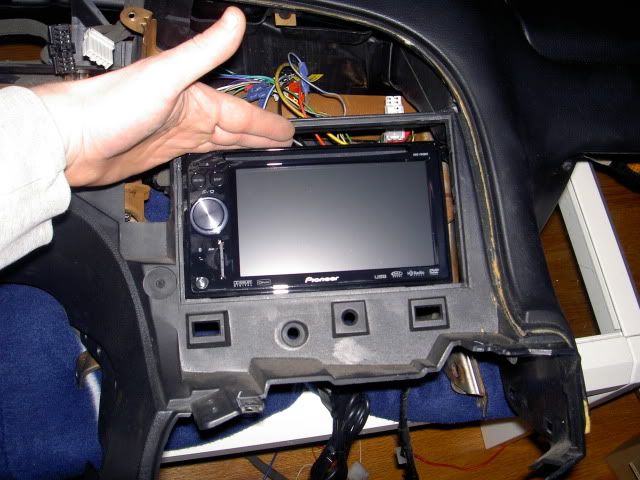
Problem: Pioneer no longer supplies trim pieces or mounting hardware (other than screws) in some of their kits. Shame on them (and any other companies doing this) now you are forced to buy an installation kit. What happened to the good old days when the $700 (not that I actually paid that much haha) radio came with everything you need?
Solution: $35 dollars later
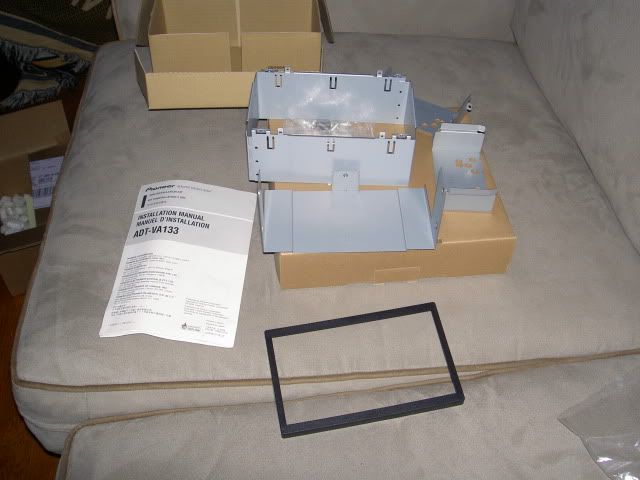
First install the sleeve:
Will eventually fold the tabs over to lock it in place
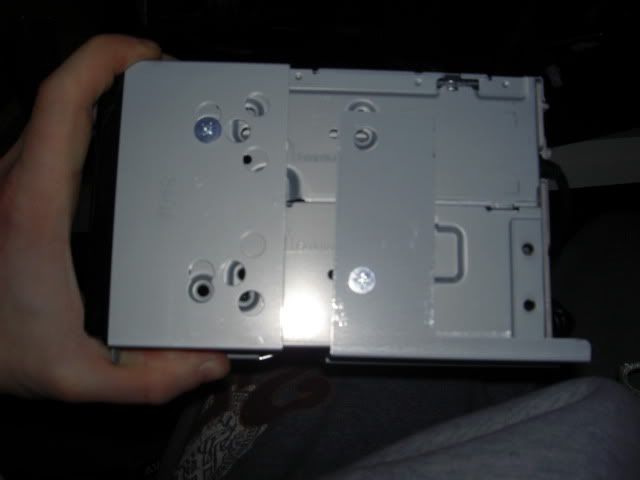
Attach hardware to head unit (back piece, two side pieces)
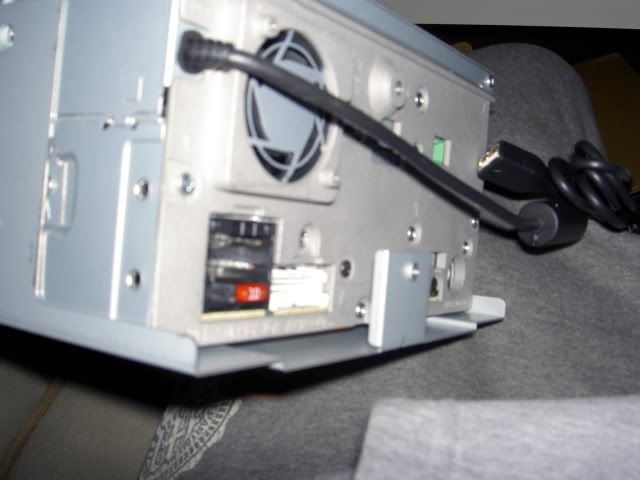
The rear piece has a hole in it, and you can screw it into the stock metal bracket in the dash. The hole is in the wrong place, so I'll need to drill a new hole a bit lower on the hardware piece, and also a hole through bracket that is in the dash. (the problem is that the hole in the hardware lines up with a spot on the dash bracket that is open already, so nothing to screw into.
Slide it into the sleeve (thats what she said haha) You'll see that the side pieces of hardware have tabs that wrap around to the front of the unit on the top and bottom. These line up perfectly with tabs located on the sleeve. When the unit is slid all the way in, you put a screw through the tabs and secure them together, this makes it really solid (especially if you have the back of the unit screwed in as well)
Clearance in the back (Perfect)
Put the trim piece on (it clips to part of the sleeve that sticks out)
Tonight I decided to mock up the head unit and make sure it fits nicely before I go wiring it in. Here are the pics:
First attempt: Uh Oh!!! big gaps, not good...
Problem: Pioneer no longer supplies trim pieces or mounting hardware (other than screws) in some of their kits. Shame on them (and any other companies doing this) now you are forced to buy an installation kit. What happened to the good old days when the $700 (not that I actually paid that much haha) radio came with everything you need?
Solution: $35 dollars later
First install the sleeve:
Will eventually fold the tabs over to lock it in place
Attach hardware to head unit (back piece, two side pieces)
The rear piece has a hole in it, and you can screw it into the stock metal bracket in the dash. The hole is in the wrong place, so I'll need to drill a new hole a bit lower on the hardware piece, and also a hole through bracket that is in the dash. (the problem is that the hole in the hardware lines up with a spot on the dash bracket that is open already, so nothing to screw into.
Slide it into the sleeve (thats what she said haha) You'll see that the side pieces of hardware have tabs that wrap around to the front of the unit on the top and bottom. These line up perfectly with tabs located on the sleeve. When the unit is slid all the way in, you put a screw through the tabs and secure them together, this makes it really solid (especially if you have the back of the unit screwed in as well)
Clearance in the back (Perfect)
Put the trim piece on (it clips to part of the sleeve that sticks out)
Last edited by TwinCharged RX7; Feb 22, 2010 at 11:12 PM.
Thread Starter
Joined: May 2008
Posts: 4,389
Likes: 964
From: Stamford, CT
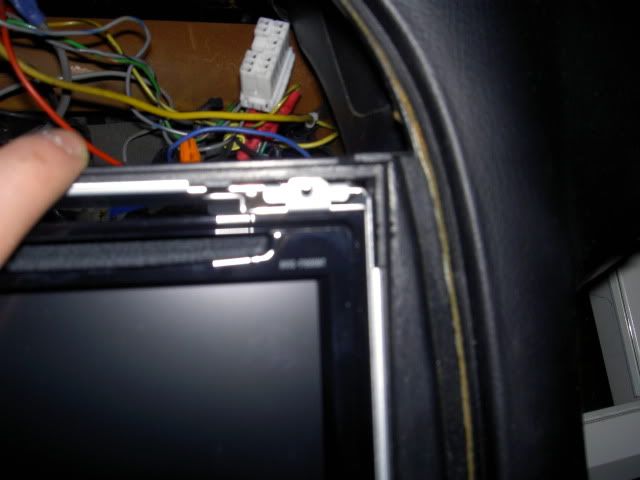
And now a finished shot with the rest of the surround:
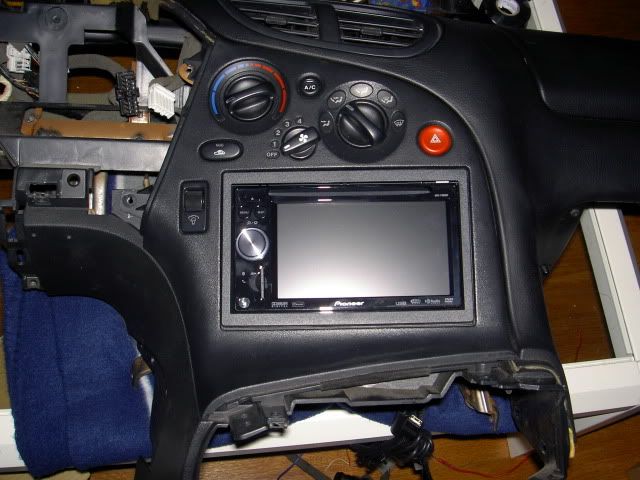
I love it.
Oh, and all of the wiring that you see in there is the old wiring, I found wire nuts I have now removed that mess. It looks like an aftermarket radio was installed and spliced into the original harness, then a newer radio was installed, and spliced into the wires to the second radio, so I found plugs for two aftermarket radios and the stock radio, still all wired together haha. And since i'll be using a 5 channel amp, i will have no speaker wires coming out of the head unit, just RCA's, this really cleans it up a lot.
I love it.
Oh, and all of the wiring that you see in there is the old wiring, I found wire nuts
I have now removed that mess. It looks like an aftermarket radio was installed and spliced into the original harness, then a newer radio was installed, and spliced into the wires to the second radio, so I found plugs for two aftermarket radios and the stock radio, still all wired together haha. And since i'll be using a 5 channel amp, i will have no speaker wires coming out of the head unit, just RCA's, this really cleans it up a lot.
Last edited by TwinCharged RX7; Feb 22, 2010 at 11:12 PM.
Seriously amazing stuff your doing man. Love the in dash.
When you do all this stuff and go through it all yourself it's really awesome because in the end you know exactly where everything is and that the job is done to your standards. It really makes you feel more comfortable with your car
When you do all this stuff and go through it all yourself it's really awesome because in the end you know exactly where everything is and that the job is done to your standards. It really makes you feel more comfortable with your car
https://www.rx7club.com/showthread.p...ght=quiet+coat
The central point though was not this, it was you don't have to cover all of the surface to get the desired sound reduction effect. Covering just a portion of the section will eliminate a lot of the vibration and with it, the sound.
Straight from the Quiet Car experts

Thread Starter
Joined: May 2008
Posts: 4,389
Likes: 964
From: Stamford, CT
3rd coat is complete. Actually applying the material took about 15 hours of labor, I could probably cut it down a little now as my 3rd coat only took me 3.5 hours. The first coat takes a while because you are covering bare metal.
I used about 2 3/4 gallons to do the entire interior, including about 95% of the insides of the doors.
I should have ordered 4 gallons though, i don't have enough left to do all 3 coats underneath the hood.
The carpet goes back in this weekend
I used about 2 3/4 gallons to do the entire interior, including about 95% of the insides of the doors.
I should have ordered 4 gallons though, i don't have enough left to do all 3 coats underneath the hood.
The carpet goes back in this weekend