
Installation Instructions for Defined Auto V-mounts

Installation Instructions for Defined Auto V-mounts
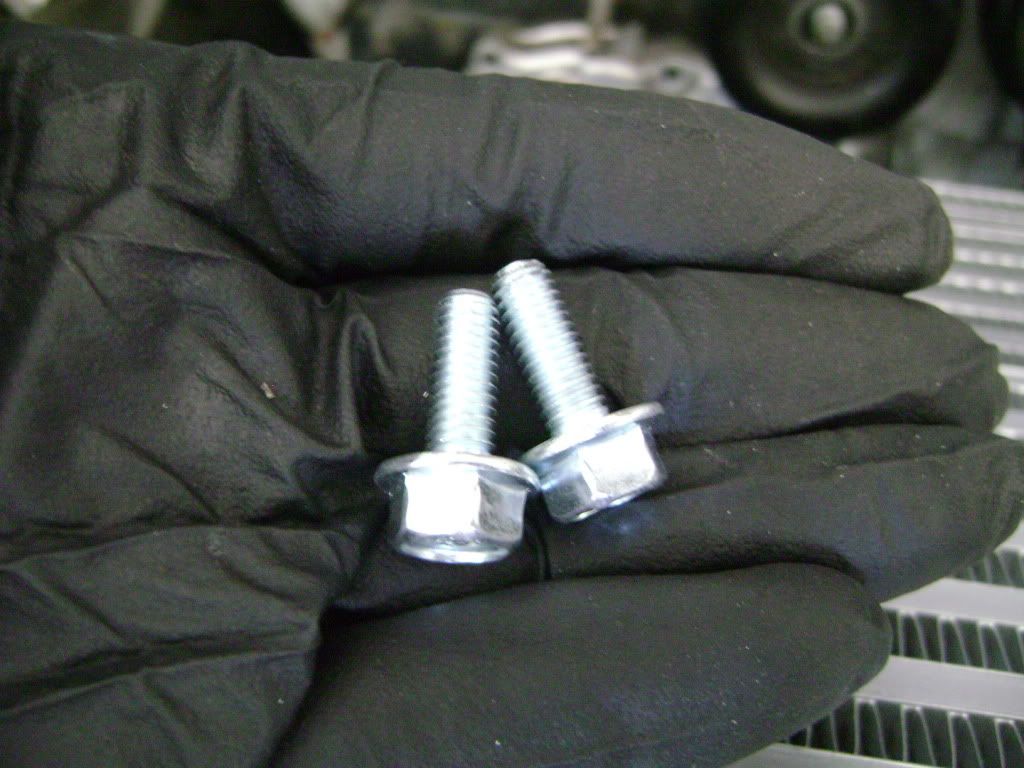
First step locate the (6) 1/4-20 studs.
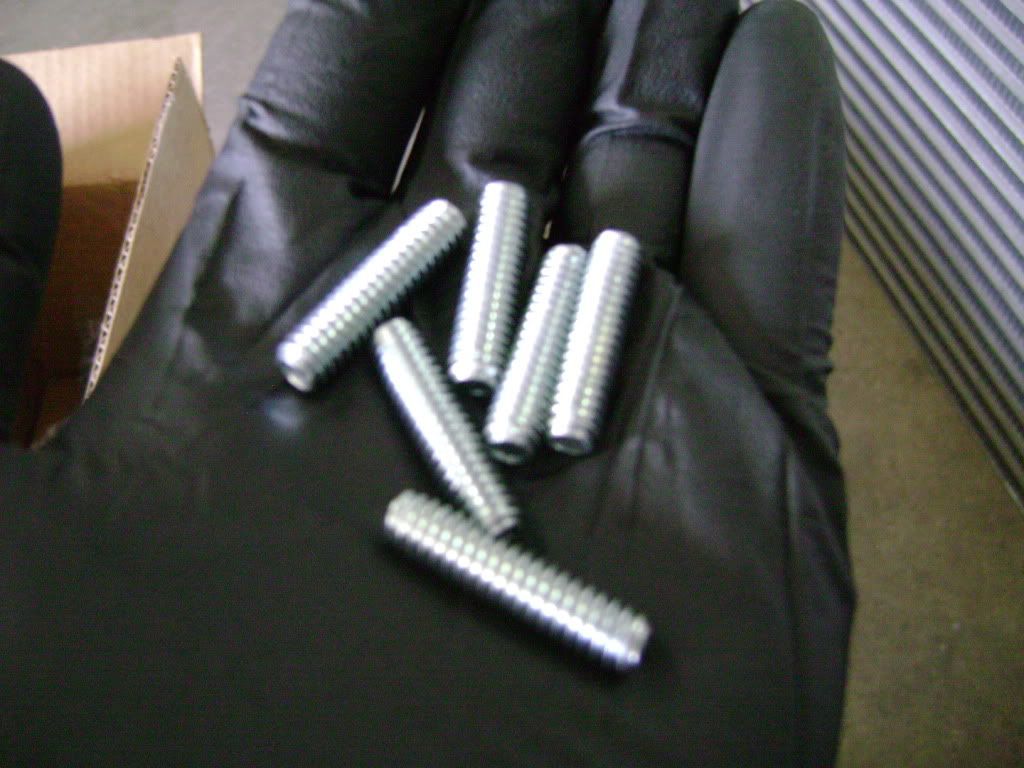
Thread four of these into the intercooler, and two into the radiator bungs. The use of Loctite is optional.
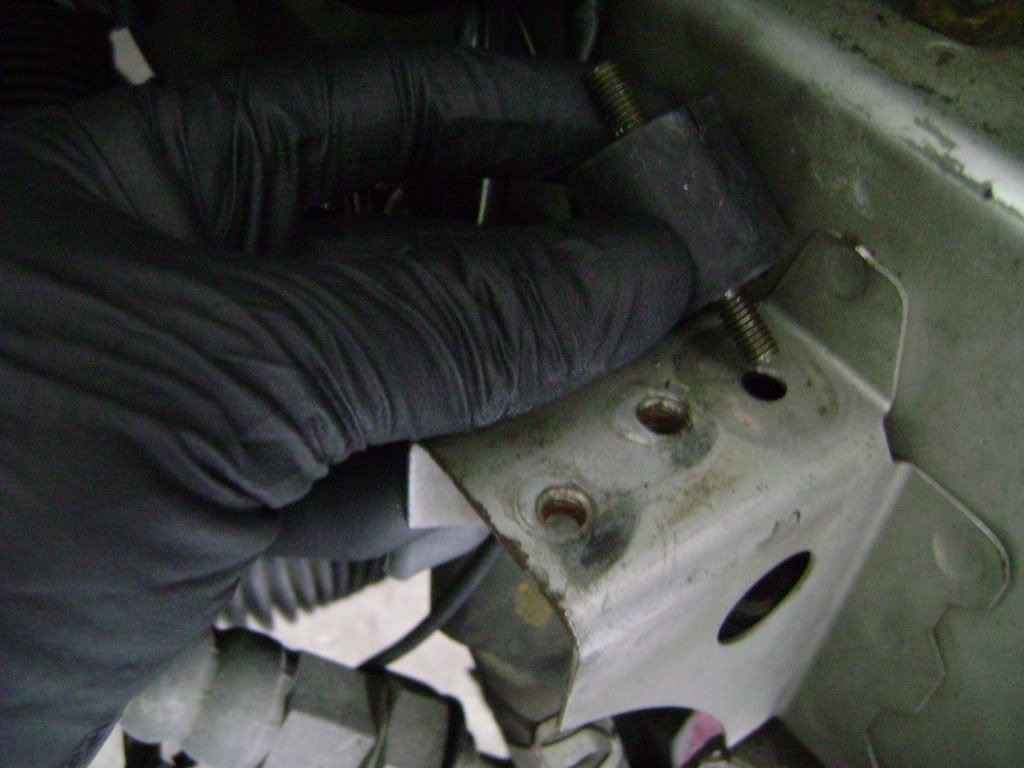
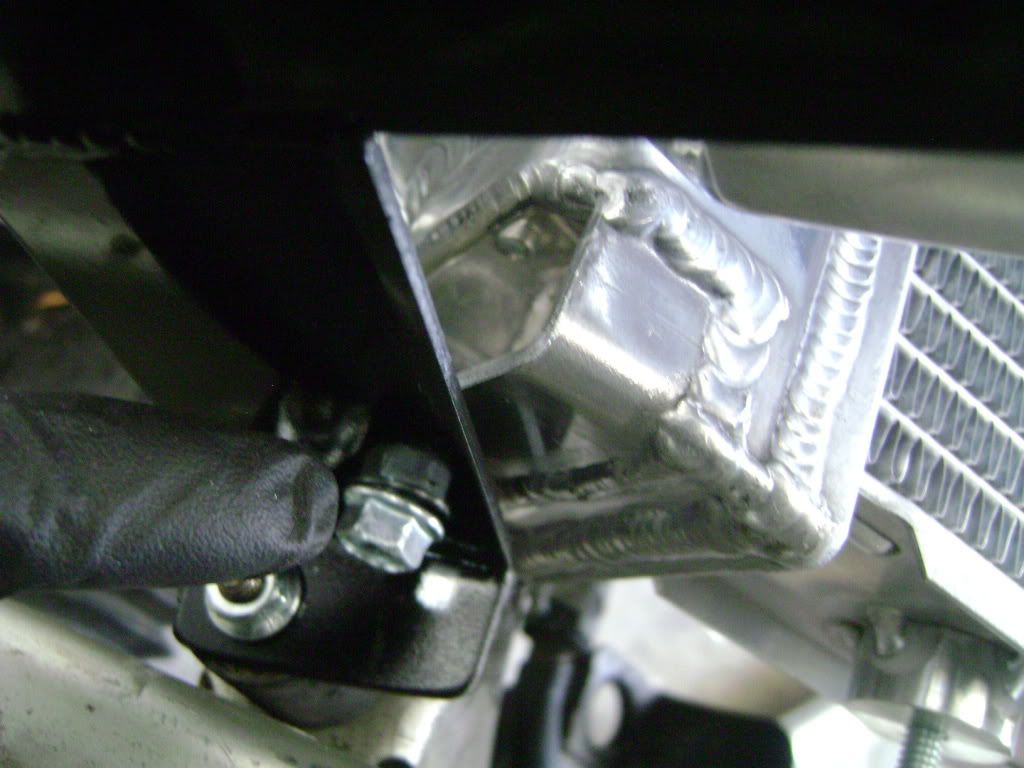
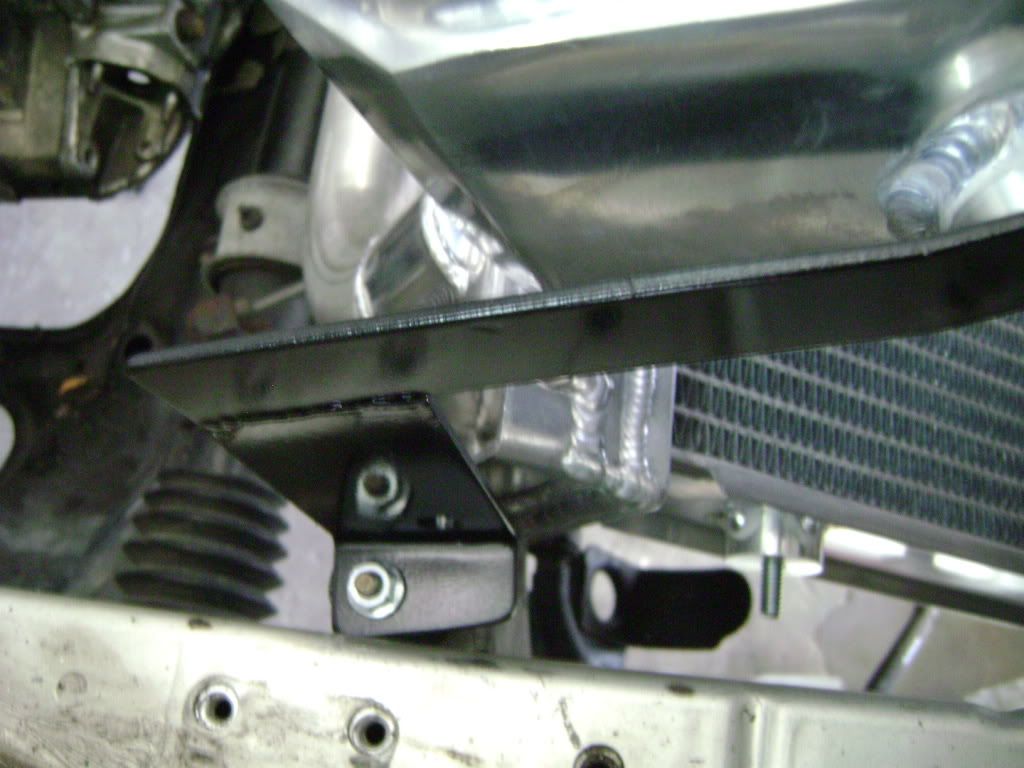
Next, look at both steel radiator mounts. One will have large holes which is the passenger side, the other will have small holes which is the driver side. Locate the two M12 bolts, and two M6 bolts. Bolt both onto the frame.
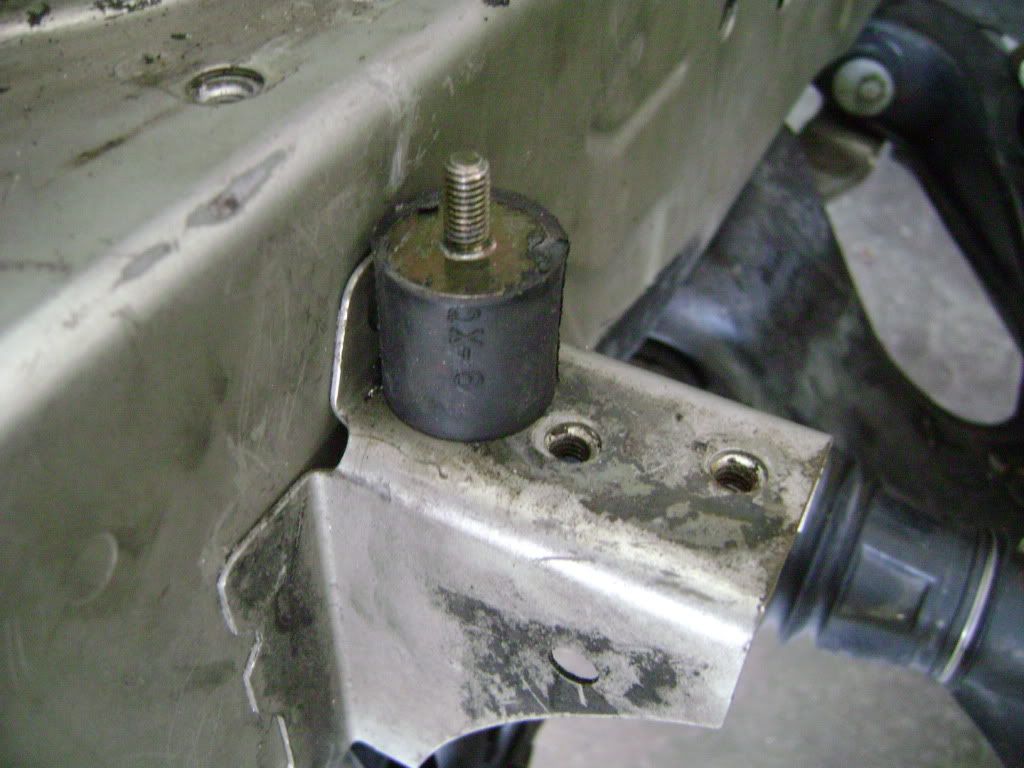
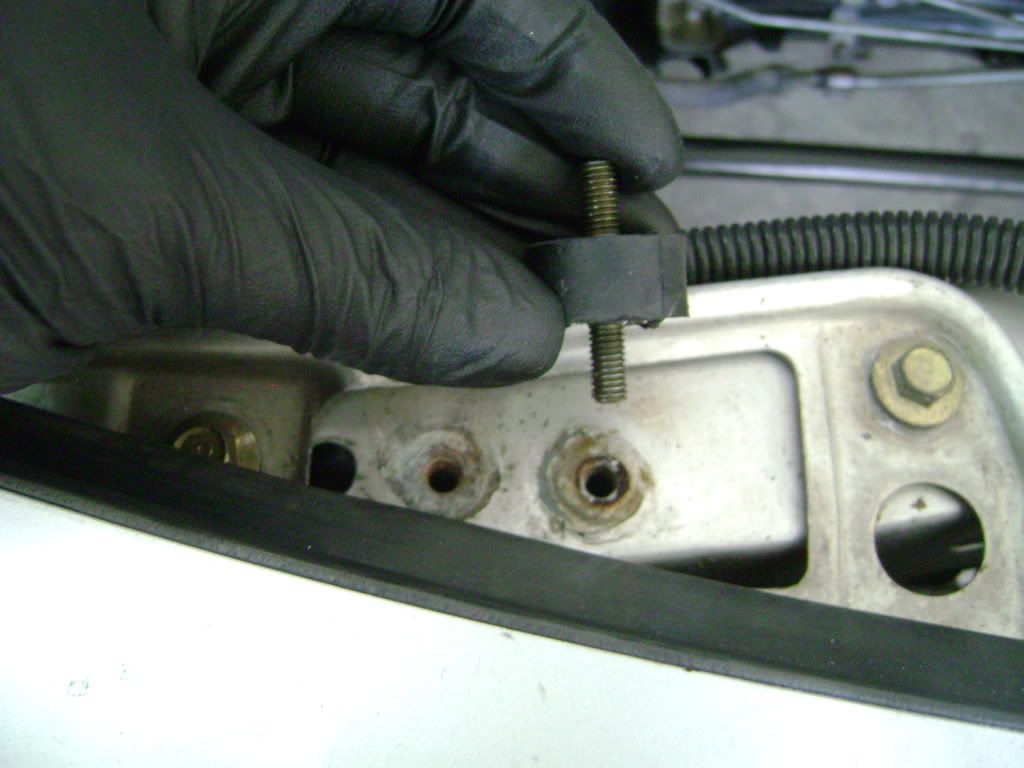
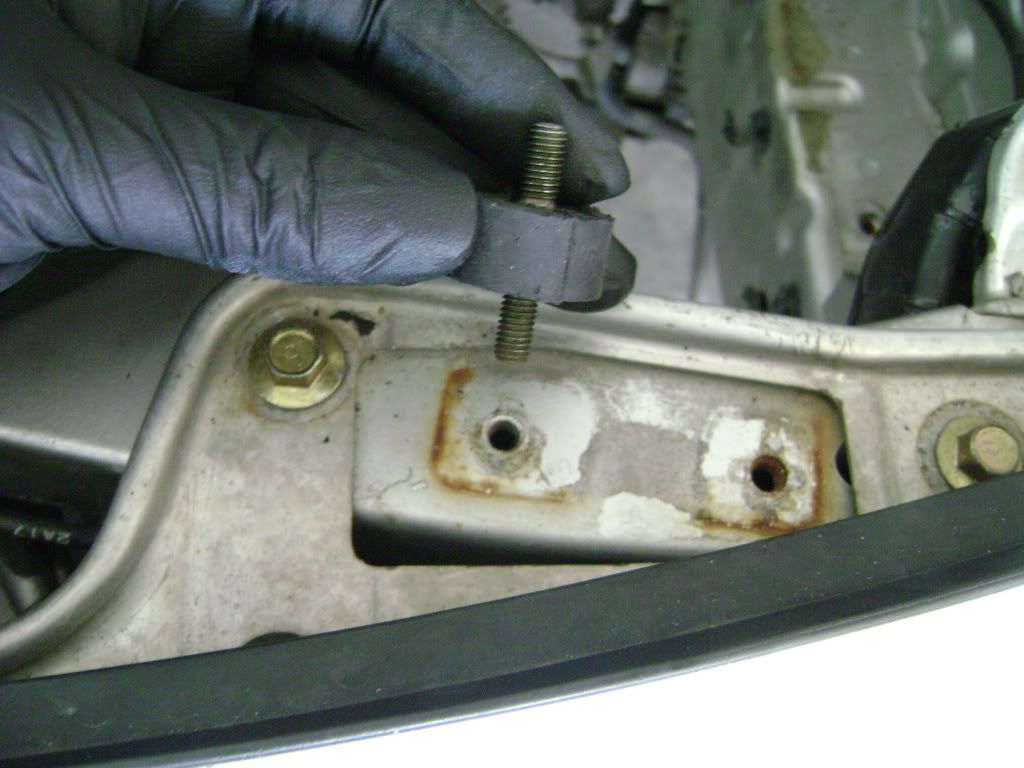
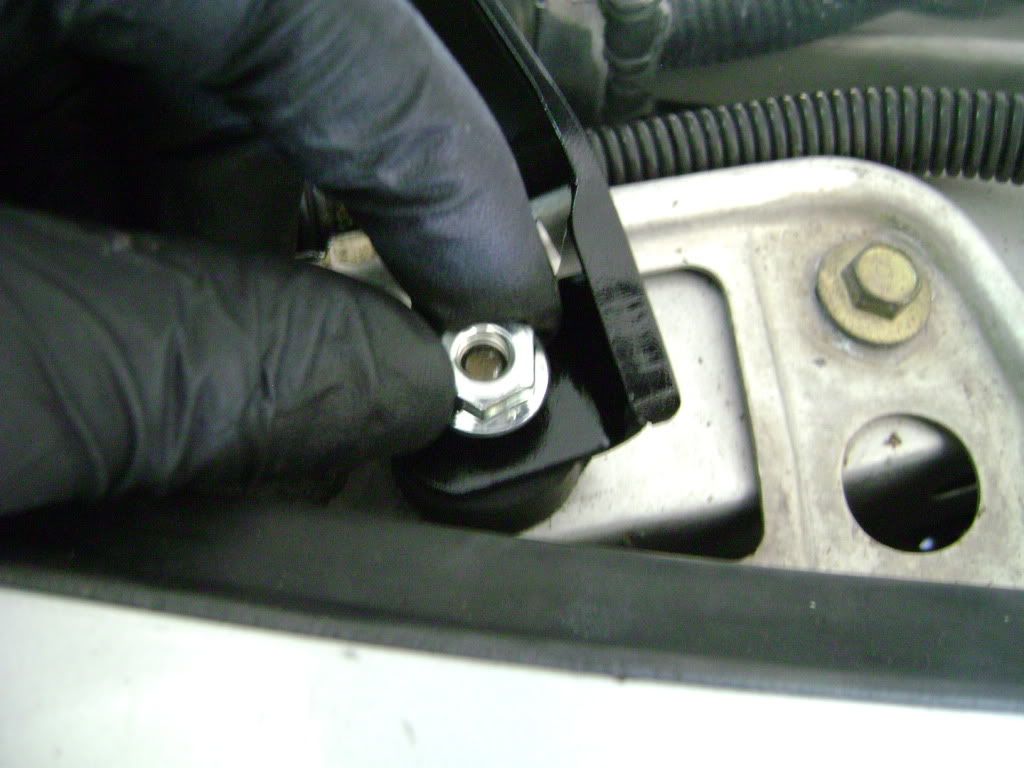
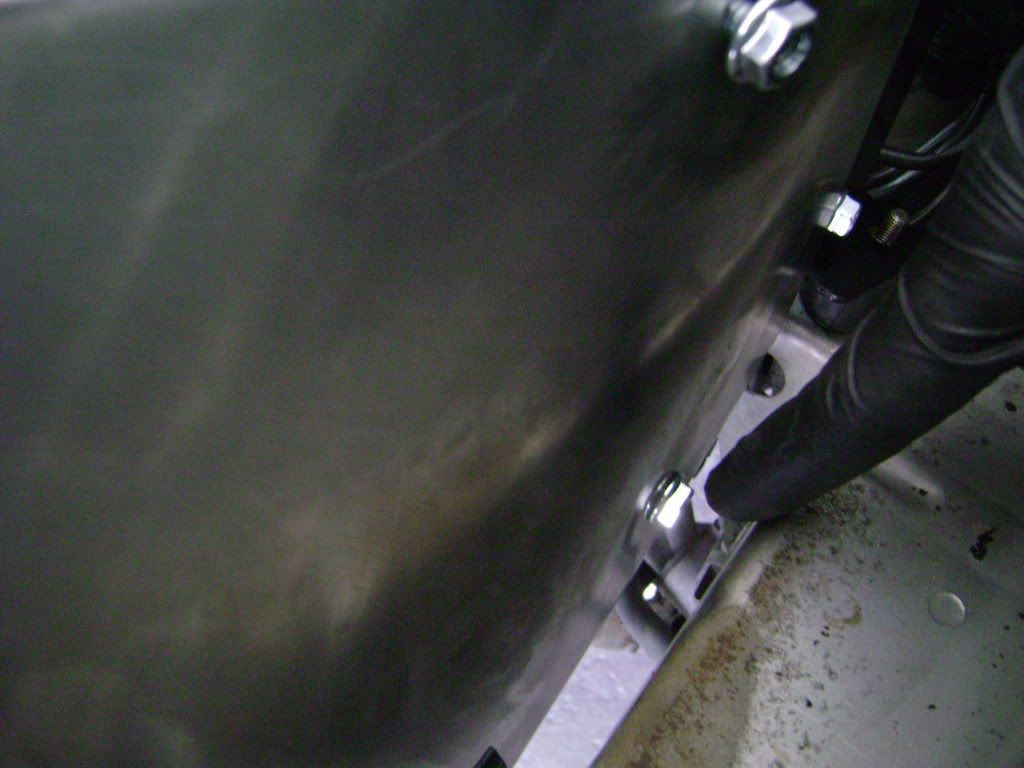
Then locate the (2) 1" rubber isolators. Place them in the brace support tab, in the hole on the far outside. It will not be threaded. Use (2) M6 nuts to secure them underneath.
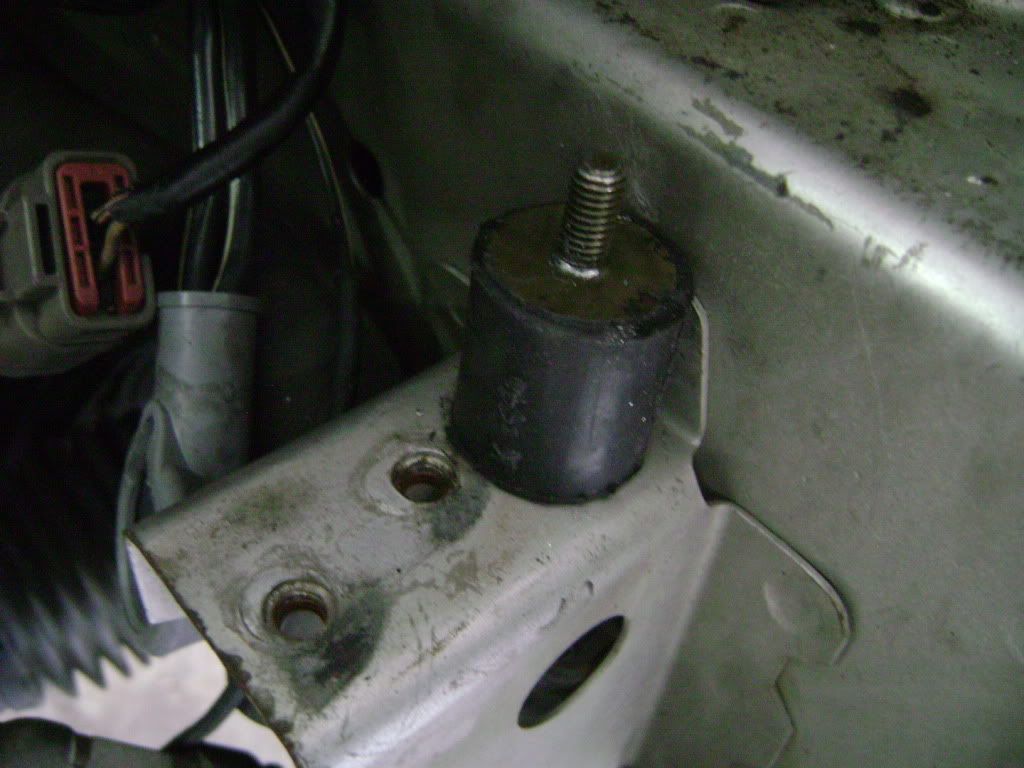
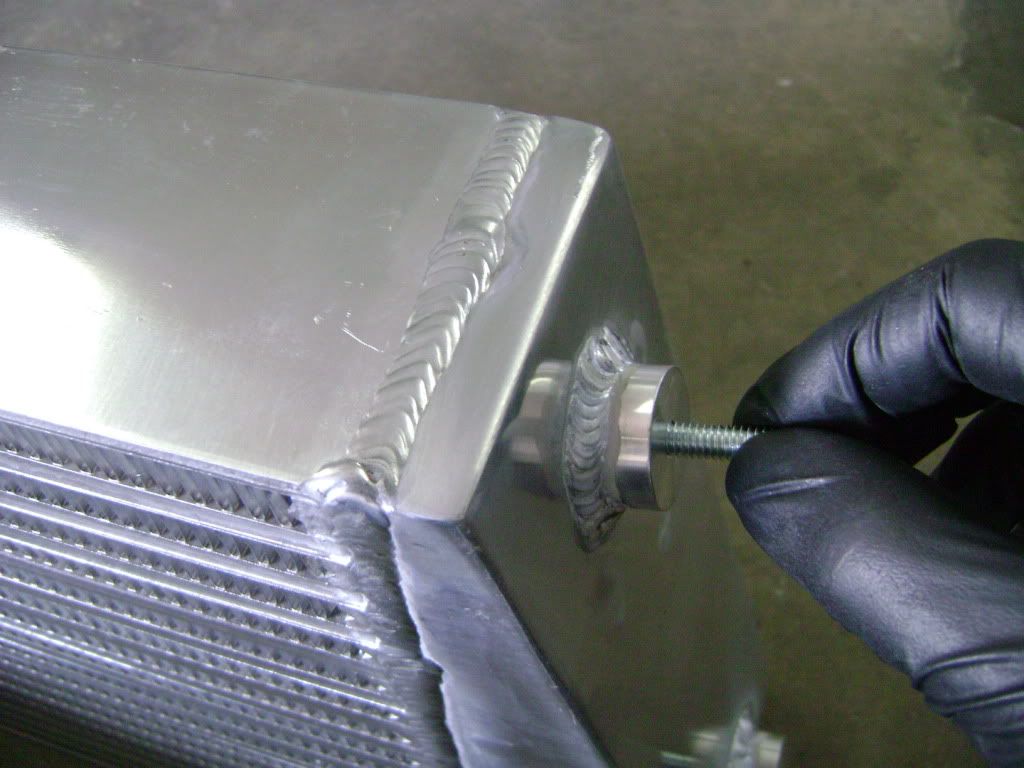
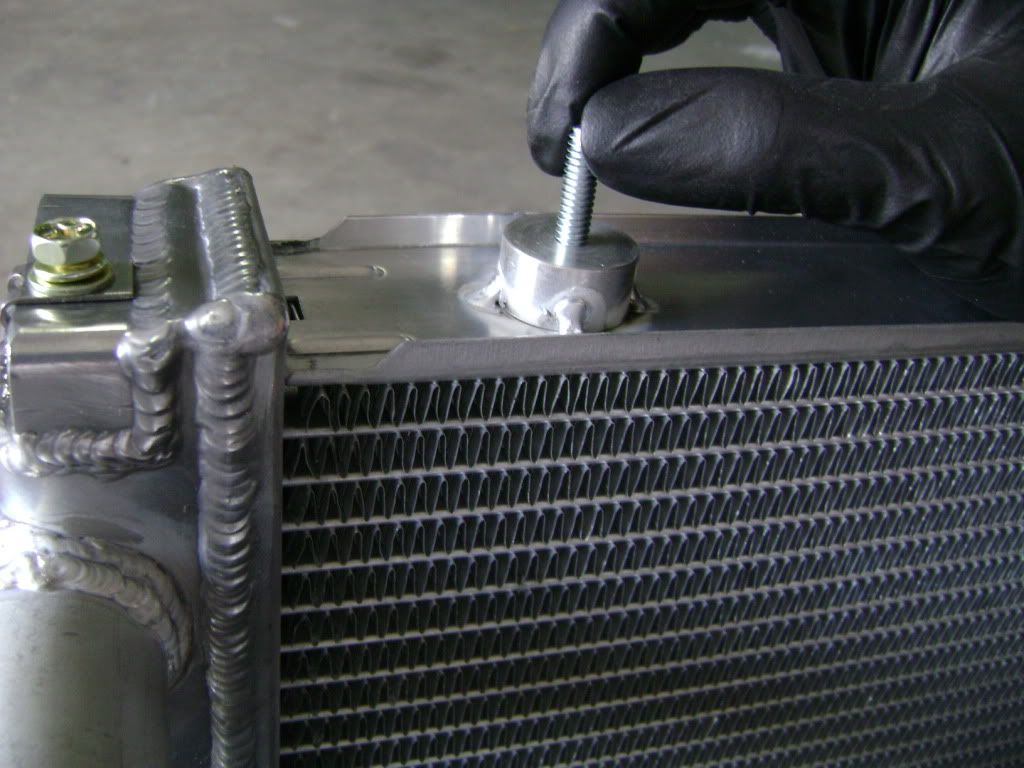
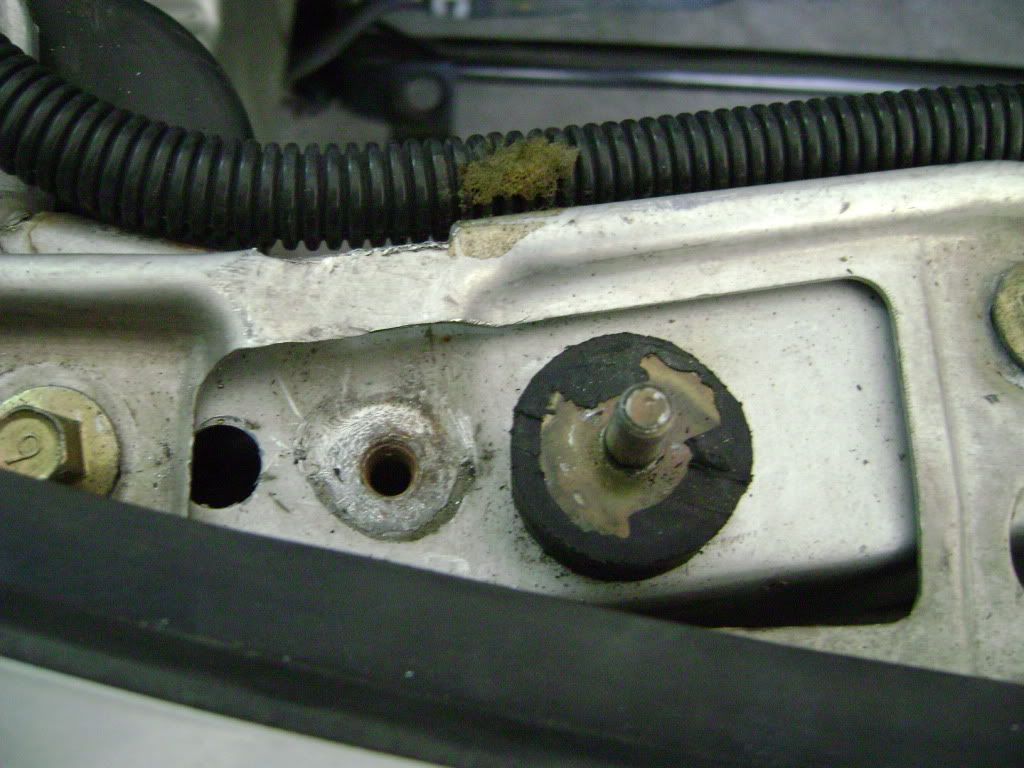
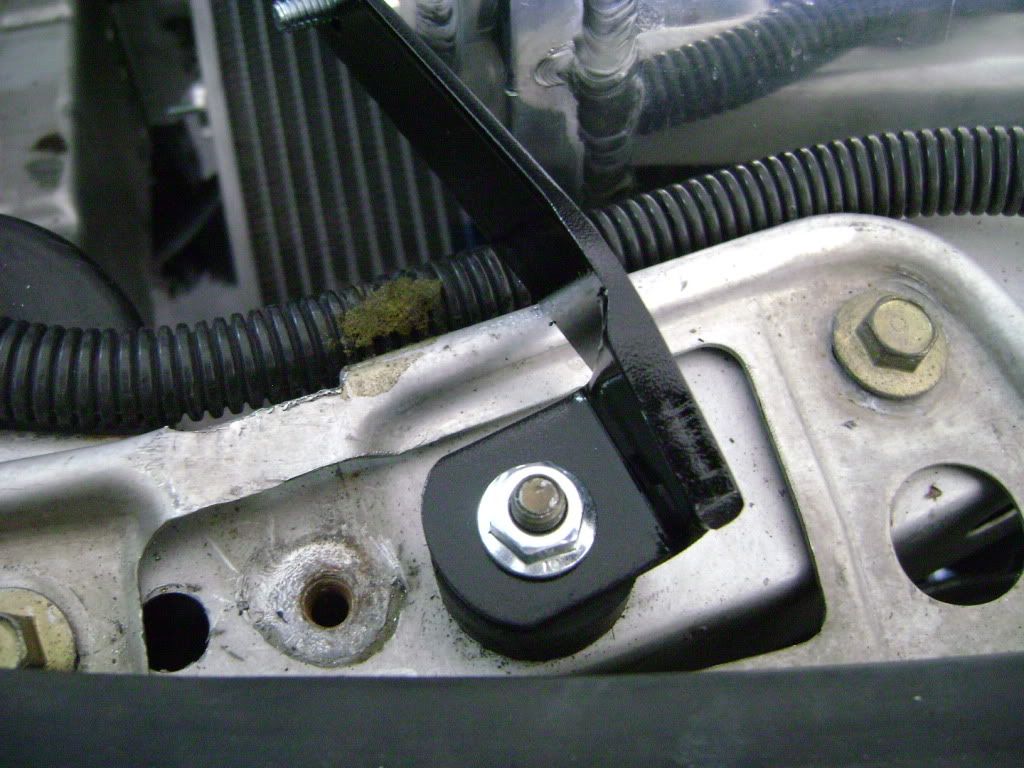
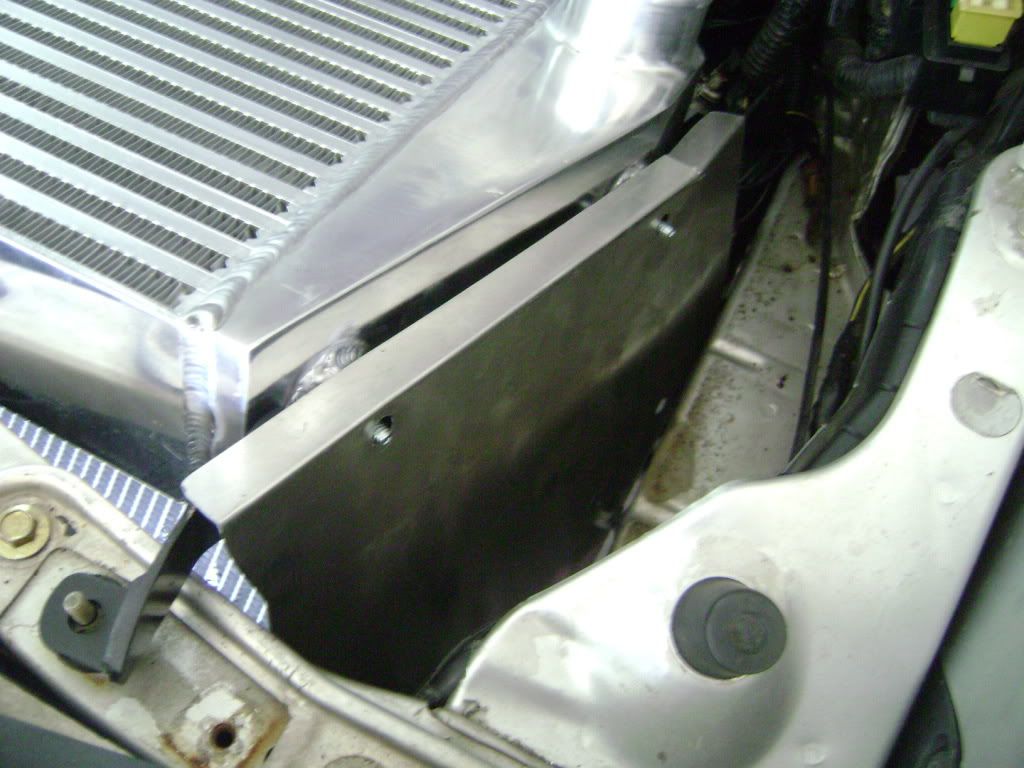
Now locate the (2) 1/2" rubber isolators. Thread them into the core support. Use photo as reference of locations
Thread four of these into the intercooler, and two into the radiator bungs. The use of Loctite is optional.
Next, look at both steel radiator mounts. One will have large holes which is the passenger side, the other will have small holes which is the driver side. Locate the two M12 bolts, and two M6 bolts. Bolt both onto the frame.
Then locate the (2) 1" rubber isolators. Place them in the brace support tab, in the hole on the far outside. It will not be threaded. Use (2) M6 nuts to secure them underneath.
Now locate the (2) 1/2" rubber isolators. Thread them into the core support. Use photo as reference of locations
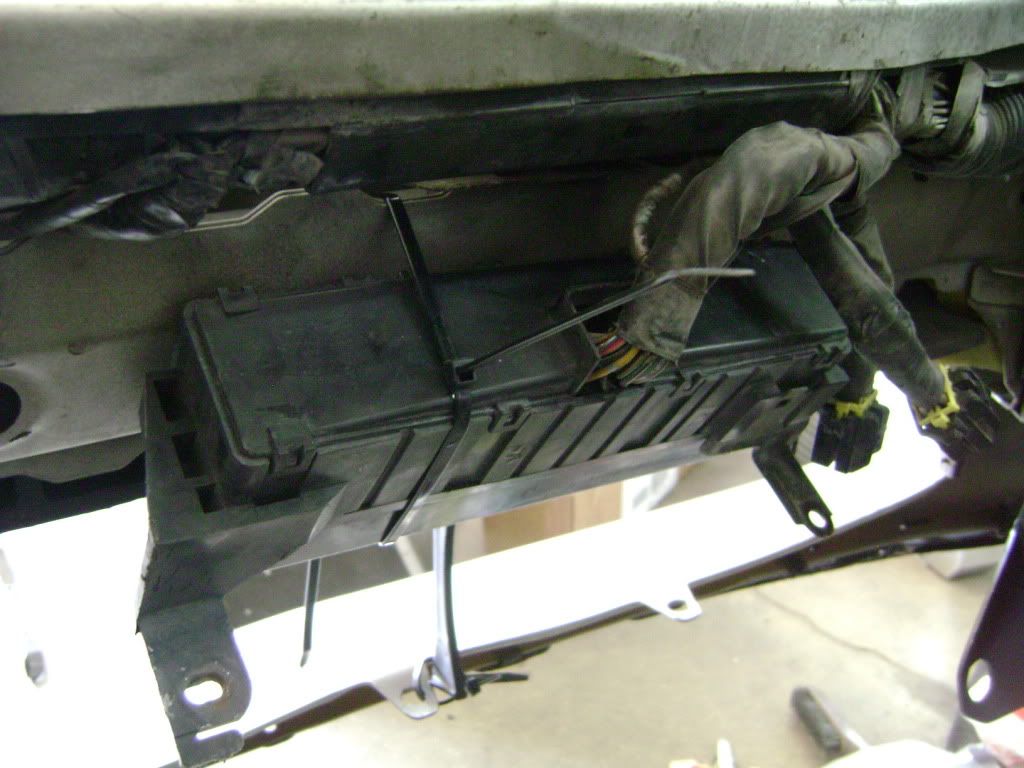
The relay box can be zip-tied up to the front frame, or relocated with wiring extensions
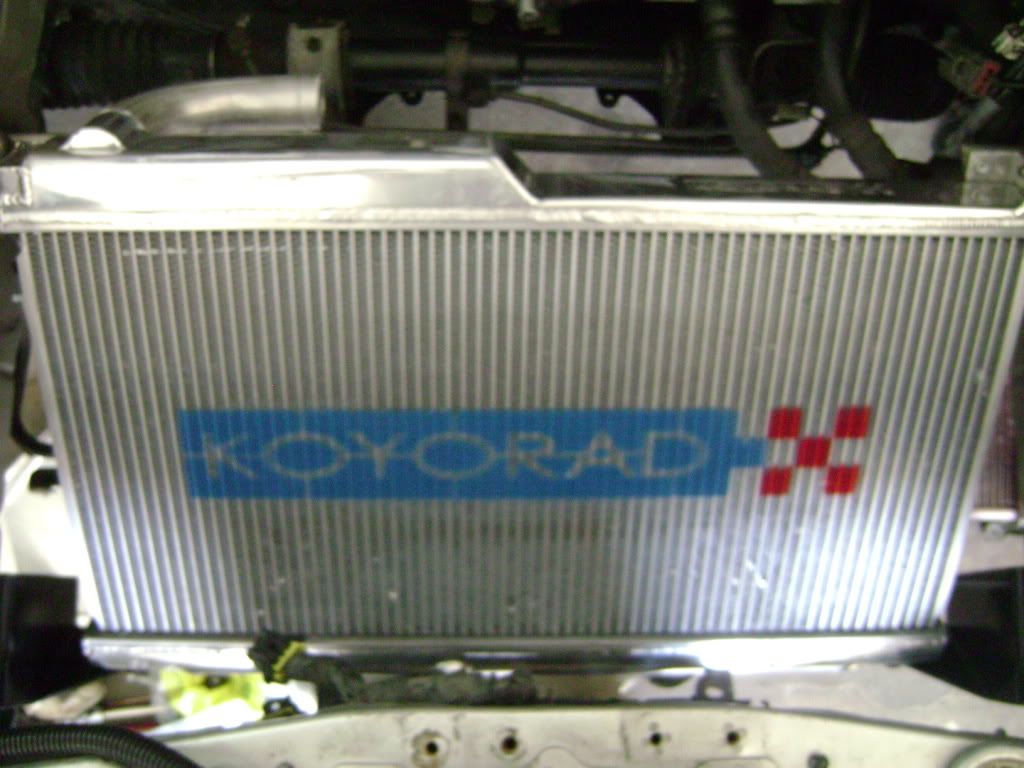
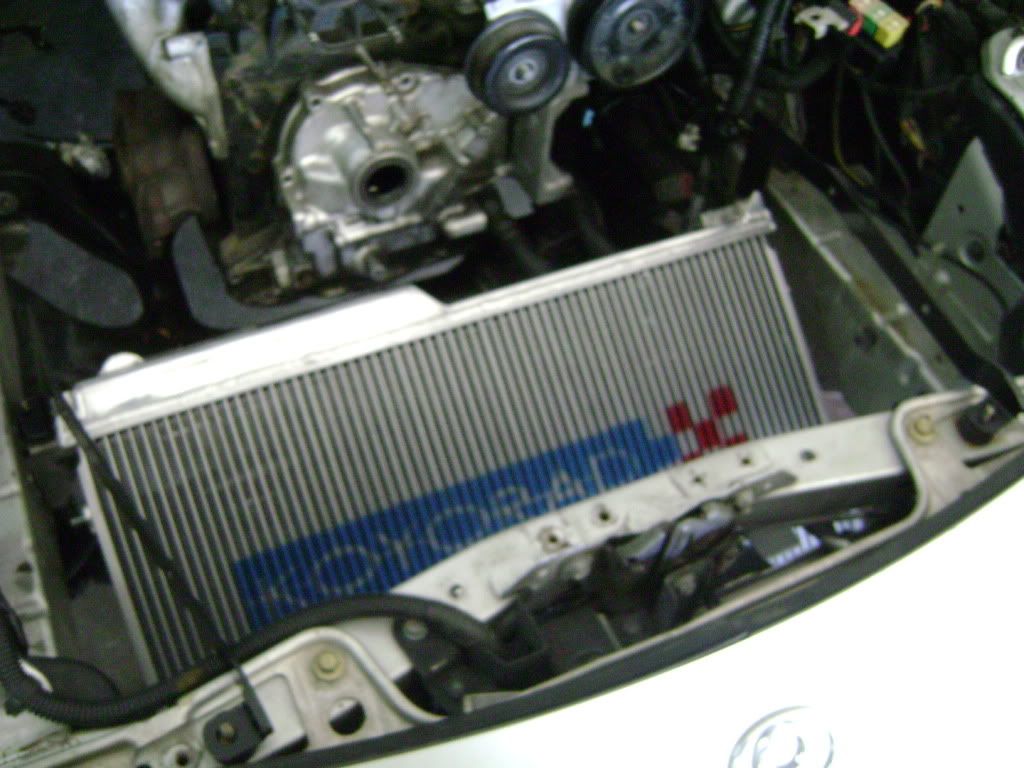
Place the radiator into the mounts, it will be a snug fit. Keep working the radiator until it sits all the way down.
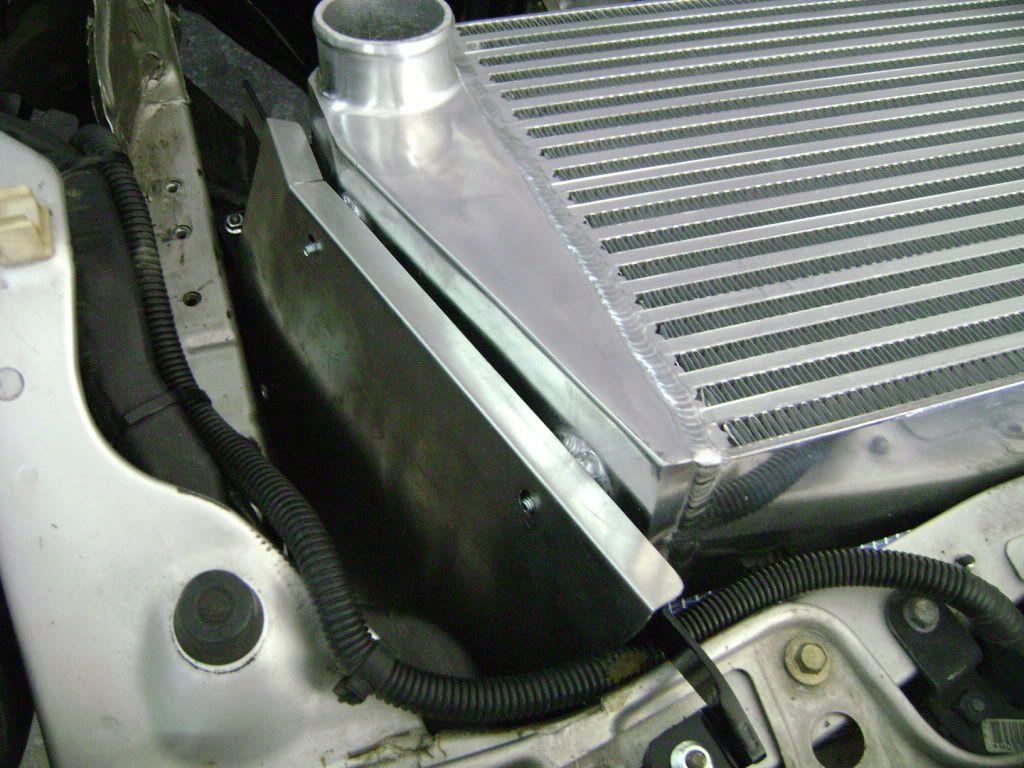
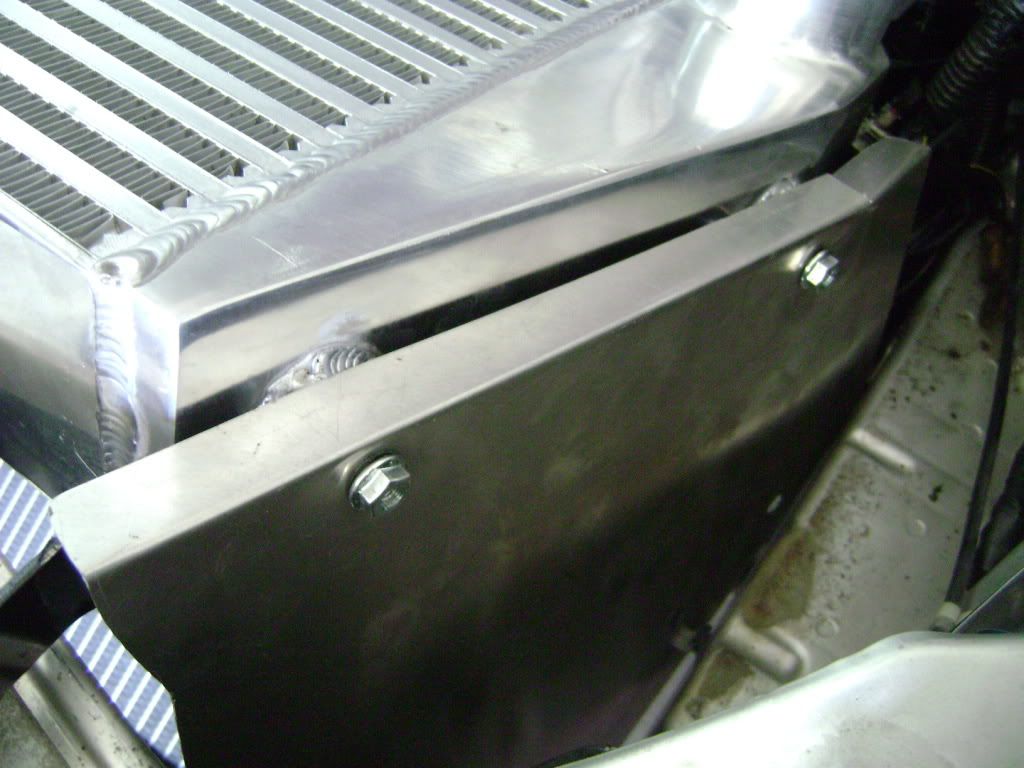
Then locate the two intercooler brackets. Place them onto the rubber isolators
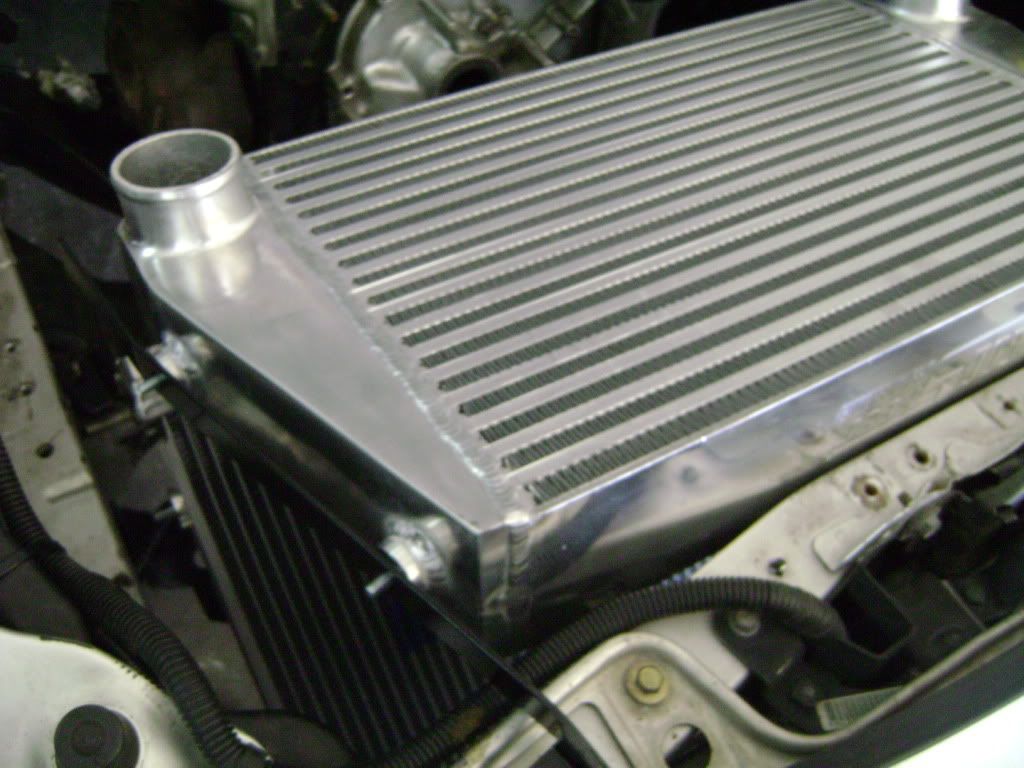
Carefully insert the intercooler, letting it rest on the studs.
Locate the other (2) M6 bolts and bolt in the top of the radiator. You may have to move the radiator around slightly in the lower mounts to find the correct fit.
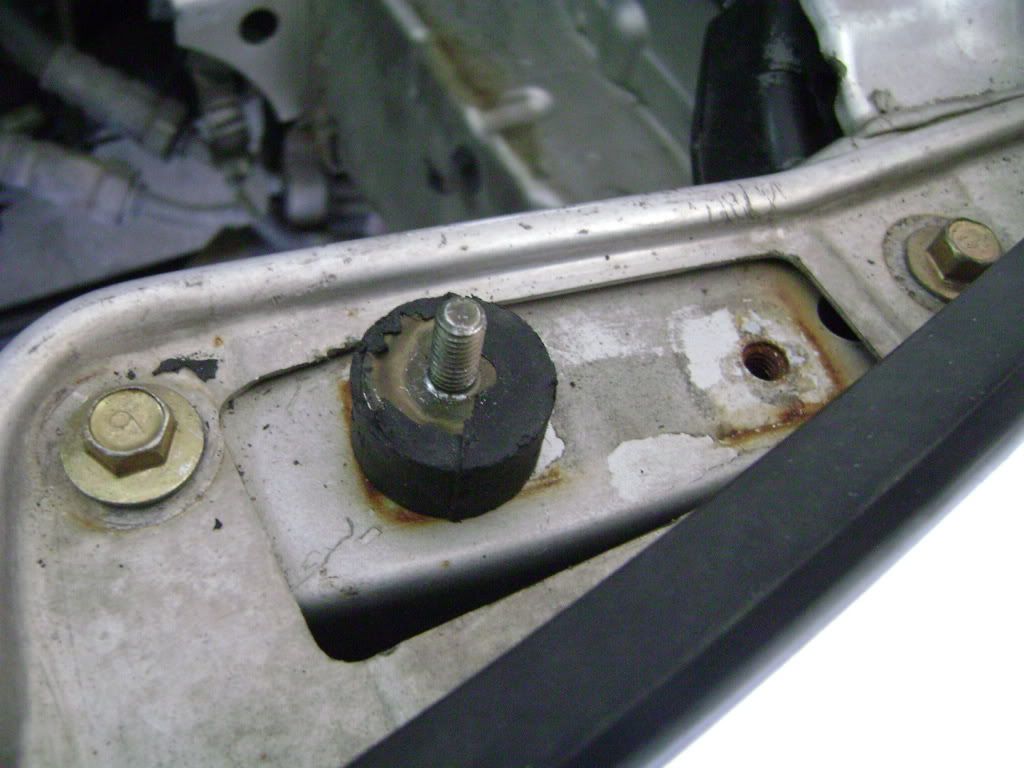
Now locate the remaining (4) M6 nuts, and thread them onto the top of each rubber isolator.
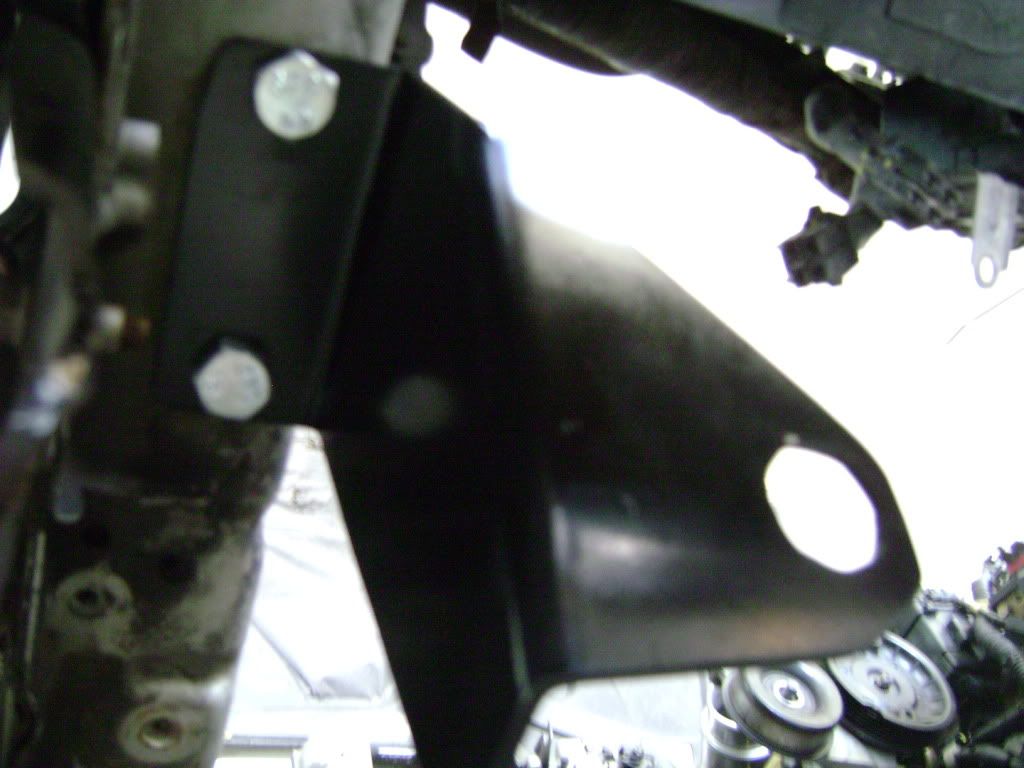
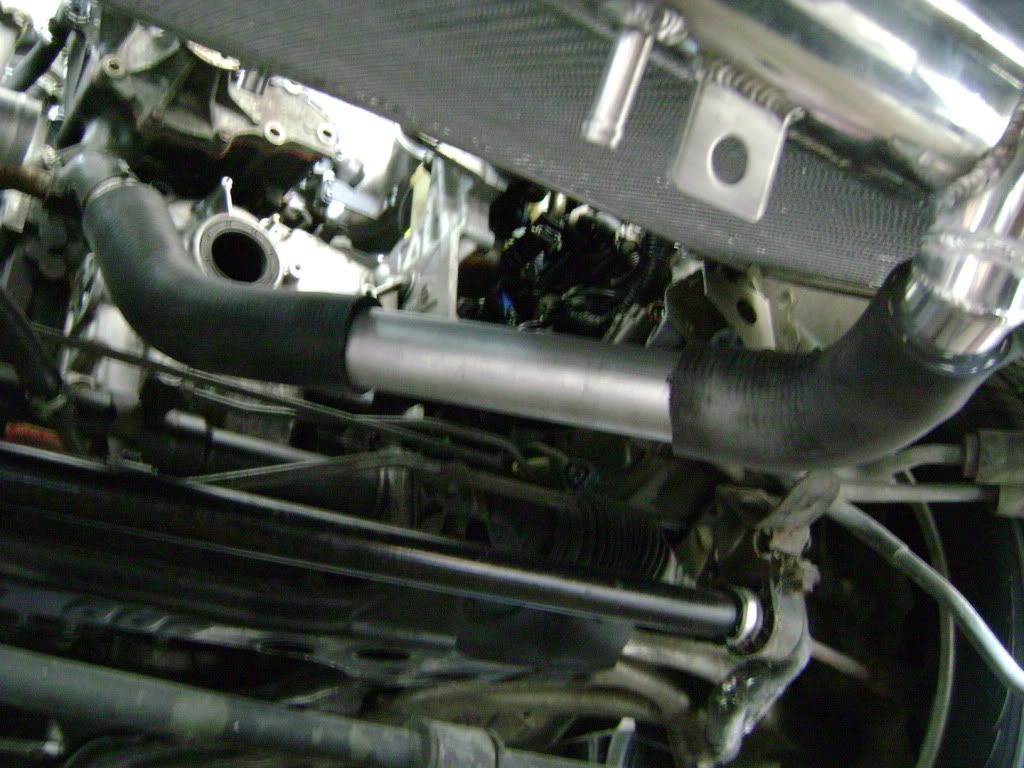
Unwrap the two aluminum side ducting, and carefully slide down on each side of the intercooler from the top. Take your time, as they will want to catch on everything. It is thin aluminum so do not use too much force.
Next locate the (6) 1/4-20 self locking nuts. Thread onto each stud up top (do not tighten) and then the two lower studs after.
Now all the 1/4-20 nuts and M6 nuts can be fully tightened. All the holes have adjustment room, so use car to align the parts as being snugged down.
Attach the 90 degree rubber radiator hose to the waterpump and upper radiator inlet
Locate the other (2) M6 bolts and bolt in the top of the radiator. You may have to move the radiator around slightly in the lower mounts to find the correct fit.
Now locate the remaining (4) M6 nuts, and thread them onto the top of each rubber isolator.
Unwrap the two aluminum side ducting, and carefully slide down on each side of the intercooler from the top. Take your time, as they will want to catch on everything. It is thin aluminum so do not use too much force.
Next locate the (6) 1/4-20 self locking nuts. Thread onto each stud up top (do not tighten) and then the two lower studs after.
Now all the 1/4-20 nuts and M6 nuts can be fully tightened. All the holes have adjustment room, so use car to align the parts as being snugged down.
Attach the 90 degree rubber radiator hose to the waterpump and upper radiator inlet
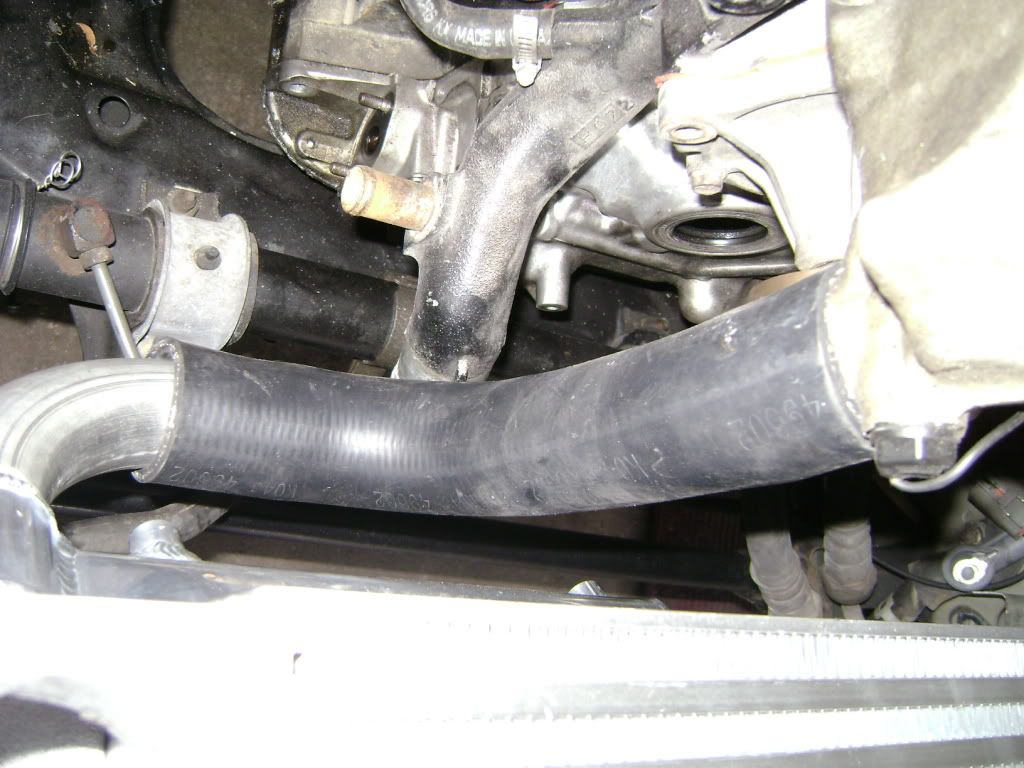
Locate and attach the lower hose assembly. Rotation of the two rubber hoses in relation to the aluminum pipe will most likely be needed. We do no pre-install in the proper rotation. Install the provided (6) hose clamps on the upper and lower radiator hoses
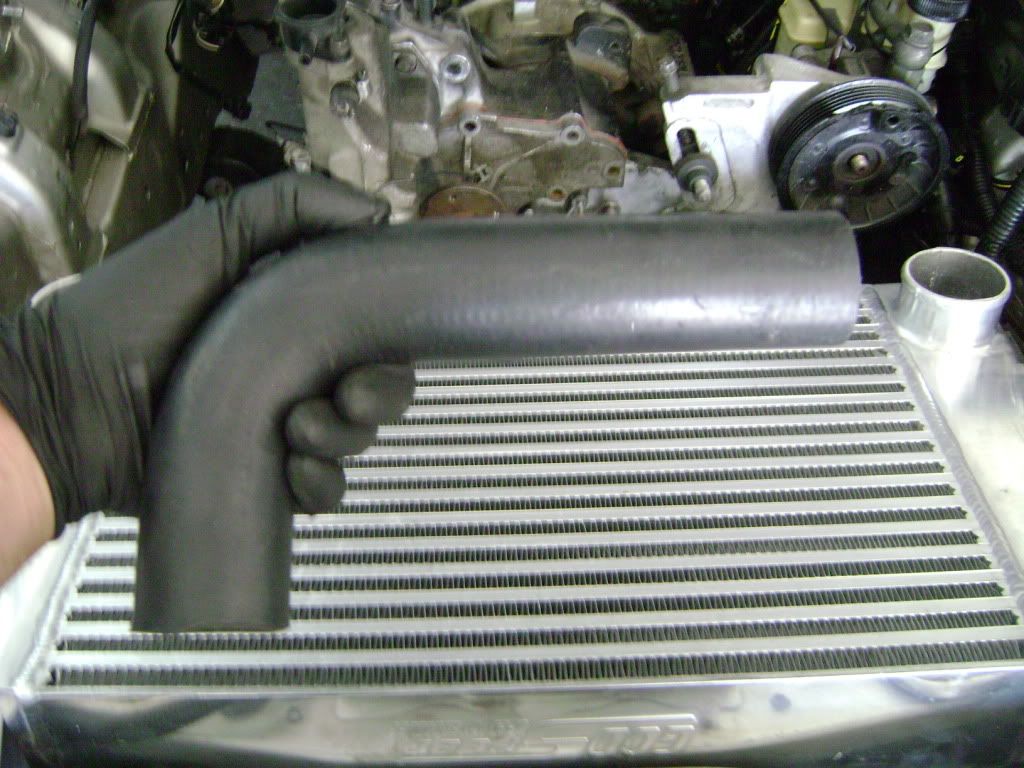
Now lastly, install the cold side intercooler pipe. It will only fit one way.
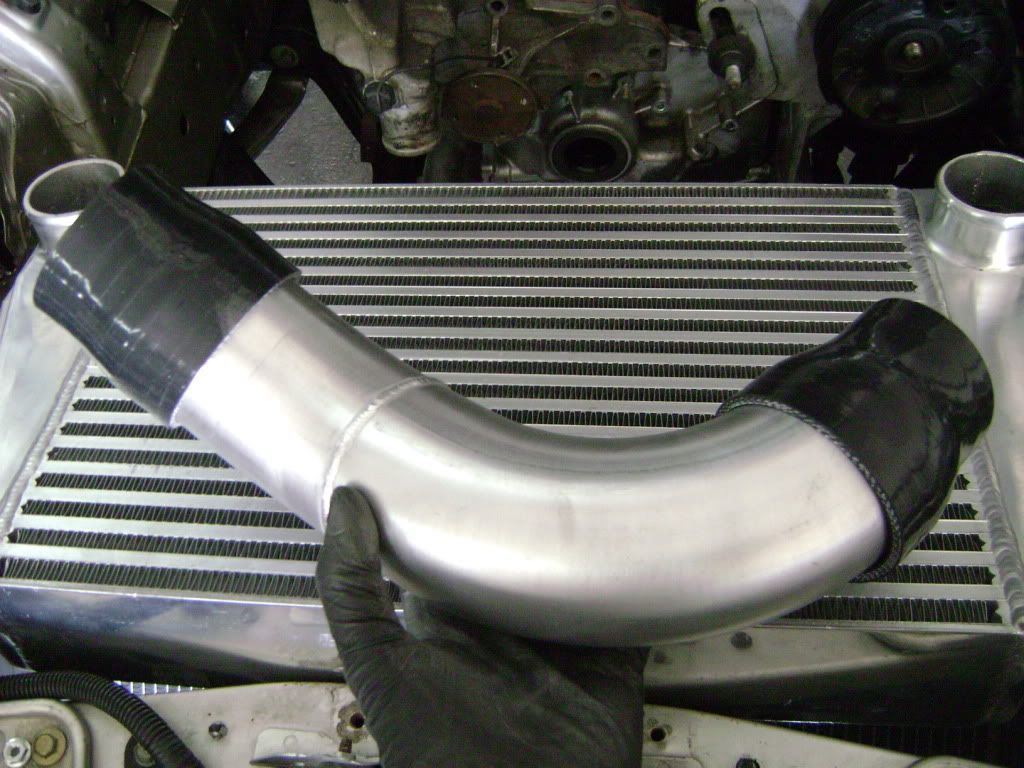
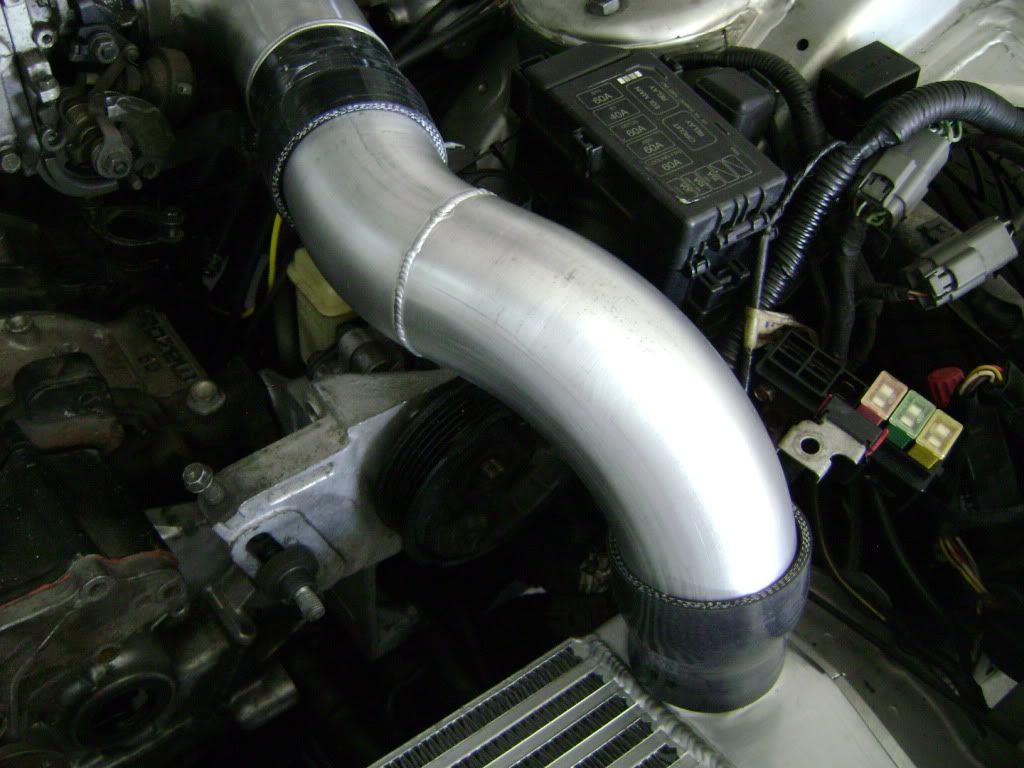
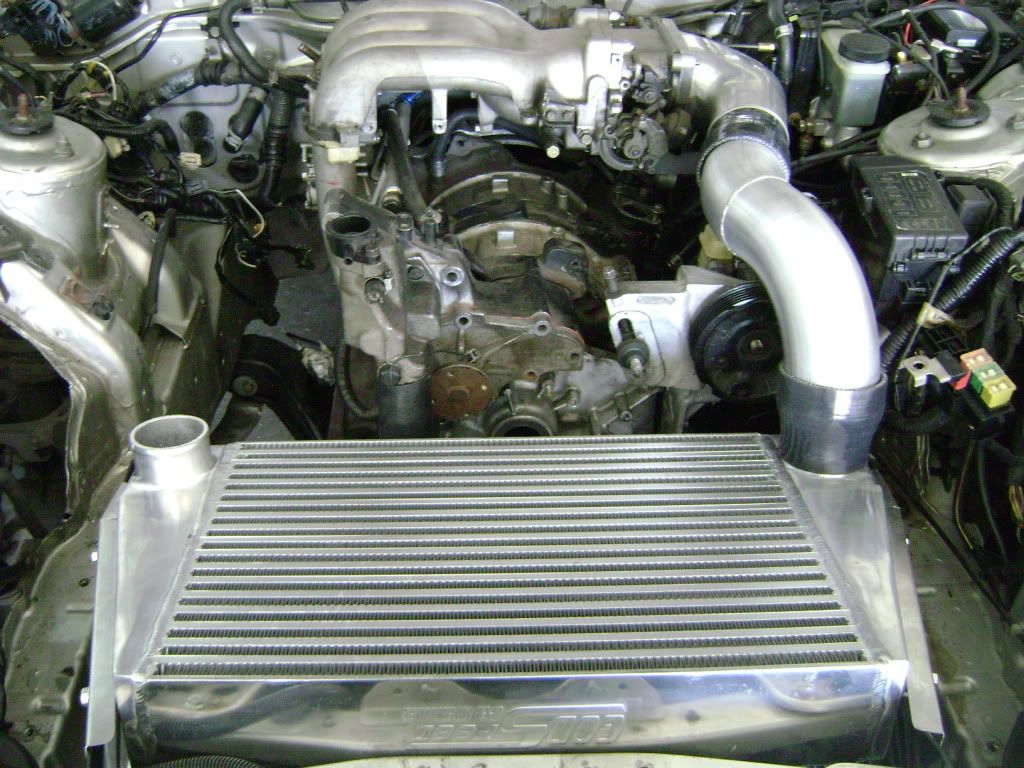
Now lastly, install the cold side intercooler pipe. It will only fit one way.


Just got mine in today. I've took some pictures but somehow there is no upload option under this thread. Maybe because it's vendor's thread so I have no right to post pictures.
Overall I would give a 8/10 for the kit.
Packaging: 7/10
Quality of kit : 8.5/10
However, upon arrival, my radiator has some bent fins on it. Which is something I dont like. Size is about 2 inches wide and 4 inches long. Seem like someone accidentally pressed onto it.
For the price, I dont think anyone on the market can beat this kit. I would still recommend it. Good job guys. Hopefully everything will be more smooth for the second gb.
-AzEKnightz
Trending Topics
Just did the install. And very easy. With the step by step instructional pictures. It went in smoothly with no motor in the bay although I don't see it being a problem any ways. Very quality kit and hardware. My radiator also had some bent fins. Must have been pressed against something in the box. My only issue will be to figure out what to do about my manifold design and turbo size. No complaints what so ever in regards with the kit. Thanks Logan.

Really nice kit, nice brackets and cost effective. For the price I say this is the best shippable vmount out there. 
I'd buy one for my FD....... if I didnt make my own :P
I'd buy one for my FD....... if I didnt make my own :P
Last edited by Rotary Extreme Sales 1; Oct 28, 2011 at 05:52 AM.


If you use Chrome and install the photobucket extension you should be able to view them. I am able to see the photos with no trouble. If you still can't see them PM me and I will download them and send them to you.

Senior Member
Joined: Apr 2007
Posts: 281
Likes: 0
From: Canada
Wow. I can't believe there's such a simple fix for all these Photobucket images not being displayed. I can't thank you enough!

Thread
Thread Starter
Forum
Replies
Last Post
sherff
Adaptronic Engine Mgmt - AUS
9
Feb 24, 2019 12:09 PM
Skeese
Adaptronic Engine Mgmt - AUS
65
Mar 28, 2017 03:30 PM
82streetracer
1st Generation Specific (1979-1985)
7
Aug 23, 2015 09:28 AM

