My latest project: streetport 12A buildup, installation 1


My latest project: streetport 12A buildup, installation 1
Hey All,
Well, for anyone interested, here's my latest engine project. I know that this will be painfully slow as I have so much else going on in my life right now, but I have decided to dedicate as much time and money as I can on this experiment, and of course, document the whole thing on this forum.
My plan: to build up a 12A engine with a relatively mild streetport, but paying attention to some details along the way. I want to basically use this project to test out various ideas I've had over the years, but never had the money to toy with. I will use whatever I glean from this experience and apply it to my 13B streetport monster project (scheduled for 2005). I've already started to stock parts for the 13B, so for that reason I will be reusing anything that is still within specs for this motor, but I do have some goodies going into it.
With school and all, I'm hoping that this will be complete by December, but if the 13B in the car has chucked a water seal (as I suspect it may have), then I might have to bite the bullet and speed things up.
Anyway, this is my chronicle ... I hope it is enjoyable. Feel free to leave tips, comments, criticisms, etc.
Thanks for the eye.
1
I'll try to select only representative pictures for display for the sake of time and space. I mean there is really no point in showing both rotors and housings unless there is something that warrants specific attention, right?
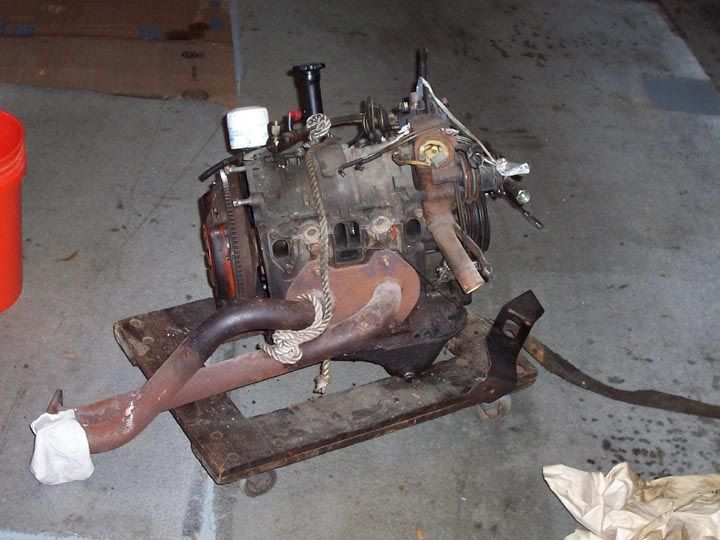
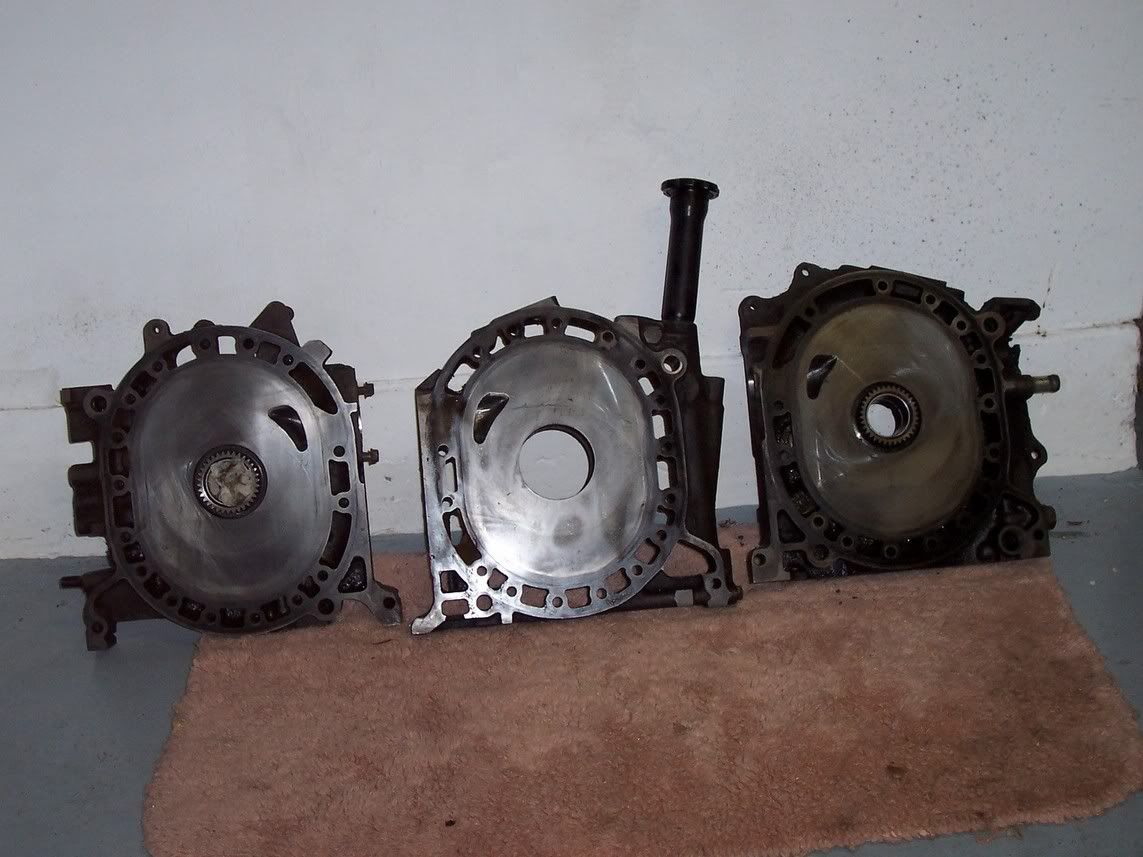
Halfway there:
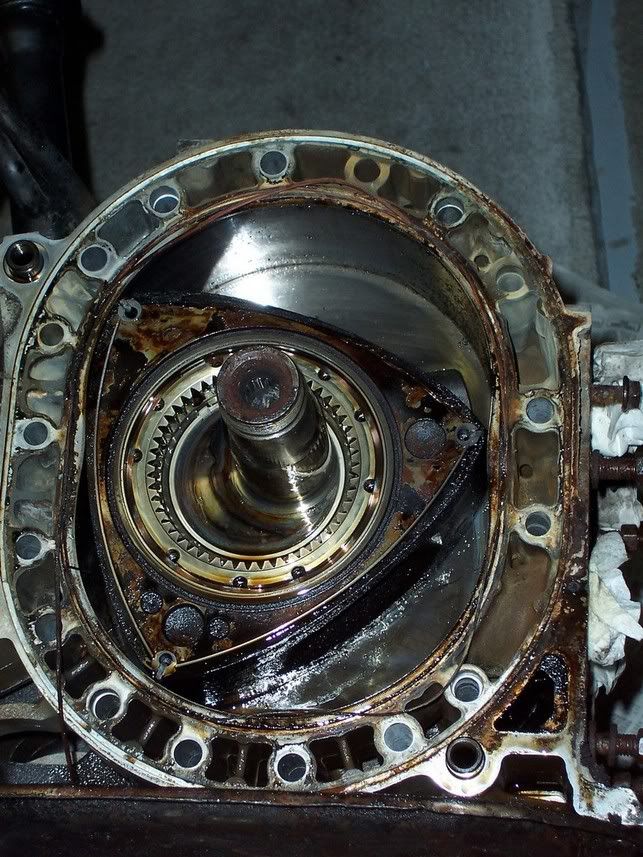
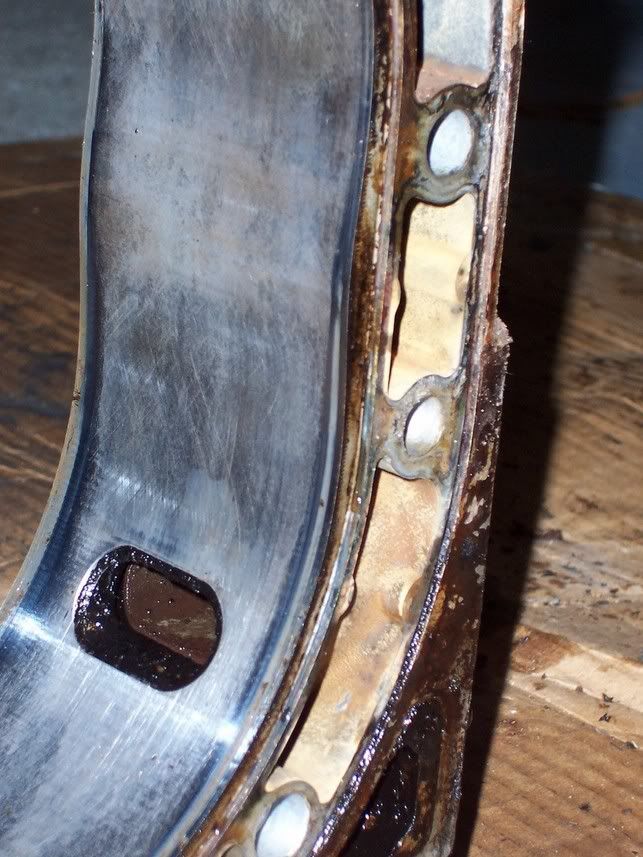
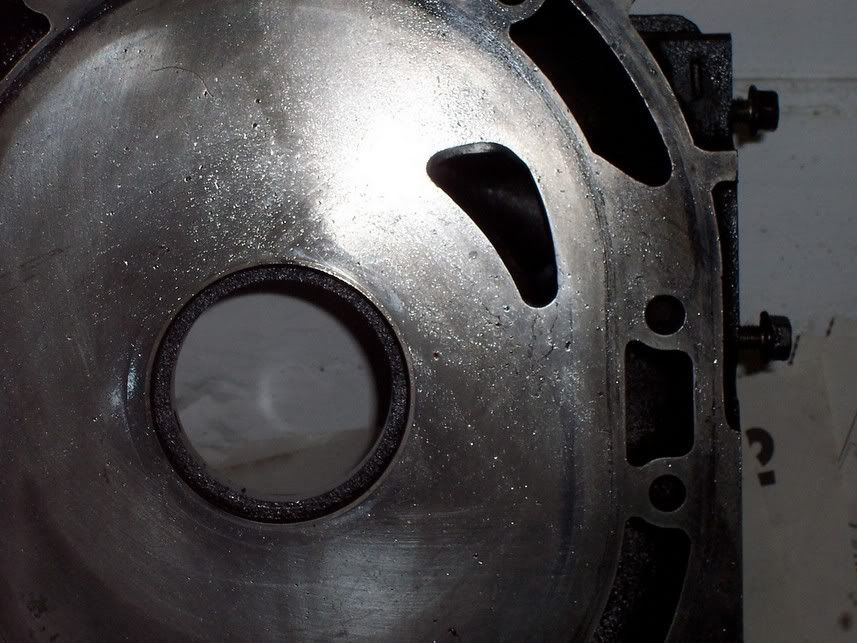
Rotor housing damage:
both rotor housings were missing chrome, so i'm going to need to locate a pair of those for the re-assembly.
Halfway there:
Rotor housing damage:
both rotor housings were missing chrome, so i'm going to need to locate a pair of those for the re-assembly.
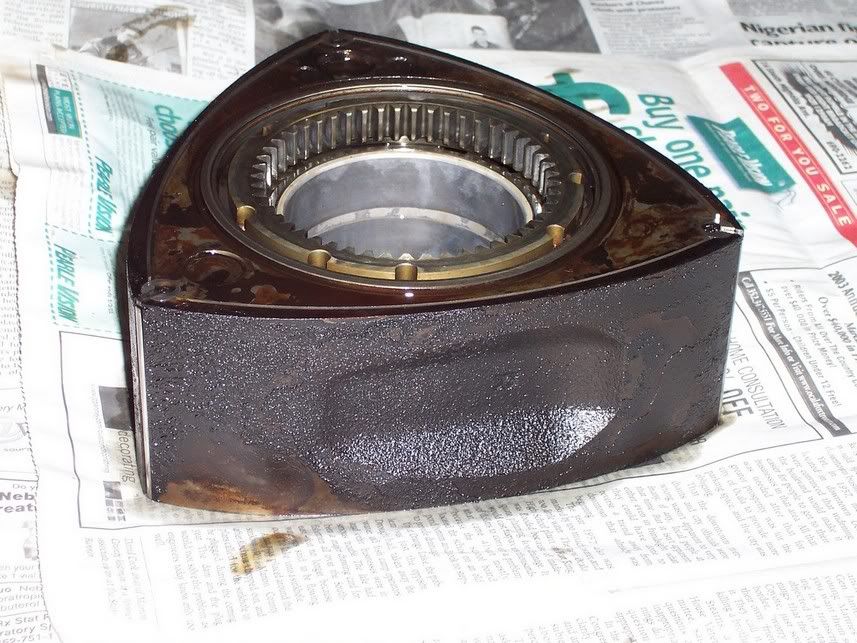
The rotor after some cleaning
This is how they looked after I spent some time cleaning them up. I use a witch's brew of kerosene, carburetor cleaner, Marvel's Mystery Oil (not all at the same time though), then I spend some time with fine sandpaper (only as needed) to get them like this. In terms of cleaning, usually for me this is the stage where they are ready for reassembly. Okay, I'd be hellbent on cleaning up the recesses a bit more, but this time ... I went even little further.
This is how they looked after I spent some time cleaning them up. I use a witch's brew of kerosene, carburetor cleaner, Marvel's Mystery Oil (not all at the same time though), then I spend some time with fine sandpaper (only as needed) to get them like this. In terms of cleaning, usually for me this is the stage where they are ready for reassembly. Okay, I'd be hellbent on cleaning up the recesses a bit more, but this time ... I went even little further.
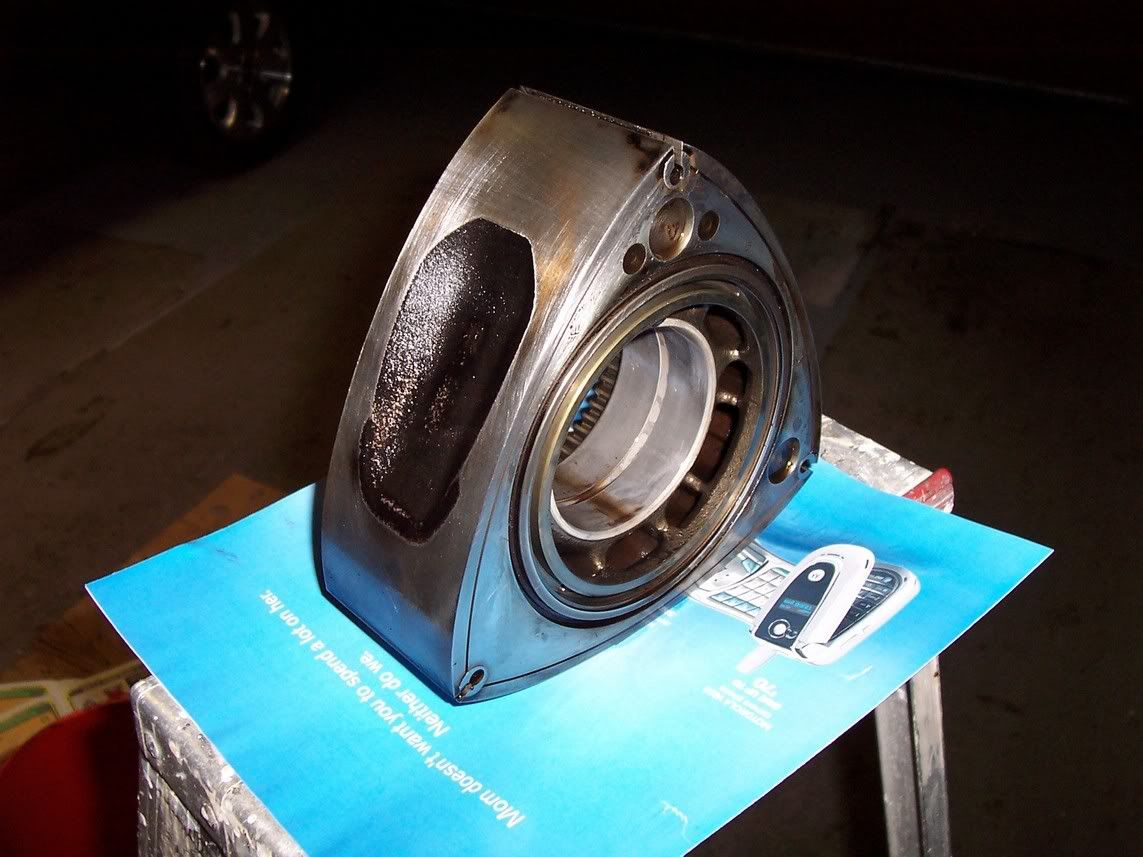
12A rotor ... polished
This is pretty much where I am right now. I've been on a quest to polish these things for the better part of about 3 months now. I eventually decided to do it myself.

Another shot ...
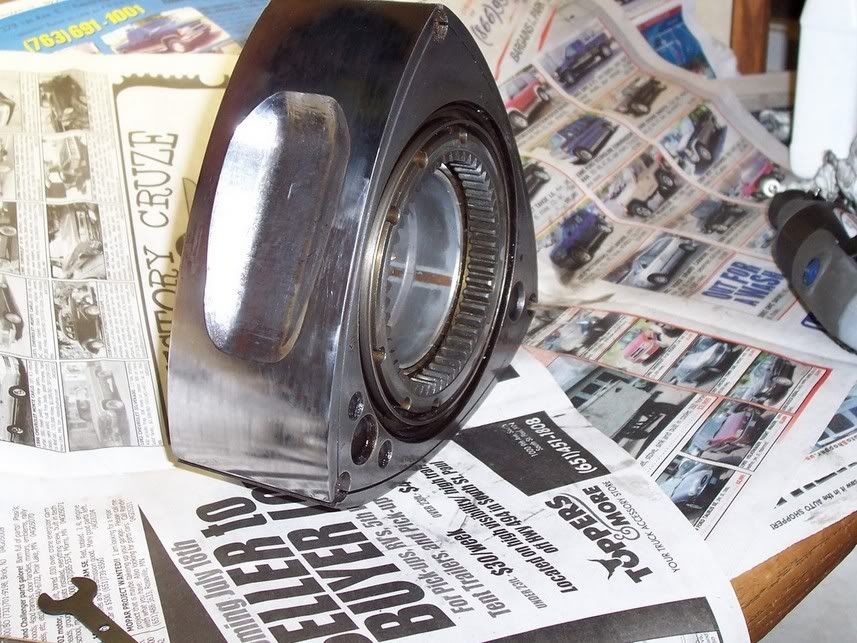
This is pretty much where I am right now. I've been on a quest to polish these things for the better part of about 3 months now. I eventually decided to do it myself.
Another shot ...
For the rotors ... I have them pretty much polished right now, but it is not to my satisfaction. I was looking at some pictures that Paul Yaw has on his site and mine don't look as shiny. If you look closely at the lower picture you can see some streaks that I figure should not be there, but I don't know what to do at this point. Anyone know what needs to be done?
Also, I will be checking the distance between the apex seal grooves and the rotor recesses, and then I will be on a quest to make them all equal. After that, it's just a matter of addressing the weight issue, to make them both equal (or as equal as I can get them). Anybody know where I can get some quality scales?
Also, I will be checking the distance between the apex seal grooves and the rotor recesses, and then I will be on a quest to make them all equal. After that, it's just a matter of addressing the weight issue, to make them both equal (or as equal as I can get them). Anybody know where I can get some quality scales?
Trending Topics

well, thanks for the tip on the scales. man, i'm not even going to ask ... 
hopefully, i can impart something useful for you and others, but even if i can't, i think it will still be fun.
hopefully, i can impart something useful for you and others, but even if i can't, i think it will still be fun.
Last edited by diabolical1; Aug 20, 2004 at 08:40 AM.
well, i didn't want to start a new thread for this, but depending responses (or lack there of) i may just have to ...
i'm trying to work out some small details ... okay, i'm a bit Dremel-happy ... but i wanted to know:
(1) how do you guys get the small curved surfaces inside the ports polished? i've got the ports all done, but there are some parts that i can't seem to reach to polish them, so they still look a little rough.
(2) what modifications can i make to the oil passages aound the pump? i'm going to be using a 13B oil pump, i can remember reading somewhere about recontouring the two passages around the pump - but i can't remember where - and i'm not home to look through my mini-library. i have the front housing with me here, so i'd like to complete it.
(3) how much should i shim the front oil pressure regulator? i'm getting the RB rear high performance street regulator - so i just need to sort out the front.
(4) i also wanted to know if there is anything that i can do to the water passages (aside from roughing them up near the exhaust ports) that will aid cooling.
any information, or links would be appreciated.
on a lighter note, things are going a bit slower than i would like, but i'm making progress. i should be able to post pictures of the ported housings and polished eccentric shaft when i go home for Thanksgiving.
thanks
i'm trying to work out some small details ... okay, i'm a bit Dremel-happy
... but i wanted to know: (1) how do you guys get the small curved surfaces inside the ports polished? i've got the ports all done, but there are some parts that i can't seem to reach to polish them, so they still look a little rough.
(2) what modifications can i make to the oil passages aound the pump? i'm going to be using a 13B oil pump, i can remember reading somewhere about recontouring the two passages around the pump - but i can't remember where - and i'm not home to look through my mini-library. i have the front housing with me here, so i'd like to complete it.
(3) how much should i shim the front oil pressure regulator? i'm getting the RB rear high performance street regulator - so i just need to sort out the front.
(4) i also wanted to know if there is anything that i can do to the water passages (aside from roughing them up near the exhaust ports) that will aid cooling.
any information, or links would be appreciated.
on a lighter note, things are going a bit slower than i would like, but i'm making progress. i should be able to post pictures of the ported housings and polished eccentric shaft when i go home for Thanksgiving.
thanks
Last edited by diabolical1; Nov 21, 2004 at 08:41 PM.


i'm home now and i have access to my rotary library, so i was able to answer 2 out of my 4 questions for myself.
i'll post the answers in case anyone else has these questions ...
for Question 1 - i used some rounded cutting bits, a sanding barrel and some sanding rolls (220 for the final polish). these seemed to work well enough. i may be missing something, but since no one answered, i'll assume that i did the right thing. at least ... i'm satisfied.
for Question 2 - Racing Beat does not recommend porting the oil passages around the pump unless it's a race motor, which this is NOT. so i opted to leave them alone because their word is good enough for me. they're not broken, so i won't "FIX" them.
for Question 3 - the front pressure regulator should be shimmed 1/8-inch ONLY IF you're using a race motor (or you decided not to listen and a run a street motor) with either the Racing-typre rear regulator or the 13B-REW rear regulator - both of which push 100+ PSI. there you go ...
i'm still working on answering the water jacket question ...
update ...
i got some rotor housings and as a bonus, my brother had started to port them about 11 years ago. all i plan to do is clean them up a bit and make it more of a "D" port because he made them pretty round. i'll be posting pictures as soon as i can take them. it sucks being so far from our parts stash ...
i'm still curious about the water jacket issue, but at this point, all i need is just some oil seals for the rotors and i think i may change the bearings on the rotors, then i'll be ready to assemble this thing.
i'm so excited ...
i got some rotor housings and as a bonus, my brother had started to port them about 11 years ago.
all i plan to do is clean them up a bit and make it more of a "D" port because he made them pretty round. i'll be posting pictures as soon as i can take them. it sucks being so far from our parts stash ... i'm still curious about the water jacket issue, but at this point, all i need is just some oil seals for the rotors and i think i may change the bearings on the rotors, then i'll be ready to assemble this thing.
i'm so excited ...
i'll try to size the forthcoming ones down a bit.
anyway, what do you "experienced" chaps use to port the exhausts. i've been having a hard time today just trying to recontour the exhausts my brother made. i'll call him tonight and ask him what he used originally.
another question ...
any tips on how to get more of an angular cut on these things? i've been trying to shape a more defined "D" into these things, but the angles are still looking rather soft ...
all in all, i had some slow, but steady progress today. it's just a pain using my Dremel. would an air die grinder be better? maybe it would be better if i had that flexible extension ...
more to come
1
okay, carbide bits, eh? thanks.
i will try to find out where to get some. i will get them and try plugging away with my Dremel, but i'll also try to see if i can find someone that has a die grinder that i could borrow. maybe rent?
these exhausts are a pain ...
Removing and swapping exhaust port sleeves
thanks. i will try to find out where to get some. i will get them and try plugging away with my Dremel, but i'll also try to see if i can find someone that has a die grinder that i could borrow. maybe rent?
these exhausts are a pain ...
Removing and swapping exhaust port sleeves
anybody tried these bits: Dremel Silicone-Carbide bits
they seem to be okay for steel and aluminum.
EDIT:
okay, the link doesn't seem to take you to the exact page. go to Accessories, then Grinding & Sharpening. there should be a Silicone-Carbide set listed near the middle of the page.
they seem to be okay for steel and aluminum.
EDIT:
okay, the link doesn't seem to take you to the exact page. go to Accessories, then Grinding & Sharpening. there should be a Silicone-Carbide set listed near the middle of the page.
Last edited by diabolical1; Jun 19, 2005 at 09:26 PM.
Originally Posted by glewsRx
I didn't know you could just grab a dremel and port your engine. I thought that was scientific or something. You got some conjones. Godspeed you fearless ****.
okay, you can port an engine with a Dremel (and the right bits - this is my first time doing exhausts) but i wouldn't call it scientific unless you're experimenting with more port timing configurations or something like that. i'm saying it relatively simple ONLY because you can theoretically just buy a template and follow the steps to port and polish your intakes and exhausts.
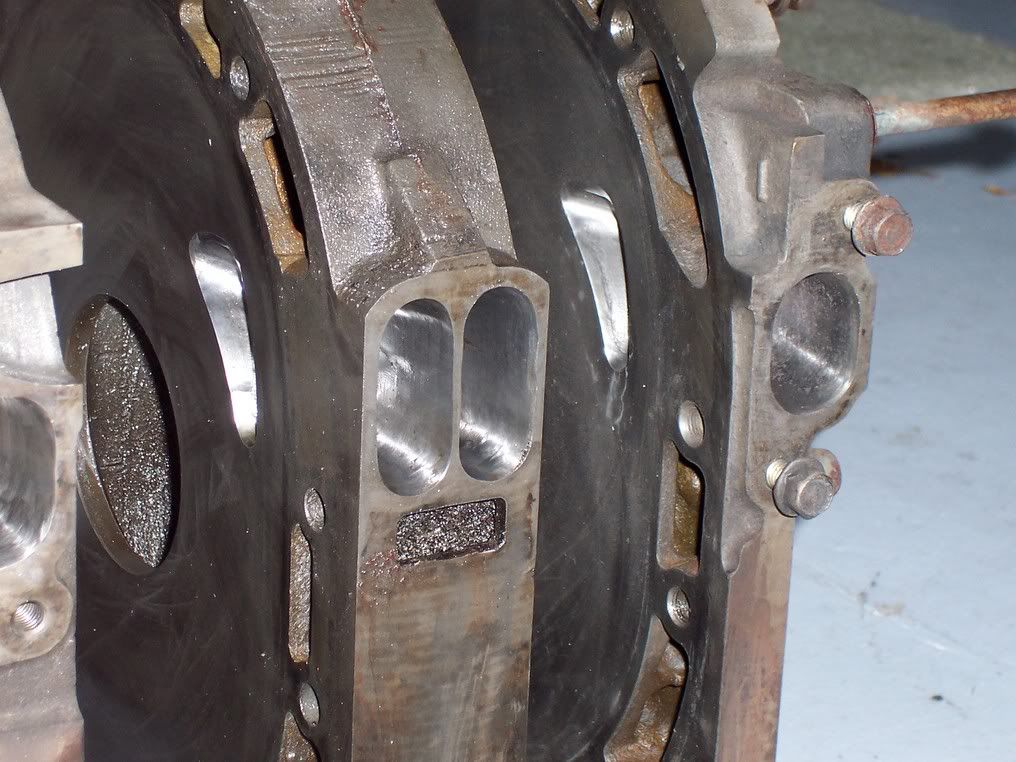
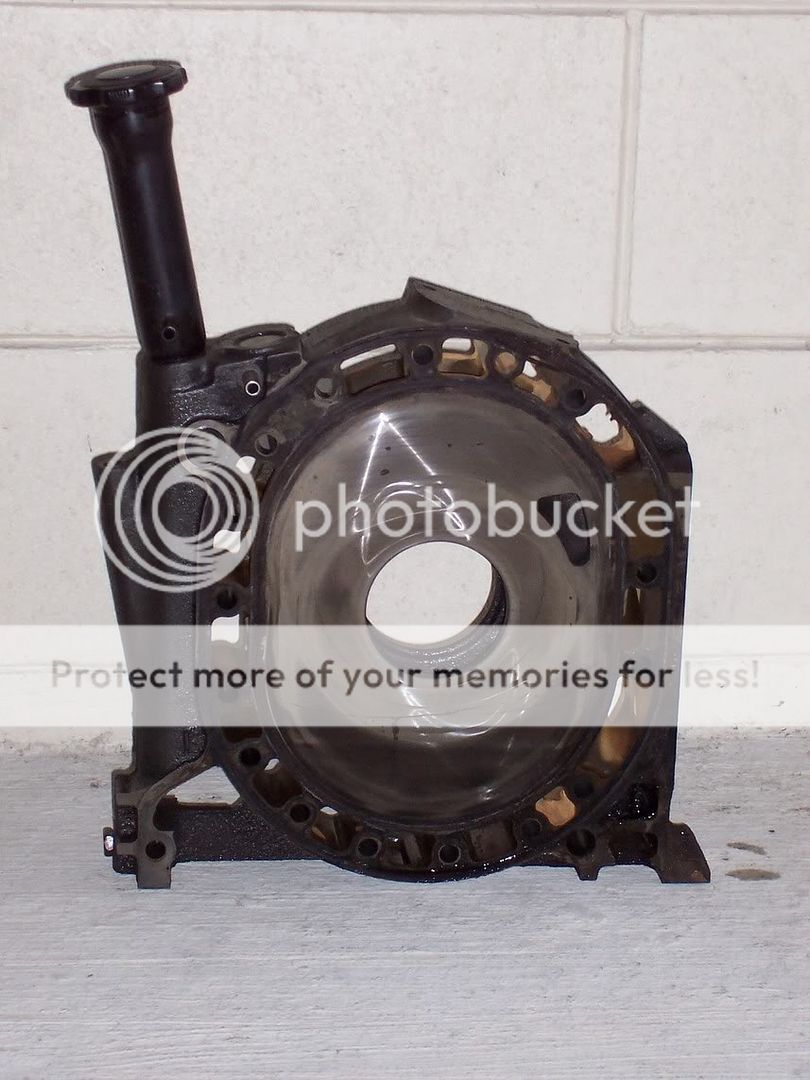
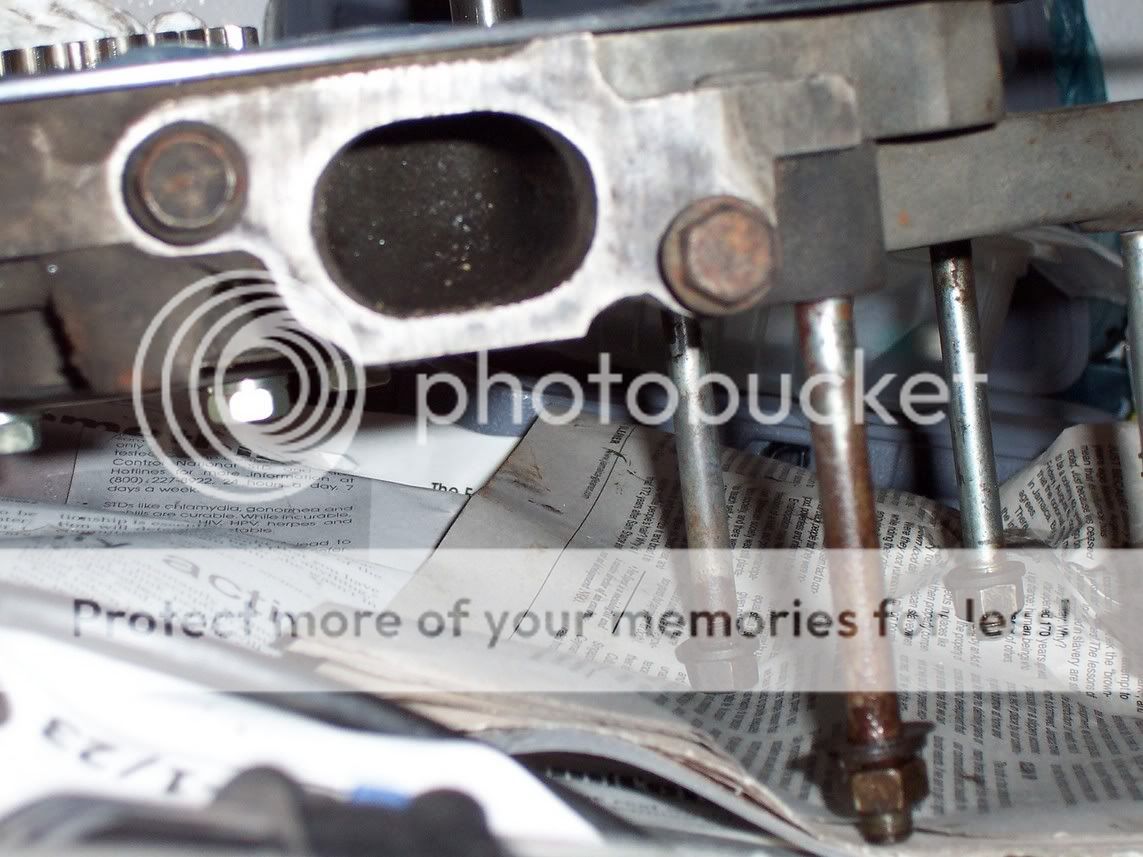
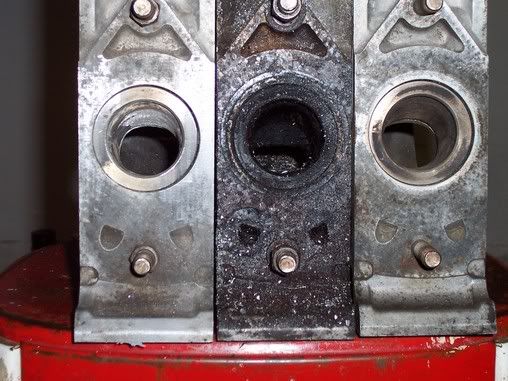
here are the exhaust ports ...
i'm FAR from finished, but as you can see, i'm waiting for the right tools to finish it up. things are going slower than i'd like, but that's more a money and time issue than anything else. i can't wait though. i'm thinking that i should be done with this thing by the end of the summer. i just hope my 13B doesn't crap out on me by then.
for this engine, i NEED to get some oil O-rings, but i think i'd like to change the bearings on the rotors as well. we'll see if i can afford to.
enjoy ...
it should be painfully obvious which are old and which are new.
the black line represents where i the RB template has me going, but i doubt if i'm going to turbo this motor, so i'm thinking of leaving just about where it is right now.
what do you guys think???

the black line represents where i the RB template has me going, but i doubt if i'm going to turbo this motor, so i'm thinking of leaving just about where it is right now.
what do you guys think???