GB Interest: Illuminated(or not) Rx8 5 Speed Shift Knobs
 11-01-07, 09:49 PM
#176
Rotary Freak
Join Date: Sep 2004
Location: Bay Area, CA
Posts: 2,444
Likes: 0
Received 0 Likes
on
0 Posts


BTW Mark did you order your 6 speed **** in brown?
 11-04-07, 11:34 PM
#180
Rotary Freak
Join Date: Sep 2004
Location: Bay Area, CA
Posts: 2,444
Likes: 0
Received 0 Likes
on
0 Posts
Boxes arrived, packages are ready to go and will be dropped off Monday. I sent tracking information to everyone except Archie's8 (waiting on reply) and Cccid (Canada shipment).
Let me know if there are any problems.
Let me know if there are any problems.
11-08-07, 03:05 PM
#181
Senior Member

Join Date: Dec 2002
Location: Portland
Posts: 392
Likes: 0
Received 0 Likes
on
0 Posts
I got my **** today! My only question is, where do I put the power, and where do I put the ground? I searched and found herblenny's writeup, but didn't really get a clear idea of what goes where...
 11-08-07, 07:17 PM
#183
Patience
iTrader: (1)
Join Date: Jun 2006
Location: Oregon
Posts: 1,483
Likes: 0
Received 0 Likes
on
0 Posts
I read herblenny's writeup as well, and it does me no good because my wires have already been cut and spliced by a pervious owner installing a radar detector, so eveyrthing is completely different and I have no idea what would go where.
My question is, seeing how I never smoke in my car, the ash tray light is pretty useless and it's never used anyway, so is it possible to just clip the connector wired to the **** and splice those two wires in with the two wires running into the little light bulb that is used for the ash tray which would elimated the ash tray light all together? I would assume this would work, but I'm not cutting anything until someone chimes in.
My question is, seeing how I never smoke in my car, the ash tray light is pretty useless and it's never used anyway, so is it possible to just clip the connector wired to the **** and splice those two wires in with the two wires running into the little light bulb that is used for the ash tray which would elimated the ash tray light all together? I would assume this would work, but I'm not cutting anything until someone chimes in.
11-09-07, 07:39 PM
#189
Patience
iTrader: (1)
Join Date: Jun 2006
Location: Oregon
Posts: 1,483
Likes: 0
Received 0 Likes
on
0 Posts
I'm not going to be able to try any of this for another week or so because I still haven't finished my motor, but I think that's the route I will take.
Edit
"maybe only cutting the wires of one clip would even work. "
I think that's basically what Herblenny's writeup is and after reading it again, that's the idea I'm getting.
11-09-07, 10:48 PM
#190
Saiga-12 Power!
Thread Starter
iTrader: (4)
Join Date: Oct 2004
Location: N of Chicago
Posts: 4,384
Likes: 0
Received 0 Likes
on
0 Posts
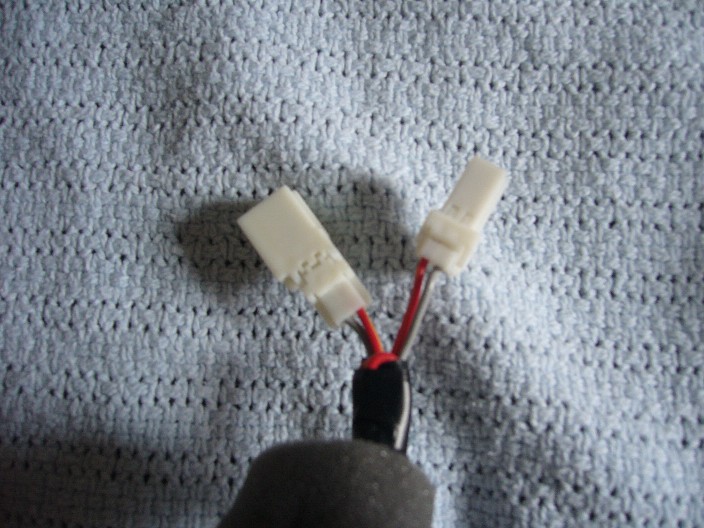
Got mine today. Spandy I think you are right about the install. The harness that was included with the **** is probably not needed at all. The wires coming out of the **** are all you need, unless you want to put a fuse in there to protect the LEDs.
ALSO, FYI to anyone wanting to swap LEDs this is what you are dealing with:

These are not exactly easy to just swap out from the tiny circuit board, it can be done though. I will probably remove the circuit board completely and do my own custom LED job.
Also, these LEDs are VERY sensitive DO NOT REVERSE THE POLARITY. There is a very high probability that you will kill the LEDs if you accidentally hook up the **** wiring backwards.
ALSO, FYI to anyone wanting to swap LEDs this is what you are dealing with:
These are not exactly easy to just swap out from the tiny circuit board, it can be done though. I will probably remove the circuit board completely and do my own custom LED job.
Also, these LEDs are VERY sensitive DO NOT REVERSE THE POLARITY. There is a very high probability that you will kill the LEDs if you accidentally hook up the **** wiring backwards.
11-10-07, 12:03 PM
#193
I read herblenny's writeup as well, and it does me no good because my wires have already been cut and spliced by a pervious owner installing a radar detector, so eveyrthing is completely different and I have no idea what would go where.
My question is, seeing how I never smoke in my car, the ash tray light is pretty useless and it's never used anyway, so is it possible to just clip the connector wired to the **** and splice those two wires in with the two wires running into the little light bulb that is used for the ash tray which would elimated the ash tray light all together? I would assume this would work, but I'm not cutting anything until someone chimes in.
My question is, seeing how I never smoke in my car, the ash tray light is pretty useless and it's never used anyway, so is it possible to just clip the connector wired to the **** and splice those two wires in with the two wires running into the little light bulb that is used for the ash tray which would elimated the ash tray light all together? I would assume this would work, but I'm not cutting anything until someone chimes in.
11-10-07, 02:14 PM
#196
Patience
iTrader: (1)
Join Date: Jun 2006
Location: Oregon
Posts: 1,483
Likes: 0
Received 0 Likes
on
0 Posts
When you wired it up, did you just use the wire that is attached to the shift ****, or did you plug it into the harness and then wire one of the clips from the harness into the ash tray bulb?
11-10-07, 03:20 PM
#197
Saiga-12 Power!
Thread Starter
iTrader: (4)
Join Date: Oct 2004
Location: N of Chicago
Posts: 4,384
Likes: 0
Received 0 Likes
on
0 Posts
Originally Posted by Pele
So how'd you get the Shift indicator lens off like that? Does it just pry off?
11-10-07, 04:54 PM
#198
Right near Malloy
iTrader: (28)
Join Date: Dec 1999
Location: Behind a workbench, repairing FC Electronics.
Posts: 7,846
Received 512 Likes
on
347 Posts
You pry it off right above the number 3. That is the best spot because there is a plastic tab under the number 4 holding it in place underneath. If you have them use very thin plastic screwdrivers or small flat head jewlers screwdrivers to pry it off and be very careful.. You may have to use 2 at once to pry and hold with one while you reach below it and pry further with the next and go slowly till you get the lense to clear the surround. Underneath that there is a glossy coated paper cover that needs to be pried off as well. Then there is a screw holding a plastic piece and the metal top surround in place. Remove the screw and the plastic piece and the metal surround and your at the circuit board.
My Gauges are blue EL paper and I've got blue LED's for the climate controls...
I wanna put blue LED's in the shifter too.
11-10-07, 05:13 PM
#199
Saiga-12 Power!
Thread Starter
iTrader: (4)
Join Date: Oct 2004
Location: N of Chicago
Posts: 4,384
Likes: 0
Received 0 Likes
on
0 Posts
The plastic piece I mentioned is just a surround\hold down piece for the circuit board and the metal surround. It does not cover the LEDs to color the light at all. The 3 little LEDs on the circuit board emit the red light.
