
ruddyrid's FC, long over due build thread.

Thread Starter


Joined: Mar 2009
Posts: 476
Likes: 45
From: Jefferson, TX
I don't have any pictures right now but probably can take some on Sunday, just trying to concentrate on getting it to run this week.
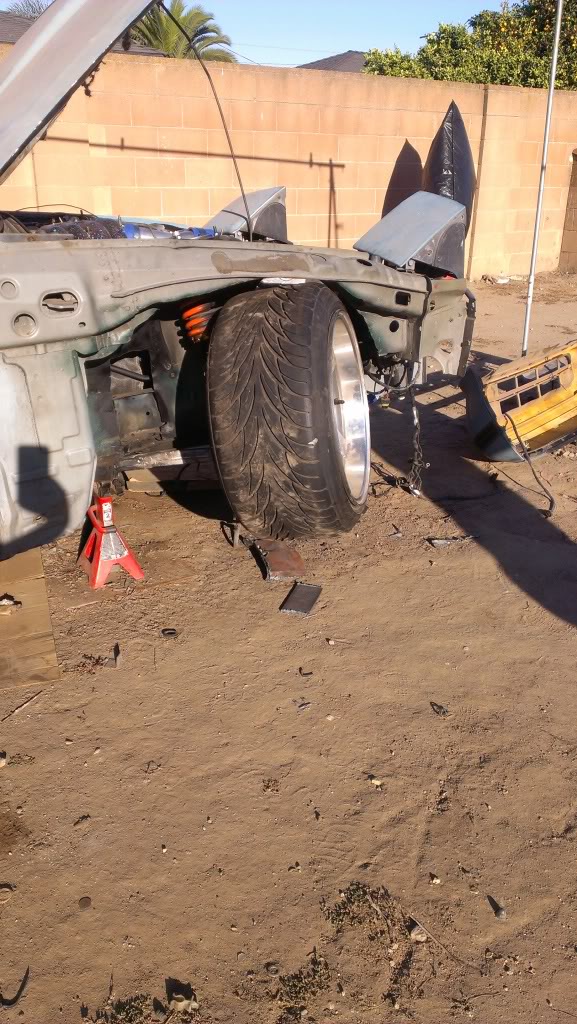
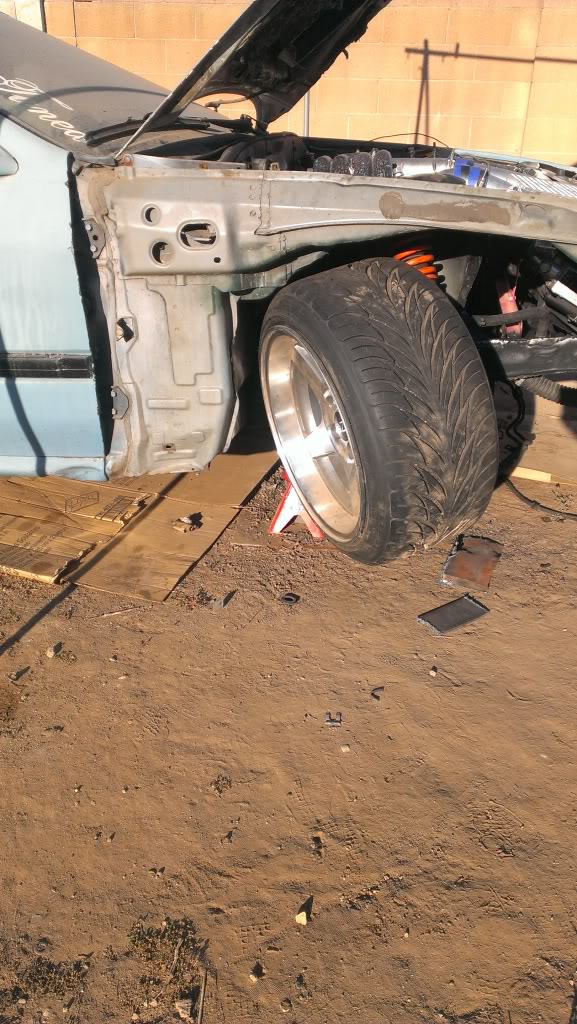
But basically we dropped the pick up point on the tie rod end, and shortened it to increase angle(obviously) and decrease ackerman. Main reason I got like one of the first sets is 'cause my car had been sitting in my backyard so it wouldn't matter if the suspension was dismantled for weeks on end.lol.
But basically we dropped the pick up point on the tie rod end, and shortened it to increase angle(obviously) and decrease ackerman. Main reason I got like one of the first sets is 'cause my car had been sitting in my backyard so it wouldn't matter if the suspension was dismantled for weeks on end.lol.
Thread Starter
Joined: Mar 2009
Posts: 476
Likes: 45
From: Jefferson, TX
Thanks man, I'm not sure if it's worth it rather than have someone else do it, but at least this way I get to learn a lot from it.
Thread Starter
Joined: Mar 2009
Posts: 476
Likes: 45
From: Jefferson, TX
Thanks man. Can't wait to drive with this angle myself. I've ridden in a few cars with these knuckles and it's freaking insane the speed you can carry and the angle you can get, one guy put it, "It's impossible to make your car fully spin out with these knuckles."lol.
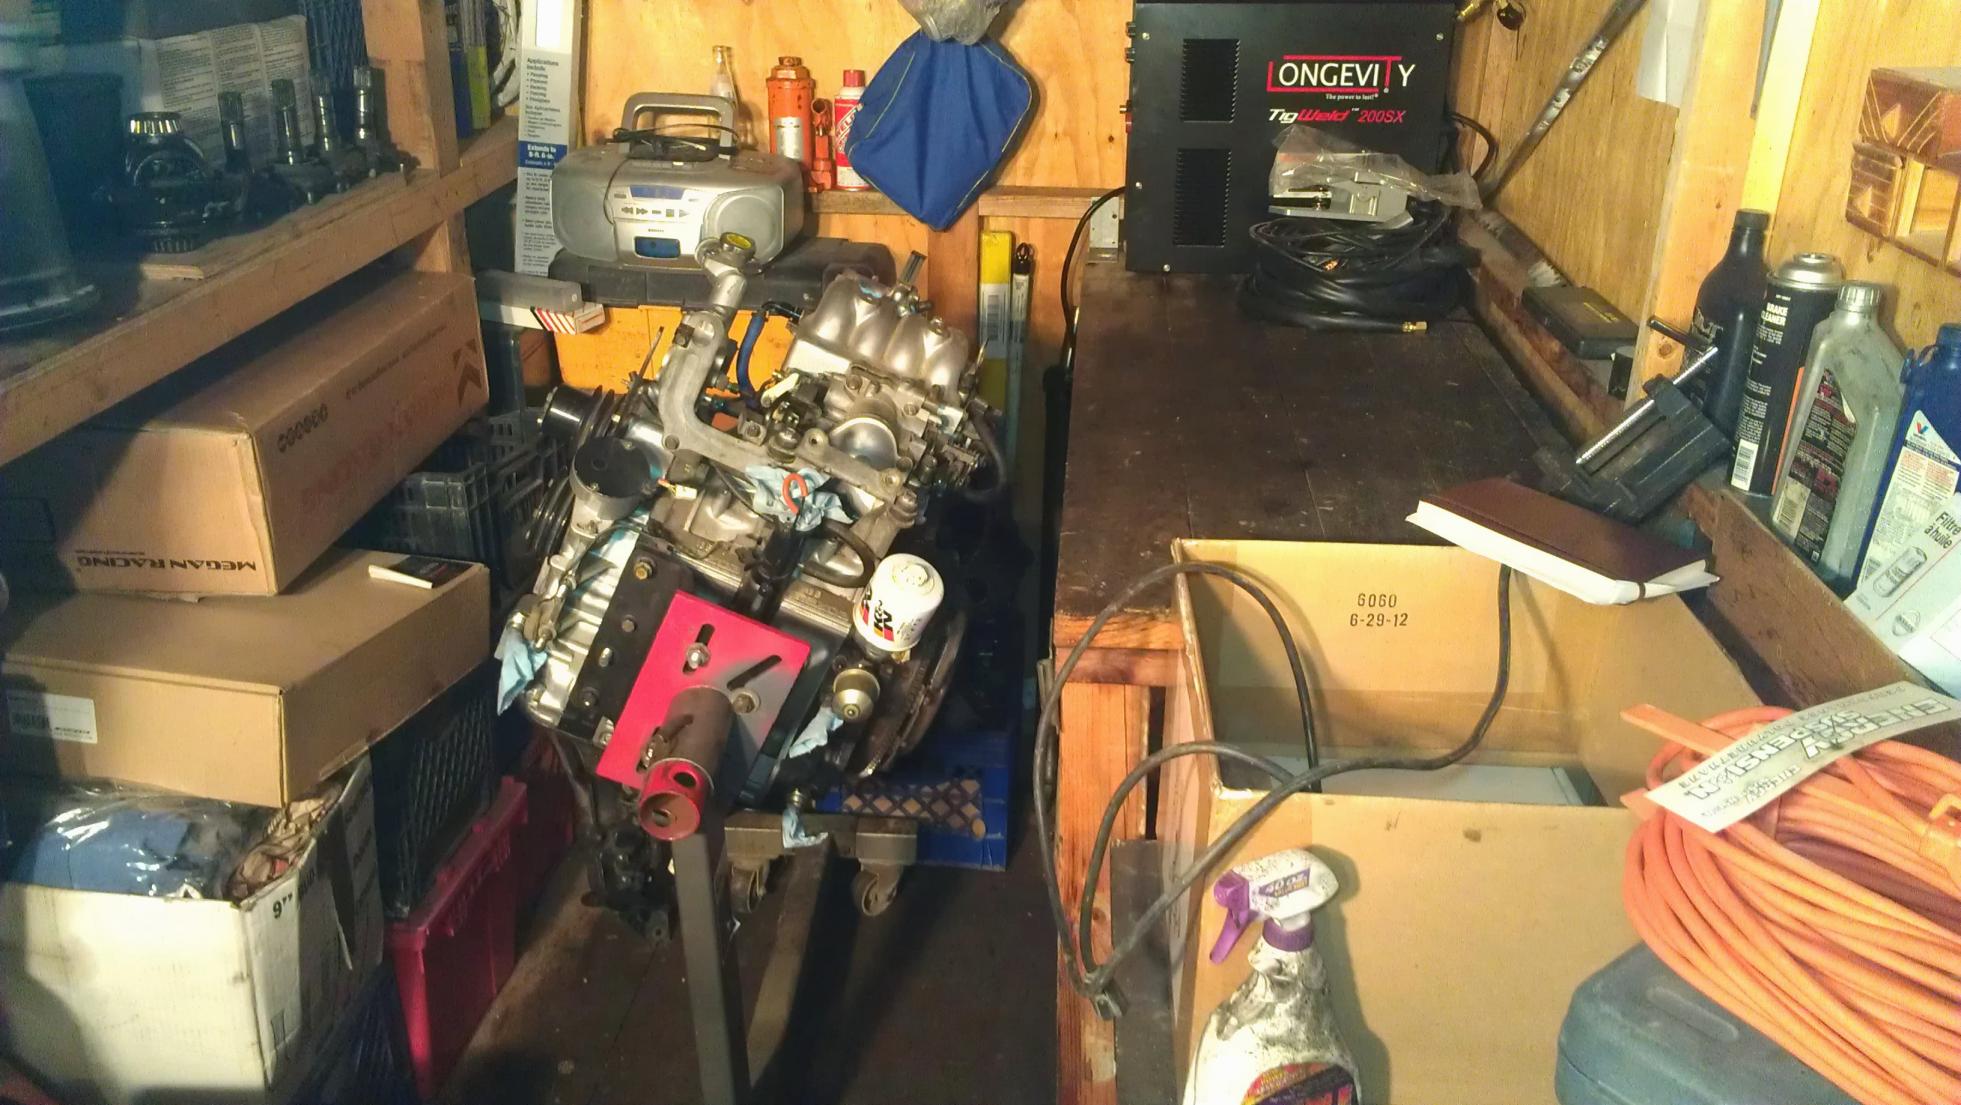
In other news, the stance monster is up and running. I seriously can't believe I've spent basically a whole year trying to get it to run.

In other news, the stance monster is up and running. I seriously can't believe I've spent basically a whole year trying to get it to run.
Thread Starter
Joined: Mar 2009
Posts: 476
Likes: 45
From: Jefferson, TX
Aaaaaaaaand I did not work on my car this weekend, got tied up in other projects for my dad's car and what not.
However, on Friday, a buddy of mine came over to shoot some pics that he needed for a school project of his. Him and his gf came over to set up and take pics. It was pretty cool to see my car lit up how it was.
Best part is, I didn't have to push it this time!
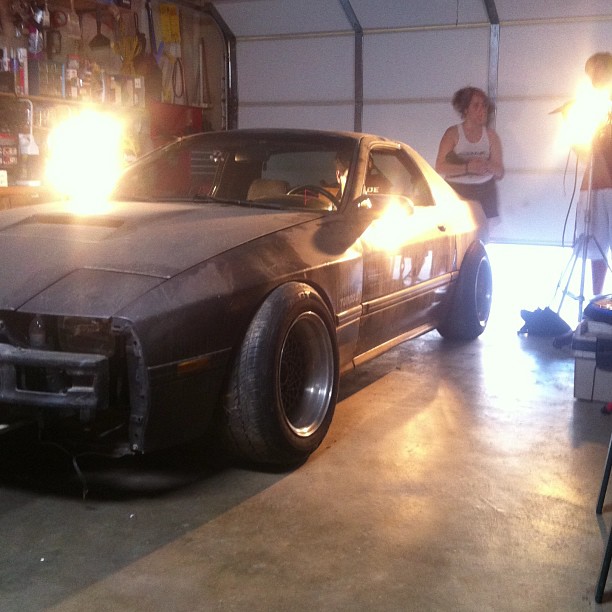
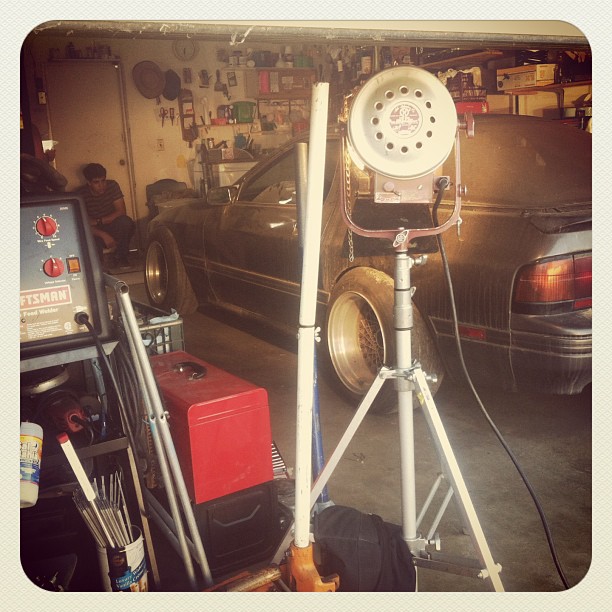
My gf took these hipster pics and put 'em up on her instagramzzz
However, on Friday, a buddy of mine came over to shoot some pics that he needed for a school project of his. Him and his gf came over to set up and take pics. It was pretty cool to see my car lit up how it was.
Best part is, I didn't have to push it this time!
My gf took these hipster pics and put 'em up on her instagramzzz
Sorry to thread jack Rudy but I'm a local an also got these. Knuckles
Extended ball joint, s13 oem tie rod ends, n knucles for my 17x10.5 -5 wheels tires are 235 30
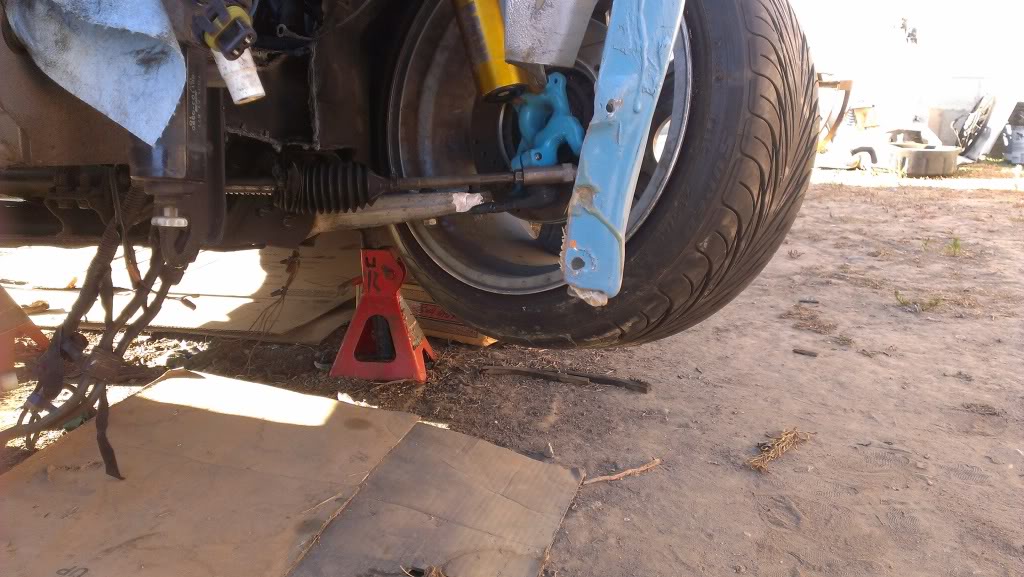
Even as the wheel is being pushed out as the leading wheel the inner rod isn't being flexed upwards dp to the pick up point on the knuckle
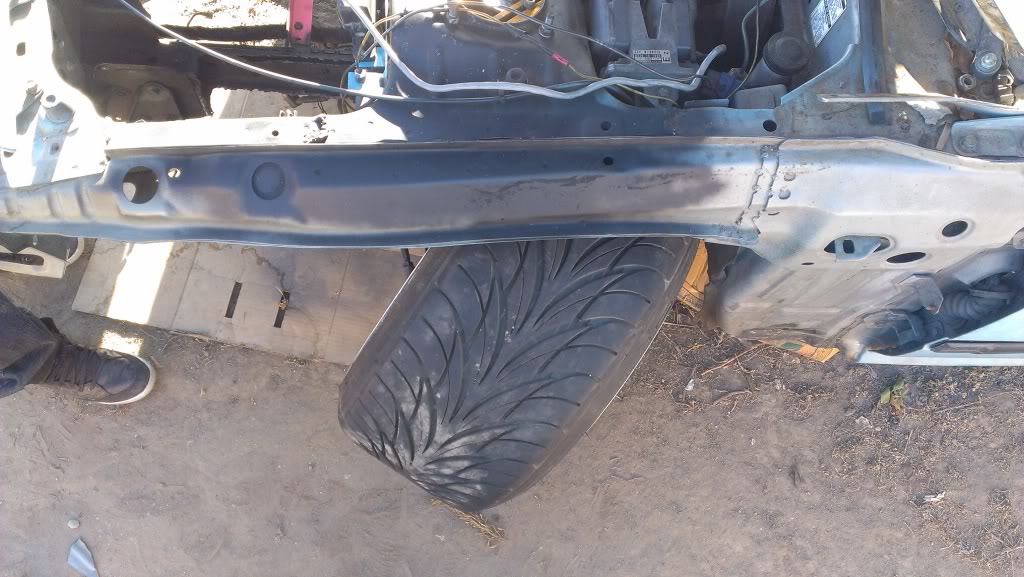
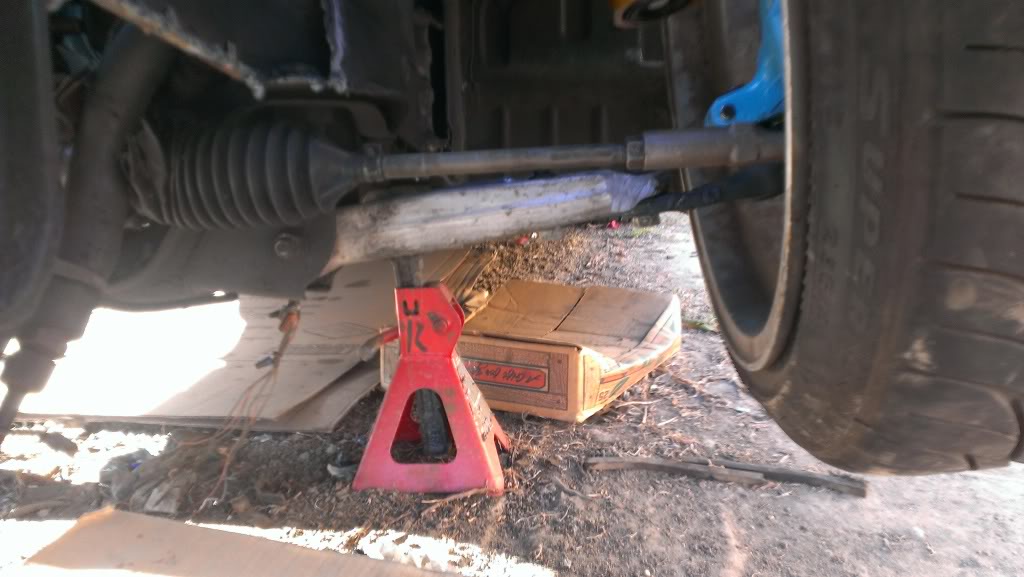
I like how the rod isn't being pulled up wards by the pick up point For daily driven(zero bumpsteer)
I'm very satisfided with my moneys worth
So I hear you have to pull you have to pull your eng Rudy?? What's up with that ??
If so we''ll deff finish our builds at the same time lolz
Extended ball joint, s13 oem tie rod ends, n knucles for my 17x10.5 -5 wheels tires are 235 30
Even as the wheel is being pushed out as the leading wheel the inner rod isn't being flexed upwards dp to the pick up point on the knuckle
I like how the rod isn't being pulled up wards by the pick up point For daily driven(zero bumpsteer)
I'm very satisfided with my moneys worth
So I hear you have to pull you have to pull your eng Rudy?? What's up with that ??
If so we''ll deff finish our builds at the same time lolz
Thread Starter
Joined: Mar 2009
Posts: 476
Likes: 45
From: Jefferson, TX
So update on my build that's been taking way too long.
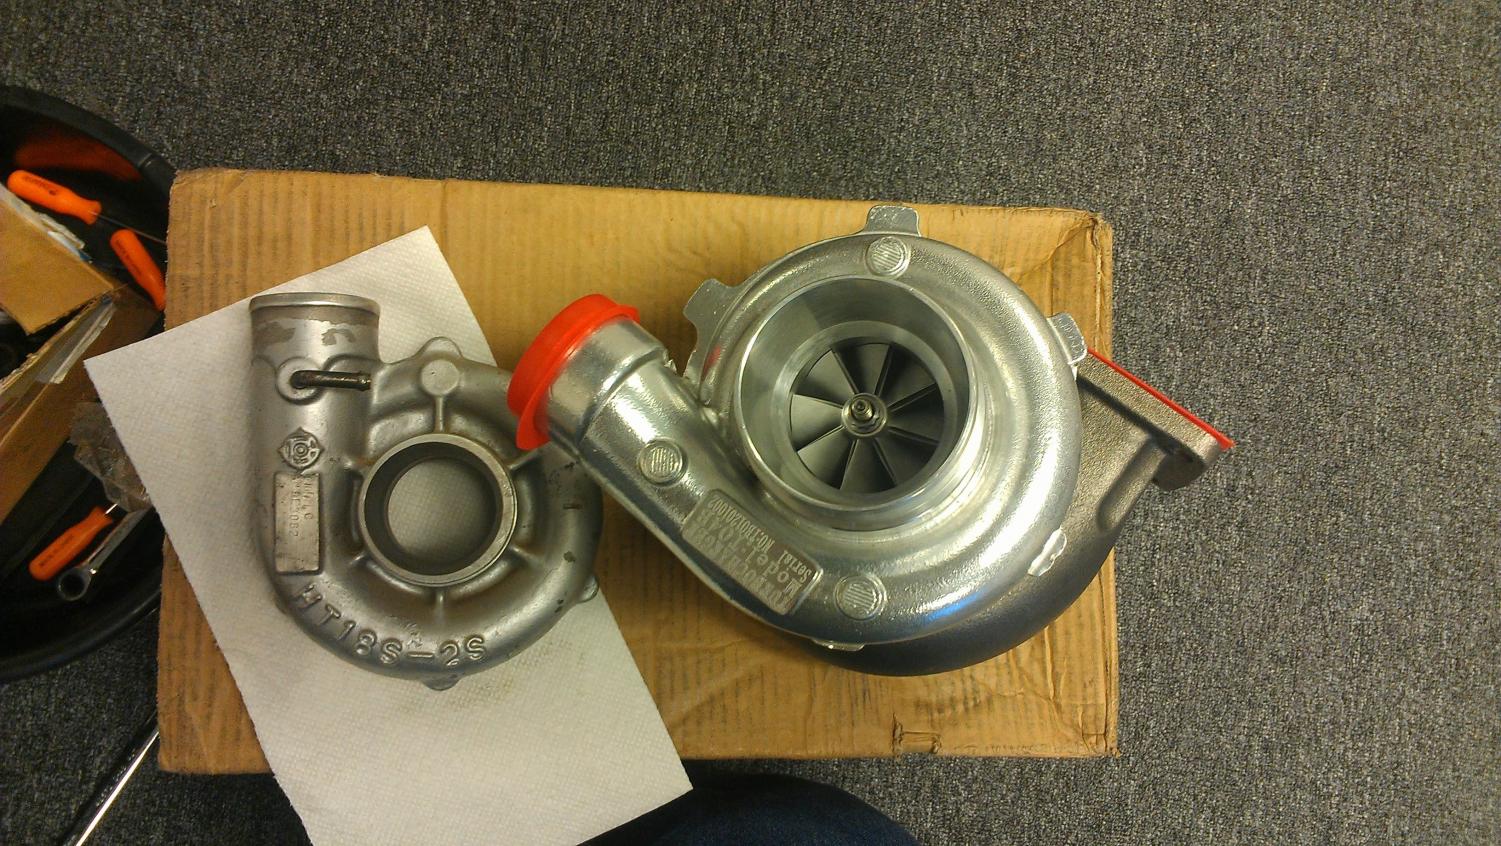
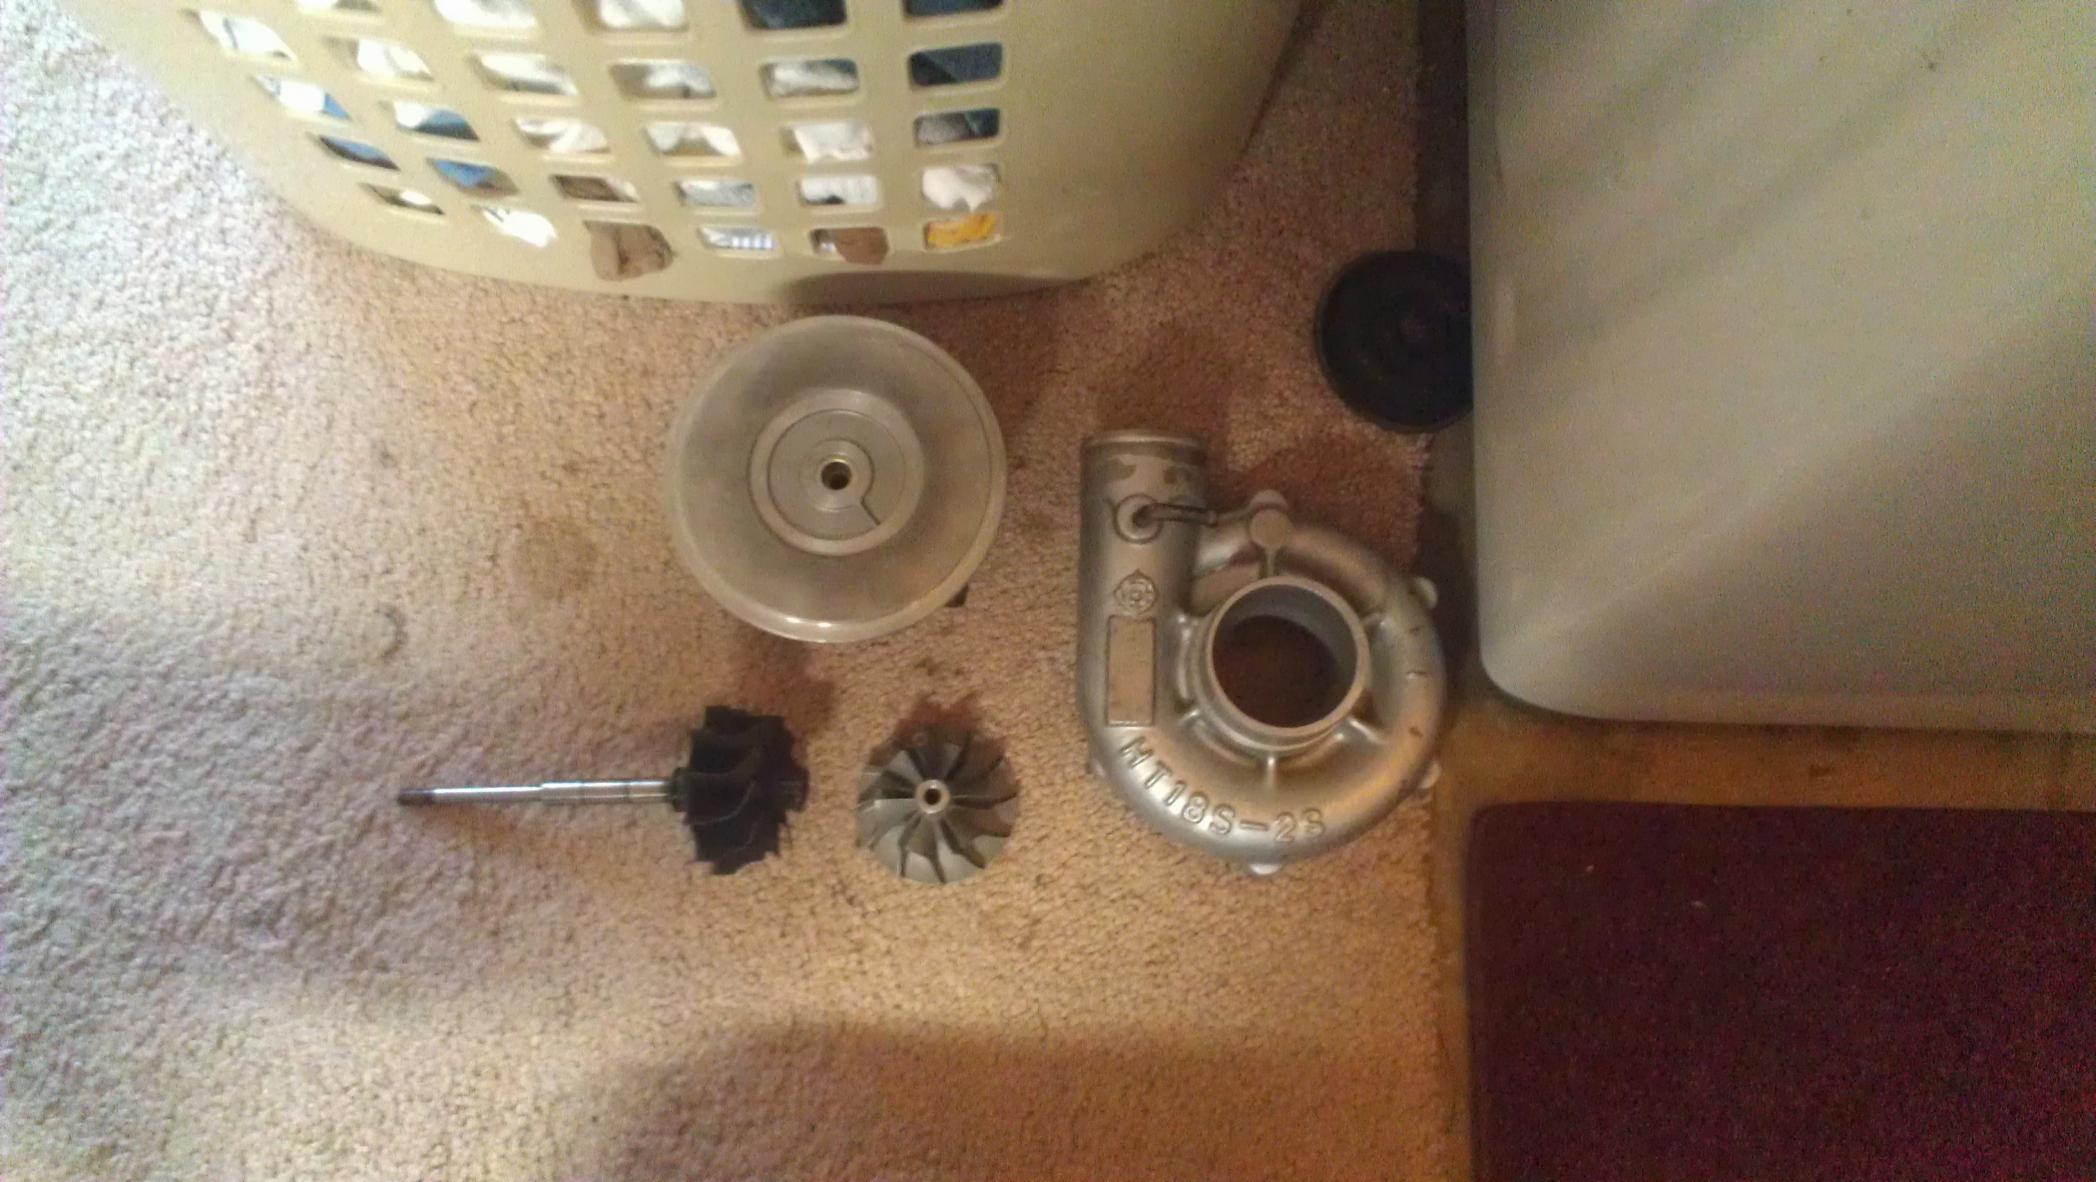
I got all of my parts in yesterday for my eBay Special Hybrid Turbo, basically a T04B25 tractor turbo($164.99 shipped) and a TA34 Trubine Wheel and Shaft($155.99 shipped).
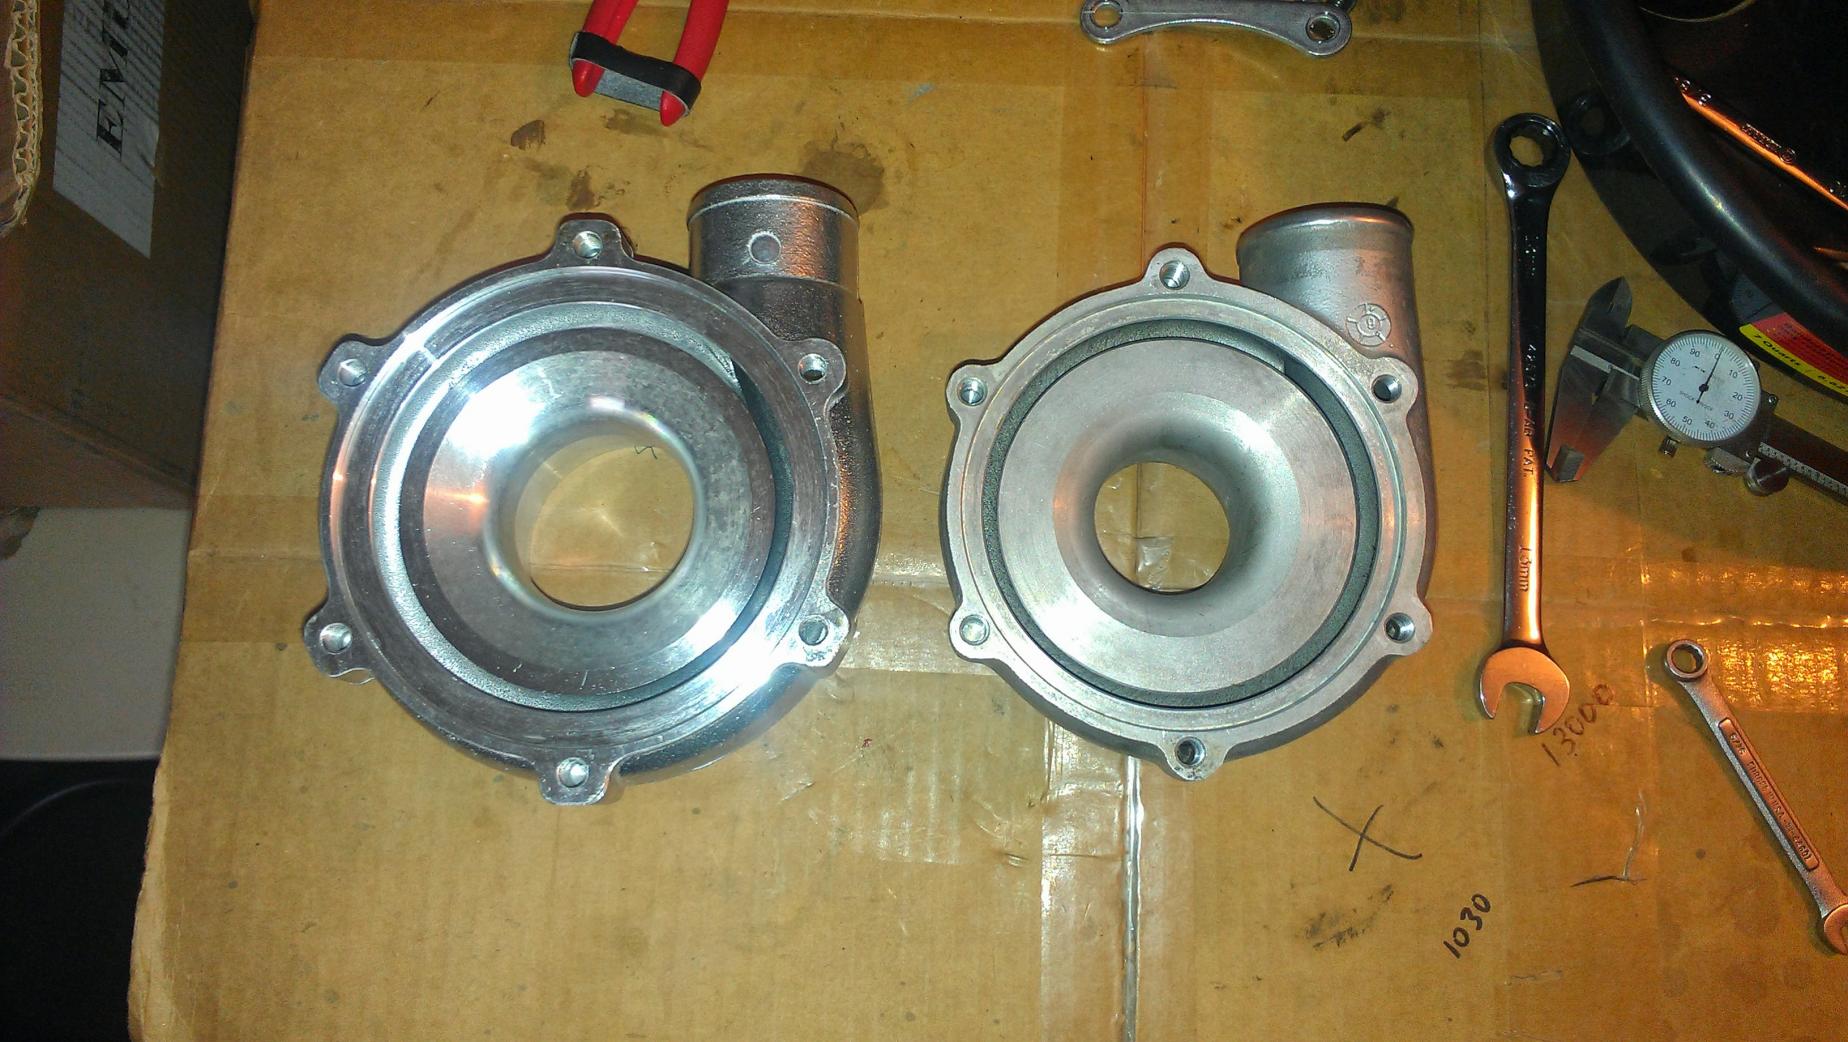
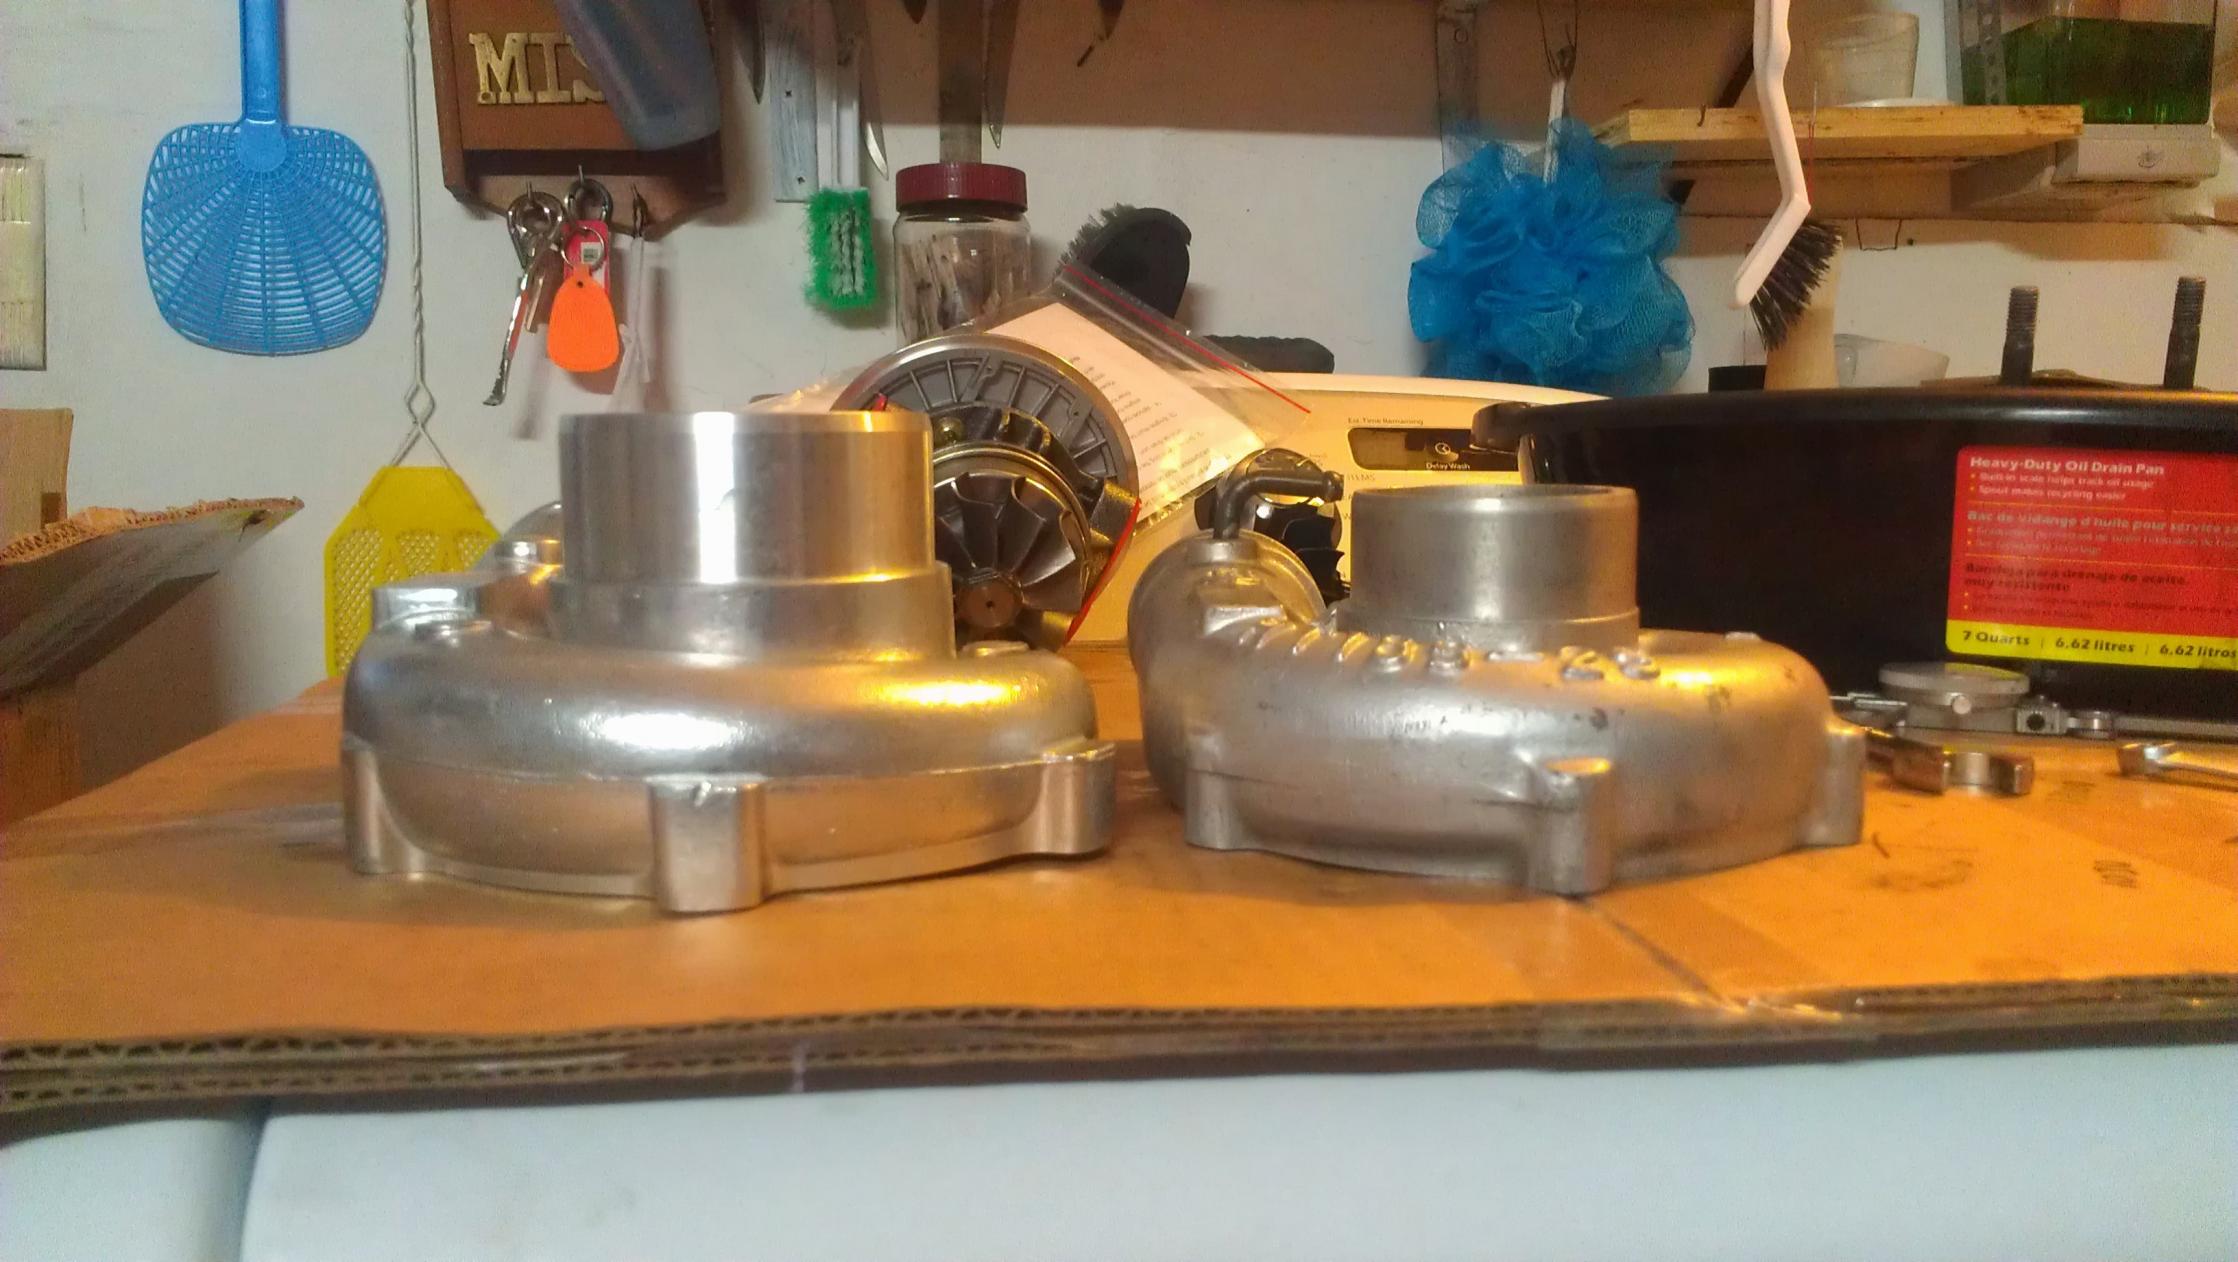
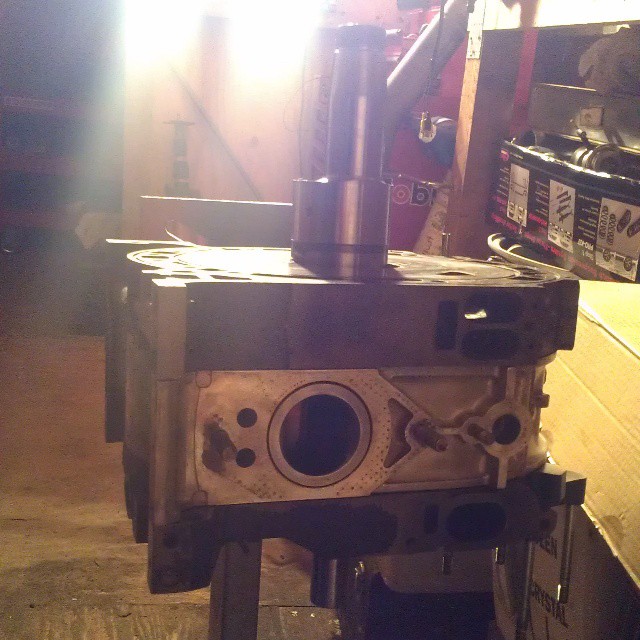
Here's a quick pic of the size comparison for the compressor housings, stock S4 vs U-Trim .60 AR T04B Housing:
Here's a quick pic of the main basic components I'm doing away with:
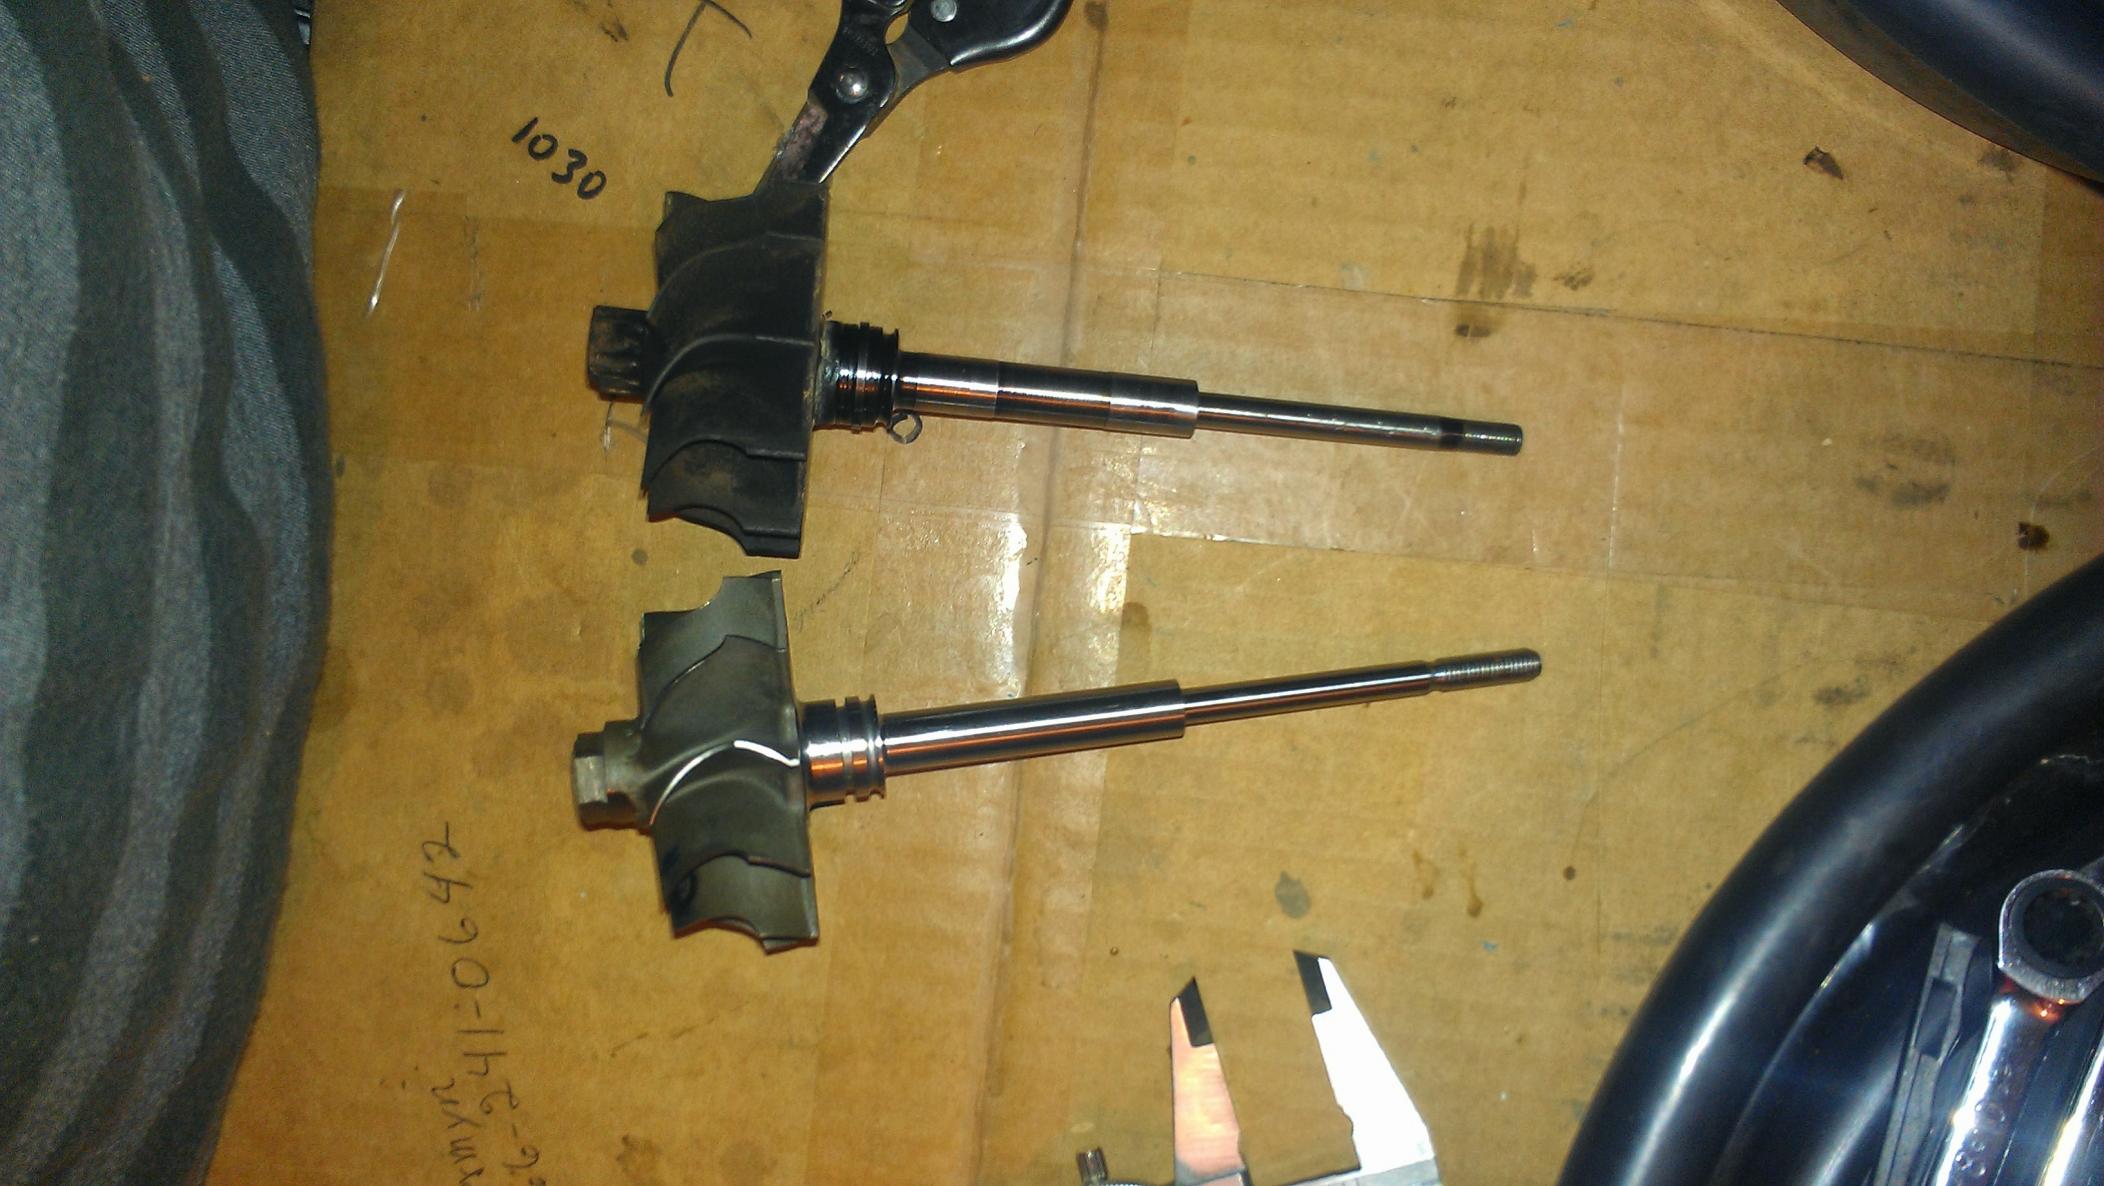
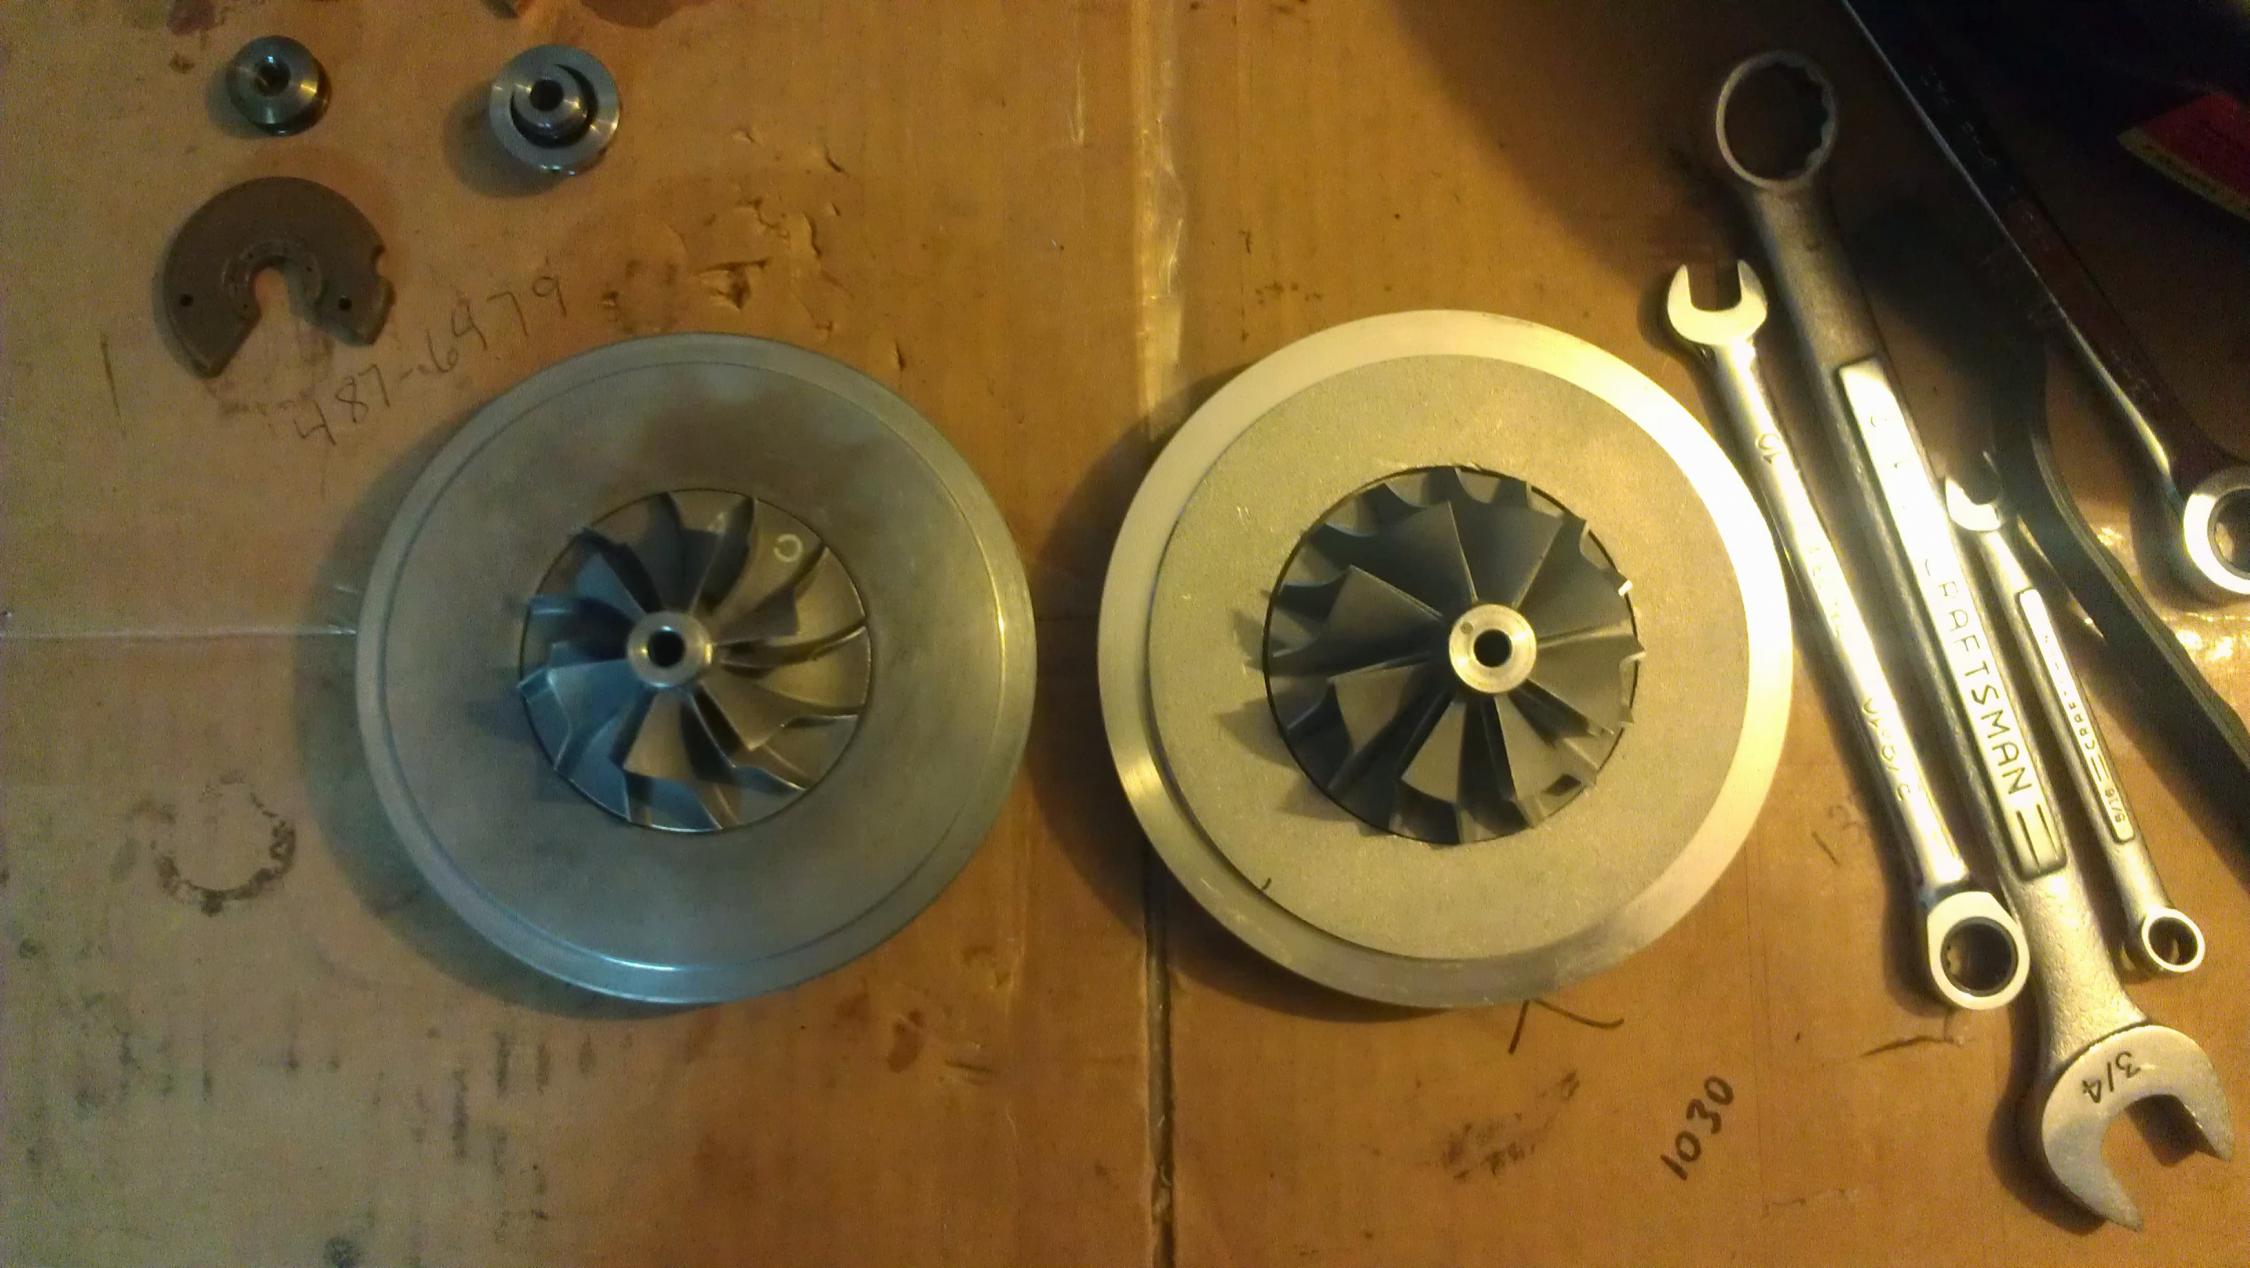
And a shot comparing the stock S4 Turbine wheel to the TA34 one, you can see there is a small difference in height and the curvature of the blades:
And more pics:
Here you can see the difference in size of the compressor wheels:

Old parts on the left, new parts on the right:
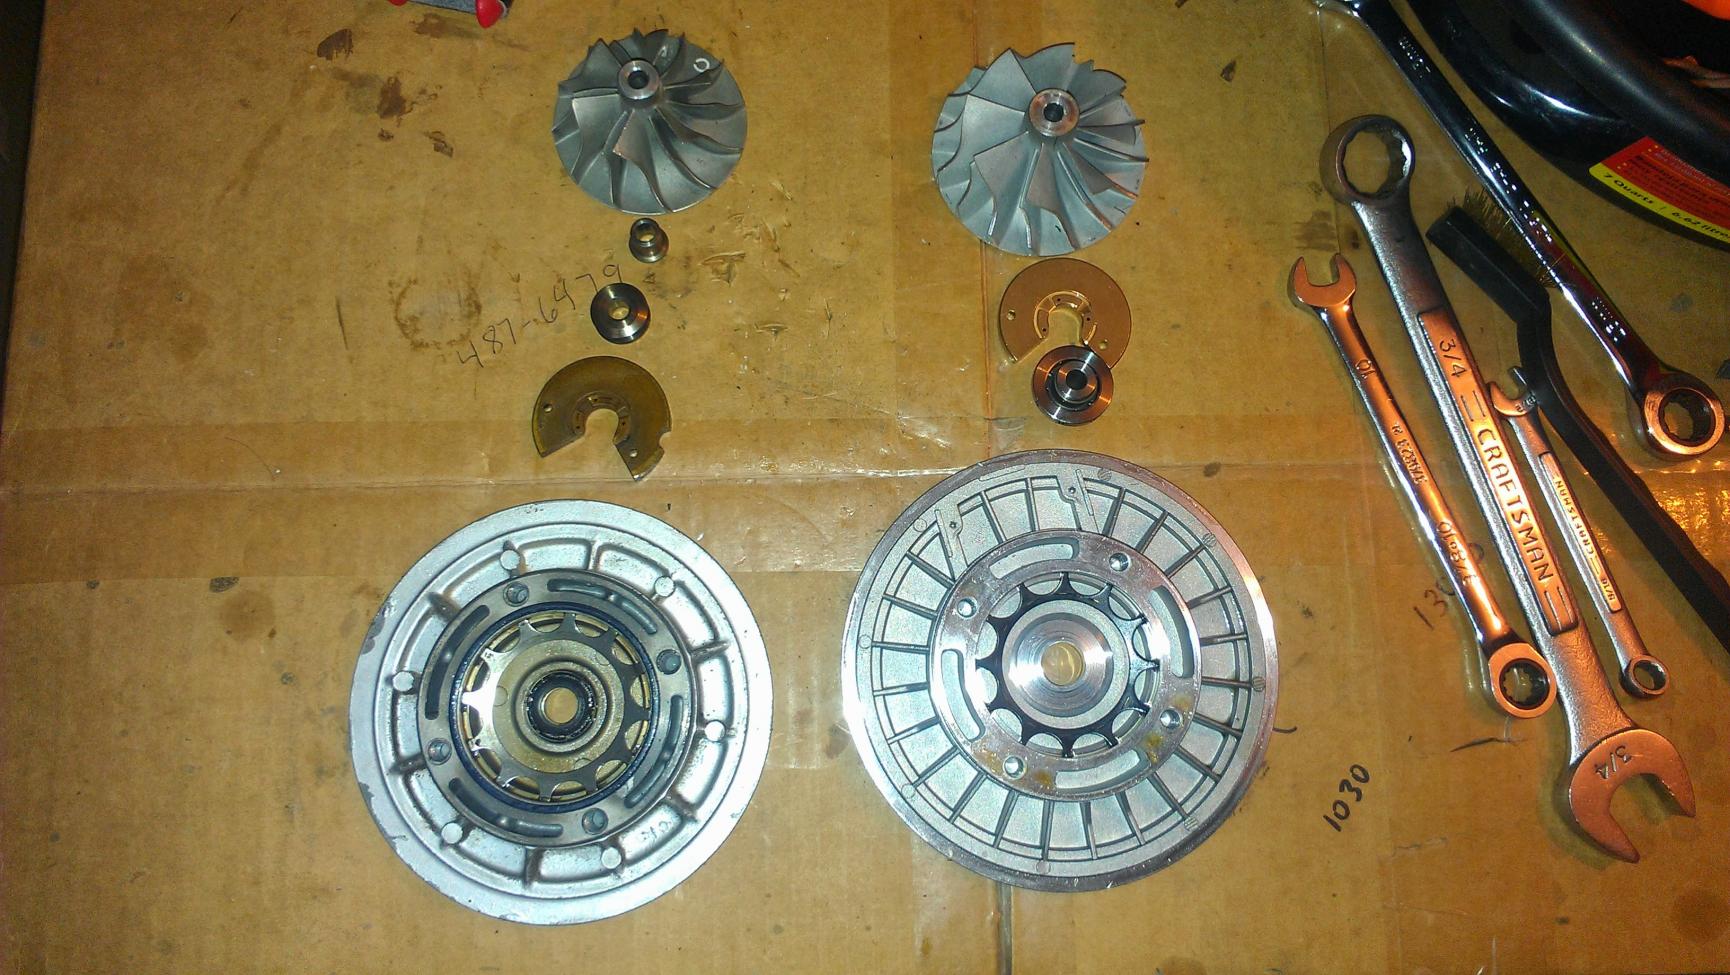
Another comparison shot:
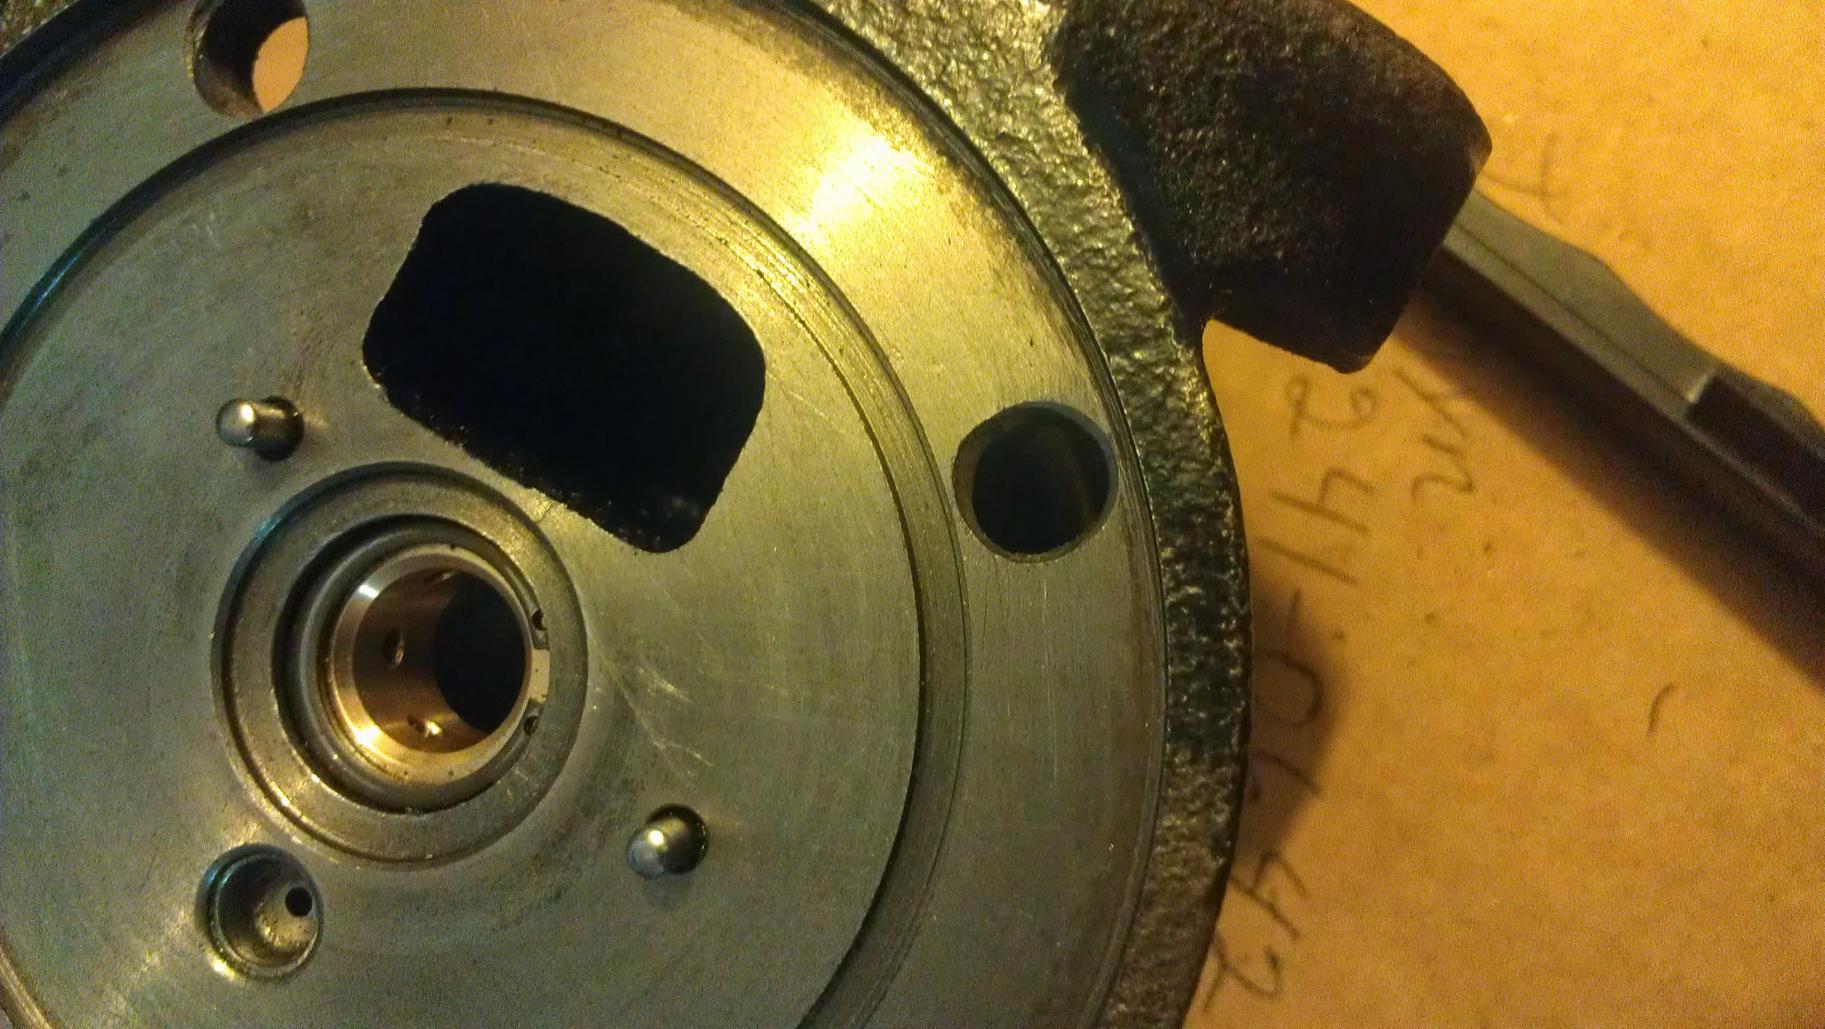
Here are some pics of the holes that need to be widened or drilled out because the bolt pattern on the T04B backing plate is a tad smaller than what's on our CHRA's, still a square but a bit larger:
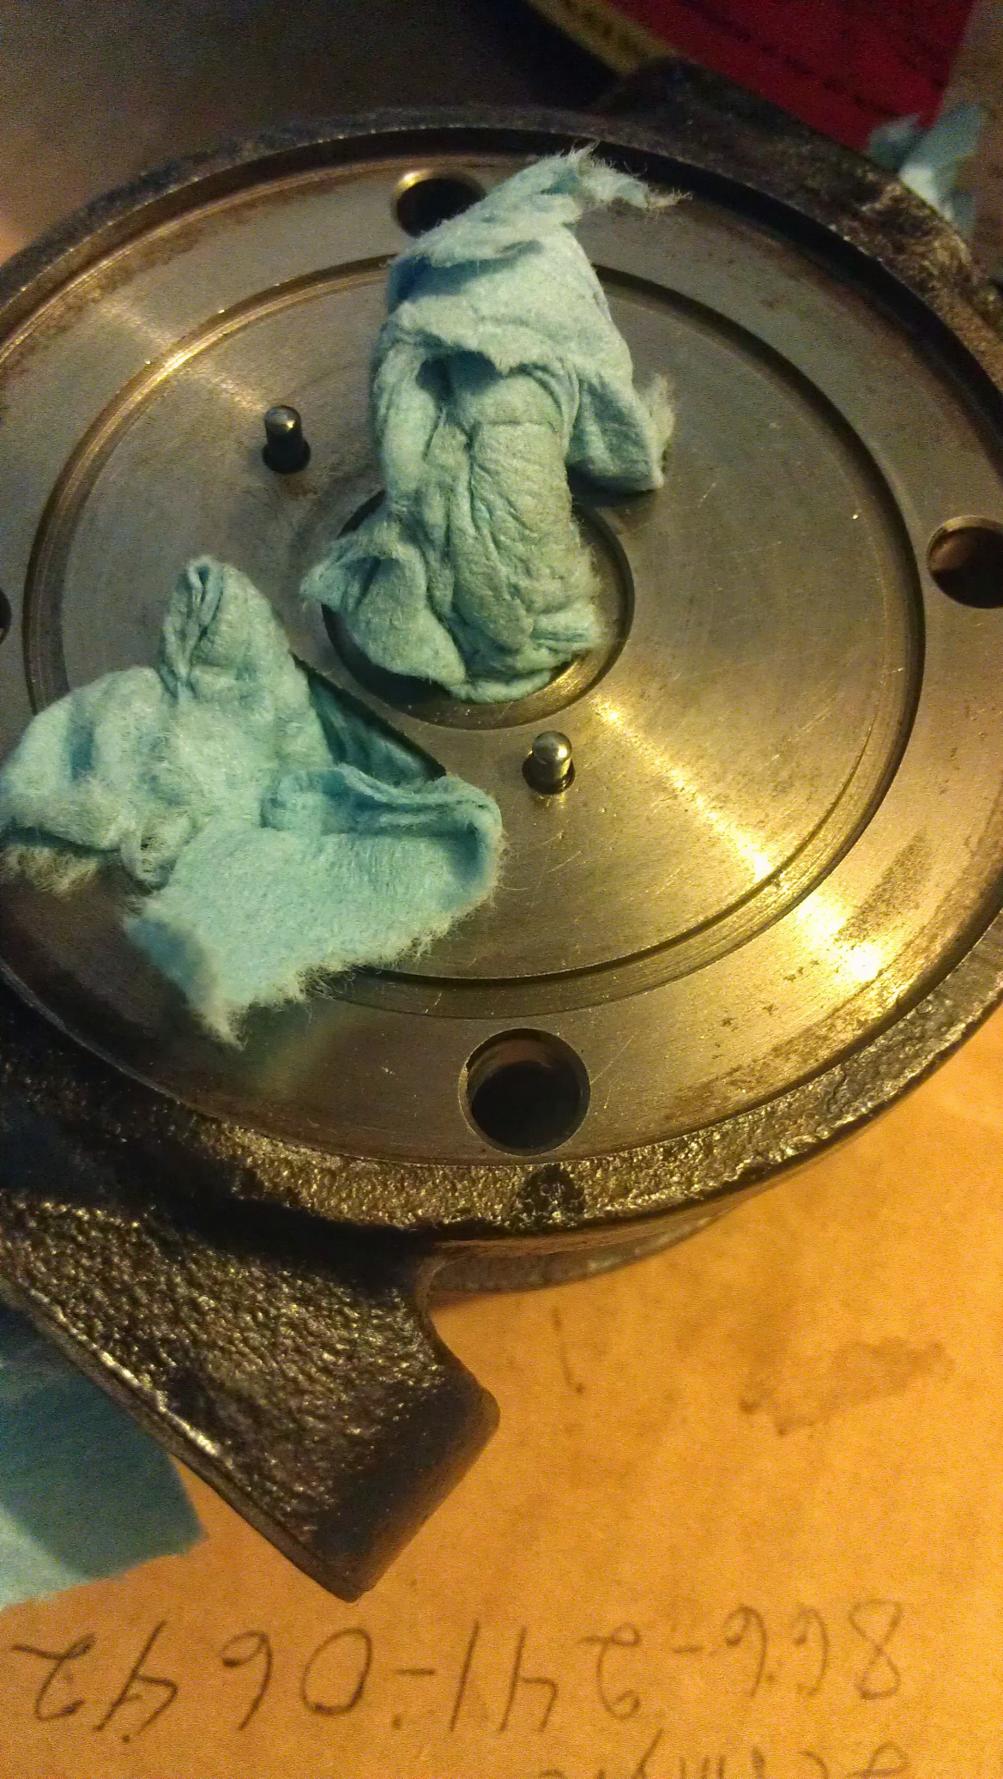
Used a Dremel since it would be easiest
All assembled:
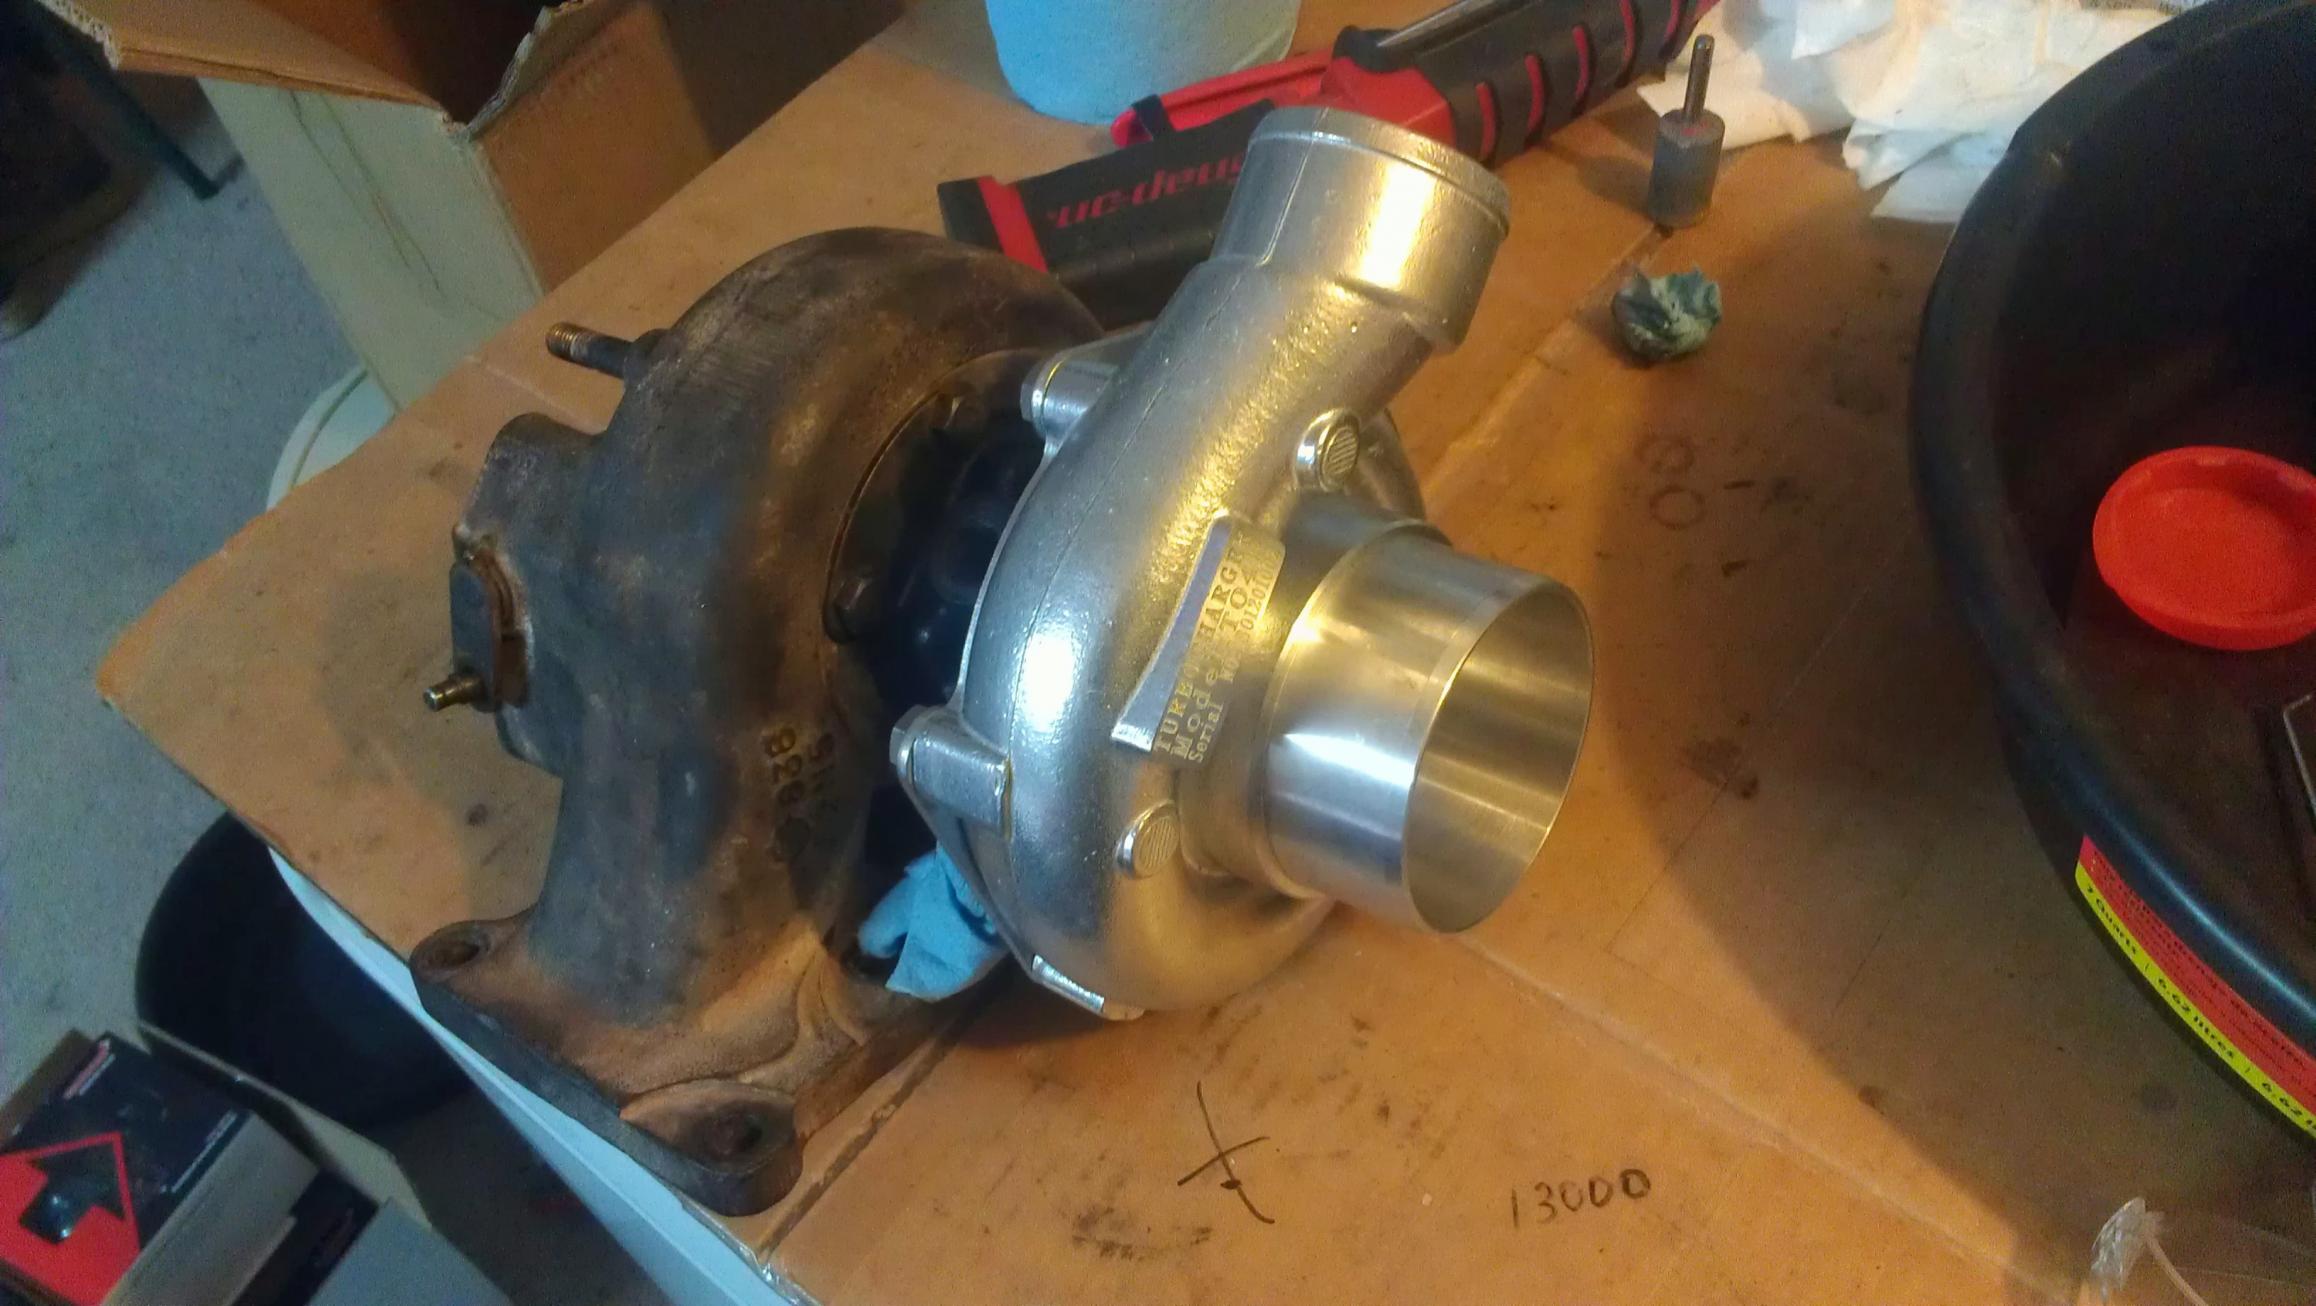
Overall, it was very straight forward. I would've liked to have used a V-Trim compressor side but meh, can't complain. I did the work myself, got what should be a bad *** turbine wheel(which added almost unnecessary cost) and was able to use all of the bushings off the eBay turbo.
People might hate on overseas turbo parts but the bushings were actually about .0005" tighter on the turbine shaft than the ones that were already on my rebuilt turbo, so I used those instead.
I guess I also found that when turbos get rebuilt without replacing the turbine, shaft play is inevitable. The brand new TA34 I got was about .001" bigger at the bearing surface than my original one, everything else checked out identical though. The eBay turbo on the other hand, had all new components and yet the shaft on the turbine was .0005" smaller than my old worn out one.
Oh and one last thing, luckily the eBay turbo came with a left hand thread nut, so I was able to use that on the TA34 turbine. Is there anything else I'm leaving unanswered??? I think that's it!
I got all of my parts in yesterday for my eBay Special Hybrid Turbo, basically a T04B25 tractor turbo($164.99 shipped) and a TA34 Trubine Wheel and Shaft($155.99 shipped).
Here's a quick pic of the size comparison for the compressor housings, stock S4 vs U-Trim .60 AR T04B Housing:
Here's a quick pic of the main basic components I'm doing away with:
And a shot comparing the stock S4 Turbine wheel to the TA34 one, you can see there is a small difference in height and the curvature of the blades:
And more pics:
Here you can see the difference in size of the compressor wheels:
Old parts on the left, new parts on the right:
Another comparison shot:
Here are some pics of the holes that need to be widened or drilled out because the bolt pattern on the T04B backing plate is a tad smaller than what's on our CHRA's, still a square but a bit larger:
Used a Dremel since it would be easiest
All assembled:
Overall, it was very straight forward. I would've liked to have used a V-Trim compressor side but meh, can't complain. I did the work myself, got what should be a bad *** turbine wheel(which added almost unnecessary cost) and was able to use all of the bushings off the eBay turbo.
People might hate on overseas turbo parts but the bushings were actually about .0005" tighter on the turbine shaft than the ones that were already on my rebuilt turbo, so I used those instead.
I guess I also found that when turbos get rebuilt without replacing the turbine, shaft play is inevitable. The brand new TA34 I got was about .001" bigger at the bearing surface than my original one, everything else checked out identical though. The eBay turbo on the other hand, had all new components and yet the shaft on the turbine was .0005" smaller than my old worn out one.
Oh and one last thing, luckily the eBay turbo came with a left hand thread nut, so I was able to use that on the TA34 turbine. Is there anything else I'm leaving unanswered??? I think that's it!

I am fairly new in my digestion of all new turbo knowledge. But everything I have read in archives ect ect really make me want to do this same build to my s5 turbo.
Porting your wastegate? I did not see it mentioned, also, what are you expecting for power from this unit?
Porting your wastegate? I did not see it mentioned, also, what are you expecting for power from this unit?
Thread Starter
Joined: Mar 2009
Posts: 476
Likes: 45
From: Jefferson, TX
I am fairly new in my digestion of all new turbo knowledge. But everything I have read in archives ect ect really make me want to do this same build to my s5 turbo.
Porting your wastegate? I did not see it mentioned, also, what are you expecting for power from this unit?
Porting your wastegate? I did not see it mentioned, also, what are you expecting for power from this unit?


Thread Starter
Joined: Mar 2009
Posts: 476
Likes: 45
From: Jefferson, TX
 But I don't think I'll ever part with these wheels, hope to once again slap them on a S30 of my own in the future.
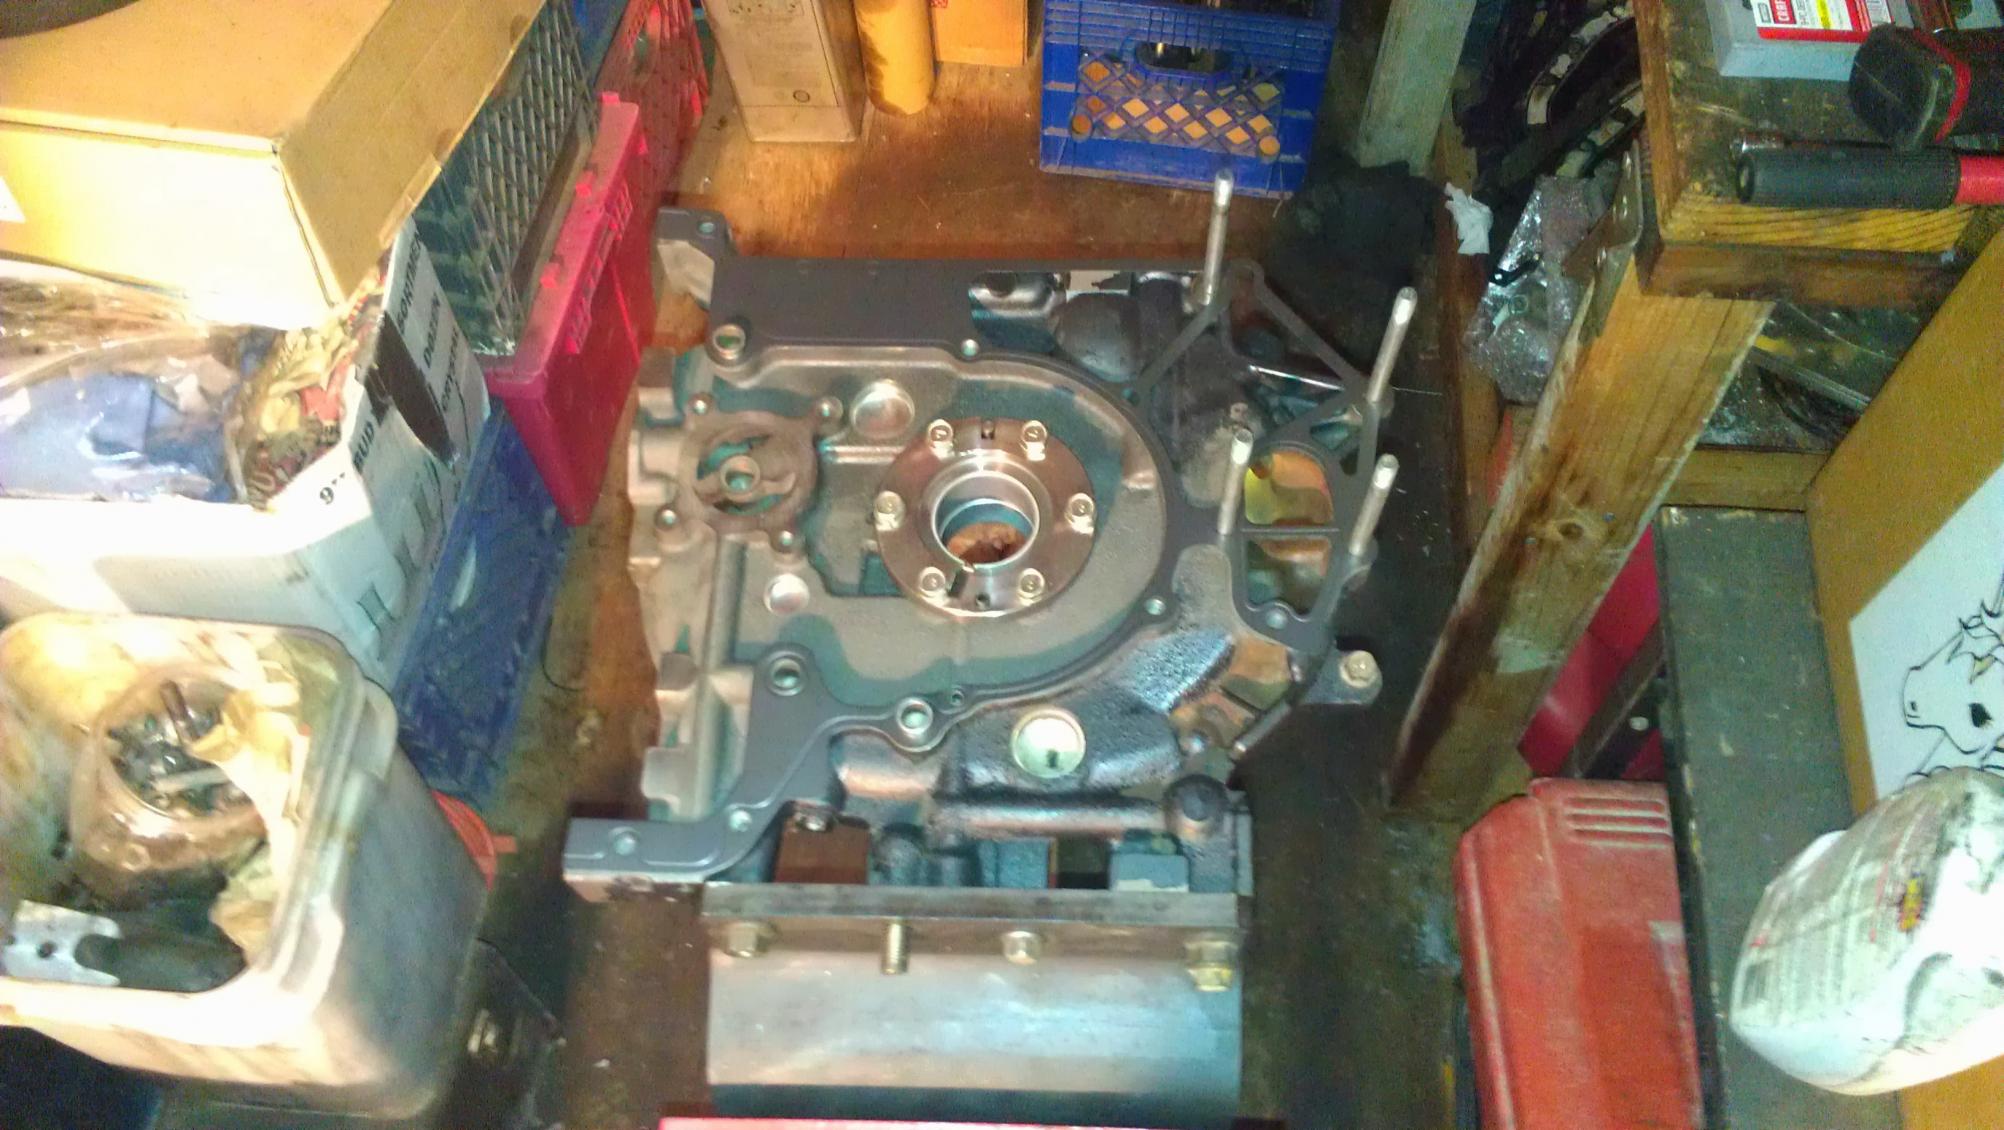
Update time though. Pulled the engine since it had a weird seizing issue. And it span easily by hand in one direction but not the normally way, it was really weird and basically happened out of nowhere.
Tear down time!
After tearing off the manifolds and what not, I immediately found the issue after taking off the front cover. Spun the front bearing, not sure how but it happened.
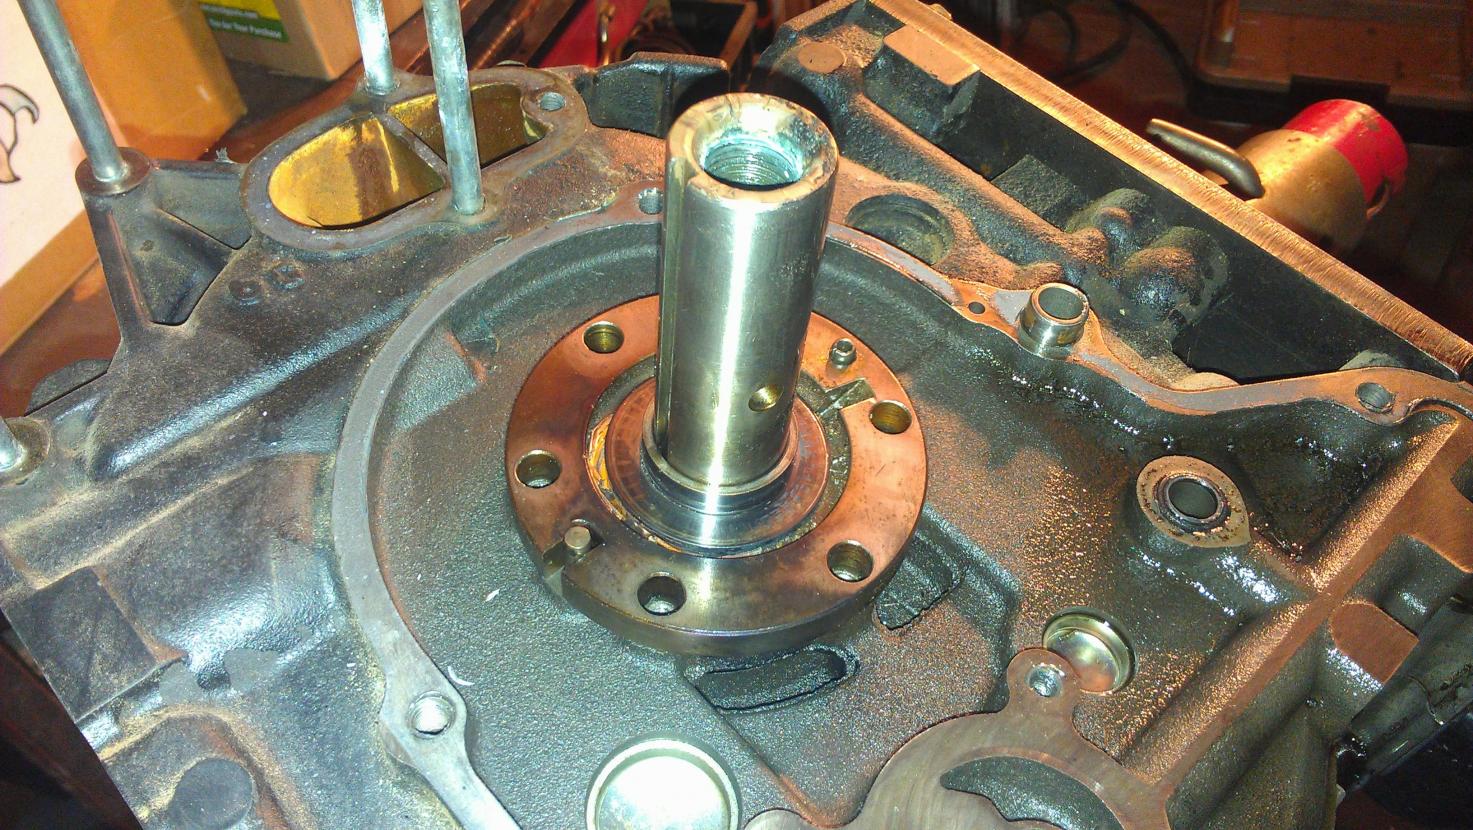
So I'll be putting in all new fresh bearings and piecing together this engine with the best spare parts I have.
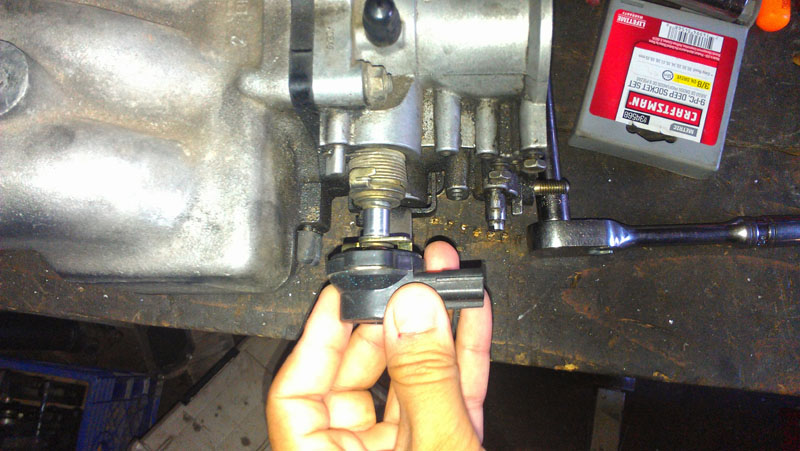
Since I don't have much money to buy some of the gaskets and bearing and what not, I kept myself busy trying to figure out a good full resolution TPS set up. Found that I could use the FD TPS shaft components, just had to eliminate the OMP arm and the original TPS arm/adjuster.
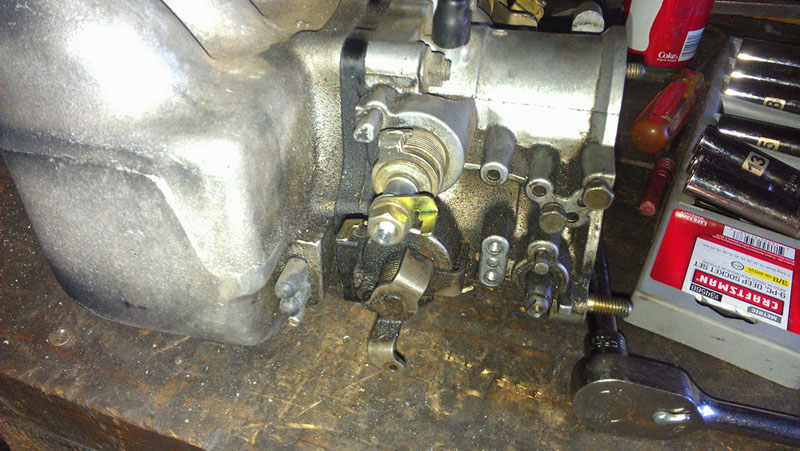
Just need to make a quick bracket for this.
Thread Starter
Joined: Mar 2009
Posts: 476
Likes: 45
From: Jefferson, TX
Come to think of it, it seems like I do. My daily z32 I had to pull the engine out of after installing due to a major oil leak from a faulty gasket.... that I installed new 
Anyways, onto the good stuff.
I made this gauge holder with a flat piece of aluminum, gotta keep an eye on fuel pressure for sure!
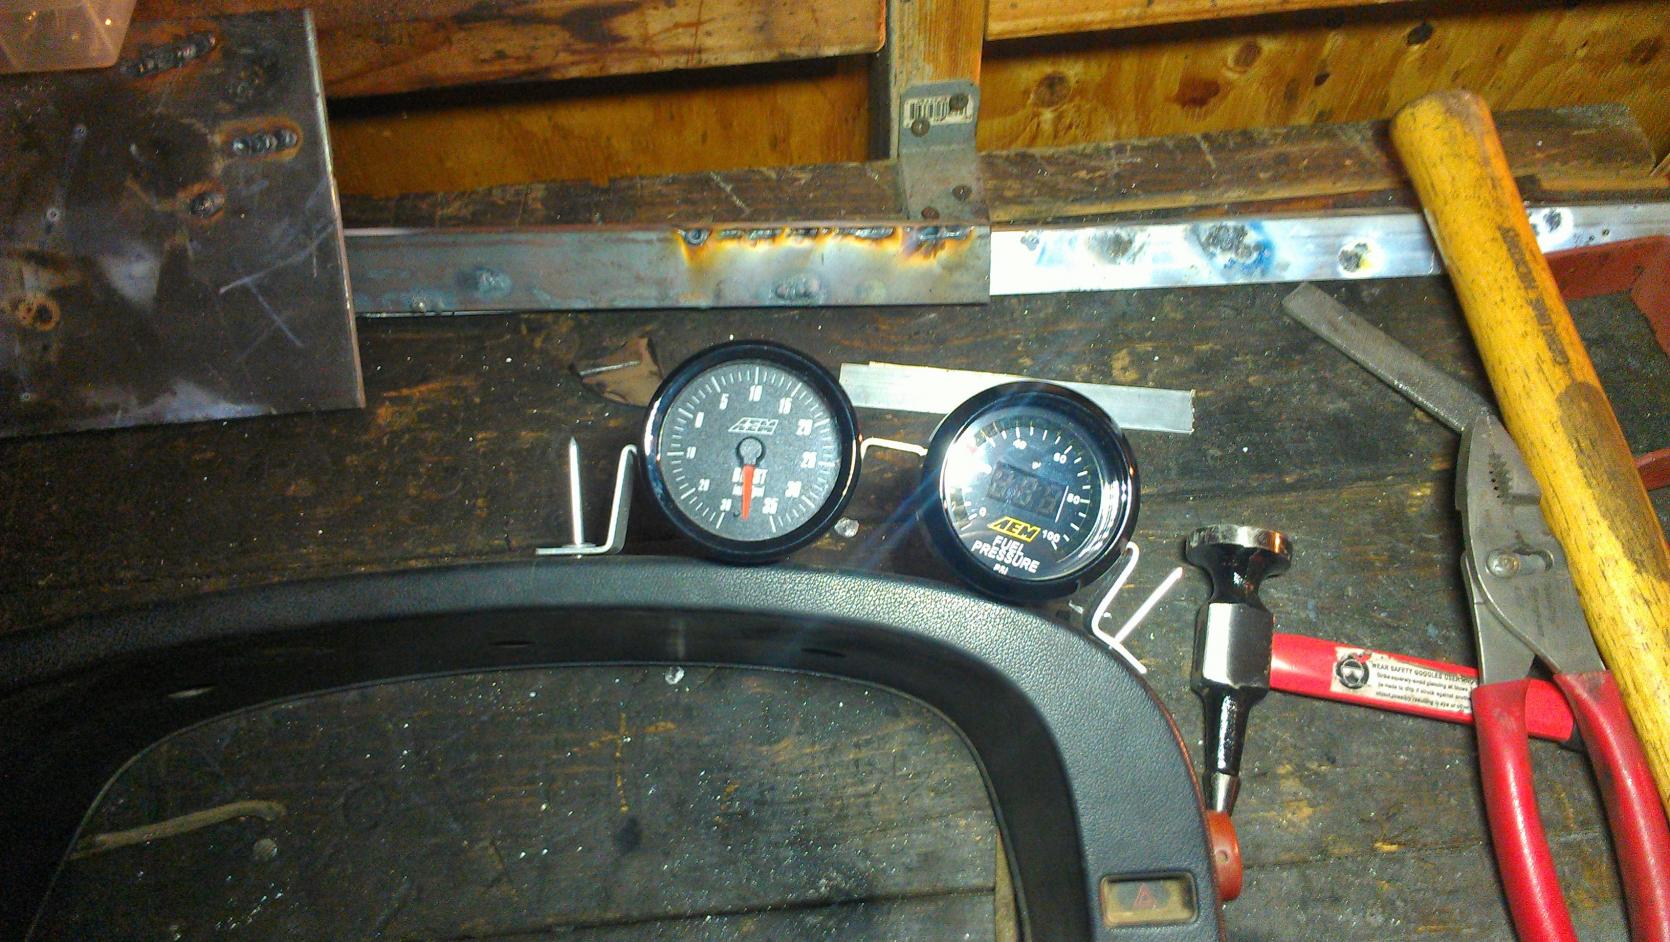
And I bought a cheap little EGT reader w/ display and analog out for data-logging. Saw some good reviews on it and it was about $130 total w/ exposed tip sensor, just need to wire it up.
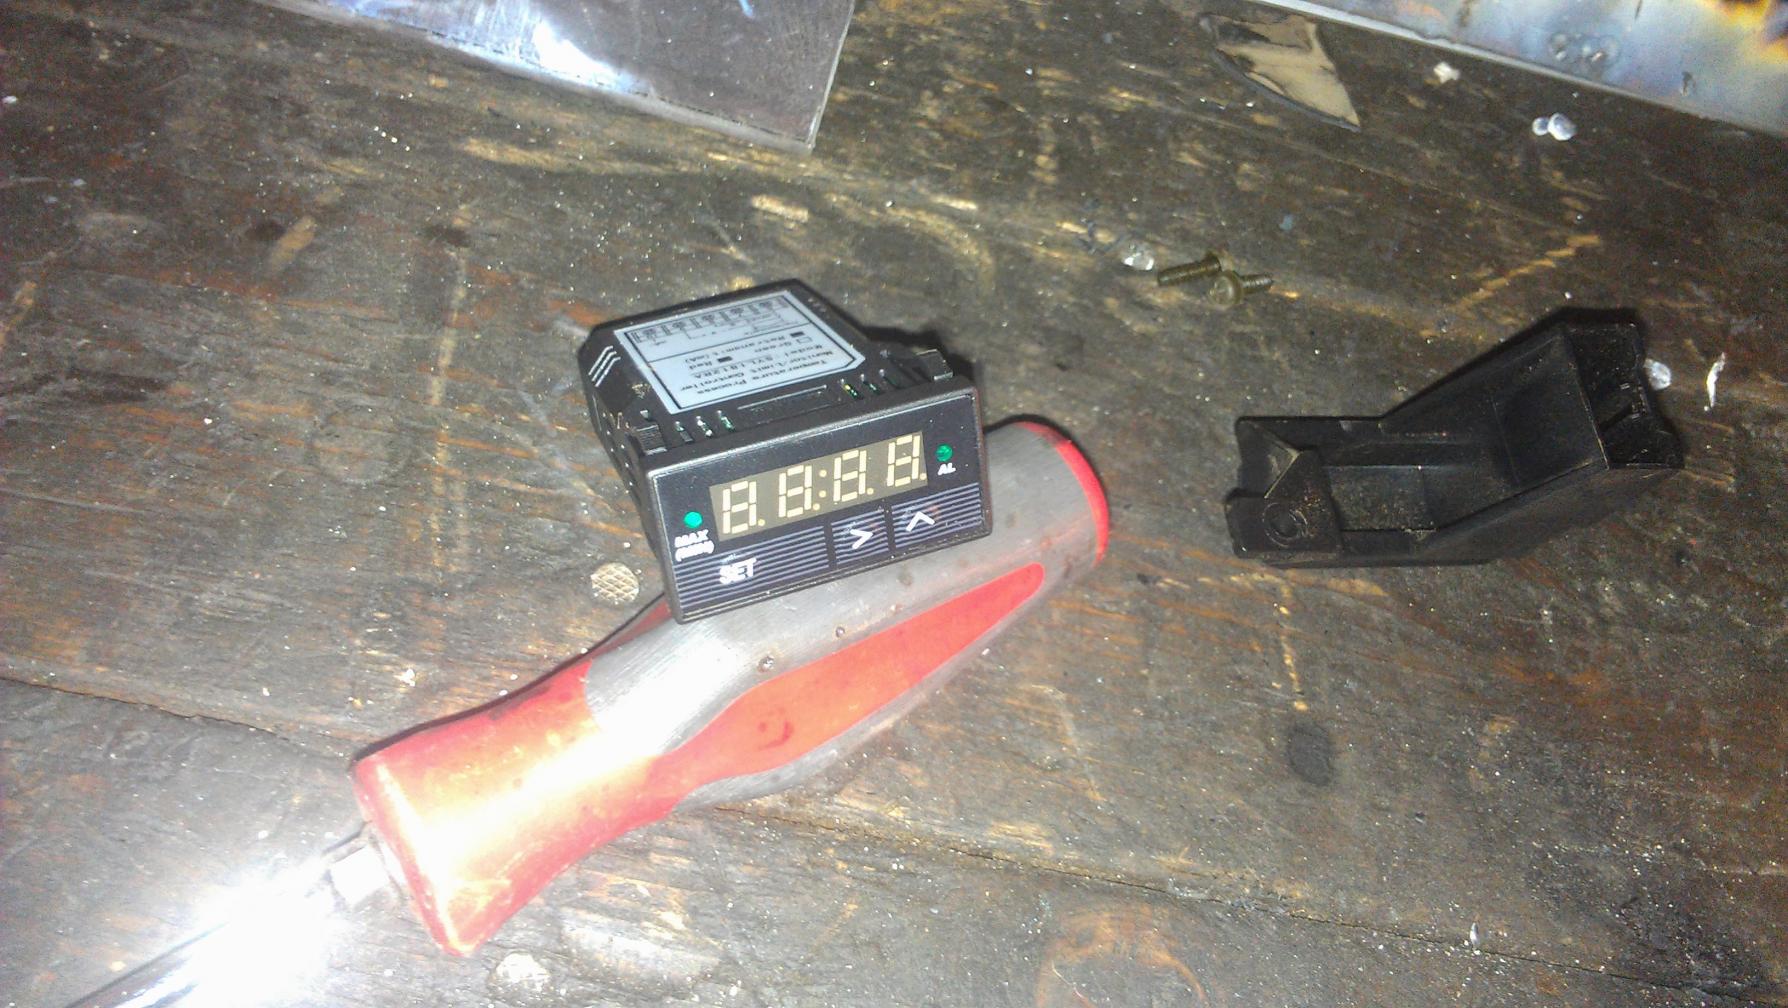
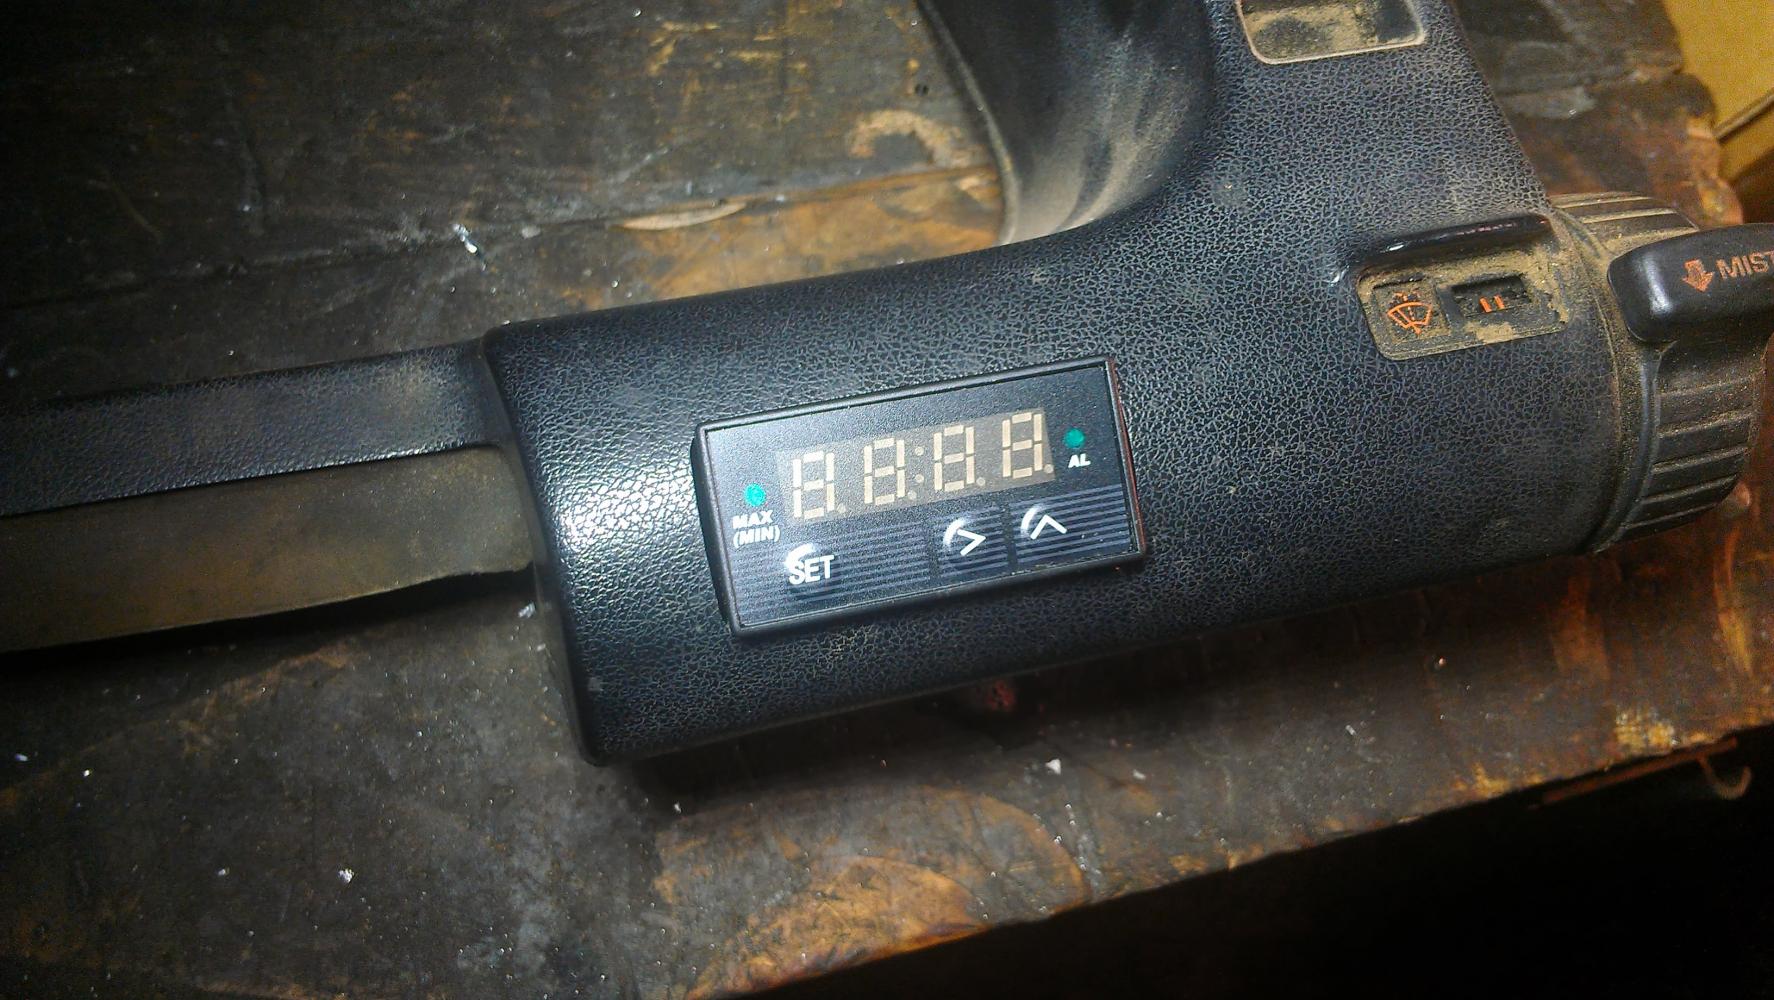
And as an unexpected plus, it actually dropped right in to the opening where the stock cruise control lever is(don't mind the dusty cluster surround, this is just a spare one I used for mock-up).
Anyways, onto the good stuff.
I made this gauge holder with a flat piece of aluminum, gotta keep an eye on fuel pressure for sure!
And I bought a cheap little EGT reader w/ display and analog out for data-logging. Saw some good reviews on it and it was about $130 total w/ exposed tip sensor, just need to wire it up.
And as an unexpected plus, it actually dropped right in to the opening where the stock cruise control lever is(don't mind the dusty cluster surround, this is just a spare one I used for mock-up).
Thread Starter
Joined: Mar 2009
Posts: 476
Likes: 45
From: Jefferson, TX
It's about time for an update I think.
But first, lets give it up to the guy that indirectly taught me some of the in's and out's on rebuilding a rotary.

Got fresh rotor bearings and just reused some good main bearings that I got off another engine a while ago.
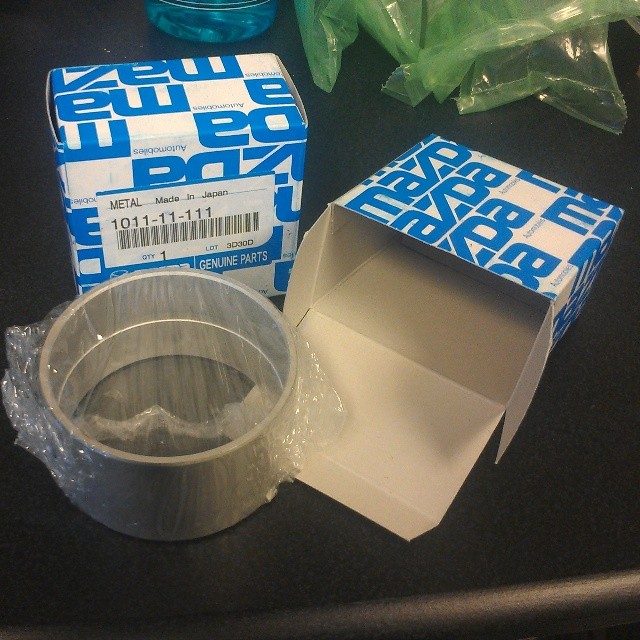
And also got an early RX-8 front cover gasket. Should be able to reuse it if I ever tear down the engine. You can see here that one of the studs doesn't line up and there's an extra bolt hole on the gasket on the cover sealing surface but it dropped right in.
Got only half way done yesterday, or last night. Wanted to continue but it was already 2am.
But first, lets give it up to the guy that indirectly taught me some of the in's and out's on rebuilding a rotary.
Got fresh rotor bearings and just reused some good main bearings that I got off another engine a while ago.
And also got an early RX-8 front cover gasket. Should be able to reuse it if I ever tear down the engine. You can see here that one of the studs doesn't line up and there's an extra bolt hole on the gasket on the cover sealing surface but it dropped right in.
Got only half way done yesterday, or last night. Wanted to continue but it was already 2am.
Thread Starter
Joined: Mar 2009
Posts: 476
Likes: 45
From: Jefferson, TX
Thread Starter
Joined: Mar 2009
Posts: 476
Likes: 45
From: Jefferson, TX
Looks like the engine should drop in this Sunday.
Started slapping on the manifolds, fitting the hybrid turbo and what not. I ran into a small problem with the secondary injectors. They're 1000cc standard length Bosch EV14's with the 60mm length caps(11mm o-ring) and I thought they would seriously drop right in... NOPE.
What I ended up doing after mixing and matching different o-rings, I removed the small diffusers and put in one o-ring that came off of the rotor housing dowel pins. On the injector I took off the lower 14mm o-ring and fitted one of the spacer grommets that these cars come with. Then up top I slid the 14mm o-ring(green o-ring between the injector and fuel rail) on the adapter cap(past the 11mm fuel rail o-ring). This ended up working really well and should keep the injectors nice and snug, didn't have to use any washers to space out the fuel rail or anything.
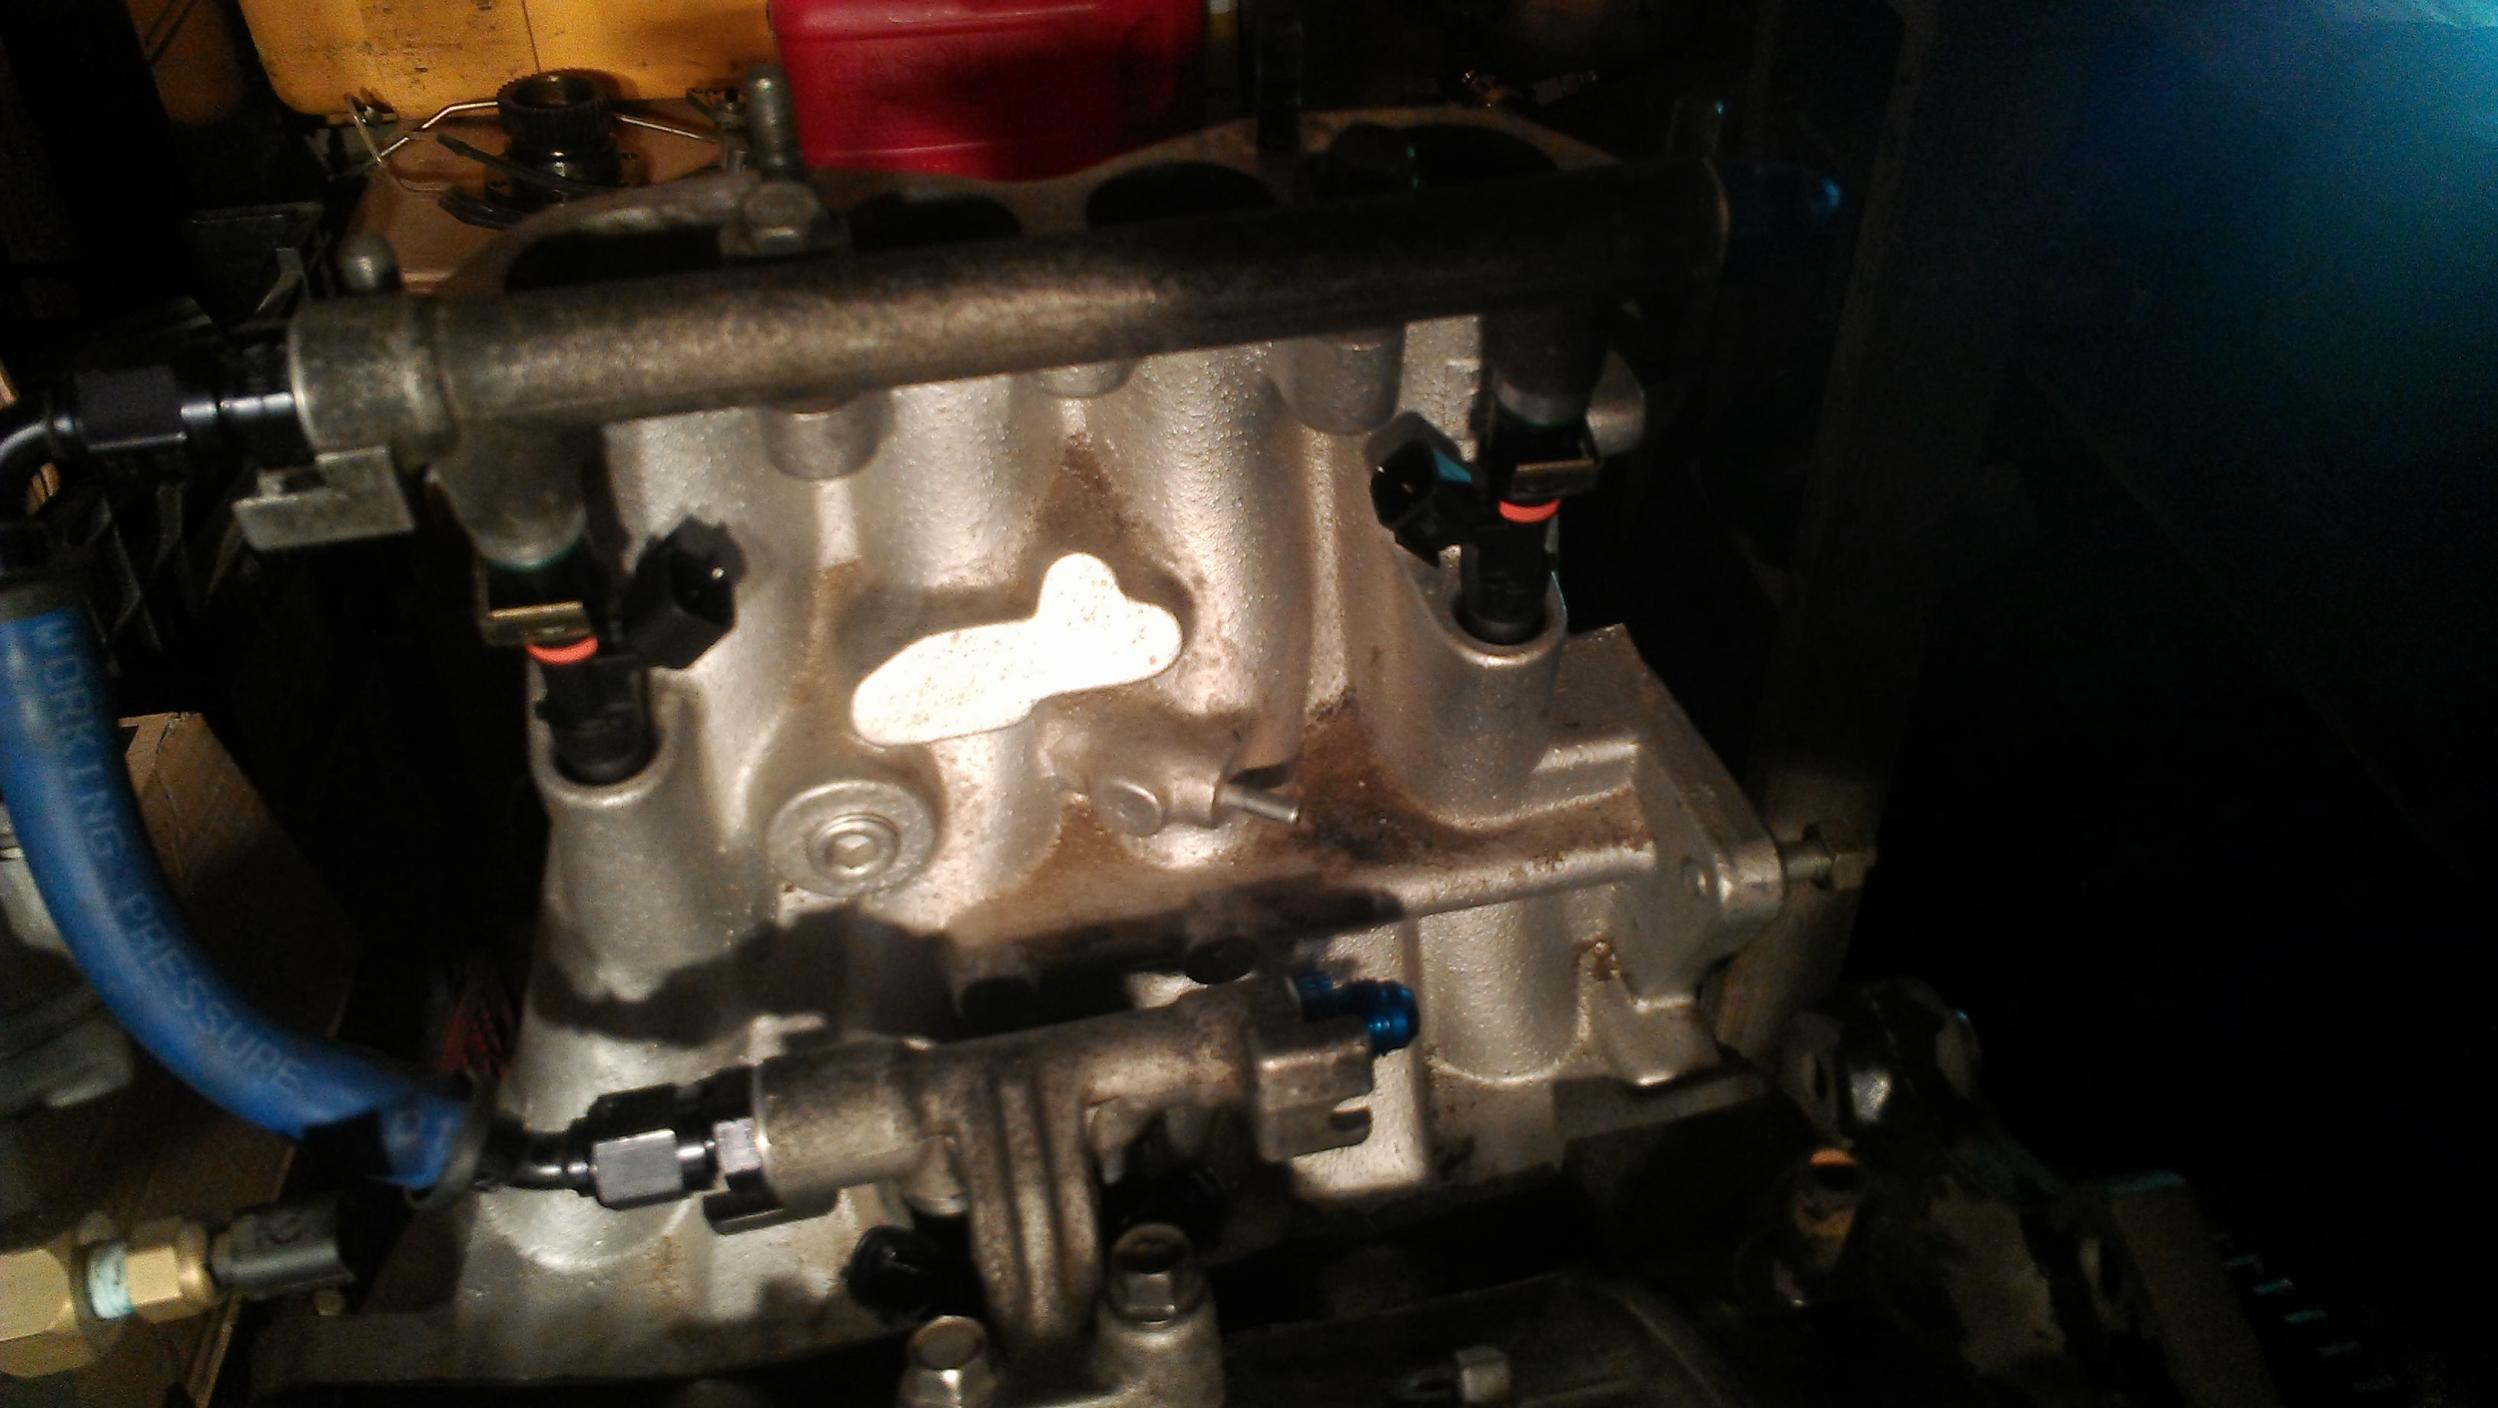
Here it is with more parts thrown on it. I'm not liking how bulky the BOV pipe is looking, I will probably use my CorkSport pipe and weld on an adapter flange for the BOV I'm using.
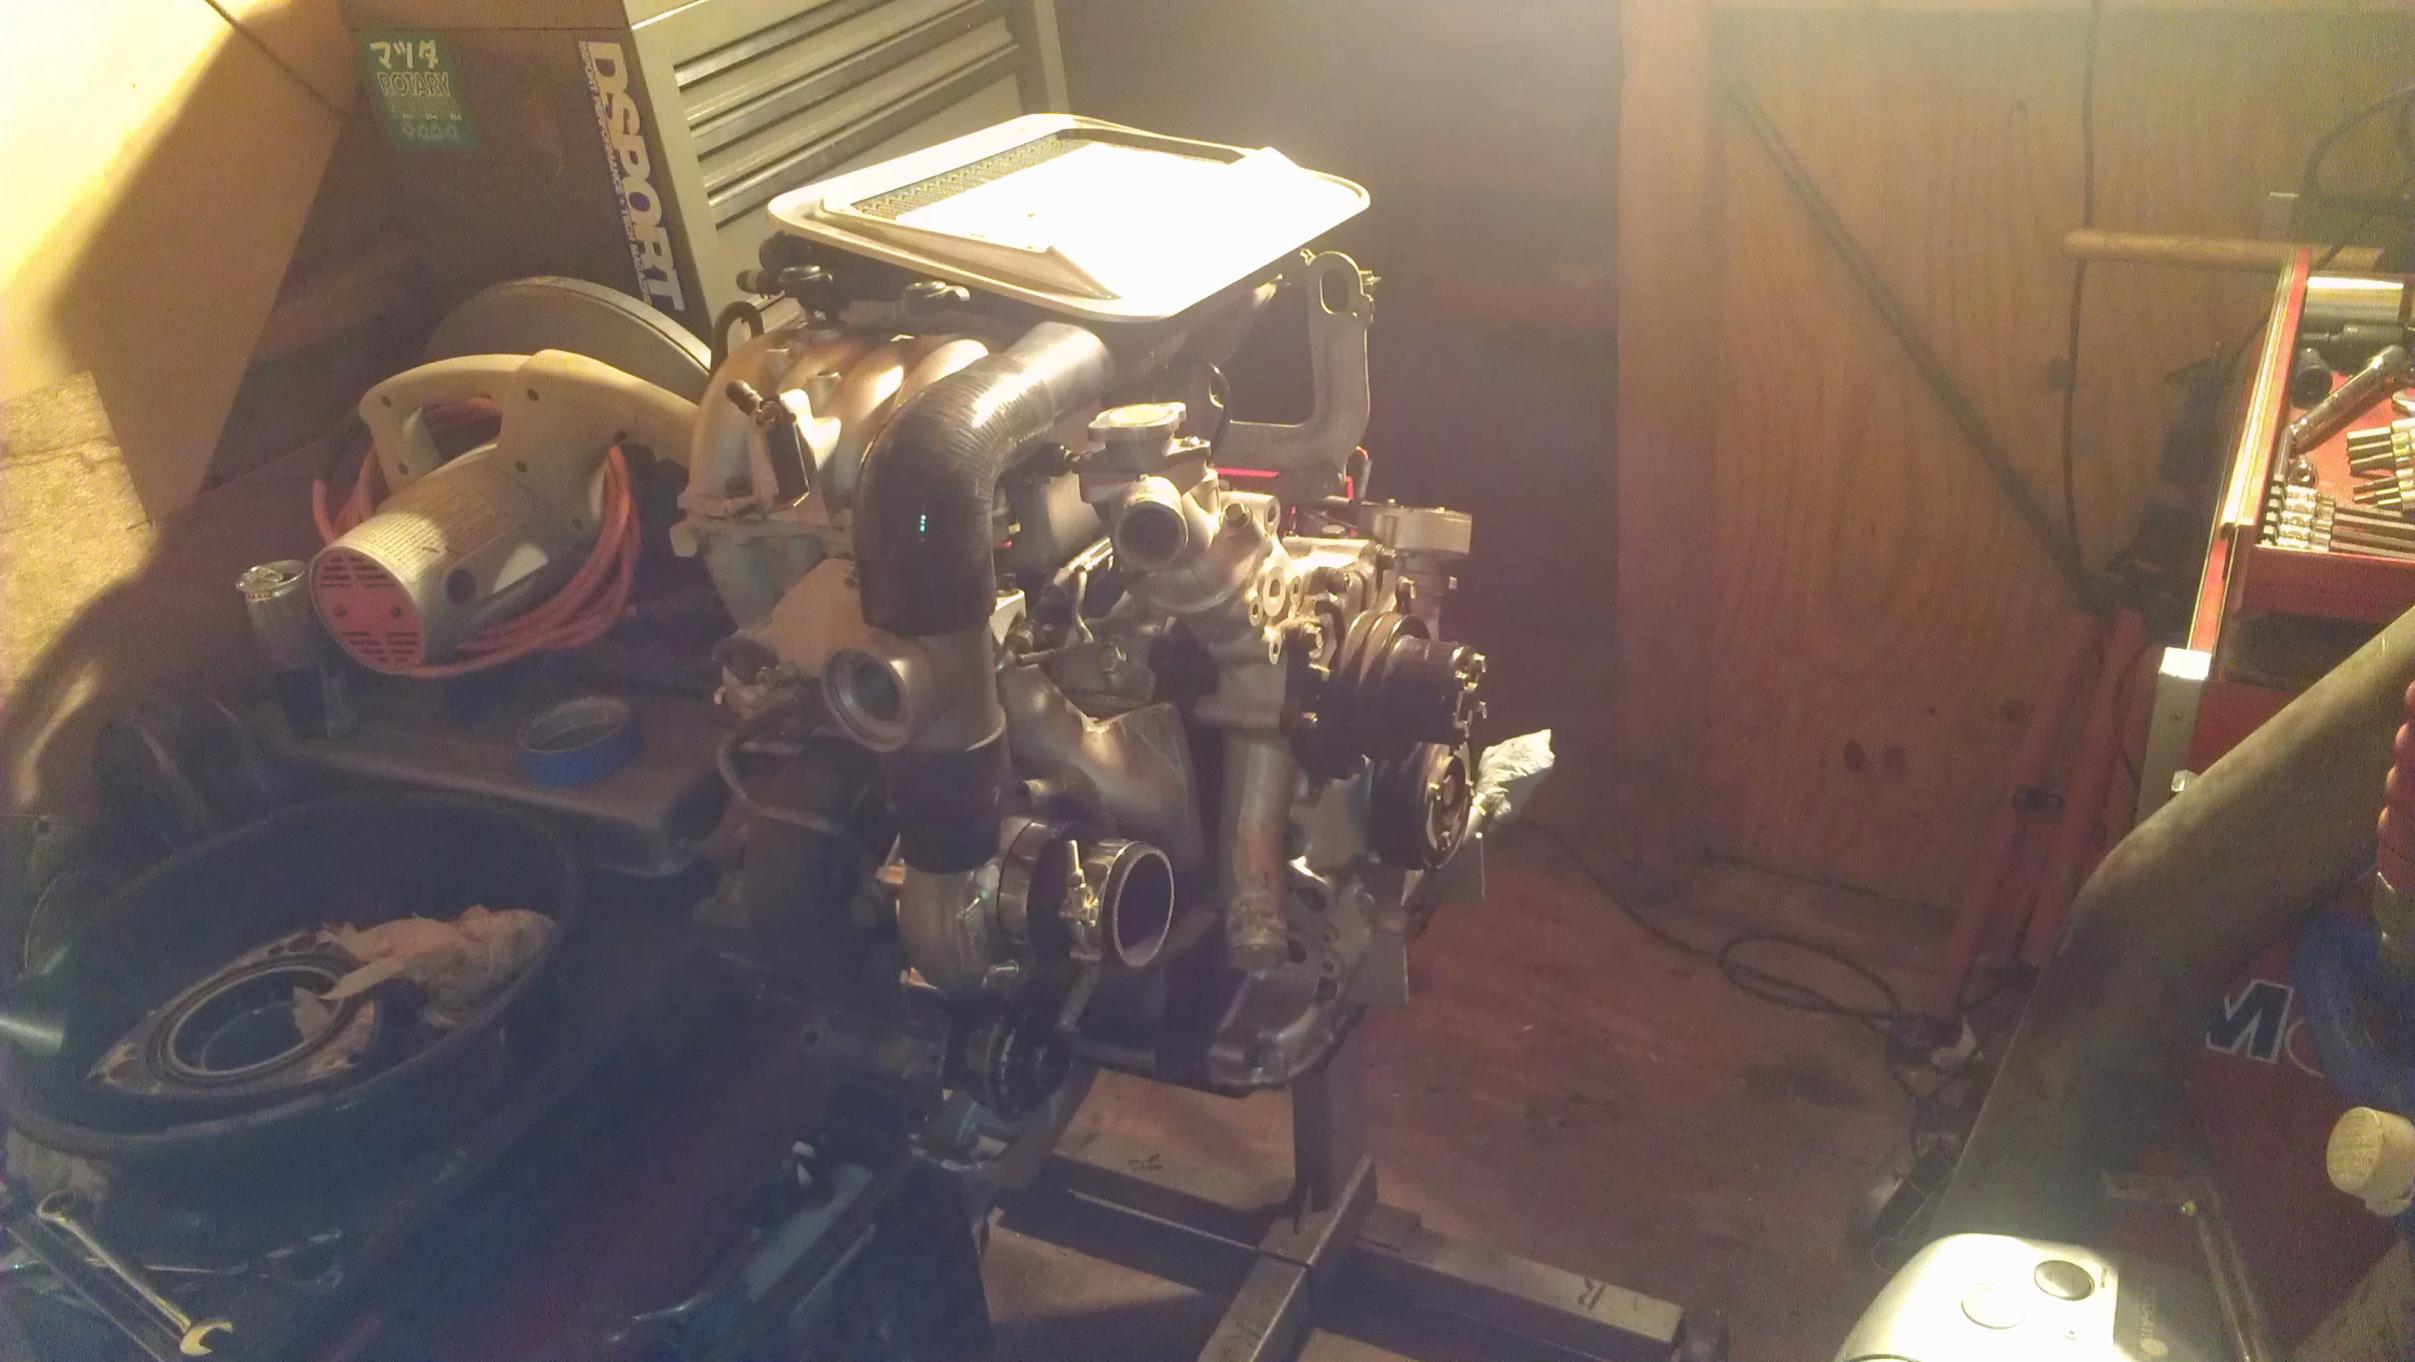
And you can kind of see how big(or small) the turbo is now. So glad I'm going this route since it has so much more potential than the stock unit ever would.

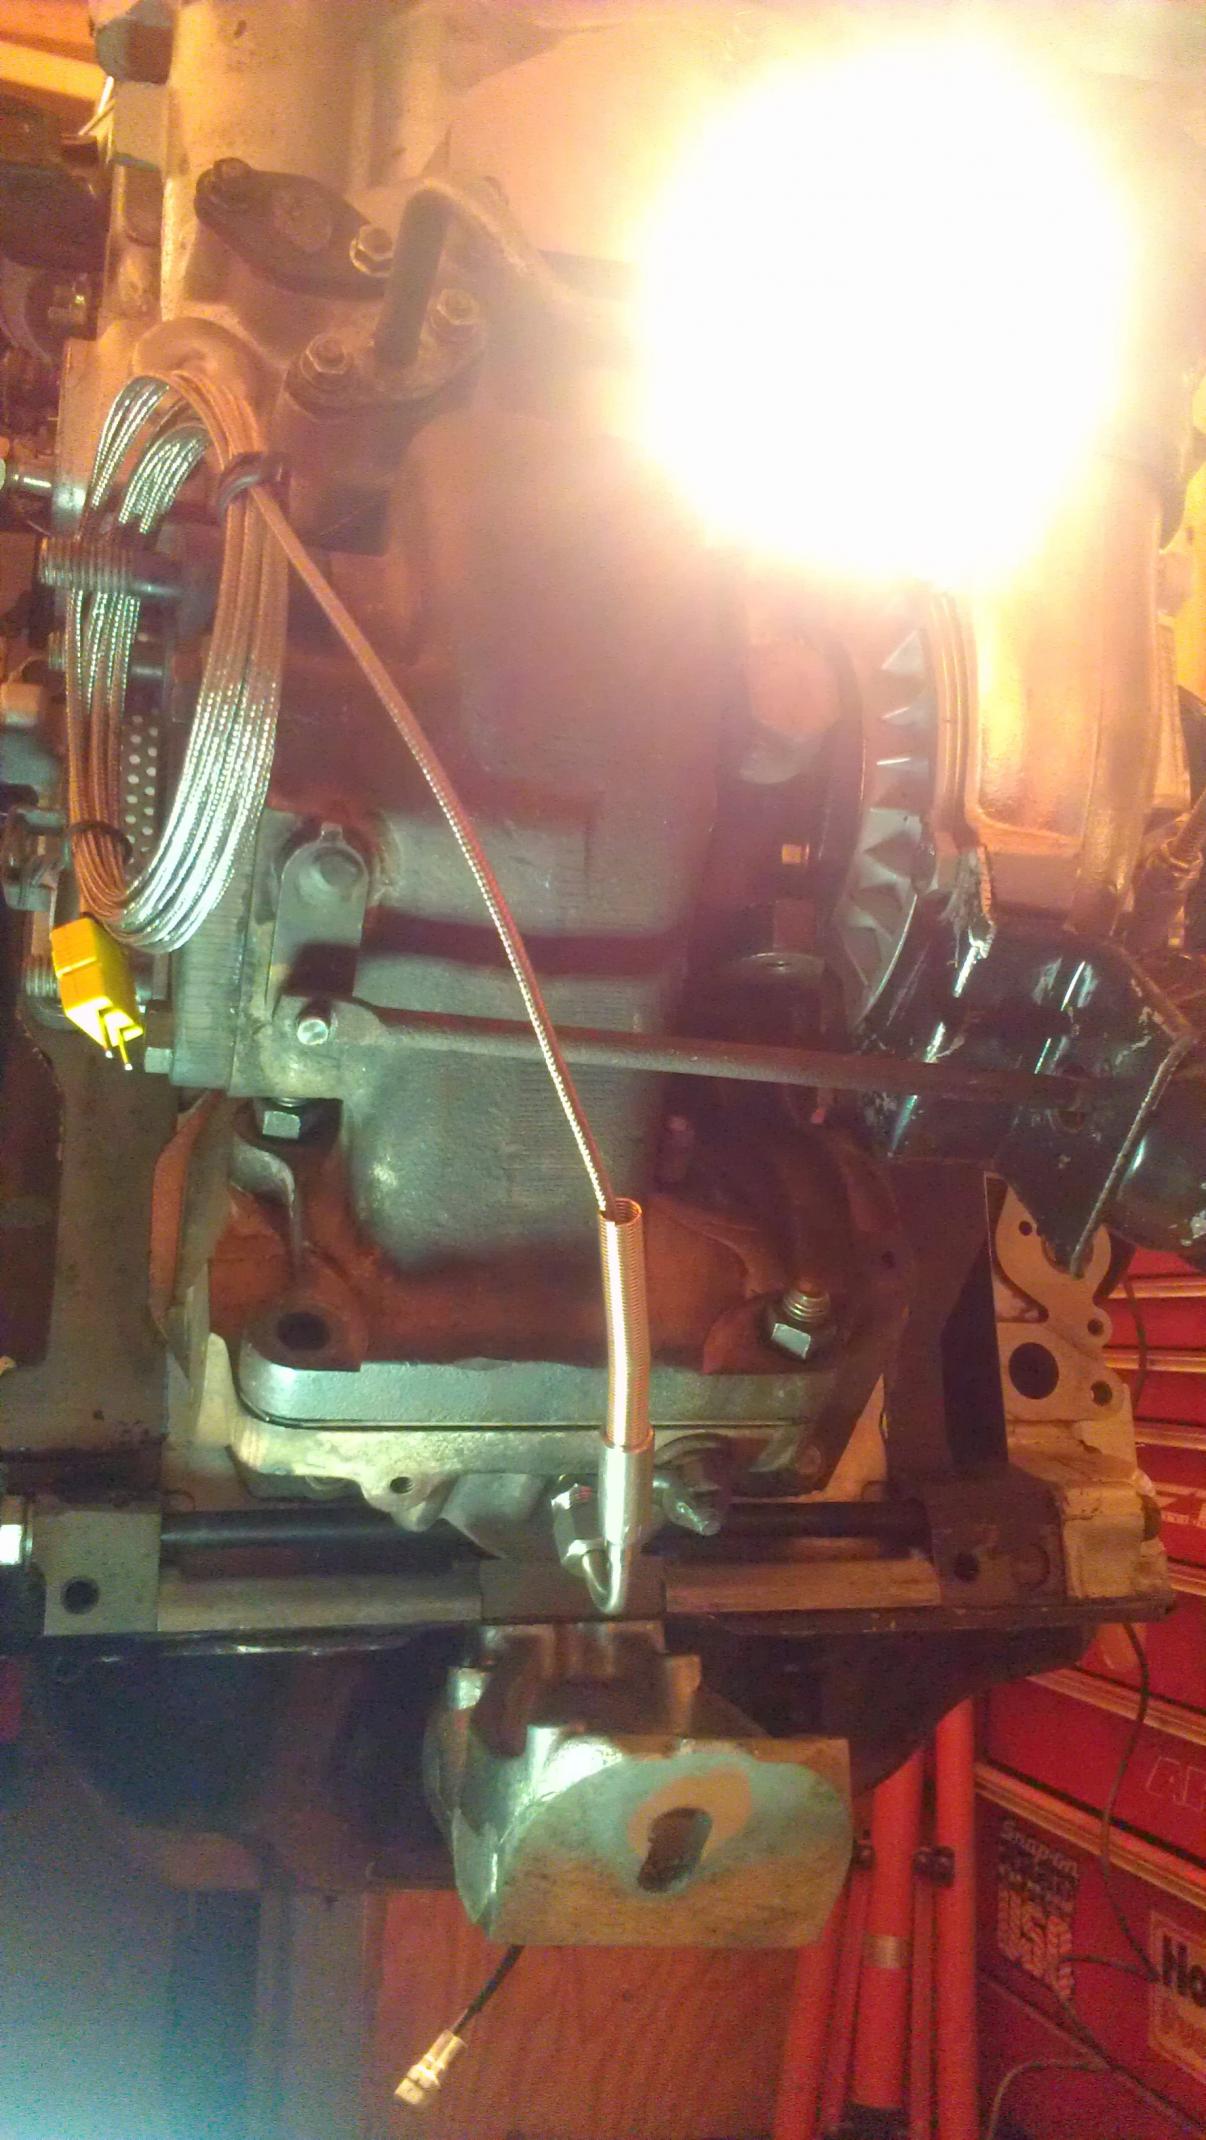
And last major component I fitted was the EGT probe. I had to drill the manifold and just tap it w/ a standard 1/8 NPT tap.
This thing is definitely starting to be over kill for the 300hp I want to put down but meh, I should be able to learn a lot from it and use the knowledge I gain if I ever step it up to large street ports and ball bearing turbits.
Started slapping on the manifolds, fitting the hybrid turbo and what not. I ran into a small problem with the secondary injectors. They're 1000cc standard length Bosch EV14's with the 60mm length caps(11mm o-ring) and I thought they would seriously drop right in... NOPE.
What I ended up doing after mixing and matching different o-rings, I removed the small diffusers and put in one o-ring that came off of the rotor housing dowel pins. On the injector I took off the lower 14mm o-ring and fitted one of the spacer grommets that these cars come with. Then up top I slid the 14mm o-ring(green o-ring between the injector and fuel rail) on the adapter cap(past the 11mm fuel rail o-ring). This ended up working really well and should keep the injectors nice and snug, didn't have to use any washers to space out the fuel rail or anything.
Here it is with more parts thrown on it. I'm not liking how bulky the BOV pipe is looking, I will probably use my CorkSport pipe and weld on an adapter flange for the BOV I'm using.
And you can kind of see how big(or small) the turbo is now. So glad I'm going this route since it has so much more potential than the stock unit ever would.
And last major component I fitted was the EGT probe. I had to drill the manifold and just tap it w/ a standard 1/8 NPT tap.
This thing is definitely starting to be over kill for the 300hp I want to put down but meh, I should be able to learn a lot from it and use the knowledge I gain if I ever step it up to large street ports and ball bearing turbits.