
The Story of Harley

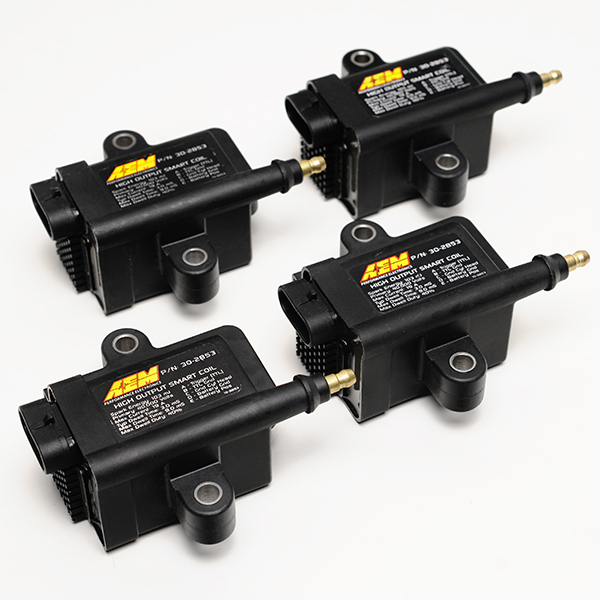
And here is a new addition to the parts: AEM Smart Coils. I was planning on buying these anyway down the road, just got lucky that they came up in the For Sale section recently for a good price. They look brand new!

there is a little metal collar on the hub assembly. Take a C-clamp and a socket big enough to go over the metal bushing. Press it so the opening that mounts to the trailing arm is wide open and flush. You will also need to persuade it in with a rubber mallet if you are using solid bushings/ dtss etc etc.
Looking good though. Sorry to hear about that tool that beat you up over $50 on an unknown part. what a butt head.. smh
Looking good though. Sorry to hear about that tool that beat you up over $50 on an unknown part. what a butt head.. smh
Thanks. You live and learn.
I have huge updates coming soon! Front end suspension 95% done, wheels, hood and front bumper test fitted! Looks great!
did you reuse the plastic donuts that those go through on the top mounting point? I did, but I left my top mount a rubber bushing versus that pbm thing. I figure with the dtss and everything else solid, that little bushing is not going to move enough for me to care.
Those plastic pieces disentigrated when I took them out. I'm using all solid PBM bushings though.
Do not run the HP+ pads on the street. That's a track/auto-x pad for a reason. They will SCREAM 9/10 times you are braking during normal driving.
I would put them on my car only the morning of a track event, and take them off when I got home.
You will cringe if you drive with them on the street. And... you will probably be pulled over.
I would put them on my car only the morning of a track event, and take them off when I got home.
You will cringe if you drive with them on the street. And... you will probably be pulled over.
UPDATES!
-MARCH-
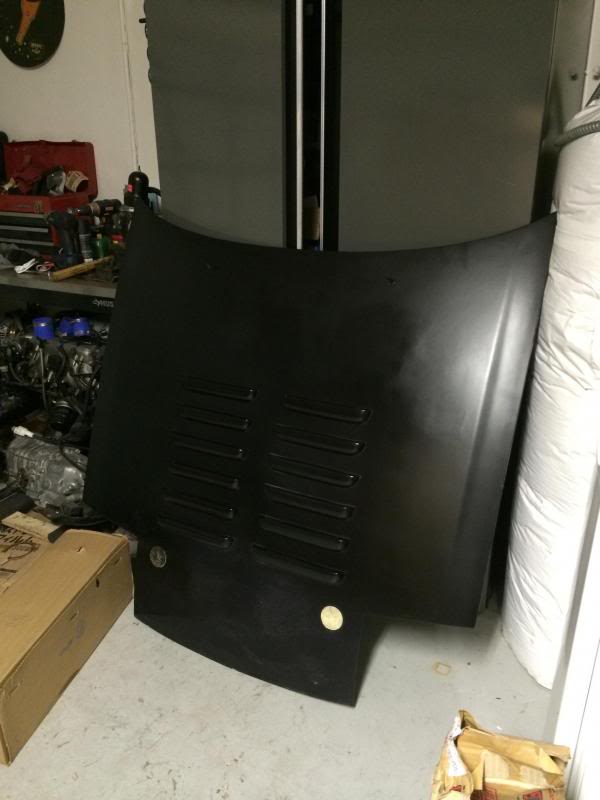
Begining of March RE-Amemiya hood came in thanks to Circuit Theory
Mid-March I took a break and went to Japan to hang out with Circuit Theory, take some pictures, check out the Sakuras, meet some awesome people and drive on Ebisu Circuit.
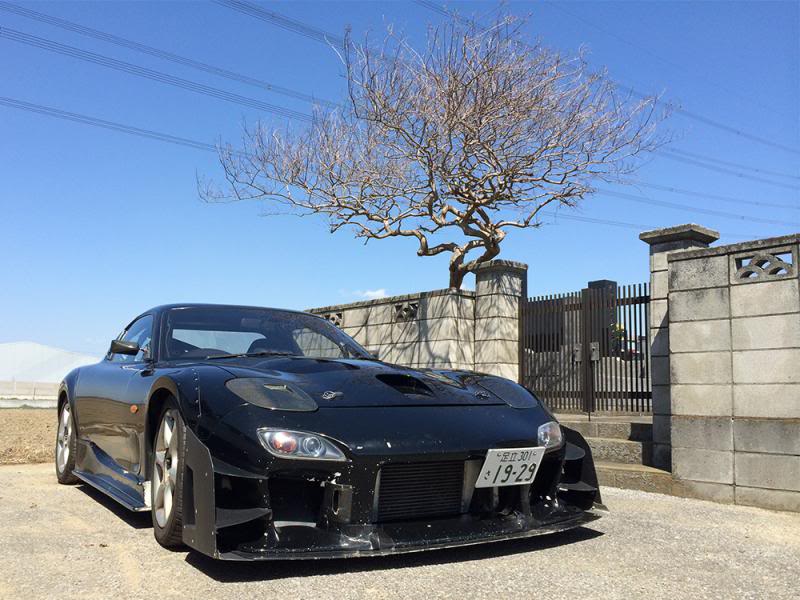
WiseOne Auto
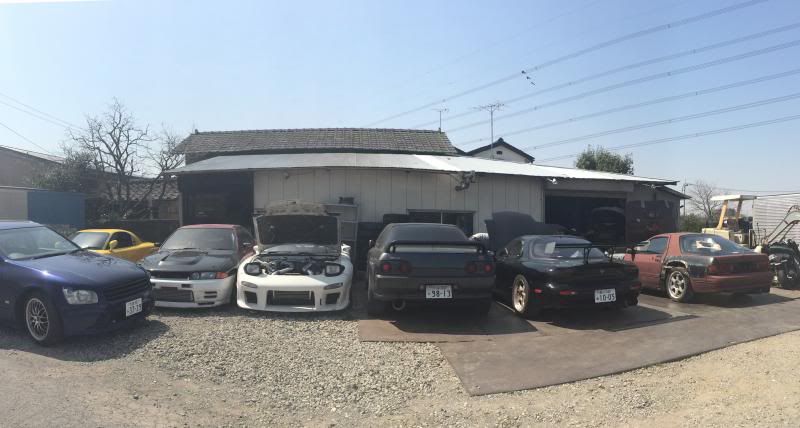
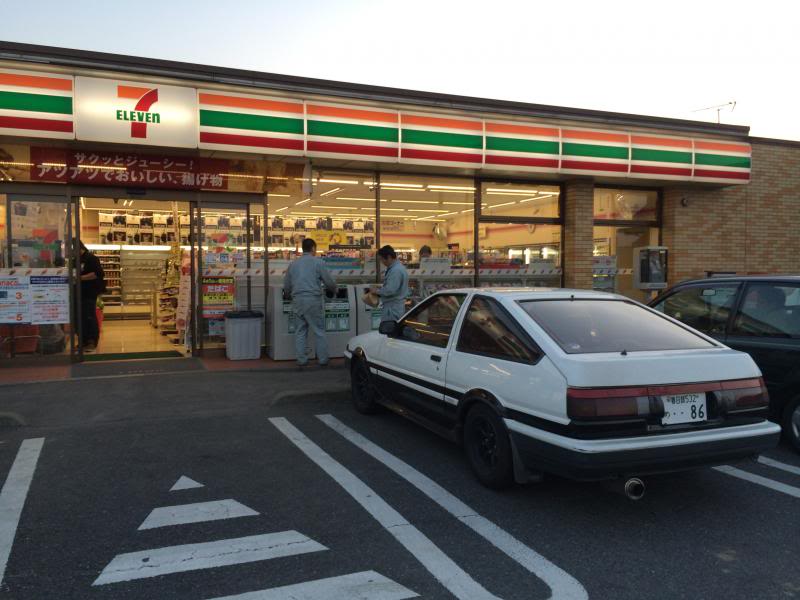
Nice 86 at 7Eleven
Ebisu Circuit

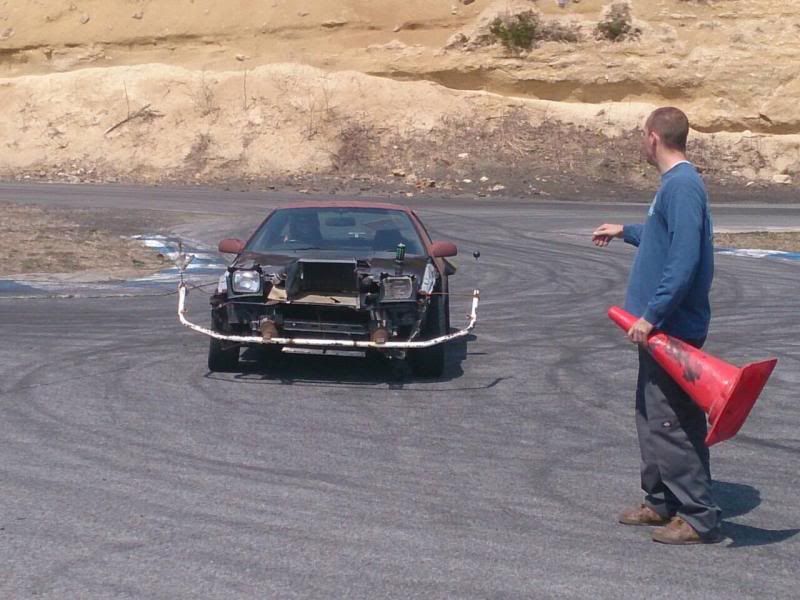
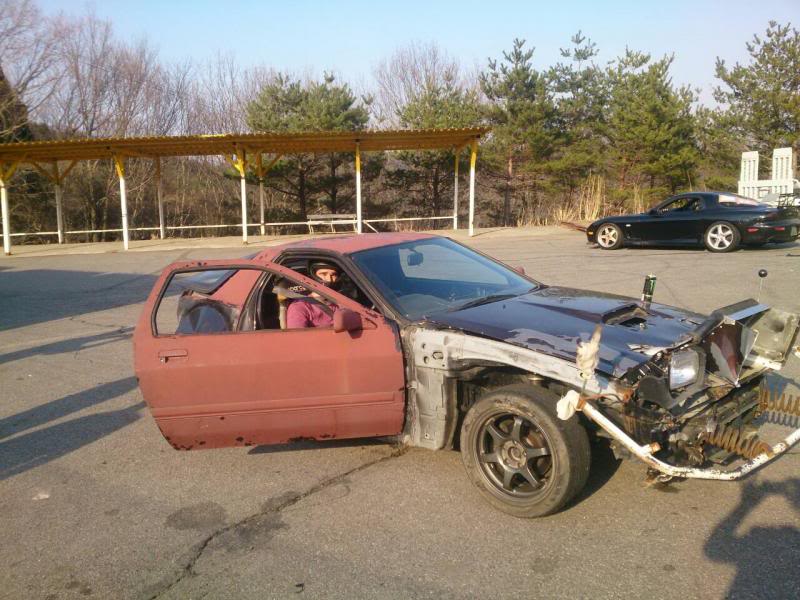
Driving Circuit Theory's missile car
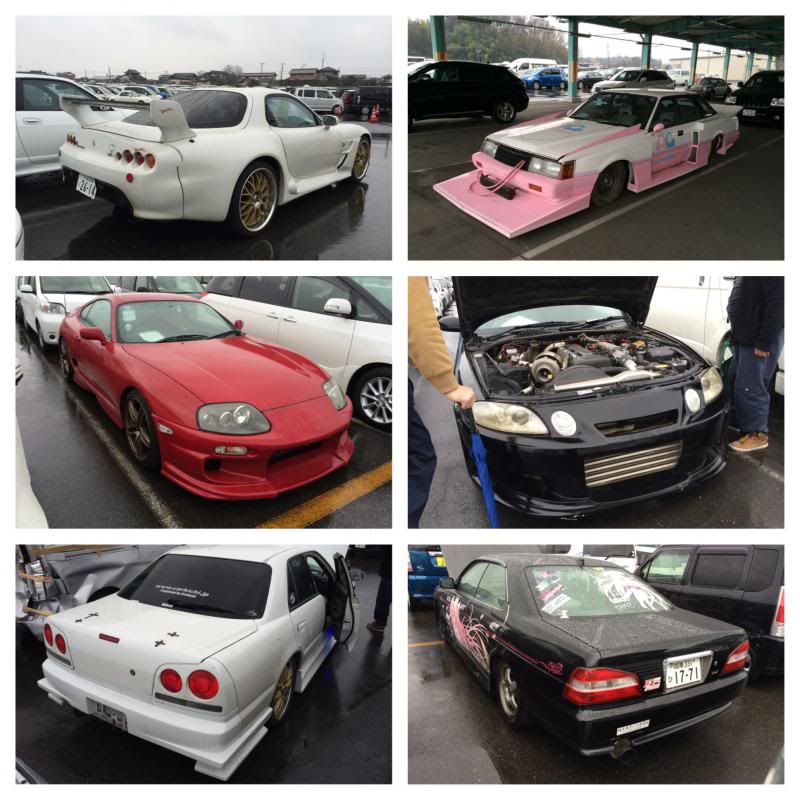
At USS Tokyo Auctions
Sakura Festival

-MARCH-
Begining of March RE-Amemiya hood came in thanks to Circuit Theory
Mid-March I took a break and went to Japan to hang out with Circuit Theory, take some pictures, check out the Sakuras, meet some awesome people and drive on Ebisu Circuit.
WiseOne Auto
Nice 86 at 7Eleven
Ebisu Circuit
Driving Circuit Theory's missile car
At USS Tokyo Auctions
Sakura Festival
-APRIL-
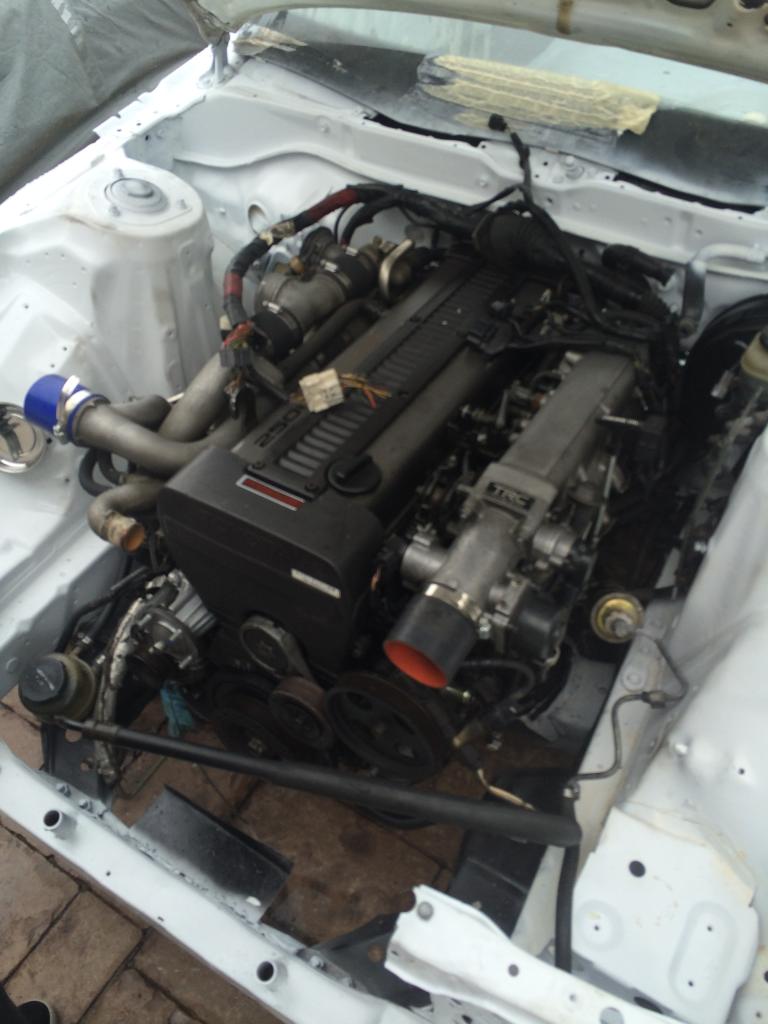
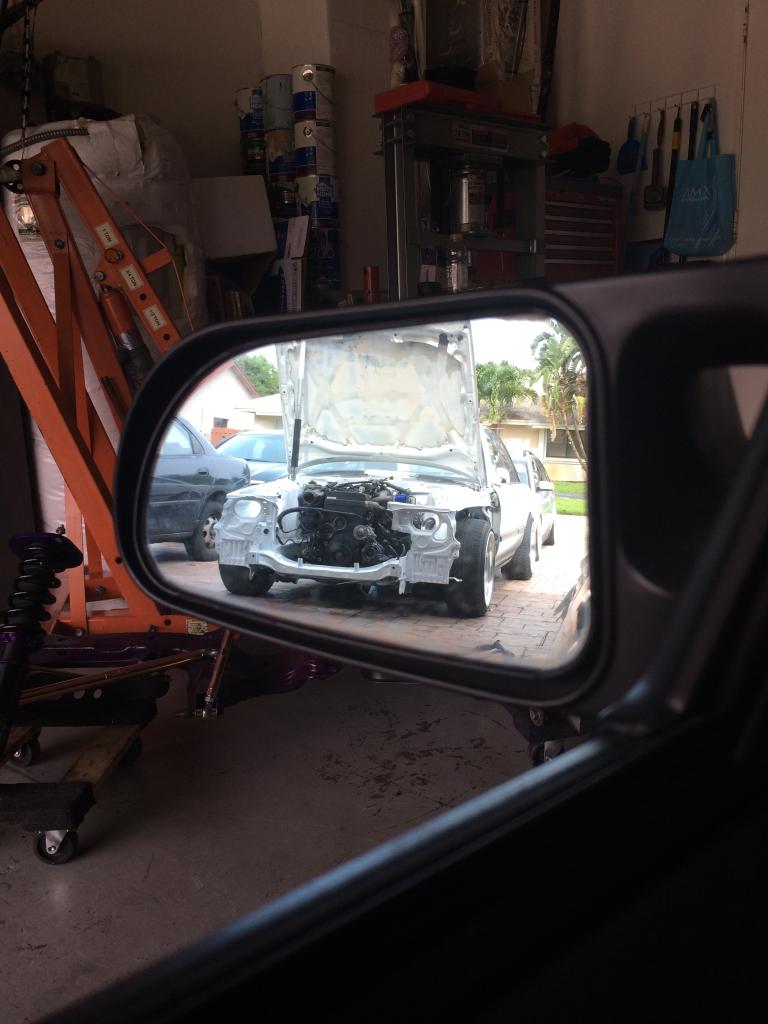
Came home from Japan to the best dog ever and the best car ever

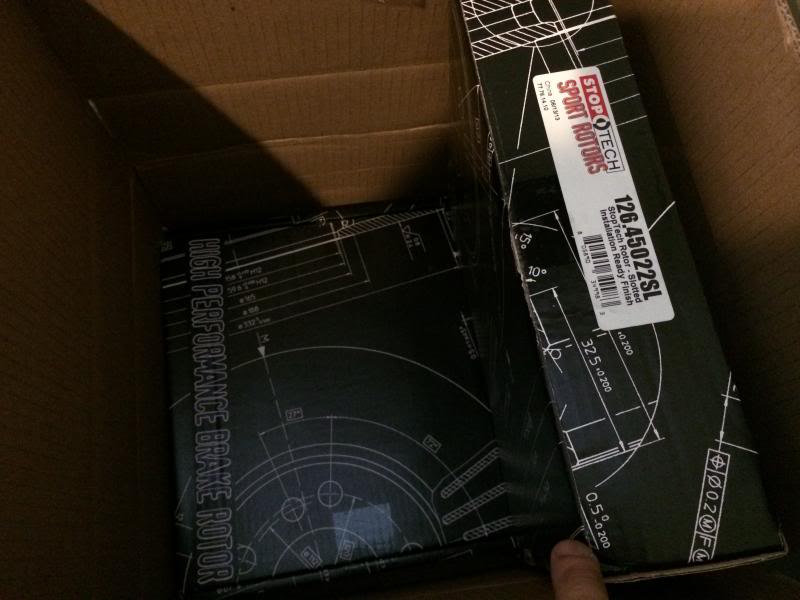
Received the front slotted brake rotors
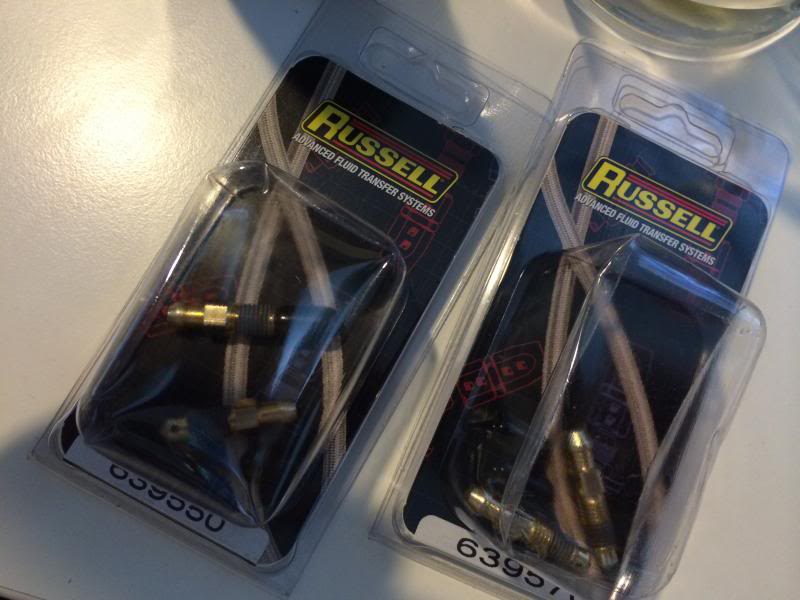
and speed bleeds (thanks to PremiumRiceOnly's thread for the idea)
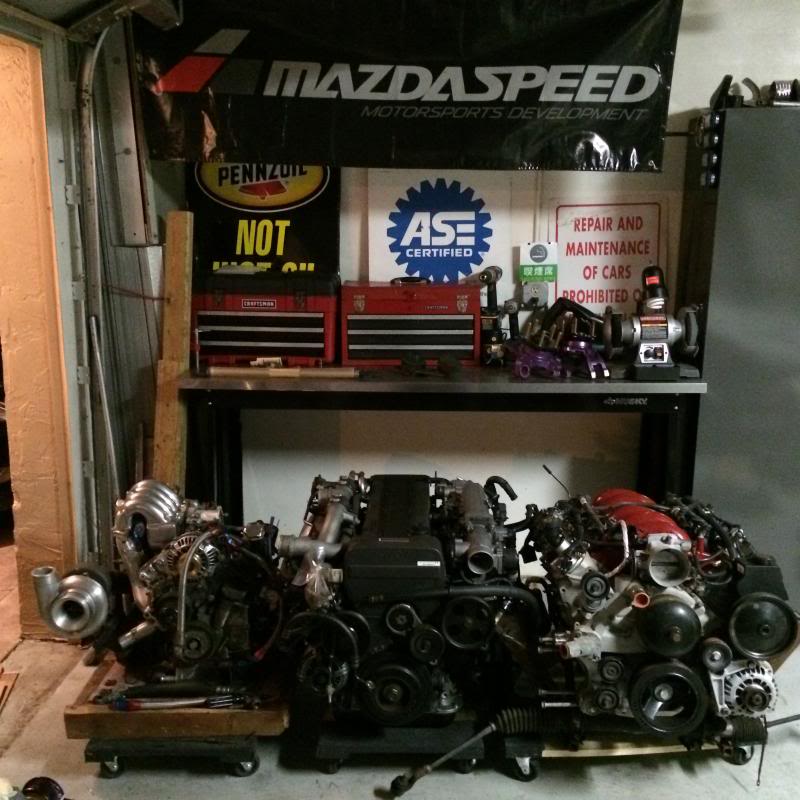
I'm now a storage facility for my friends' motors�.funny enough they are the top three choices to put in a FC haha. L->R 13B (mine) 1J (Bertha/x83) and LS1 (S13)
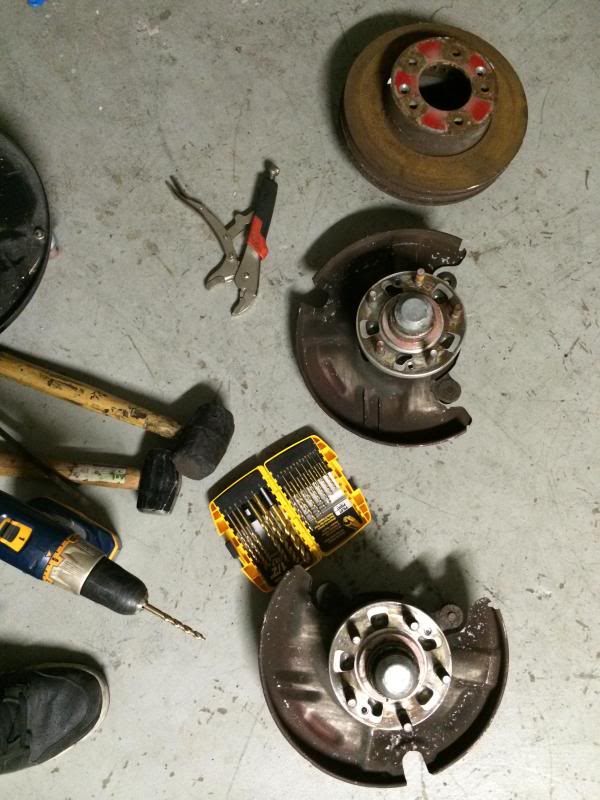
Took the front hubs/spindles off. Even with an impact screwdriver these locator screws were not coming off. Had to take more extreme measures.
Came home from Japan to the best dog ever and the best car ever
Received the front slotted brake rotors
and speed bleeds (thanks to PremiumRiceOnly's thread for the idea)
I'm now a storage facility for my friends' motors�.funny enough they are the top three choices to put in a FC haha. L->R 13B (mine) 1J (Bertha/x83) and LS1 (S13)
Took the front hubs/spindles off. Even with an impact screwdriver these locator screws were not coming off. Had to take more extreme measures.
-MAY-
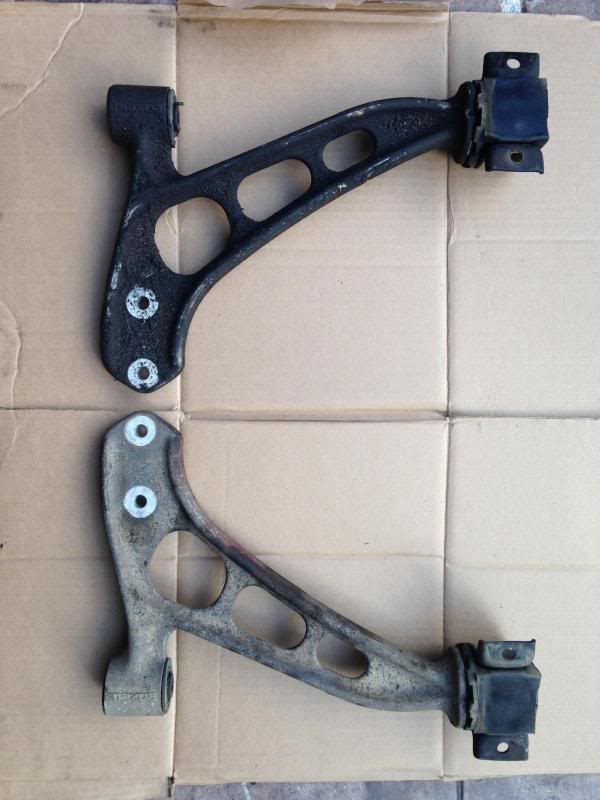
S4 Lower Control Arms I picked up locally for free from a buddy. This is how they looked right off of the car.
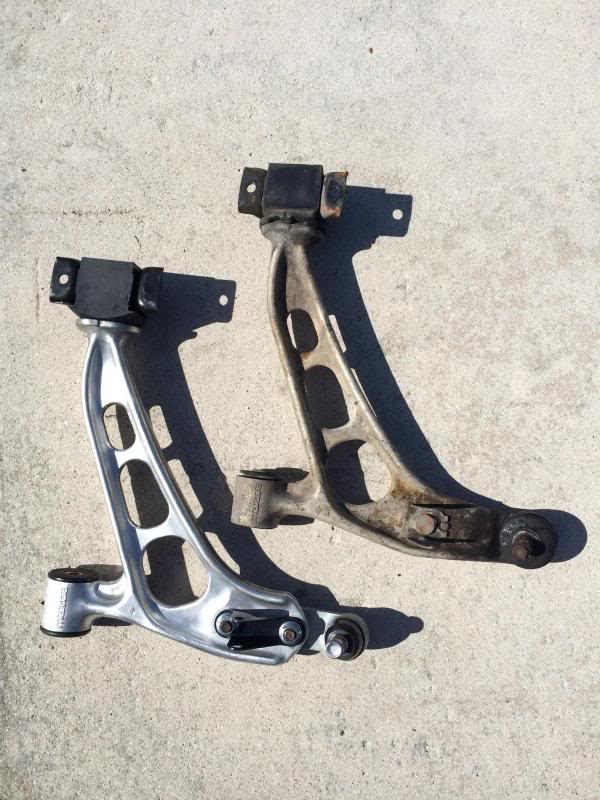
S4 Front LCA cleaned up with new Energy Suspension poly bushings and new MOOG ball joint compared to original S5 FLCA that came on my car.
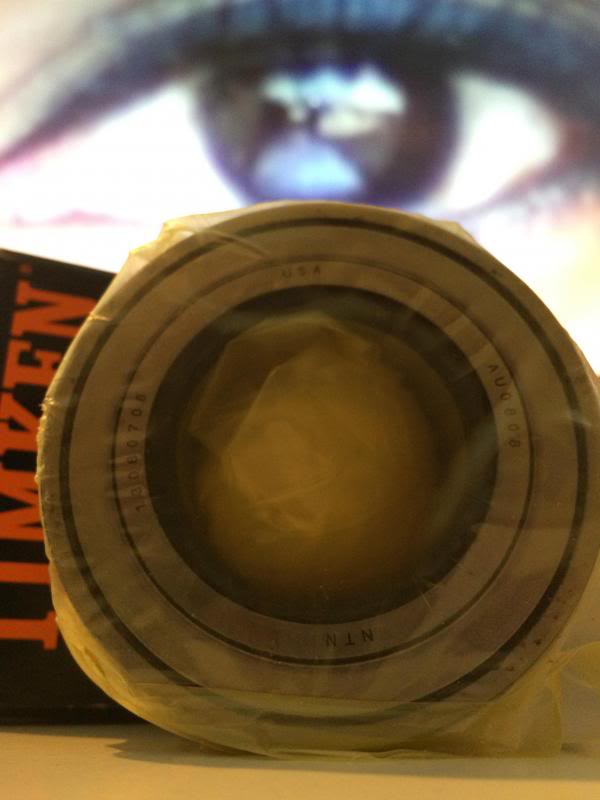
New wheel bearings, Timken
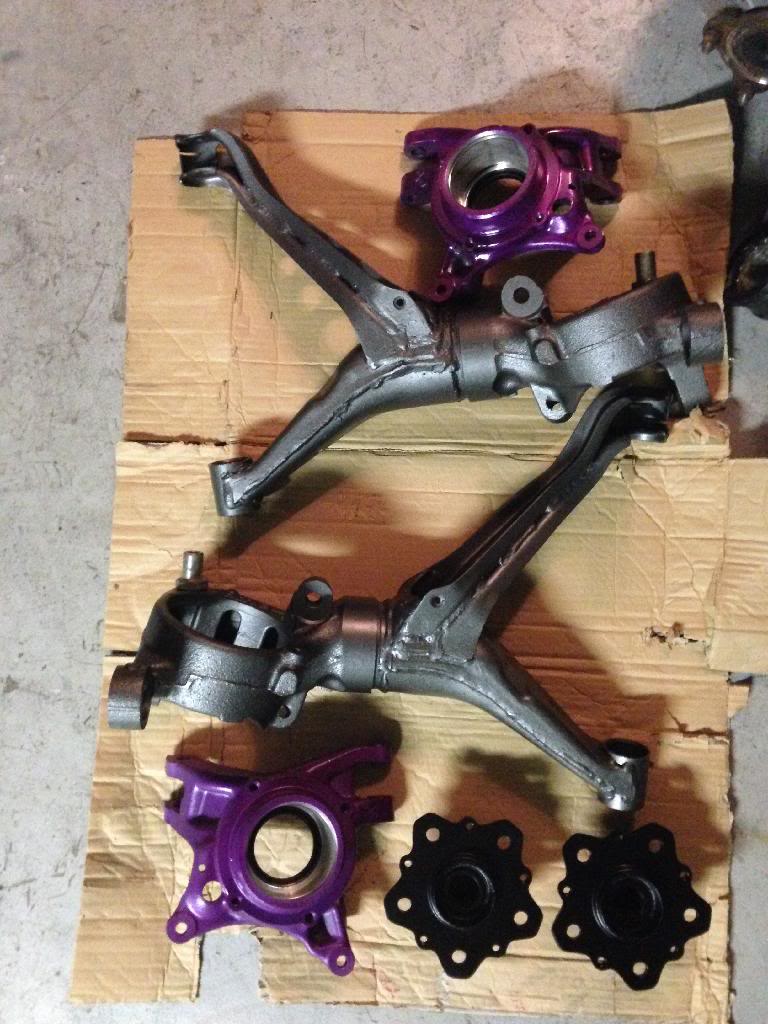
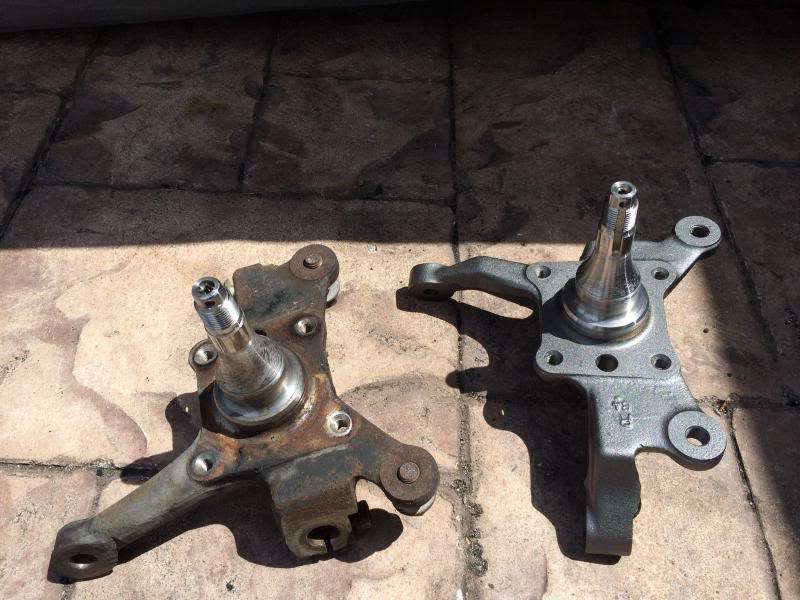
Spindles Before

Spindle before and after
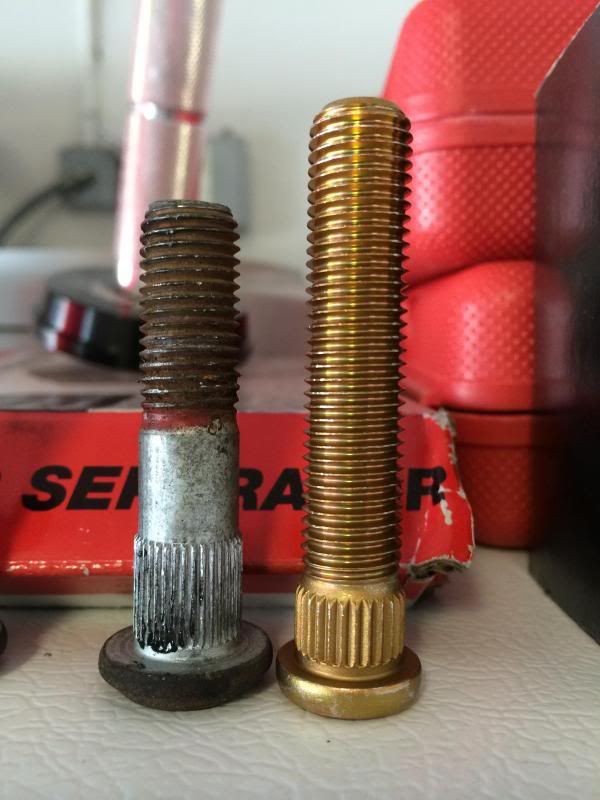
ARP vs Stock studs
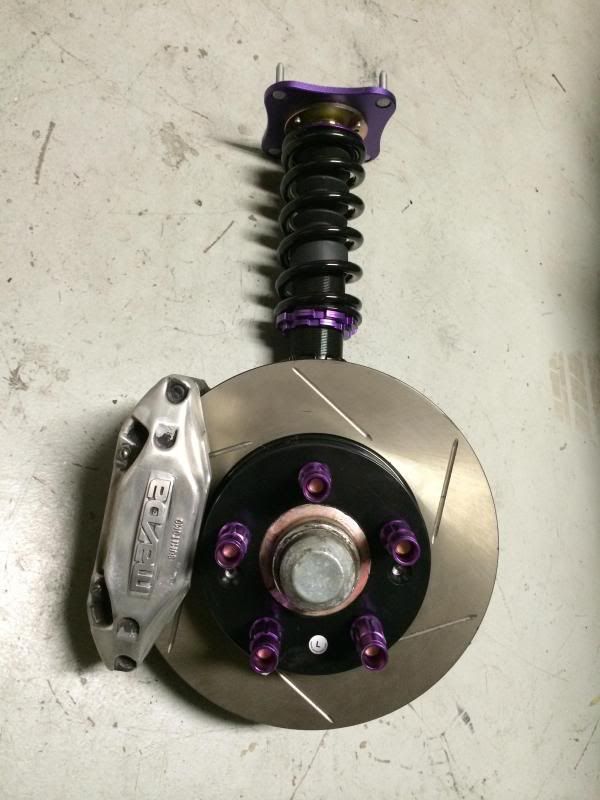
Front suspension/brakes assembled just for display purposes in my garage before actually putting it in. Rocking D2s until I find something I really like. FD Calipers. StopTech Slotted Rotors as pictured earlier. eBay lug nuts for now.
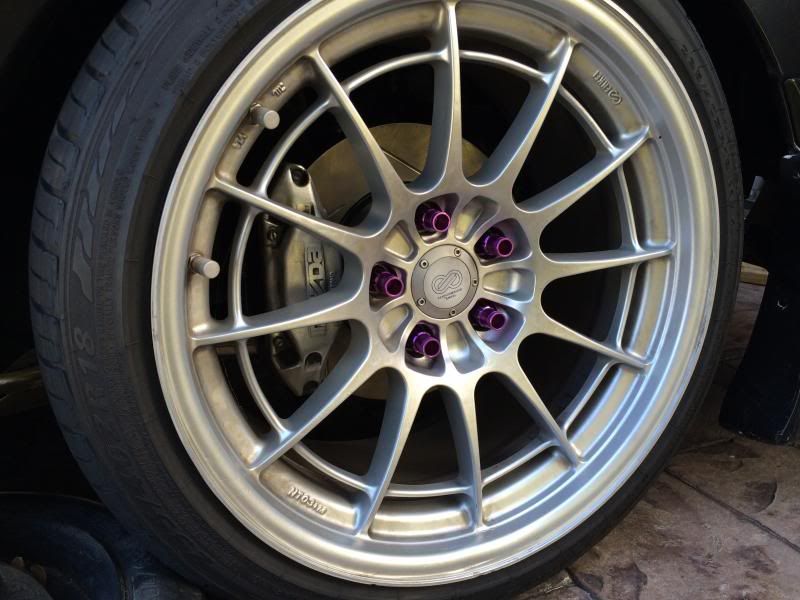
Front suspension/brakes and wheels on the car. Enkei NT03+M 18x9.5 +27 235/40/18
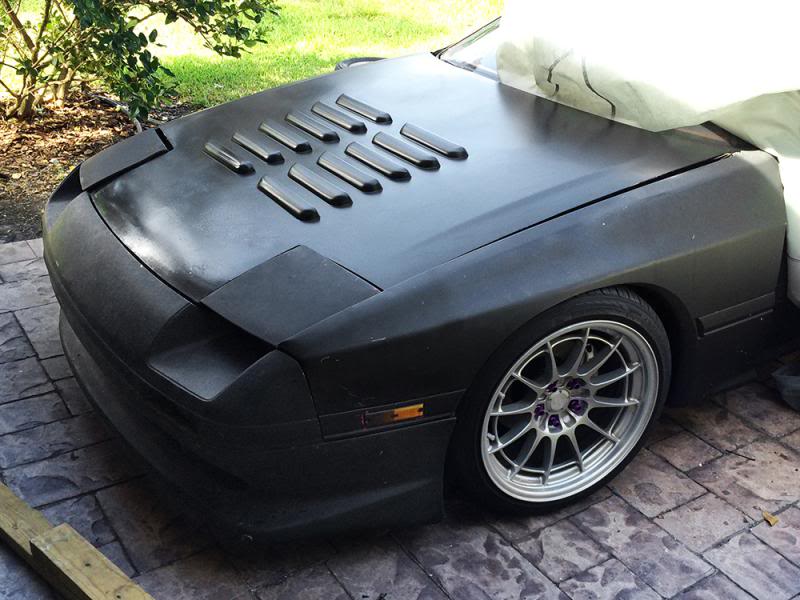
Test fitting all of the body panels with the wheels and suspension - R*Magic front bumper, RE-Amemiya hood, Enkei NT03s, D2 Coilovers.
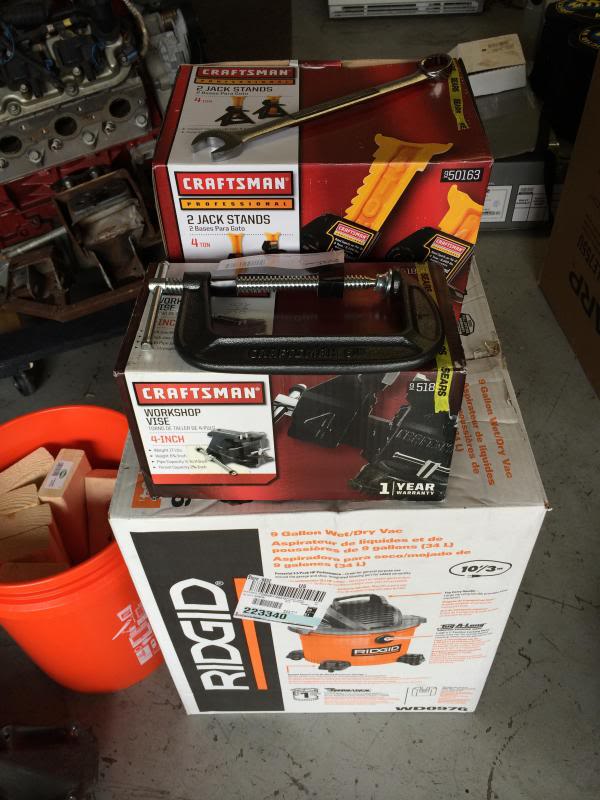
Picked up some more stuff for the garage. Better shop Vac, Vise, Clamp, better jack stands, big *** 24mm wrench for the new MOOG tie rod inners.
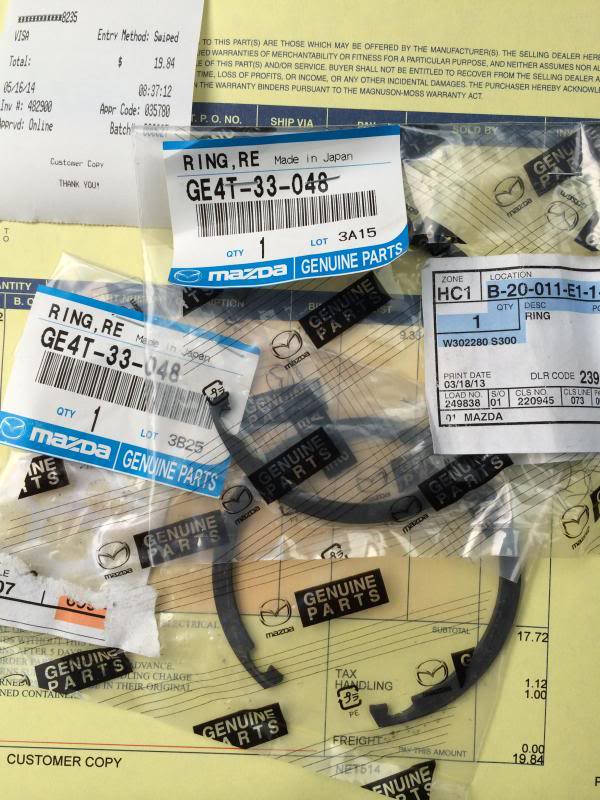
When I did the rear hub bearings I fucked them up multiple times. I had to buy SnapOn C-Ring pliers because every single set of off brand ones that I bought couldn't handle it and they all literally broke on the first try. The SnapOn ones did the trick. Then I found out the original snap rings were grinding on the bearing and preventing it from turning smoothly. I pushed them out and they were destroyed this time. I went to Mazda and bought brand new C-Rings that look completely different from the original ones and worked MUCH better. I highly recommend if you are going to change the rear bearings you should invest in the new C-Rings. $20 from Mazda and they were in stock.
S4 Lower Control Arms I picked up locally for free from a buddy. This is how they looked right off of the car.
S4 Front LCA cleaned up with new Energy Suspension poly bushings and new MOOG ball joint compared to original S5 FLCA that came on my car.
New wheel bearings, Timken
Spindles Before
Spindle before and after
ARP vs Stock studs
Front suspension/brakes assembled just for display purposes in my garage before actually putting it in. Rocking D2s until I find something I really like. FD Calipers. StopTech Slotted Rotors as pictured earlier. eBay lug nuts for now.
Front suspension/brakes and wheels on the car. Enkei NT03+M 18x9.5 +27 235/40/18
Test fitting all of the body panels with the wheels and suspension - R*Magic front bumper, RE-Amemiya hood, Enkei NT03s, D2 Coilovers.
Picked up some more stuff for the garage. Better shop Vac, Vise, Clamp, better jack stands, big *** 24mm wrench for the new MOOG tie rod inners.
When I did the rear hub bearings I fucked them up multiple times. I had to buy SnapOn C-Ring pliers because every single set of off brand ones that I bought couldn't handle it and they all literally broke on the first try. The SnapOn ones did the trick. Then I found out the original snap rings were grinding on the bearing and preventing it from turning smoothly. I pushed them out and they were destroyed this time. I went to Mazda and bought brand new C-Rings that look completely different from the original ones and worked MUCH better. I highly recommend if you are going to change the rear bearings you should invest in the new C-Rings. $20 from Mazda and they were in stock.
-MAY- (cont'd)
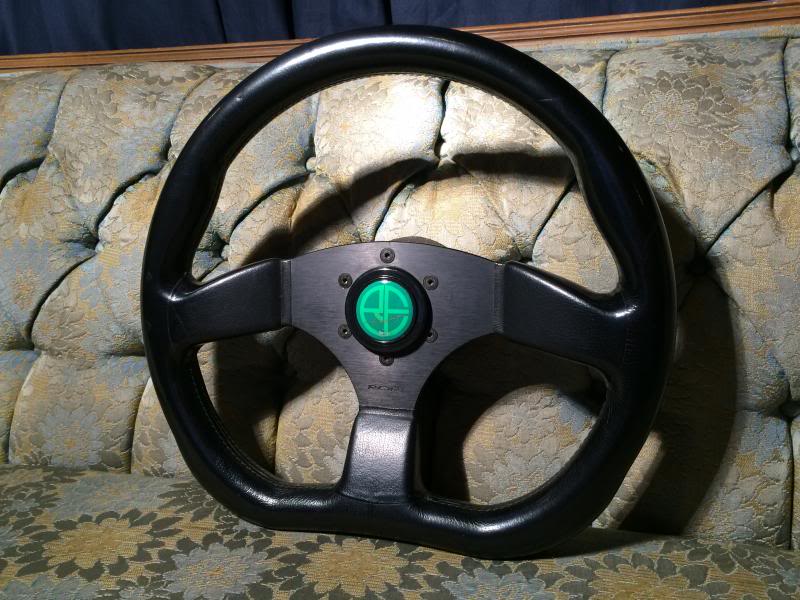
Picked up a RE-Amemiya steering wheel
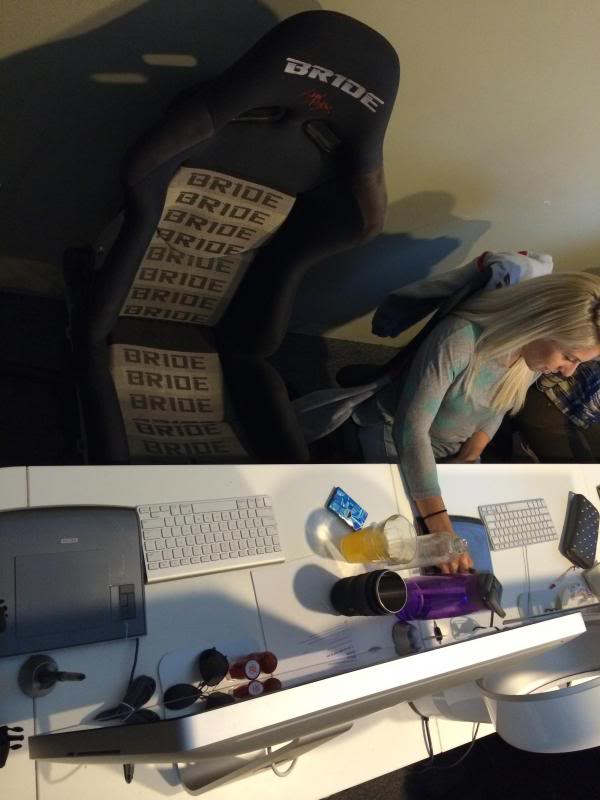
New Bride computer chair at the studio lol
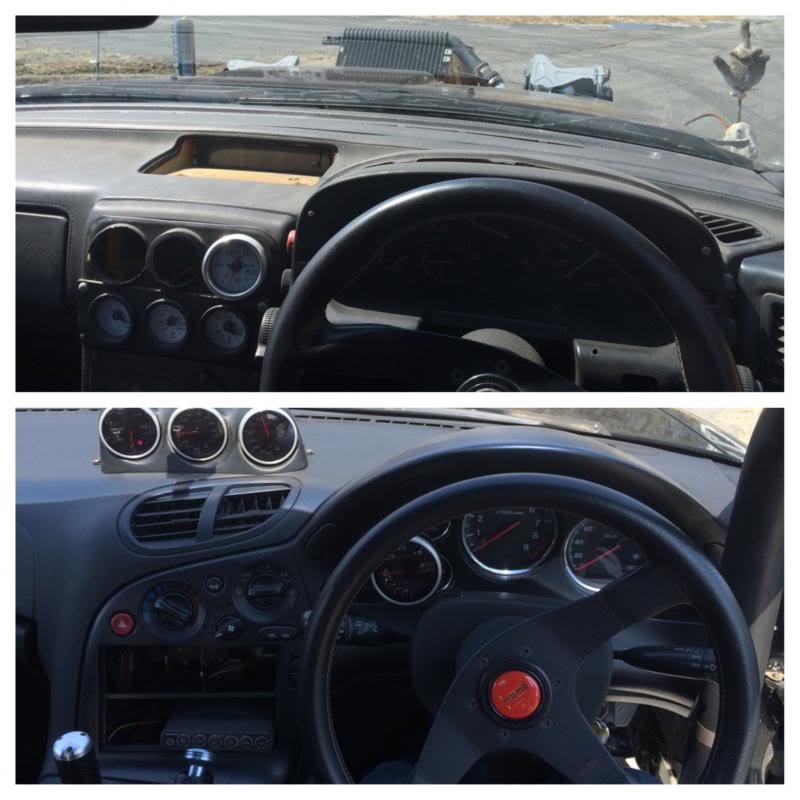
Care Package thanks to Circuit Theory - Omori 10k black faced Tach, been trying to get one forever! This finally completes my full set - Tach, Boost, Water, Oil temp, Oil Press, EGT

-JUNE-
I've been insanely busy, but I need to put the rear end back together and as soon as it can roll it is going to the shop for the finishing touches. This time a reputable shop! Same place I bought my TII. First I will bring the motor to be rebuilt and then the car to have everything that I don't have the tools/time/space/experience to do. Cage, Motor and turbo rebuilding, fab piping, etc.
Picked up a RE-Amemiya steering wheel
New Bride computer chair at the studio lol
Care Package thanks to Circuit Theory - Omori 10k black faced Tach, been trying to get one forever! This finally completes my full set - Tach, Boost, Water, Oil temp, Oil Press, EGT
-JUNE-
I've been insanely busy, but I need to put the rear end back together and as soon as it can roll it is going to the shop for the finishing touches. This time a reputable shop! Same place I bought my TII. First I will bring the motor to be rebuilt and then the car to have everything that I don't have the tools/time/space/experience to do. Cage, Motor and turbo rebuilding, fab piping, etc.
Thanks. I actually found the steering wheel on ebay and didn't hesitate on the buy it now! lol. But besides that I would saw 90% of my awesome rare parts are from Circuit Theory. Motor, Turbo set up, Hood, Polished UIM, Trust 90mm exhaust, etc. and soon some wheels. Stay tuned to check them out!
Not much work wise, just some more parts came in:
Came up on not one, but two MazdaSpeed Lower Arm Bars. One used and one NOS. I'm probably going to rock one on each car, but not decided yet.
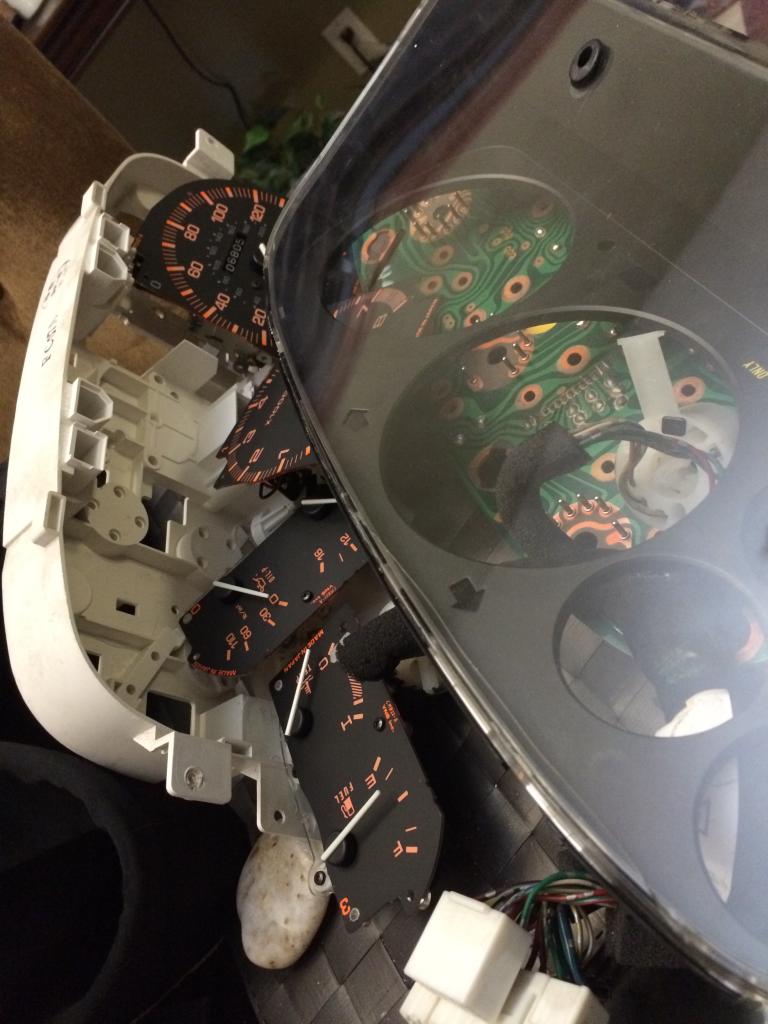
Bought a stock gauge cluster to cut up and modify. More of a fun project. If it comes out nice I'll use it, but not much into fabricating (even simple things lol)
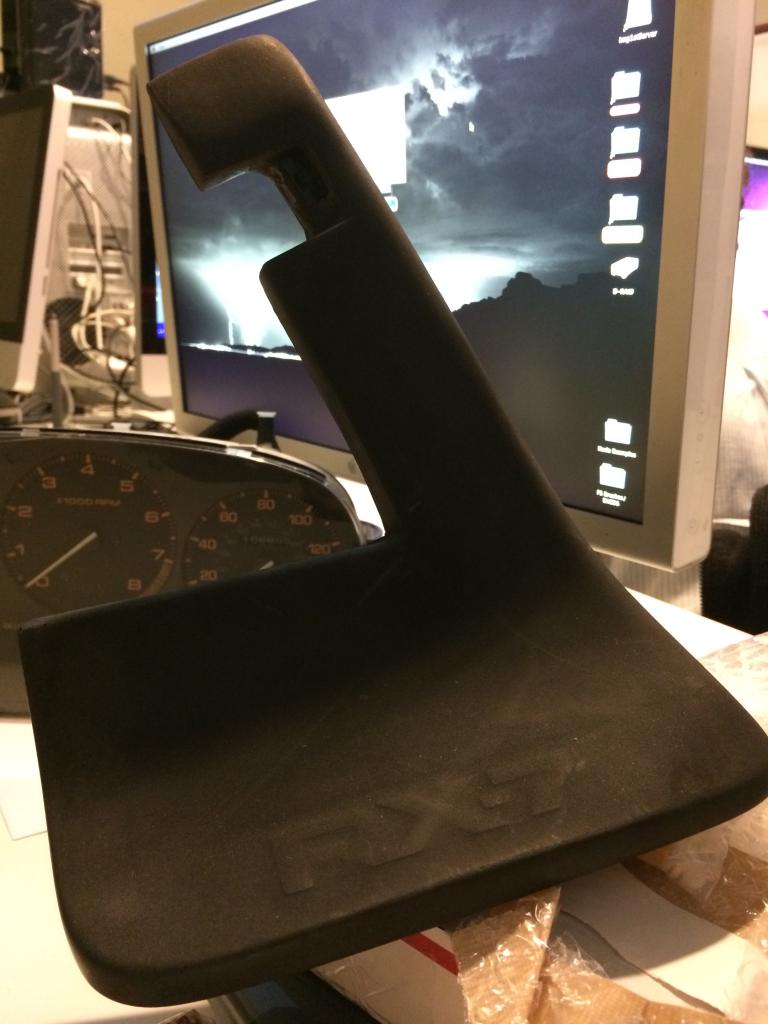
Got some OEM Mudflaps for Selena
All gold errrrthang - MazdaSpeed Horn Button - hopefully for a MazdaSpeed wheel I can pick up sometime in the future.

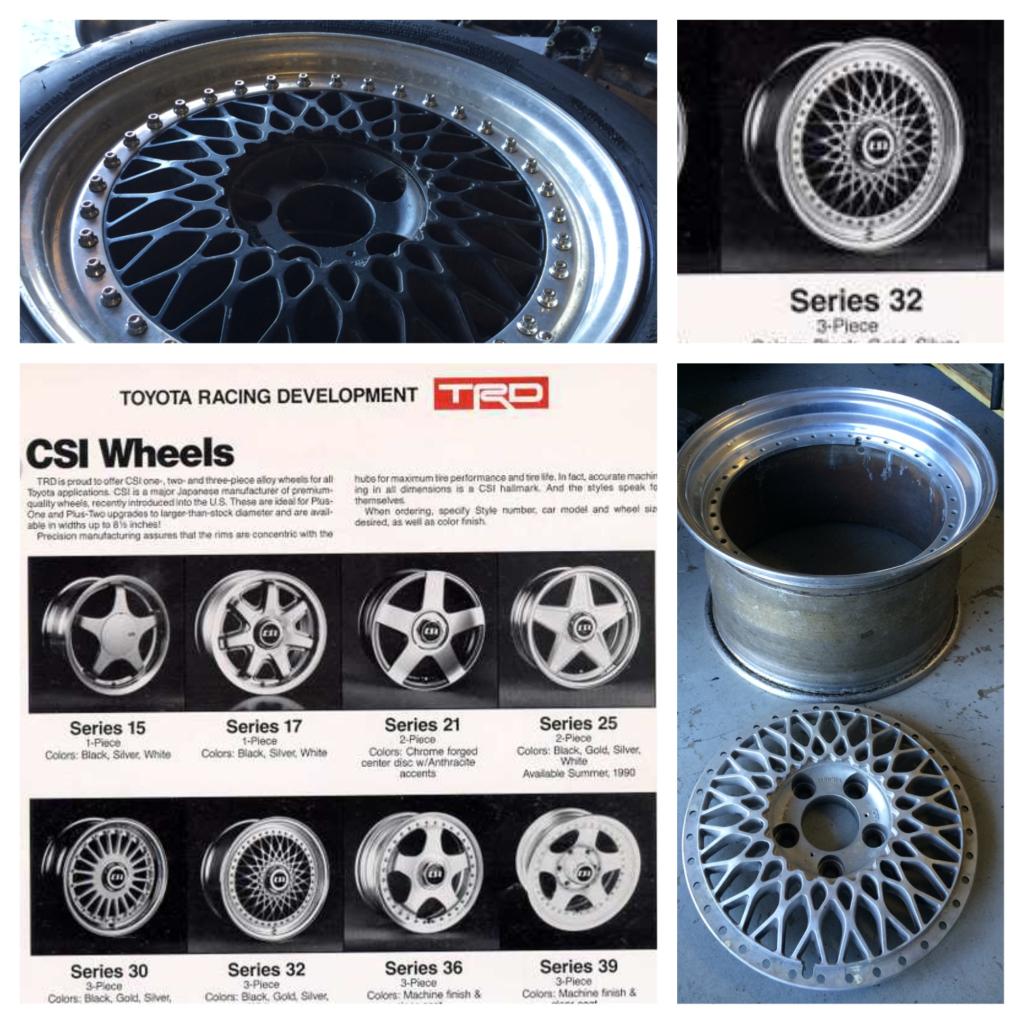
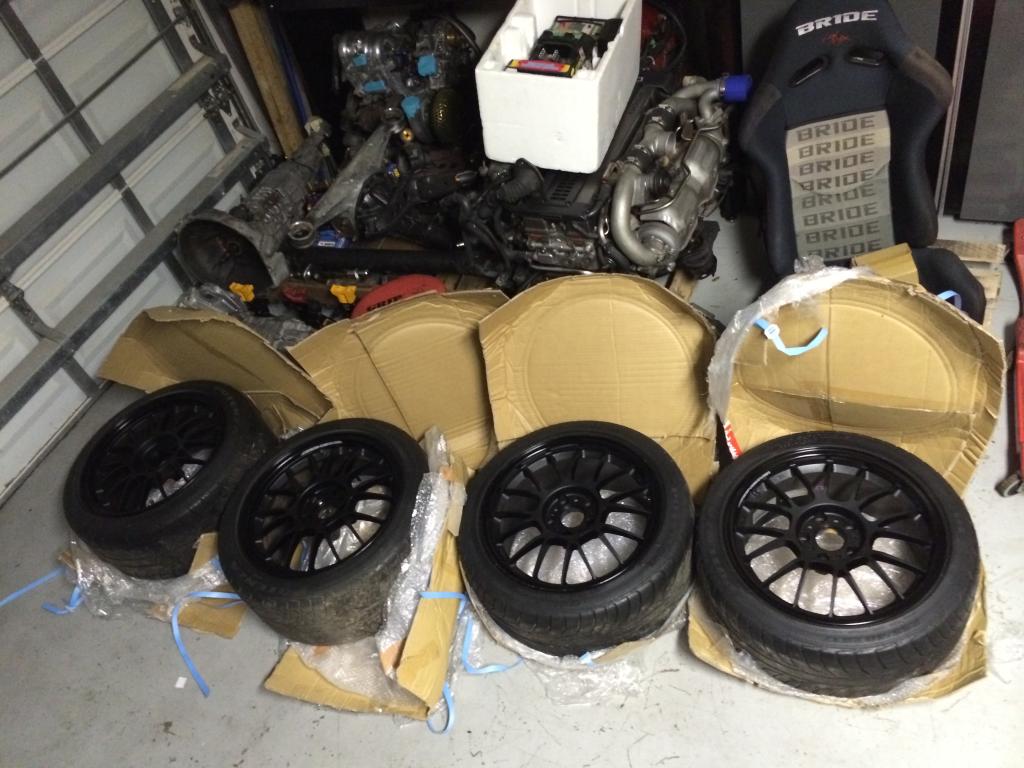
Picked up a set of CSI Series 32 wheels. Pretty rare in the size I have. I actually think the rears were widened at some point? 16x8or8.5?/F 16x9/R. Picked these up for $100! once I put them together I will use them as rollers and drift spares (cheaper tires)
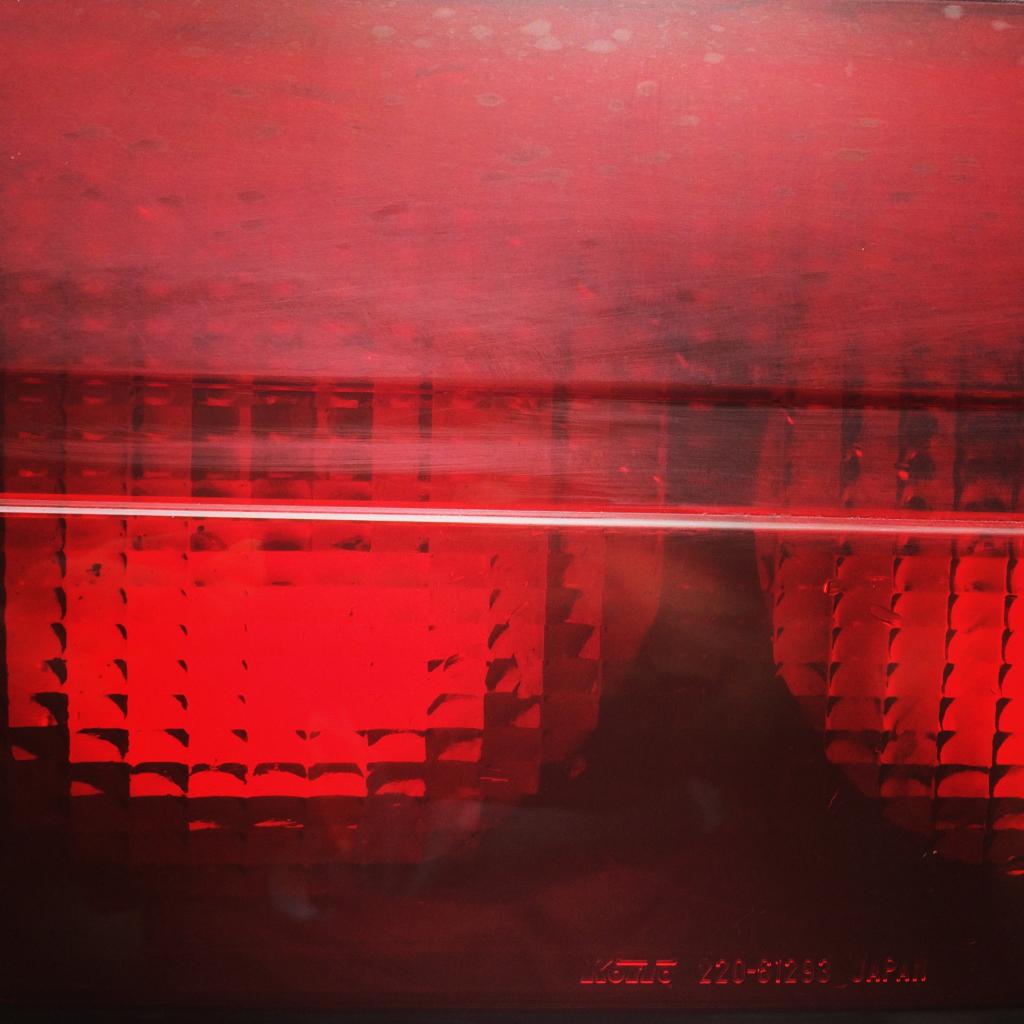
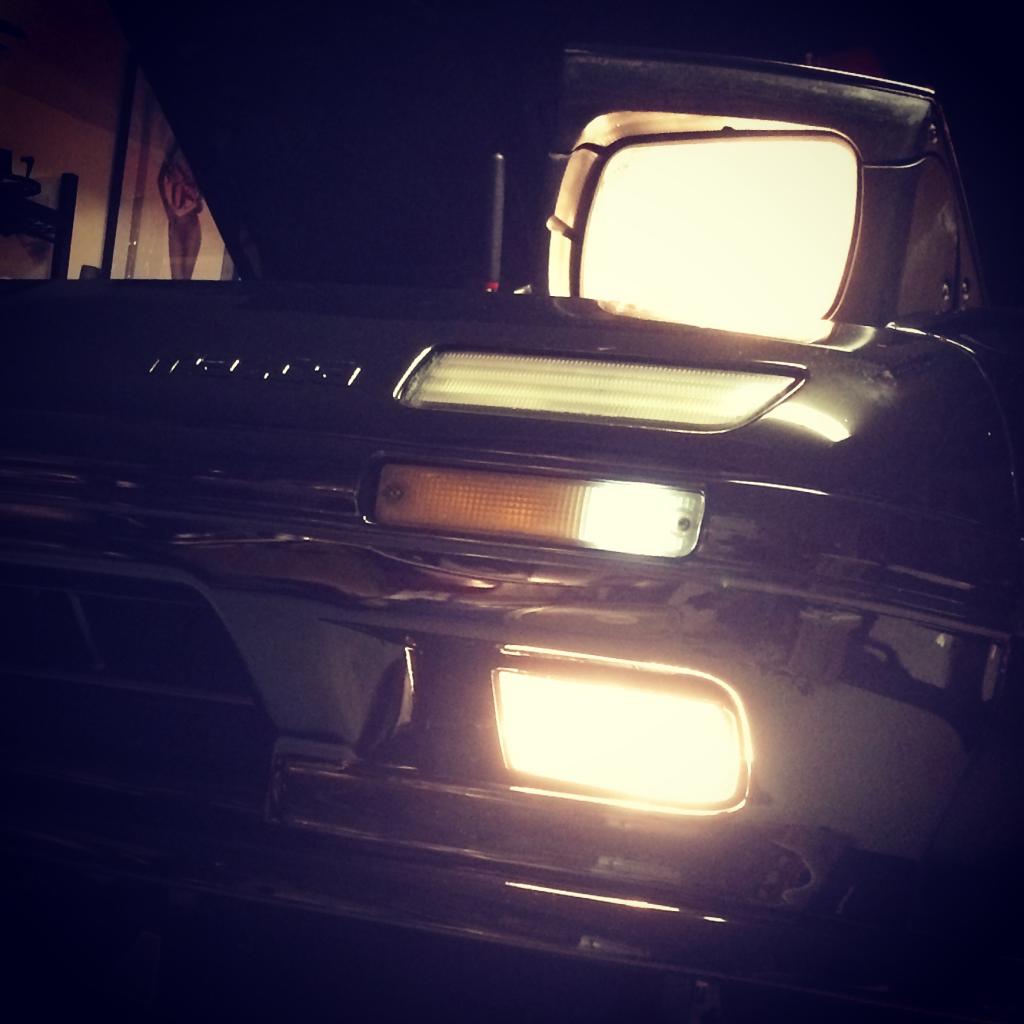
Cleaned up my tail lights before sending them out to be modified by AZRX7/Digi7ech with LEDs. Top is wet sanded bottom polished with Mequiars PlastX and drill attached buffing wheel.
My friend bought a brand new Nismo Juke and wanted to put some miles on it so we went to pick up some large packages.
Volk SE37Ks! Has been my favorite wheel for almost 10 years now. I can't believe I actually own them.
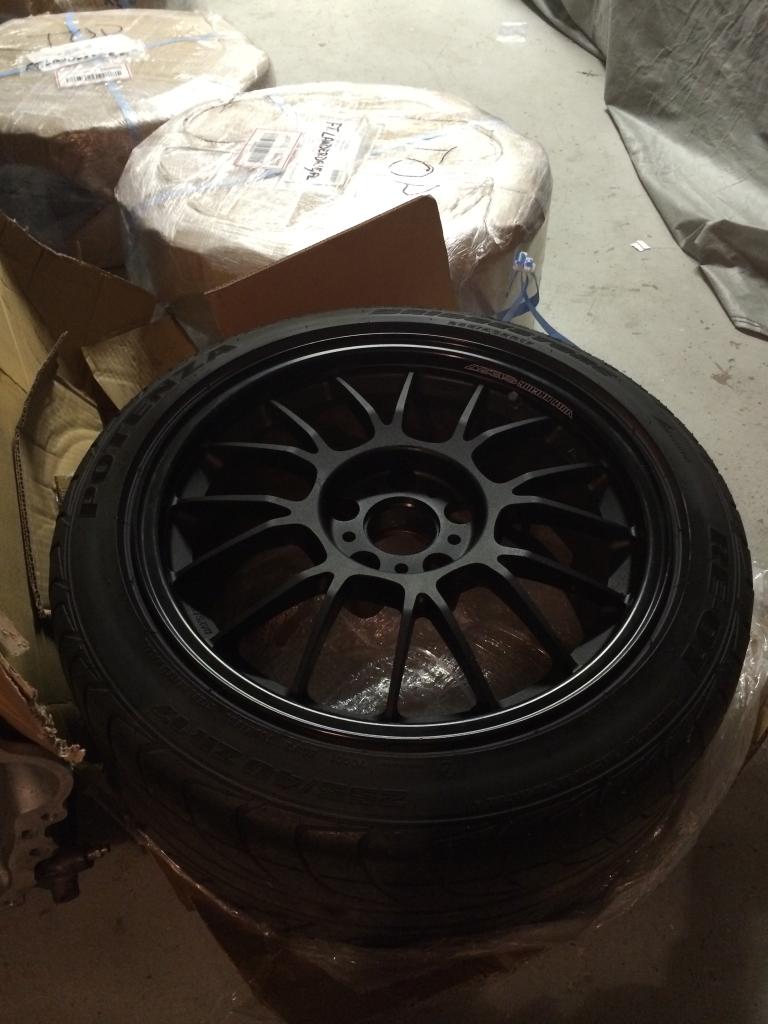
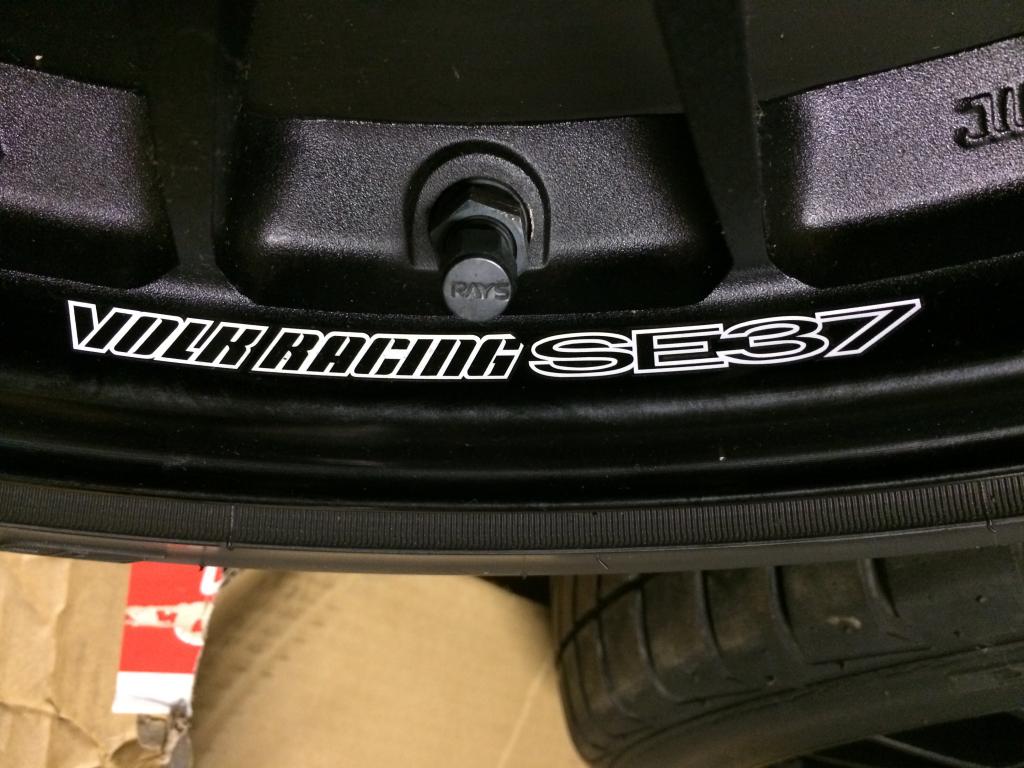
F/17x8.5 +40 R/17x9.5 +35 (never mind the disaster garage)
The city made me cover up the car, because it had no tag. Unfortunately all I had was a cover that was only to prevent dust not weather�.so this happened�.
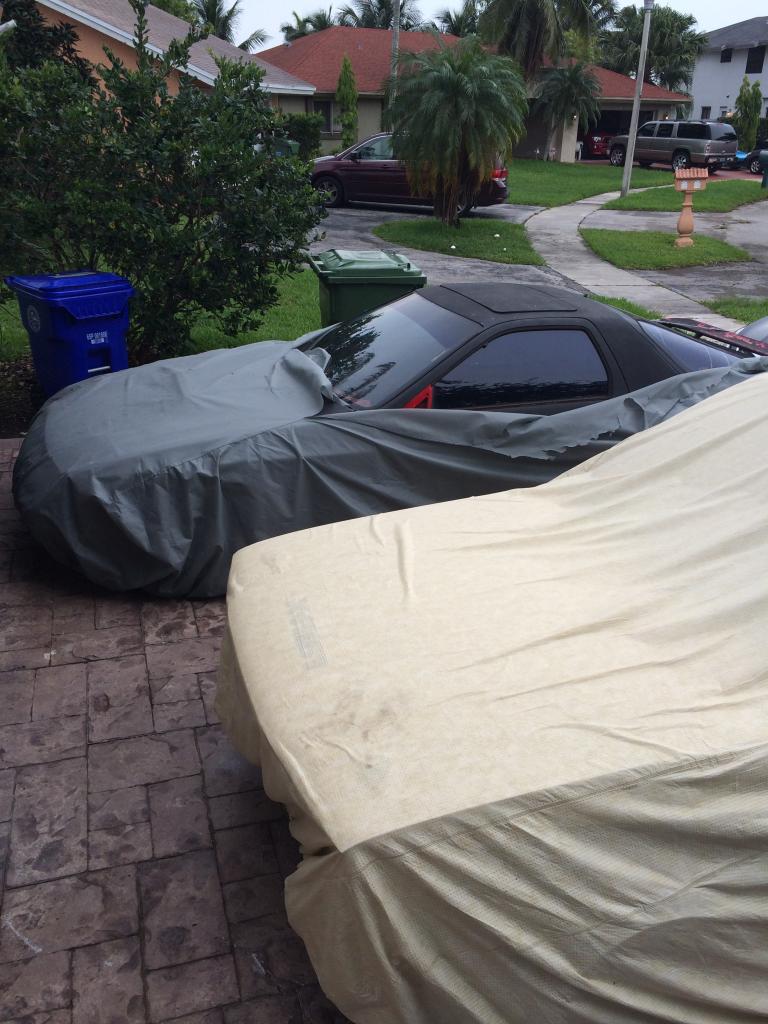
New cover should be here by Friday.
That's about it for now. I have two days off this week so I should hopefully get some work done on it.

Junior Member
Joined: May 2014
Posts: 1
Likes: 0
From: Miami, FL
I'm just a 20 year old guy in Miami trying to get in the rotary game, so this thread is the most inspiring one I've found to date lol. Your life seems to have changed a lot just over the course of this thread, keep it up! Can't wait to see the final result!


Do not run the HP+ pads on the street. That's a track/auto-x pad for a reason. They will SCREAM 9/10 times you are braking during normal driving.
I would put them on my car only the morning of a track event, and take them off when I got home.
You will cringe if you drive with them on the street. And... you will probably be pulled over.
I would put them on my car only the morning of a track event, and take them off when I got home.
You will cringe if you drive with them on the street. And... you will probably be pulled over.
other then that it looks god dude. (BTW we met at the churazo meet last year and i had ask you about your brembo setup)
My friend is starting to get ahead with his project so I needed to get off my ***�.not that it is a competition or anything 
1J Cressida
So I finally put the rear end together and was JUST about to put it on
When this happened�..gotta love Florida weather

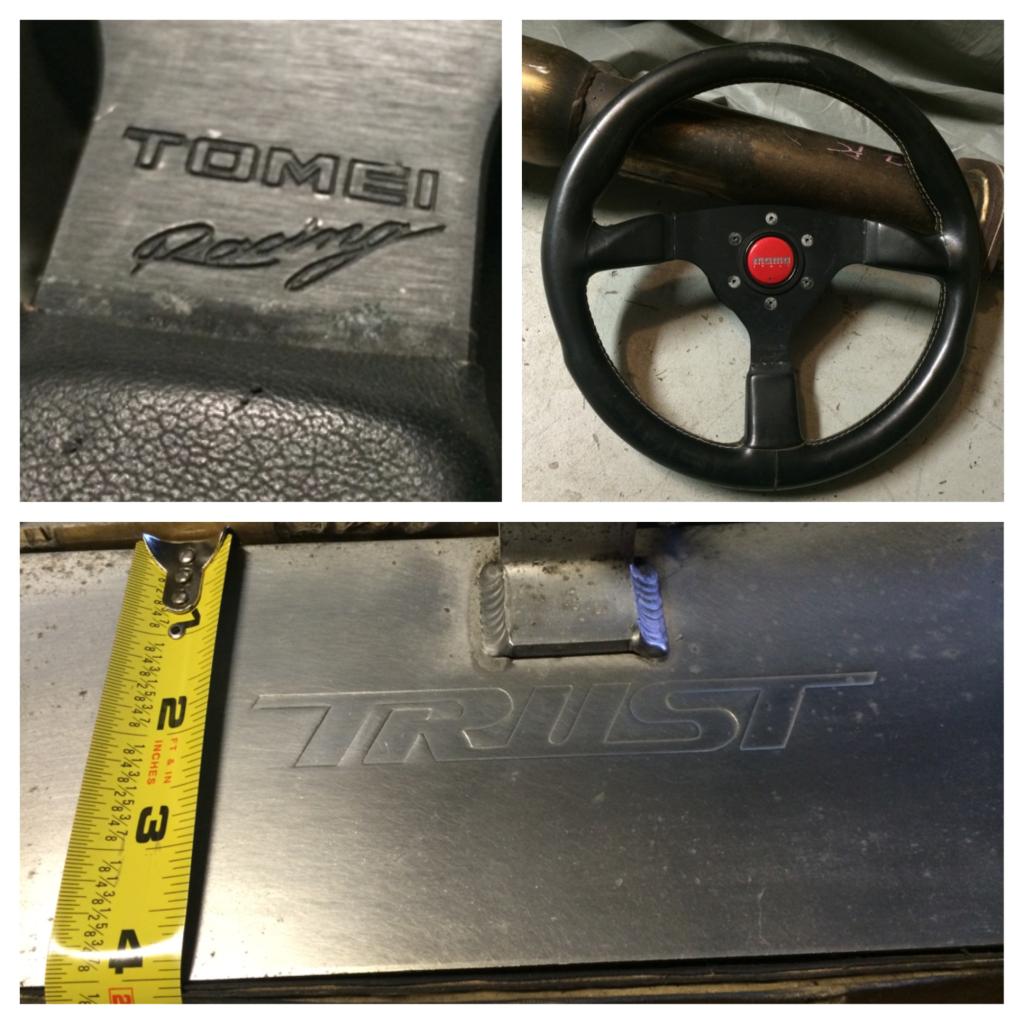
While waiting for another day off to work on Harley (which come few and far between) I ordered more parts from Circuit Theory: Trust Thick Core FMIC/piping/BOV, MazdaSpeed short shifter not pictured and Tomei steering wheel. I added the horn button that I had laying around.
Too bad the intercooler arrived with a hole in the end tank�.how does that even happen? USPS sucks...
It was insured but I just opted to have it fixed instead
I also ordered a set of LED taillights from Digi7ech. I was bothering him for the past year to see when he would be done designing them haha. I have never taken apart a tail light so I sent him mine. He sent me a picture when they were done and they looked great!
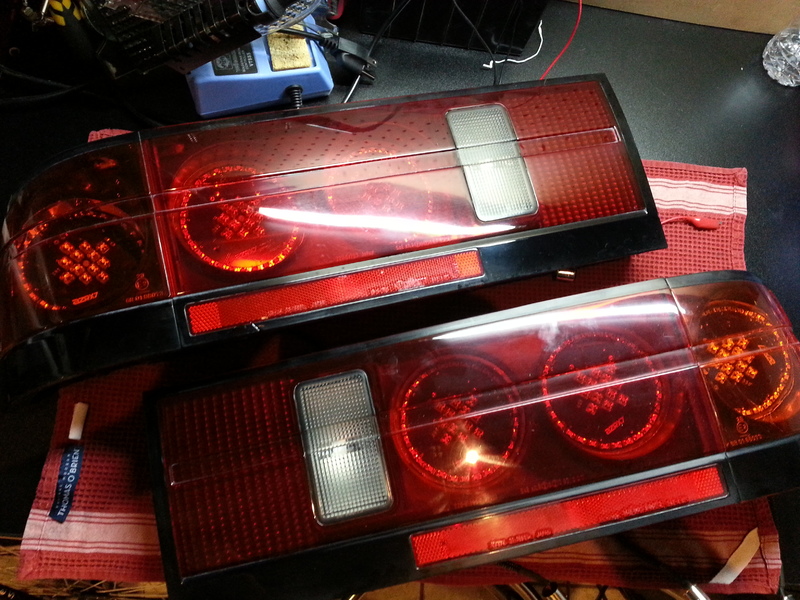
Too bad they didn't arrive in the same condition�.Another USPS Special
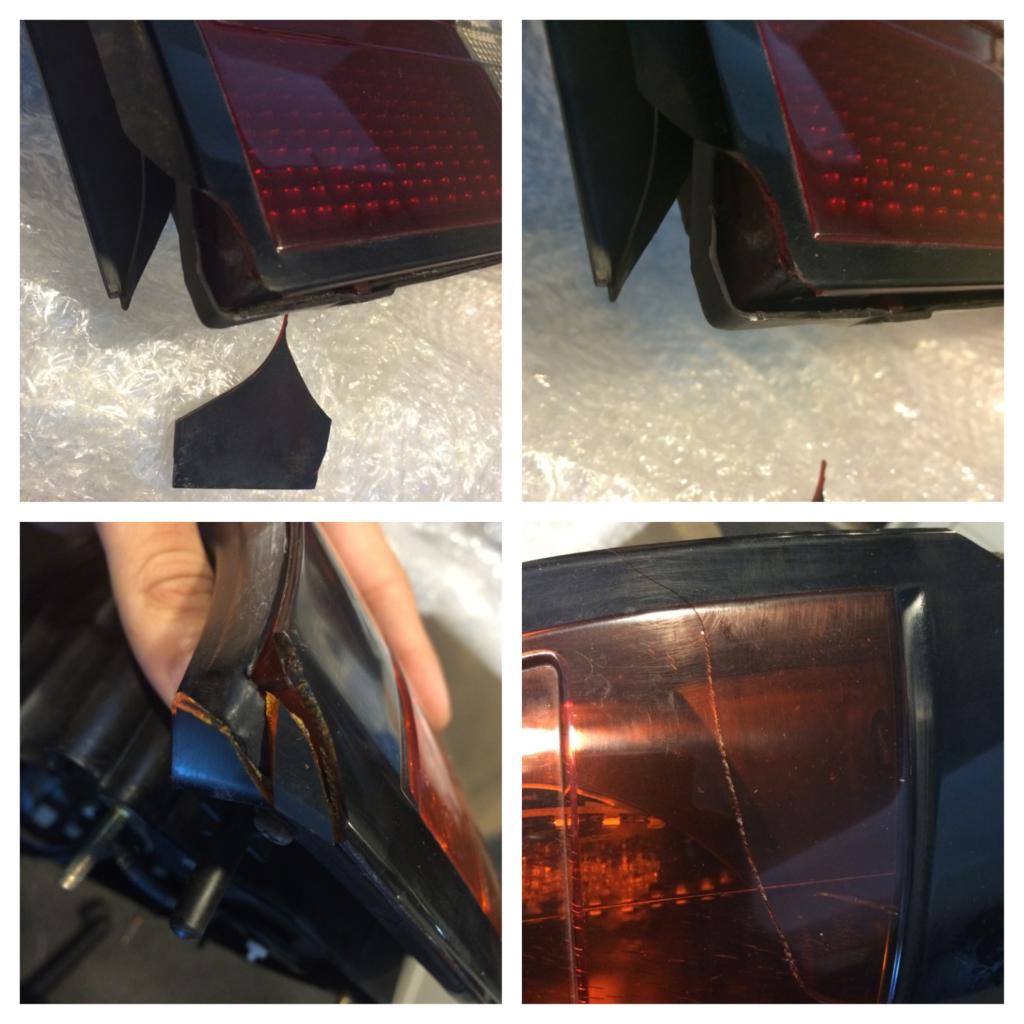
These were also insured and I will be claiming them as they are a total loss
Both Circuit Theory and AZRX7/Digi7ech were awesome with communication and helped with the situation. I highly recommend doing business with either of them! Thanks guys!
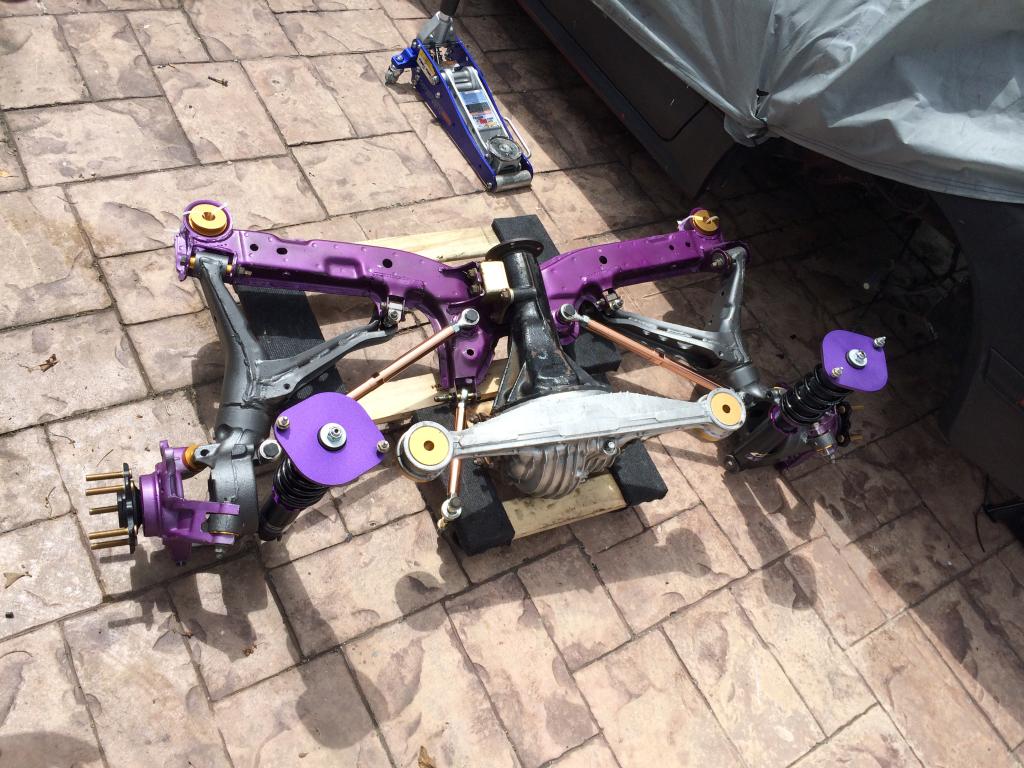
Finally got the day off last week and the time to actually put the rear subframe in. It was not easy, but it also was not as hard as everyone makes it out to be when you have full PBM rear end parts.
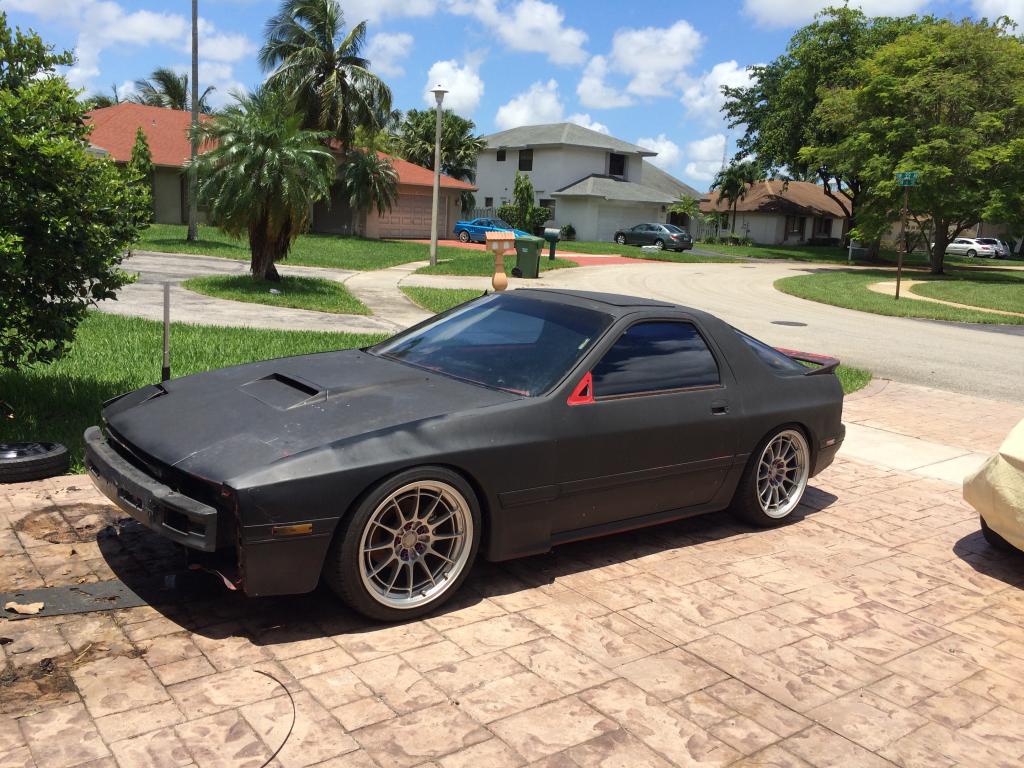
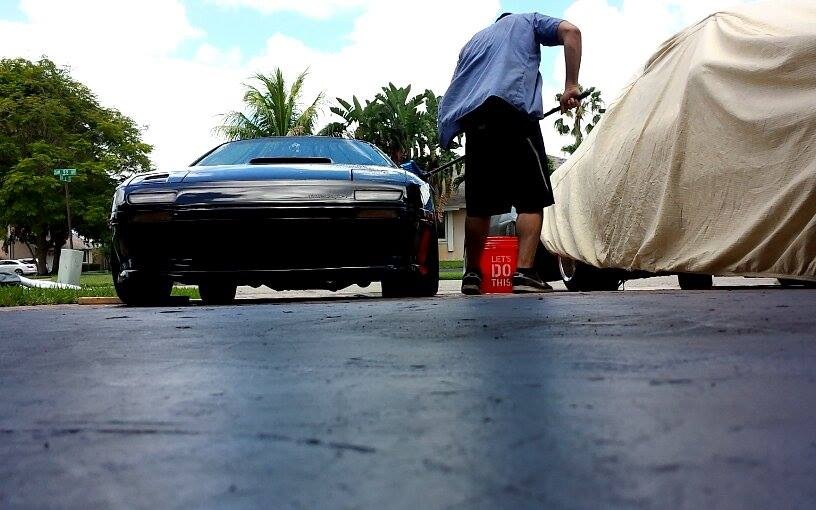
Now that she rolls again I could mover her out of the way to bring Selena Street Car out and give her a wash
Also got around to putting on the fog lights to complete the S5 conversion in the front (just need to put on the moldings and rear bumper and the whole car is done)
And that's pretty much where I'm at now�stay tuned!
1J Cressida
So I finally put the rear end together and was JUST about to put it on
When this happened�..gotta love Florida weather
While waiting for another day off to work on Harley (which come few and far between) I ordered more parts from Circuit Theory: Trust Thick Core FMIC/piping/BOV, MazdaSpeed short shifter not pictured and Tomei steering wheel. I added the horn button that I had laying around.
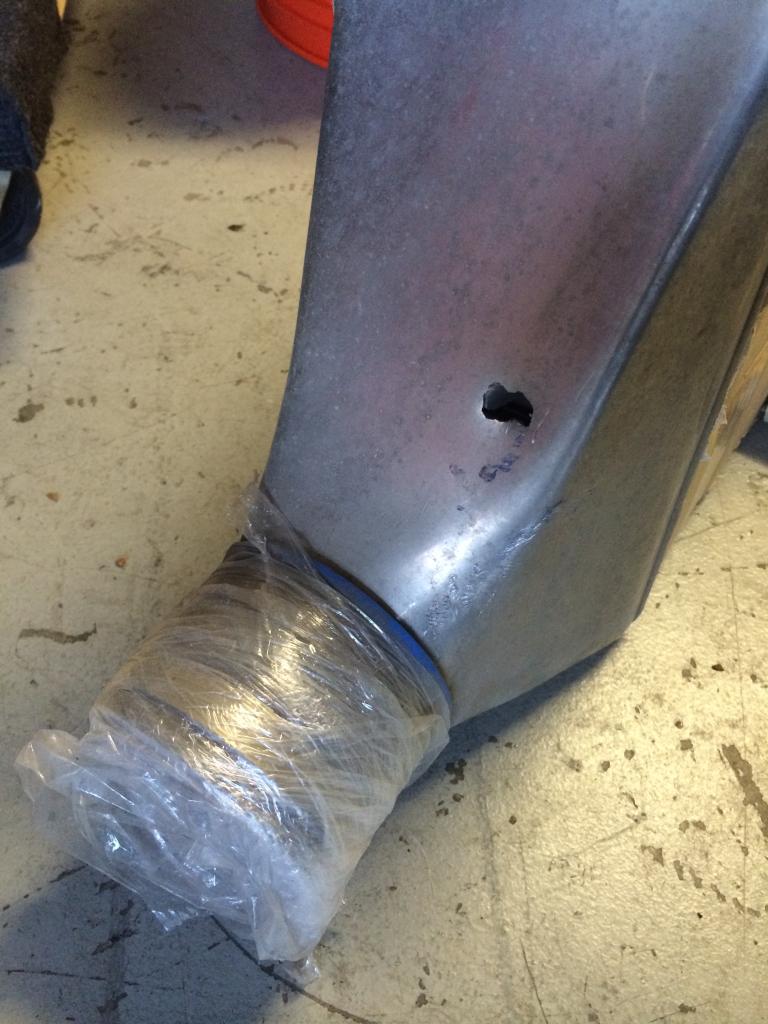
Too bad the intercooler arrived with a hole in the end tank�.how does that even happen? USPS sucks...
It was insured but I just opted to have it fixed instead
I also ordered a set of LED taillights from Digi7ech. I was bothering him for the past year to see when he would be done designing them haha. I have never taken apart a tail light so I sent him mine. He sent me a picture when they were done and they looked great!
Too bad they didn't arrive in the same condition�.Another USPS Special
These were also insured and I will be claiming them as they are a total loss
Both Circuit Theory and AZRX7/Digi7ech were awesome with communication and helped with the situation. I highly recommend doing business with either of them! Thanks guys!
Finally got the day off last week and the time to actually put the rear subframe in. It was not easy, but it also was not as hard as everyone makes it out to be when you have full PBM rear end parts.
Now that she rolls again I could mover her out of the way to bring Selena Street Car out and give her a wash
Also got around to putting on the fog lights to complete the S5 conversion in the front (just need to put on the moldings and rear bumper and the whole car is done)
And that's pretty much where I'm at now�stay tuned!
nice, yeah 2 jacks makes the rear end install a breeze, IT IS possible with 1, but i'm not the strongest guy on the planet.. so.. yea. I am jelly of your jdm parts horde.
I used 1 jack on the diff and a 2ft 2x4 and another manly man besides myself lol. The jack did most of the work though really.