
Selina Street Car - Clean S4 TII - Street Port - S5 Ext/Int - Dash of JDM

Selina Street Car - Clean S4 TII - Street Port - S5 Ext/Int - Dash of JDM
I mentioned picking up this TII in my other Build thread - The Story of Harley. I decided it's starting to deserve it's own thread. I would not totally consider it a build, but more of a slight restoration and adding some of my own style to a great base car. Jerry's thread has been a great inspiration to really make this car as perfect as possible, even the little things.
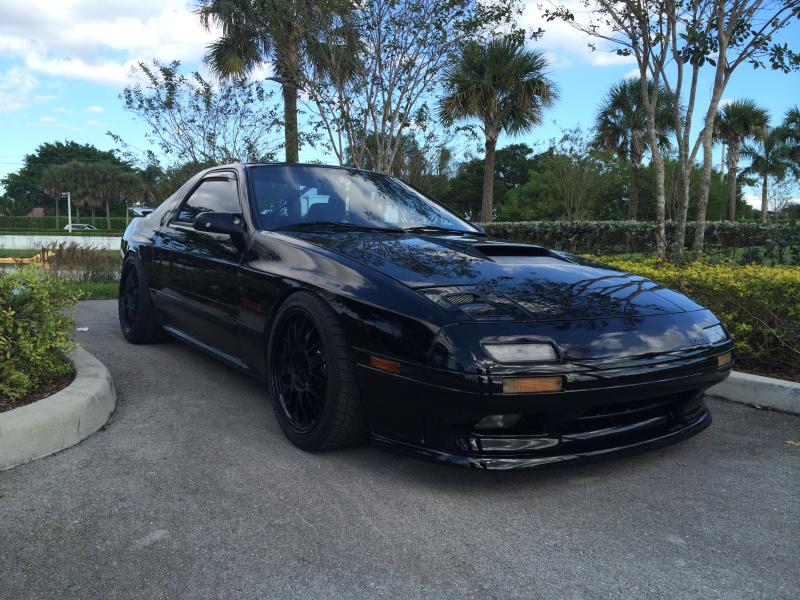
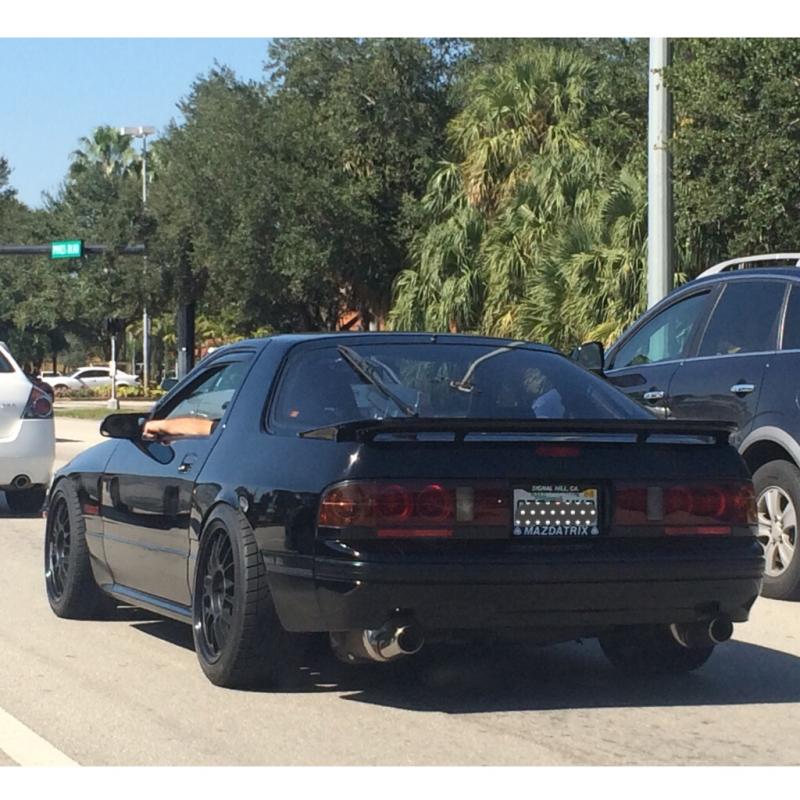
Selina (after Selina Kyle aka Cat Woman from Batman)
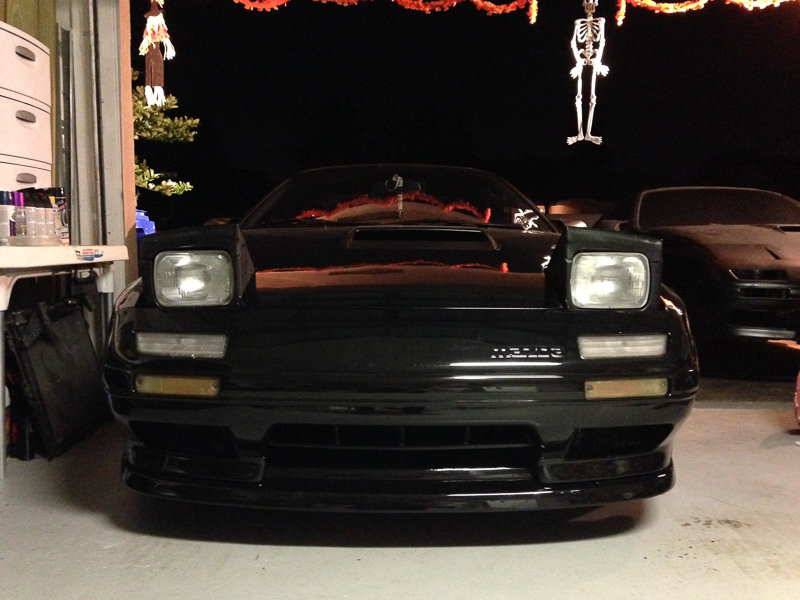
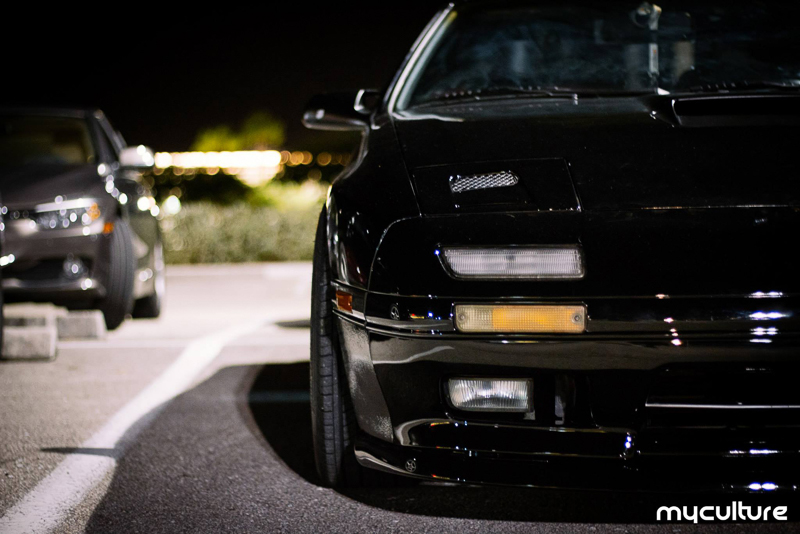
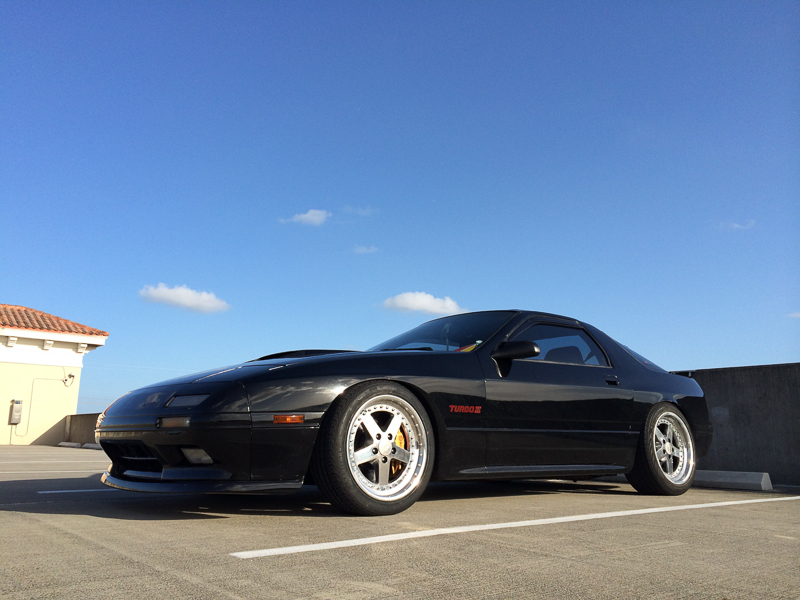
1987 Brilliant Black Turbo II - 90,700mi on the chassis, no accidents, rust free. Clean inside and out. AC WORKS! No power steering though.
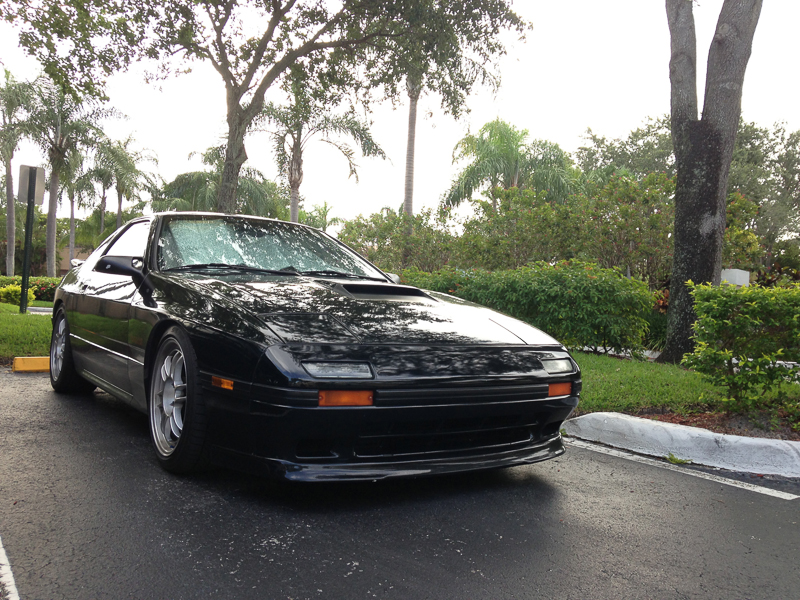
The car was originally built by Roger at PROs in Riviera Beach, FL. This is what was included with it.
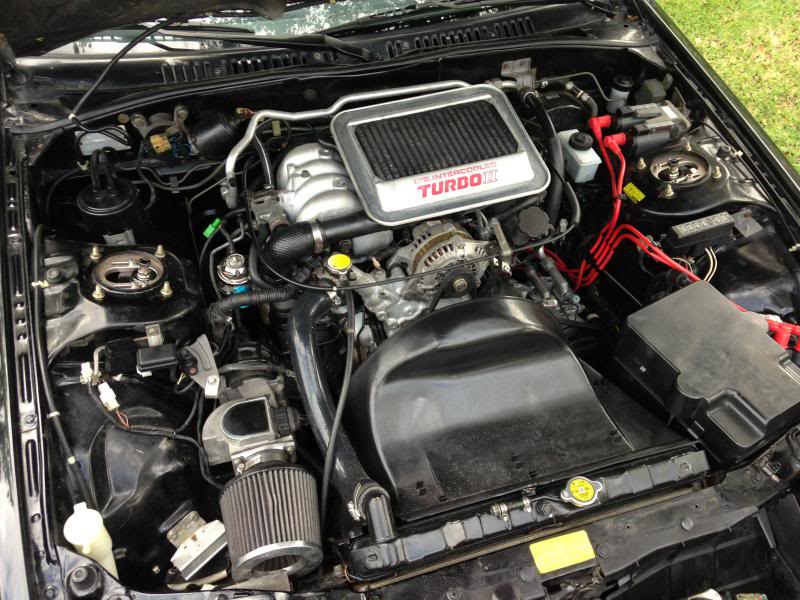
Rebuilt Series 4 TII Motor
ALS Apex Seals
OEM Apex Springs
93 Corner Seal Springs
93 Side Seals Springs
93 Corner & Side Seals
New Rotor Bearings
New Stationary Gear Bearings
OEM Gasket Set
Series 5 Turbo
GReddy Type RS BOV
All New OEM Mazdaspeed Mounts
New Clutch Master & Slave Cylinder
New Brake Master
New Alternator
ACT Organic Clutch
Racing Beat Turbo back
Racing Beat Spark Plug Wires
Racing Beat FCD
Apexi Super AFC II (Black)
Walbro 255lph Fuel Pump
BC Racing Coilovers (Softer spring rate option)
Suspension Techniques Sway Bar
STi Brembo Brake Upgrade
SS Braided Brake Lines
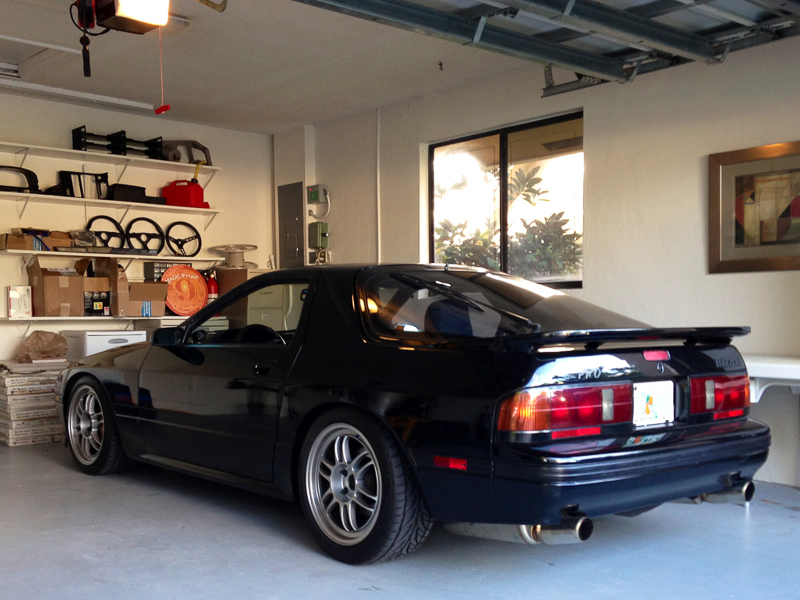
Enkei RPF1 Wheels 17x8.5/9
New Tires
Repainted
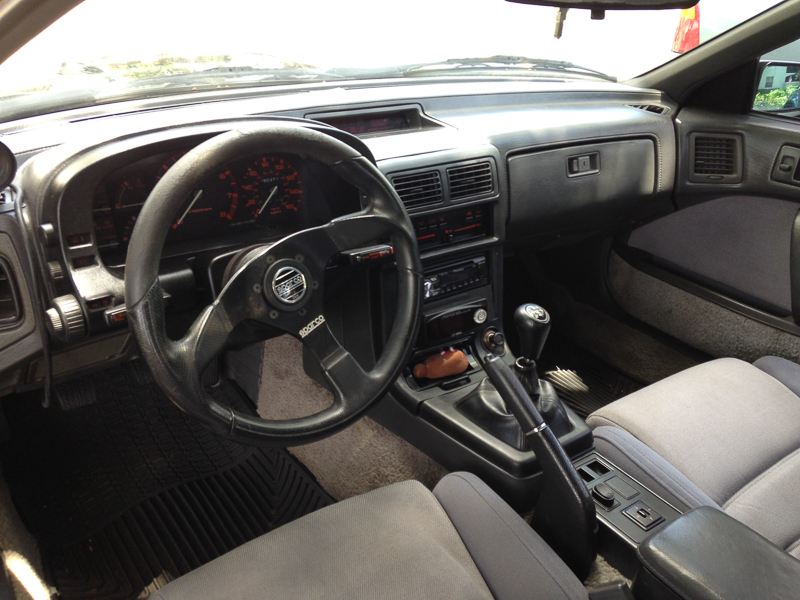
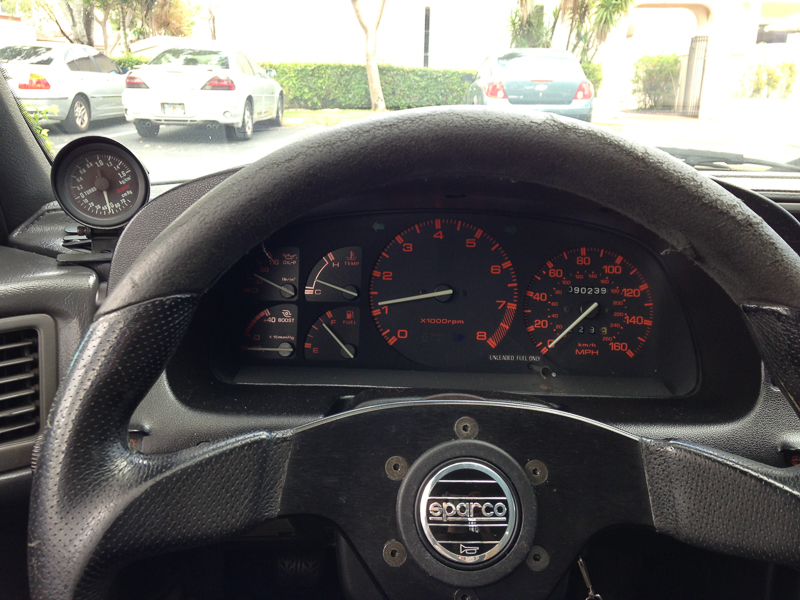
Sparco Steering Wheel
1991 Tail lights
Pioneer radio
Pioneer speakers
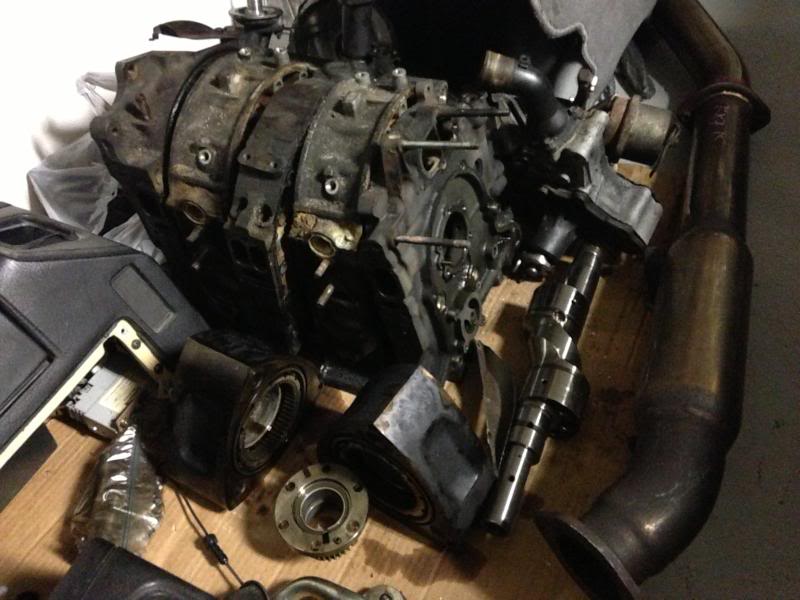
Roger also threw in a TON of extra stuff including the original motor, 1 S4 and 1 S5 Turbo, extra TII transmission, brand new ACT 6 puck clutch and pressure plate, a bin FULL of parts. Too much stuff to name. I kept some spare stuff for myself and sold a lot of it. I'm pretty sure I made close to $1,500 off of the parts that I sold!
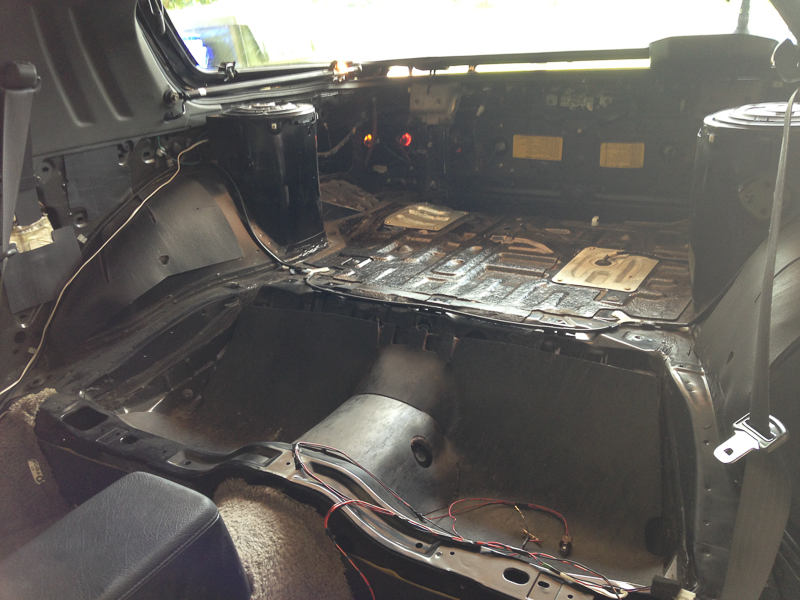
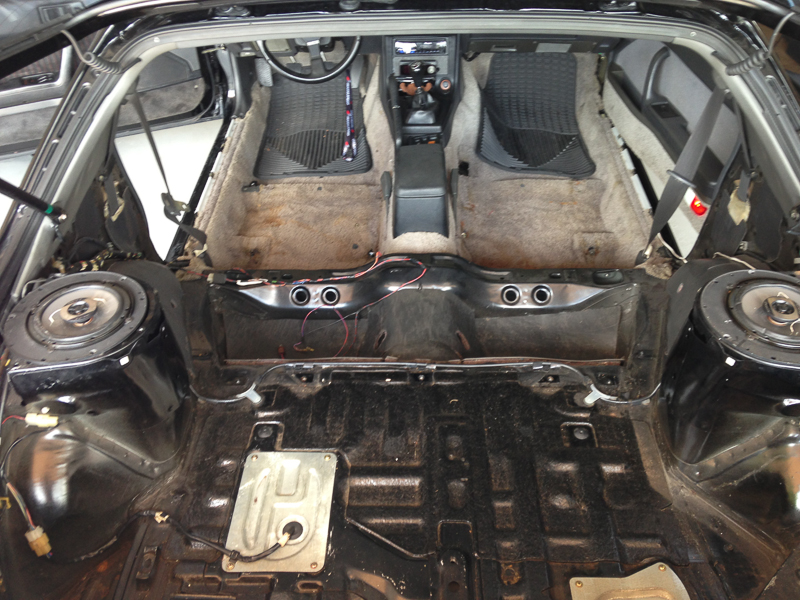
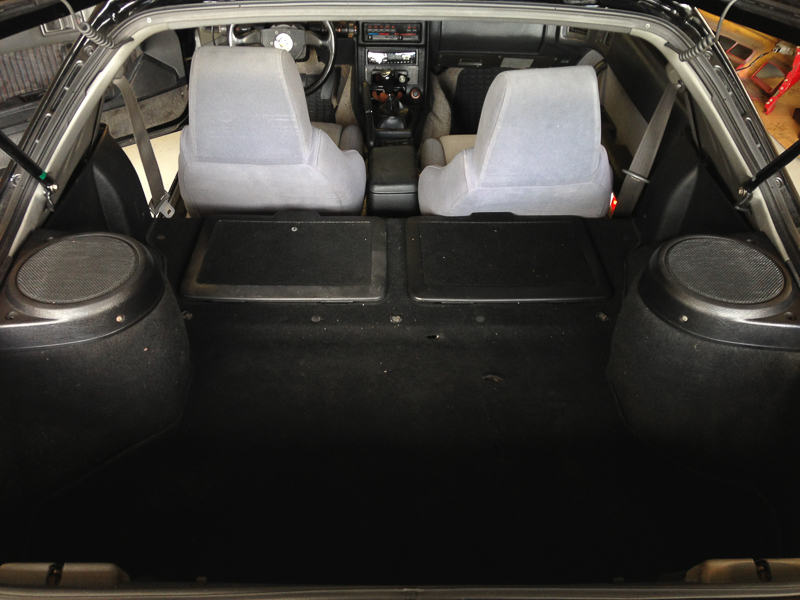
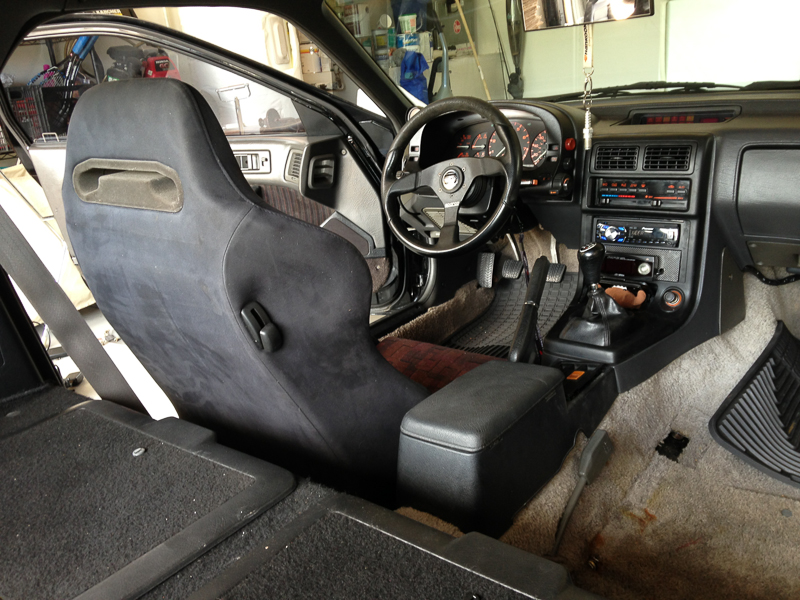
Some interior shots:
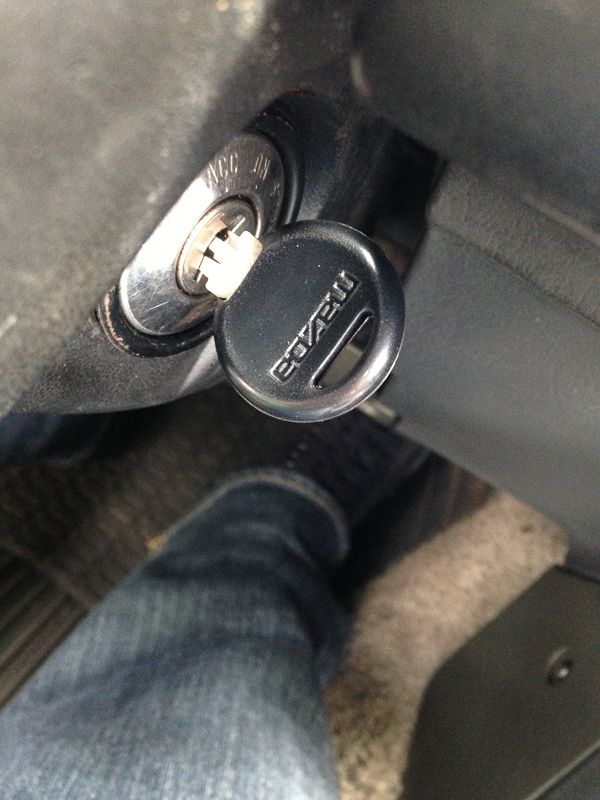
First mod? Brand new VIN cut key from Mazda. The key that came with the car was too long so it was hard to open the door lock and sometimes a pain to start the car. When I got this brand new key from Mazda everything worked perfectly. I didn't think it was going to be such a difference. I highly recommend it and to have an original key gives me a kind of warm feeling inside.
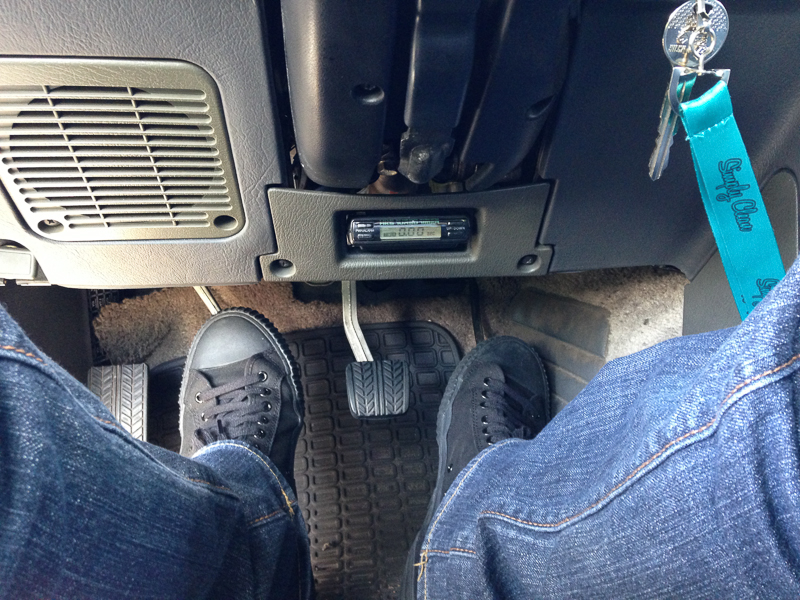
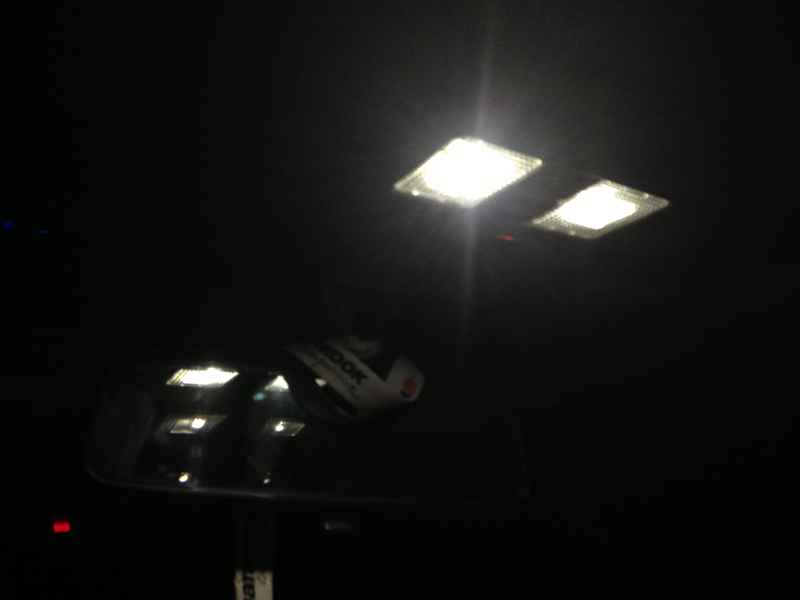
Next thing I did was install a HKS turbo timer……only because I had it laying around really.
I love how it fits perfectly in the ball vent. There's absolutely nothing holding it in there. It just fits perfectly snug.
Next I wanted to modernize the interior lighting with LEDs
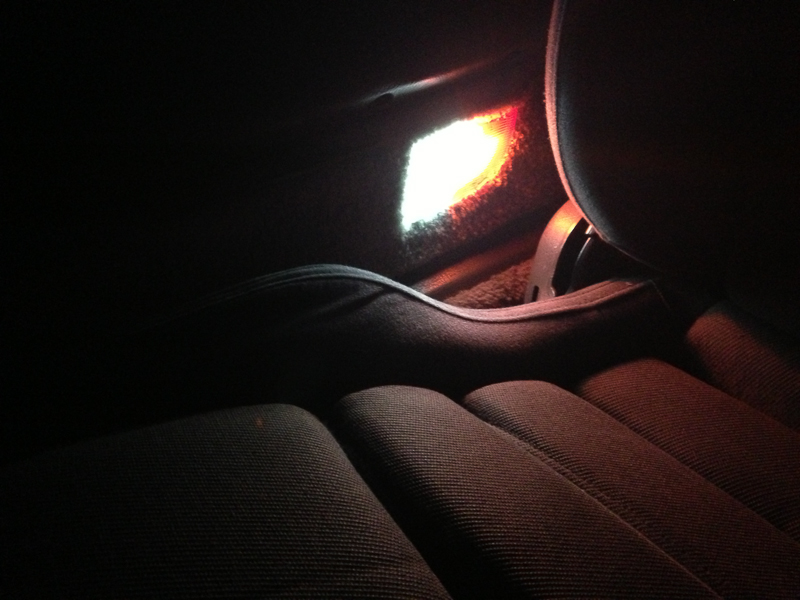
Another thing I didn't think was going to make such a huge difference was the LEDs in the door. They looked soo dingy and gross looking with the regular bulb. I thought it was the plastic. When I put the LEDs in they became such a bright white I was amazed. Another cheap mod I highly recommend
Getting some car wash action
Selina (after Selina Kyle aka Cat Woman from Batman)
1987 Brilliant Black Turbo II - 90,700mi on the chassis, no accidents, rust free. Clean inside and out. AC WORKS! No power steering though.
The car was originally built by Roger at PROs in Riviera Beach, FL. This is what was included with it.
Rebuilt Series 4 TII Motor
ALS Apex Seals
OEM Apex Springs
93 Corner Seal Springs
93 Side Seals Springs
93 Corner & Side Seals
New Rotor Bearings
New Stationary Gear Bearings
OEM Gasket Set
Series 5 Turbo
GReddy Type RS BOV
All New OEM Mazdaspeed Mounts
New Clutch Master & Slave Cylinder
New Brake Master
New Alternator
ACT Organic Clutch
Racing Beat Turbo back
Racing Beat Spark Plug Wires
Racing Beat FCD
Apexi Super AFC II (Black)
Walbro 255lph Fuel Pump
BC Racing Coilovers (Softer spring rate option)
Suspension Techniques Sway Bar
STi Brembo Brake Upgrade
SS Braided Brake Lines
Enkei RPF1 Wheels 17x8.5/9
New Tires
Repainted
Sparco Steering Wheel
1991 Tail lights
Pioneer radio
Pioneer speakers
Roger also threw in a TON of extra stuff including the original motor, 1 S4 and 1 S5 Turbo, extra TII transmission, brand new ACT 6 puck clutch and pressure plate, a bin FULL of parts. Too much stuff to name. I kept some spare stuff for myself and sold a lot of it. I'm pretty sure I made close to $1,500 off of the parts that I sold!
Some interior shots:
First mod? Brand new VIN cut key from Mazda. The key that came with the car was too long so it was hard to open the door lock and sometimes a pain to start the car. When I got this brand new key from Mazda everything worked perfectly. I didn't think it was going to be such a difference. I highly recommend it and to have an original key gives me a kind of warm feeling inside.
Next thing I did was install a HKS turbo timer……only because I had it laying around really.
I love how it fits perfectly in the ball vent. There's absolutely nothing holding it in there. It just fits perfectly snug.
Next I wanted to modernize the interior lighting with LEDs
Another thing I didn't think was going to make such a huge difference was the LEDs in the door. They looked soo dingy and gross looking with the regular bulb. I thought it was the plastic. When I put the LEDs in they became such a bright white I was amazed. Another cheap mod I highly recommend
Getting some car wash action
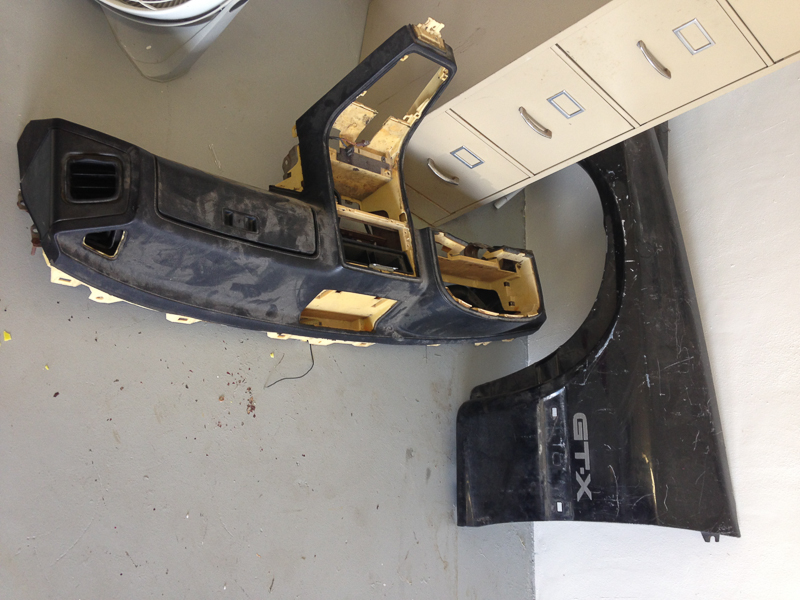
Since I thought I was keeping the gray dash for a while I decided to frankenstein some door panels. Half Gray half Black.
Before
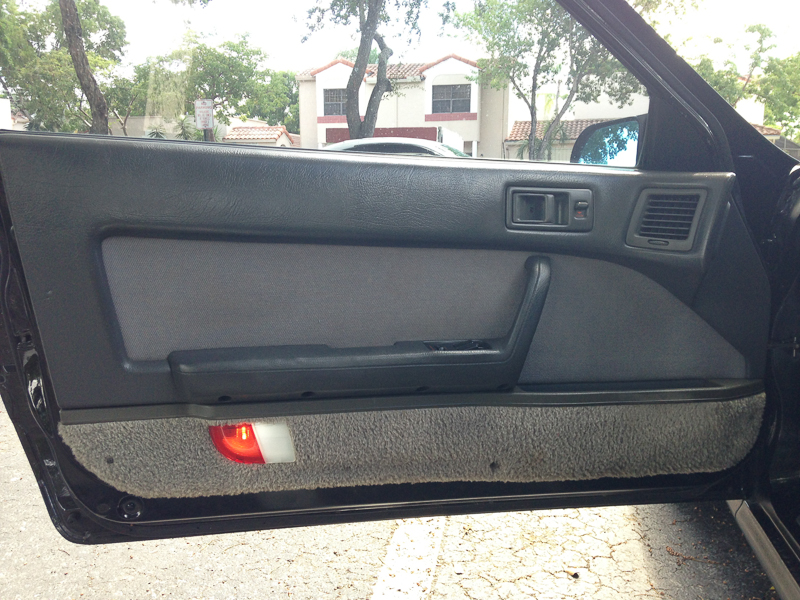
After

Picked up a good condition full black interior (carpet/trim/headliner) from Holton in Gainesville, FL so swapped that out
Here I'm testing out one of the Mitsubishi Evolution IV seats I picked up to see how it would look
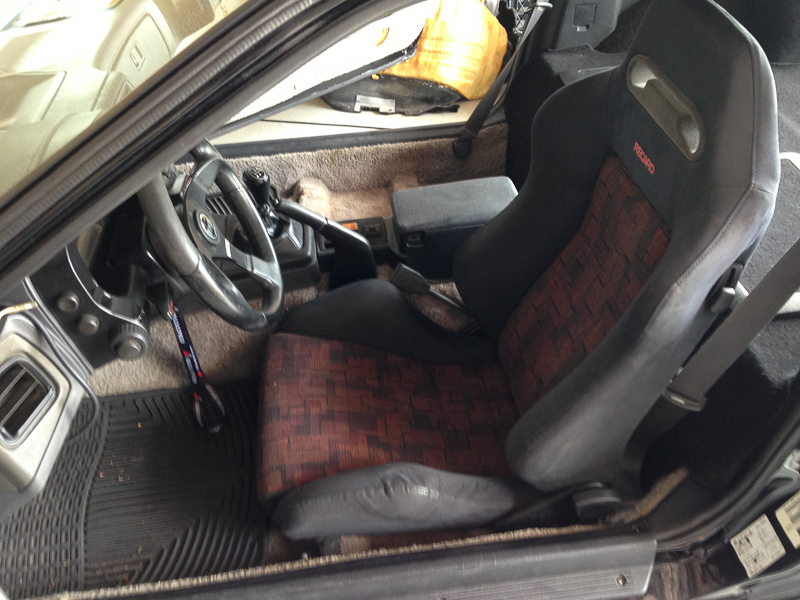
I love this seat!
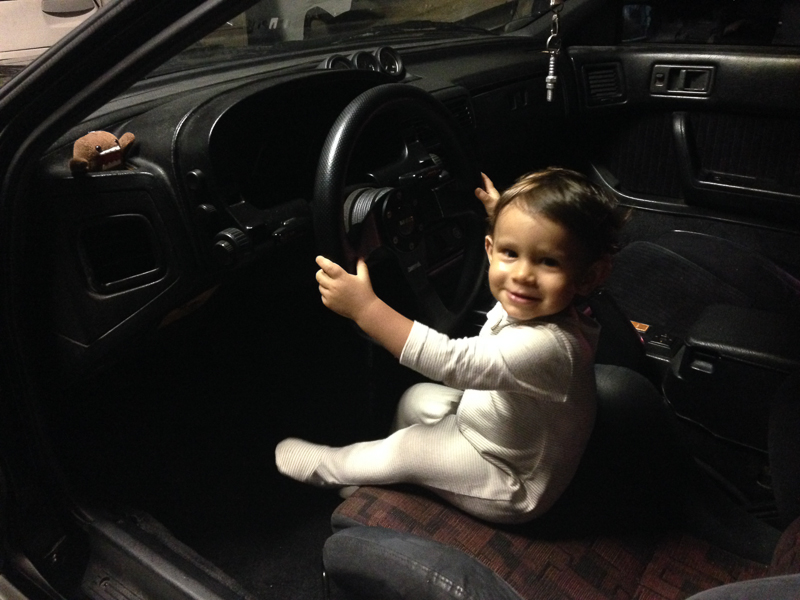
Black dash sooner than expected
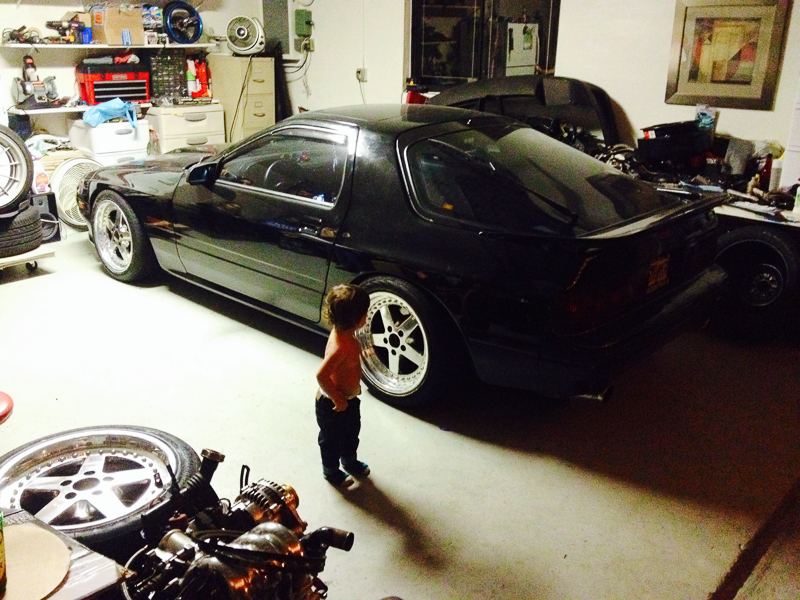
Full black interior in and my girlfriends nephew falling in love with RX7s already! Also added a MOMO Competition steering wheel and Omori Boost and EGT, AEM Wideband gauges�..and Domo
Had the opportunity to test fit some Volk GTUs at Drag International Ft. Lauderdale, FL
They were 8 in the front and 10 in the back. I loved them. Just didn't have the time to get the funds before they sold.
Before
After
Picked up a good condition full black interior (carpet/trim/headliner) from Holton in Gainesville, FL so swapped that out
Here I'm testing out one of the Mitsubishi Evolution IV seats I picked up to see how it would look
I love this seat!
Black dash sooner than expected
Full black interior in and my girlfriends nephew falling in love with RX7s already! Also added a MOMO Competition steering wheel and Omori Boost and EGT, AEM Wideband gauges�..and Domo
Had the opportunity to test fit some Volk GTUs at Drag International Ft. Lauderdale, FL
They were 8 in the front and 10 in the back. I loved them. Just didn't have the time to get the funds before they sold.
My buddy and I at a local meet. Same wheels -_-
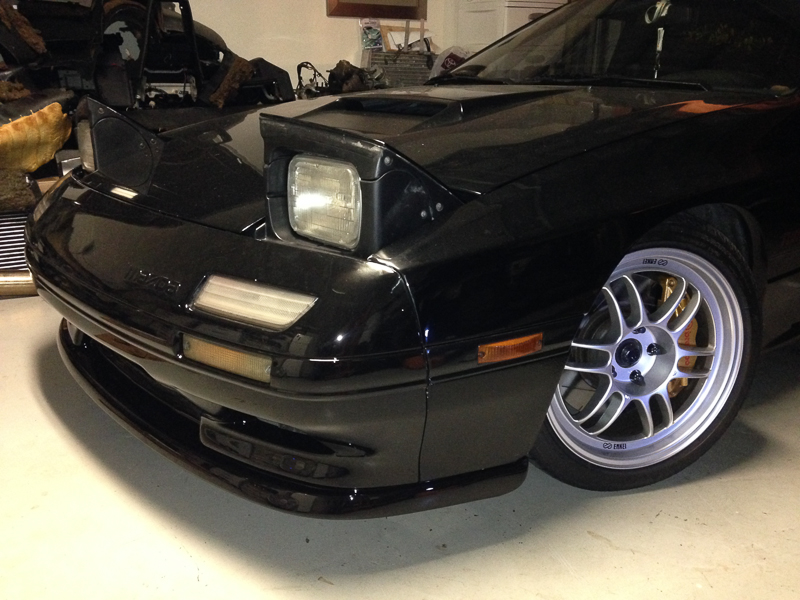
Acquired S5 TII front bumper and lip thanks to LS1FC
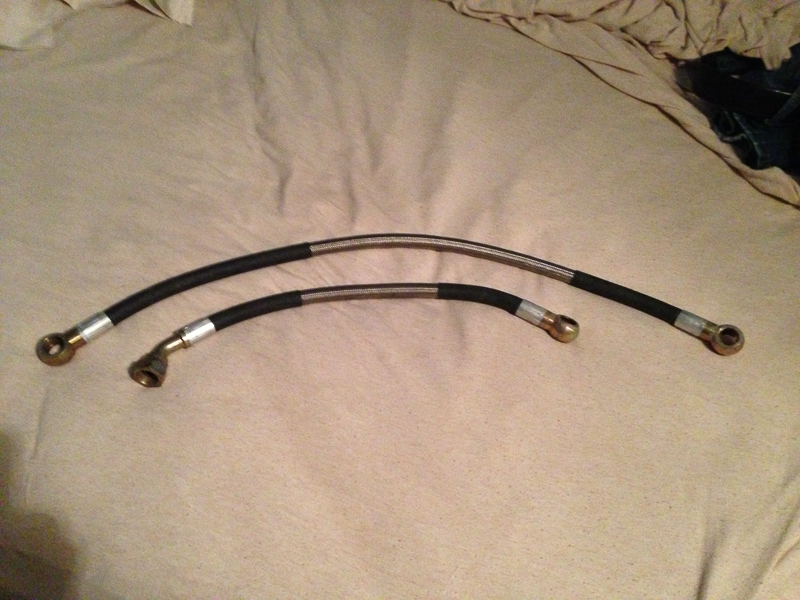
I started to notice a leak from the oil cooler lines so I bought some lightly used CorkSport lines
Added some JDM goodies to the car
-KSP Attain Headlight Vent
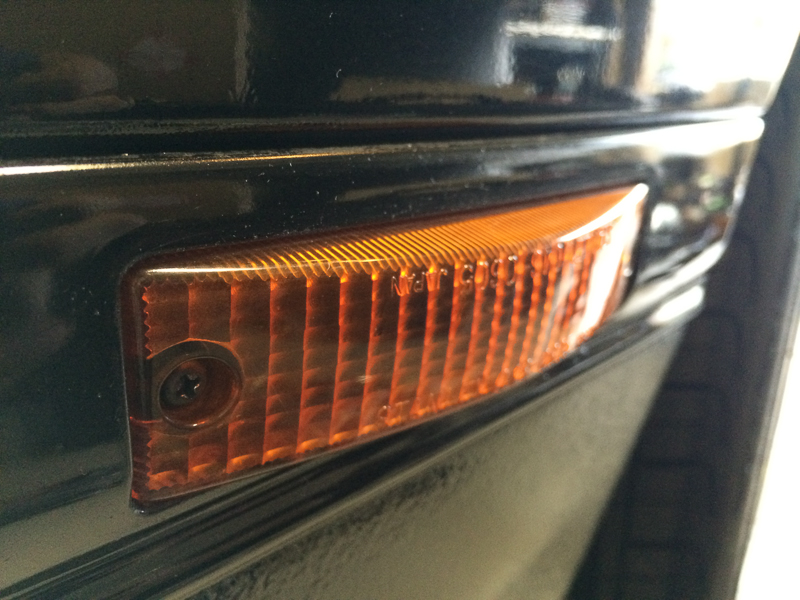
-Brand New JDM OEM Mazda Bubble side markers thanks to Circuit Theory. I also installed most of the moldings at this time
-JDM OEM Mazda Rear Molding with marker light delete (not pictured)

-JDM OEM Mazda Blinkers with two bulbs and the orange filter modified.
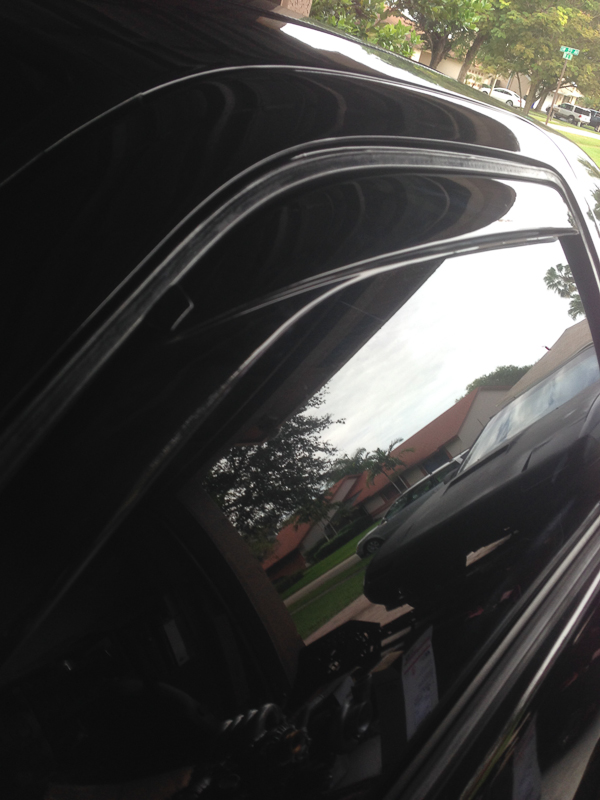
-Brand New JDM OEM Mazda Window Visors also courtesy of Circuit Theory
Acquired S5 TII front bumper and lip thanks to LS1FC
I started to notice a leak from the oil cooler lines so I bought some lightly used CorkSport lines
Added some JDM goodies to the car
-KSP Attain Headlight Vent
-Brand New JDM OEM Mazda Bubble side markers thanks to Circuit Theory. I also installed most of the moldings at this time
-JDM OEM Mazda Rear Molding with marker light delete (not pictured)
-JDM OEM Mazda Blinkers with two bulbs and the orange filter modified.
-Brand New JDM OEM Mazda Window Visors also courtesy of Circuit Theory
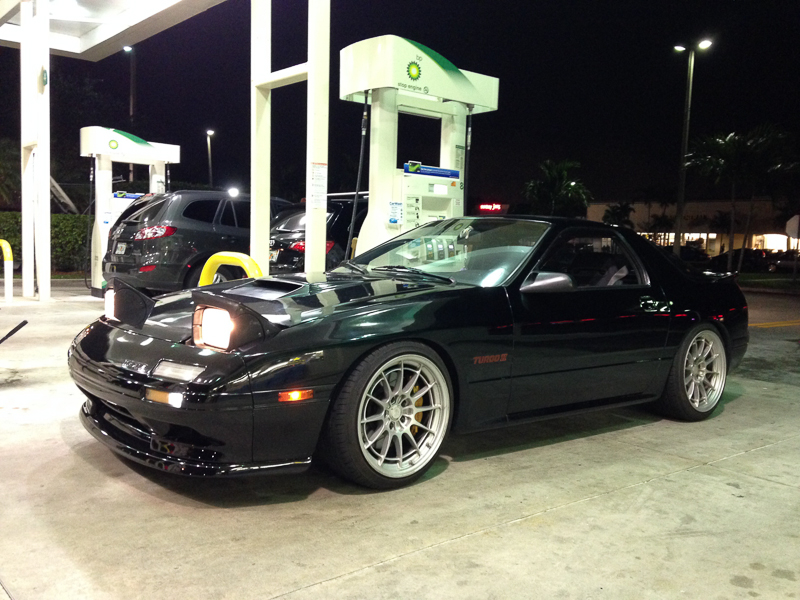
Picked up a set of Enkei NT03s. Has been one of my favorite wheels since I was in high school. They are meant for Harley, but I tried them out on Selina first.
Didn't quite clear the Brembos once the brakes were applied
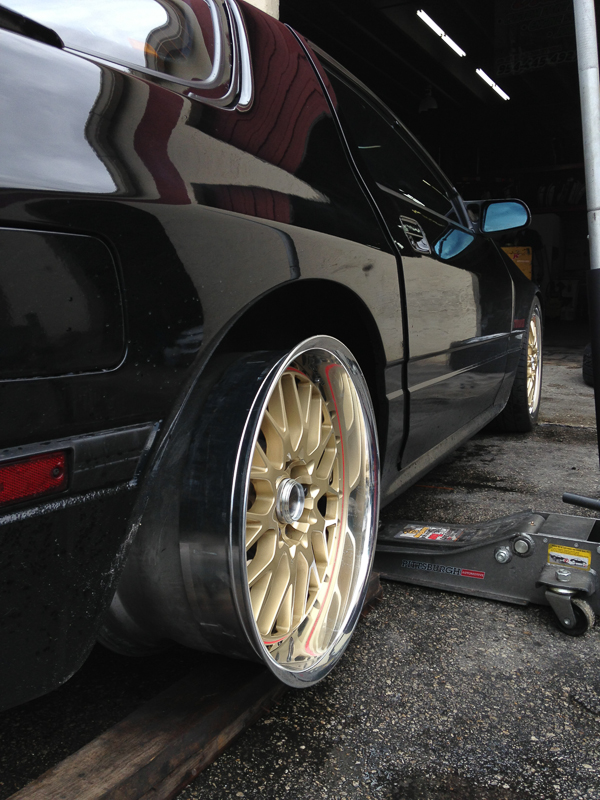
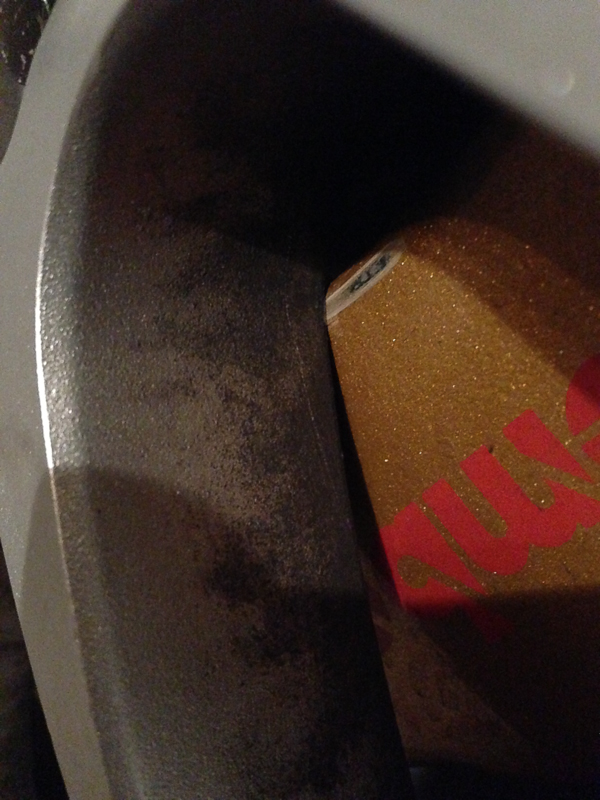
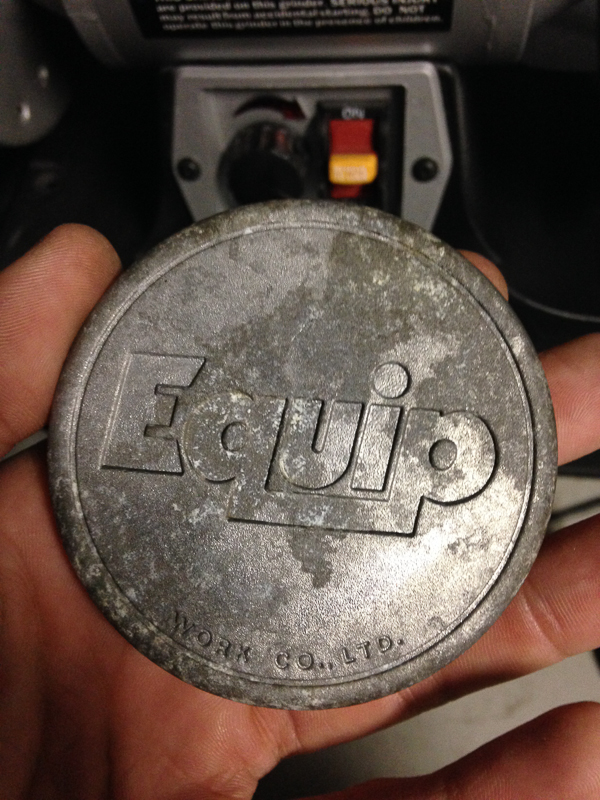
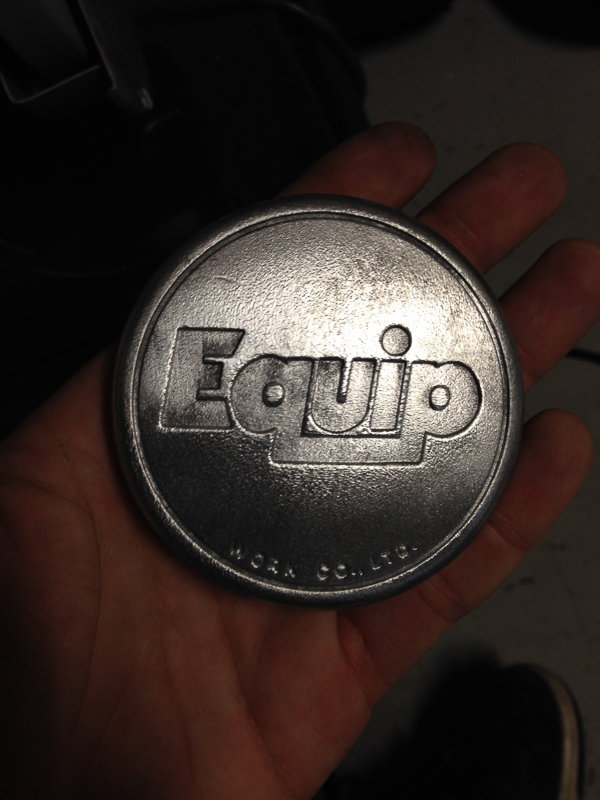
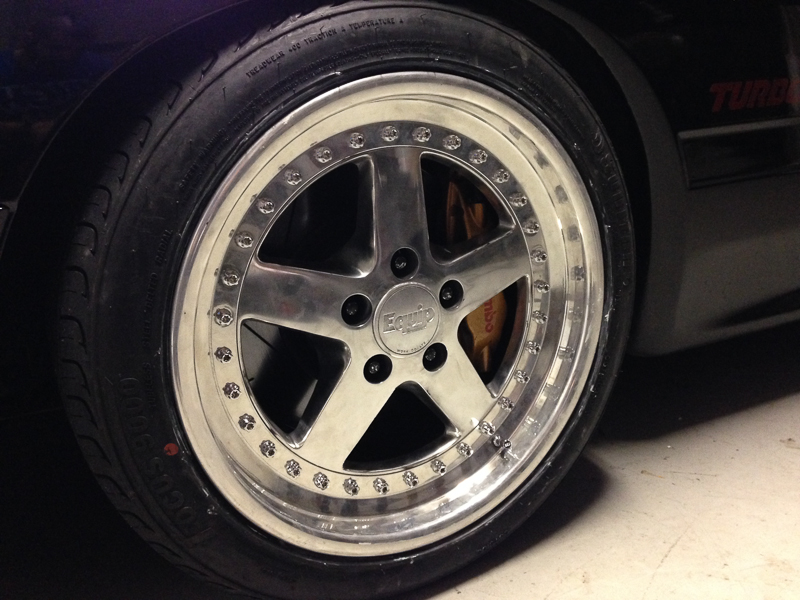
Traded the Enkei RPF1s that came on the car for a set of Equips 17x8/9 street offset as I would call it
Had to clean up the center caps a bit
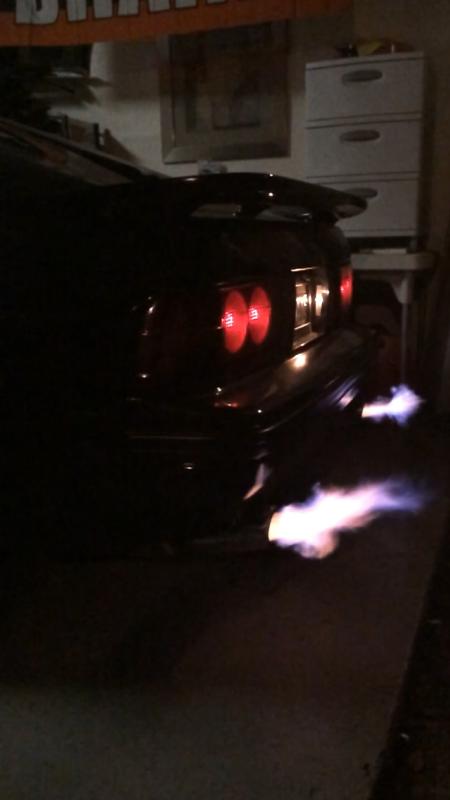
Flammage
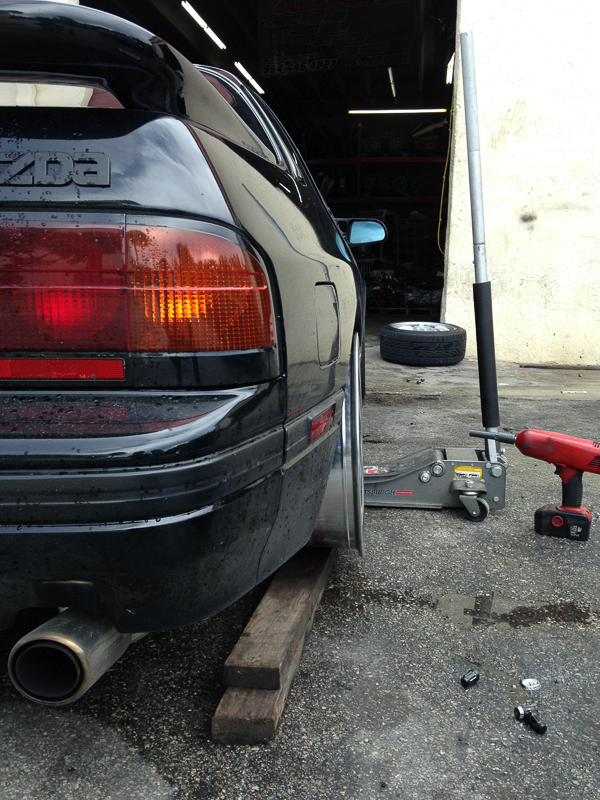
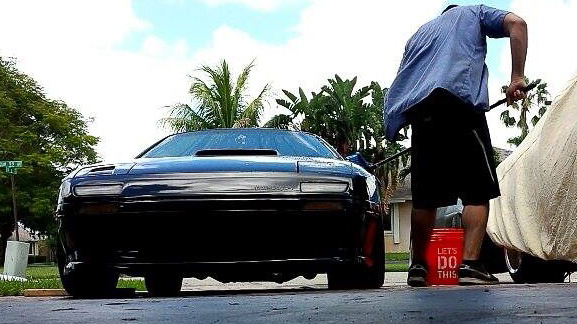
I put her down for about 6 months so I could focus on getting Harley moving again. Took her out and gave her a bath.
Now I'm not really a fan of having a thumping sound system, but I do like to have a little bit of bass. This setup is definitely over kill for my liking, but it was all stuff that my room mate had laying around, brand new in the box, and gave to me for free. So I threw it in. YOLO.
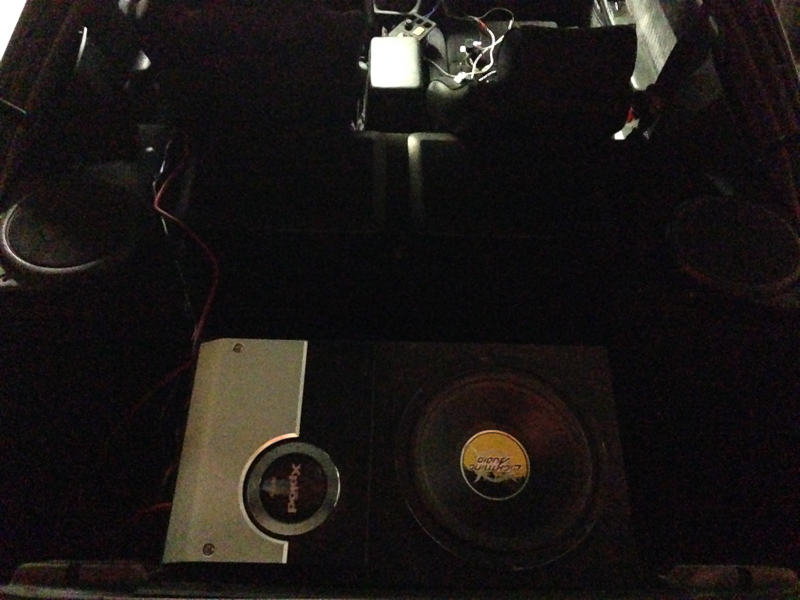
I'm looking to get something like the Kicker all in one 8in powered sub set up and tuck it somewhere hidden.
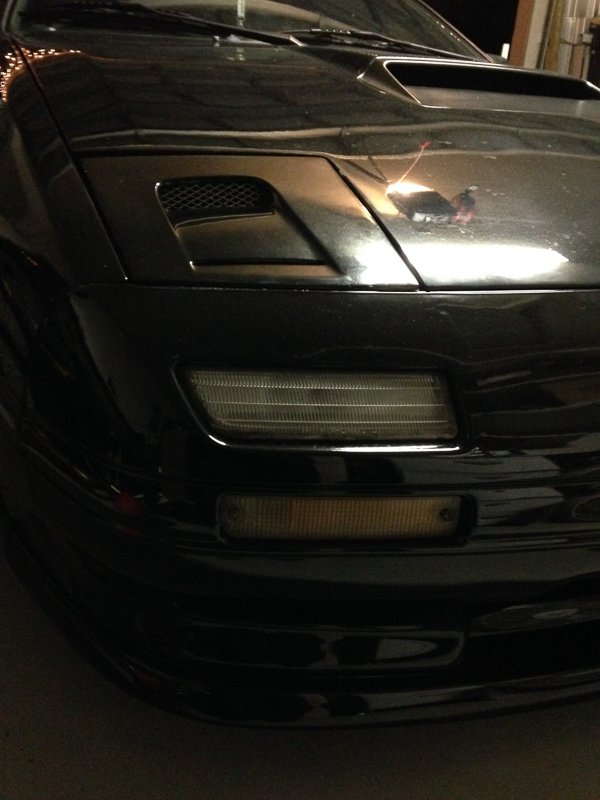
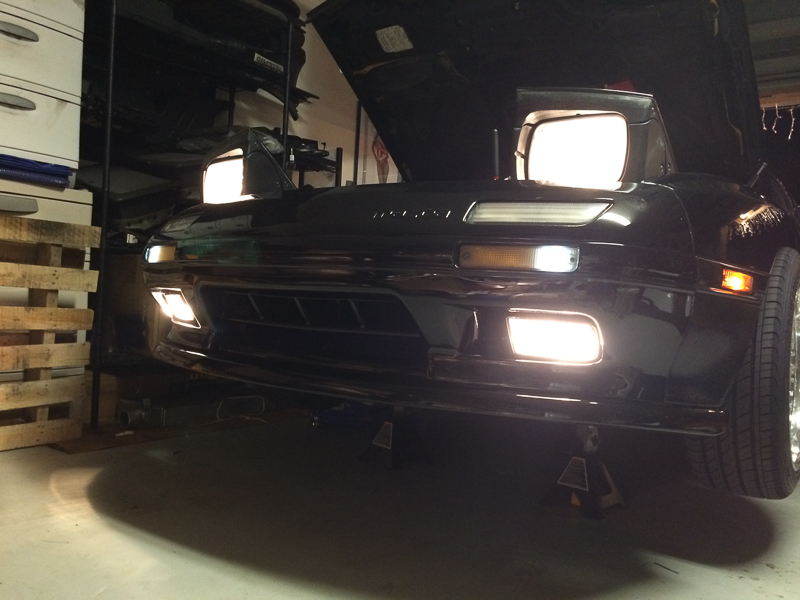
Finally picked up a set of fogs. It looks soo complete when the fogs are on!
Didn't quite clear the Brembos once the brakes were applied
Traded the Enkei RPF1s that came on the car for a set of Equips 17x8/9 street offset as I would call it
Had to clean up the center caps a bit
Flammage
I put her down for about 6 months so I could focus on getting Harley moving again. Took her out and gave her a bath.
Now I'm not really a fan of having a thumping sound system, but I do like to have a little bit of bass. This setup is definitely over kill for my liking, but it was all stuff that my room mate had laying around, brand new in the box, and gave to me for free. So I threw it in. YOLO.
I'm looking to get something like the Kicker all in one 8in powered sub set up and tuck it somewhere hidden.
Finally picked up a set of fogs. It looks soo complete when the fogs are on!
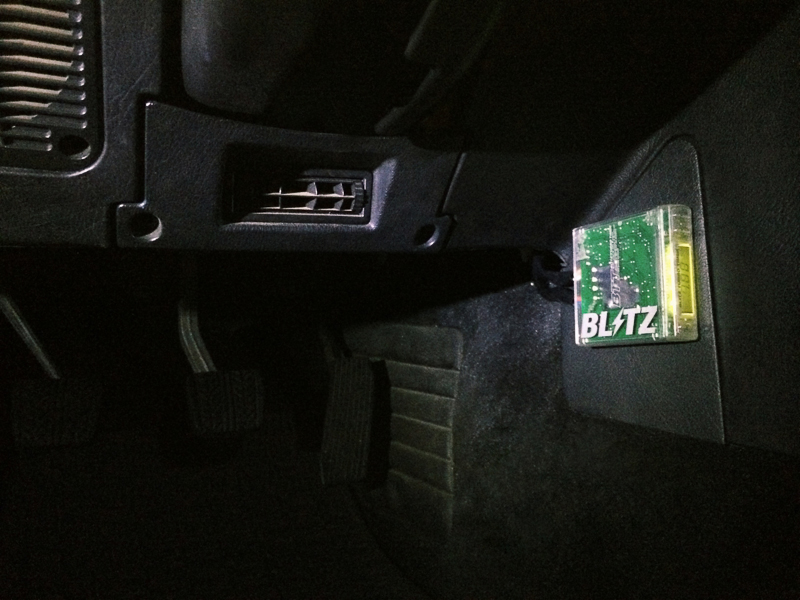
Picked up this Blitz turbo timer while I was in Japan at Wise One Auto. I really liked how the HKS mounted and unfortunately this Blitz would not mount the same way, but this position really grew on me fast.
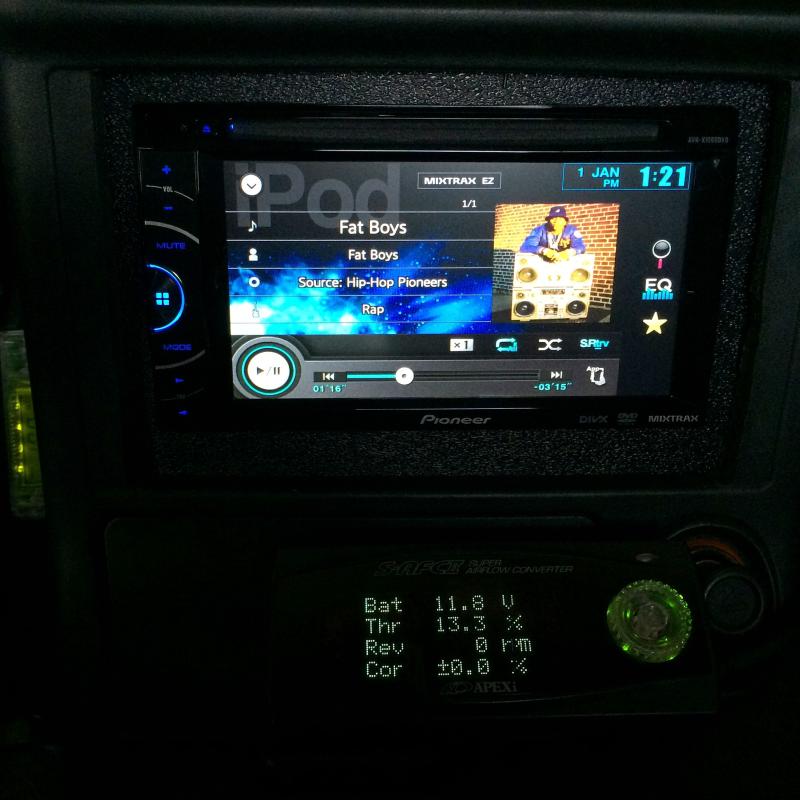
This has been a project I have been planning for a while. I wanted to start getting into MilSpec automotive wiring. I thought what better way to start than with a radio harness. The previous owner had cut the OEM plugs off to tap into an aftermarket radio. I removed the radio and opted for a Pioneer double din DVD player. I decided to create my own harness and use only one plug instead of 3. I used a Deutsch DTM 12 pin connector.
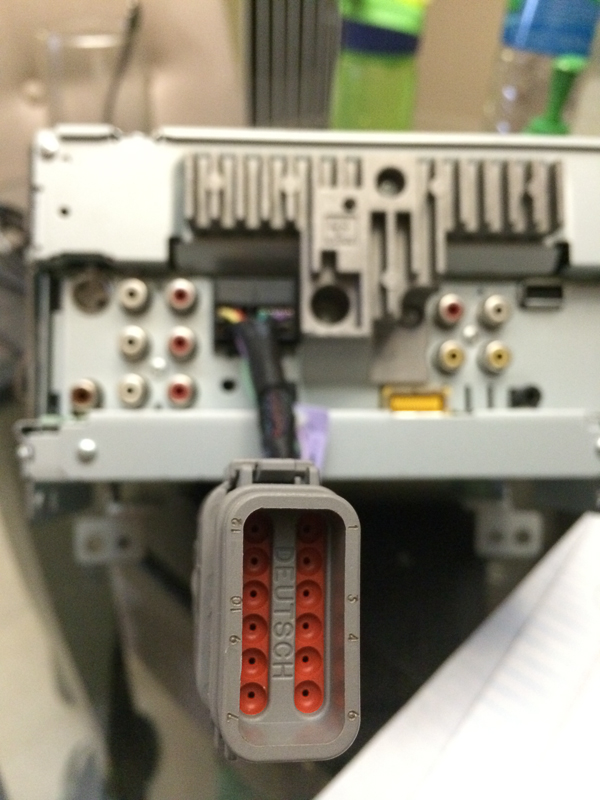
I wish I took a picture of the dash harness side, but I was on a time limit and it was getting late.
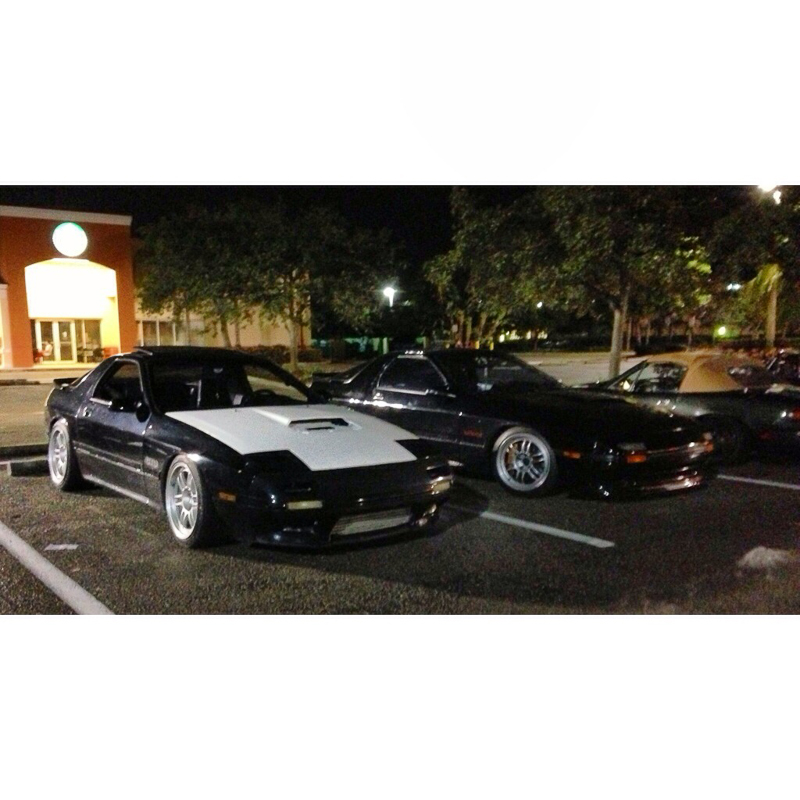
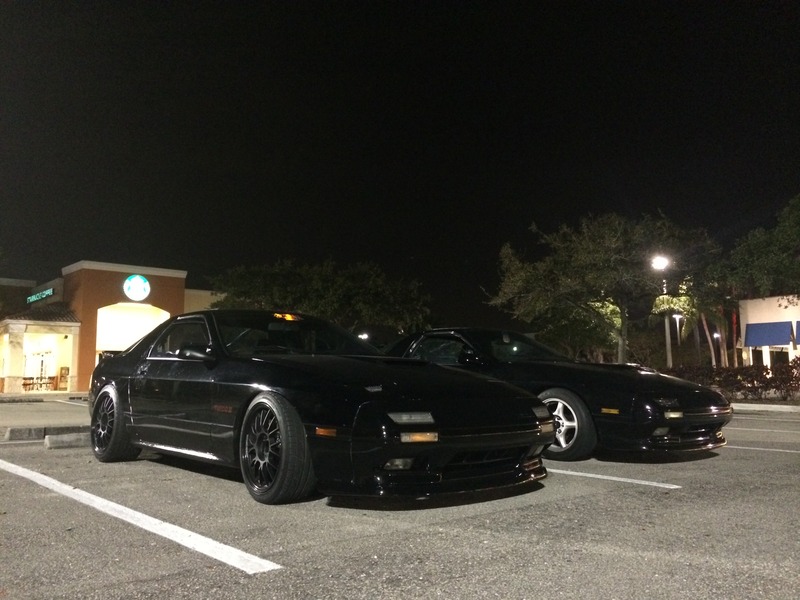
My friend took some pics at a local meet.
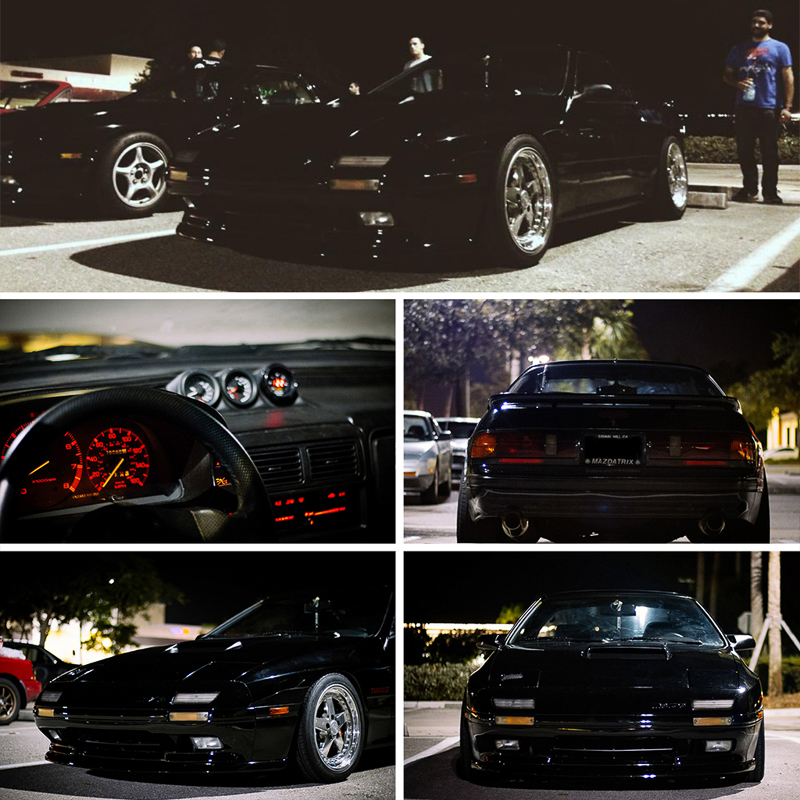
Twinning!
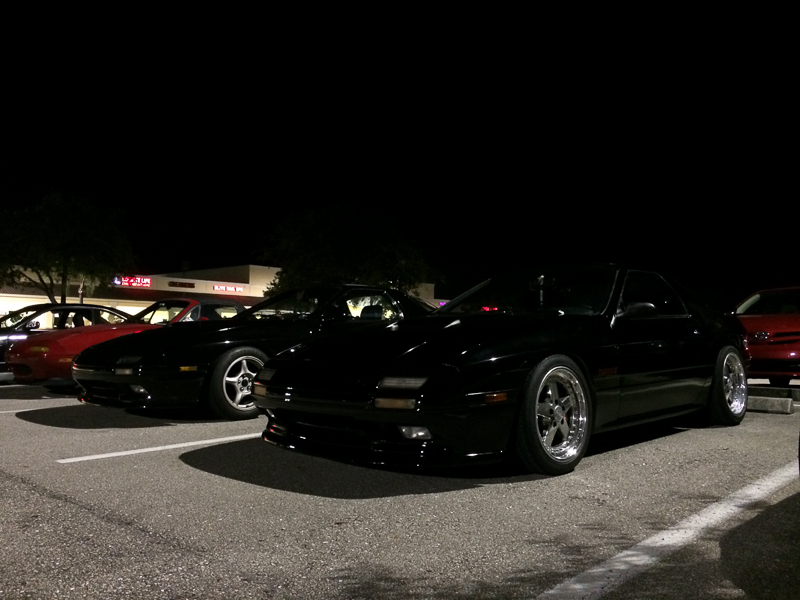
Some random pics
Next on the list of things to do:
Custom Plastic Radio Surround
Replace the last of the gray interior bits (int. door handles/little things)
Fix the horn (wire is missing from the hub?)
Install yellow fog light capsules (for JDM yellow look) + Clean/Paint Fog Light Surround
Wire JDM FTPs correctly
Future plans:
The car was repainted Black, not Brilliant Black, when I got it. It looks good…..but not great. There are imperfections that bother me. I have the S5 rear bumper, rest of the moldings and TII side skirts, but need to have them painted. I decided I'm just going to save up and have it all done at one time and repaint the whole car original Mazda Brilliant Black
This has been a project I have been planning for a while. I wanted to start getting into MilSpec automotive wiring. I thought what better way to start than with a radio harness. The previous owner had cut the OEM plugs off to tap into an aftermarket radio. I removed the radio and opted for a Pioneer double din DVD player. I decided to create my own harness and use only one plug instead of 3. I used a Deutsch DTM 12 pin connector.
I wish I took a picture of the dash harness side, but I was on a time limit and it was getting late.
My friend took some pics at a local meet.
Twinning!
Some random pics
Next on the list of things to do:
Custom Plastic Radio Surround
Replace the last of the gray interior bits (int. door handles/little things)
Fix the horn (wire is missing from the hub?)
Install yellow fog light capsules (for JDM yellow look) + Clean/Paint Fog Light Surround
Wire JDM FTPs correctly
Future plans:
The car was repainted Black, not Brilliant Black, when I got it. It looks good…..but not great. There are imperfections that bother me. I have the S5 rear bumper, rest of the moldings and TII side skirts, but need to have them painted. I decided I'm just going to save up and have it all done at one time and repaint the whole car original Mazda Brilliant Black

Thanks! Look on eBay for 194 T10 W5W LEDs and they work for anything that has a slot type socket that fits. I only get bright white but you can choose cool blue or amber or whatever else they offer.
Trending Topics
 What size and offset?
18x9.5 +27 all around. They look too big on this car with stock aero. I think they look much better on my other car:
Did that gauge pod come from Styx? If so I messed up because I was going to buy it haha.
This build is top notch. Super jealous of the JDM FTP and Euro spec turn signals! Super coutos
Furthers my beliefs that I need a front lip and some legit wheels
This build is top notch. Super jealous of the JDM FTP and Euro spec turn signals! Super coutos
Furthers my beliefs that I need a front lip and some legit wheels
Thank you I appreciate the compliments. Didn't I sell you the gray center console? That came from this car.
I might have a set of JDM FTPs for sale with a custom harness with LEDs available soon. If you are interested let me know!
It's been a while and lots of little upgrades have happened.
Last I left off I made the harness for the double din Pioneer. I used OEM brackets to mount it. since I didn't use a kit it left undesirable space all around the head unit so I made a surround out of ABS plastic to clean it up.
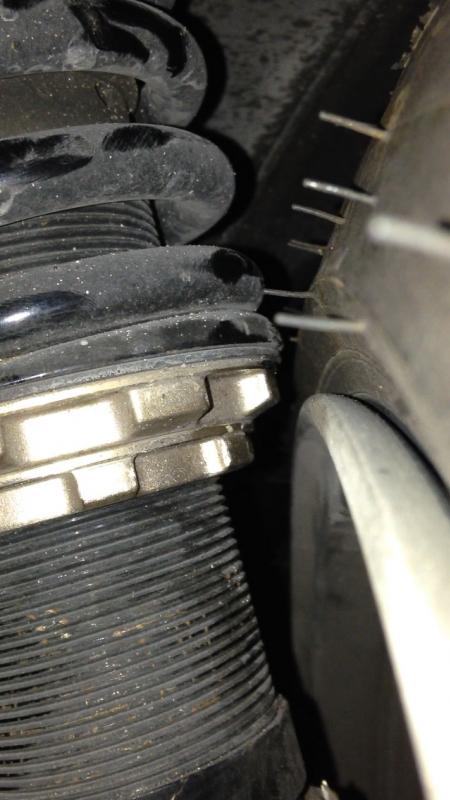
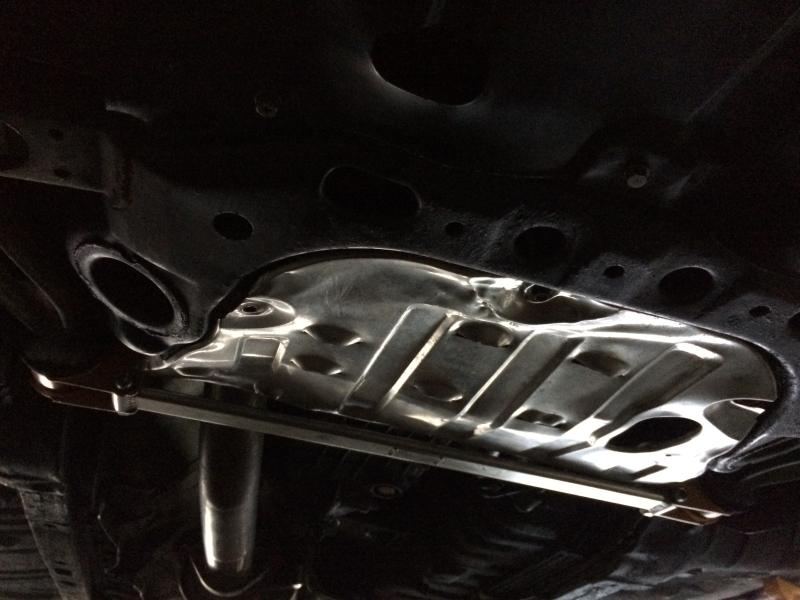
I had the 10th Aniv. aluminum under tray and MazdaSpeed lower arm bar hanging around collecting dust so I decided to finally put both on. The tray needed a little�.finessing�to fit correctly with the lower arm bar. Not ecstatic with the final product but whatever, it's there.
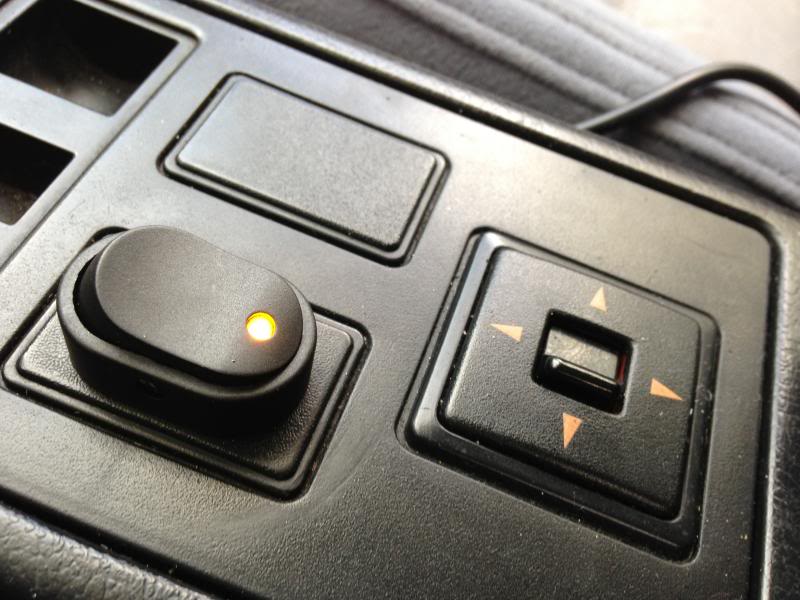
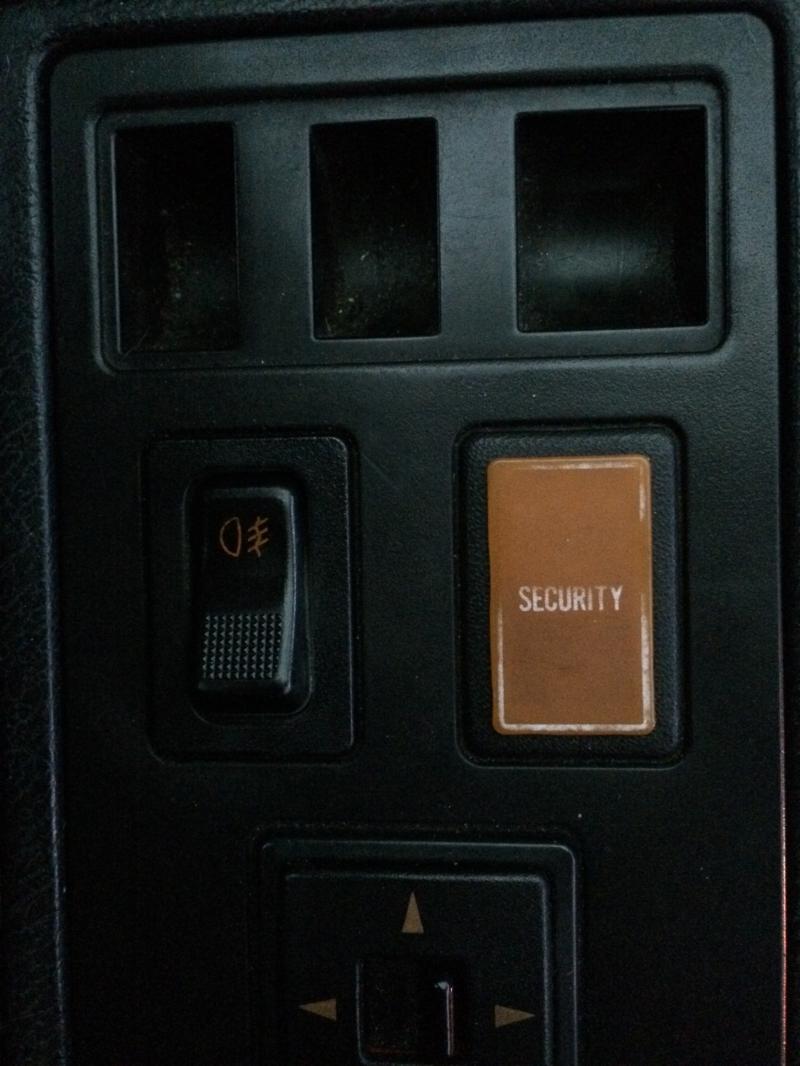
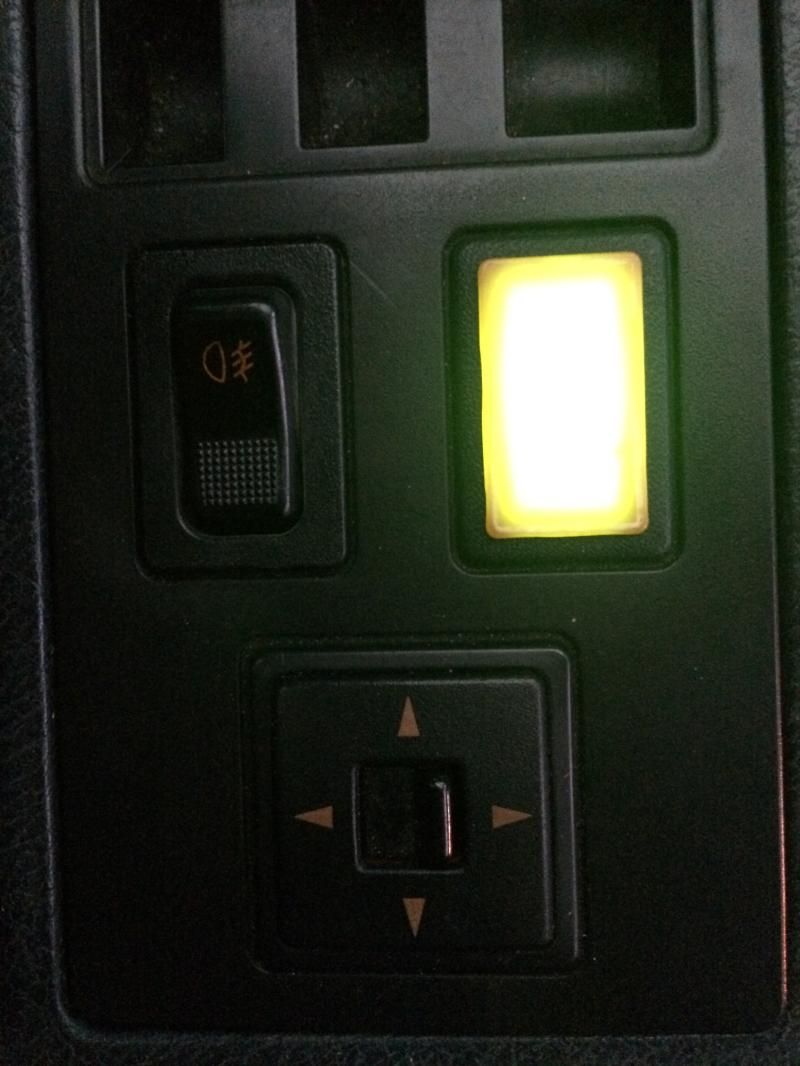
When I bought the car it had an aftermarket switch to cut fuel when it floods. I decided I wanted a cleaner look so I used a stock foglight switch and made it so the Security part lights up when the switch is active. I only had a green LED on hand at the time so I will be changing that. I will be mounting the switch for the actual fog lights on the dash at some point below the head light switch.
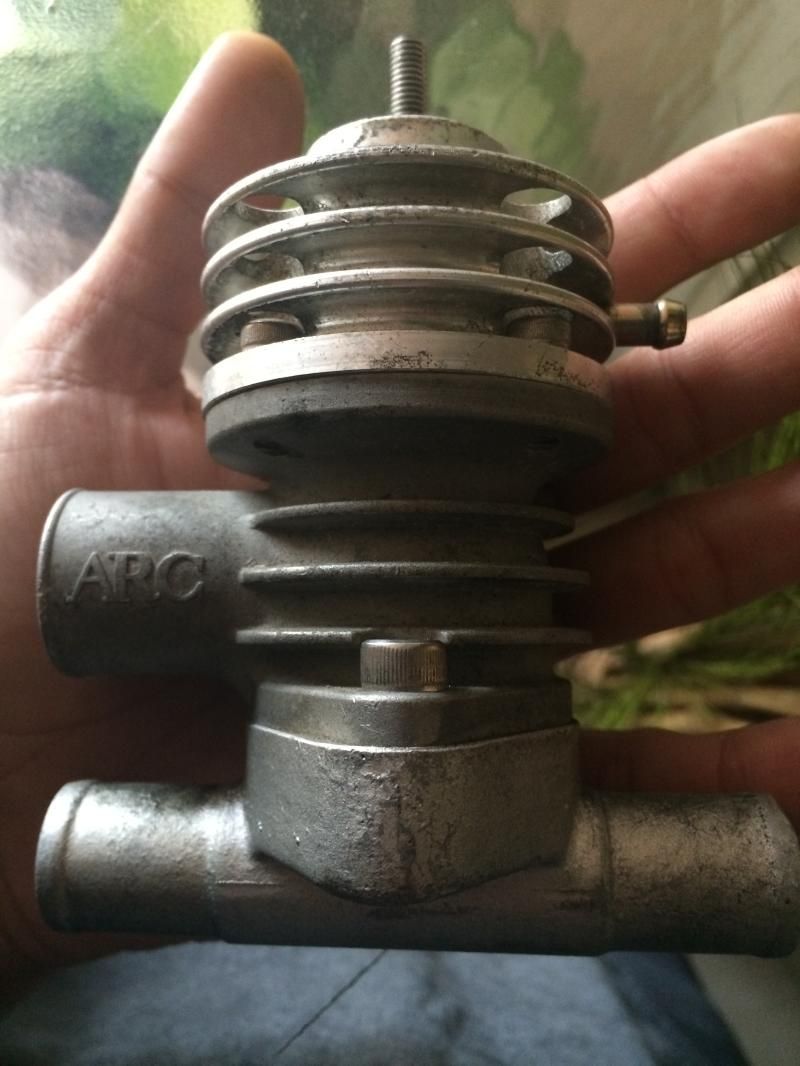
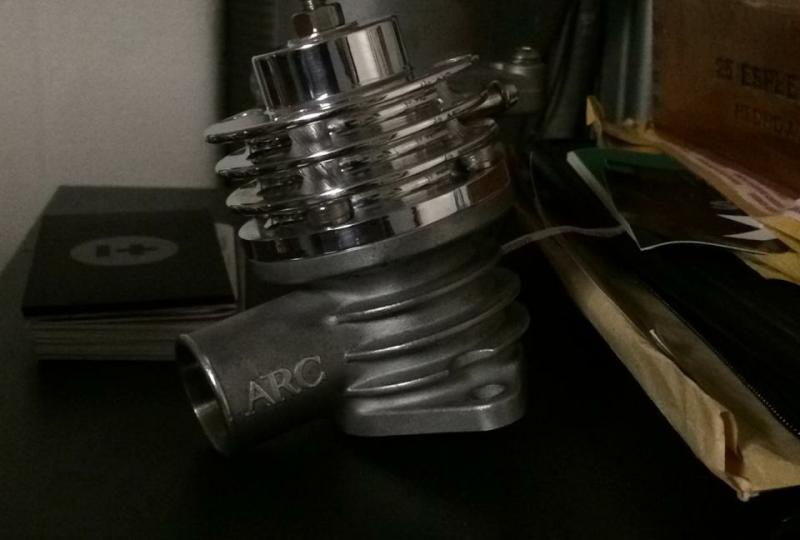
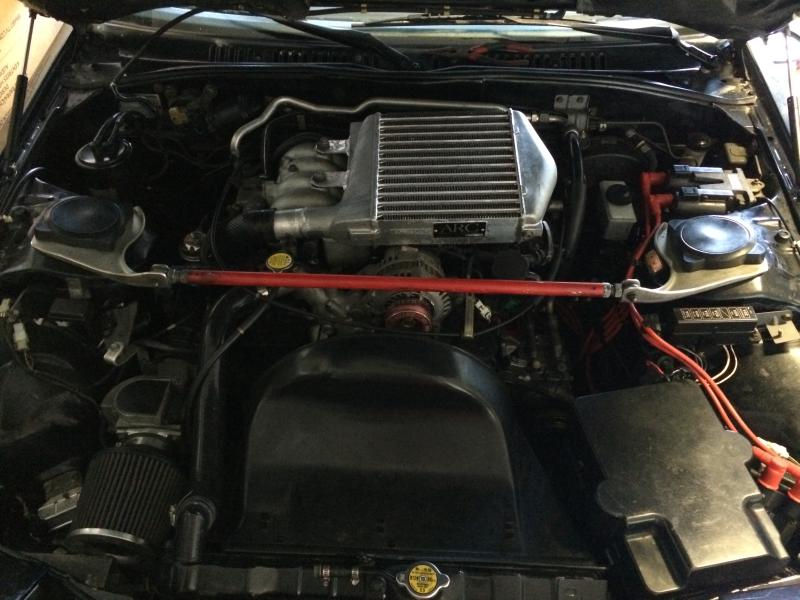
An ARC top mount came up for sale on the forums so despite it not being in my budget I decided I couldn't pass up the opportunity to have it. While waiting for it to come in (Holiday times made it take forever!) I decided to buy an ARC BOV to match the intercooler. I have a friend that enjoys the JDM trinkets and has an eye for detail just like myself so when he saw the BOV he told me he would take it to work and clean it up. Ultrasonic bath and polished up.
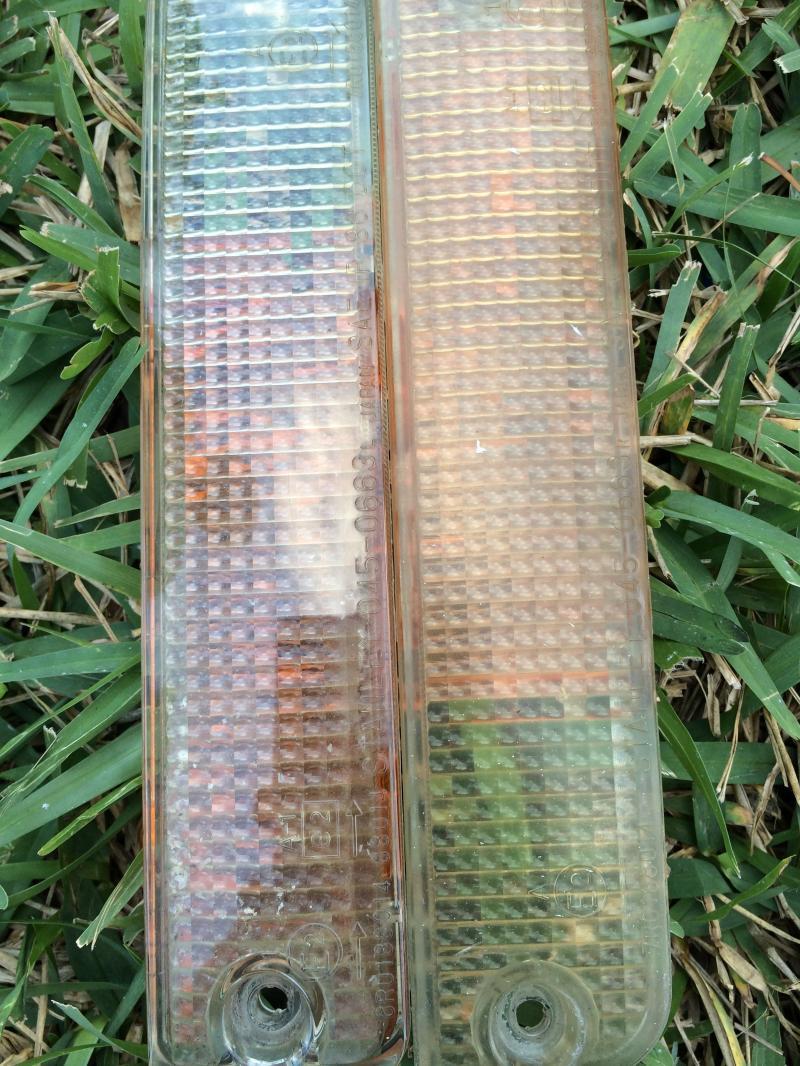
After receiving the ARC BOV all polished up and pretty my friend decided that we should polish ALL THE THINGS! Cleaned up the JDM turn signals. Here's a side by side:
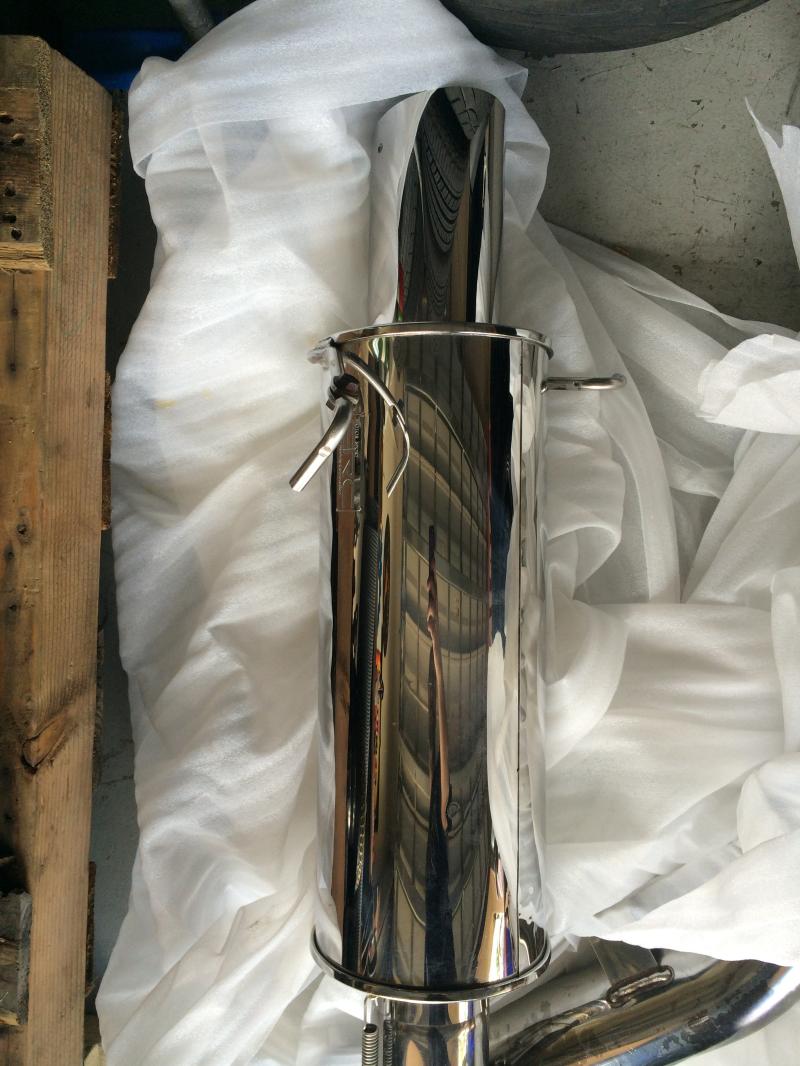
Also purchased this ERC exhaust from my go to guy for the best JDM parts, Circuit Theory, so we decided to polish it up as well:
Not the best picture but there will be much more when I install it
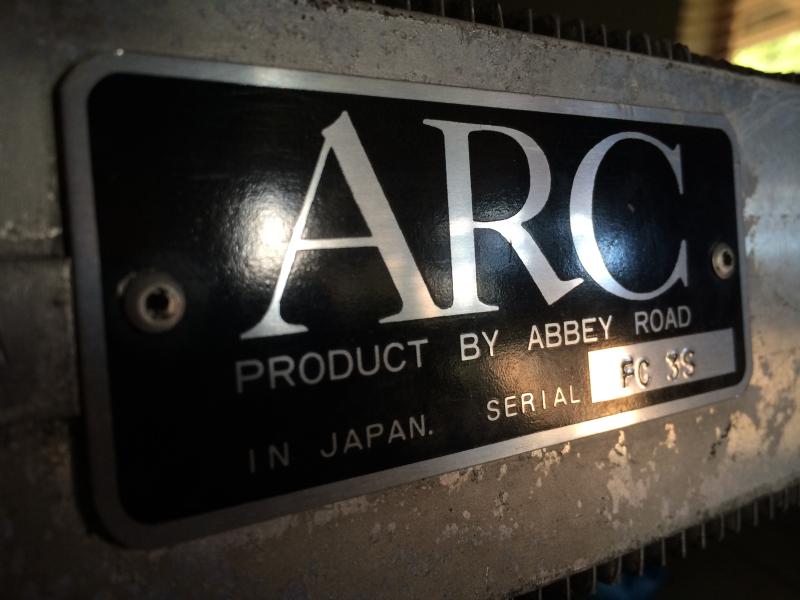
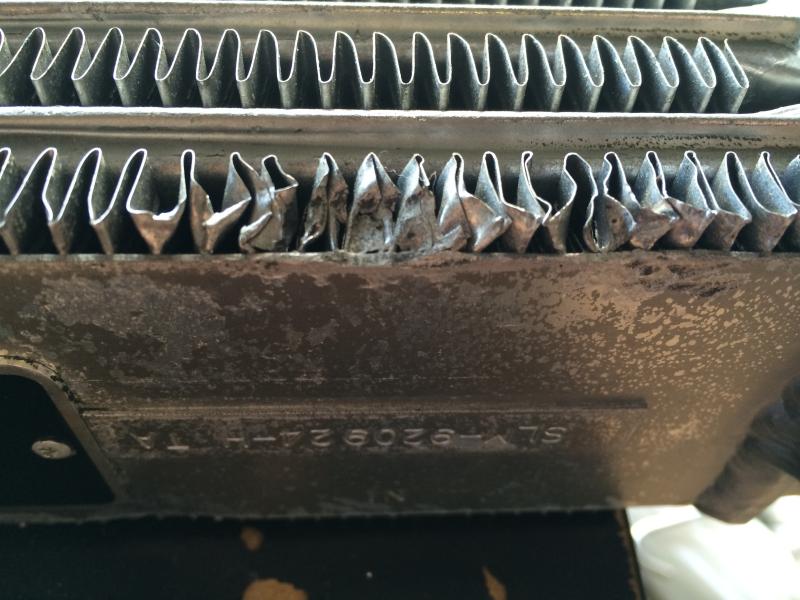
The ARC top mount came in and, understandably, had minor damage for it's age and being shipped around. So I cleaned up all of the fins. This was the worst part and it came out ok. Good thing its on the bottom and can't be seen. I also straightened every single fin that was even a little out of place (OCD)

Last I left off I made the harness for the double din Pioneer. I used OEM brackets to mount it. since I didn't use a kit it left undesirable space all around the head unit so I made a surround out of ABS plastic to clean it up.
I had the 10th Aniv. aluminum under tray and MazdaSpeed lower arm bar hanging around collecting dust so I decided to finally put both on. The tray needed a little�.finessing�to fit correctly with the lower arm bar. Not ecstatic with the final product but whatever, it's there.
When I bought the car it had an aftermarket switch to cut fuel when it floods. I decided I wanted a cleaner look so I used a stock foglight switch and made it so the Security part lights up when the switch is active. I only had a green LED on hand at the time so I will be changing that. I will be mounting the switch for the actual fog lights on the dash at some point below the head light switch.
An ARC top mount came up for sale on the forums so despite it not being in my budget I decided I couldn't pass up the opportunity to have it. While waiting for it to come in (Holiday times made it take forever!) I decided to buy an ARC BOV to match the intercooler. I have a friend that enjoys the JDM trinkets and has an eye for detail just like myself so when he saw the BOV he told me he would take it to work and clean it up. Ultrasonic bath and polished up.
After receiving the ARC BOV all polished up and pretty my friend decided that we should polish ALL THE THINGS! Cleaned up the JDM turn signals. Here's a side by side:
Also purchased this ERC exhaust from my go to guy for the best JDM parts, Circuit Theory, so we decided to polish it up as well:
Not the best picture but there will be much more when I install it
The ARC top mount came in and, understandably, had minor damage for it's age and being shipped around. So I cleaned up all of the fins. This was the worst part and it came out ok. Good thing its on the bottom and can't be seen. I also straightened every single fin that was even a little out of place (OCD)
This was more of a test fit as I need new clamps. It sits a little awki.
If you know anything about me you know that I am a freak about Omori gauges. I probably have enough for 5 cars, different sizes, colors, electric, mechanical lol. I decided to try my hand at restoring them. I took them apart, took out the 2 dinky bulbs and added 3 LEDs. Also adjusted the needle since they were off by a lot and then tested to make sure they were correct. Everything came out better than expected.
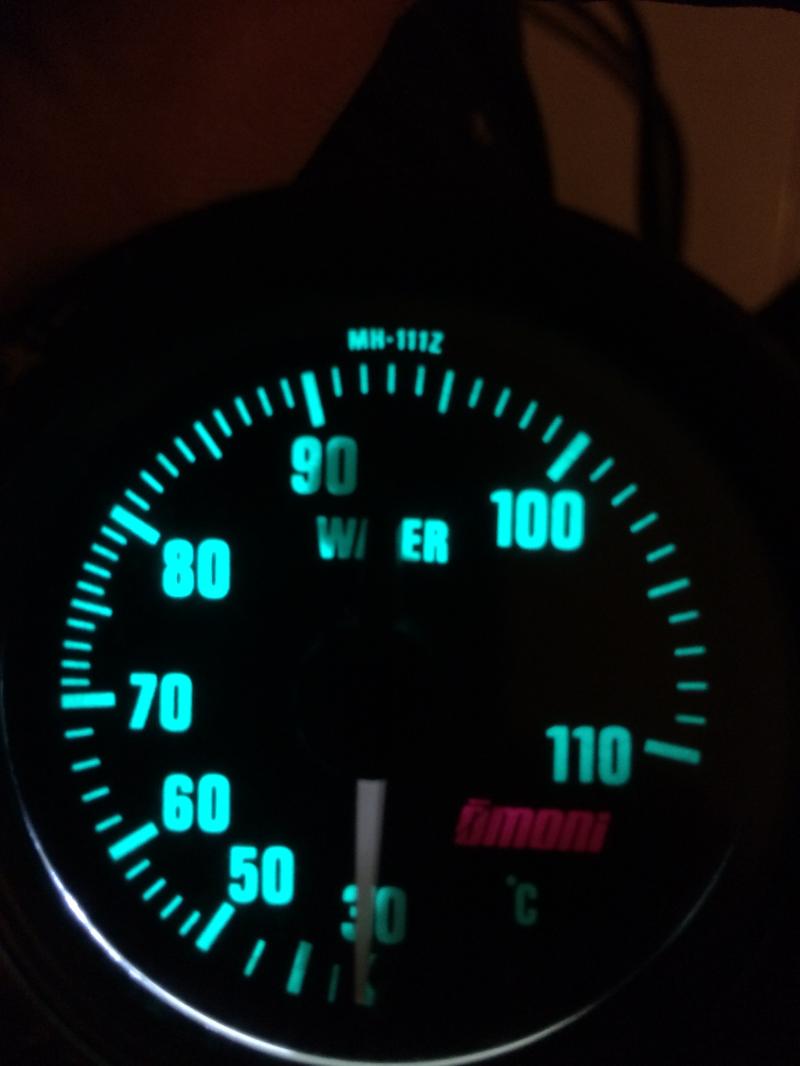
In this picture it looks a lot lighter than it actually is. In person it is a much deeper green. I will post more pictures of the other gauges when they are mounted and lit up.
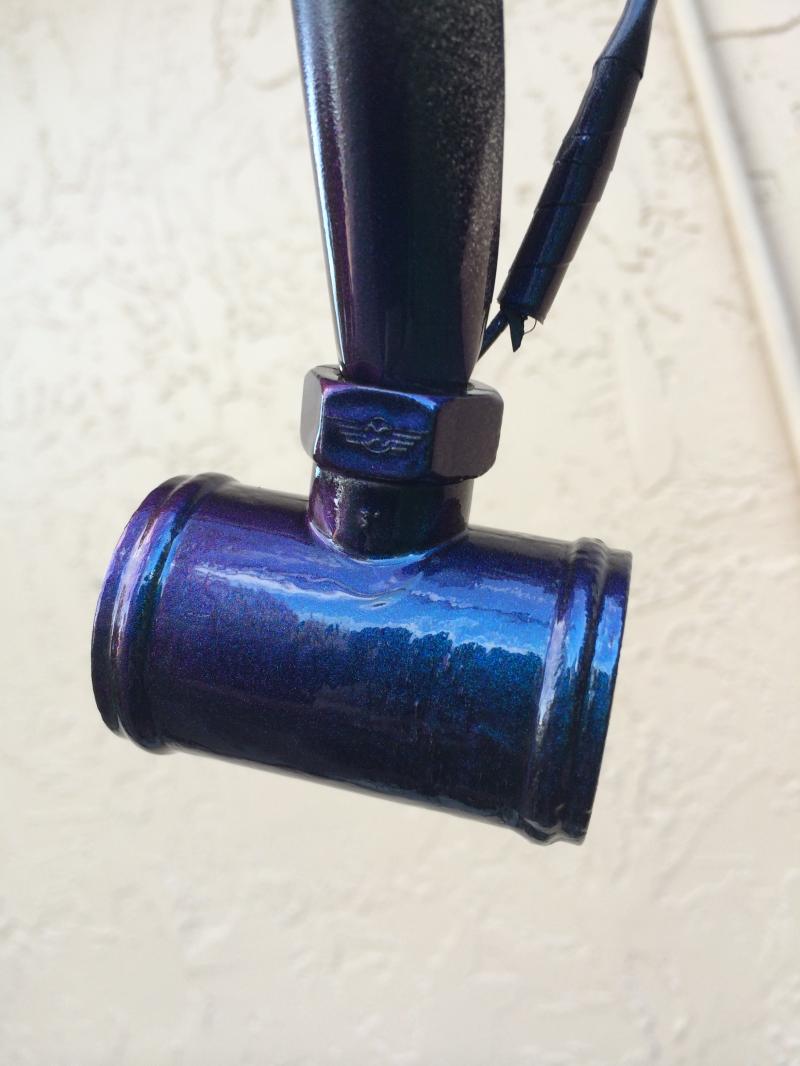
Also the adapter for the water temp gauge was all nasty and crudded up so I stripped and painted it.
Swapped the Equips for Volk SE37K 17x8.5 and 17x9.5. The Equips are for sale now.

If you know anything about me you know that I am a freak about Omori gauges. I probably have enough for 5 cars, different sizes, colors, electric, mechanical lol. I decided to try my hand at restoring them. I took them apart, took out the 2 dinky bulbs and added 3 LEDs. Also adjusted the needle since they were off by a lot and then tested to make sure they were correct. Everything came out better than expected.
In this picture it looks a lot lighter than it actually is. In person it is a much deeper green. I will post more pictures of the other gauges when they are mounted and lit up.
Also the adapter for the water temp gauge was all nasty and crudded up so I stripped and painted it.
Swapped the Equips for Volk SE37K 17x8.5 and 17x9.5. The Equips are for sale now.
cup holder/fog switch
FAL, I am at work so the photos wont show up, but I am making a 1 off cup holder panel. It currently has a spot for power windows and a fog switch. i am going to be selling one of the prototypes with a power mirror switch clipped in and the fog switch epoxied (hole was undersized and when I opened it up it wouldn't clip. Here is what she looks like.
Or, if you want you can save some money and just buy the panel and fix your own set up into it.
Let me know if you are interested. Long time follower as you know we have communicated many-a-times and I would love to see my part in a true enthusiasts car.
Shoot me a PM and keep building!
P.S.
I got my aluminum tray in as well yesterday, cant wait for my SS oil lines to come in so that I can put everything back in!
Sorry images are HUGE. I forgot to resize. Next up for Selina:
Clamps for couplers to ARC TMIC
Custom pipe/adapter for ARC BOV
Mount Omori gauges
Mount real foglight switch
Wire JDM FTP/DRL
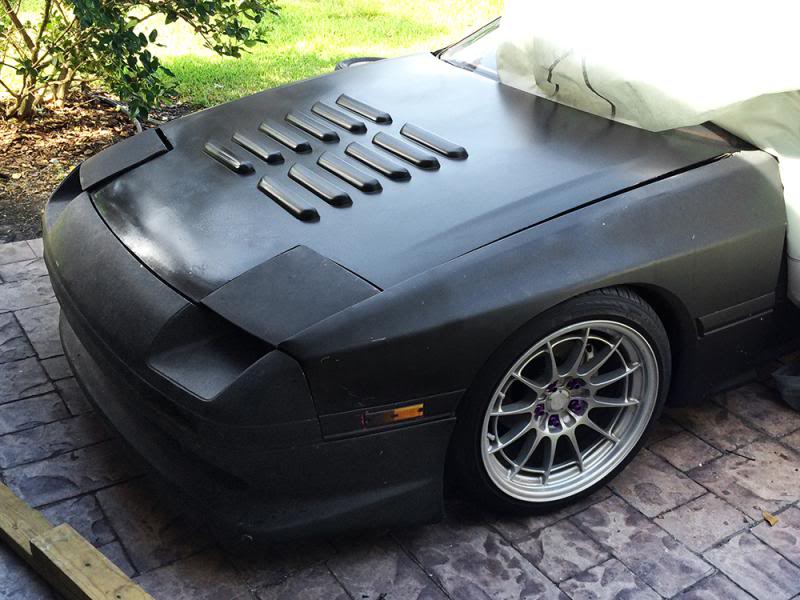
Paint and mount MazdaSpeed hood scoop
Paint and mount S5 door moldings and TII side skirts
Hey buddy, thanks for the compliments. I appreciate the offer, but out of my 4 cars this is the only one that has or needs cup holders lol
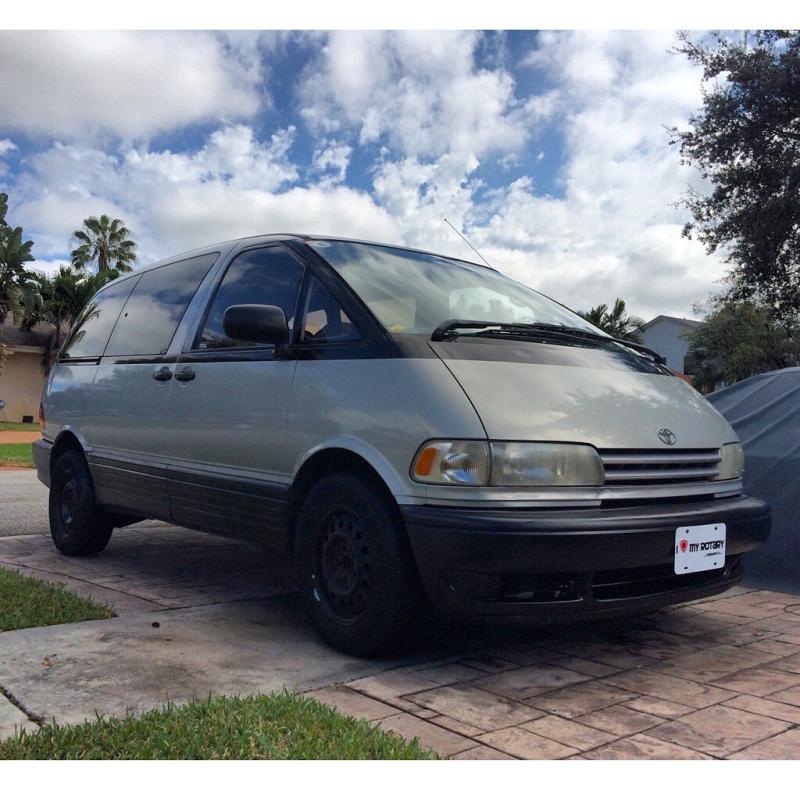
Best purchase 2014: 1995 Toyota Previa SuperCharged RWD. Runs great, AC, daily, road tripper/camper, parts/work equipment hauler, wet road sliding, 2 cup holders up front - $800
It's a great idea though for those that use their FCs as dailys or at least more than I do. In 1.5 years I've only put around 1000miles on her! She's at 90,100ish miles now.
Clamps for couplers to ARC TMIC
Custom pipe/adapter for ARC BOV
Mount Omori gauges
Mount real foglight switch
Wire JDM FTP/DRL
Paint and mount MazdaSpeed hood scoop
Paint and mount S5 door moldings and TII side skirts
FAL, I am at work so the photos wont show up, but I am making a 1 off cup holder panel. It currently has a spot for power windows and a fog switch. i am going to be selling one of the prototypes with a power mirror switch clipped in and the fog switch epoxied (hole was undersized and when I opened it up it wouldn't clip. Here is what she looks like.
Or, if you want you can save some money and just buy the panel and fix your own set up into it.
Let me know if you are interested. Long time follower as you know we have communicated many-a-times and I would love to see my part in a true enthusiasts car.
Shoot me a PM and keep building!
P.S.
I got my aluminum tray in as well yesterday, cant wait for my SS oil lines to come in so that I can put everything back in!
Or, if you want you can save some money and just buy the panel and fix your own set up into it.
Let me know if you are interested. Long time follower as you know we have communicated many-a-times and I would love to see my part in a true enthusiasts car.
Shoot me a PM and keep building!
P.S.
I got my aluminum tray in as well yesterday, cant wait for my SS oil lines to come in so that I can put everything back in!
Best purchase 2014: 1995 Toyota Previa SuperCharged RWD. Runs great, AC, daily, road tripper/camper, parts/work equipment hauler, wet road sliding, 2 cup holders up front - $800
It's a great idea though for those that use their FCs as dailys or at least more than I do. In 1.5 years I've only put around 1000miles on her! She's at 90,100ish miles now.
Yeah I am in the same boat. got my car with 89K 5 years ago and I am at 103k i think, But thats because I daily her in the summer and go on trips up/down the North East.
Great build, as always subscribed and looking forward to more!
Great build, as always subscribed and looking forward to more!

It's been a while. Nothing crazy, but here are some updates.
Omori boost and water temp with AEM gauge. Just recently I have replaced these though with Omori gauges the light up dark red (trying to match as much as possible to stock). They are a factory option on the Atenza (Mazdas 6 in Japan) so they do not say Omori on them so I kind of like that. Its like a Mazda factory option in my car made by my favorite gauge company. it all works out. The new lay out will be Volts, Oil Presssure and Oil Temp. Check next picture for new boost gauge.
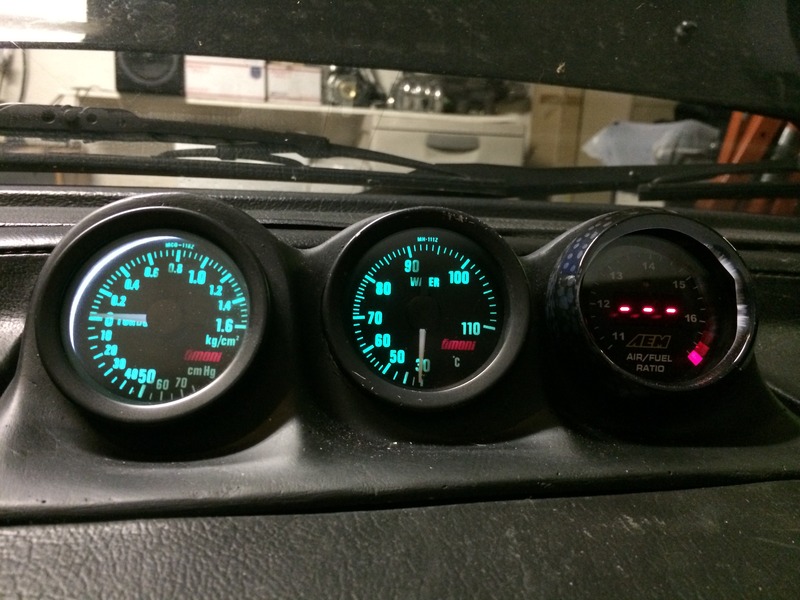
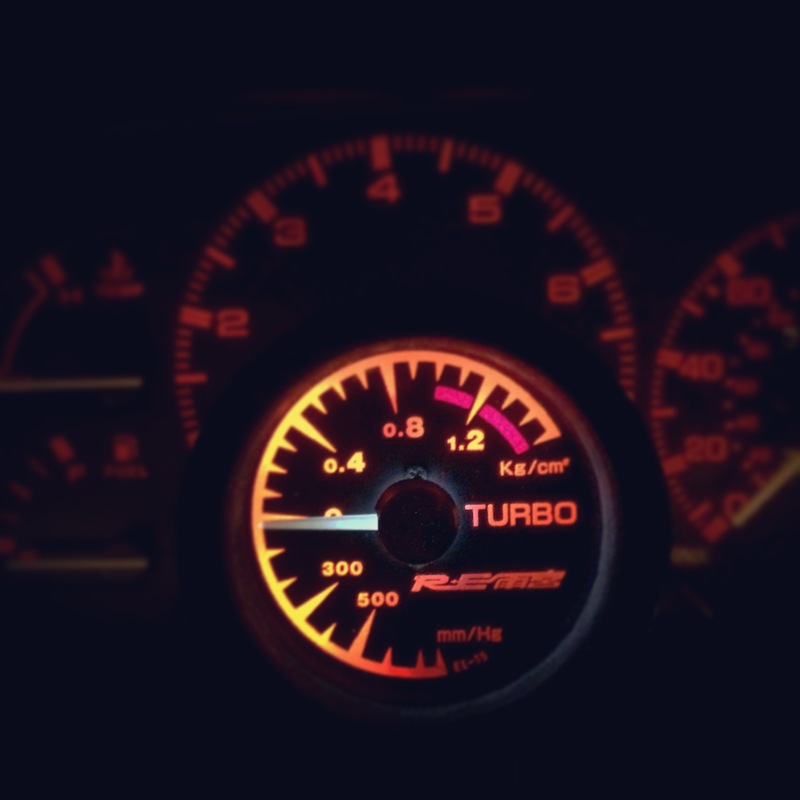
RE-Amemiya Boost Gauge. When I received it USPS had done their usual great job and it had the needle off of 0 by about 5mm. I took it apart, replaced the bulbs with LEDs and recalibrated it. works great now and I'm like 99.998% sure that Omori made this gauge. Amemiya just designed the face.
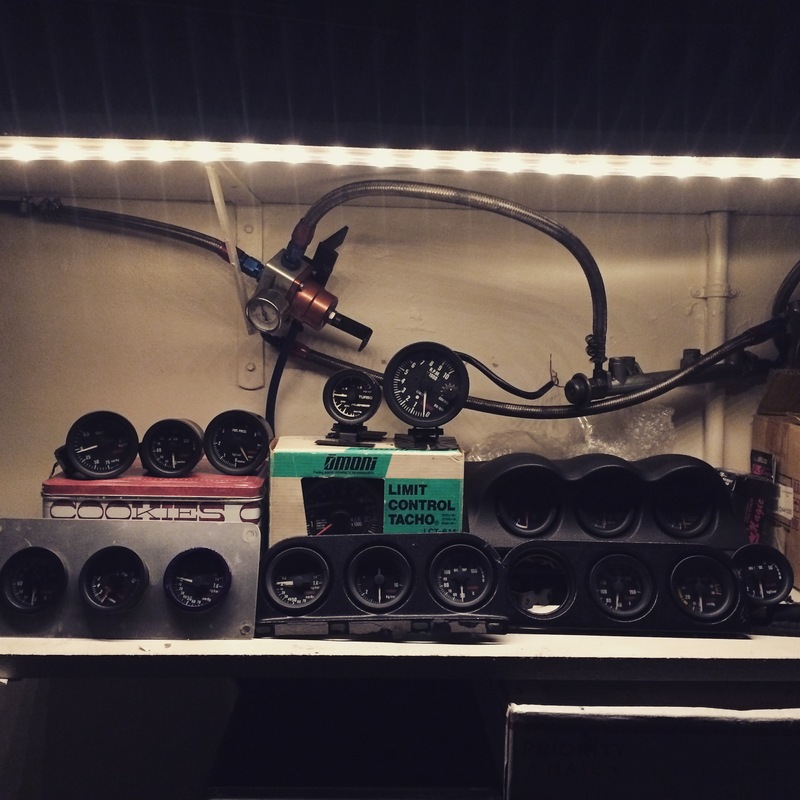
Remember that thing I said a while ago about having a lot of Omori gauges? I have three other cars for these to go in though.
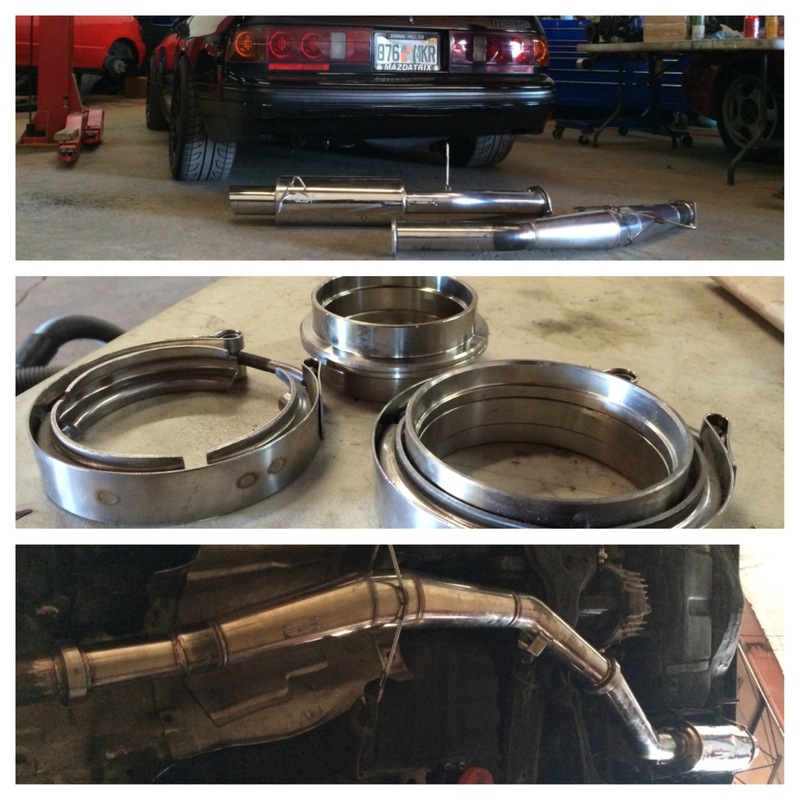
ERC Exhaust install. Decided to change the flanges to V-Band since they didn't match up directly to the Racing Beat down pipe. No pictures of it on as I don't think it looked good in the picture I took and I'm still trying to get a good video of the sound. Honestly I don't think it sounds wildly different from any other straight pipe exhaust, but I do think it sounds amazing.
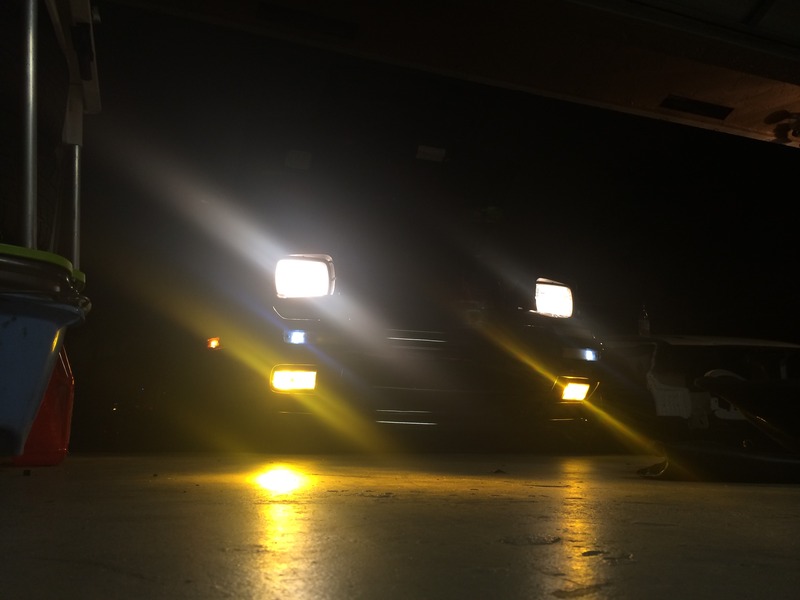
JDM Fog Lights�.well these are actually Lexus capsules in stock FC foglight housings. After a short while of being on they go from light yellow (in this picture) to a very deep orange like the turn signals�.I have no idea why, but I just decided to order OEM JDM fog lights and call it a day.
Twinning with Chris (88fc3sT2) at a local meet
Cleaned up the garage a bit
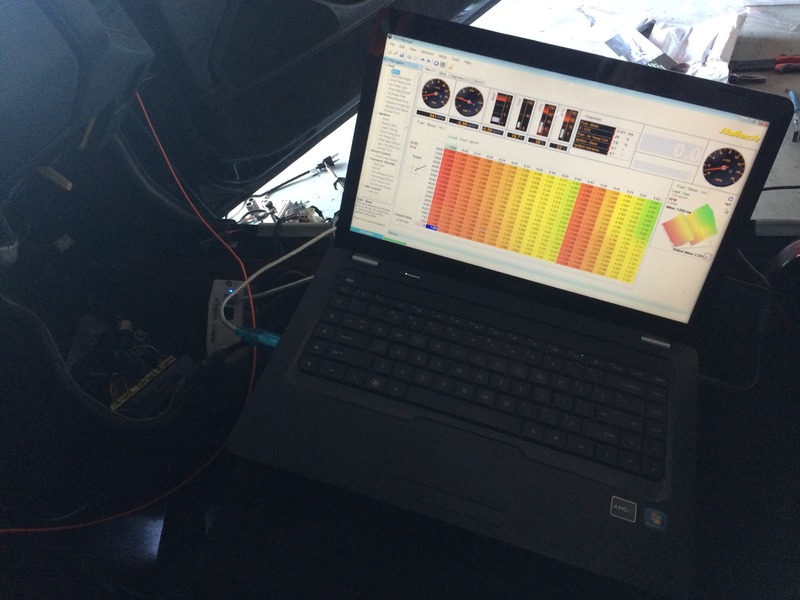
Had a Haltech laying around with S4 patch harness. Decided to slap it on to replace the SAFC II. Working on taping the throttle elbow for the ATS�.but I don't want to tap into the ARC elbow�..any suggestions on an alternate place to tap would be great. Worst case I'll go back to stock for now to tap an easy to replace stock elbow (that I have 3 of) and think about what I'm going to do.
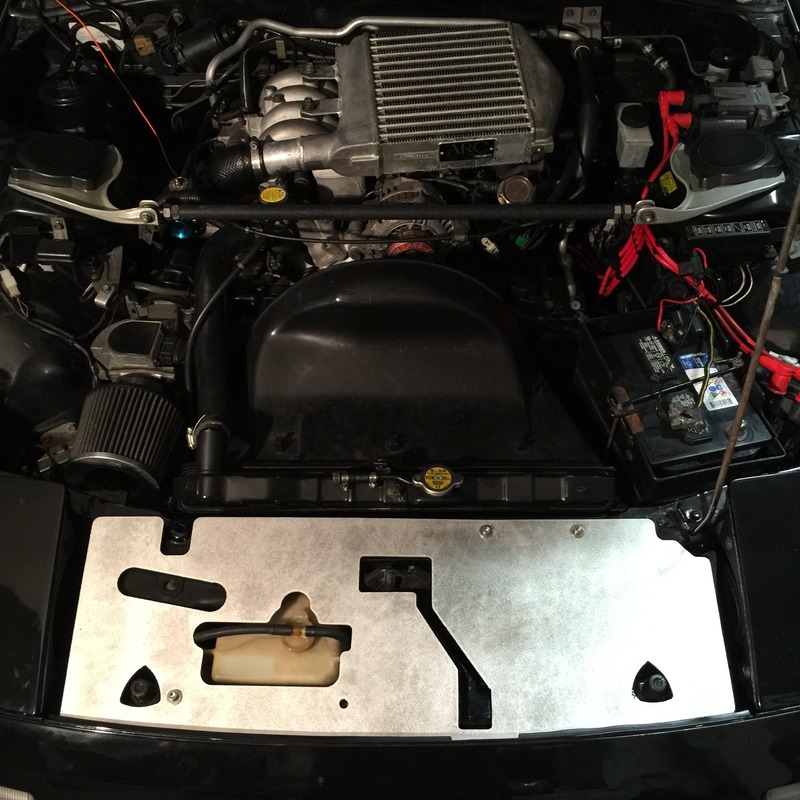
LRB Speed (Landon Balk) Cooling panel. Great quality, great fit, awesome guy. Also you can see I painted the Infini strut bar.
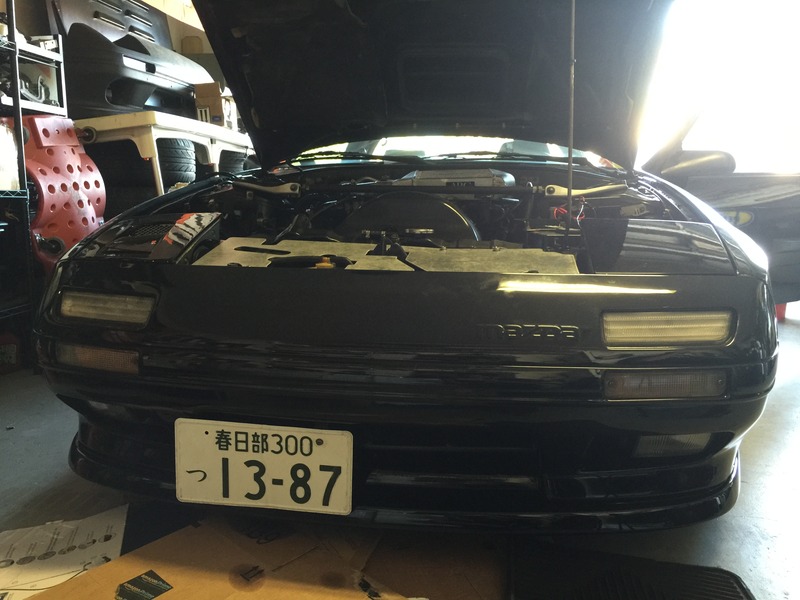
Nifty Japanese tag worked out pretty well. 13(B) - (19)87. Tried my hand at making some brackets to set it off center with out drilling the bumper�still working on that.
That's it for now. Still need to do most of the things from my last to do list, but I just finished paying for the motor for Project Harley so there should be wayyyy more updates for that car and this one will be on the back burner for a while.
Thanks for looking!
Omori boost and water temp with AEM gauge. Just recently I have replaced these though with Omori gauges the light up dark red (trying to match as much as possible to stock). They are a factory option on the Atenza (Mazdas 6 in Japan) so they do not say Omori on them so I kind of like that. Its like a Mazda factory option in my car made by my favorite gauge company. it all works out. The new lay out will be Volts, Oil Presssure and Oil Temp. Check next picture for new boost gauge.
RE-Amemiya Boost Gauge. When I received it USPS had done their usual great job and it had the needle off of 0 by about 5mm. I took it apart, replaced the bulbs with LEDs and recalibrated it. works great now and I'm like 99.998% sure that Omori made this gauge. Amemiya just designed the face.
Remember that thing I said a while ago about having a lot of Omori gauges? I have three other cars for these to go in though.
ERC Exhaust install. Decided to change the flanges to V-Band since they didn't match up directly to the Racing Beat down pipe. No pictures of it on as I don't think it looked good in the picture I took and I'm still trying to get a good video of the sound. Honestly I don't think it sounds wildly different from any other straight pipe exhaust, but I do think it sounds amazing.
JDM Fog Lights�.well these are actually Lexus capsules in stock FC foglight housings. After a short while of being on they go from light yellow (in this picture) to a very deep orange like the turn signals�.I have no idea why, but I just decided to order OEM JDM fog lights and call it a day.
Twinning with Chris (88fc3sT2) at a local meet
Cleaned up the garage a bit
Had a Haltech laying around with S4 patch harness. Decided to slap it on to replace the SAFC II. Working on taping the throttle elbow for the ATS�.but I don't want to tap into the ARC elbow�..any suggestions on an alternate place to tap would be great. Worst case I'll go back to stock for now to tap an easy to replace stock elbow (that I have 3 of) and think about what I'm going to do.
LRB Speed (Landon Balk) Cooling panel. Great quality, great fit, awesome guy. Also you can see I painted the Infini strut bar.
Nifty Japanese tag worked out pretty well. 13(B) - (19)87. Tried my hand at making some brackets to set it off center with out drilling the bumper�still working on that.
That's it for now. Still need to do most of the things from my last to do list, but I just finished paying for the motor for Project Harley so there should be wayyyy more updates for that car and this one will be on the back burner for a while.
Thanks for looking!
