
My sweet 87 Turbo2 project

Thread Starter
Joined: Sep 2004
Posts: 3,706
Likes: 4
From: Dinwiddie, Va
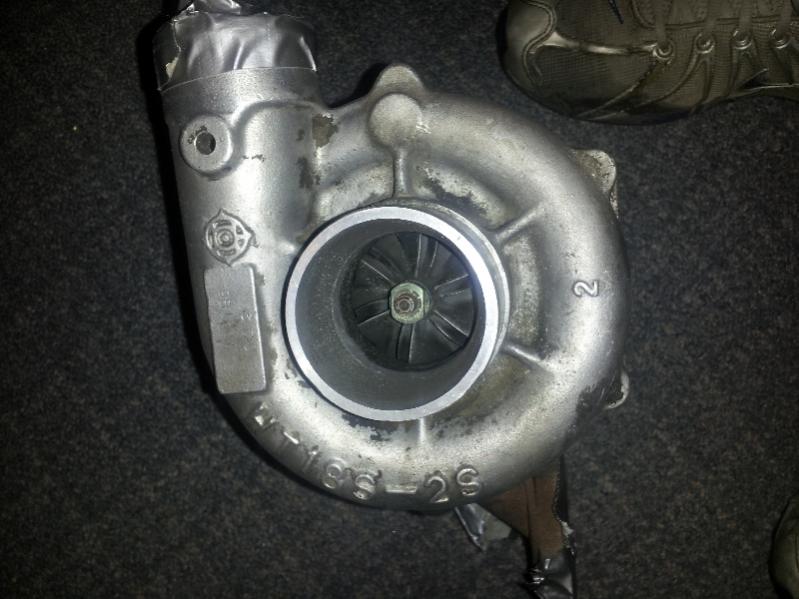
Looks good man. Make sure you inspect that turbo for shaft play both in and out plus up and down. A tiny bit of up and down is okay but you don't want any in and out play at all.
Also some of those fins look kinda bent up. When people "clip" wheels on a turbo, it's usually the exhaust turbine and not the compressor wheel.
Also some of those fins look kinda bent up. When people "clip" wheels on a turbo, it's usually the exhaust turbine and not the compressor wheel.
I did get a full s5 turbo swap in mint condition though so that'll be going on after I port the waste gate.
Rotary >Pistons


Thread Starter
Joined: Sep 2004
Posts: 3,706
Likes: 4
From: Dinwiddie, Va
I'm not even sure if the heat shields are completely necessary to have but I'd think its a good idea to use them.
I'm also going to look into setting up my efan with a thermal switch and getting a temp gauge, though I'm not sure where I'd mount it.
I really don't want to put a hole in my tstat if I don't have to, but I do want it in a place that will provide an accurate temperature. I'll have to adjust the thermal switch according to the temp so it turns on at the right time
Aaron cakes has a writeup on his website about how to wire up the setup properly. The last owner that installed it put it in to run constantly, which is the wrong way to do it, seeing as it constantly draws power (which is bad), and it doesn't always need to be on (only needs to be when the cooling is needed as temperature reach around 190).
I found a kit with a radiator probe, adjustable thermal switch, and relay on summitracing.com for $22 +shipping, I'll probably go with that.
Hoping I can set it up with it looking clean and not tacky.
Rotary >Pistons
Thread Starter
Joined: Sep 2004
Posts: 3,706
Likes: 4
From: Dinwiddie, Va
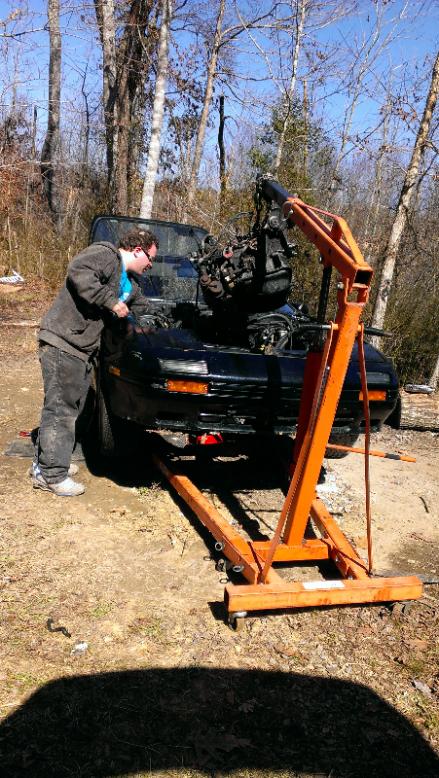
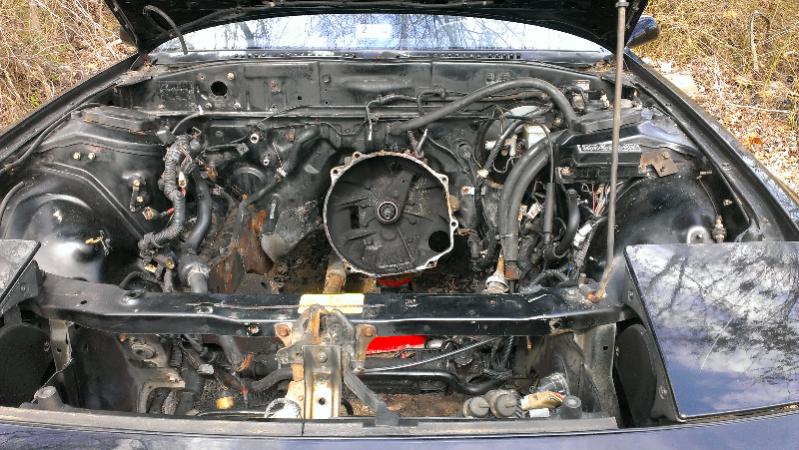
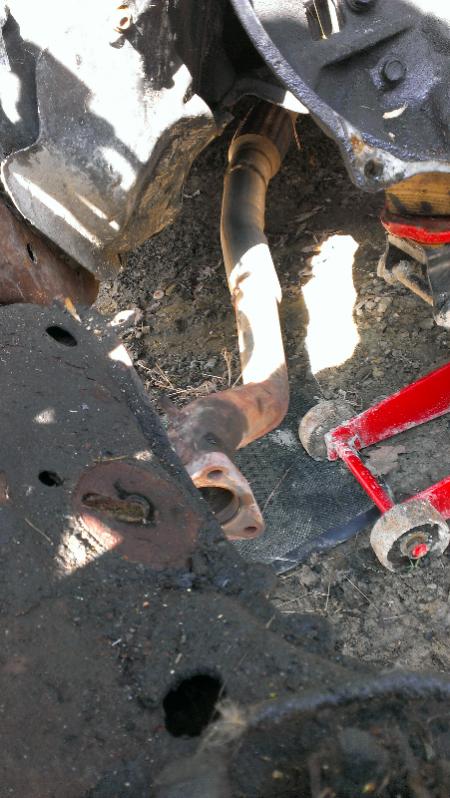
Just got the engine out, the welds on the flange on the down pipe where it bolts on split and the transmission looks like it has broken mounts or missing mounts, ill have to get that fixed.
Also made a dumb decision of jacking the car up in the wrong place and got a little spot pushed up under the driver side door. Its not bad, but stupid mistakes really get me mad.
Also made a dumb decision of jacking the car up in the wrong place and got a little spot pushed up under the driver side door. Its not bad, but stupid mistakes really get me mad.
Thread Starter
Joined: Sep 2004
Posts: 3,706
Likes: 4
From: Dinwiddie, Va
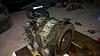
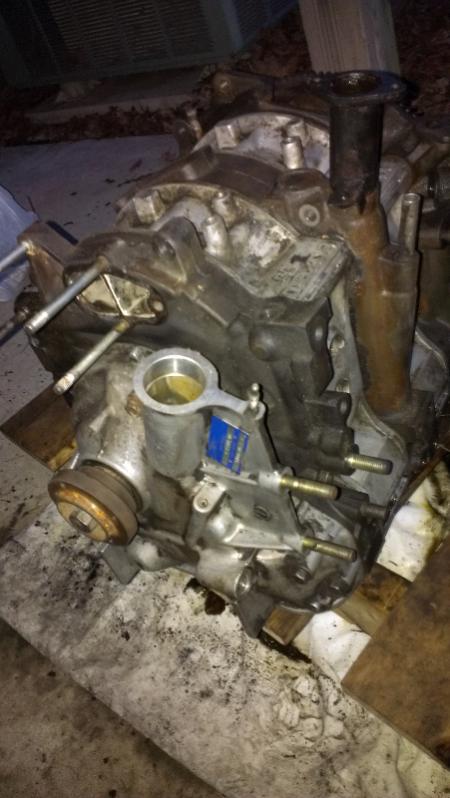
Taking the engine down to short block today and discovered it was rebuilt.
What made it obvious was the sealant coming out of all the seams on the irons/housings on the bottom of the block.
This block is very dirty, worse than my junkyard engine.
One of the housings had gelled/hardened coolant in the passage mating to the lim where the o-ring goes. I cleaned it out and a bunch of oily coolant came out and the passage appears to have surface rust, hopefully the damage isn't substantial.
I already went through 3 cans of carb cleaner cleaning this block. I'm getting two more cans and will post pictures of the results.
Thread Starter
Joined: Sep 2004
Posts: 3,706
Likes: 4
From: Dinwiddie, Va
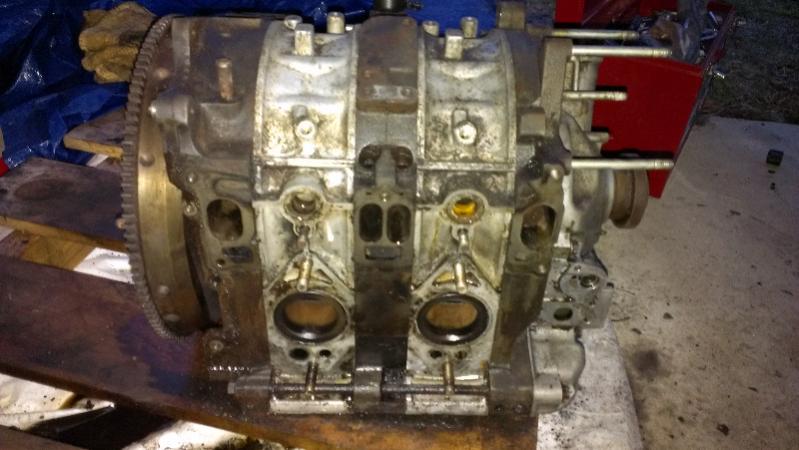
After cleaning it more this is how it came out. I wonder how it got so dirty on the housings and got rust on the irons.
I guess it had to of sat for quite awhile outside.
The other block came out much cleaner, I'm surprised considering this engine came out of a car with 94k miles and was rebuilt. The other from the junkyard supposedly has 160k.


I guess it had to of sat for quite awhile outside.
The other block came out much cleaner, I'm surprised considering this engine came out of a car with 94k miles and was rebuilt. The other from the junkyard supposedly has 160k.

Thread Starter
Joined: Sep 2004
Posts: 3,706
Likes: 4
From: Dinwiddie, Va
I'm also going to look into setting up my efan with a thermal switch and getting a temp gauge, though I'm not sure where I'd mount it.
I really don't want to put a hole in my tstat if I don't have to, but I do want it in a place that will provide an accurate temperature. I'll have to adjust the thermal switch according to the temp so it turns on at the right time
I found a kit with a radiator probe, adjustable thermal switch, and relay on summitracing.com for $22 +shipping, I'll probably go with that.
Avoid the adjustable/rad probe type switches like the plague, they are garbage.
You can drill/tap the waterpump housing and find endless varieties of OEM fixed temp switches that are far more reliable and consistent than what you're considering.
Another location for the switch is the upper rad hose, just splice in an adaptor.
Thread Starter
Joined: Sep 2004
Posts: 3,706
Likes: 4
From: Dinwiddie, Va
Not sure what the "hole in the thermostat" is about, certainly nothing to do with a thermoswitch install.
Avoid the adjustable/rad probe type switches like the plague, they are garbage.
You can drill/tap the waterpump housing and find endless varieties of OEM fixed temp switches that are far more reliable and consistent than what you're considering.
Another location for the switch is the upper rad hose, just splice in an adaptor.
I'm not sure what temp the fan should be coming on though. 190? 185? I wouldn't think 180, since that's when the tstat opens.
I like the upper rad hose idea, seems simple and functional. I didn't really like the tapped tstat housing, depends how big the hole is.
Thread Starter
Joined: Sep 2004
Posts: 3,706
Likes: 4
From: Dinwiddie, Va
The fan has to be designed as a two speed, you can't "make" a single speed into a two stage fan.
Why two speeds?
Modern cars (from whom we're appropriating the hardware) run much hotter than we're used to...presumably for emissions purposes.
Current GM V-8's, and even the FD, don't activate their fans till @ 225�- way beyond what we can tolerate.
With a large OEM fan (like the popular Taurus unit) it takes a lot of juice to get it spinning up. Jackhild (got it right, Jack!) demonstrated that this "spike" is not as extreme as people thought, but it's still to be reckoned with.
Once spinning however, the bump needed to jump to the second speed is much less, far easier on fuses and alternator.
Grafted into a FC, such a fan is usually going to be sufficient on low speed, high is for real emergencies.
The 18" Lincoln fan in my car turns on LOW at 195� (and goes off at @ 180�), HIGH is activated at 210�...to the best of my recollection, it's never gone to HIGH in normal driving.
Ideally you want to run in the sweet spot between the thermostat being full open (@184�) and TOO HOT! FAN ON!
Below @ 50� ambient, my stripper NA (no AC) rarely runs the fan and if on, it's only briefly.
On the highway, you need no fan at all (in fact, you're better off without one from an airflow perspective).
You want the biggest single fan that will fit your rad- one big fan>two small ones- with a tight fitting shroud and a robust control circuit.
You can see how I did it here.
Thread Starter
Joined: Sep 2004
Posts: 3,706
Likes: 4
From: Dinwiddie, Va
Do these switches work to turn on the high speed at certain temp and low speed at certain temp? As well as shutting off automatically when below the temp it turns on at? My fan is suppose to be from a Pontiac fiero.
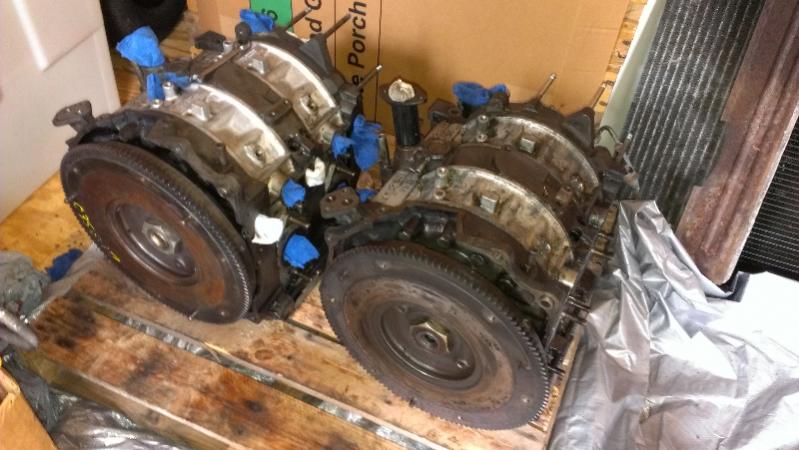
Here's a pic of my twin blocks Im using on my rebuild.
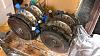
Here's a pic of my twin blocks Im using on my rebuild.
Thread Starter
Joined: Sep 2004
Posts: 3,706
Likes: 4
From: Dinwiddie, Va
Thread Starter
Joined: Sep 2004
Posts: 3,706
Likes: 4
From: Dinwiddie, Va
Took the two blocks to Kevin today , turns out my junkyard block was a rebuilt/remain with like new housings, he said they looked like they had 30-40k miles and were 9/10 in quality being like new.
Needless to say my $250 junkyard engine turned out to be well worth it.
Needless to say my $250 junkyard engine turned out to be well worth it.
Congrats man! Fresh housings is the biggest plus you could get!
If you have a powerwasher then you can degrease it and blast it to do most of the work. If you plan to paint the bay then use air craft stripper. Comes in a can and gallon form, removes paint to bare metal so it saves a lot of the headache. Pull the harness, fix any bad clips and such then rewrap it too. Now is the time to make it fresh.
If you have a powerwasher then you can degrease it and blast it to do most of the work. If you plan to paint the bay then use air craft stripper. Comes in a can and gallon form, removes paint to bare metal so it saves a lot of the headache. Pull the harness, fix any bad clips and such then rewrap it too. Now is the time to make it fresh.
Thread Starter
Joined: Sep 2004
Posts: 3,706
Likes: 4
From: Dinwiddie, Va
The engine harness isn't bad but the other harness worries me. That one is huge.
If I could I'd like to take everything out and repaint the bay or at least fix the spots with rust.
I'd want to paint it some out of the ordinary color possibly, maybe I'd just keep it black.
Im probably gonna tell Kevin I want the block blue and black instead of the traditional colors he does, I didn't put any thought into it until after I told him to do it black/Gunmetal.
He won't be starting my build for a few weeks so I dont think it'll be a problem.
To pull the driver side harness, its easiest if you remove the dash. Then you disconnect the headlights/front lights, front relay rack, engine fuse block, PS plugs, leading coil, main relay plug, starter cut relay plug, the 3 connectors that connect near the trailing coil. Then you can either pull it into the cab and do what you want, or you can leave the dash in and just drape it over the fender while you're painting and such. I left the dash in (I've done it before so I knew how to get at it) and probably cut out 3/4 of the wiring that wasnt being using (auto suspension, coil harness, etc) and then I heat shrunk the wires I wasnt using and then taped it up (I will be removing the dash next fall and depinning everything).
Anyways, long story short, it would take a couple hours to get the harness out of the way so you can clean it up.
Good luck!
Anyways, long story short, it would take a couple hours to get the harness out of the way so you can clean it up.
Good luck!
I don't think many people appreciate the size/scope of the harness since they've never seen it out of the car and rarely do I see a "pruning/simplify" harness job that extends beyond the engine bay, which I would consider only a first step and not an acceptable endpoint.
Consider the AAS system for instance (almost universally unused at this point).
The computer for the AAS is in the spare tire well and it has connectors going to all four suspension towers (this may be the biggest single system in the whole car in terms of length), so simply removing the engine bay wiring is only touching the surface, most of the system is still in place.
Consider also that simply unplugging the AAS cpu from the harness does not stop the car from sending power to the connector, it'll still be hot even unplugged.
The more systems you remove (AC, PS, power antenna, etc.), the more unused power you have coursing through the harness, just looking for a ground.
Seems like that would be something more worth eliminating than just a few connectors in the engine bay.
Thread Starter
Joined: Sep 2004
Posts: 3,706
Likes: 4
From: Dinwiddie, Va
I've swapped all the harnesses before on my old na so I know doing all this is a pain.
I do have a few messed melted up connectors that go to unused stuff as it is that I should probably remove. The abs and aas are two that I know of and there might be more.
I just am pessimistic about removing all this stuff to paint it and creating more problems.
I do have a few messed melted up connectors that go to unused stuff as it is that I should probably remove. The abs and aas are two that I know of and there might be more.
I just am pessimistic about removing all this stuff to paint it and creating more problems.
I will certainly agree that working on harnesses is a PITA but an empty engine bay (which you already want to strip for paint) is as good as it's gonna get.
Thread Starter
Joined: Sep 2004
Posts: 3,706
Likes: 4
From: Dinwiddie, Va
You already have problems that will require digging into the harness (melted connectors are never a good sign) and will the job ever be easier than now?
I will certainly agree that working on harnesses is a PITA but an empty engine bay (which you already want to strip for paint) is as good as it's gonna get.
I will certainly agree that working on harnesses is a PITA but an empty engine bay (which you already want to strip for paint) is as good as it's gonna get.
How they got melted? I have idea, I know the car does have the xenon hid kit.