When you click on links to various merchants on this site and make a purchase, this can result in this site earning a commission. Affiliate programs and affiliations include, but are not limited to, the eBay Partner Network.
Well, I successfully pulled the engine out last night and got it apart. The rotors look almost mint but, I'm questioning the rotor housings. Rotors have no chipping or any damage from what I saw. The apex seal were all broke right in half, which I know is common for OEM seals. The sides or the housings have grooves and I'm not sure if they are too deep or what. Here's a few pictures.
excellent work here! that exhaust looks great and sounds even better! i also have pacesetter headers, and they fit perfectly with no leaks using the supplied gasket. my car also has the smoke belch after WOT. i'll be going in to repair like you this week hopefully along with some other *ahem* things... (some form of bridgeport and standalone). can't wait to see more of what you are doing!
Housings are out of spec. The hunt is on for new or replacements. If it comes down to it I can order from mazda motorsports as they have the cheapest NEW housings.
Well, after lots of careful consideration things have been ordered. Irons are good so I got a porting template from mazdatrix. New housings from mazdamotorsports are on the way.Rebuild kit is coming from Atkins rotary. BC coilovers are on the way as well to replace all of the blown shocks. Boy that escalated quickly. Lots of cleaning and prepping for the upcoming projects.
Got some parts in. Coilovers were installed. Ride height isn't set truly yet. Friends were a big help. All the seals came as well as the brand new housings from mazdamotorsports. I ported one of the irons with the mazdatrix template but, I still have to do the other yet. Then, I'll be grind to fit the side seals. Couple more things to order such as, oil control ring springs and freeze plugs to plug the holes in the turbo housings. I've seen people use nickels or quarters (which ever it was) but I'd rather do it correctly.
Ordered some polyurethane and made some motor mounts. Not the prettiest mounts but, they'll be better than stock. Also, fit the front rotor side seals so, I only need to do the rear rotor now. Since it was warm over the weekend, I picked up some high heat spray paint and painted the housings and irons. I'm waiting for one rotor bearing to come in so I can replace that.
So, I was working on the engine bay and decided hey it's easy to access the fuel filter with the engine out. Got it our and looked at how it was in........... Previous owner put it in backwards............. The filter is even stamped "IN" and "OUT"......... What the.... Well, I put the new fuel hose in and put the filter in correctly. Maybe this will cure the fuel dash light and cutting out problem I was having. It definitely can't hurt.
LOTS of progress over the weekend. Started with turning down a piece of aluminum I've had for 8 years into a rotor bearing press. Then, I pressed in a new bearing. Installed my homemade 95A durometer poly trans mounts. Finally, I put everything together. I still need to put on the oil pump before I can put the front cover on. Half of me wants to just spend the money to replace all the brake hard lines and fuel hard lines. I also have a clutch alignment tool coming. So, I'm forecasting putting the engine back in this weekend. We're also trying to close on a house in roughly two weeks as well so, lots of time was eaten.
Well, last night was a semi success. Only a couple bad things happened when putting the engine back in. 1: The cold start assist sensor or whatever it is (most of what I read says people don't even have it plugged in) had the wires ripped out. 2: The lower starter bolt threads on the rear iron were.... fudged. All in all not too bad. I'll have to pick up a tap for that. My friends were a great help installing the engine. Now the task becomes to put on all the accessories and fix the threads on the starter hole.
Long awaiting driving and hanging out with friends.
To be honest I'm still surprised it is running. That being said I am troubleshooting a couple of things now. From what I've been experiencing, my brake booster isn't holding vacuum anymore. Super stiff pedal and the check valve is still functioning properly. The other thing is that there is a water leak coming from either the heater core hose on the rear iron or somewhere around there. Keeps setting off that stupid add coolant buzzer. Really hate that noise. I'd rather just have the light come on vs that blaring buzzer that makes being inside the car unbearable. Currently though, I've been working on fixing up the wife and I's house we bought in March. It was a complete gut basically. It's almost ready to move into though. After that is done, I'd like to start putting some time back into the car. Diagnosing the water leak and replacing the booster and possibly doing the differential swap. Which for the swap I bought some PBM solid bushings to replace the mazda toe bushings. After all that I'll get it aligned. Something else that's been on my mind is the chassis stiffness. When I back out of our driveway I hear the car flexing. My coworker has a 65 Falcon and he has been working on subframe connectors for it which gave me an idea. Possibly cutting off the old thin metal "frame" and welding in some new either tube metal or similar as well as an x-brace to that for added rigidity. That would also allow me to have a place to actually jack up the car other than the subframes. Just an idea at this point. I've seen where people use Miata bolt on channels to add rigidity also. I figure some form of tube welded on would be a lot stiffer and more permanent. Trust me, I'm an engineer. Lots of things to do before anything happens though. Doesn't seem like many have done that with an FC. Usually it's caged but, I'd rather not put a cage in it. I'd like to keep it somewhat wife friendly.
2 months later
Well, I did my first autocross since rebuilding the engine. Only ran the first 3 runs due to water temperatures and levels. There is most likely air in the system that I didn't bleed out properly.Not comfortable with the car at all so I didn't fair that great. Then, a few days later I began the process of pulling the rear sub-frame off of the car to start the rear end swap. I have some solid DTSS bushings for added stability and feedback. Now my dilemma is deciding which route to go with it. Solidly mount everything and make it stable but uncomfortable or half and half. Ironically, half of me wants to do one and half wants to do the other. One thing is for certain though, this is a perfect opportunity to clean and paint the rear end as well as put new brake and fuel lines in.
I was able to swap out the DTSS bushings for the PBM aluminum replacements. Limited slip diff from an 88 NA is in and the whole assembly has been reinstalled onto the car. Also, put new rotors and pads on the rear. Now the struggle is to start it and burp the coolant to be able to drive. I did pick up a spill free coolant funnel. That thing is the best purchase ever. It is alive and now I have to dig it out of the garage to drive it.
My next goal is going to be replumbing the brake and fuel lines. They are pretty crusty. (I really should've tackled that with the rear end out).
In other news, my loving wife gave me the "okay" to start gathering turbo engine parts. I have already obtained front and rear S5 turbo irons. Basically, what I need is ECU (probably stand alone), turbo rotors, front turbo iron cover, intake.... You know... All the essential stuff, like the S5 transmission. So I don't grenade the NA gearbox. This is going to take a while but, I'm not in a rush. Would it be cheaper and faster to buy a T2? Probably. That is if you can find one in the immediate area and that its not been molested by an LS swap failure. Plus that's a whole other box of worms.
I've really been thinking hard about what direction to take the turbo build. Been doing a lot of reading of other builds trying to figure out what would be the best autocross set up. At first, I HAD to have the birdgeport sound. Then, discovered that it really is a top end power modification to do. Where as I really want the power in all of the band. A mild street port would do me fine. Then, I wanted 10k rpm. That one is still in my mind mainly because it's realistic. There are a few companies out there that will balance the whole rotating assembly. After that it is a matter of getting enough fuel and air into the engine and timing. Obviously there's a lot more going on with 10k rpm as far as supporting mods. Price wise, from what I've seen, getting it balanced isn't actually too bad. It's all the supporting stuff that adds up quick. Hardened stationary gears, race bearings, scatter shield, etc. So, we will see how that goes. I highly doubt it though. Pretty sure with a mild street port I would never have enough air to support 10k. Not sure. I'm going to doubt 10k. I think the main reason would be to have a longer power band for autocross. So, you'd never have to shift essentially. For now, I think the goal is going to be get it running on a haltech ecu (unless stand alone puts me in a prepared class) with stock turbo2 parts. Perhaps an S6 upper intake and throttle body. (Supposedly they have a better power curve).
After some deliberation on which ecu route to take, I opted for the megasquirt 3.
Seeings as how I really want to eliminate as many wires from the original harness as possible, it seemed the best way to go for the money. Also, i picked up an Innovate a/fr gauge to communicate with the ms3 as well as an eastwood tubing bender for unrelated or related projects.
I was able to drive it around yesterday and it did alright. The coolant buzzer blipped once but, I'm pretty sure I still have a pocket in the upper radiator hose. The spill free funnel worked great but, for some reason the water wants to hold an air pocket in the upper hose. I think I will try to jack the front up as high as I can and re-burp it. Hopefully that's all that issue is. This weekend will be the first autocross event with it since last year. It is at Gingerman Raceway. After the autocross they are having an SCCA member only track day, which I've signed up for as well. I definitely need as much seat time as I can get. Driver mod is king in all aspects. It's probably a good thing that the event is about an hour away. You never really know what your car can do until you road trip it. Tonight I'll be changing the differential fluid with some fresh Motul with additive in it. Got to check the oil and change it if need be, dig out my gopro and that's pretty much it. I'm hoping for a happy weekend of racing and road tripping.
Sunday's autocross at Gingerman Raceway was mildly successful. I didn't get last. I got second to last in class..... But I didn't get last. 6th out of 7 up against S2ks and M3s isn't too bad for me. My tire pressures were just way too high. I left a lot of time out there because of that and lack of driver mod.
3 runs into the 4 run event I noticed my tire was being shaved by the fender.
Luckily one of my friends had a pair of channel locks so I could pinch the fender as a band aid. I had signed up for the discounted track day but, after I noticed the tire being shaved decided to call it safe not to run the track night. Being so far away from home and popping a tire would've been a disaster. Perhaps pulling and rolling the fender is in my future.
One of the main struggles I had was not being able to sit in a comfortable position in the car due to my height and helmet. I sort of have to scrunch up to sit low enough for my helmet to not hit the a pillar/roof. Luckily, I kept my MOMO race seat from my previous project. I'm going to try reusing the slide rail with the mounting brackets. That way there is "some" adjustment. Not that it would really be needed once I find the position I like.
Also, I think mounting my 6 point harness would be advantageous as well. Starting to notice hiccups with the auto seat belt motors. Especially on the passenger side, which is odd.
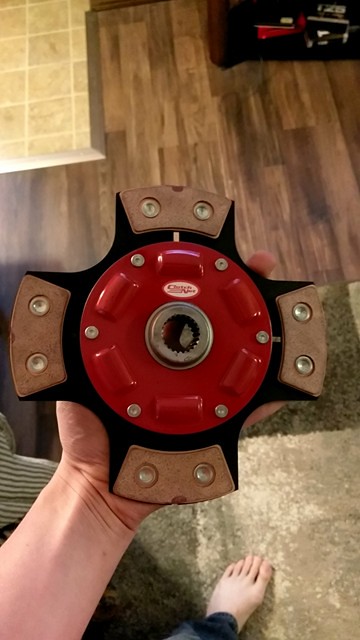
Ordered a new 4 puck sprung clutch and street/strip pressure plate. Hopefully when that goes in and gets broke in I will be able to launch without just pure clutch slip. Other than that, I worked on fabricating a mounting solution for my seat. I tried to use the stock slider rail but, it didn't lower the seat enough for me to sit comfortably. Therefore, I mounted it in a fixed position. The seat is actually touching the floor in the rear and it's still not really as low in the butt as I would like. At least I can sit in a good position without having to slouch or tilt my head though. I believe the only way I can truly get the seat low enough is to go with an aluminum seat and almost zero padding. This will work for now though.
Well, this weekend was truly awful. For a while my house air conditioning has been out, waited till this morning to schedule a repair. Then Friday night, my water pump stops working. So, that's great. Hopefully today both of those issues will be alleviated.
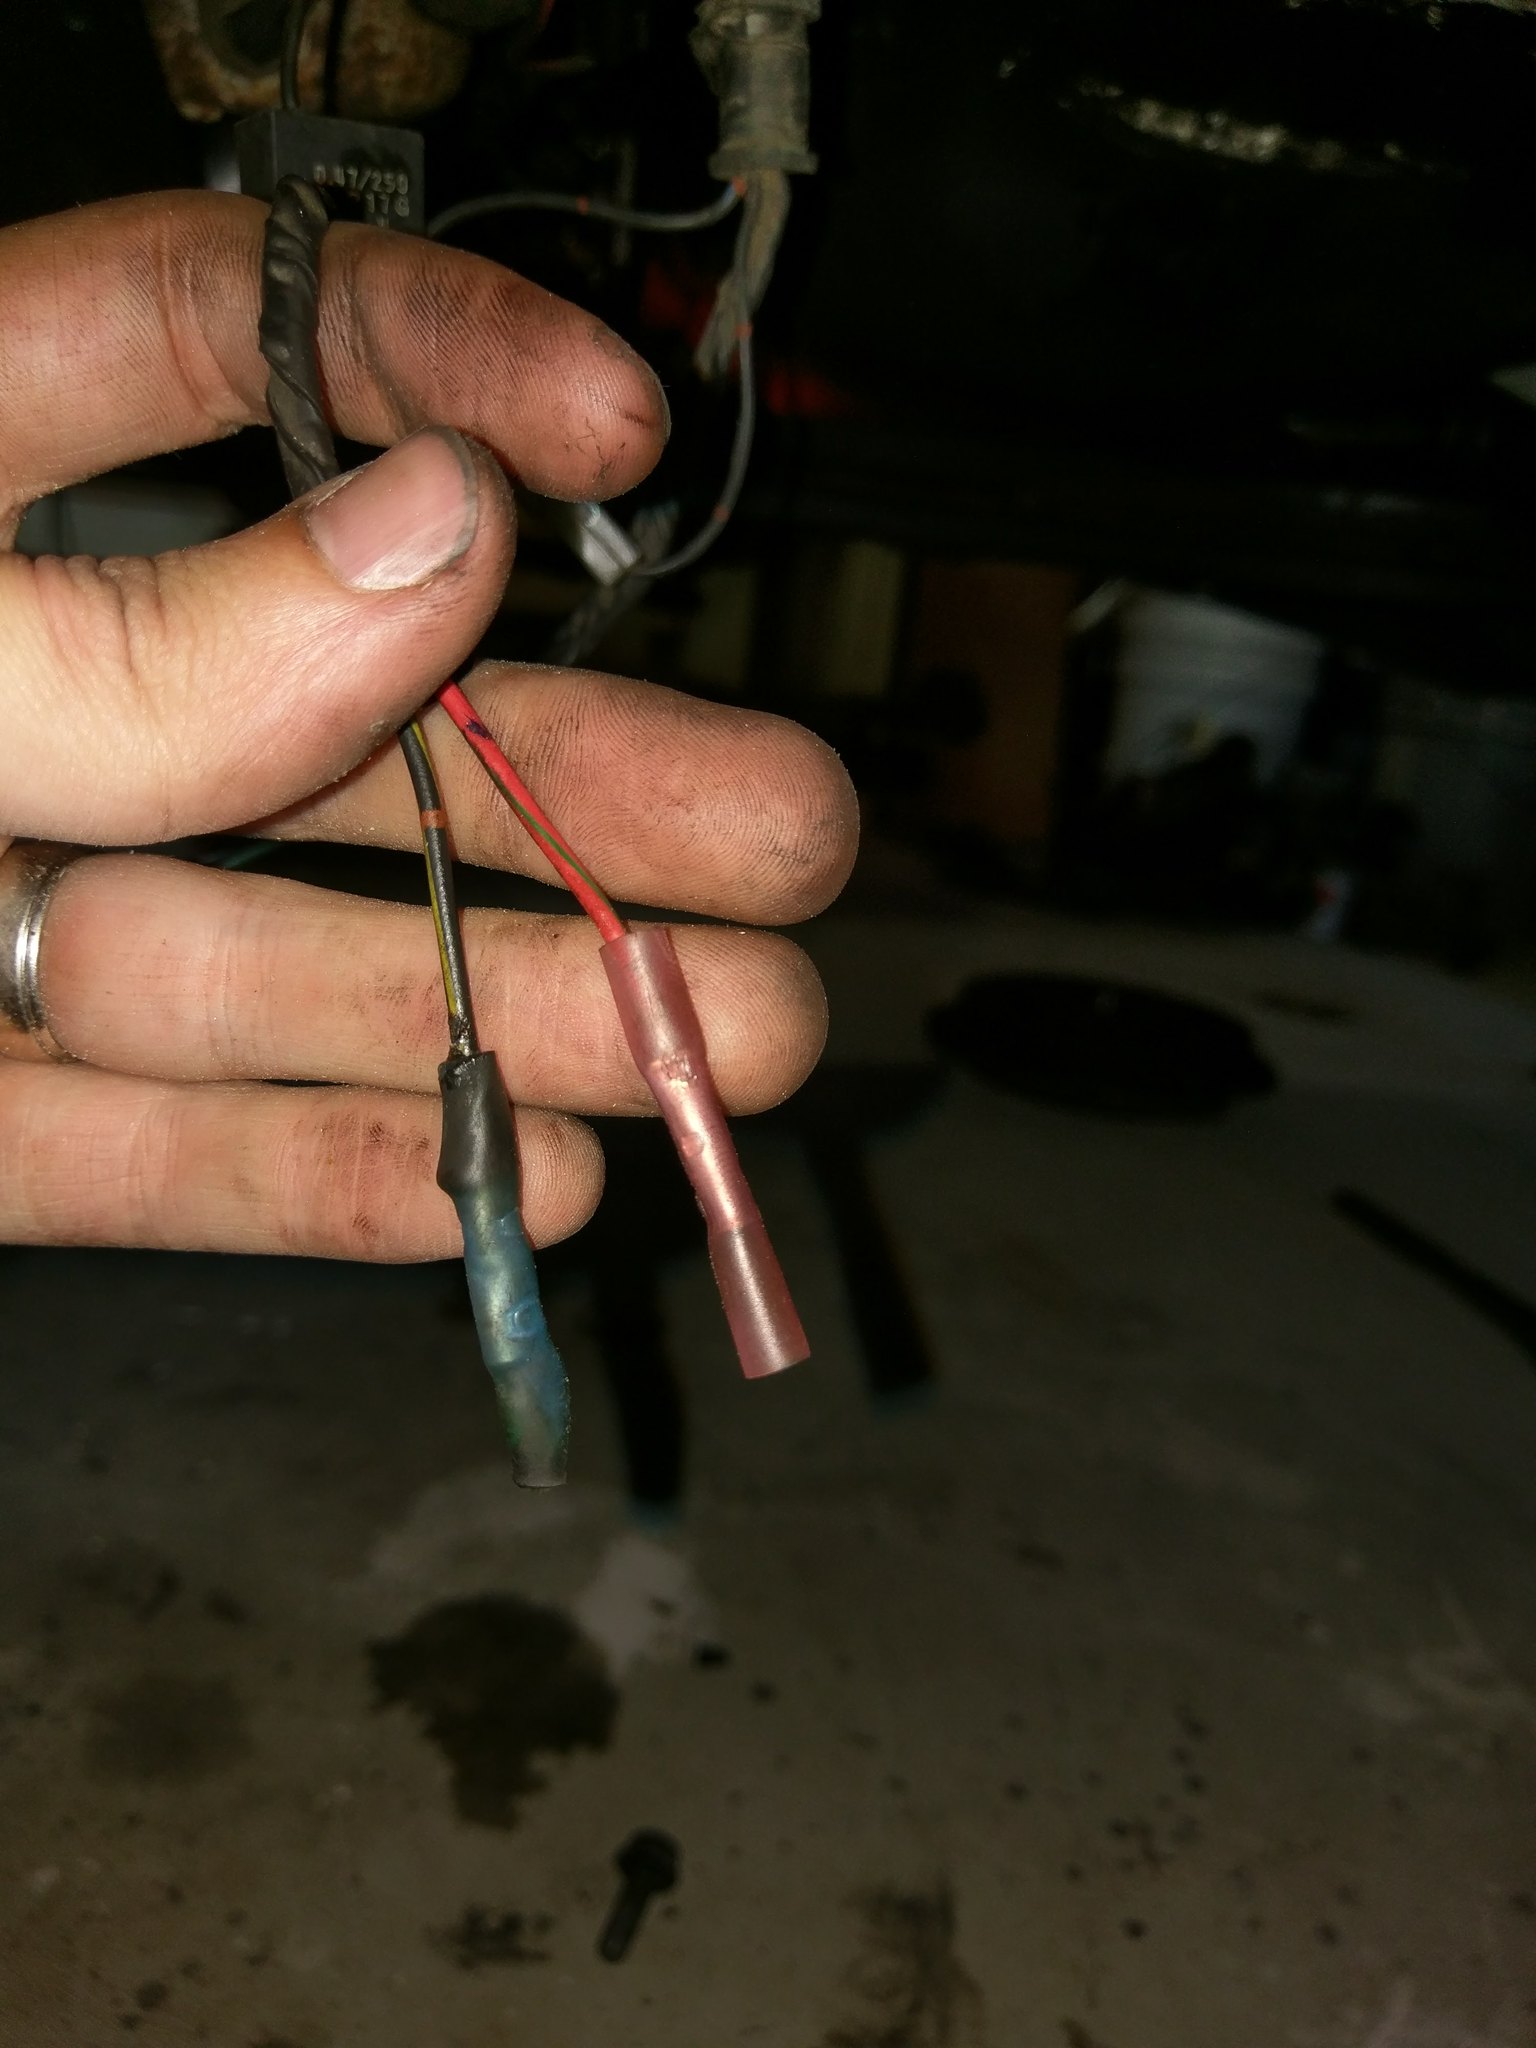
Other than that, I was able to pull the gearbox out. Wasn't too bad. Couple odd wires with crimp connectors on them instead of a plug. I hope to address that while it's out and fresh in my mind. Just have to figure out which goes to which. I really don't know why i didn't take a picture before I yanked them out. Dumb move by me.
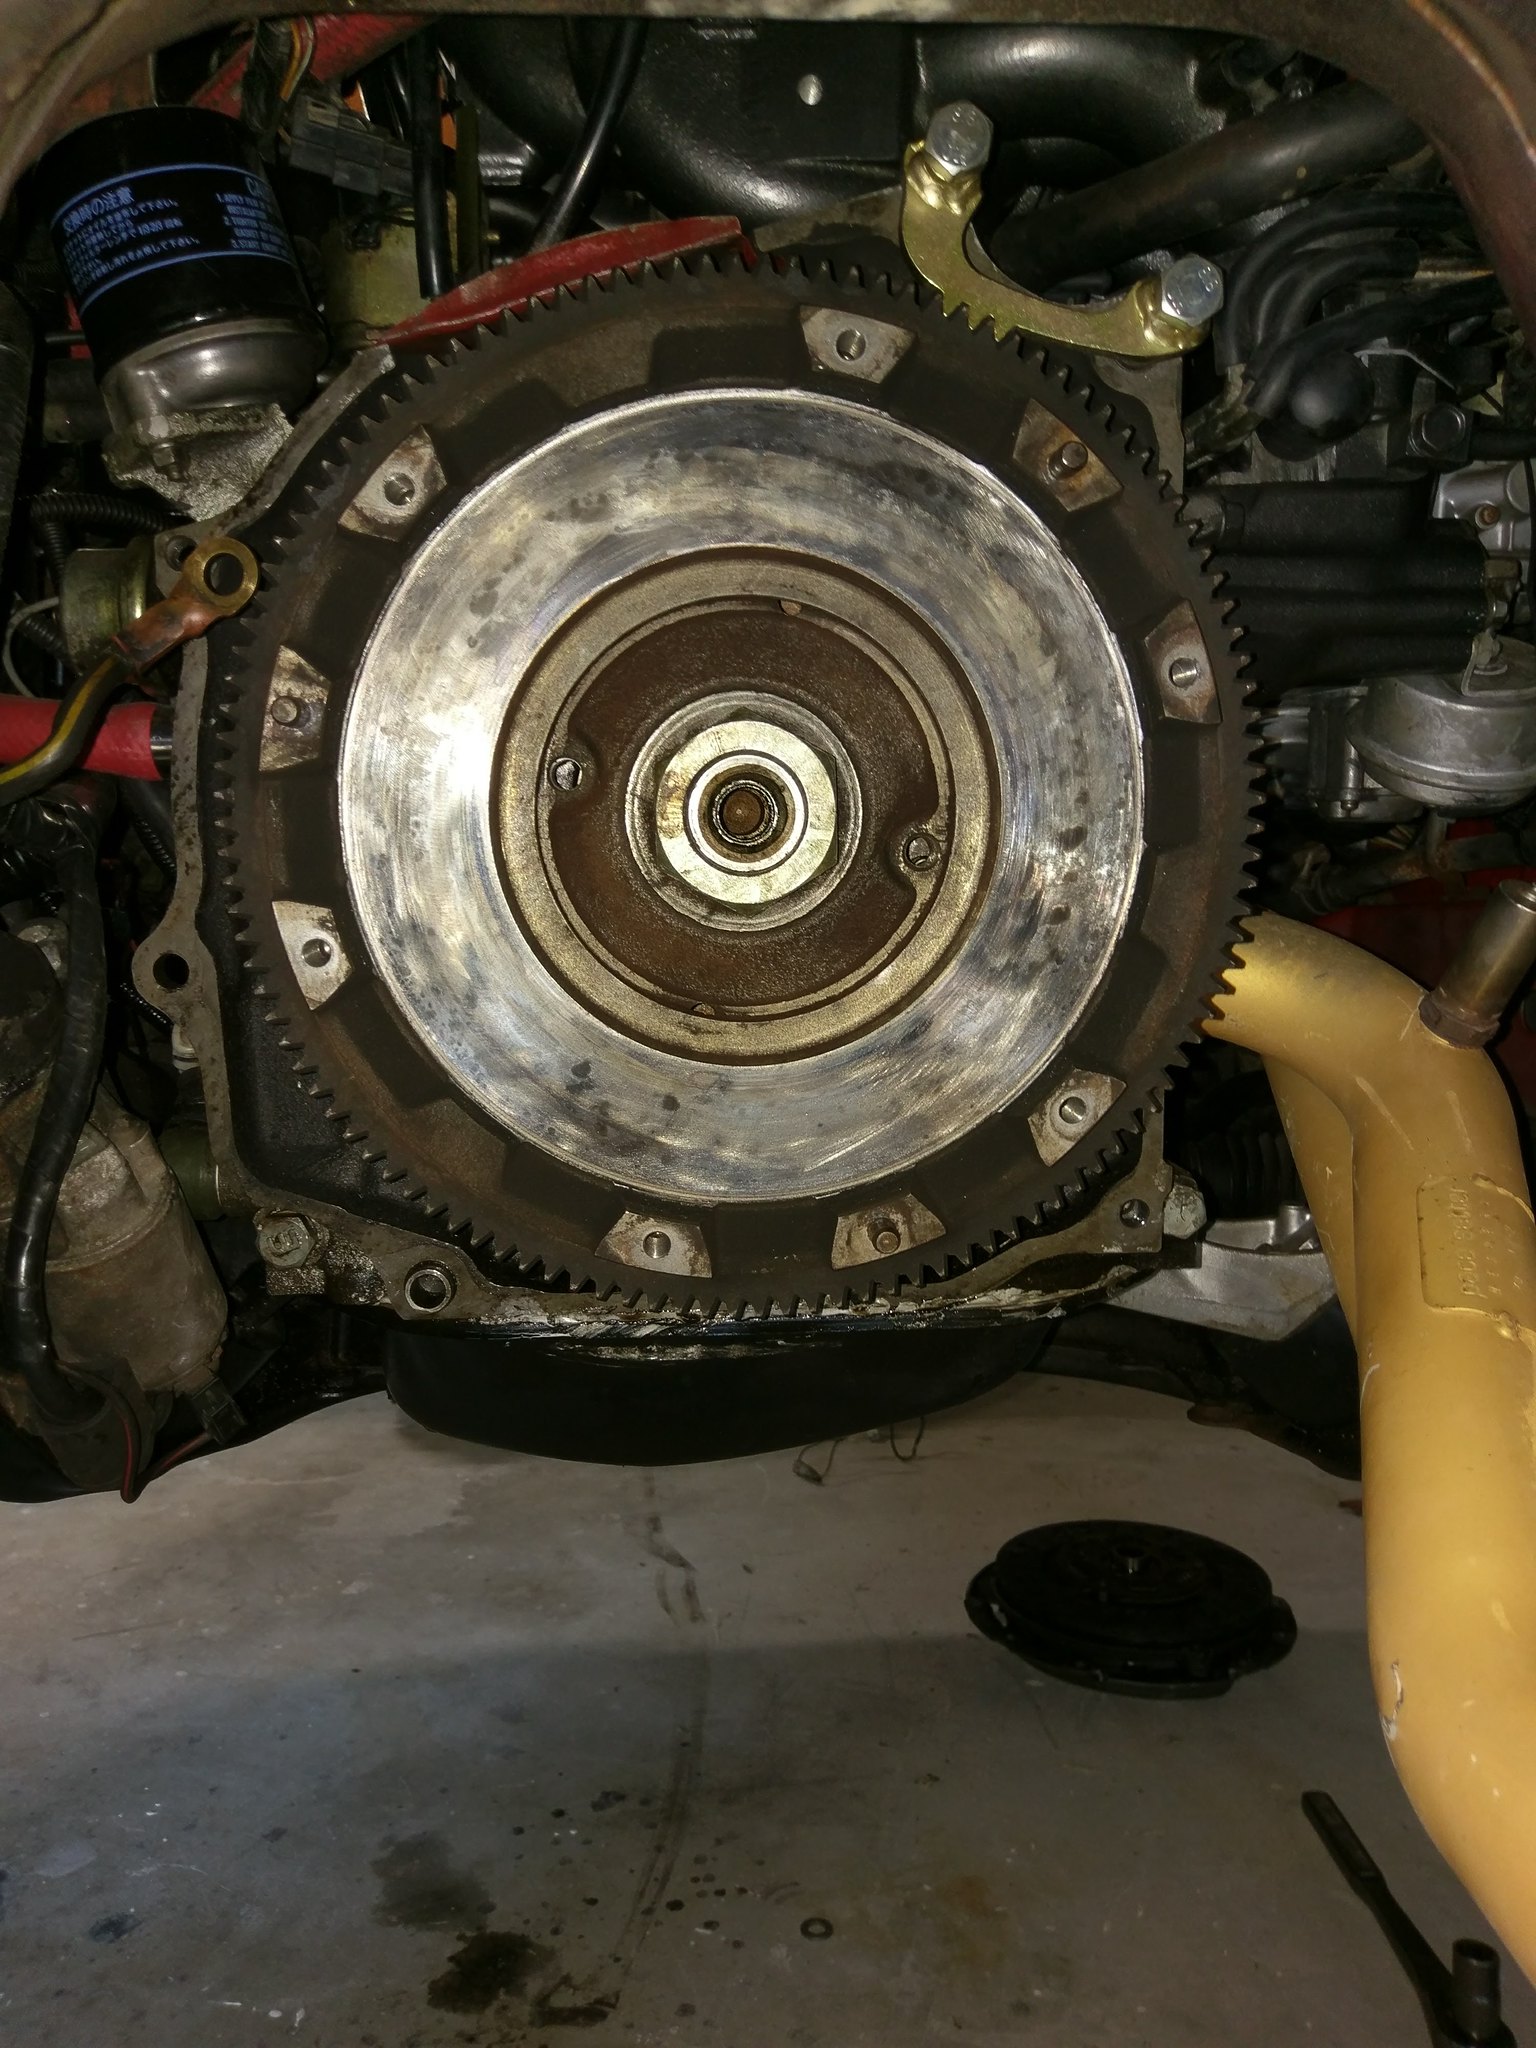
Got the clutch off the flywheel and holy burntness batman. I expected to see the hot spots on the flywheel though. Trying to repeatedly launch was fantastic for burning. I'll have to get it surfaced but, I knew that going into it. New clutch hopefully will allow me to launch and shift a bit harder than the "stock" replacement. I hope to get it broke in before the next autocross on father's day.
New parts are pretty though. Mazdatrix and Racingbeat/CR3 motorsports for the win on the parts. Stree/strip pressure plate and the 4 puck sprung sport/race clutch. Should be grippy enough. Hopefully not too undriveable. Even though it really only sees autocross and the occasional trip to work and back.
Last edited by Coinshark; Jun 5, 2017 at 12:17 PM.
Well wasn't that just a great successful evening. Never had tried it before but, I read where people used bread to push out pilot bearings. It worked great!
Flywheel cleaned up perfectly.
Everything is installed now except the gearbox and such. Hopefully, I will have the car put together for the weekend. That way I can ensure that it's broke in before the autocross in less than two weeks.
Got the clutch bled and started breaking it in this weekend. As I was cruising on the highway I noticed my oil pressure gauge dropping scary low. Pulled it out of gear and gave it a blip of the throttle and it raised a little but, it wouldn't hold. So, I started doing some searching and read that it could be a failed o-ring behind the front cover or a failed sending unit. The pressure was fine after the rebuild however, that doesn't mean that the o-ring hasn't failed still. Step one is going to be putting a mechanical gauge on it and getting an accurate reading. I will just buy the o-ring in the mean time though just so I can have it if it is in fact that. I'm pulling for it to be the sending unit but, I think it will end up being that o-ring.
I went ahead and got an oil pressure gauge. Installed it to double verify. Turned the car on, pressure rose to 45ish psi then the longer it ran the lower the pressure went. Shut it off when it hit about 20psi roughly. Err... Oh well, I had a sneaking suspicion that it was that o-ring so, I went through and bout all the seals and gaskets it takes to replace that o-ring. Too bad I have to take the water pump off. Especially after finally bleeding the system completely of air. I get to use the polycarb cover I have over my radio hole though. Finally, putting that to use.
Autocross was fantastically successful this weekend. Not only did I have enough time Friday to get the front cover o-ring fixed, I also had enough time to cut out a flange and weld on a tube to make an adapter for my Apexi cone filter. Of course I didn't take a picture of it. My welds didn't suck too much this time. Practice makes perfect. It was very evident at the autocross that I really need more seat time. Thankfully, I've finished every mod that I had a goal set for done already. Now, there is nothing I want to change for this season. It is all down to learning the car and getting seat time in. Overall, I'm happy with how everything is going this year. Failed front o-ring and all.
It's definitely fixed now. Pretty sure it wasn't in when I autocrossed last...................... The car is very tail happy now and it makes me smile. Reminiscent of gran turismo racing now lol. Now, I need get it to idle. I've adjusted the TPS perfectly but, I think it's actually the throttle cable being too long. Deleting all the stuff of the throttle body is biting me at this moment. The idle air screw on top allows for finer adjustments but, I need to adjust the throttle cable first. We will see. It's really a non-issue but worth mentioning I think. Mainly for a reminder for myself though.


 I have already obtained front and rear S5 turbo irons. Basically, what I need is ECU (probably stand alone), turbo rotors, front turbo iron cover, intake.... You know... All the essential stuff, like the S5 transmission. So I don't grenade the NA gearbox. This is going to take a while but, I'm not in a rush. Would it be cheaper and faster to buy a T2? Probably. That is if you can find one in the immediate area and that its not been molested by an LS swap failure. Plus that's a whole other box of worms.