
(Australia) Cams series 5 build


Thread Starter
Joined: Jul 2011
Posts: 138
Likes: 0
From: Sydney, Australia
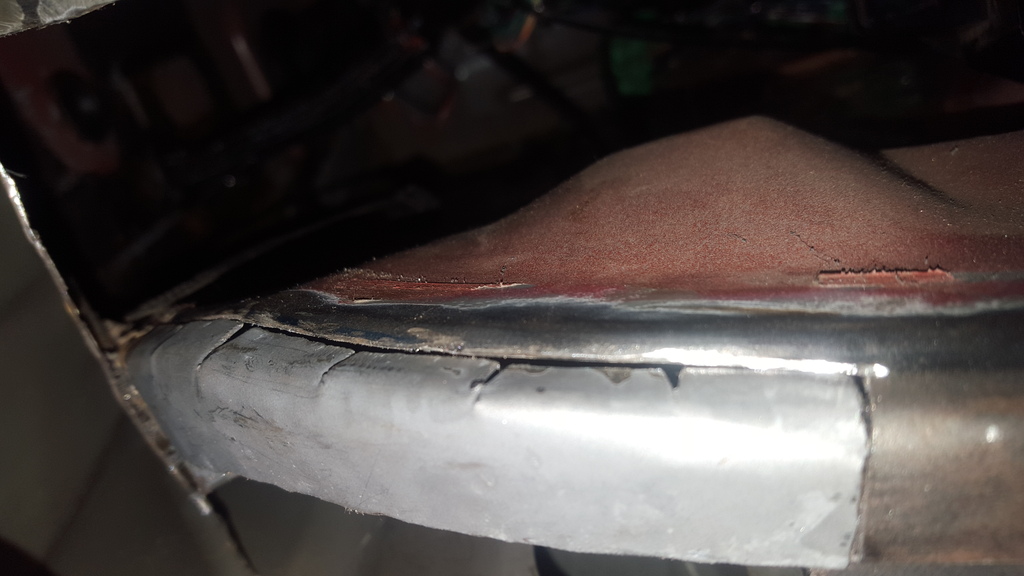
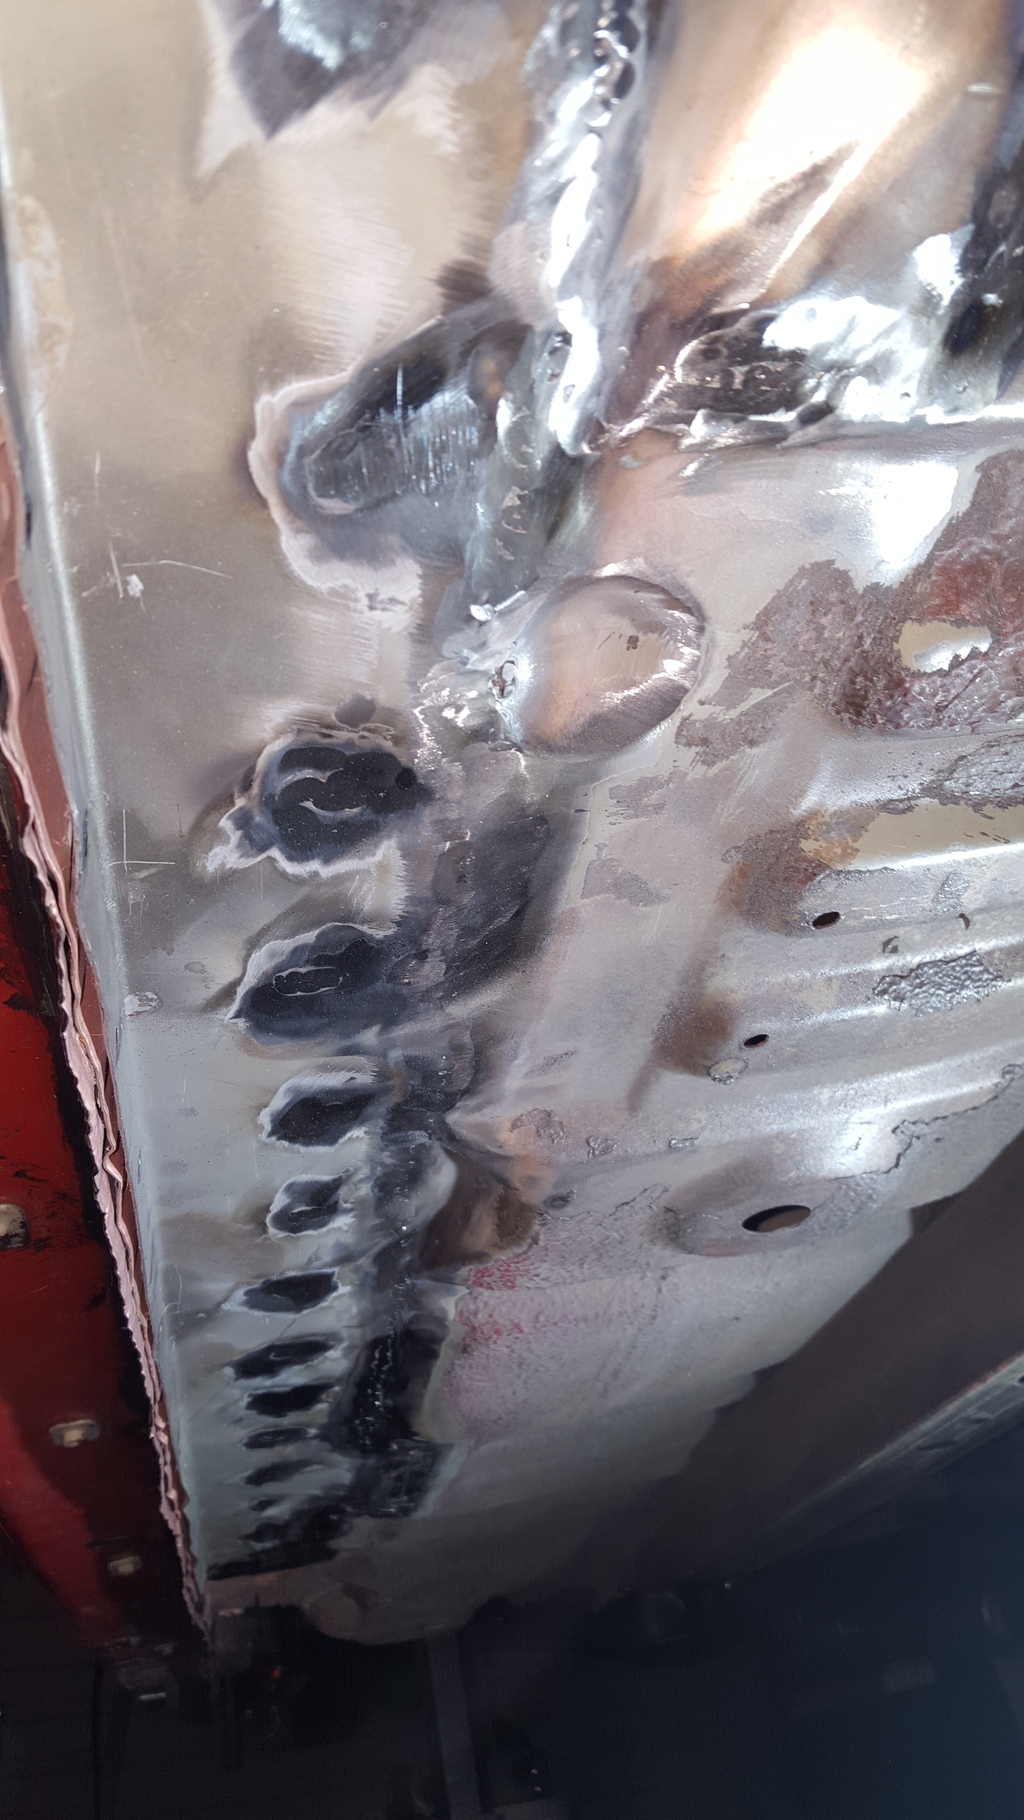
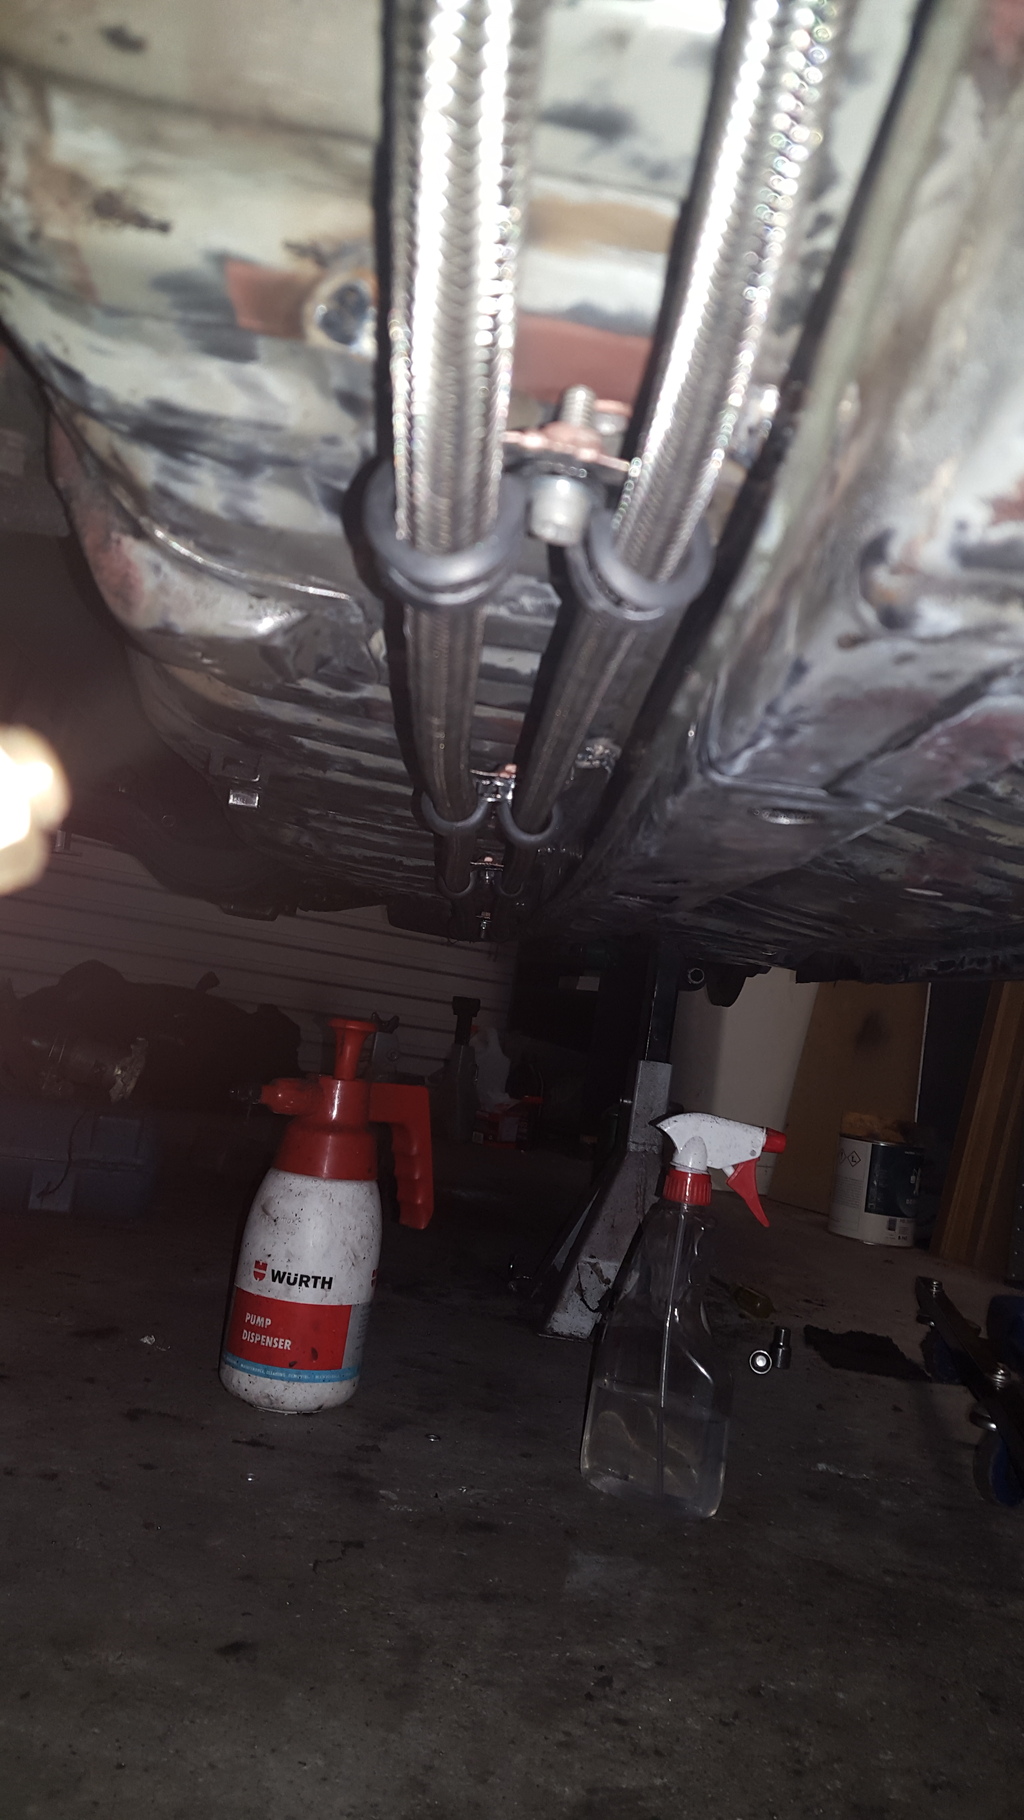
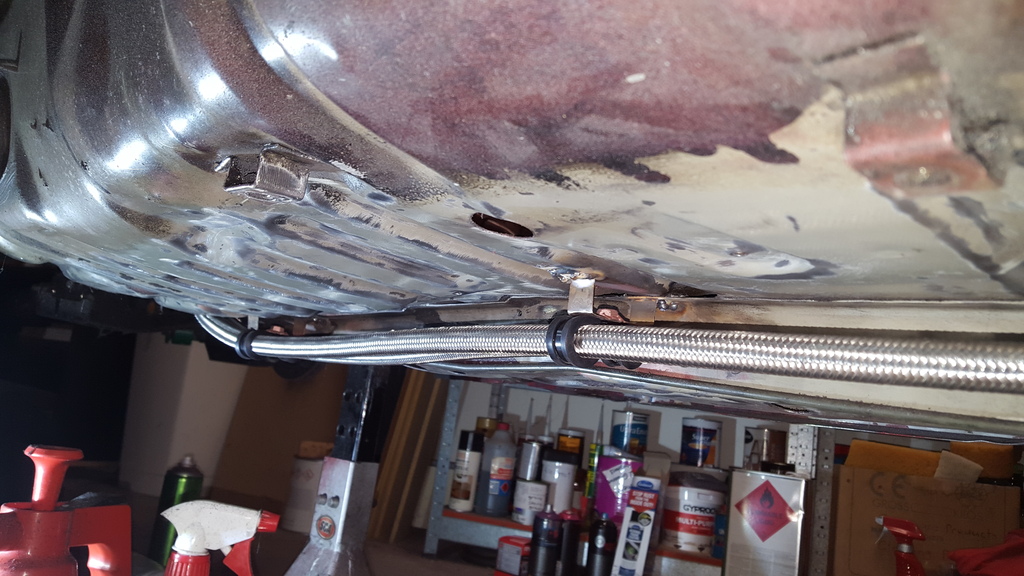
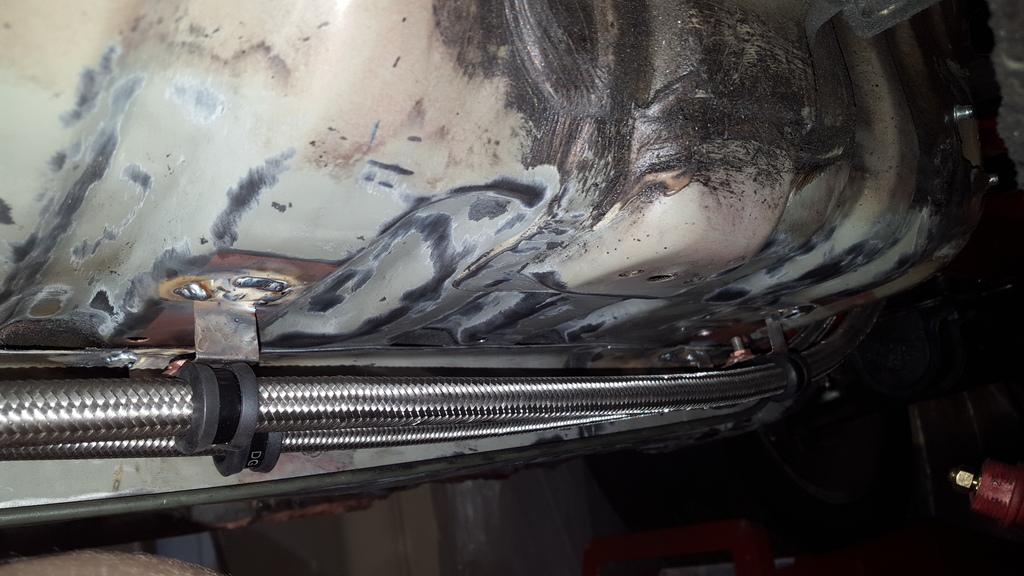
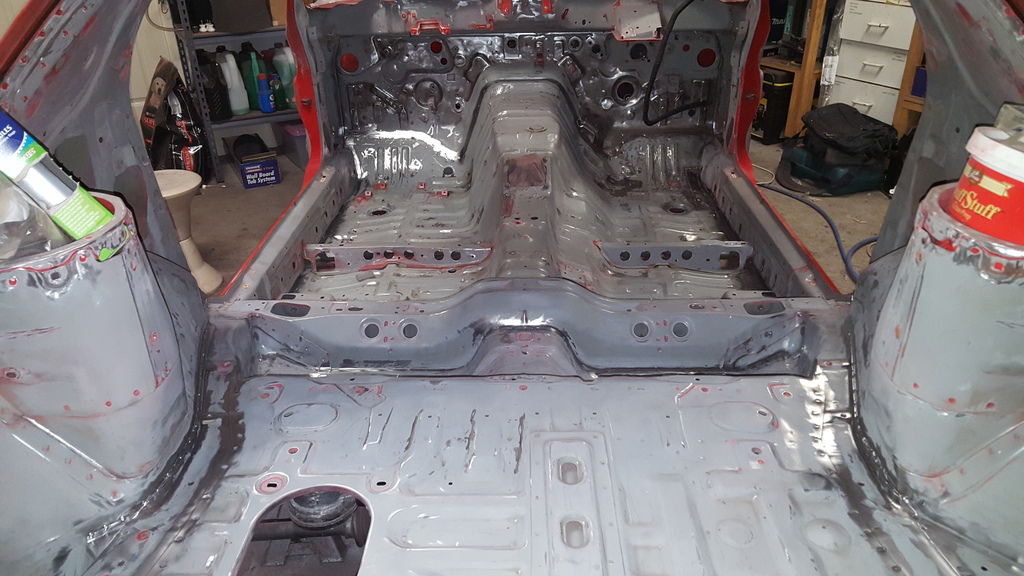
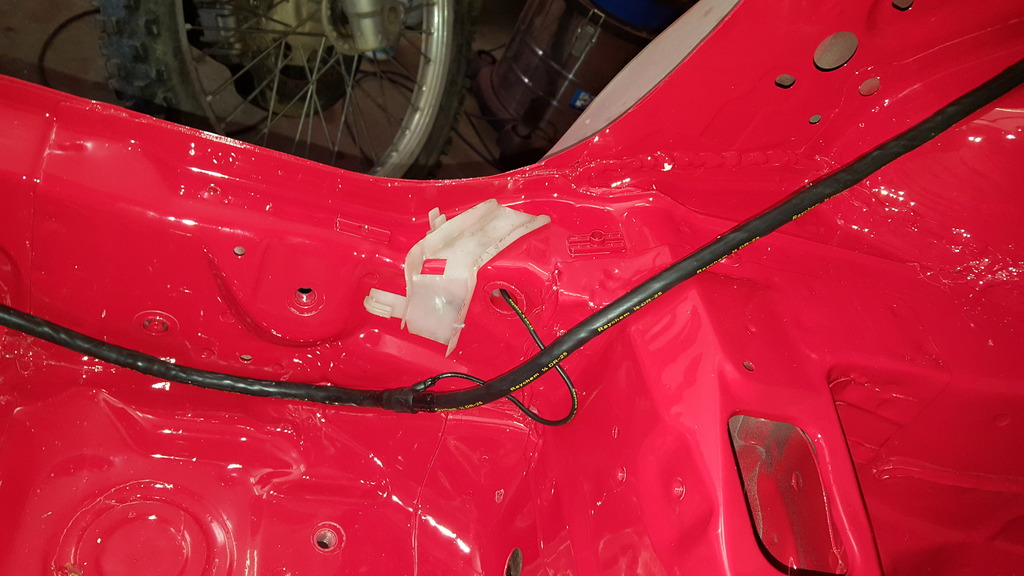
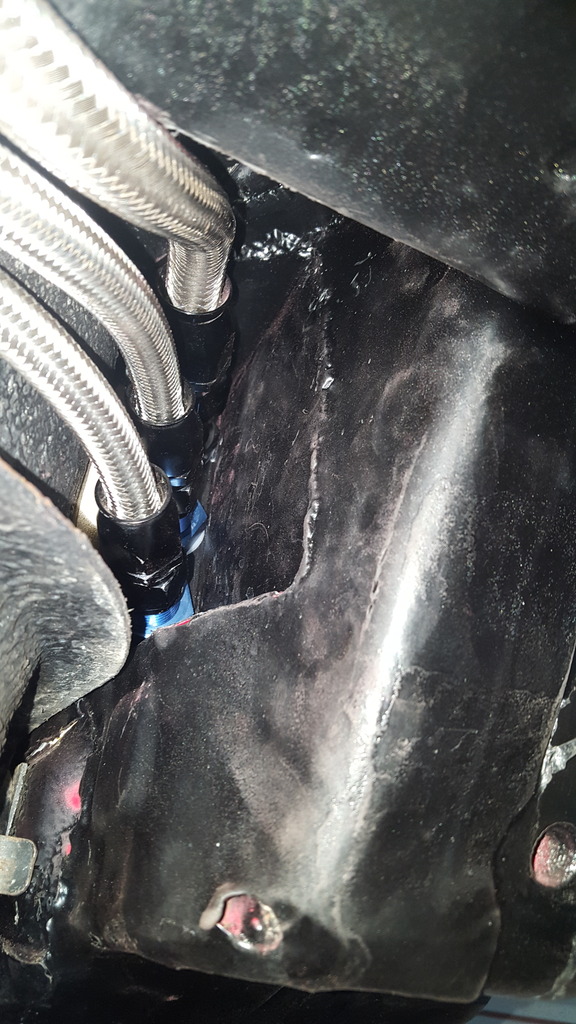
Put in a bit of work yesterday. Stripped the underbody paint off the passenger side floor area. Welded in my tabs for the fuel lines. Made some more fuel lines for the surge tank setup and then stripped all of the paint off so I can paint it all in Por 15 later on today.
Fuel lines all done.
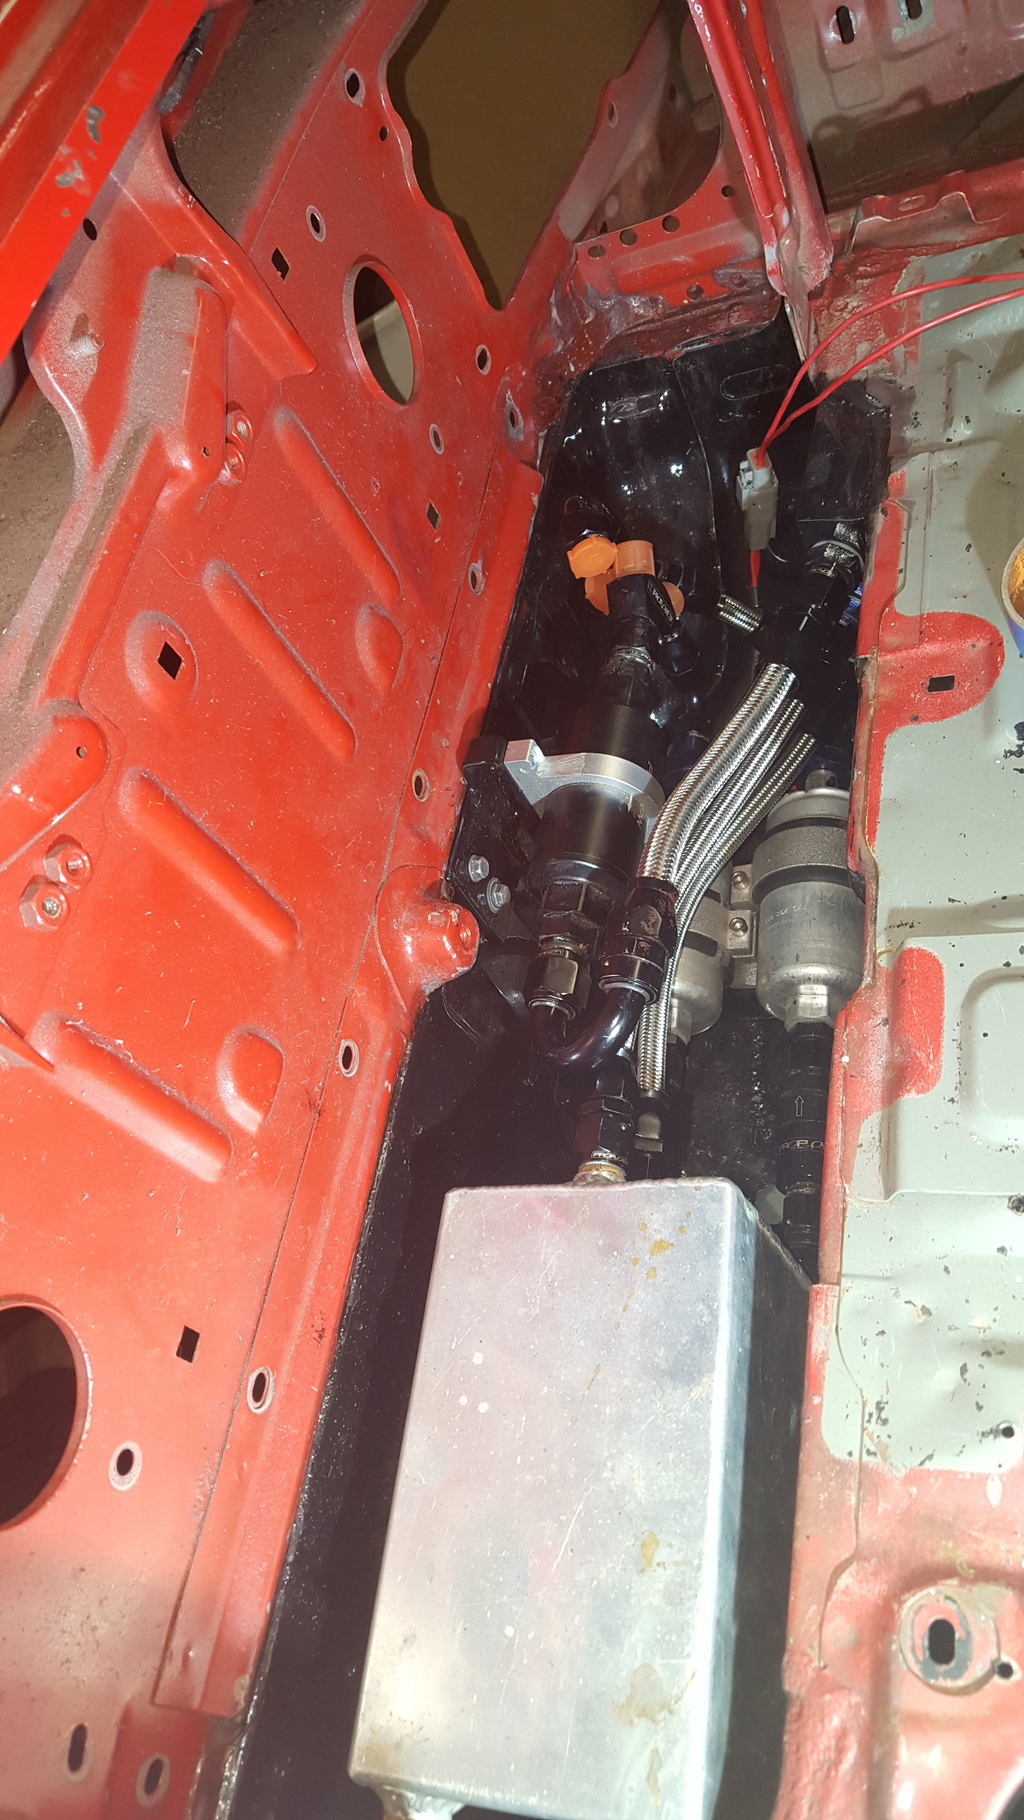
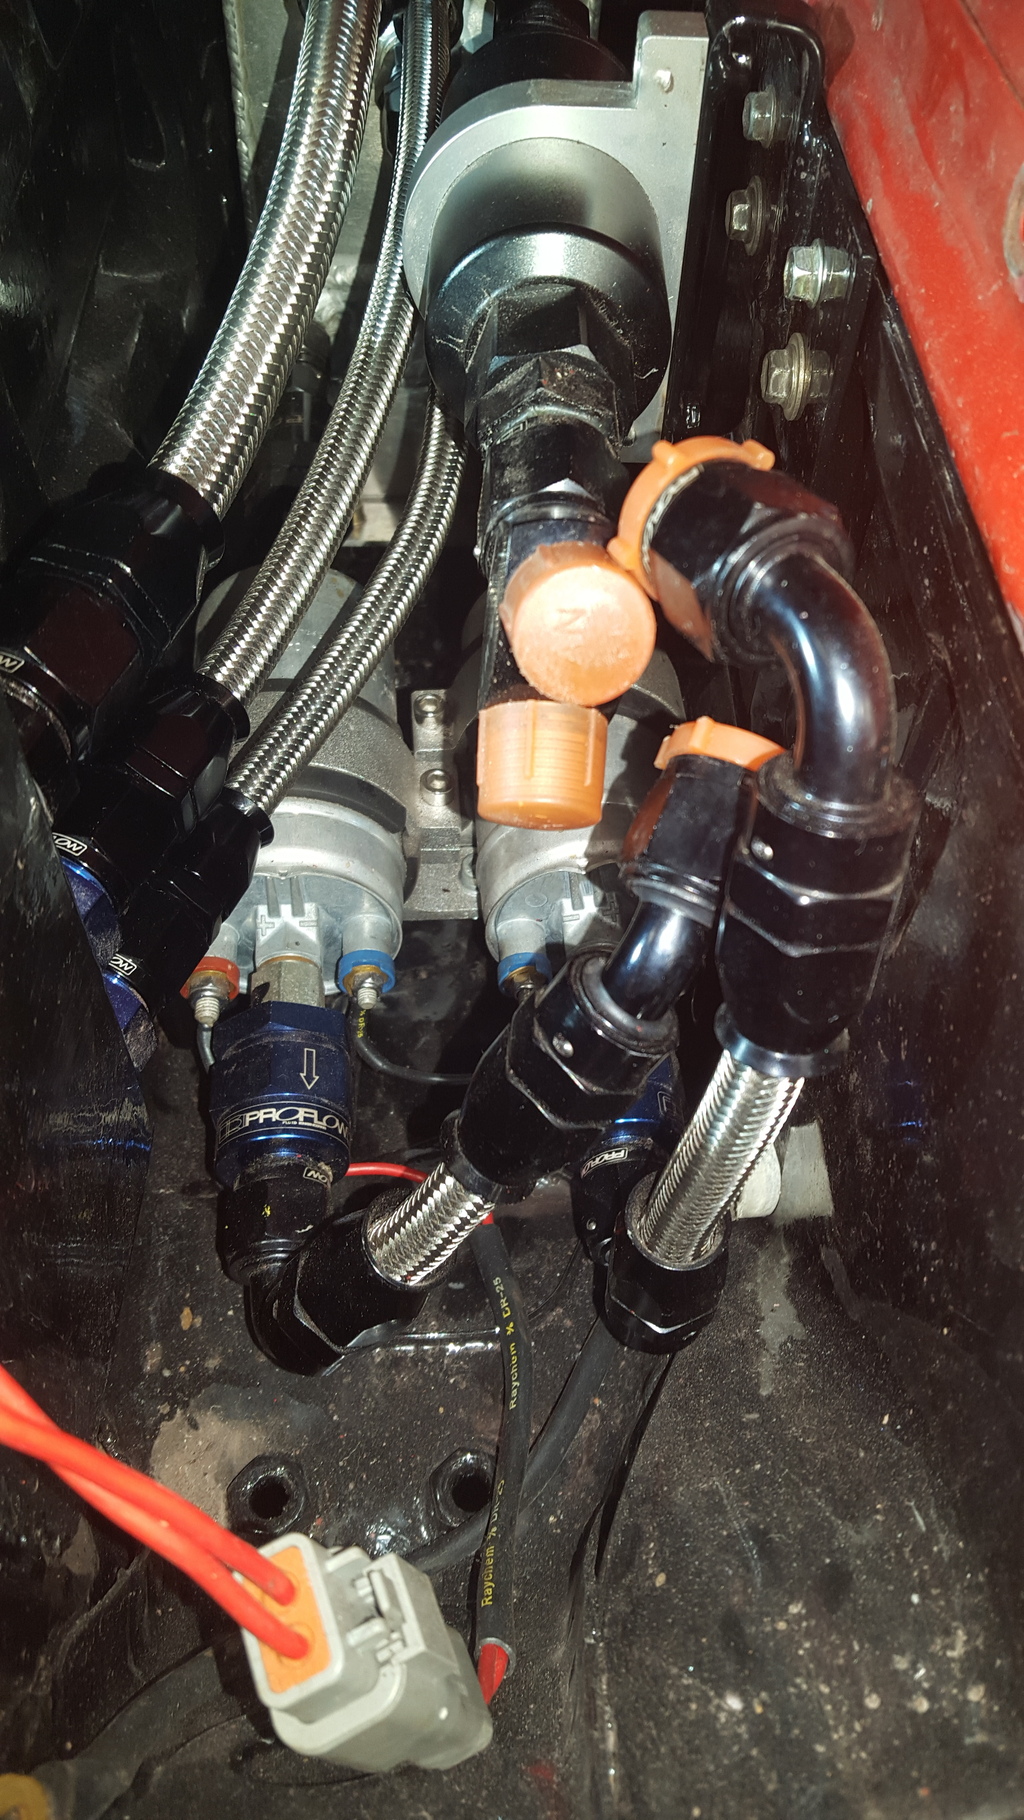
Tabs mounted and all underbody paint removed.
Fuel lines all done.
Tabs mounted and all underbody paint removed.


Thread Starter
Joined: Jul 2011
Posts: 138
Likes: 0
From: Sydney, Australia
Thanks dude.
I havent had any issues with it so far, but for the extra money its not worth it IMO. It only has a longer piston rod so your paying for the name
I havent had any issues with it so far, but for the extra money its not worth it IMO. It only has a longer piston rod so your paying for the name
Thread Starter
Joined: Jul 2011
Posts: 138
Likes: 0
From: Sydney, Australia
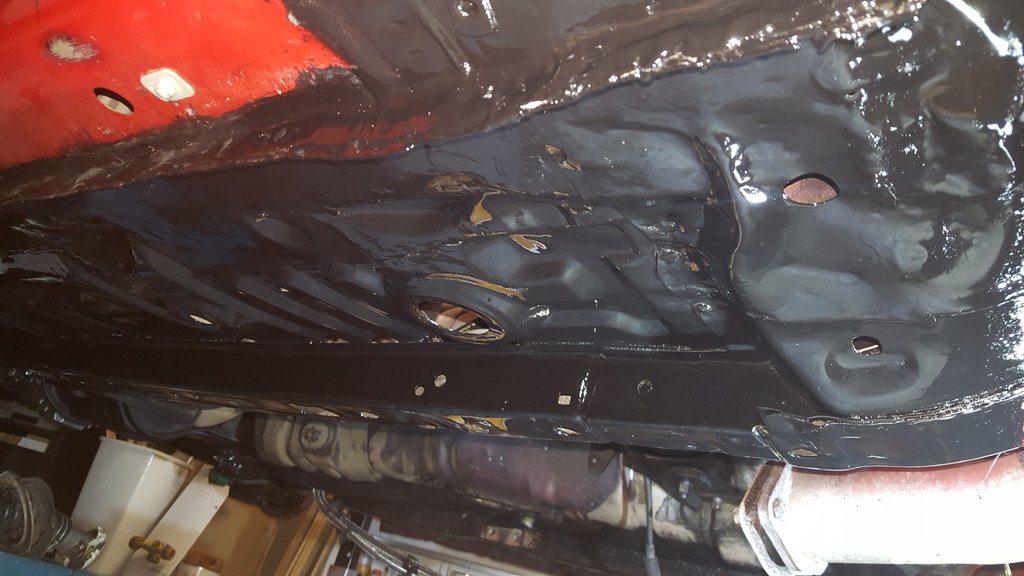
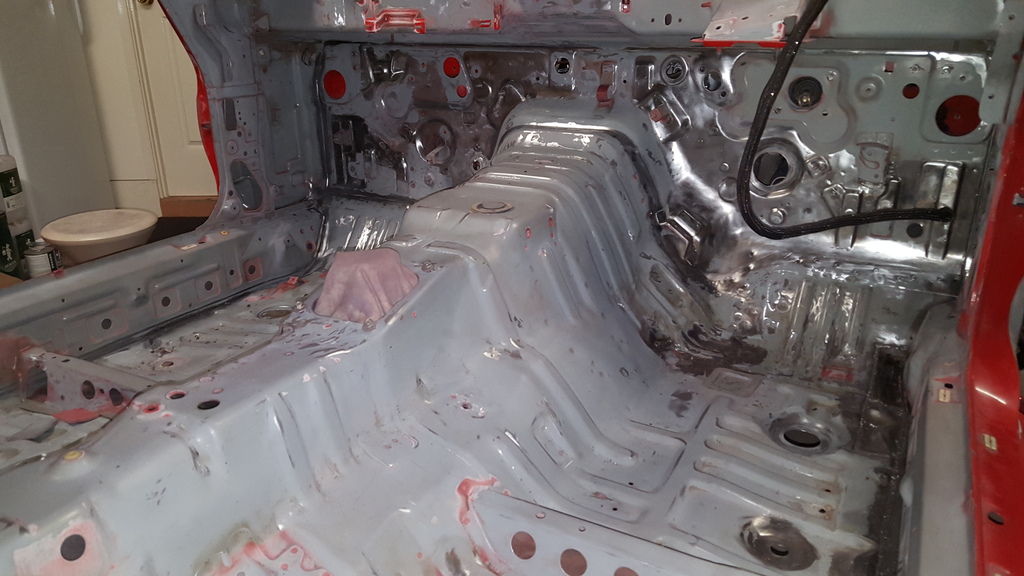
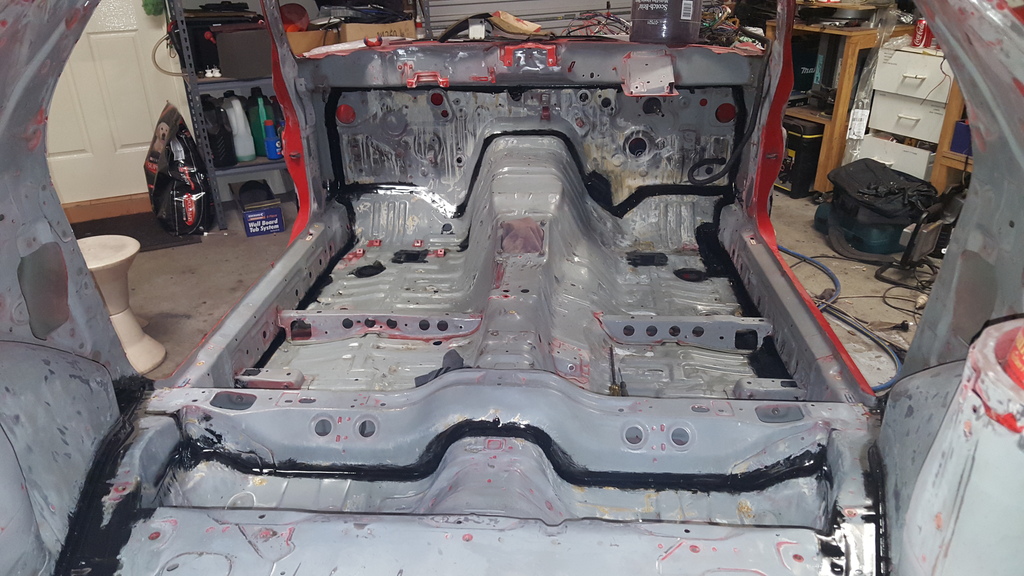
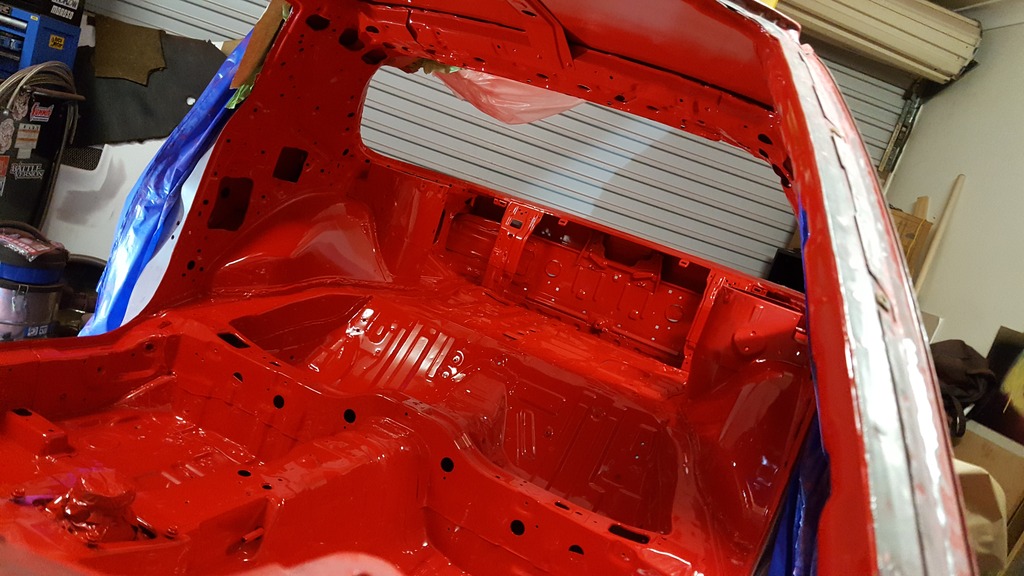
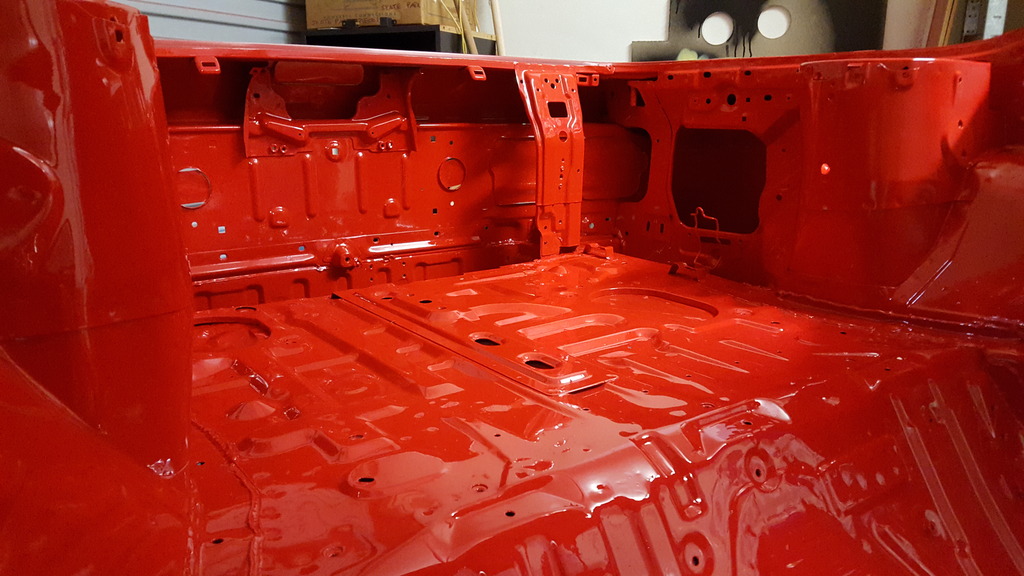
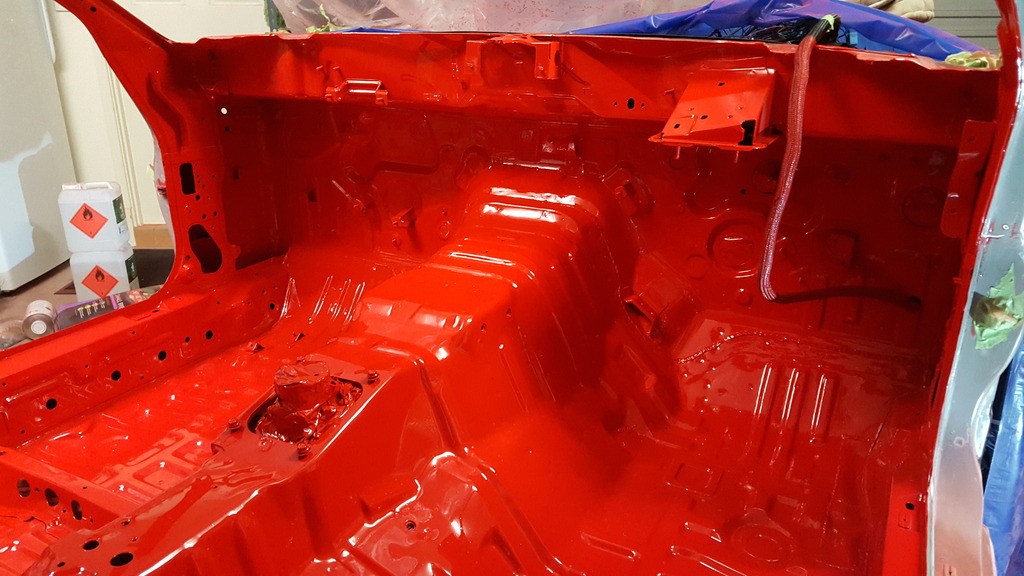
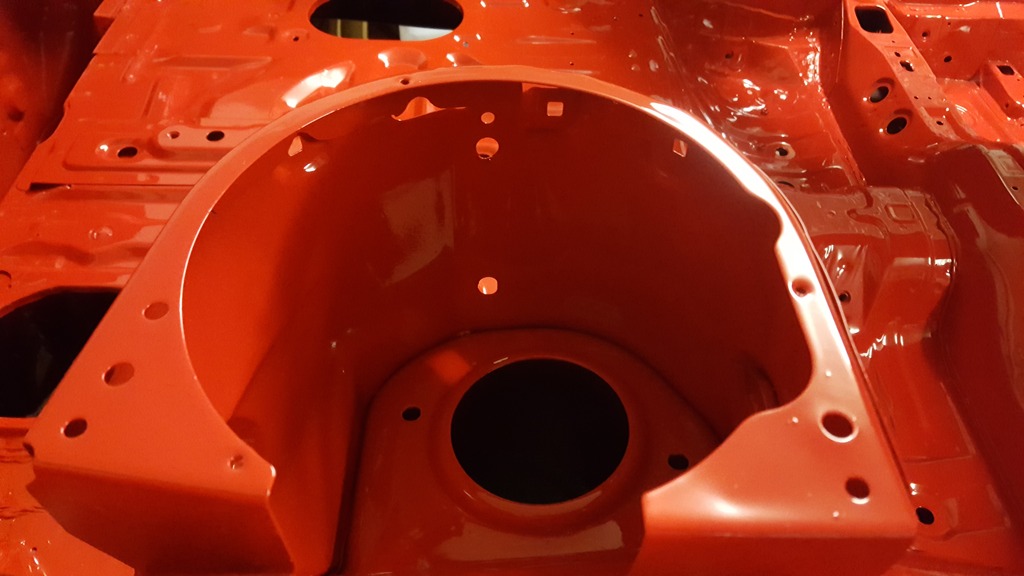
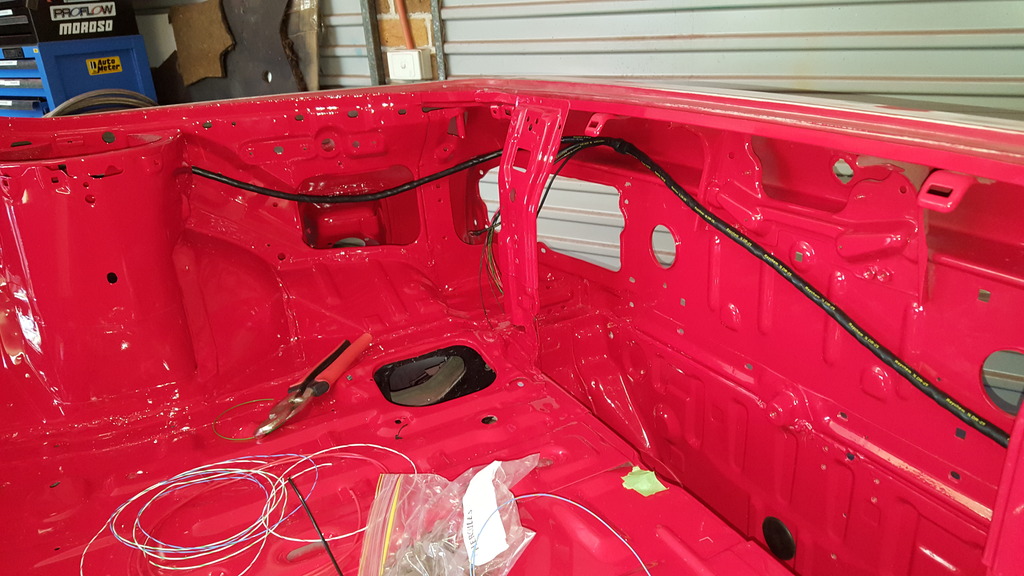
Put in quite a few hours over the last 2 weeks. Finally finished painting the underbody in POR-15. I have only painted the areas either side of the gearbox tunnel and will drop the gearbox and diff once the fuel system and interior are back in as I have no more room to store parts anywhere lol. Then I can paint the last 2 sections. Also started back on the interior sanding and now im about half way im really regretting doing this job. Its like sanding an engine bay just 5 times the size and a shitload more cracks and crevices to sand.
Rebuilt the top end on some strange 450cc rotary for a mate too. Had some funny round rotor that was called a piston and these cam thingys on top or something.
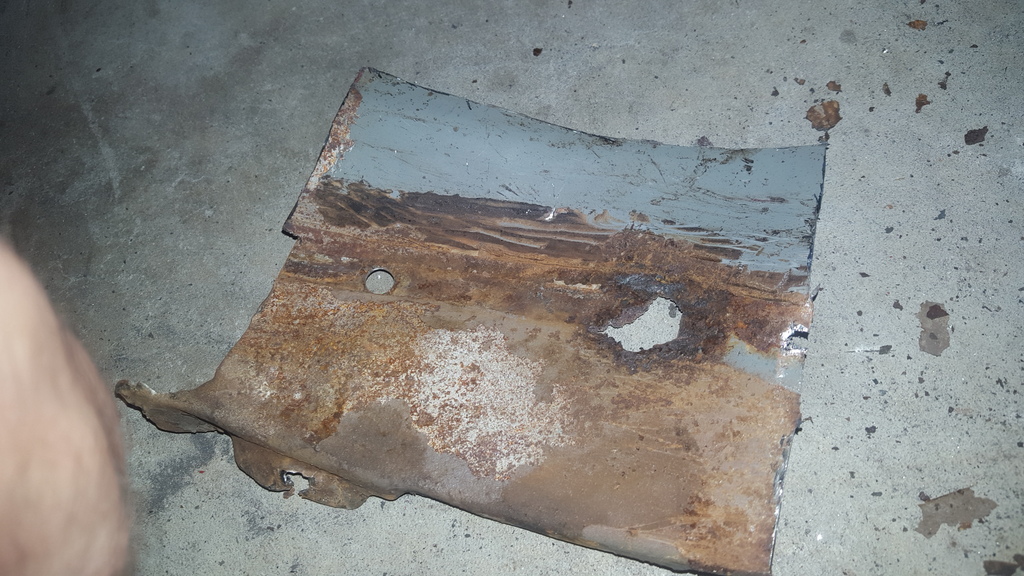
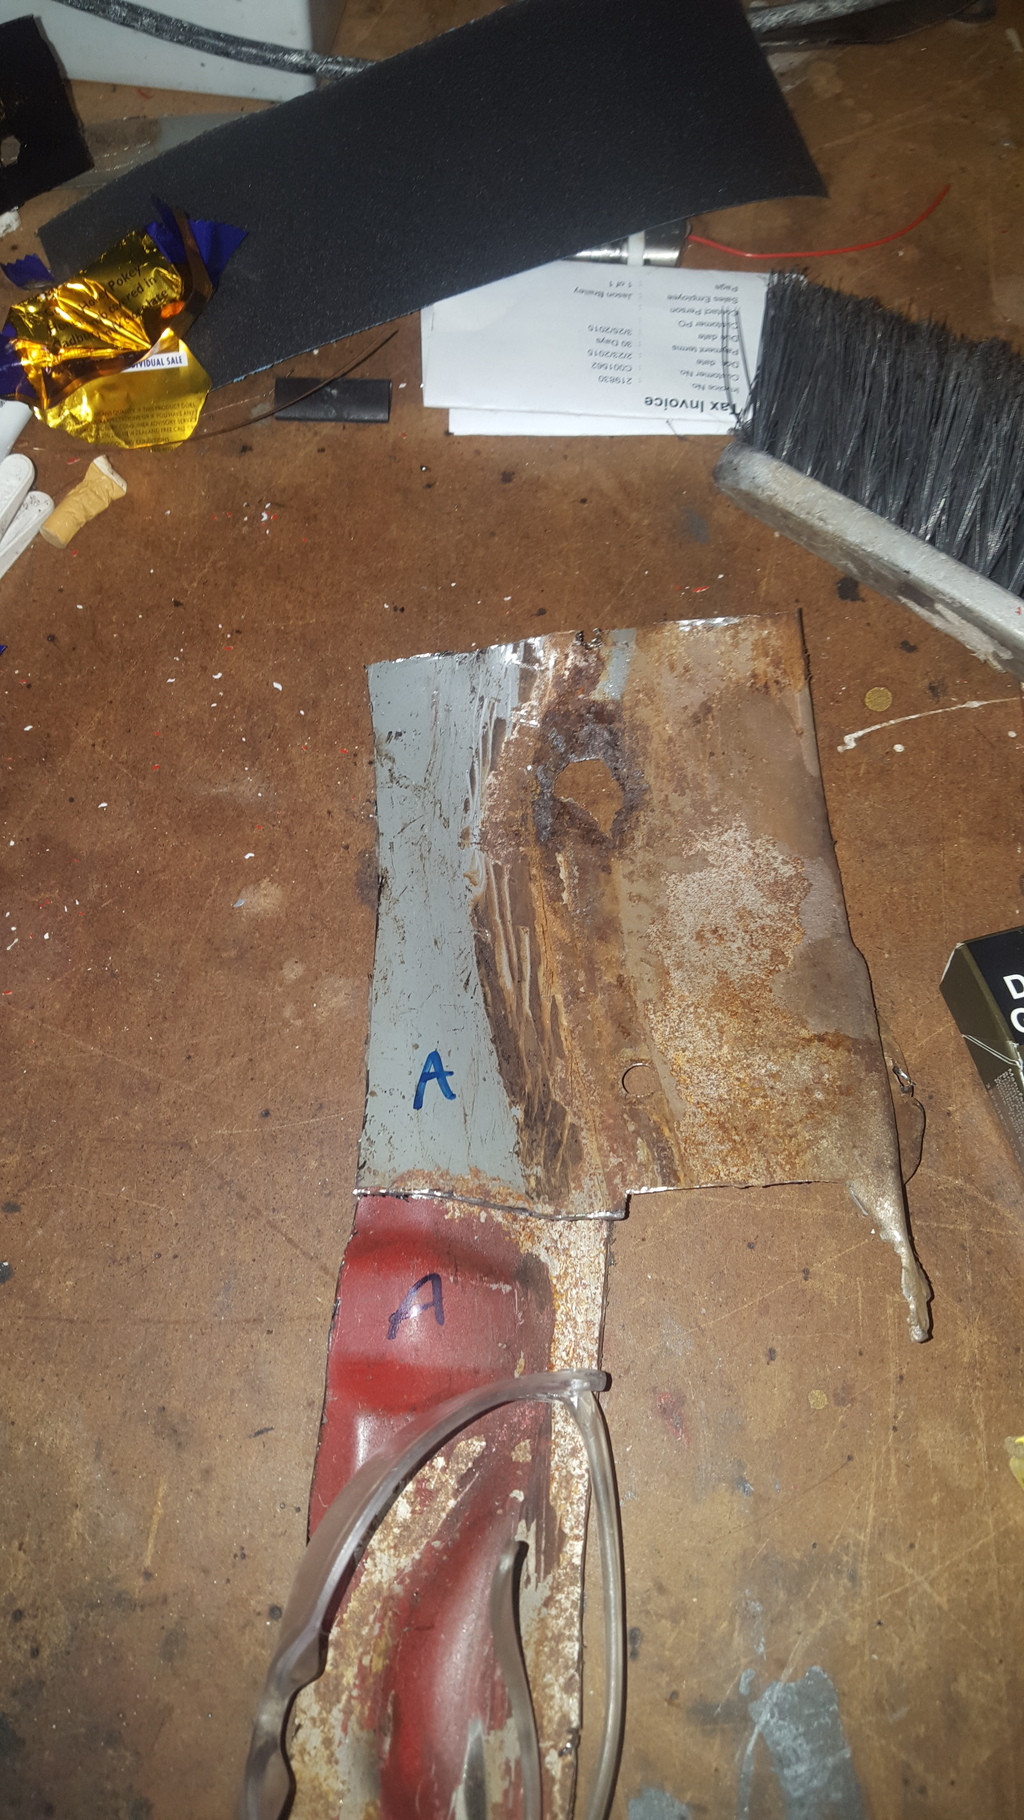
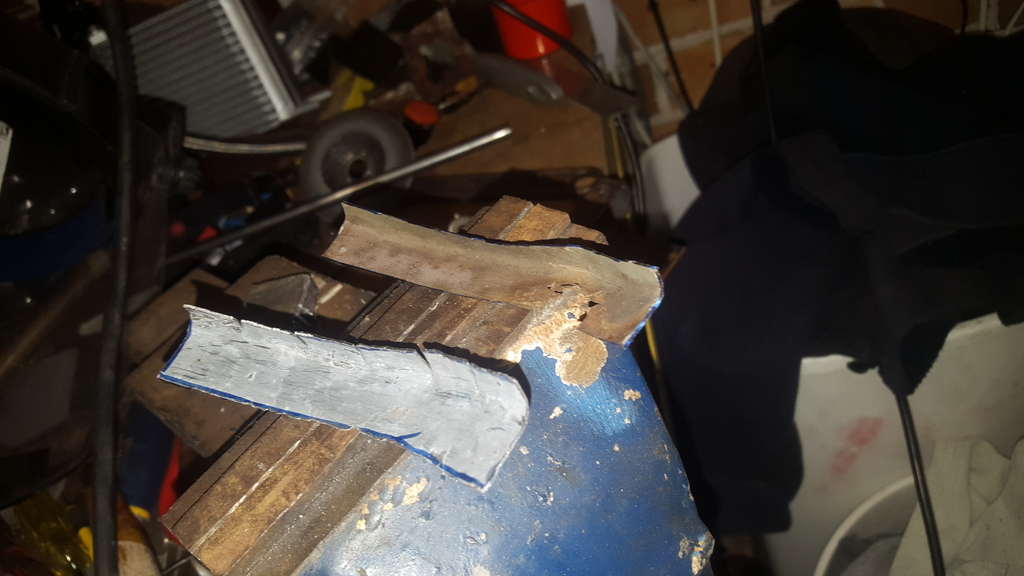
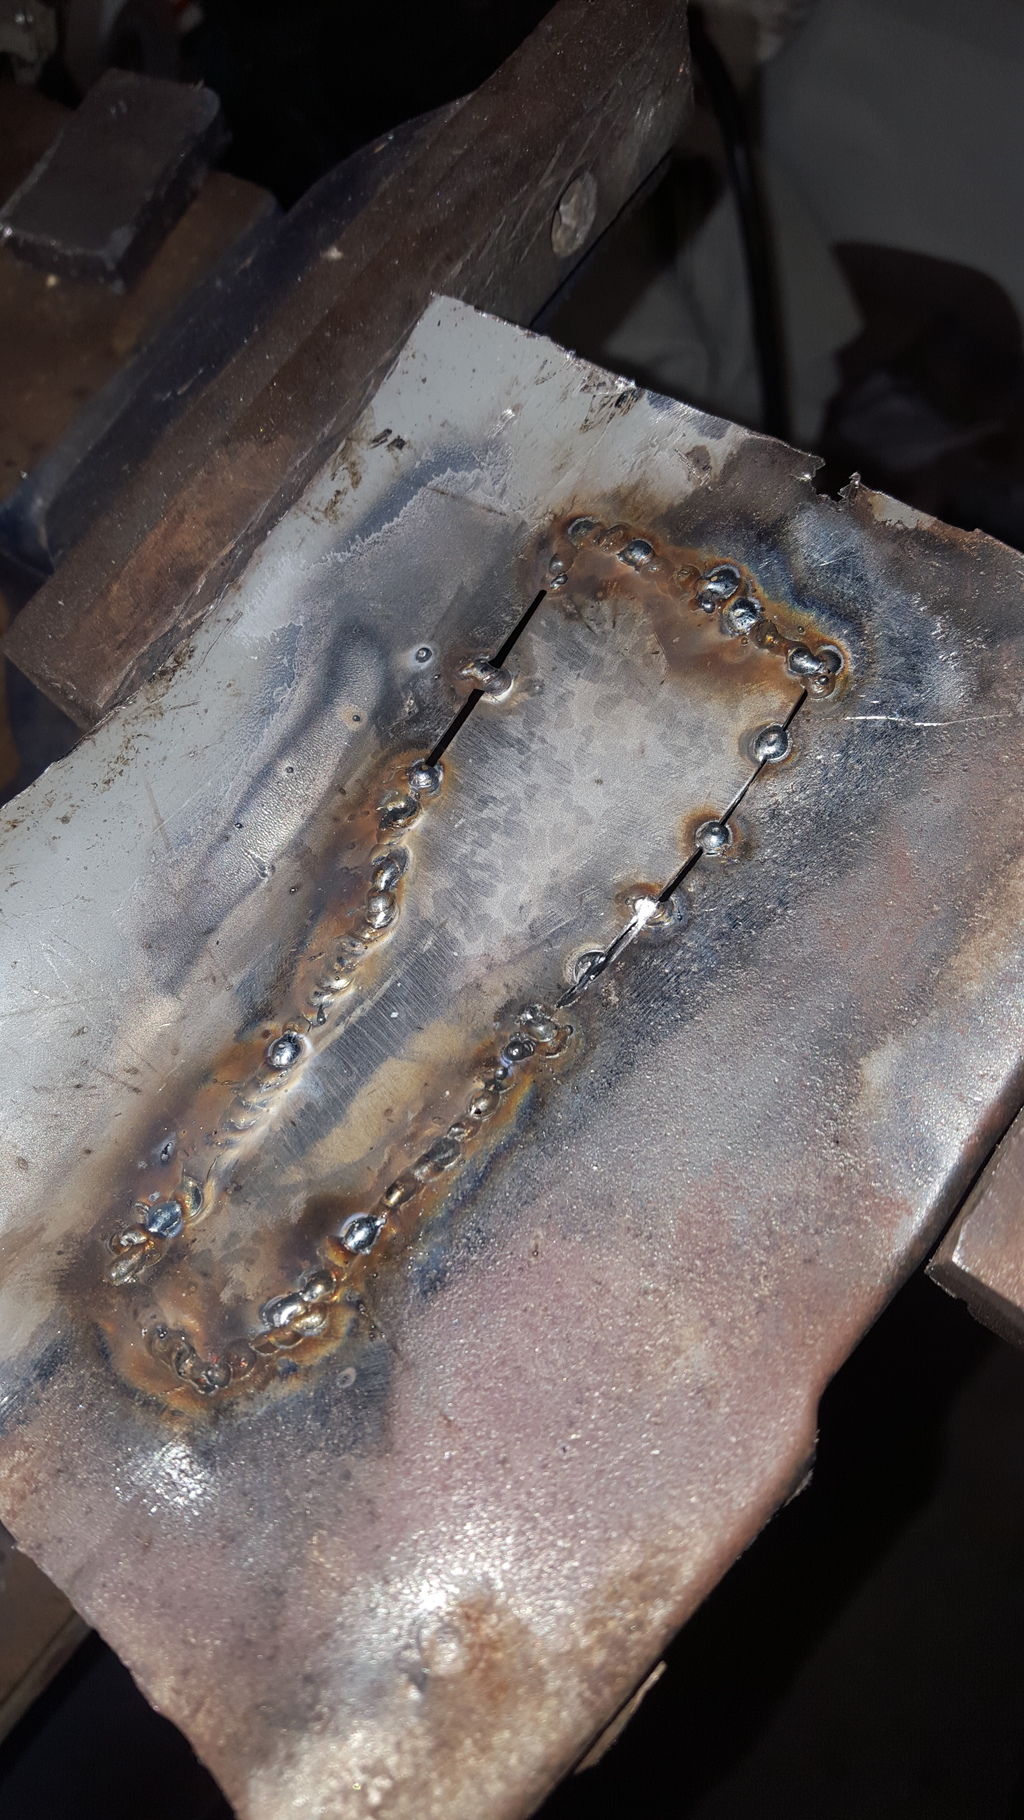
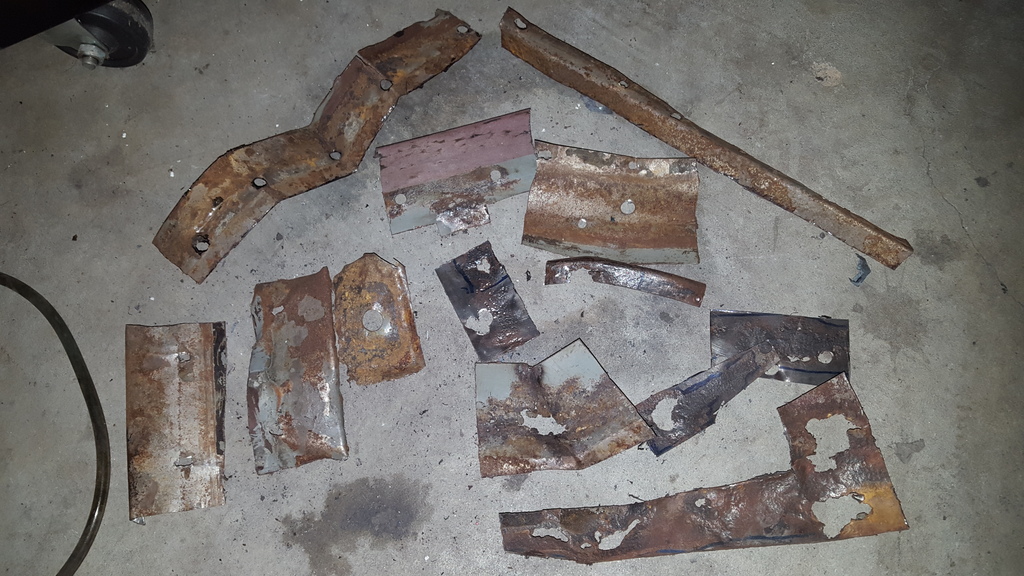
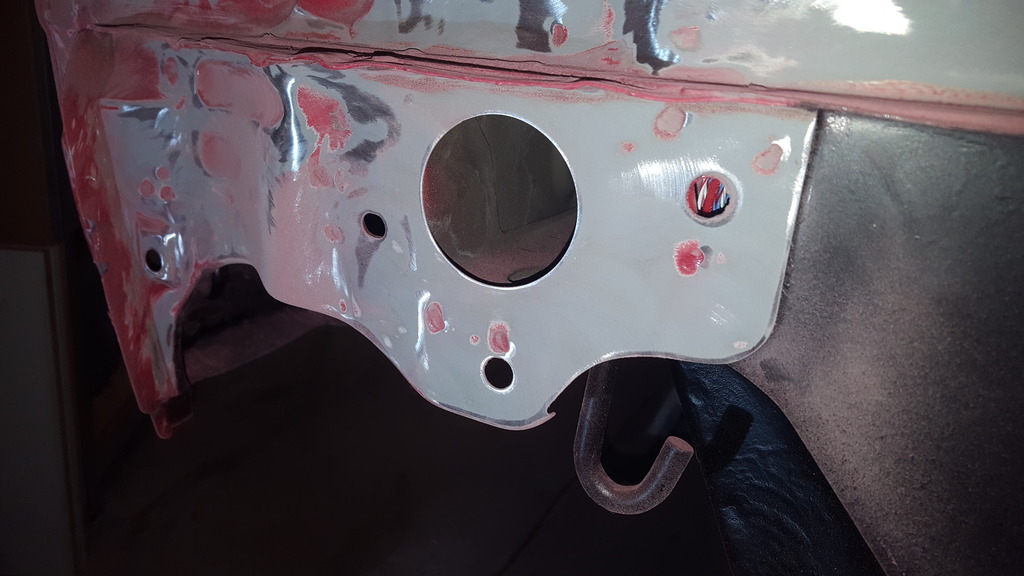
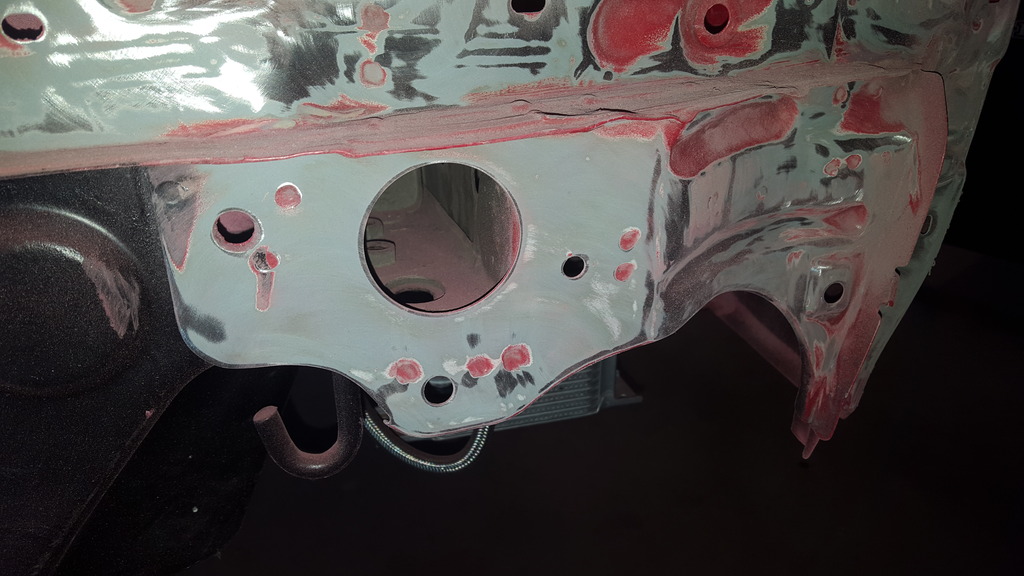
This is just the rust I cut out.
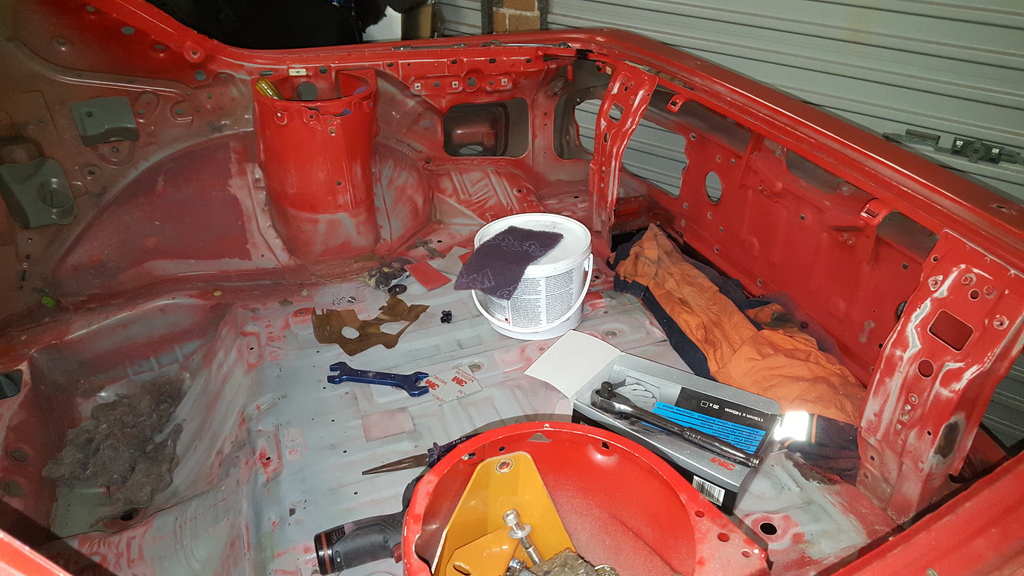
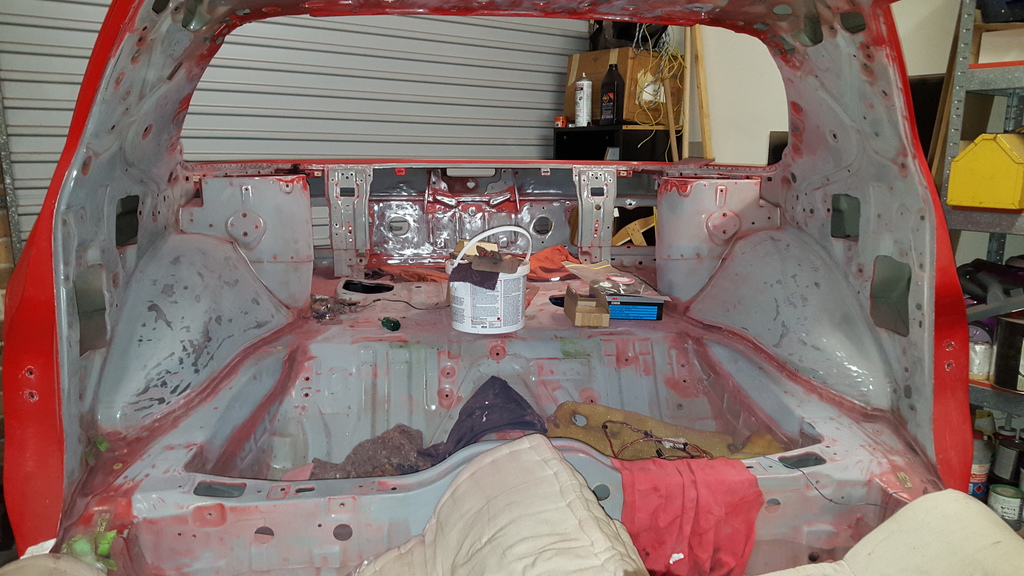
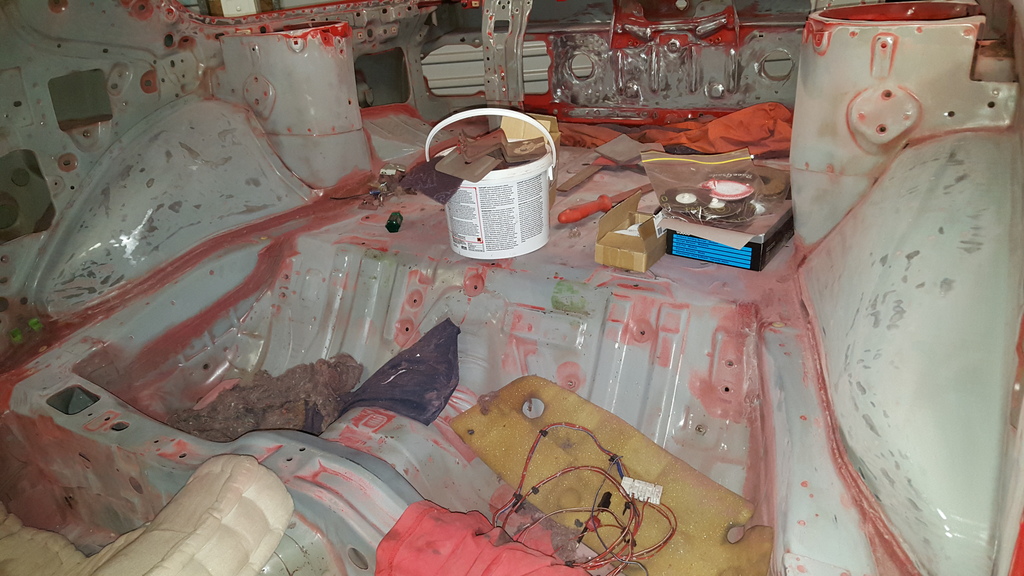
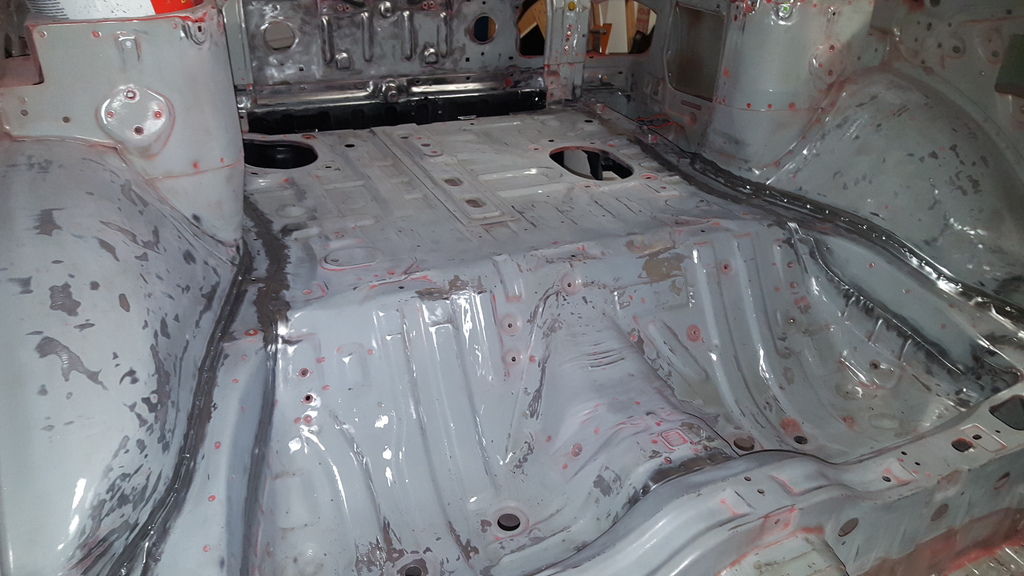
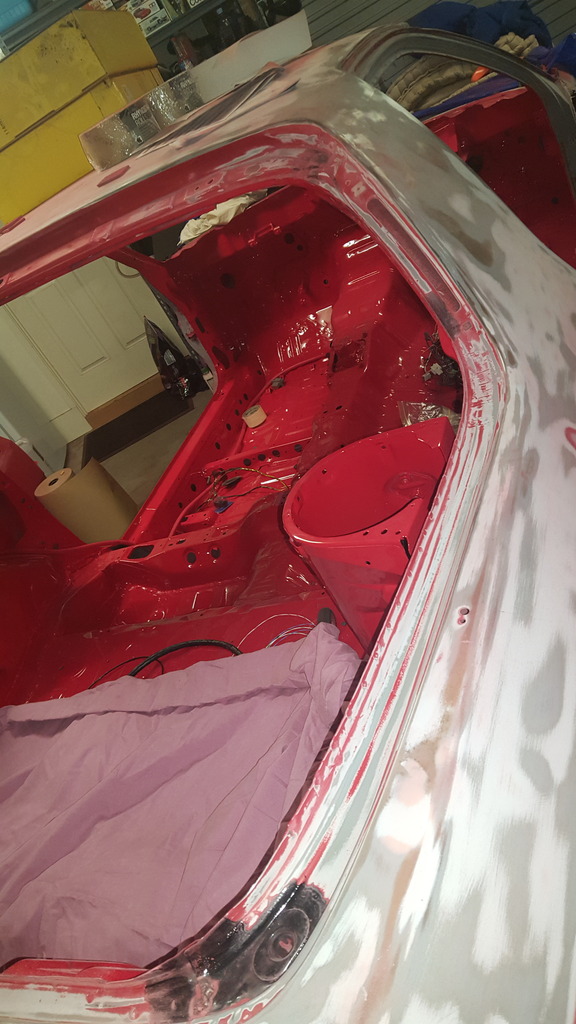
Drivers side hatch area cleaned and quickly sanded. Still have to thouroughly sand again
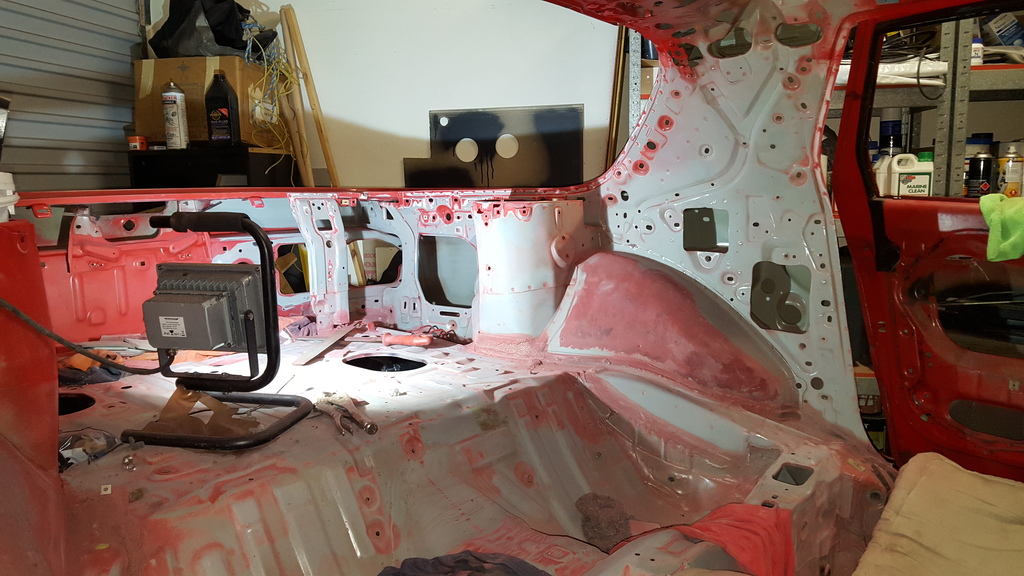
Passenger side hatch area all sanded and almost ready for paint. Just a quick scuff in the hard to reach areas and this section is ready for some debeer epoxy
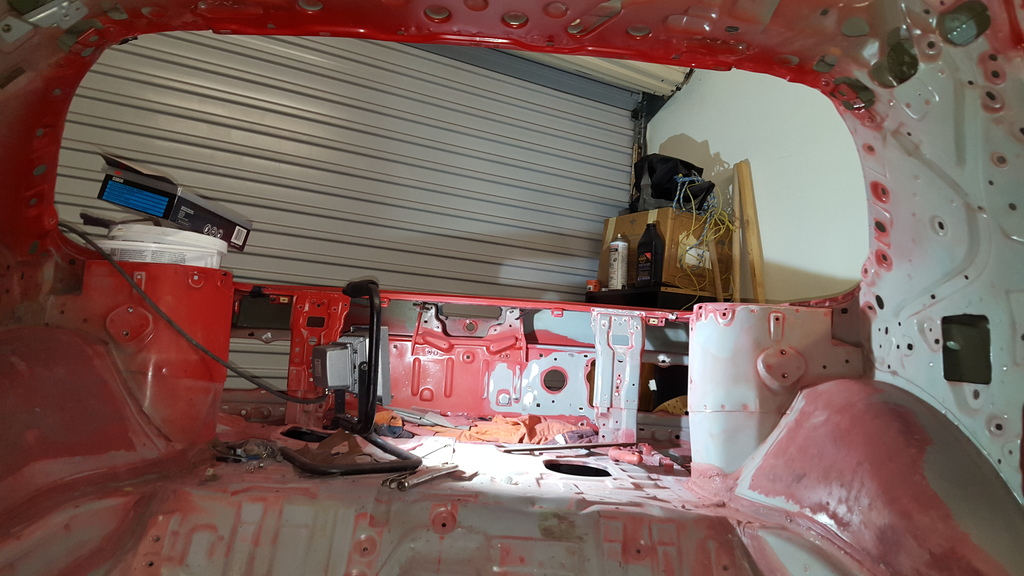
Underbody all painted in POR-15
Bike rebuild
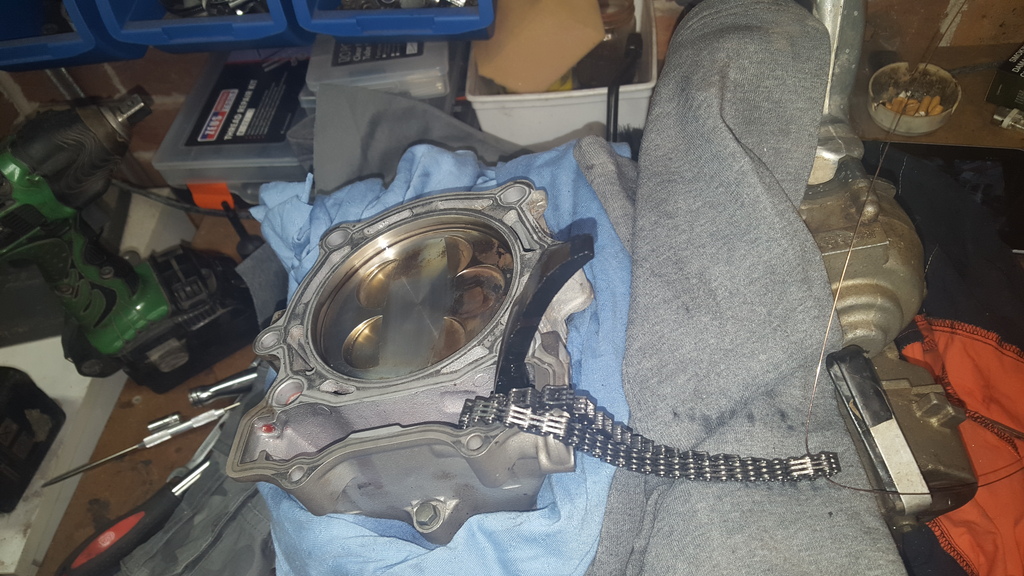
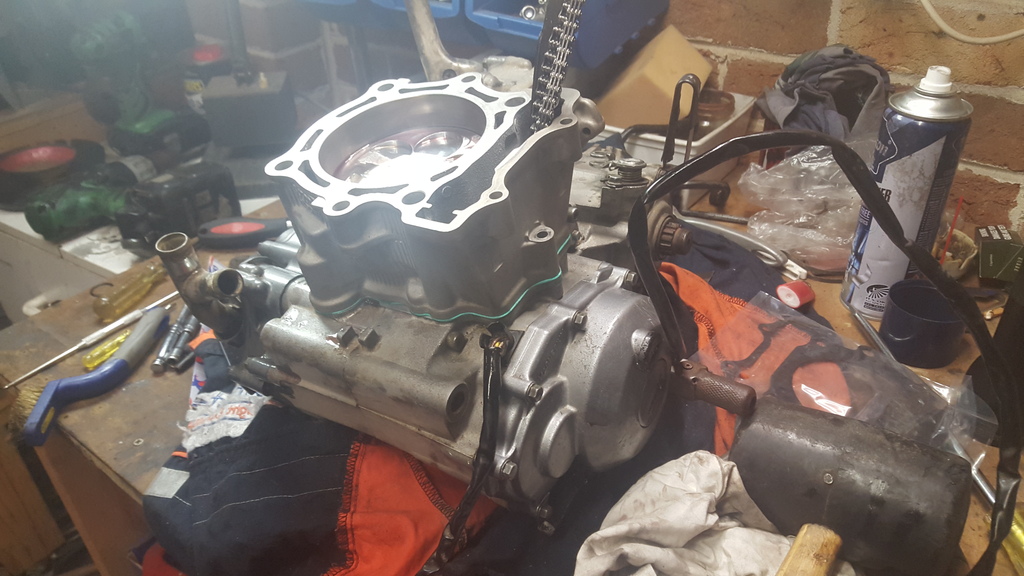
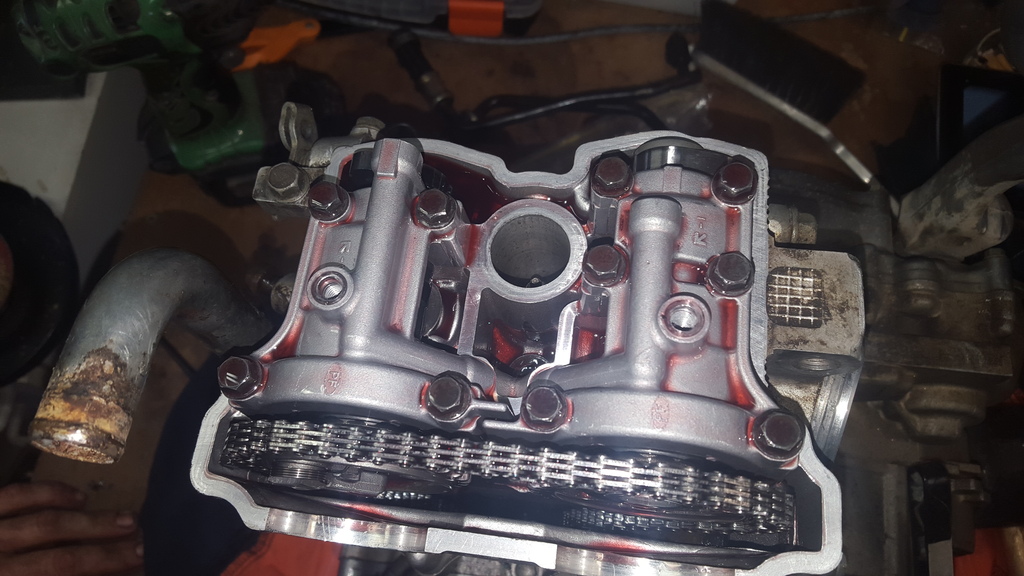
Rebuilt the top end on some strange 450cc rotary for a mate too. Had some funny round rotor that was called a piston and these cam thingys on top or something.
This is just the rust I cut out.
Drivers side hatch area cleaned and quickly sanded. Still have to thouroughly sand again
Passenger side hatch area all sanded and almost ready for paint. Just a quick scuff in the hard to reach areas and this section is ready for some debeer epoxy
Underbody all painted in POR-15
Bike rebuild
Thread Starter
Joined: Jul 2011
Posts: 138
Likes: 0
From: Sydney, Australia
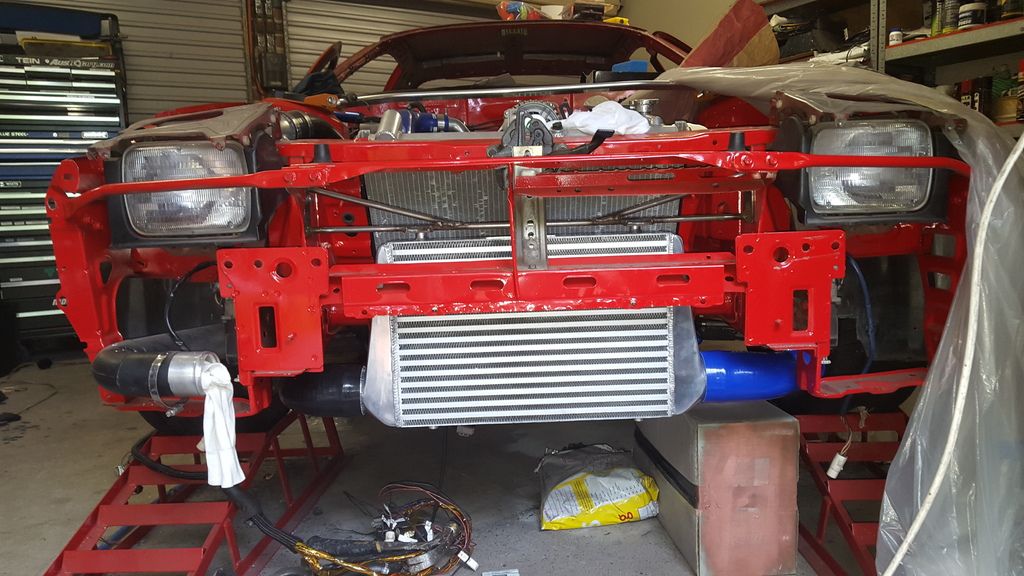
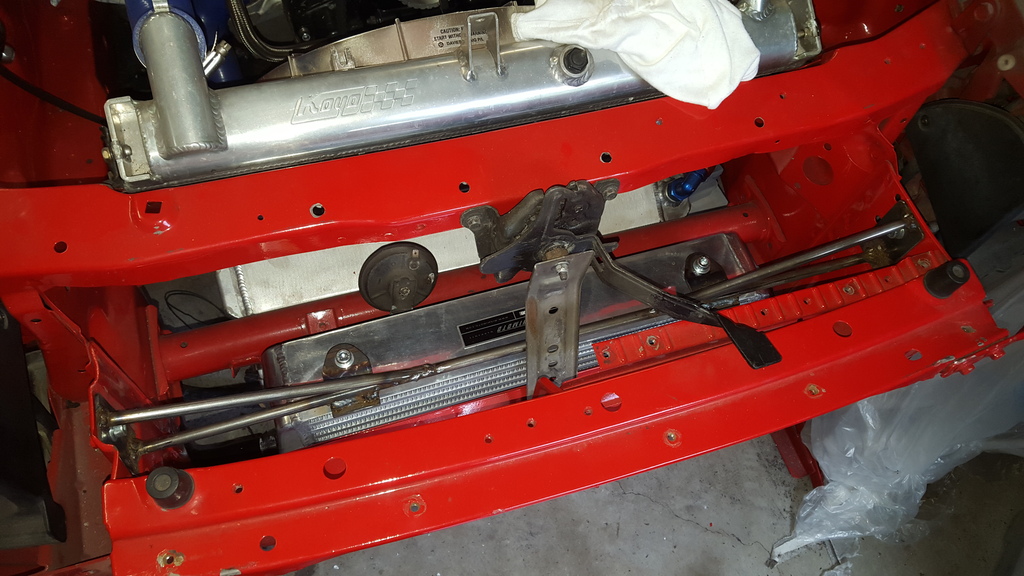
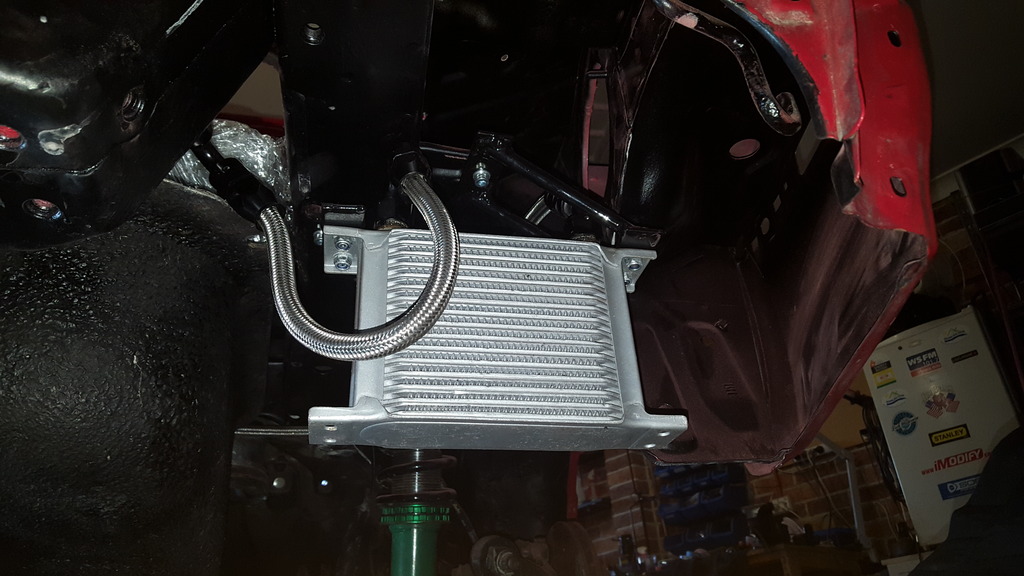
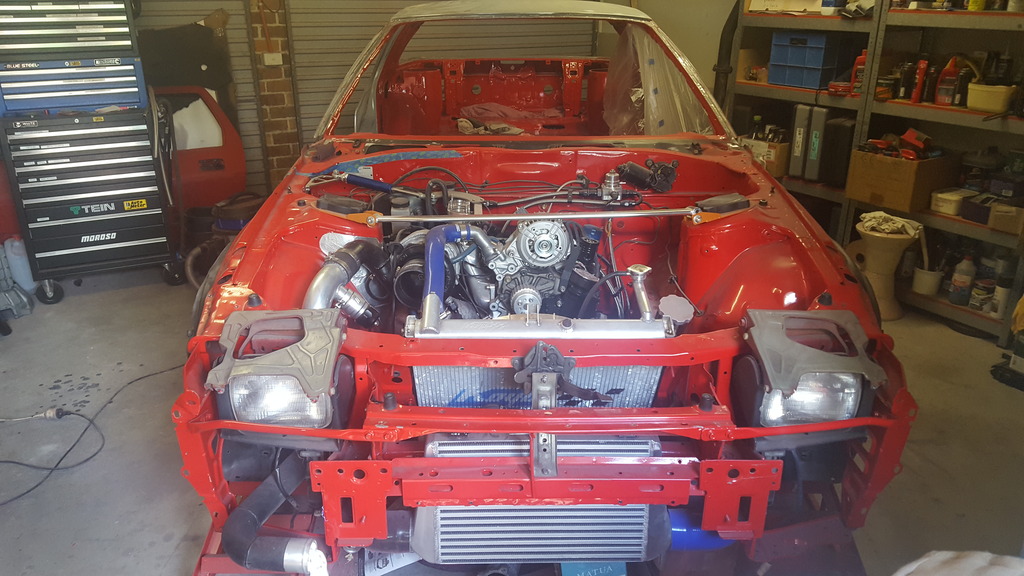
Finished the top intercooler mount. Just need to make 2 smaller brackets to hold the bottom from rocking.
Interior is getting there. Whole rear section is pretty much sanded.
Interior is getting there. Whole rear section is pretty much sanded.
Thread Starter
Joined: Jul 2011
Posts: 138
Likes: 0
From: Sydney, Australia
Well I had planned on painting the interior a few weeks back but it rained so I held off for a bit and then changed my mind. Originally I was just going to quickly spray the seams in epoxy, lay down some seam sealer, sand and scuff the seams again and then do a full coat of epoxy followed by 2 wet on wet coats of colour.
Well after a week of thinking about it. I changed my mind a bit and decided to POR 15 the seams.
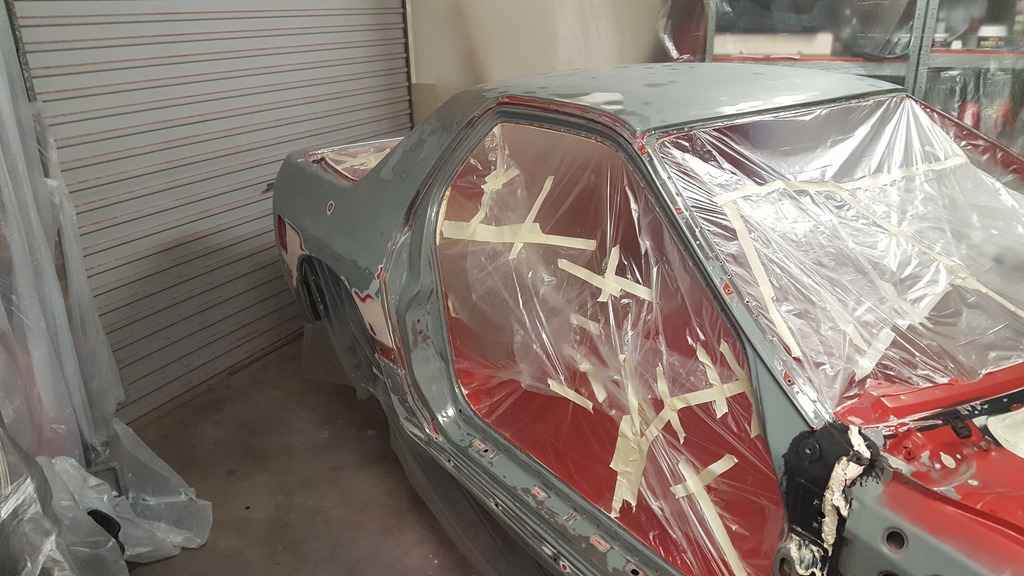
So I stripped the seams bare metal this week, sanded and scuffed, and have now painted all the seams in POR 15.
Hopefully this week I can get the seam sealer on, sand and scuff, and then this weekend I might have a painted interior.
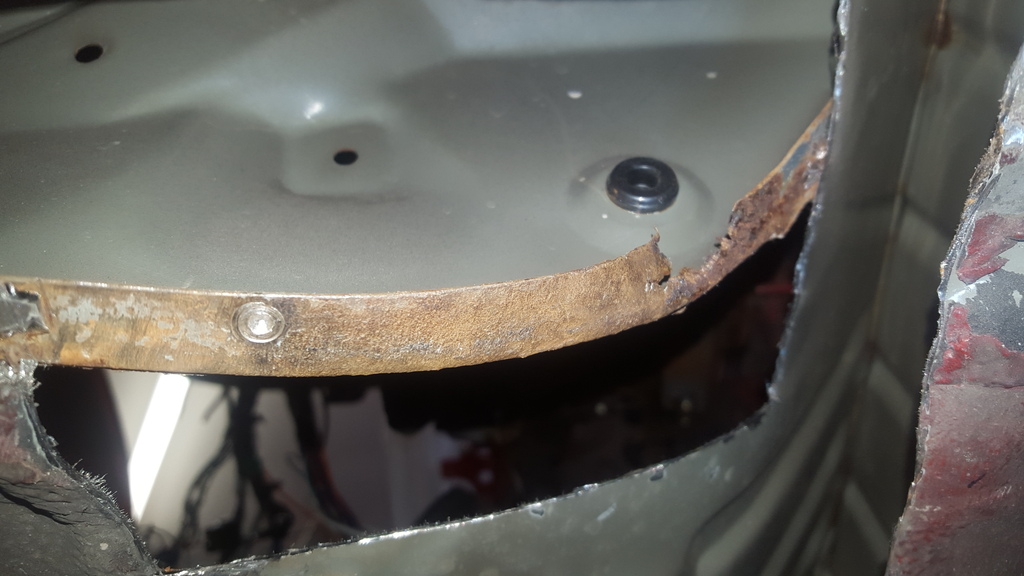
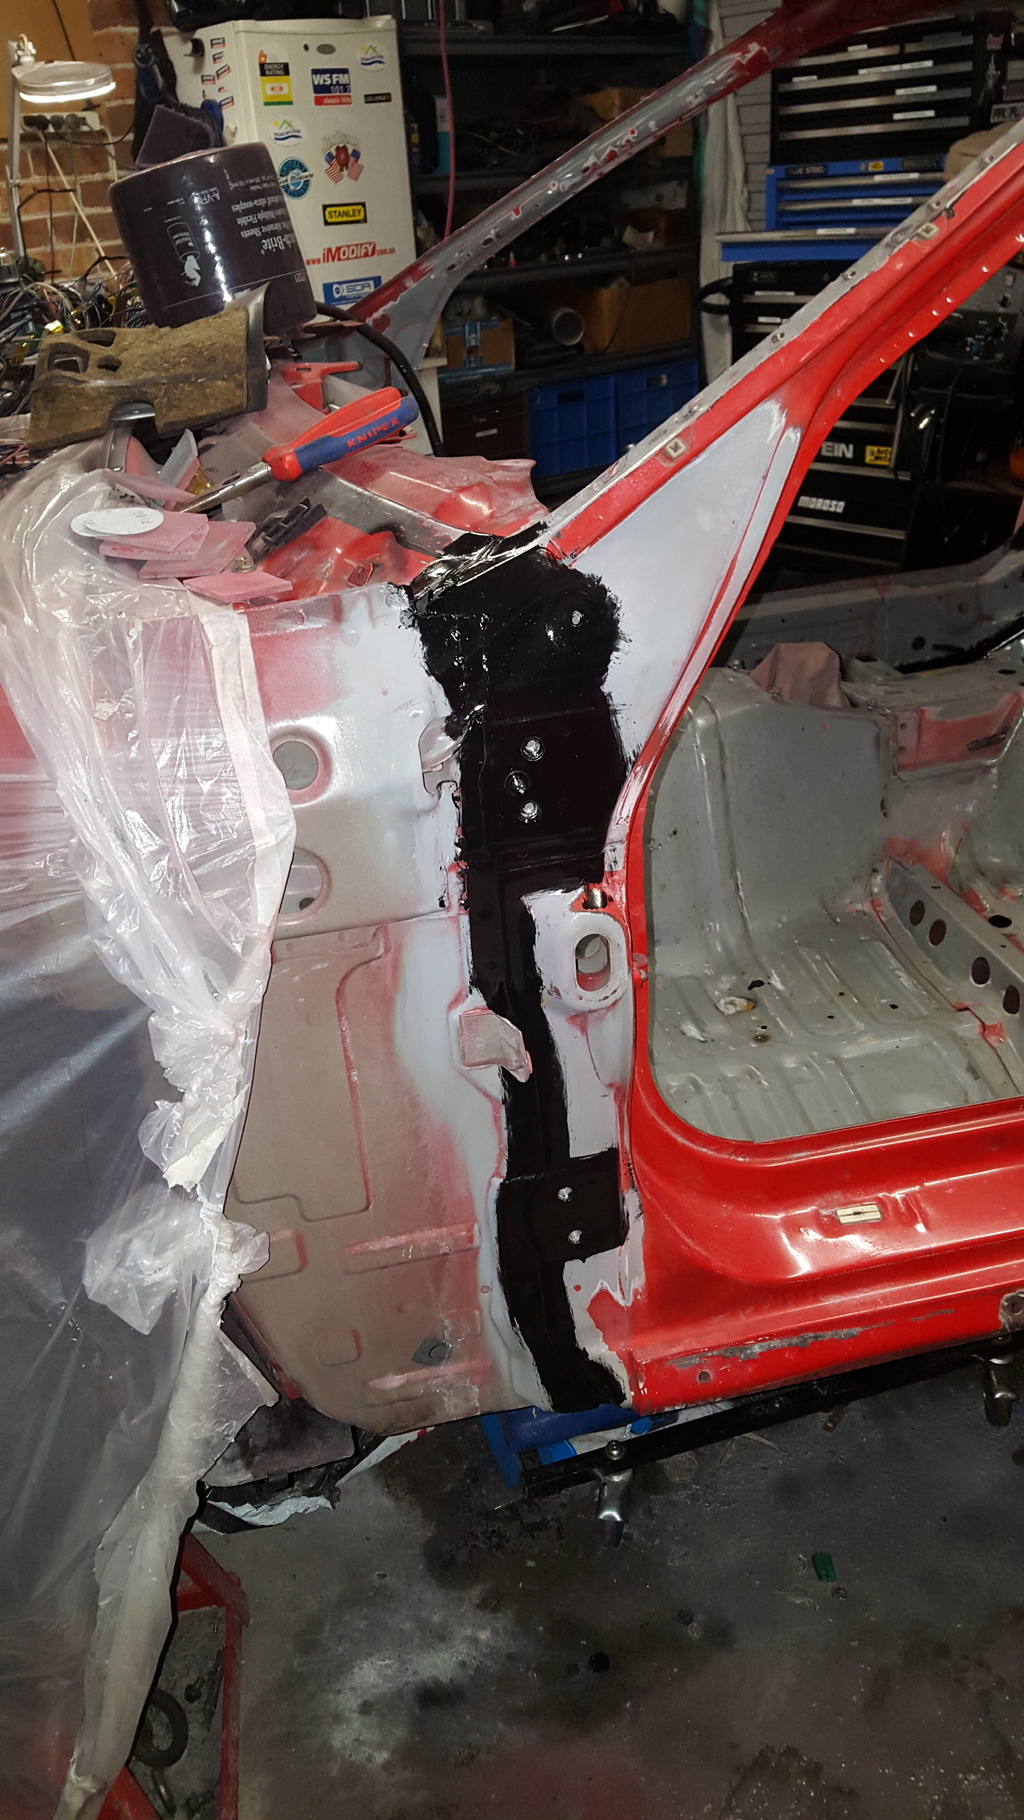
Took the doors off to find some more minor surface rust.
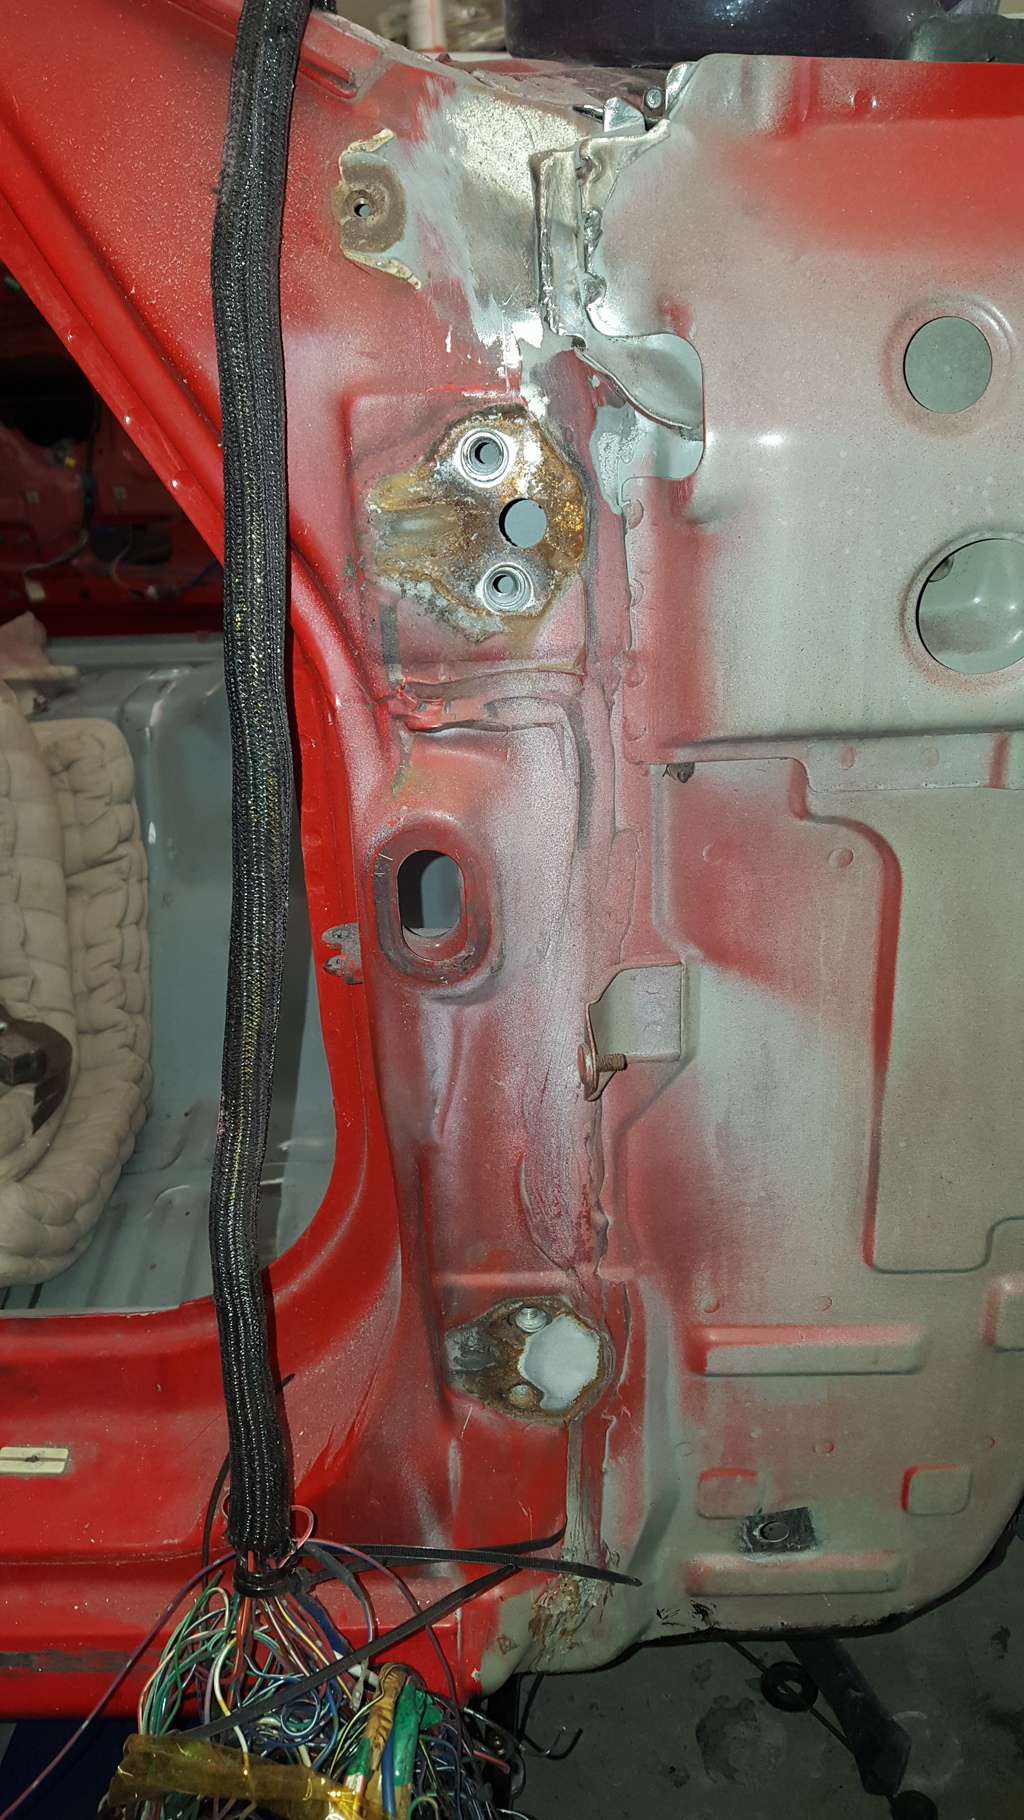
Wire brushed the surface rust and seam sealer off
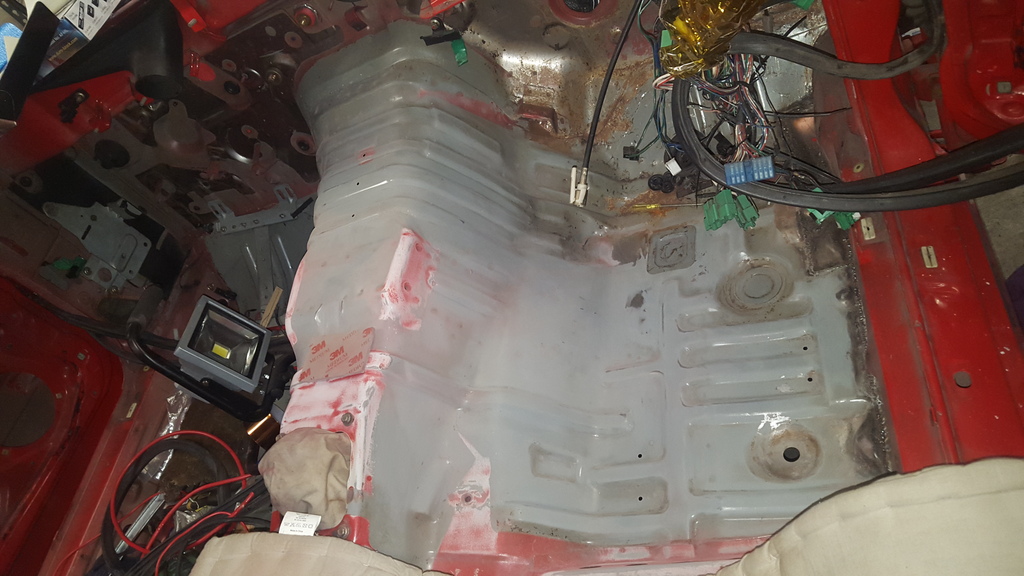
Front half of the interior all ready to go
Rear half all ready to go
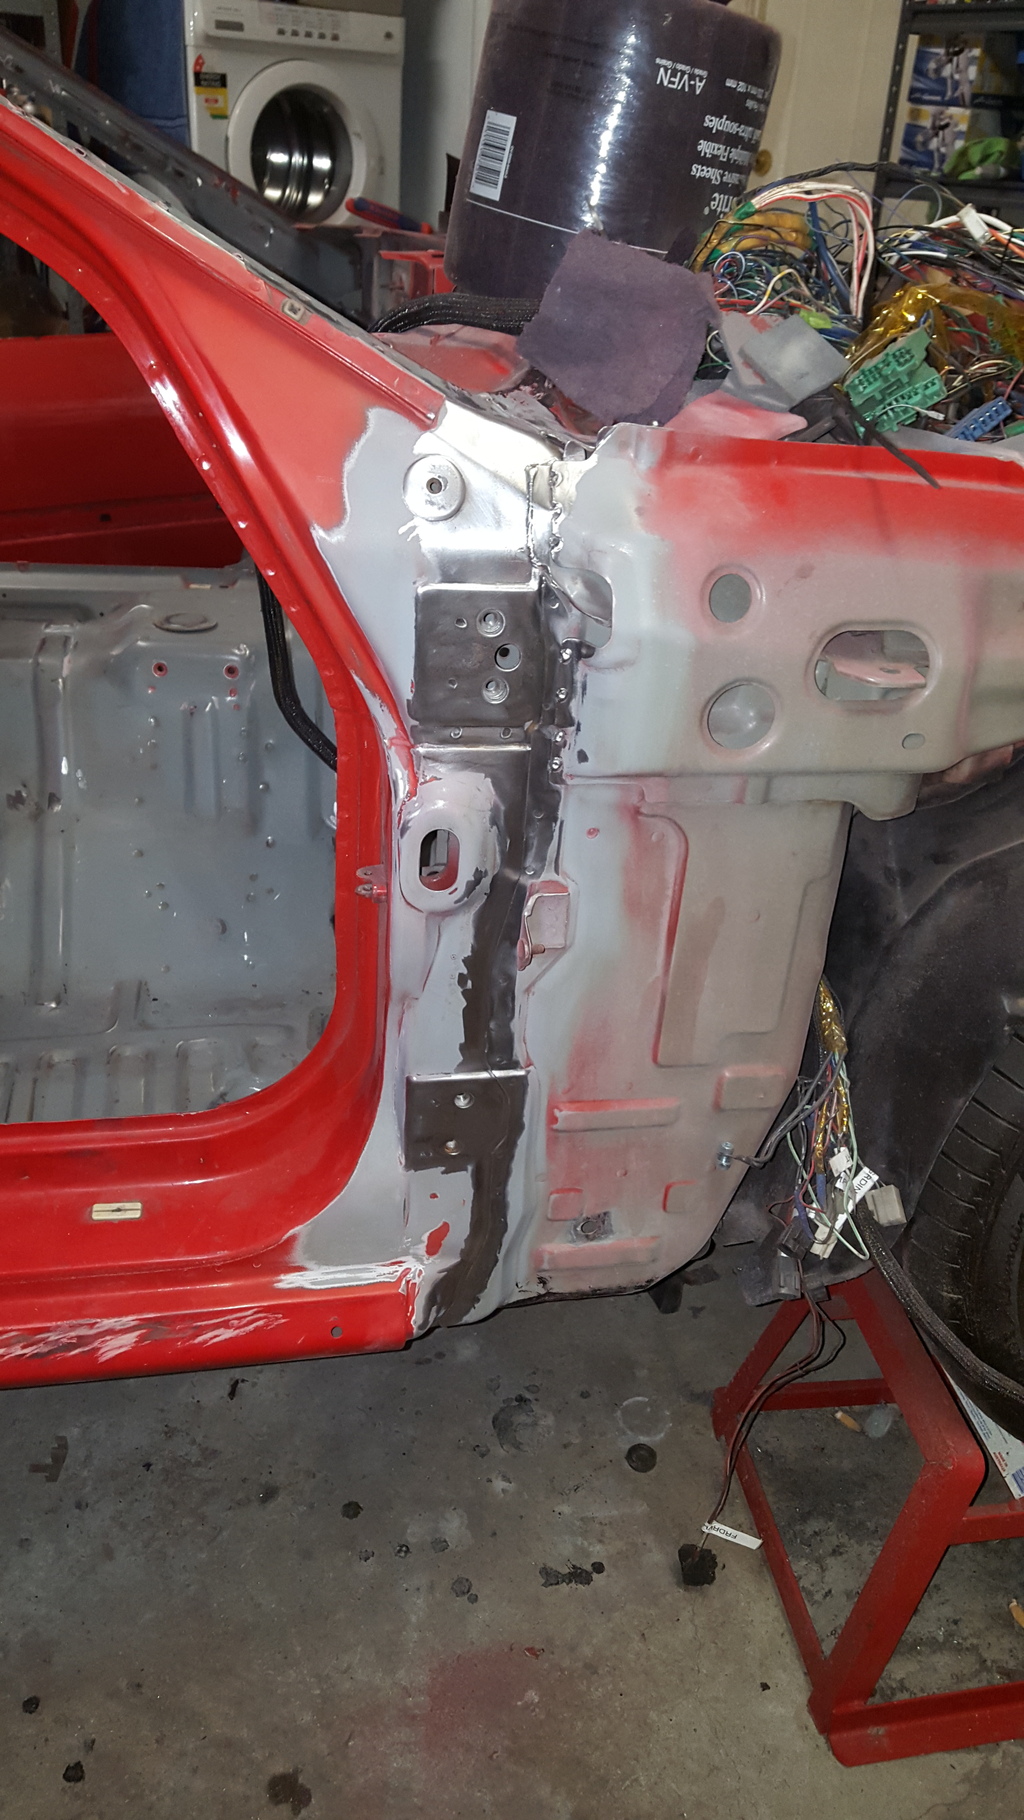
Door hinge/seam seal all painted in POR 15
Front Half of seams all painted in POR 15
Rear Half of seams all painted in POR 15

Well after a week of thinking about it. I changed my mind a bit and decided to POR 15 the seams.
So I stripped the seams bare metal this week, sanded and scuffed, and have now painted all the seams in POR 15.
Hopefully this week I can get the seam sealer on, sand and scuff, and then this weekend I might have a painted interior.
Took the doors off to find some more minor surface rust.
Wire brushed the surface rust and seam sealer off
Front half of the interior all ready to go
Rear half all ready to go
Door hinge/seam seal all painted in POR 15
Front Half of seams all painted in POR 15
Rear Half of seams all painted in POR 15
Thread Starter
Joined: Jul 2011
Posts: 138
Likes: 0
From: Sydney, Australia
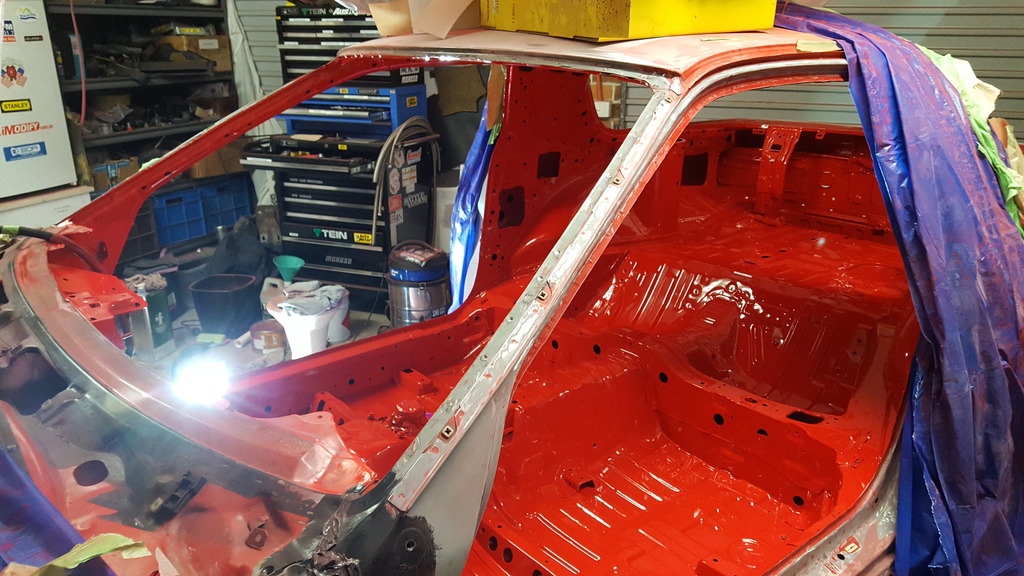
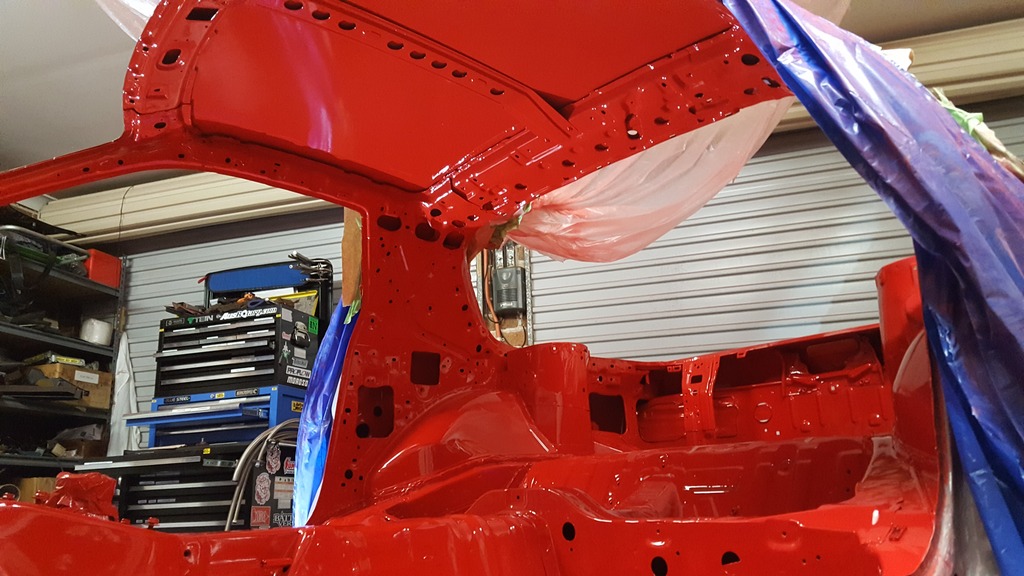
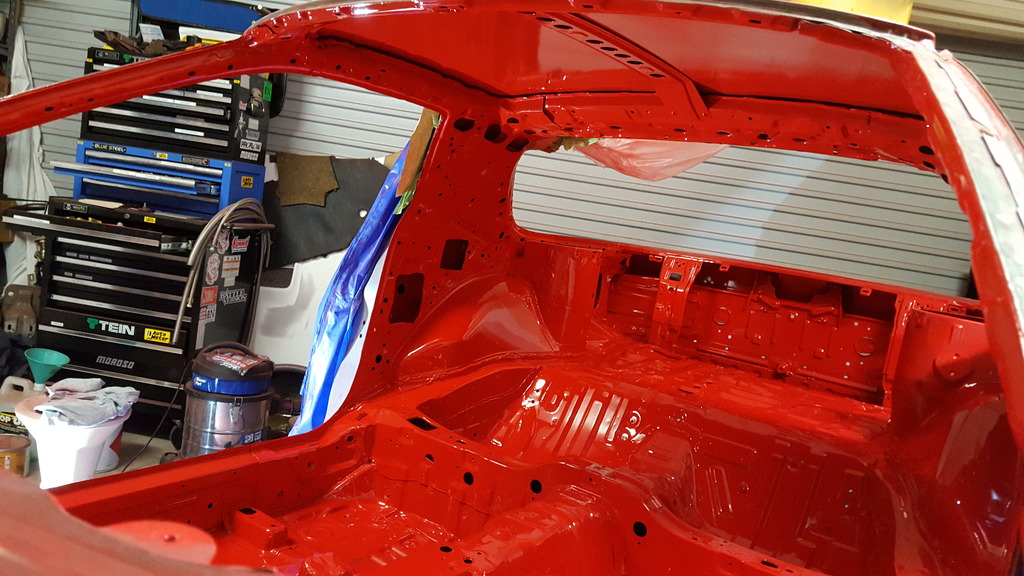
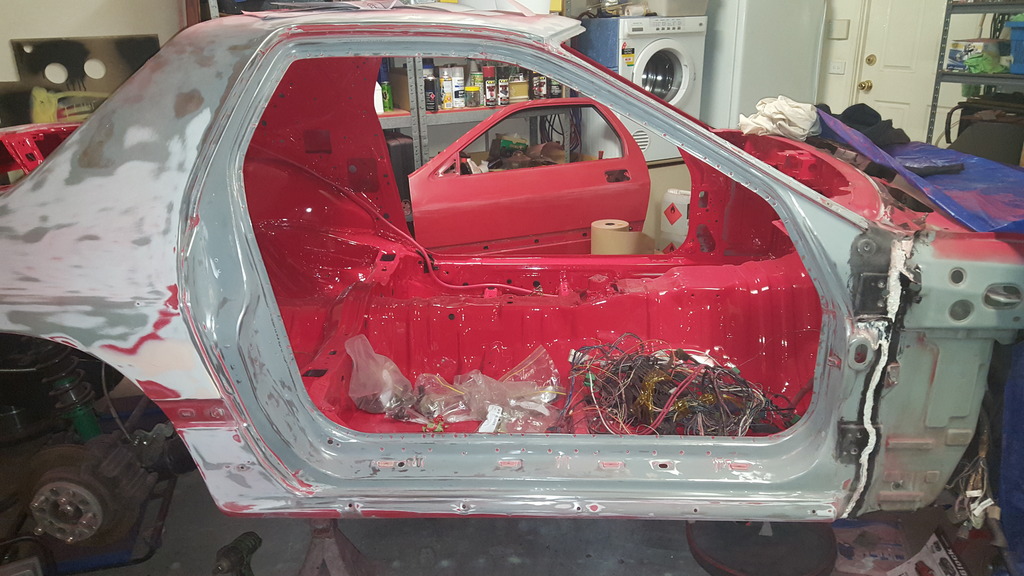
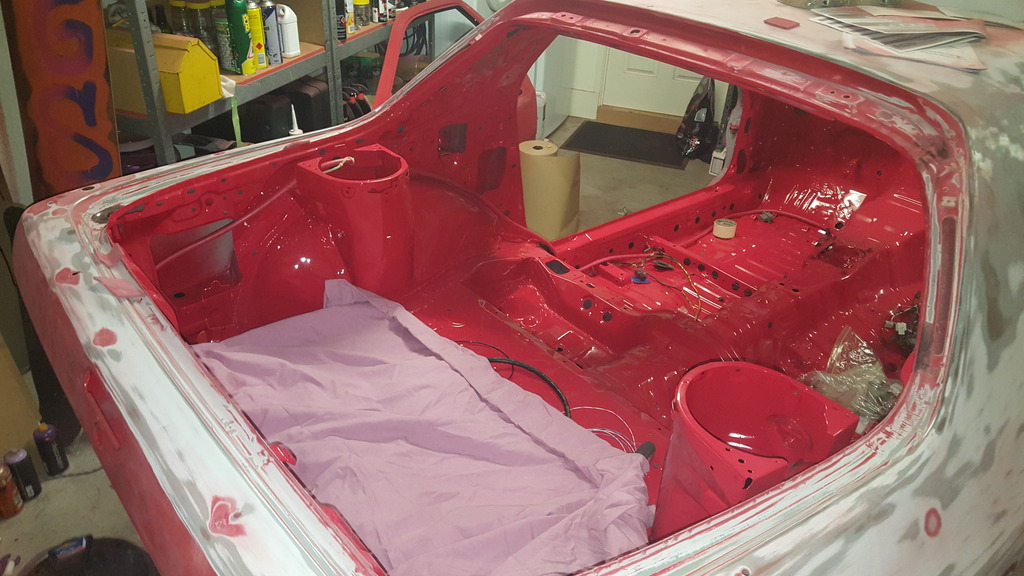
Interior is finally all painted. I stuffed up a bit and didnt clean the shed the best, so had a bit of dust settle on the paint but its the interior so im not fussed. Just going to have to clean a lot more before i do the body


Thread Starter
Joined: Jul 2011
Posts: 138
Likes: 0
From: Sydney, Australia
Cheers dude. How did you go for a gearbox all sorted yet?
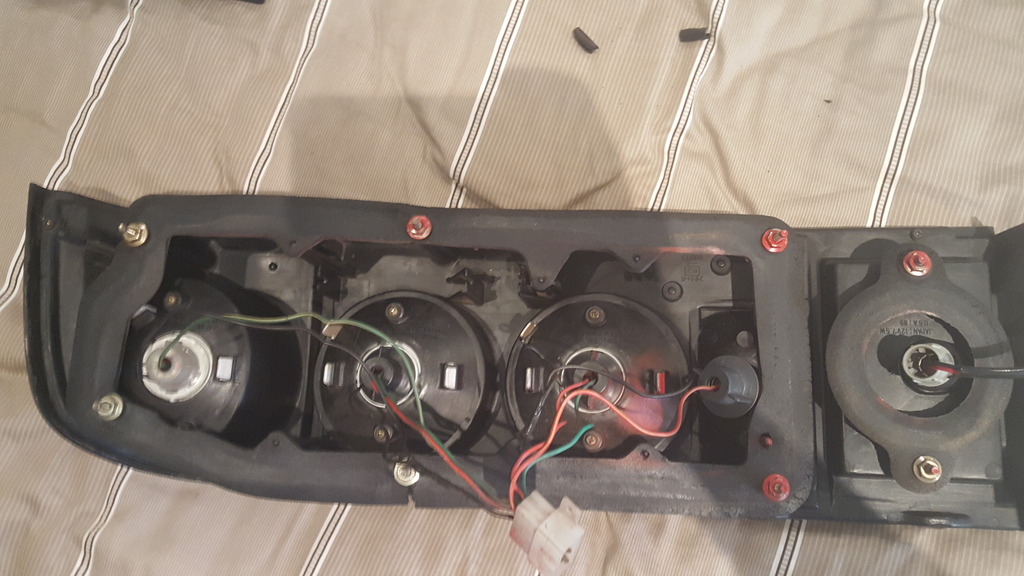
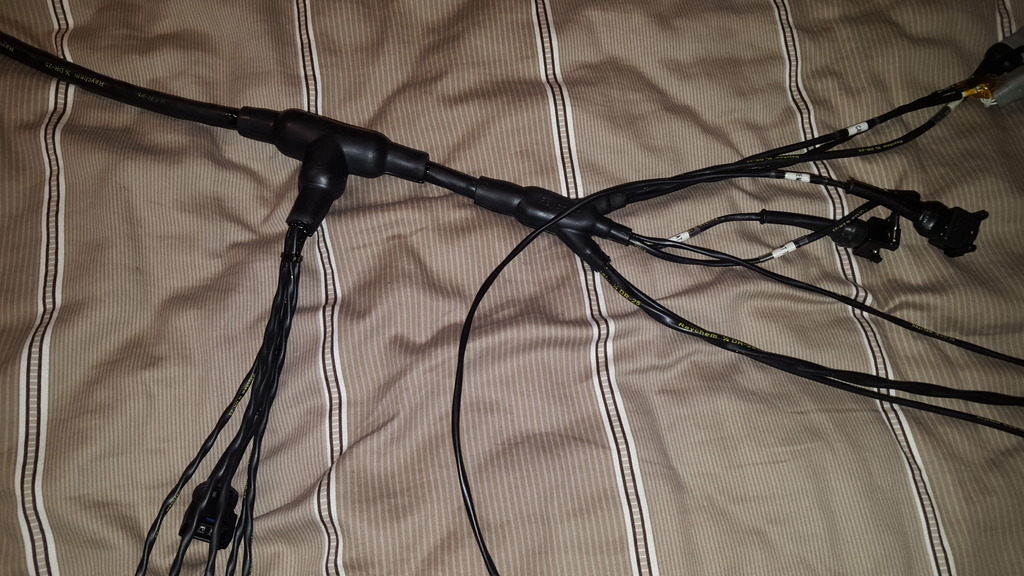
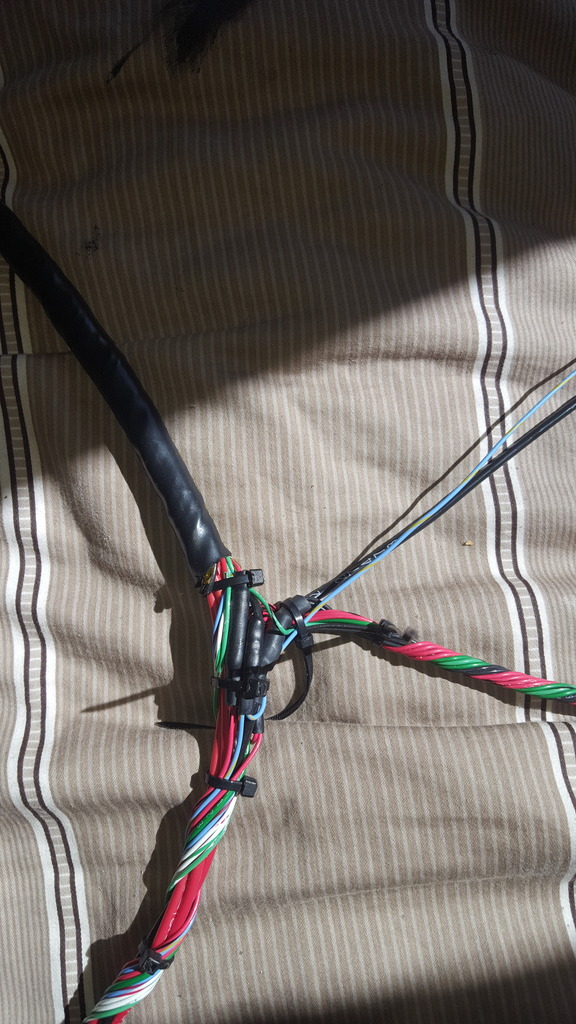
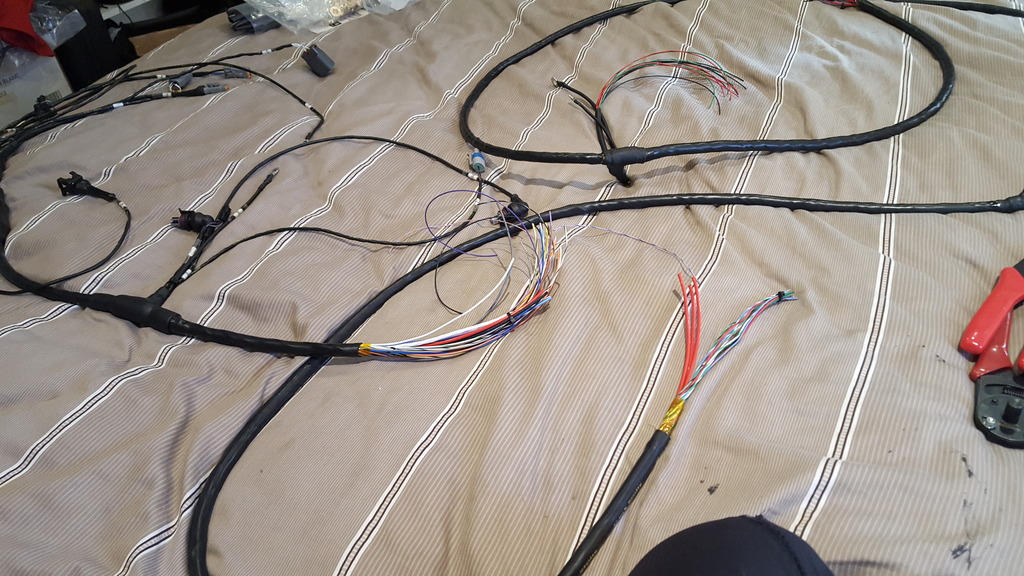
Started building the rear harness now the inside of the car is all nice and shiney! Got one tail light rewired so I can work out plugs and wire arrangement for the off shoot from the main section of harness.
Before
After

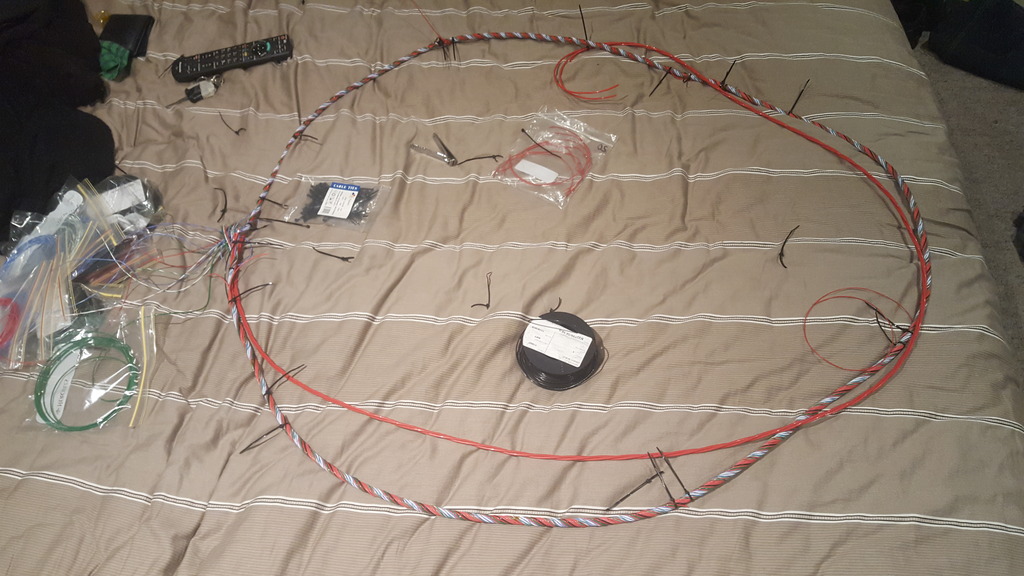
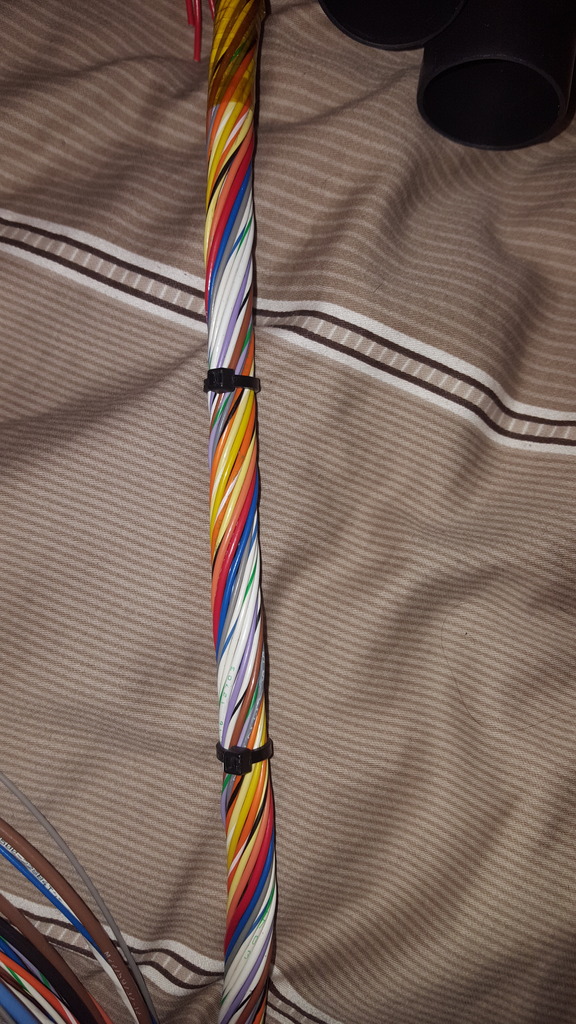
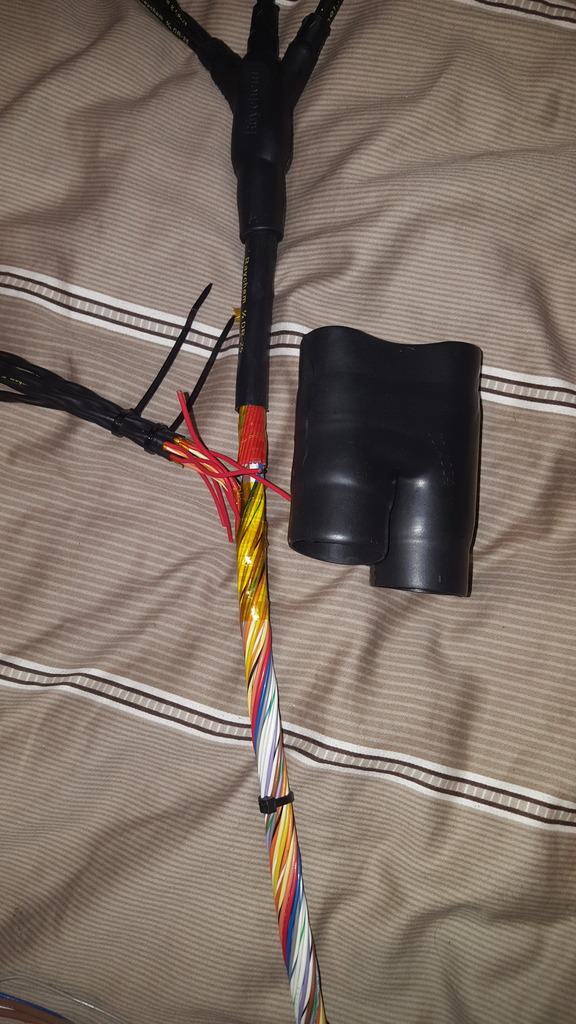
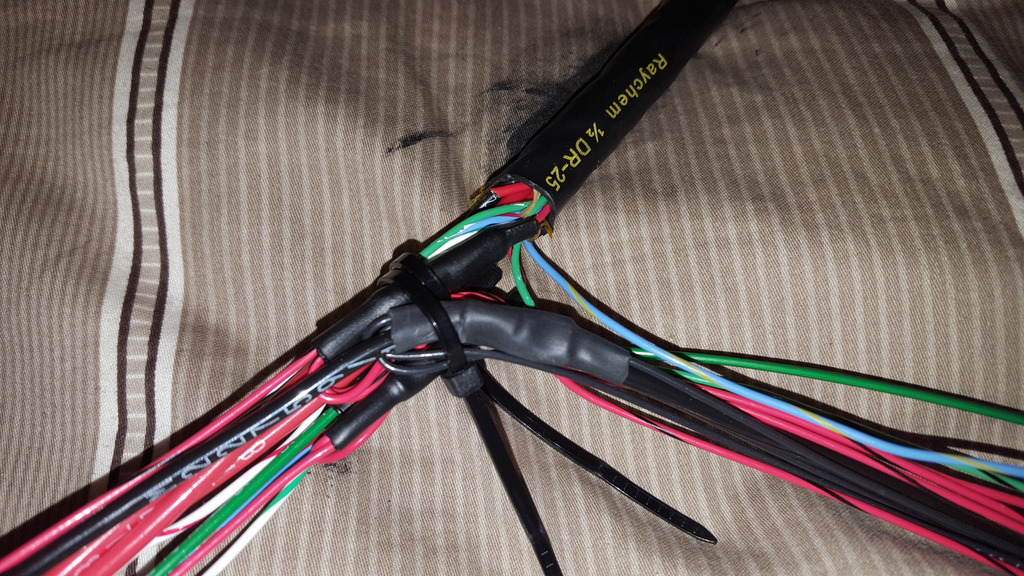
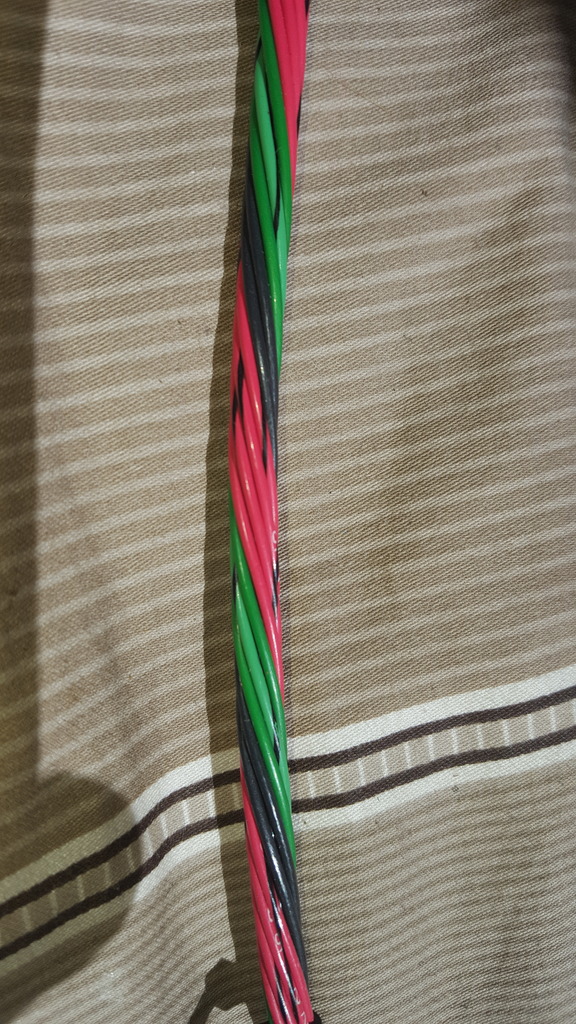
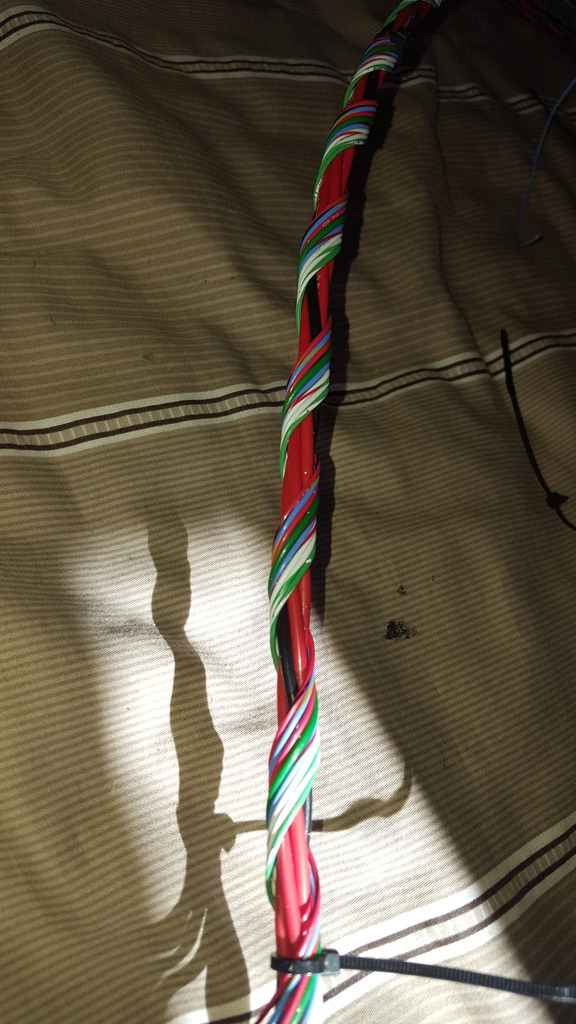
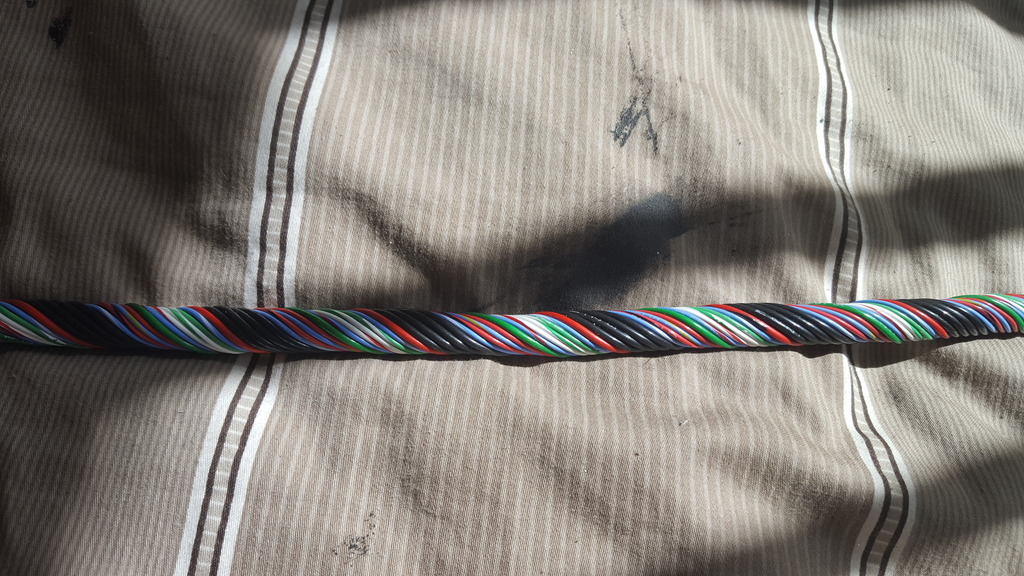
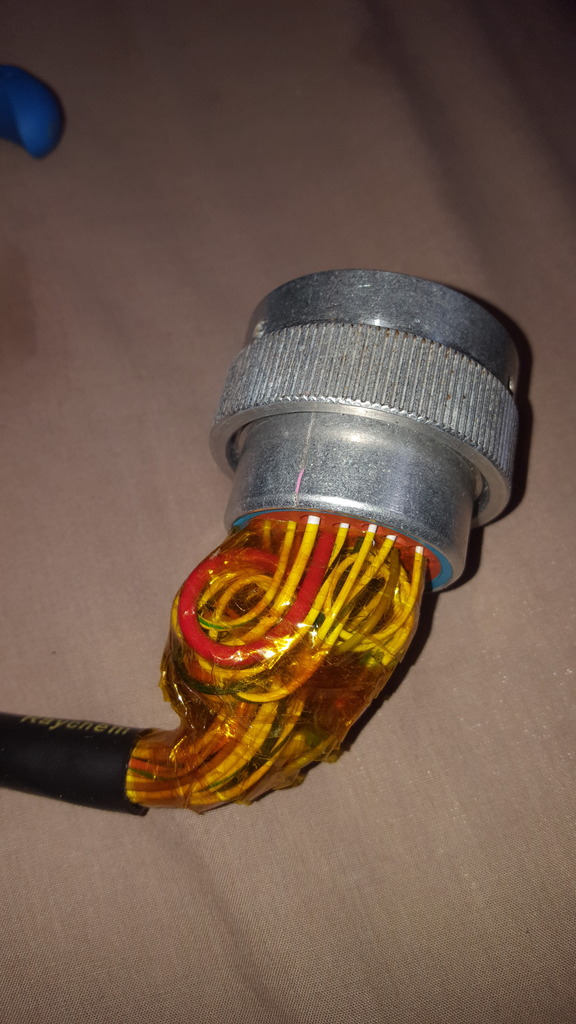
Rear looms main 3400mm section twisted!
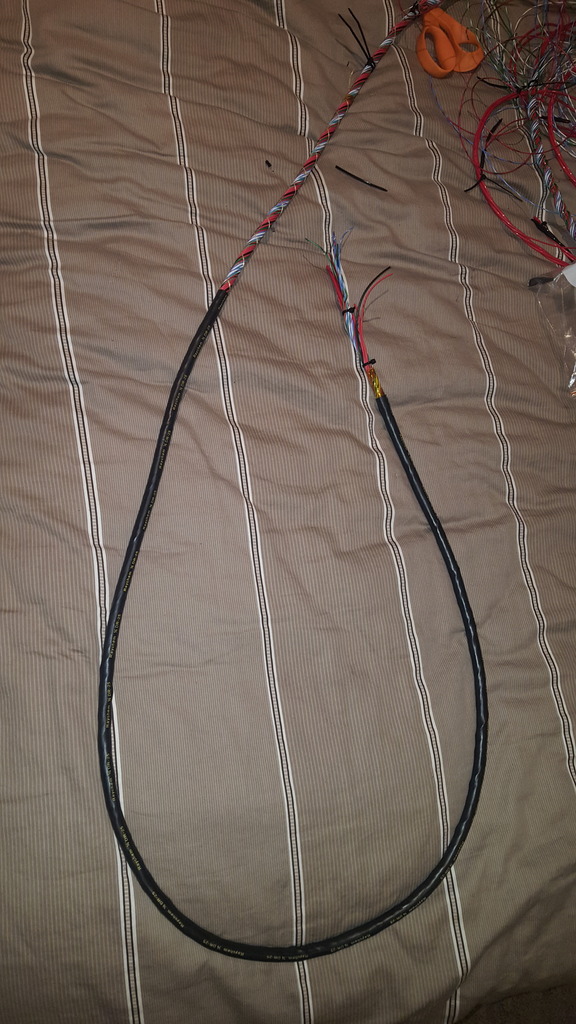
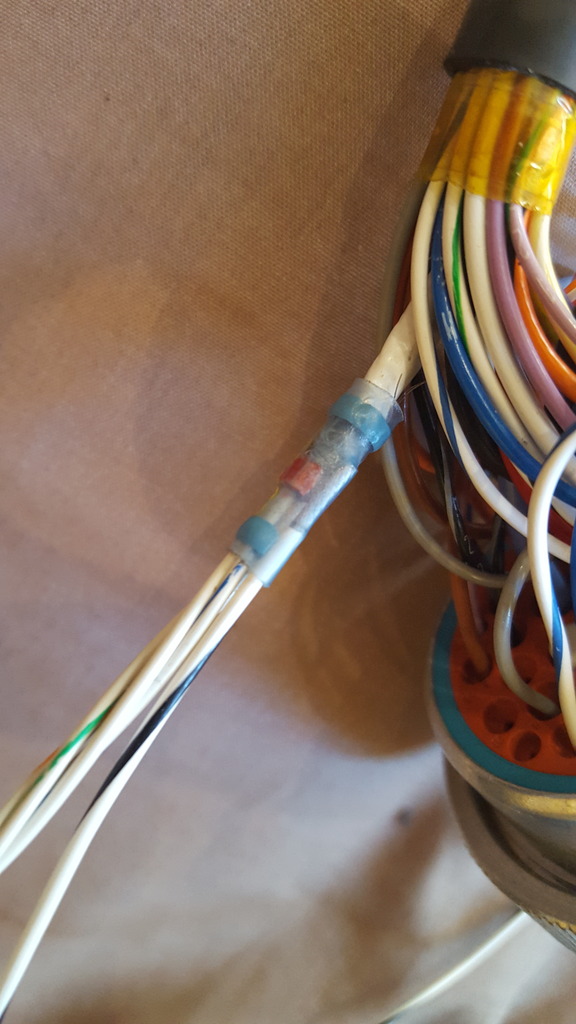
Heat shrinked up to the first breakout.
Started building the rear harness now the inside of the car is all nice and shiney! Got one tail light rewired so I can work out plugs and wire arrangement for the off shoot from the main section of harness.
Before
After
Rear looms main 3400mm section twisted!
Heat shrinked up to the first breakout.
Thread Starter
Joined: Jul 2011
Posts: 138
Likes: 0
From: Sydney, Australia
Thanks Ian. Have you got a build thread?
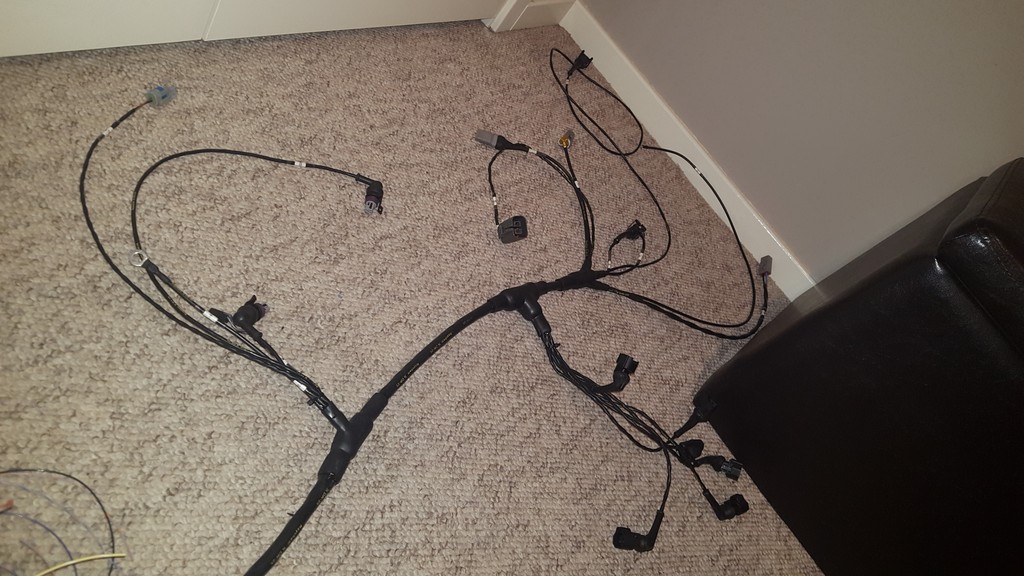
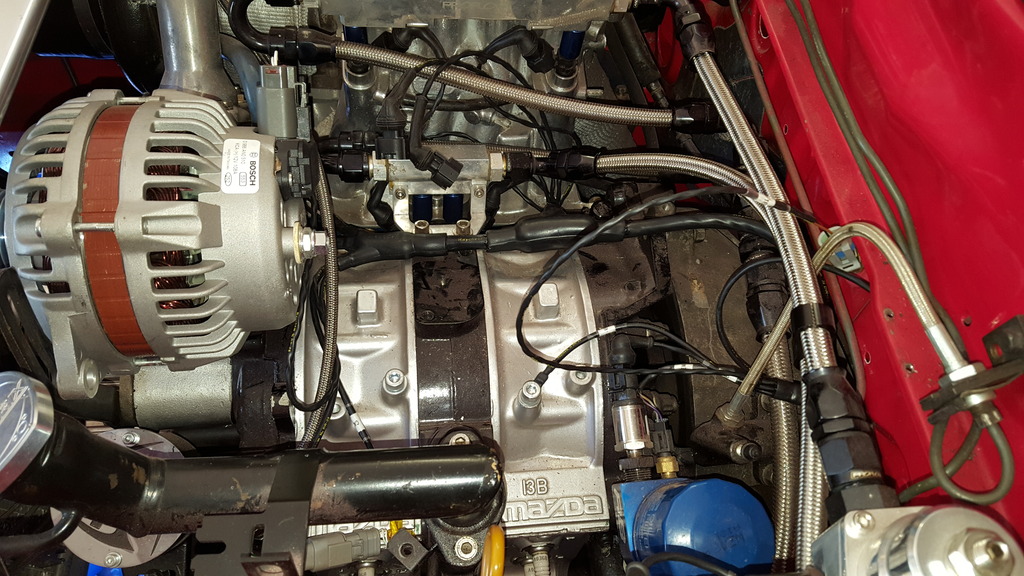
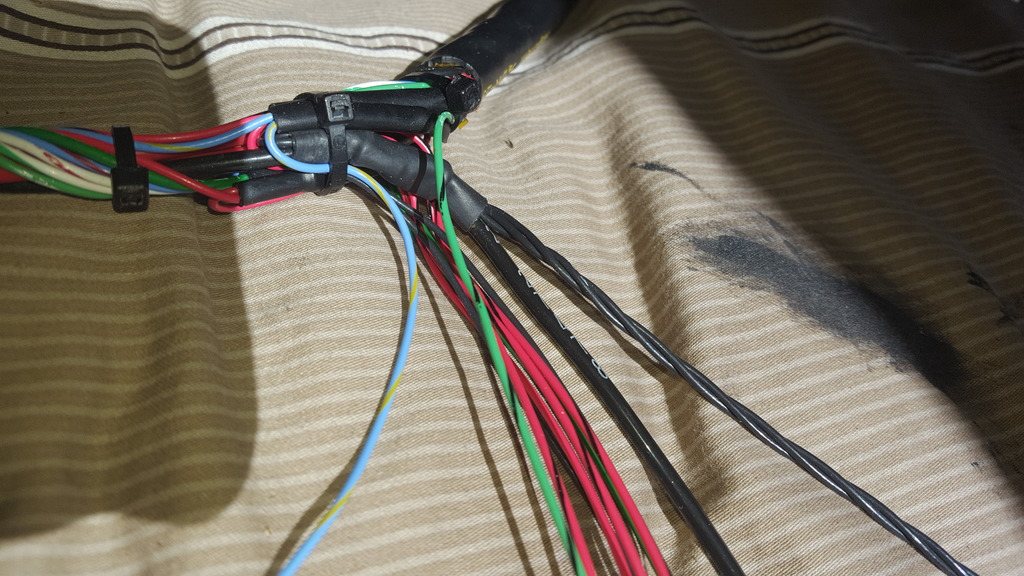
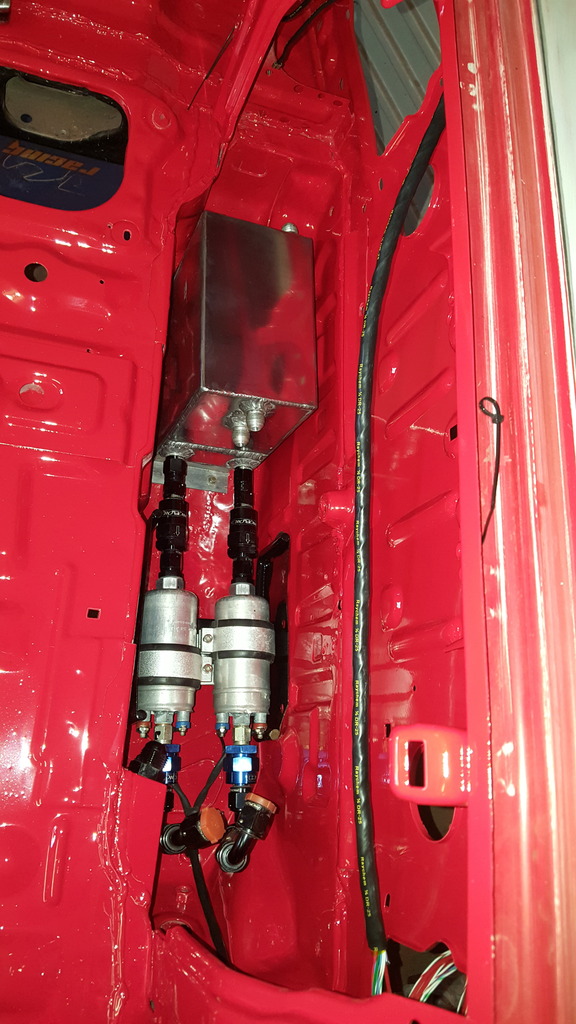
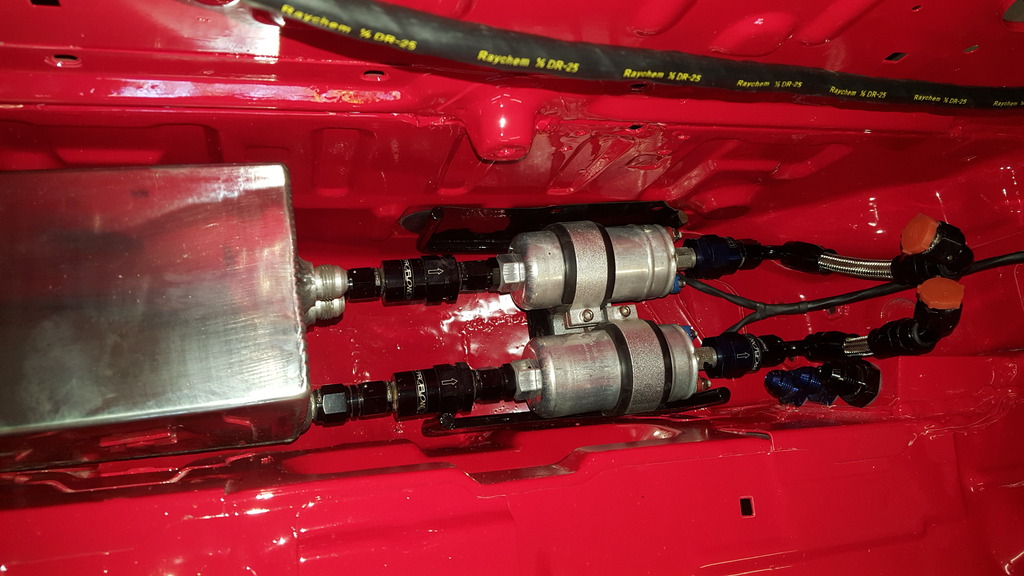
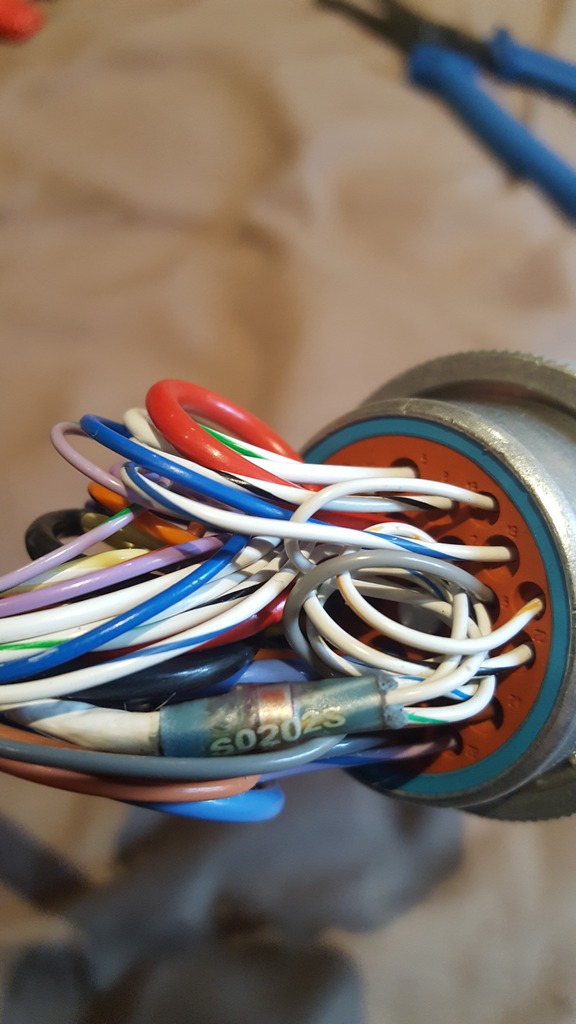
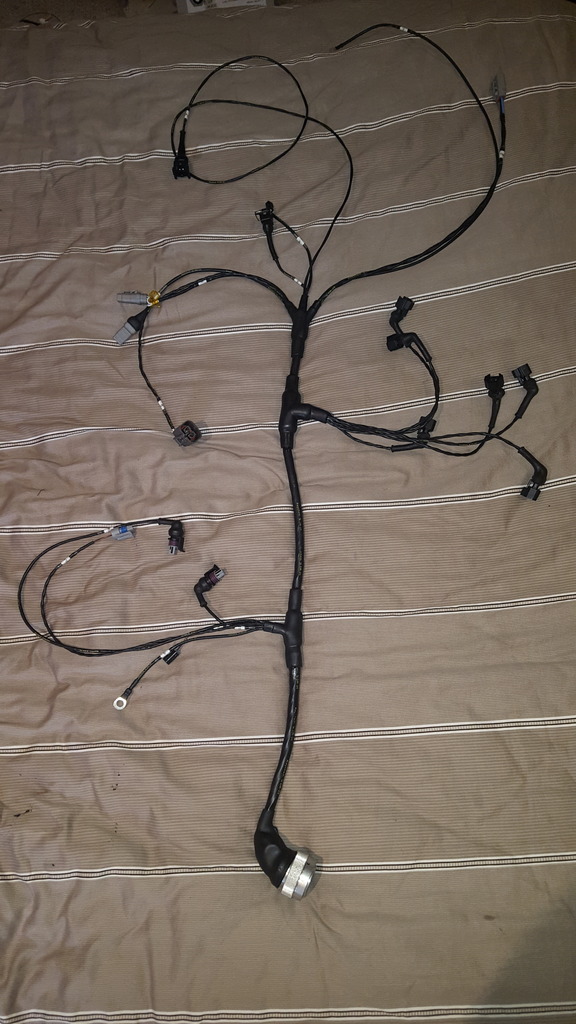
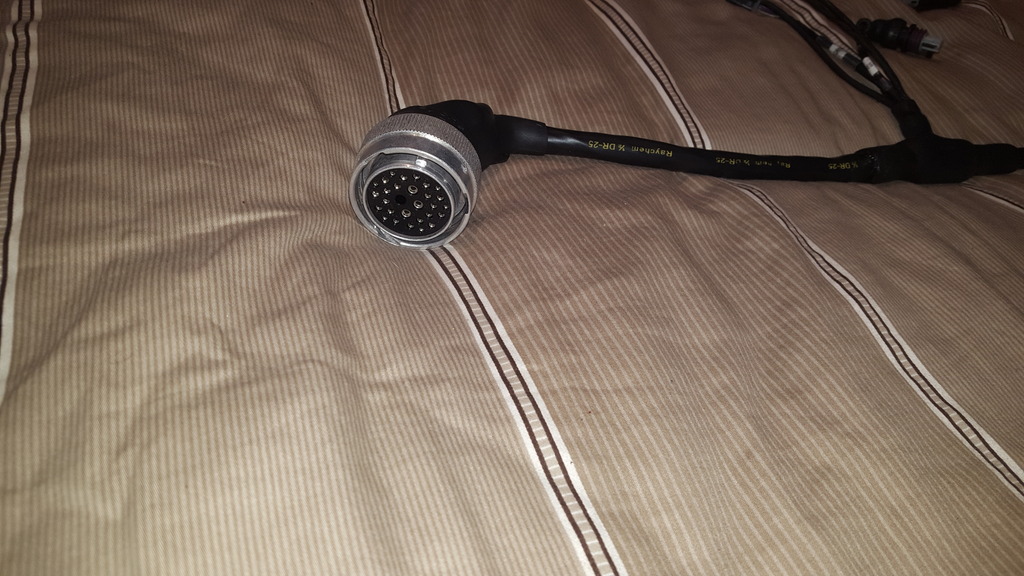
Added the injector breakout to the engine harness. Only one breakout left on the engine harness and I can pin out the firewall plug!
Rear body loom is waiting on some heat shrink to be delivered as I ran out of DR-25 in � inch.
Planning to try and get the door jams and body in epoxy primer this weekend.
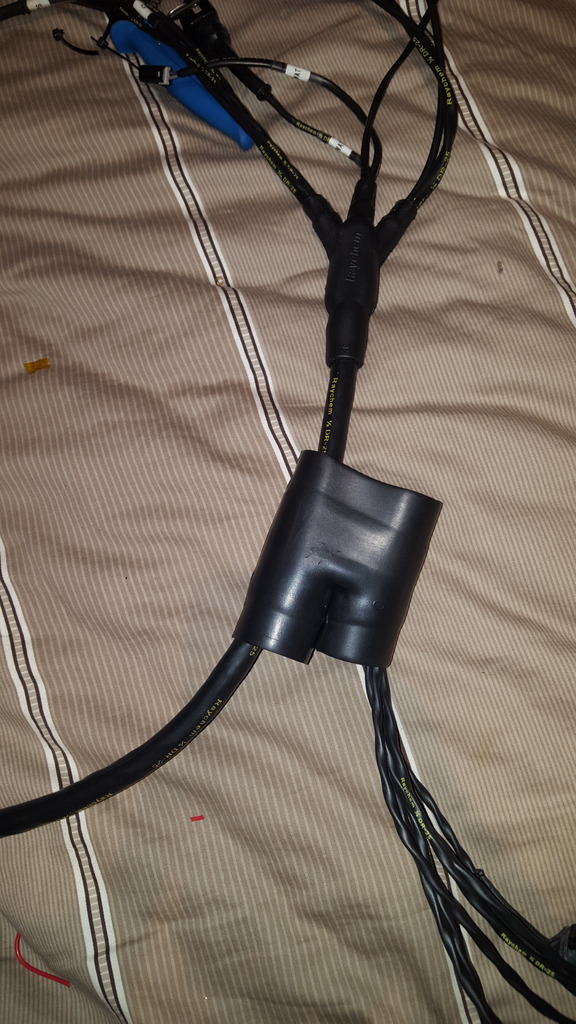
Thread Starter
Joined: Jul 2011
Posts: 138
Likes: 0
From: Sydney, Australia
Moulded heat shrink boots.
https://prowireusa.com/c-39-301a.aspx
https://prowireusa.com/c-39-301a.aspx
Thread Starter
Joined: Jul 2011
Posts: 138
Likes: 0
From: Sydney, Australia
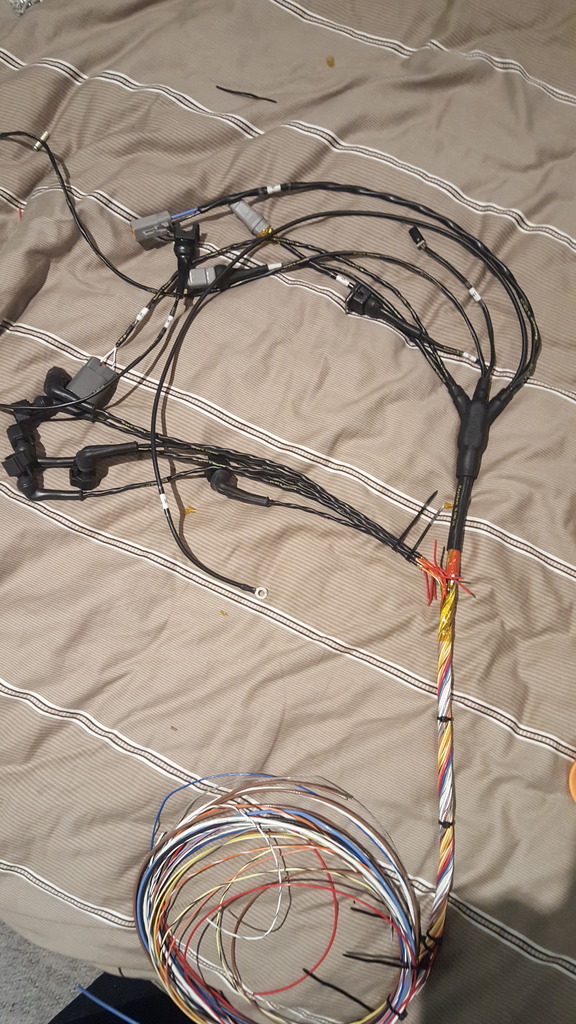
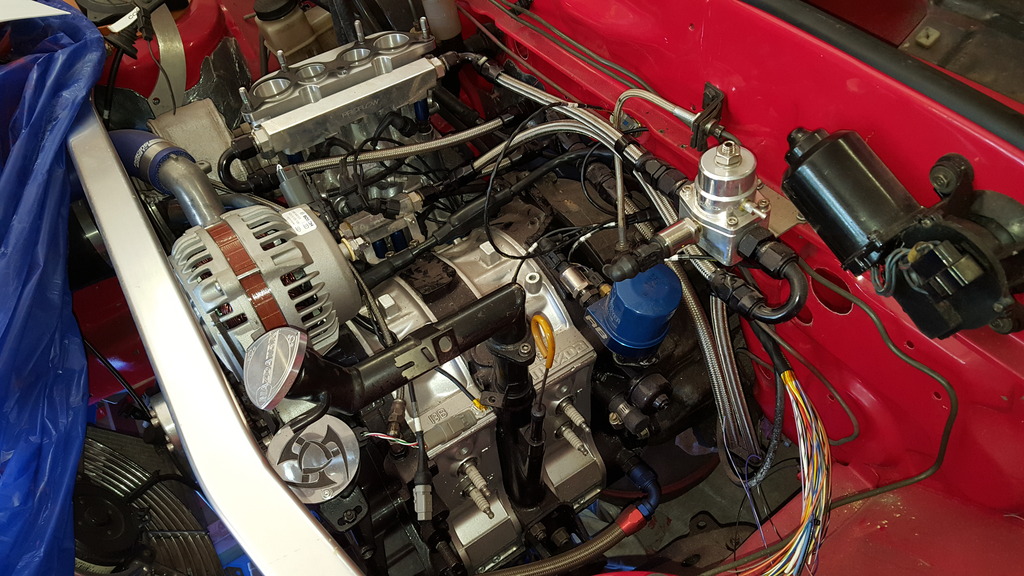
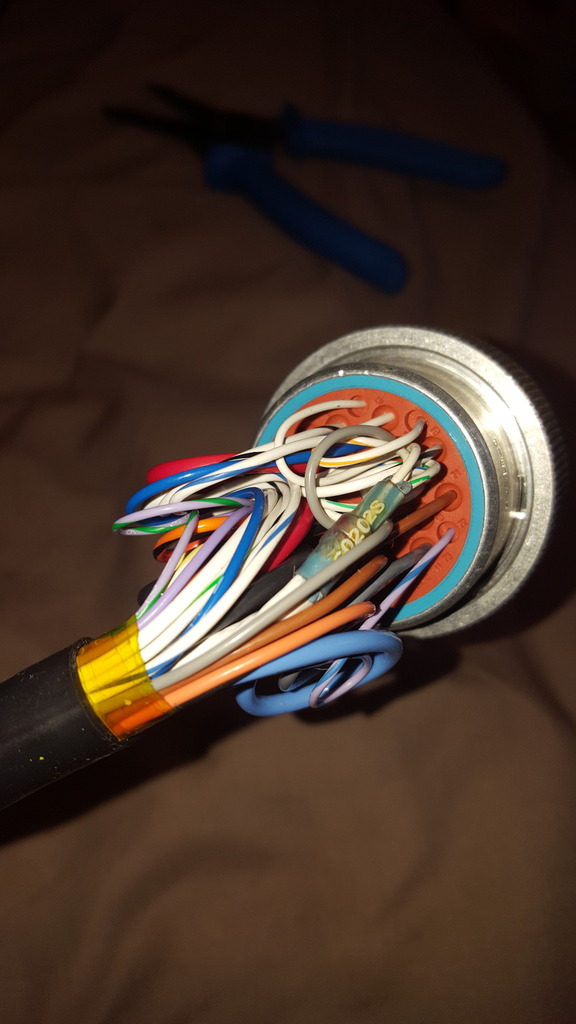
Final breakout has been added to the engine harness just have to pin out the main firewall plug and do some final testing.
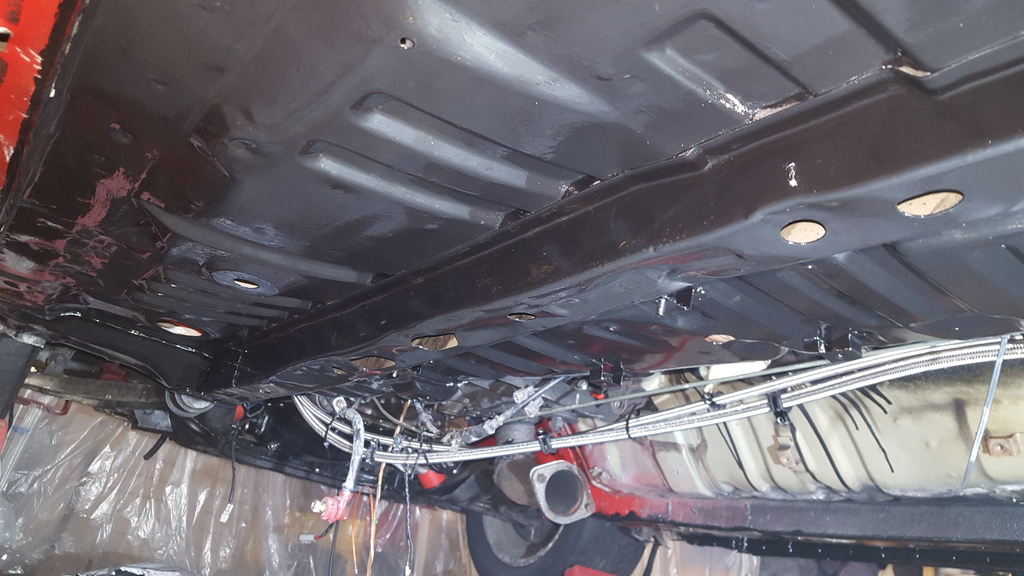
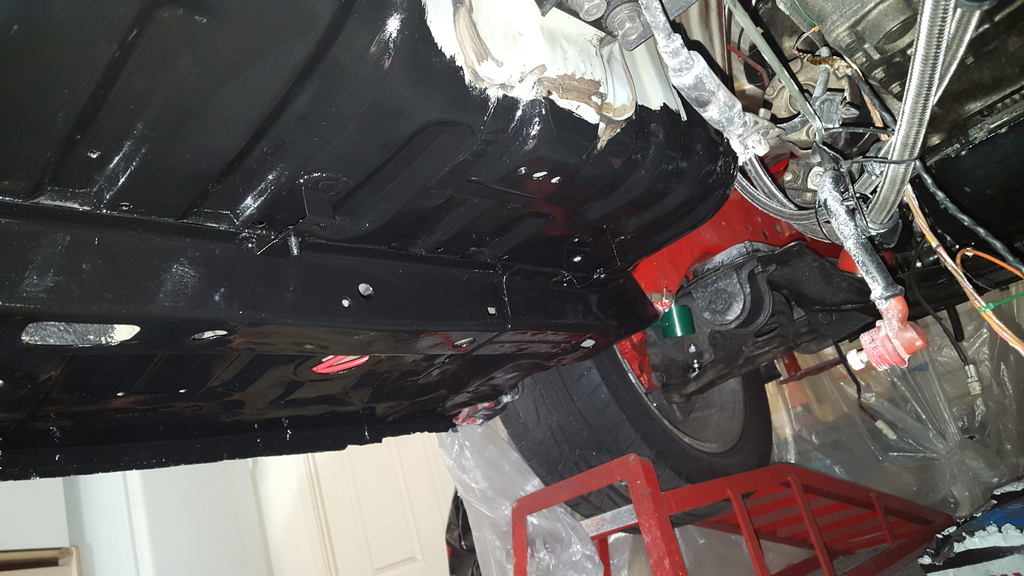
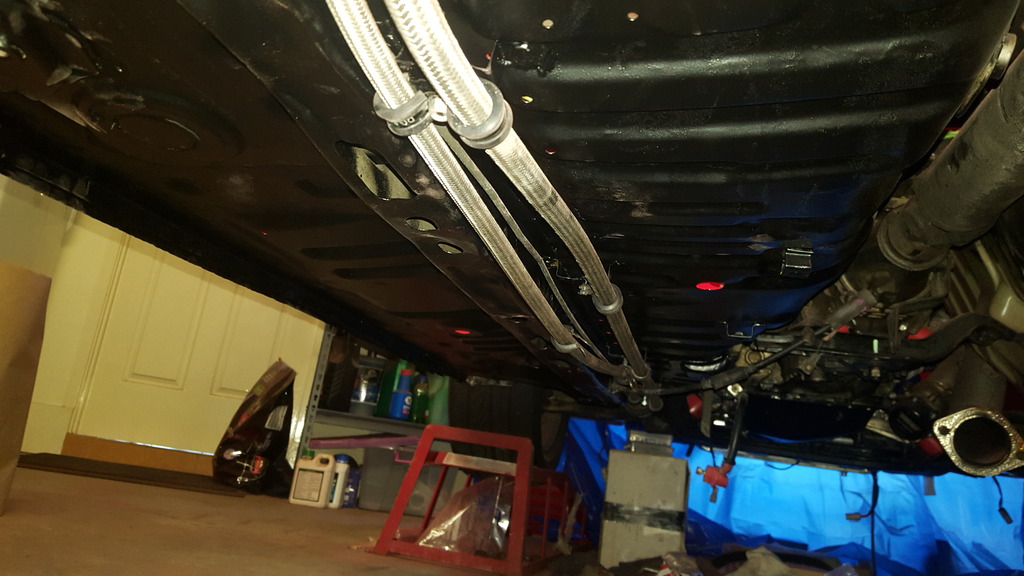
Also painted the passenger side underbody in POR 15 Underbody paint.
Also painted the passenger side underbody in POR 15 Underbody paint.
Thread Starter
Joined: Jul 2011
Posts: 138
Likes: 0
From: Sydney, Australia
Test fitted the engine harness and double checked I had continuity on all circuits.
You may notice a few extra plugs not connected. These are all planned mods for the future.
I have 6 injectors wired in but im only using 4 at the moment
I have the alternator wired so that I can run side mount or a top mount alternator, depending on water pump.
I also have the electric water pump sensor and the actual power cicuit for the electiric water pump wired in.
Finished the driver�s tail light break out on the rear body harness. Just need to wait for boots and then I can do the passenger side.
Thread Starter
Joined: Jul 2011
Posts: 138
Likes: 0
From: Sydney, Australia
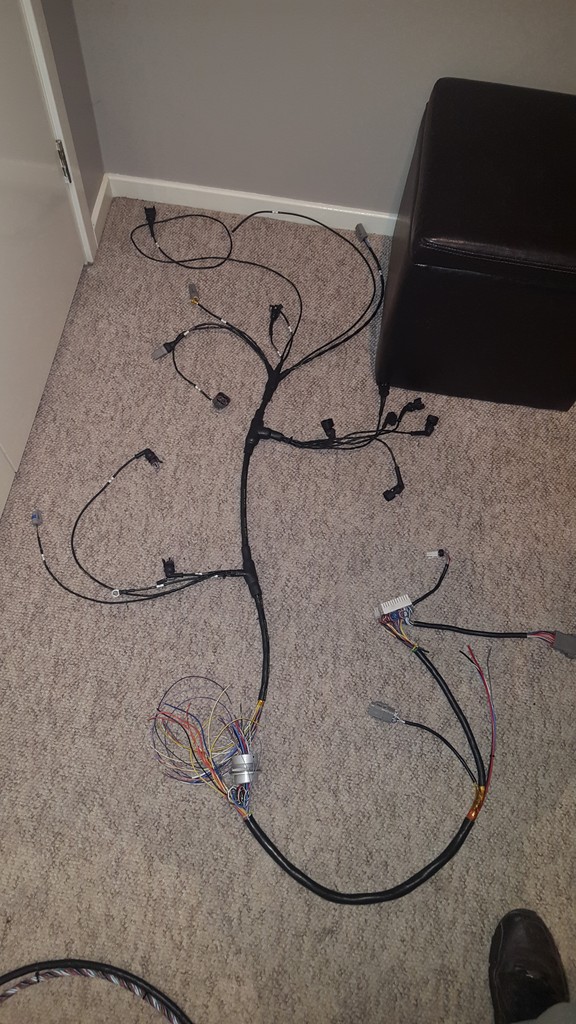
Got the engine harness finished off over the weekend, firewall plug is all pinned out heat shrink boot is installed and tested it all works and lengths were correct. I left the shielded CAS wire until last so that I could neatly add in the splice to the outer braided shield so that I can have the earth continue through the plug.
Also sanded the door jams, and front and rear window jams as well so hopefully I can epoxy prime all these by the weekend
Also sanded the door jams, and front and rear window jams as well so hopefully I can epoxy prime all these by the weekend

Thread Starter
Joined: Jul 2011
Posts: 138
Likes: 0
From: Sydney, Australia
Thanks mate.
Started drawing up the front body loom and all the relays and fuses. All drawings are still not finalised or cleaned up much but there readable to me.
Still unsure if I want to run toggle ignition switches and a push button starter or the standard ignition switch?

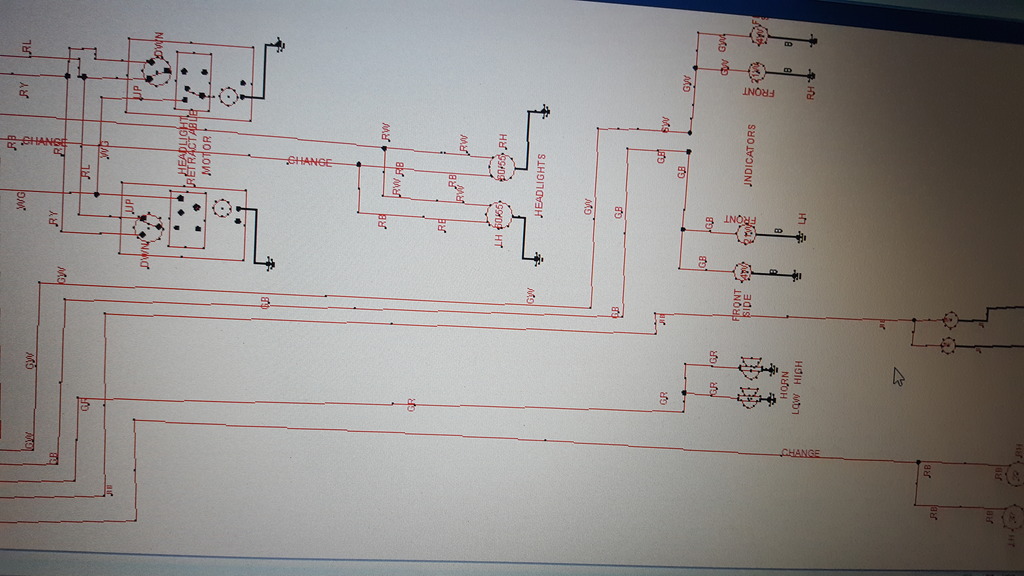
Started drawing up the front body loom and all the relays and fuses. All drawings are still not finalised or cleaned up much but there readable to me.
Still unsure if I want to run toggle ignition switches and a push button starter or the standard ignition switch?
Thread Starter
Joined: Jul 2011
Posts: 138
Likes: 0
From: Sydney, Australia
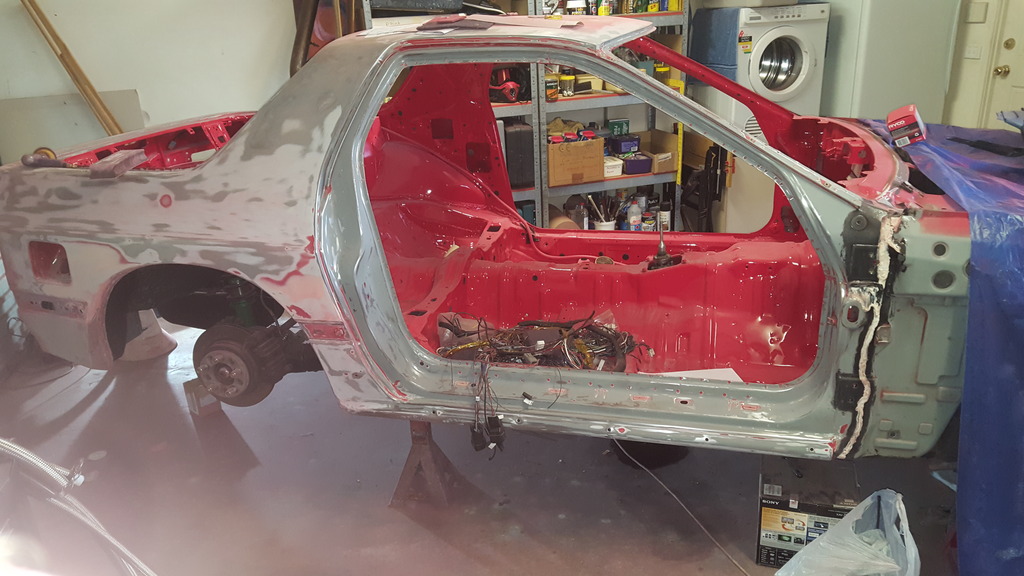
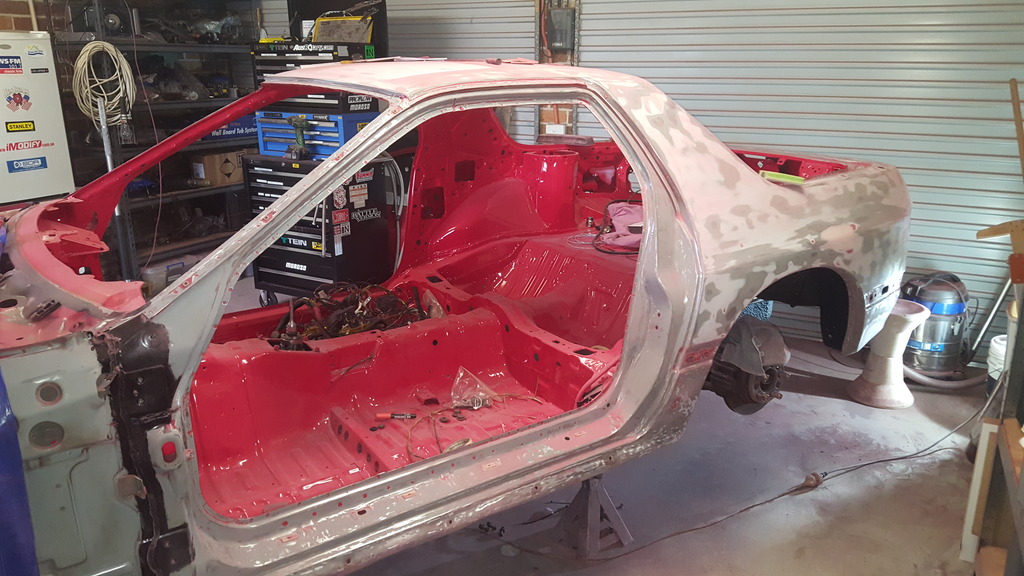
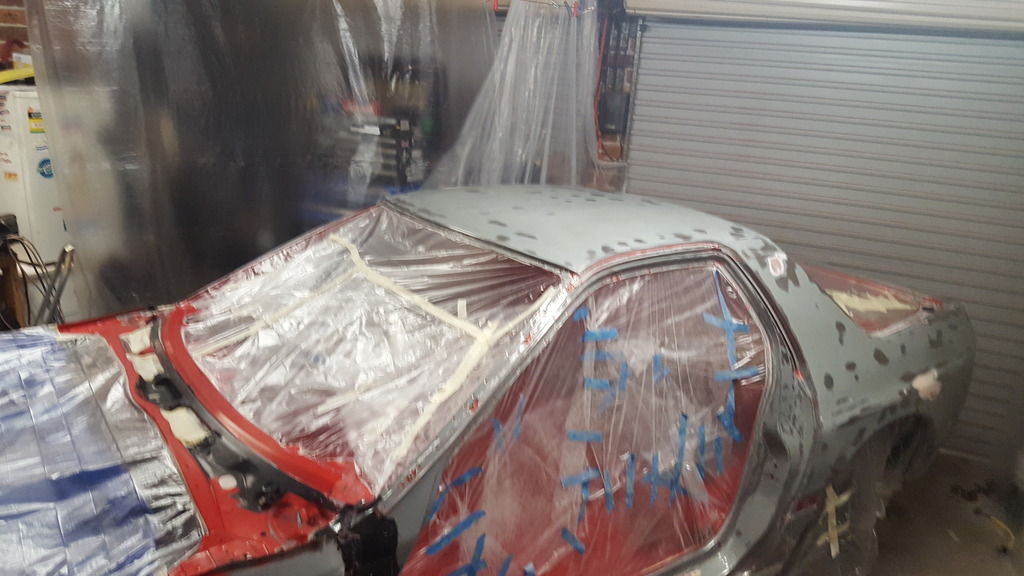
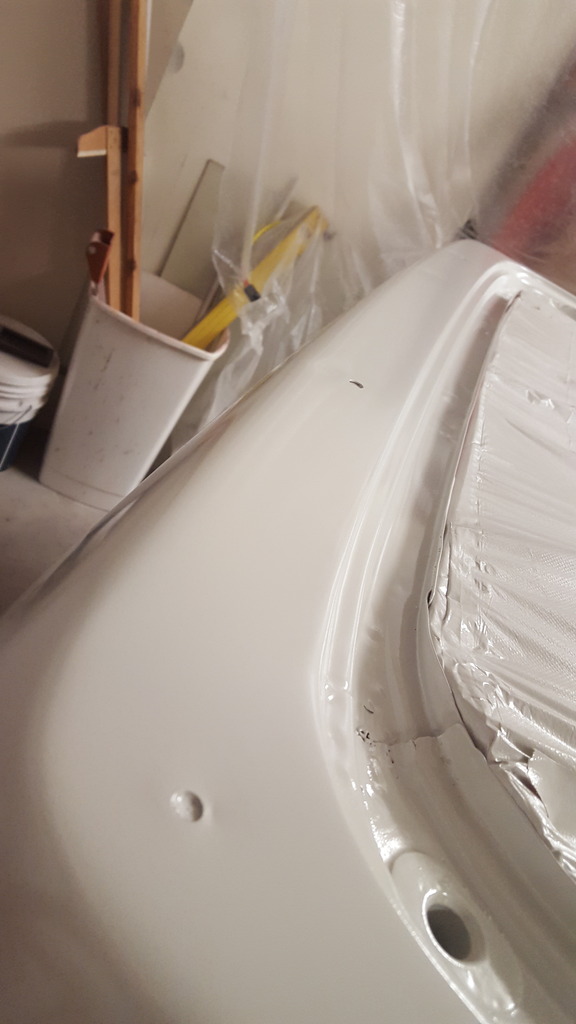
Finally got the car ready for epoxy over the weekend. The whole car was blocked back to what you see in the below photos using 80 grit by hand. The reason I chose to do it by hand instead of orbital was simple for me. I now have blocking experience when I comes time to do the real blocking work. That and I know I don�t have any warped panels due to me sanding a bit long in the one spot.
Funny thing is though I am a cabinet maker by trade and have spent hours upon hours sanding with orbitals (and by hand) just on a different material so I could of done a decent job, but I wanted to practice blocking.
Originally, I was only planning to epoxy the jambs, then rub back the body and epoxy up to the door jams. Since then I have changed my mind and decided to just do it all in one go to save on masking and cleaning up.
The body still requires a bit more minor sanding by hand before epoxy but nothing major (mainly to remove some surface rust that built up over time, due to me being a lazy bastard). Oh and then another �fucked up amount� of hours when I get it in high fill. Definitely not looking forward to sanding back the high fill!
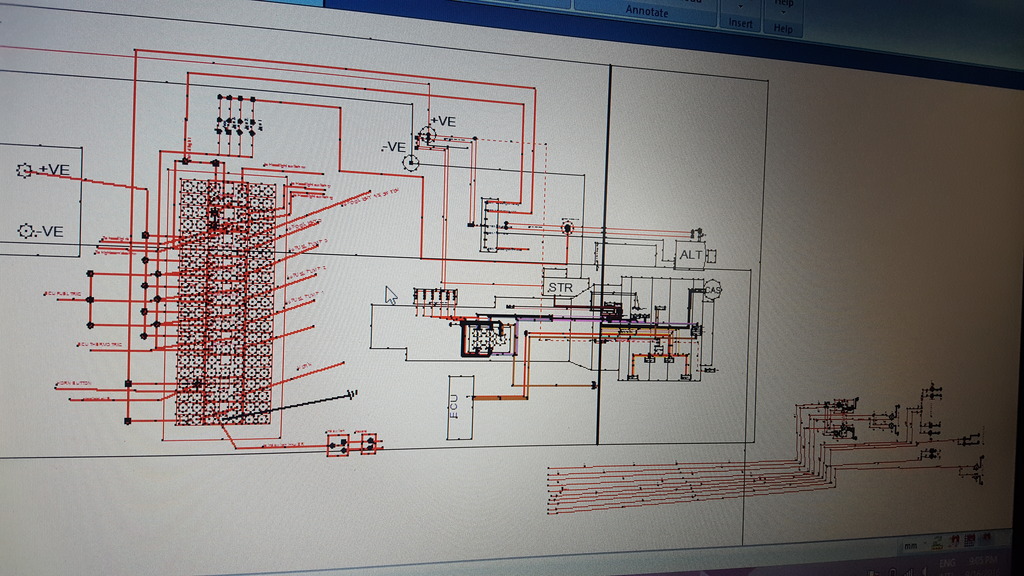
Still going with wiring harness drawings (see video below to see the full harness diagram). This is quite a time consuming task but it makes life so much easier.
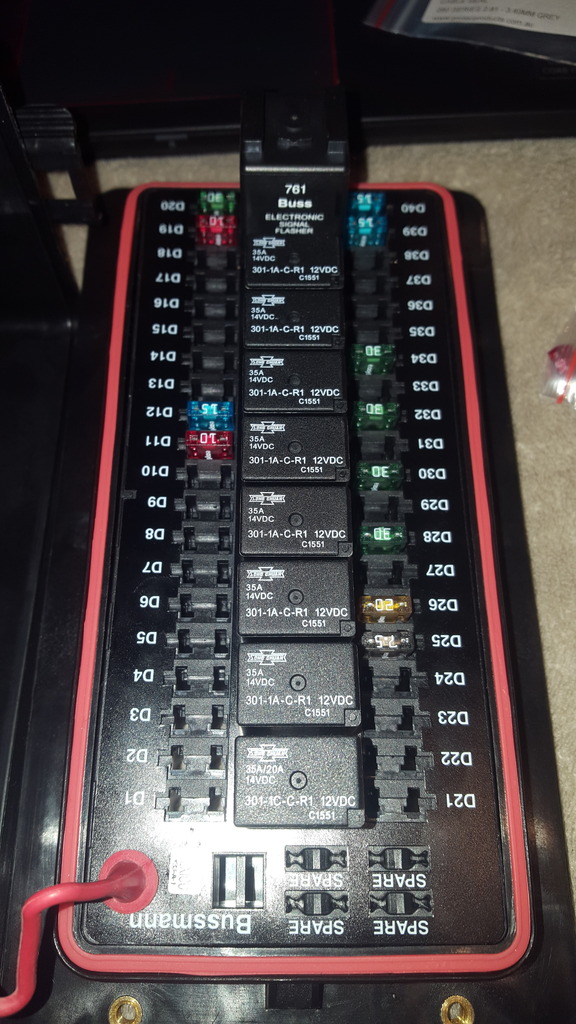
At this stage its looking like I will not need to keep any factory wiring or relays. All of this will be controlled through my bussman fuse and relay box.
Finally have the factory hazard button working and sorted thanks to Leevone(SHY13B) down in Melbourne. I will do a full rewiring post and explain more once I get a diagram finalised but in short, due to mazda only using the hazard button as an earth trigger to the CPU, we had to add a relay just to utilise the factory hazard button. If I ran another switch for the hazard button the extra relay wouldn�t be needed.
And to all those people sitting there thinking why the **** didn�t this guy just go PDMand be done. Well.. A PDM still requires the exact same amount of wiring harness that my relay setup does. PDM is 3 or 4 (if im lucky) times the cost. PDMs are also limited in their number of inputs and outputs, so I wouldn�t have had enough inputs to run everything so I would have a PDM and something else. Either that or I would have to redesign everything to suite my limited inputs and lose some stuff I wanted to keep.
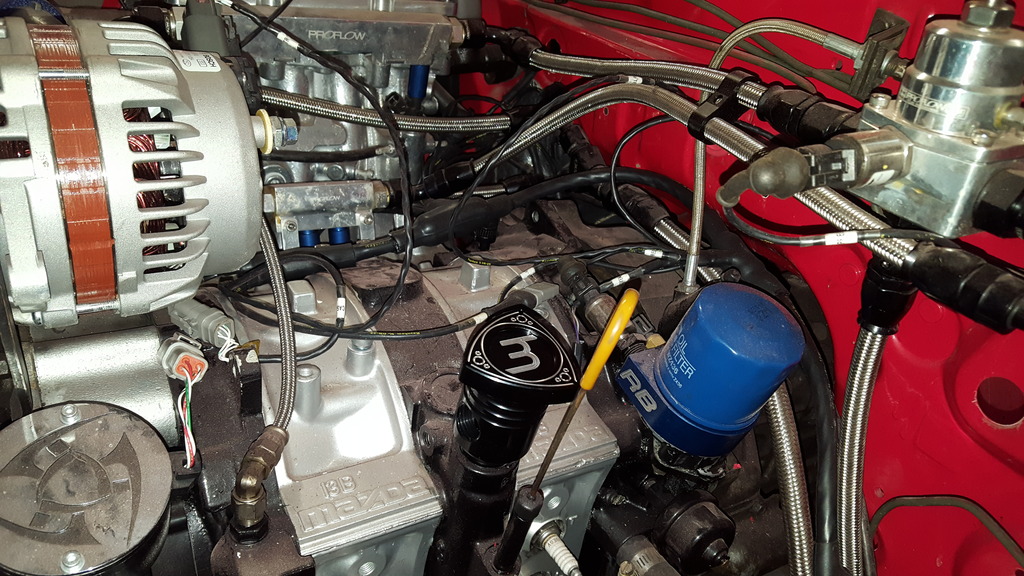
My new Franklin Engineering oil filler neck with -10 port
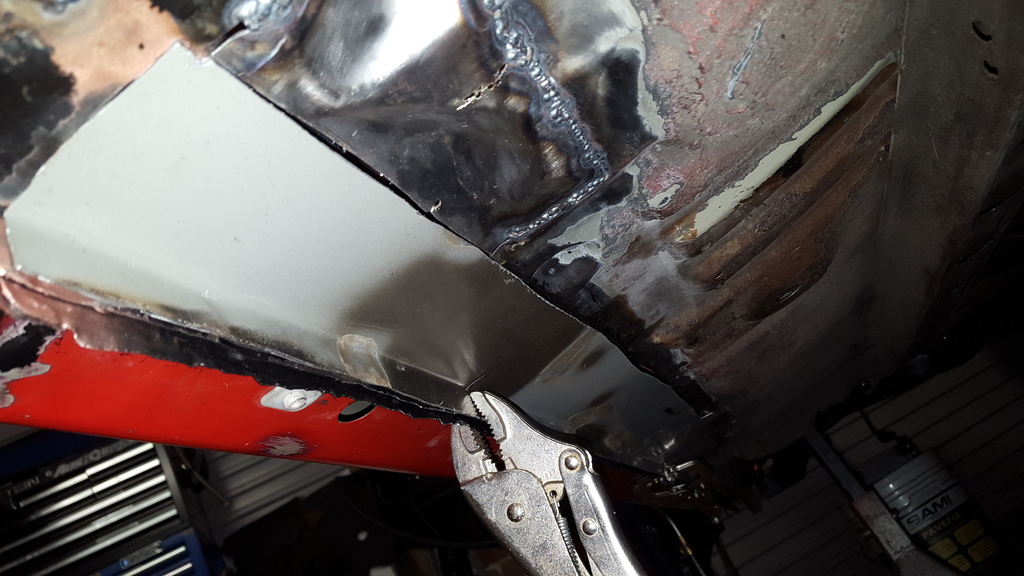
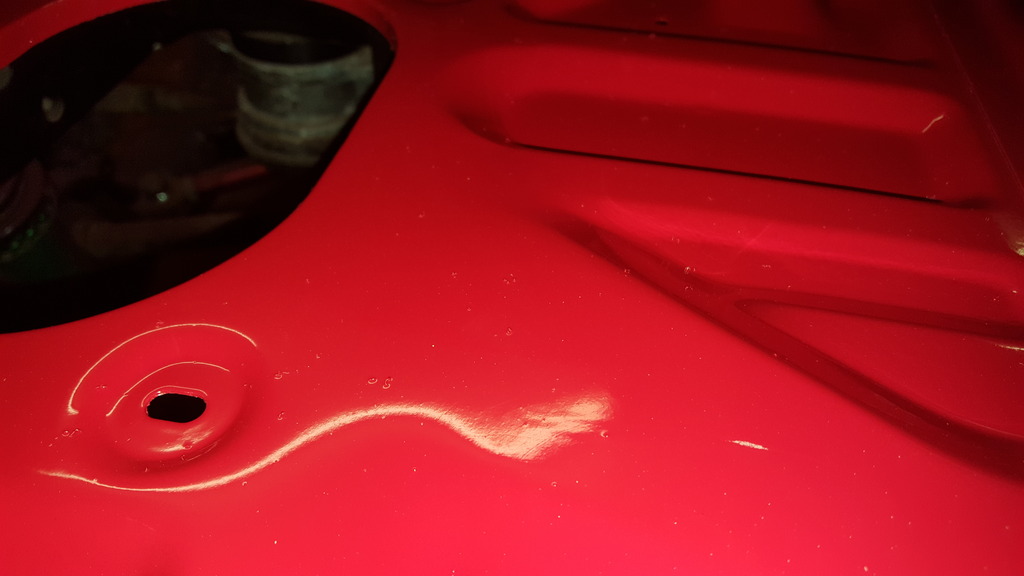
Drivers side body all done. Rear quarter has been hit at some stage. Still don�t know if I should remove the bog, pull it as best I can and then redo the bog or just leave it as is??

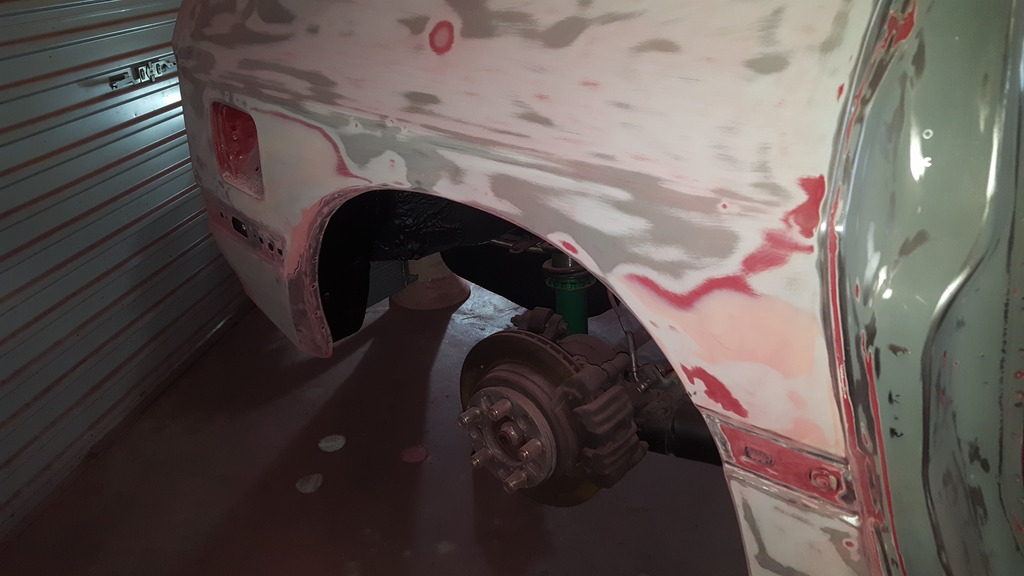
Passenger side all done. Less bog on this side. Only minimal amounts and I pretty happy with it as is.
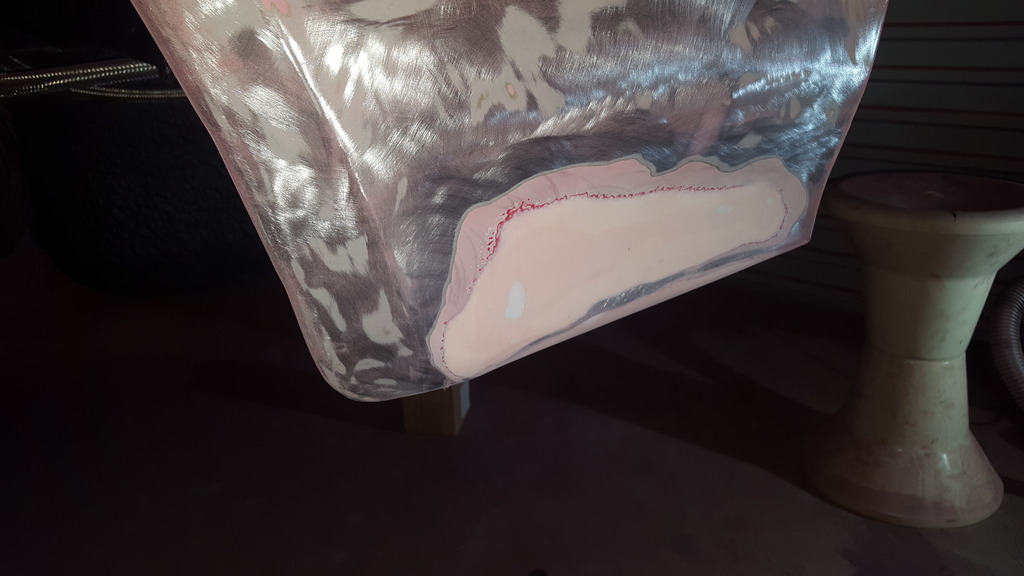
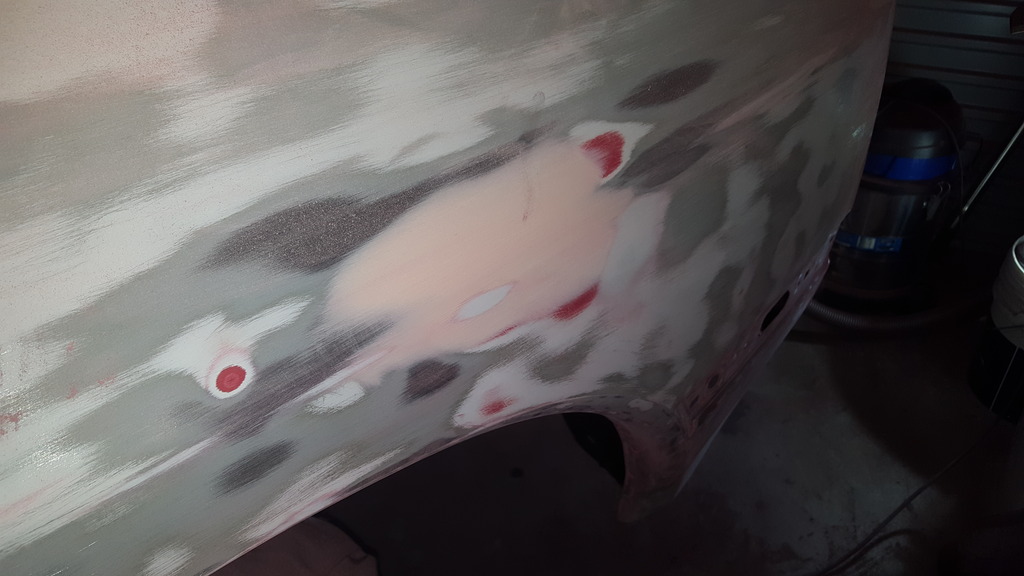
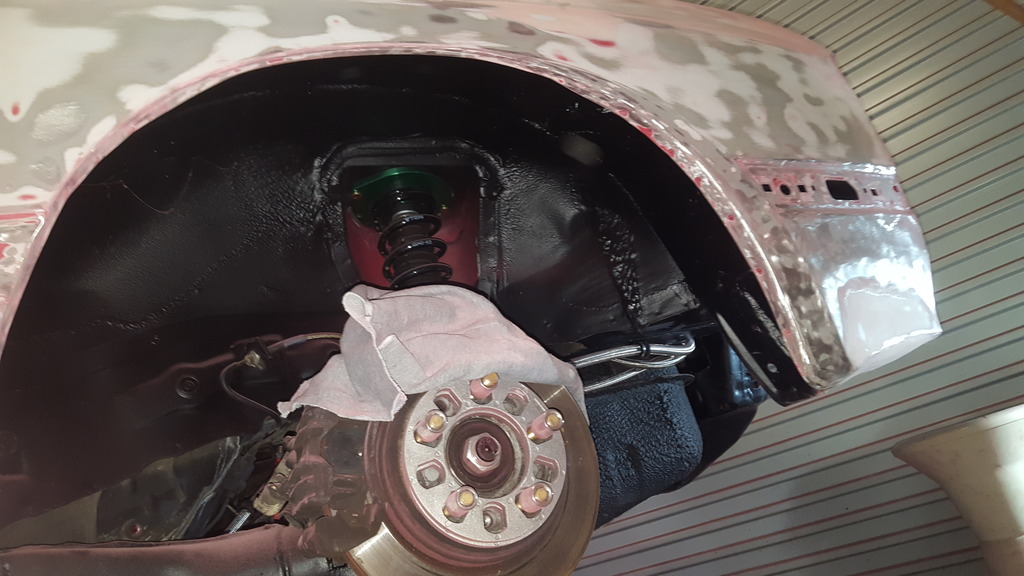
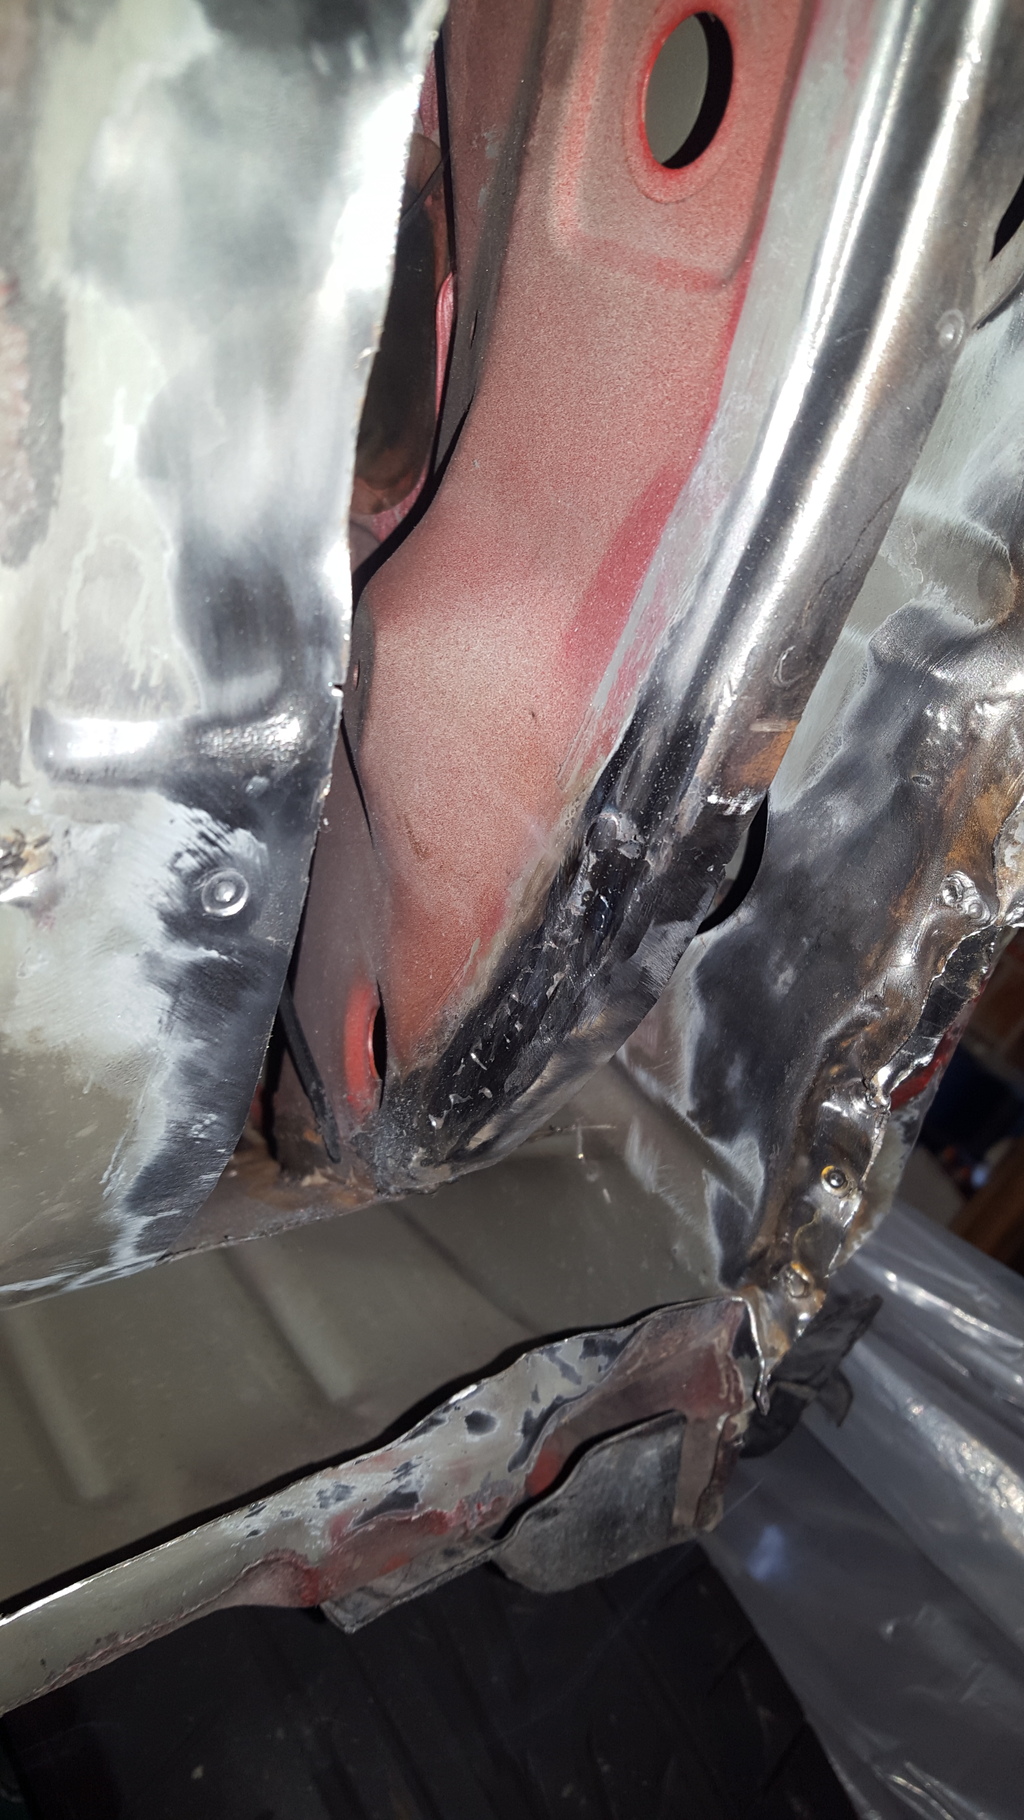
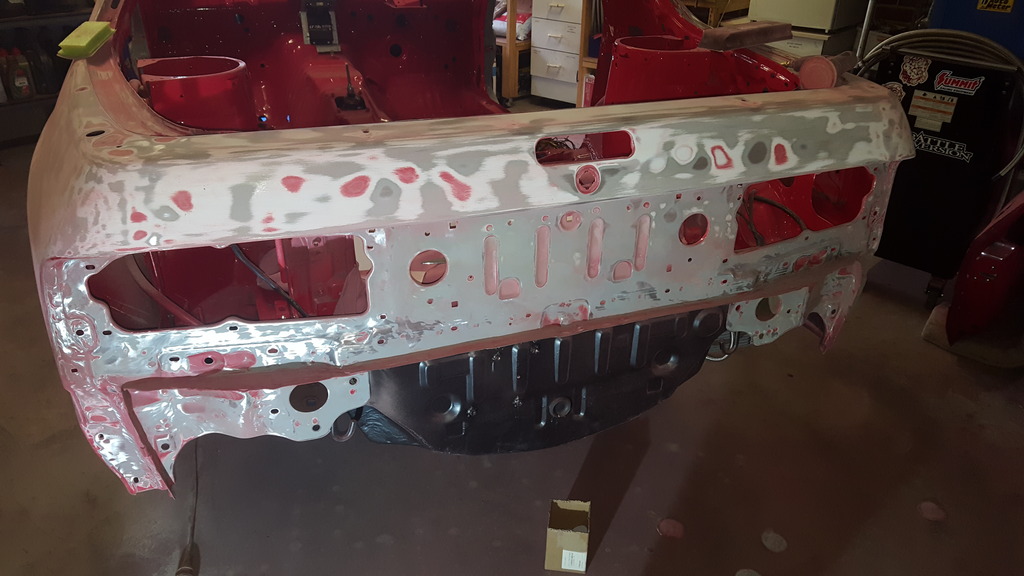
Rear of the car all done. Found there was a bit of hit to the passenger side frame rail. Luckily it didn�t kink the frame itself.
Funny thing is though I am a cabinet maker by trade and have spent hours upon hours sanding with orbitals (and by hand) just on a different material so I could of done a decent job, but I wanted to practice blocking.
Originally, I was only planning to epoxy the jambs, then rub back the body and epoxy up to the door jams. Since then I have changed my mind and decided to just do it all in one go to save on masking and cleaning up.
The body still requires a bit more minor sanding by hand before epoxy but nothing major (mainly to remove some surface rust that built up over time, due to me being a lazy bastard). Oh and then another �fucked up amount� of hours when I get it in high fill. Definitely not looking forward to sanding back the high fill!
Still going with wiring harness drawings (see video below to see the full harness diagram). This is quite a time consuming task but it makes life so much easier.
At this stage its looking like I will not need to keep any factory wiring or relays. All of this will be controlled through my bussman fuse and relay box.
Finally have the factory hazard button working and sorted thanks to Leevone(SHY13B) down in Melbourne. I will do a full rewiring post and explain more once I get a diagram finalised but in short, due to mazda only using the hazard button as an earth trigger to the CPU, we had to add a relay just to utilise the factory hazard button. If I ran another switch for the hazard button the extra relay wouldn�t be needed.
And to all those people sitting there thinking why the **** didn�t this guy just go PDMand be done. Well.. A PDM still requires the exact same amount of wiring harness that my relay setup does. PDM is 3 or 4 (if im lucky) times the cost. PDMs are also limited in their number of inputs and outputs, so I wouldn�t have had enough inputs to run everything so I would have a PDM and something else. Either that or I would have to redesign everything to suite my limited inputs and lose some stuff I wanted to keep.
My new Franklin Engineering oil filler neck with -10 port
Drivers side body all done. Rear quarter has been hit at some stage. Still don�t know if I should remove the bog, pull it as best I can and then redo the bog or just leave it as is??
Passenger side all done. Less bog on this side. Only minimal amounts and I pretty happy with it as is.
Rear of the car all done. Found there was a bit of hit to the passenger side frame rail. Luckily it didn�t kink the frame itself.

Thread Starter
Joined: Jul 2011
Posts: 138
Likes: 0
From: Sydney, Australia
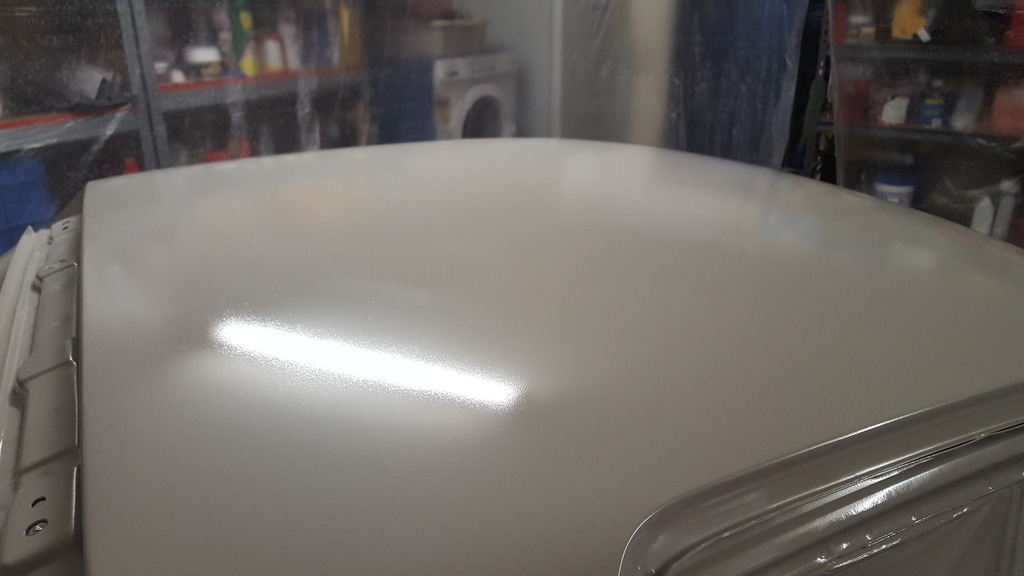
Body is in epoxy primer and will be in high fill as soon as i bog the tiny dents under the spoiler and sand/scuff.
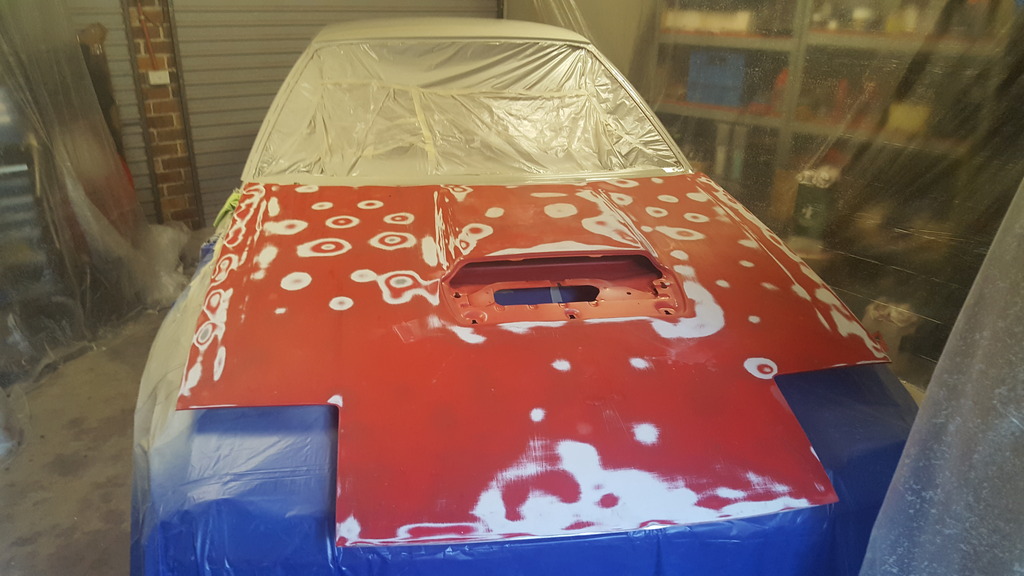
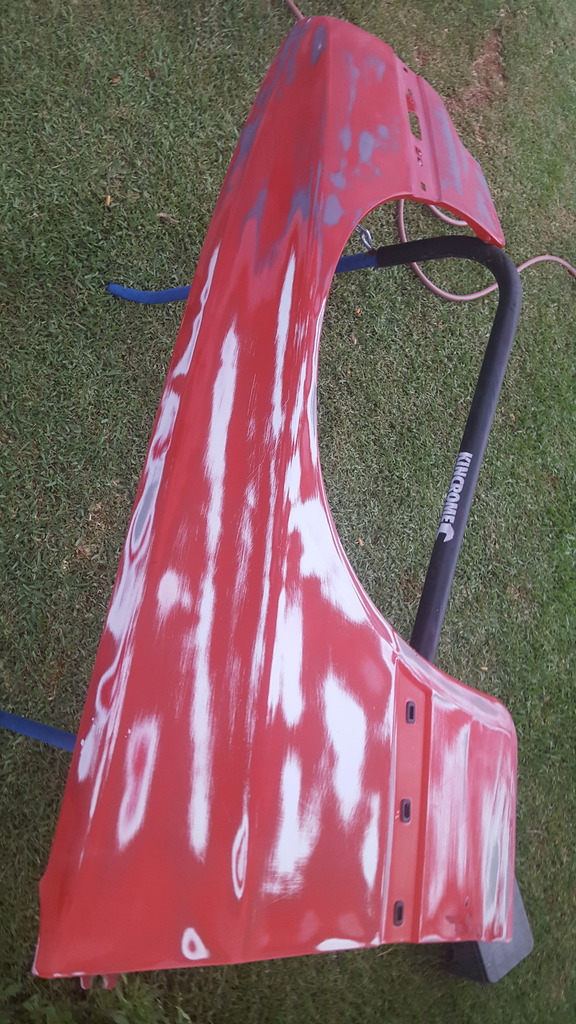
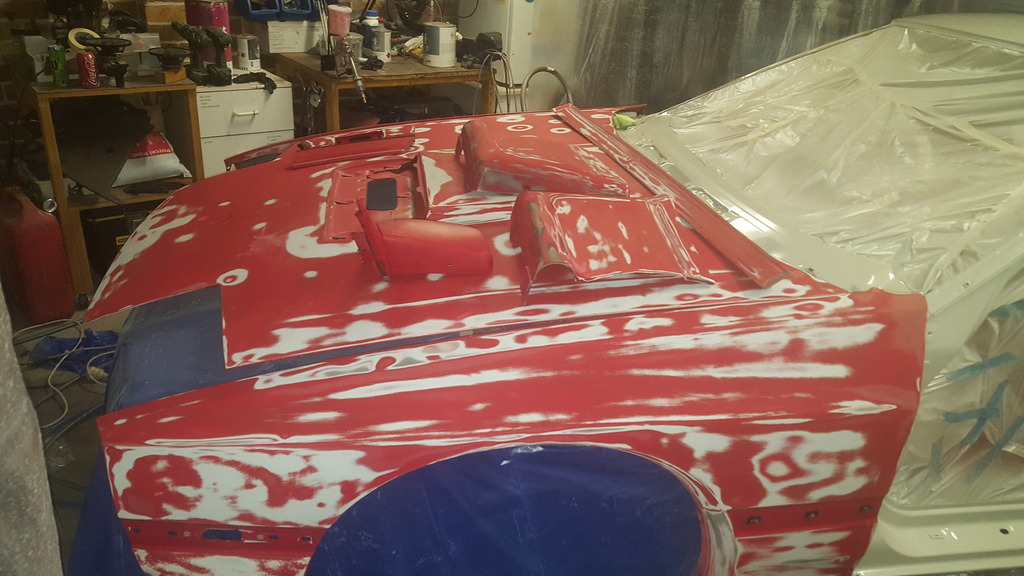
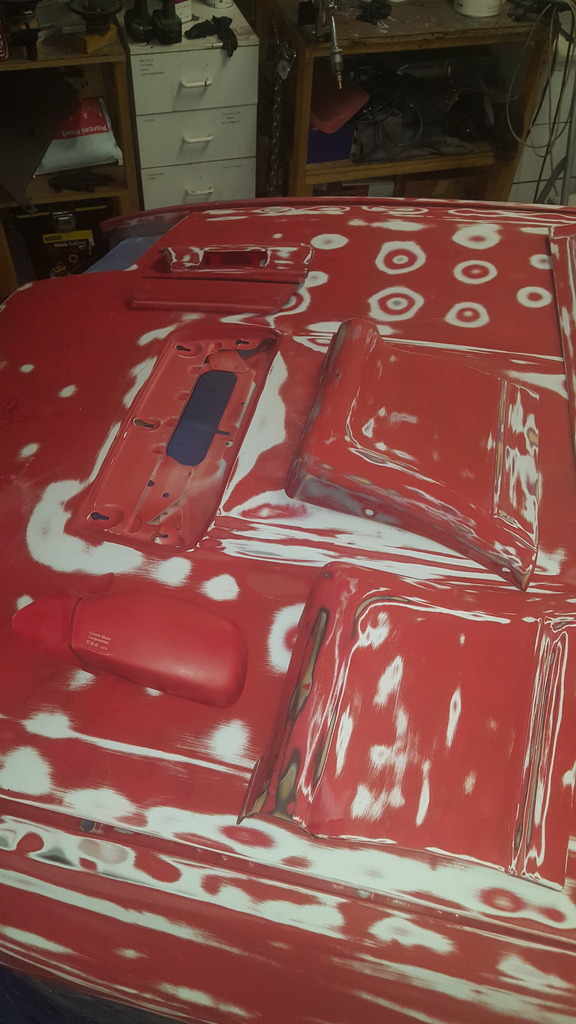
Guards and bonnet have had the clear sanded back. The bonnet will be sanded back a lot more as i plan on keeping it for the life of the car so will get rid of all the colour same as the body and then epoxy, highfill and so on, but the guards are only going to be sanded as pictured as i will probably end up with some wider guards in the near future so not planning longevity.
Next up is sanding the doors, fuel cap and headlight covers and then all the plastic stuff like bumpers, moulds, mirrors.


Thread Starter
Joined: Jul 2011
Posts: 138
Likes: 0
From: Sydney, Australia
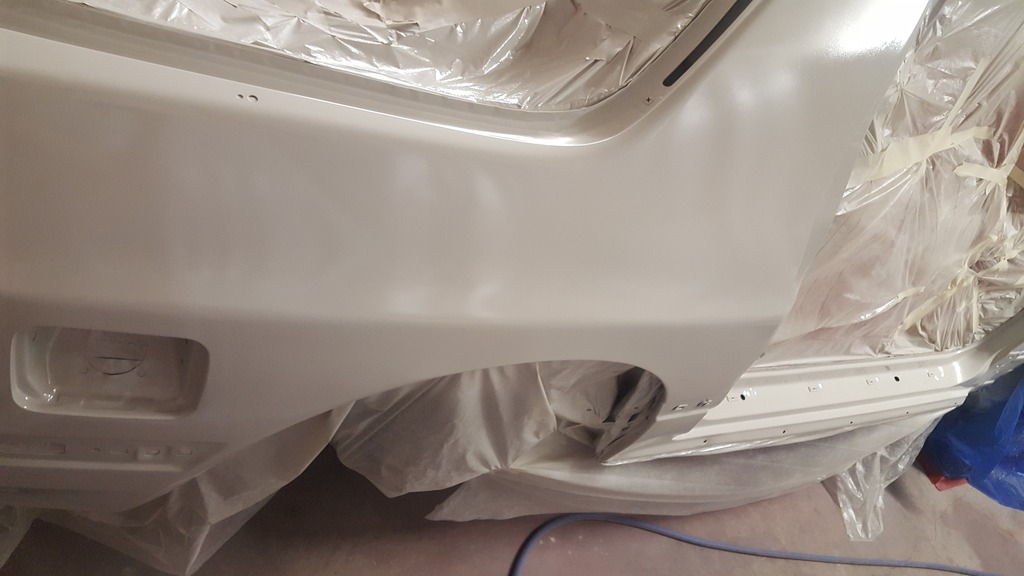
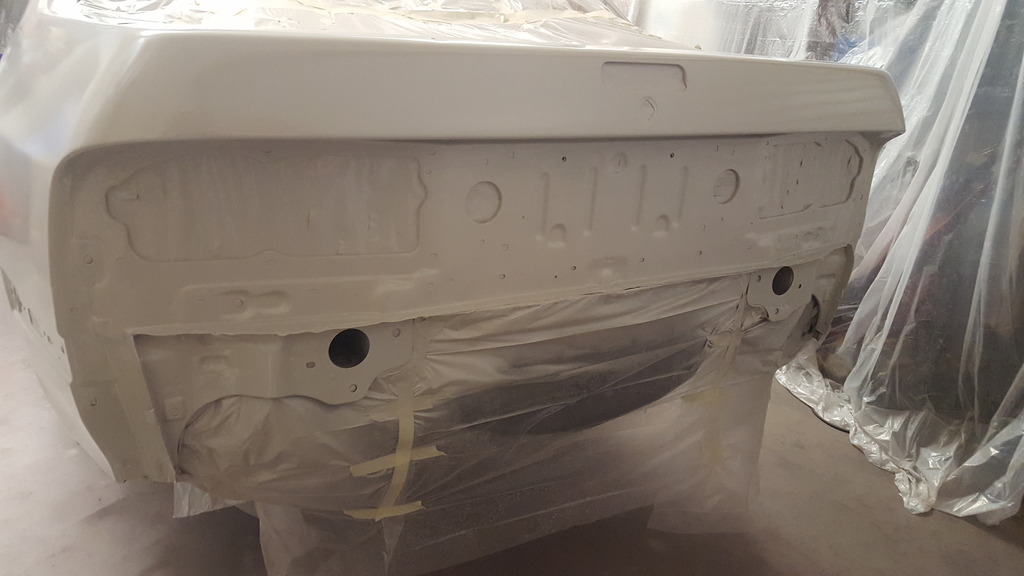
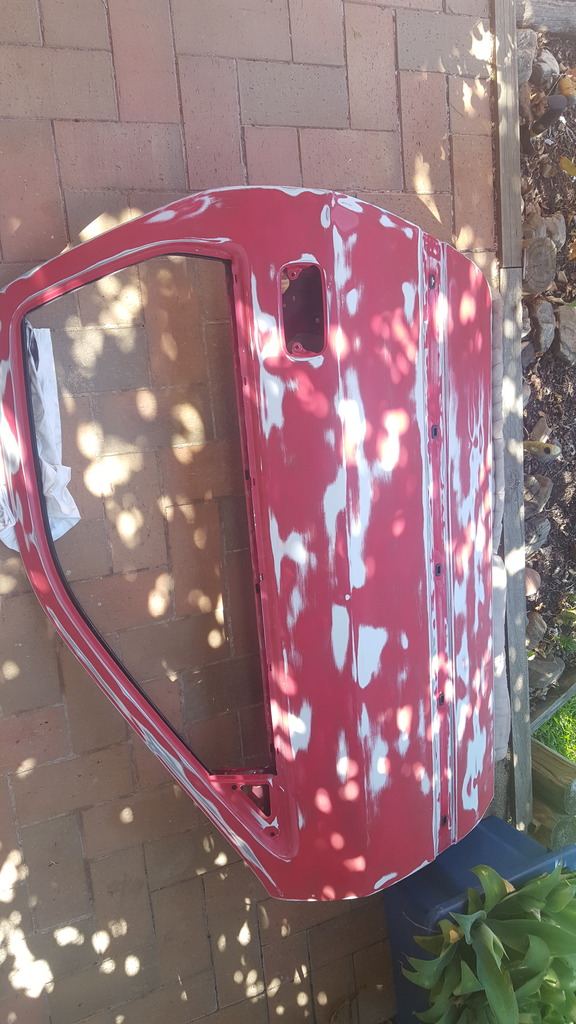
Still slowly getting there. Have one door left to sand and then I can get the rest of the steel panels in epoxy.
Front and rear bar are the only remaining plastics to sand but as the high fill and plastic primer are a wet on wet application I am waiting untill I have the rest of the steel body panels in epoxy so I can do a full day of spraying and get everything into High fill on the same day.
Front and rear bar are the only remaining plastics to sand but as the high fill and plastic primer are a wet on wet application I am waiting untill I have the rest of the steel body panels in epoxy so I can do a full day of spraying and get everything into High fill on the same day.