The 10th Anniversary clone (TII) build
 03-06-15, 03:51 PM
#26
I know what you mean when it looks like the motor is "crooked" i put my first 7 in the ditch, and i thought i ruined the subframe cause the motor looked tweaked, but now that i've looked at my second 7, and many engine bay pics on here, they all seem to sit a little crooked, idk if theres reason? Or just a friday ooopsie at the factory that no one noticed
.......or maybe its those eyes........
.......or maybe its those eyes........
 03-08-15, 06:48 PM
#27


Today was battery box day.
I had built this box a while back. Its made from stainless steel and held together with solid rivets.
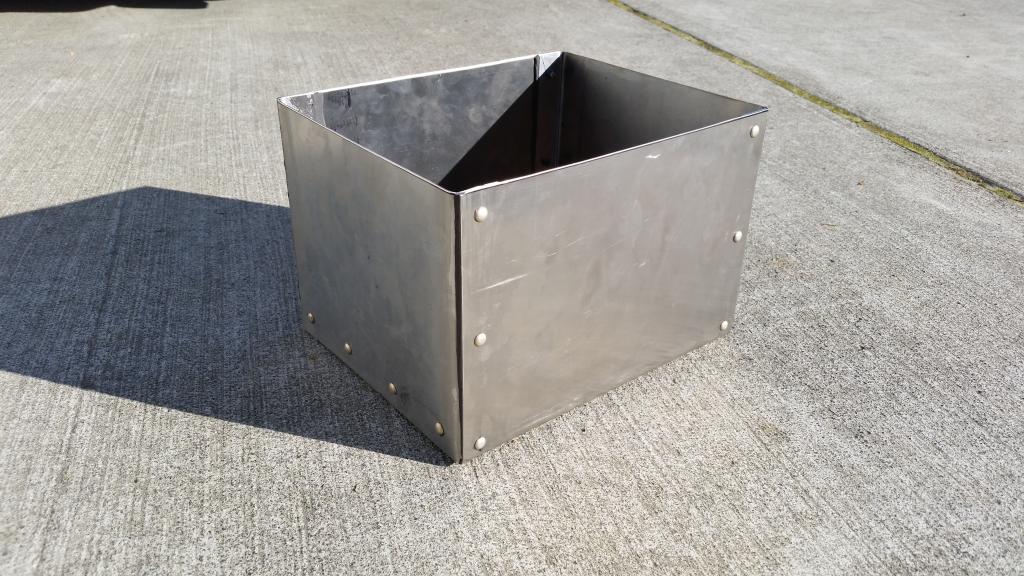
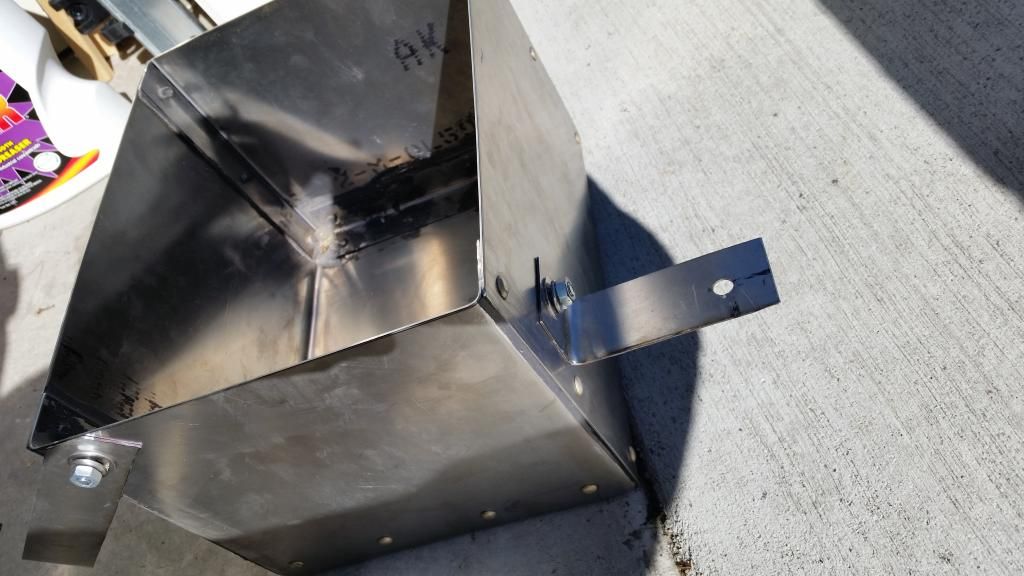
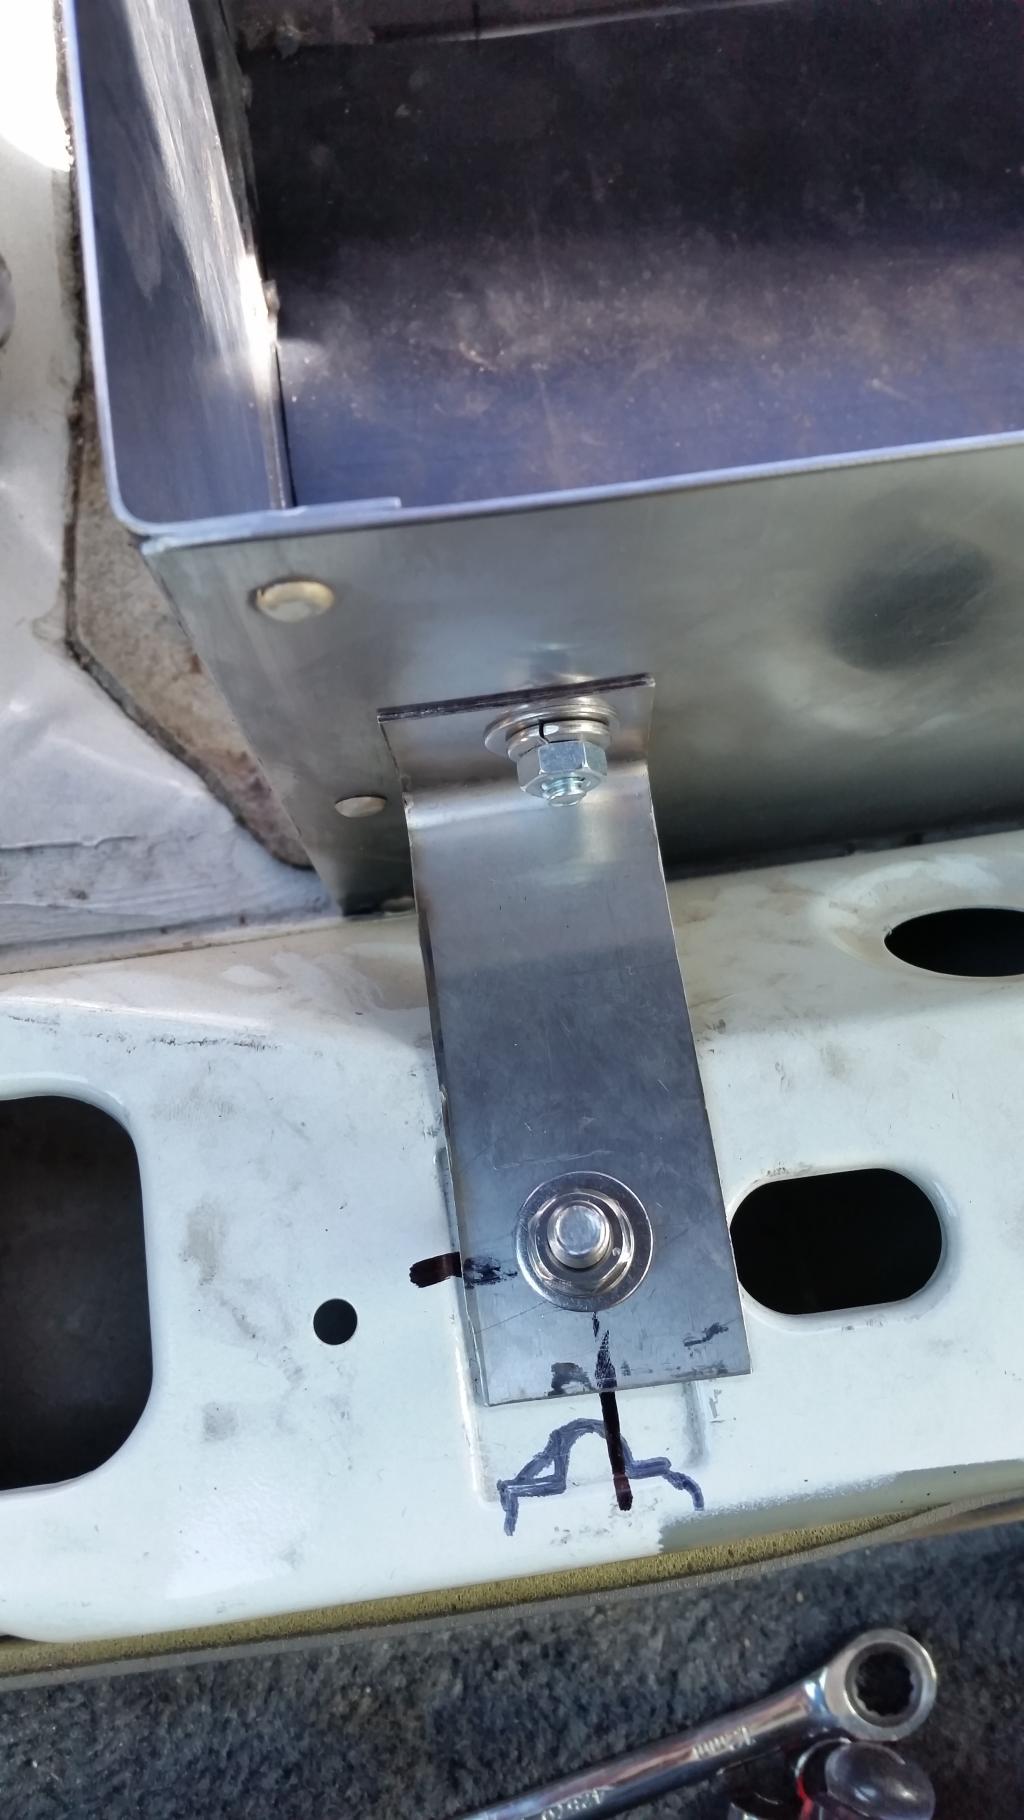
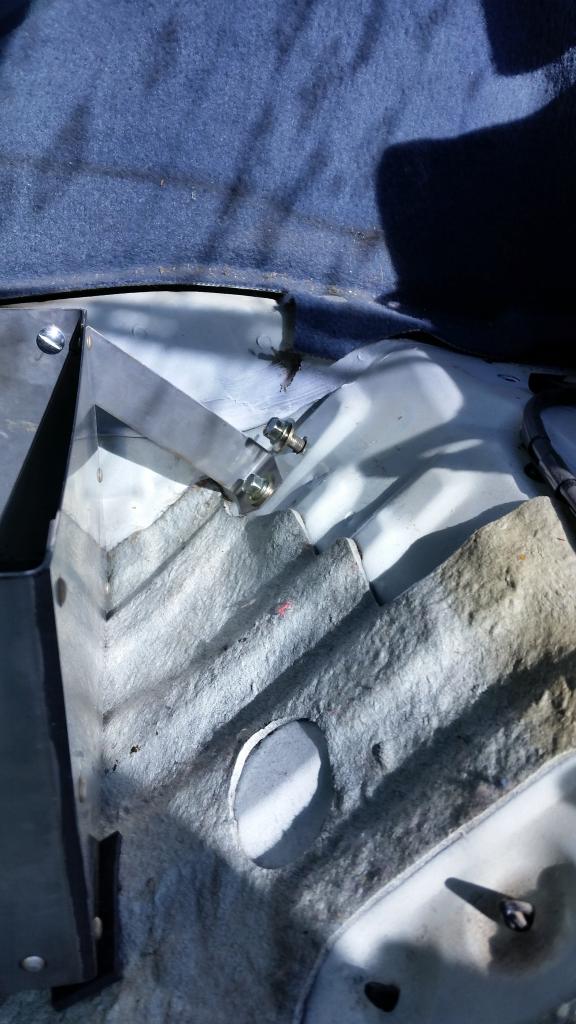
I came up with a way to mount the box in stock holes without having to drill anywhere. I made these two brackets to attach to the box.
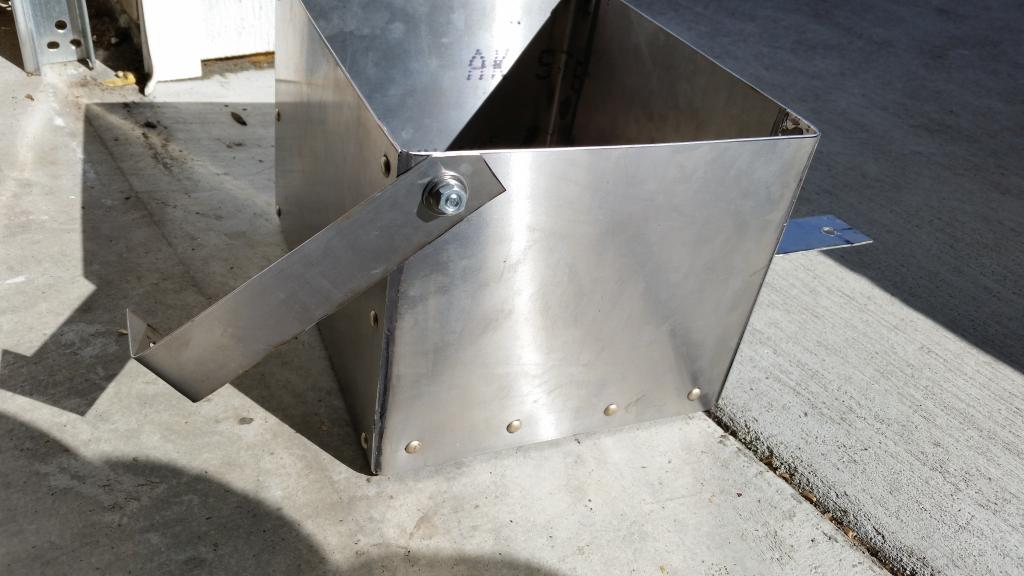
They are pretty simple I just had to trim them to size and make a 90* bend on the rear one and a slightly smaller angle on the forward one.
Next I found a scrap piece of thick rubber to put on the bottom of the box for added cushioning/corrosion protection. I just trimmed it to fit on the inside of the box.

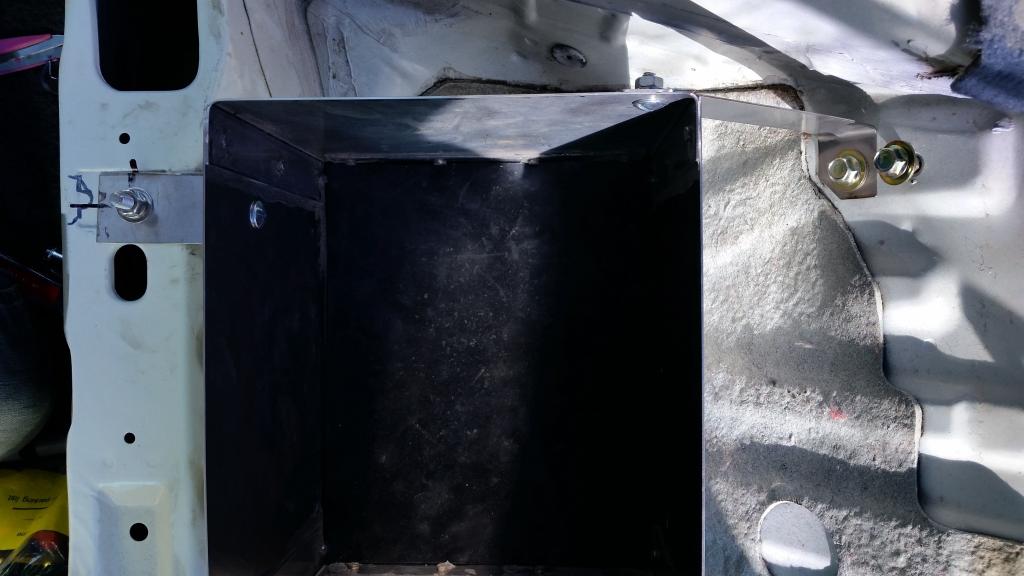
Here is the box mounted in the car. I know it looks rather insufficient, but the box is held in very tight.
Here is the battery and the 1/0 gauge ground cable I made today.
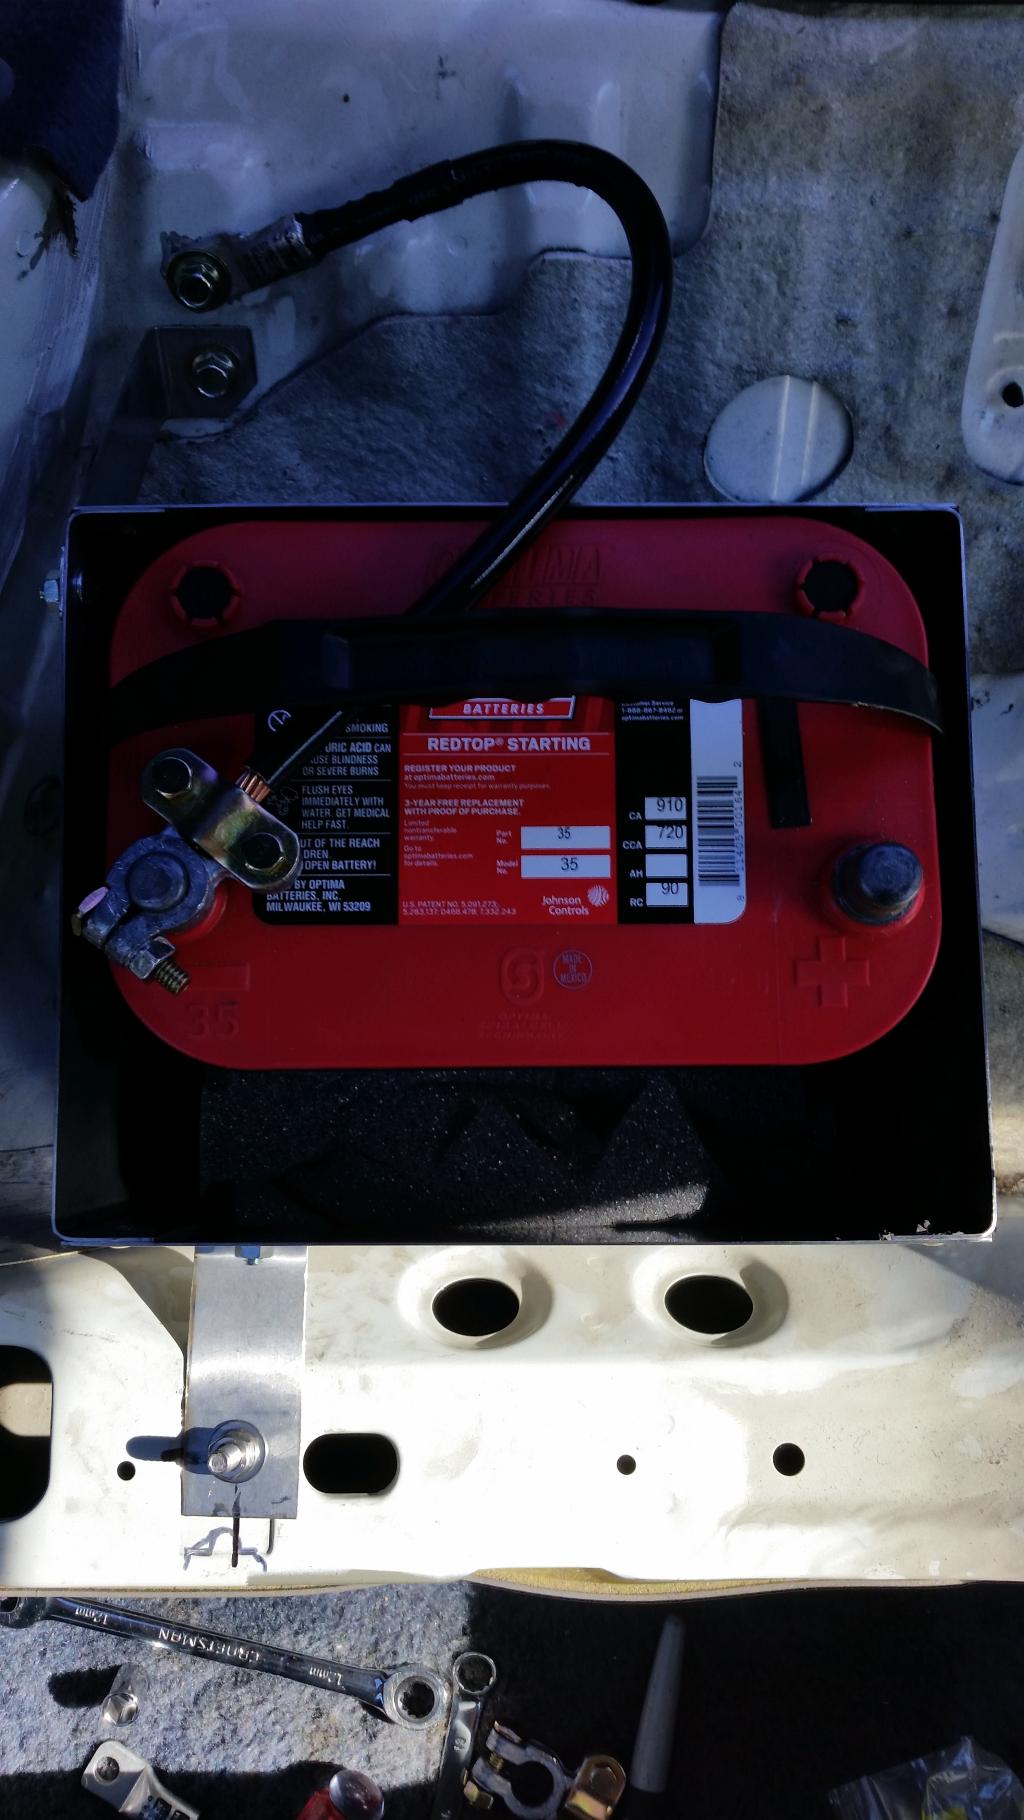
The box was originally made for a larger battery so it doesn't fit tight. I found some high density foam to pack in around the battery. If I find that it shifts, I will need to come up with something else but I think it is sufficient.
Next up I have to make and run the positive cable up to the engine bay.
Only a few more steps to go and she should be running!
I had built this box a while back. Its made from stainless steel and held together with solid rivets.

I came up with a way to mount the box in stock holes without having to drill anywhere. I made these two brackets to attach to the box.

They are pretty simple I just had to trim them to size and make a 90* bend on the rear one and a slightly smaller angle on the forward one.

Next I found a scrap piece of thick rubber to put on the bottom of the box for added cushioning/corrosion protection. I just trimmed it to fit on the inside of the box.

Here is the box mounted in the car. I know it looks rather insufficient, but the box is held in very tight.


Here is the battery and the 1/0 gauge ground cable I made today.

The box was originally made for a larger battery so it doesn't fit tight. I found some high density foam to pack in around the battery. If I find that it shifts, I will need to come up with something else but I think it is sufficient.
Next up I have to make and run the positive cable up to the engine bay.
Only a few more steps to go and she should be running!


 04-10-15, 01:00 PM
#32
Sorry for the delay everyone! Had to transport the car during a move to a new house and with settling in/finding my parts/and working graveyard shift, work has been brutally slow.
Over the last week I have picked up the pace. I installed the Racing beat REV TII exhaust from the resonator back. I have to get the bung on the downpipe for the Wideband re-welded because the person I purchased it from either had a one inch tall sensor or had no transmission tunnel. Seriously, its like someone just guessed where it should be and went with it.
I also ran the battery cable along the drivers side floor and up into the engine bay. This job was not very fun considering I used 1/0 cable. It was very uncooperative.
I will post photos soon!
My only real major task left is installing the FMIC kit without any instructions. It shouldn't be a problem with the fab work, but I have never installed a FMIC on any car before so any tips would be appreciated.
05-16-15, 08:47 PM
#33
A long overdue update
Finally started to kick this project into high gear!
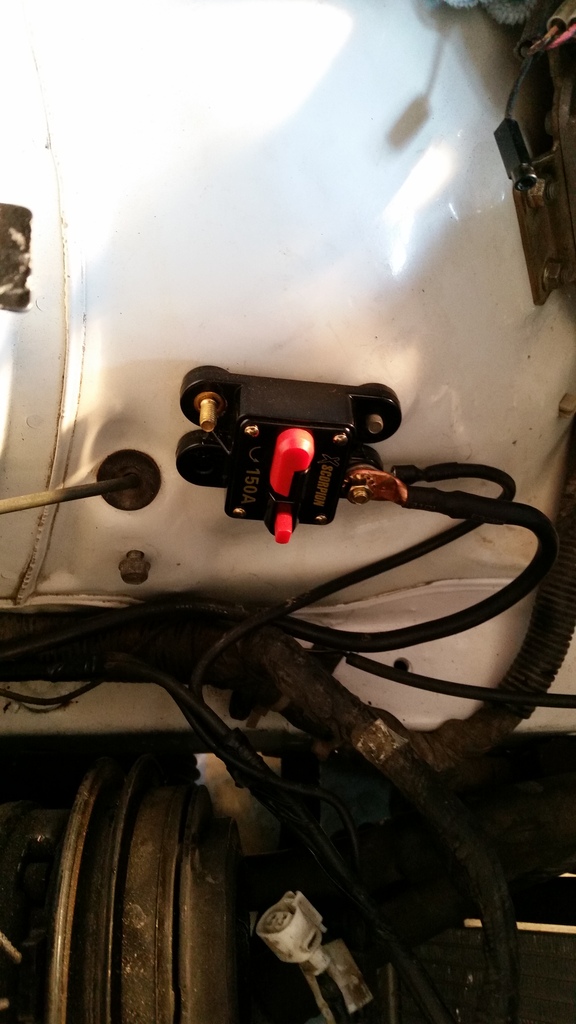
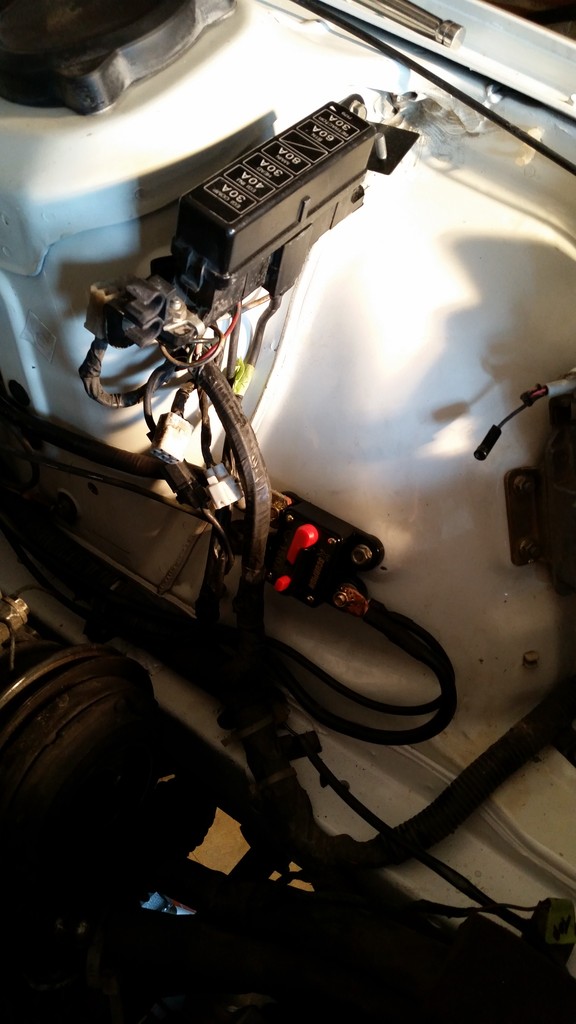
My first task was to finish up the battery relocation. Ran the 1/0 cable up through the driver's side floorboard and into the engine compartment. I only had to drill one hole behind the driver's seat to accommodate the cable. You can see the first circuit breaker and the hole I ran the cable through.
That 1/0 cable is a pita to run!

Here is the c/b in the engine bay. I am a little worried about these c/b as they were pretty cheap, but I didn't really have too many other options. Got all the wiring done and kept a little extra just in case I'm forced to relocate this when I add the FMIC.
As tidy as it's going to get!
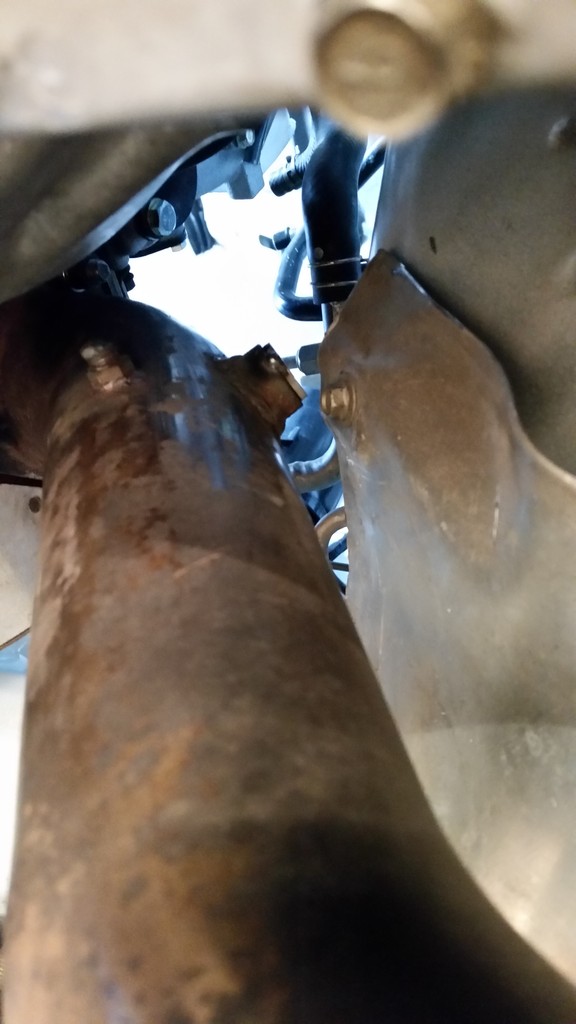
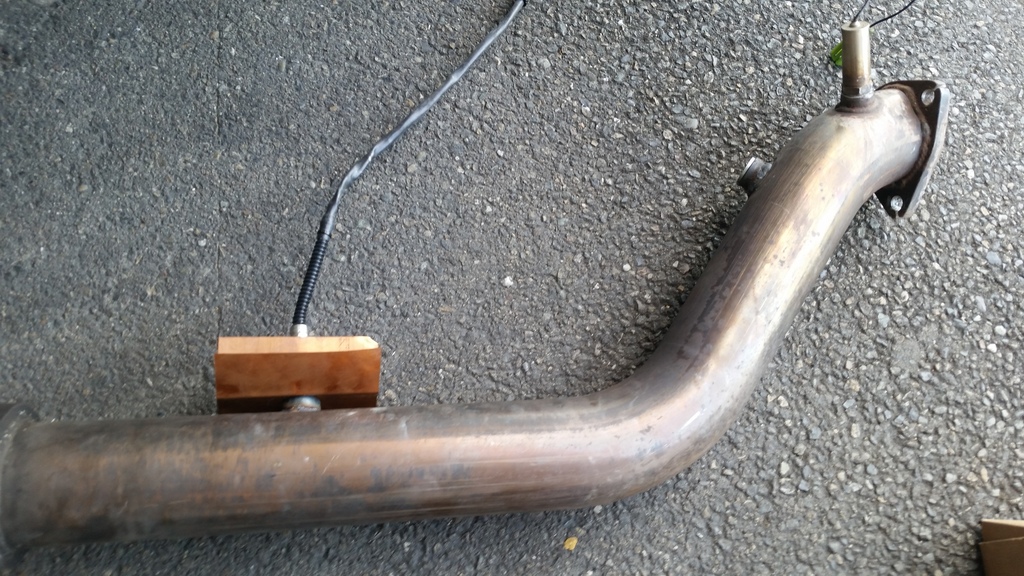
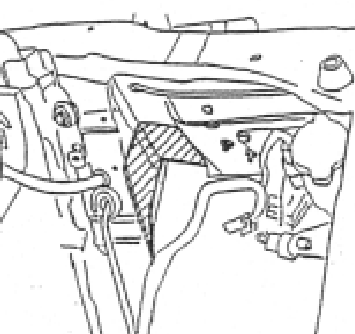
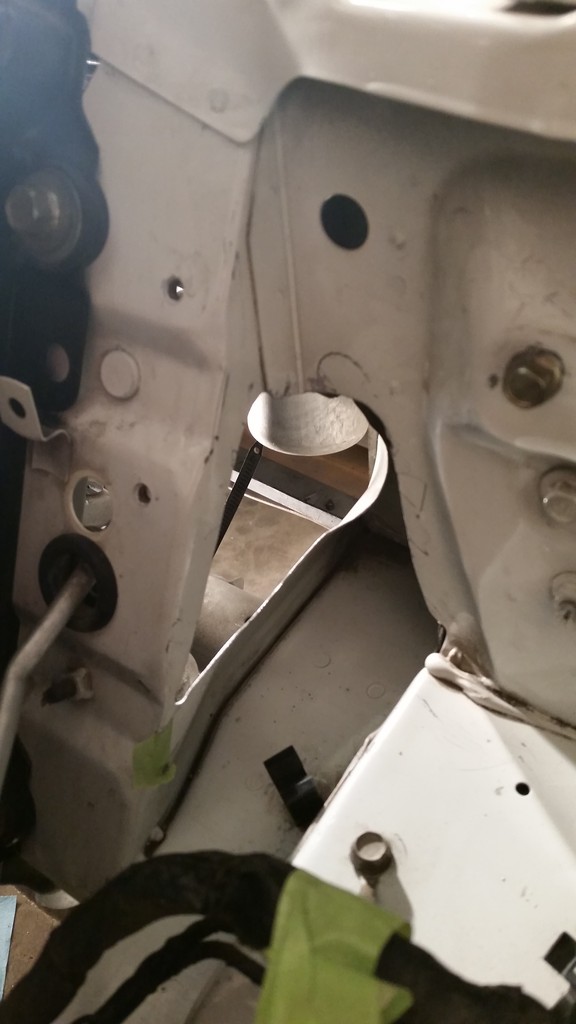
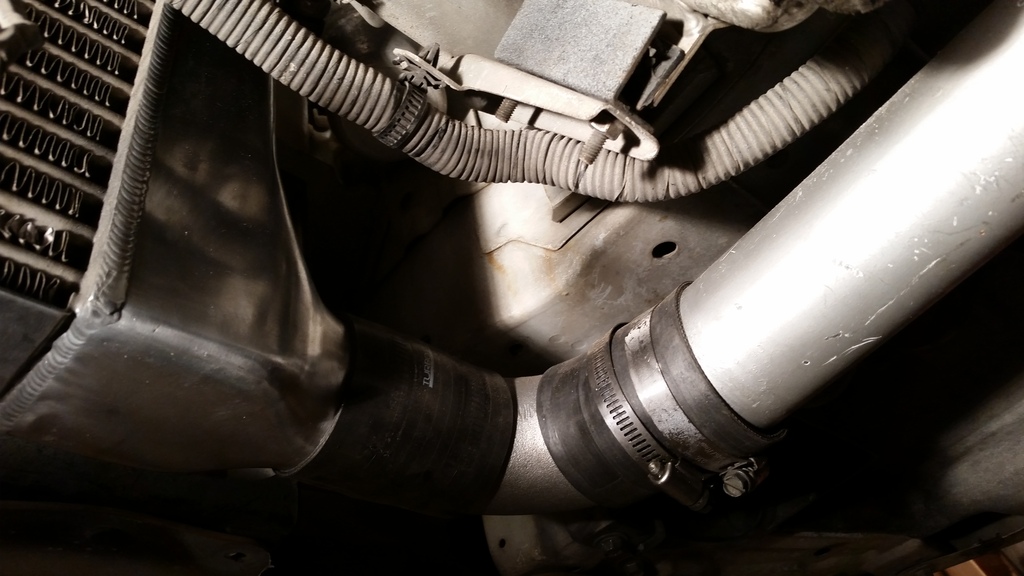
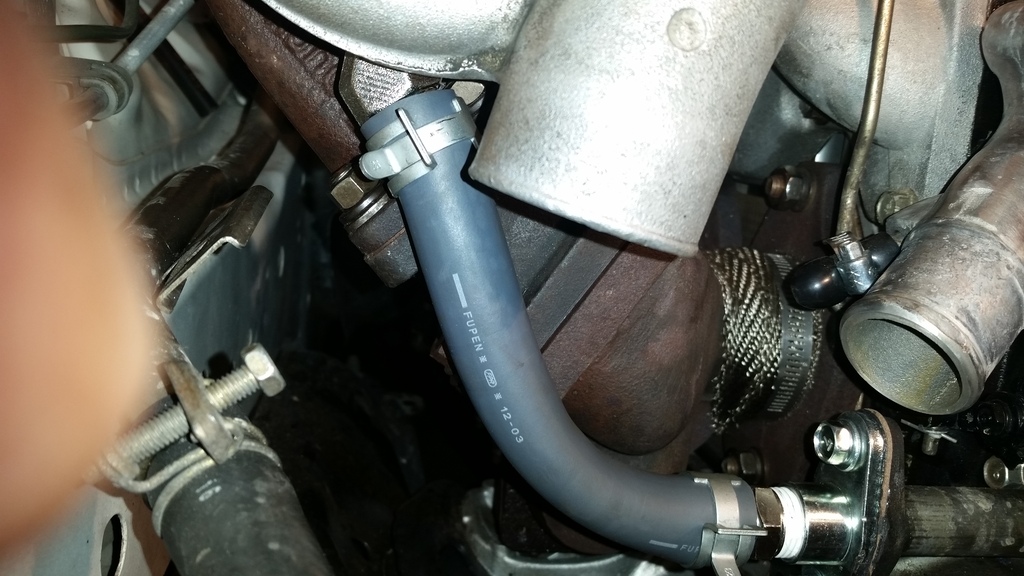
My next issue was the used RB downpipe I purchased off of Craigslist. Someone welded this second bung is a very inconvenient location. First off, it was much too close to the turbo and secondly when I went to temp install it, I saw that it was in a spot that the sensor would either have to be 1" tall or I would be forced to smash the sheet metal in to make some space. This was definitely not an option for me.
It's almost like they guessed where it should be and went with it. This is looking up from under the car and although it's difficult to see, there is no room for a wideband sensor there!
From here I proceeded to weld in a new bung and plug the old one. I put it the recommended distance down the pipe and took it to a local shop to get welded in.
There was also a wayward EGT probe bung that got plugged.
I constructed a heat sink of a sort out of some thin gauge copper sheeting to help with sensor longevity.

After a couple more weeks I plugged along at it and got her here.
Like my gravity trans fluid setup?
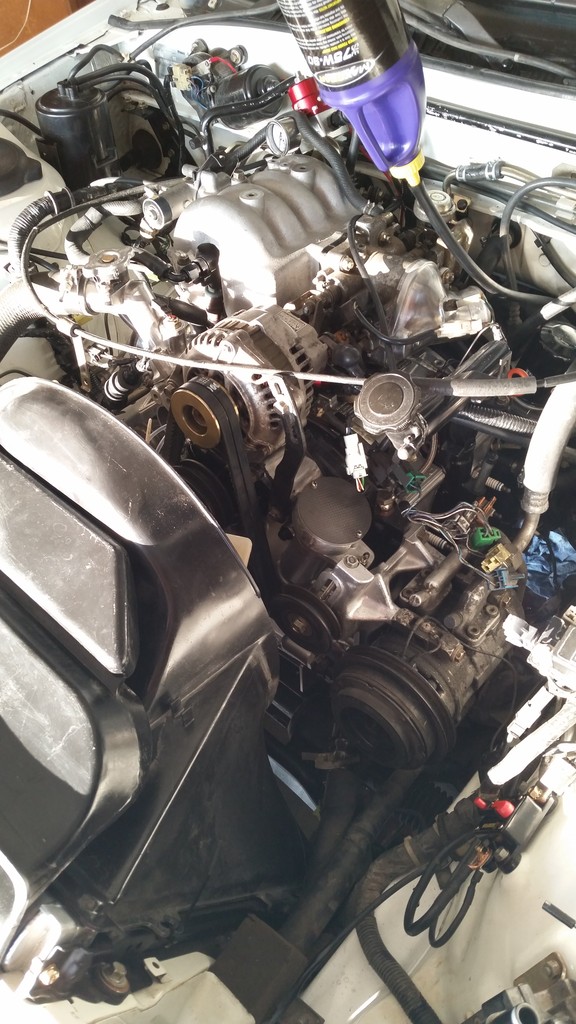
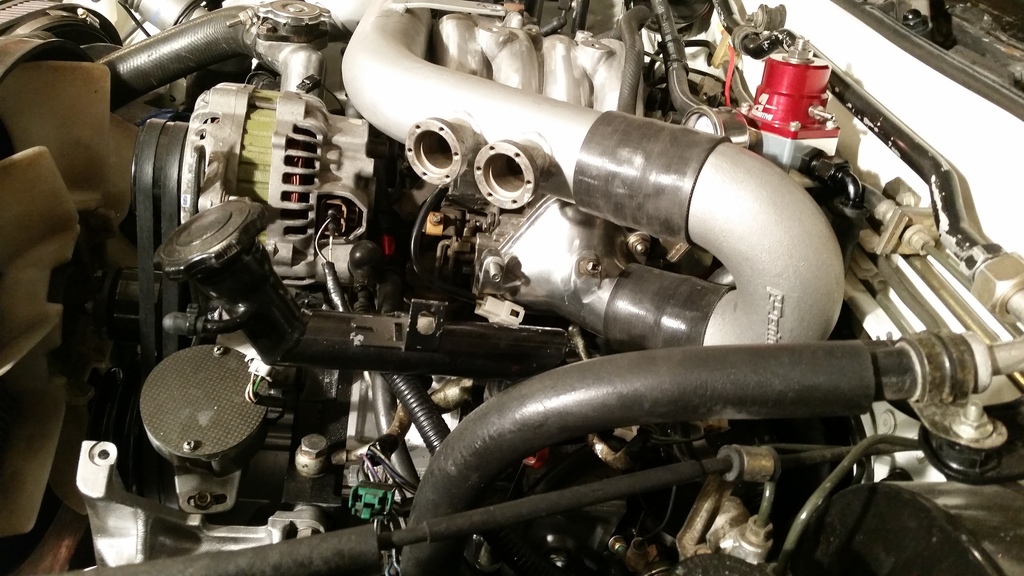
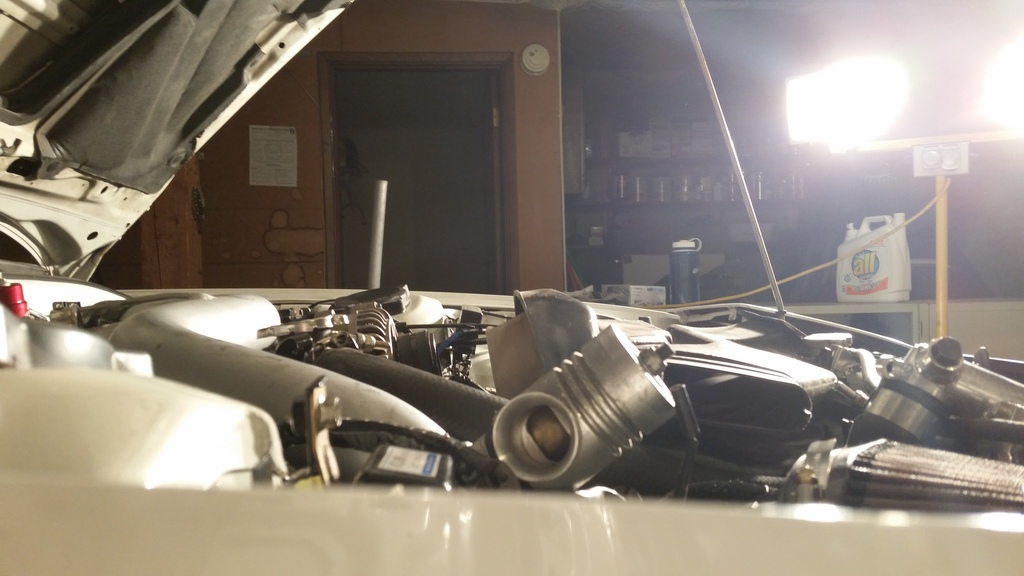
And now she is ready to fire for my first stage which will be using the TMIC just for the break in period so that I can drive the car to my work to drill holes and cut some sheet metal for the FMIC install. You can see here I have the fuel pressure regulator scrunched over to the side. Unfortunately it will not fit anywhere else with the TMIC in place so it will have to do temporarily. Performed a fuel leak check and after some electrical gremlins the fuel system checked out perfectly.
I had some more trouble with the starter, but as soon as I replaced that she cranked without issue.
Today was the first fire day but it didn't go so well......
Built up oil pressure, hooked up a battery booster and she started up right away. Revs shot up to 3k and the car would just stumble and die. Could not get it to hold steady revs or idle at all without dying.
Started with the basics and we had fuel,spark and everything hooked up properly electric-wise.
After a lot of frustration and some time to clear my head, I started to check for Vac leaks. Found this..........
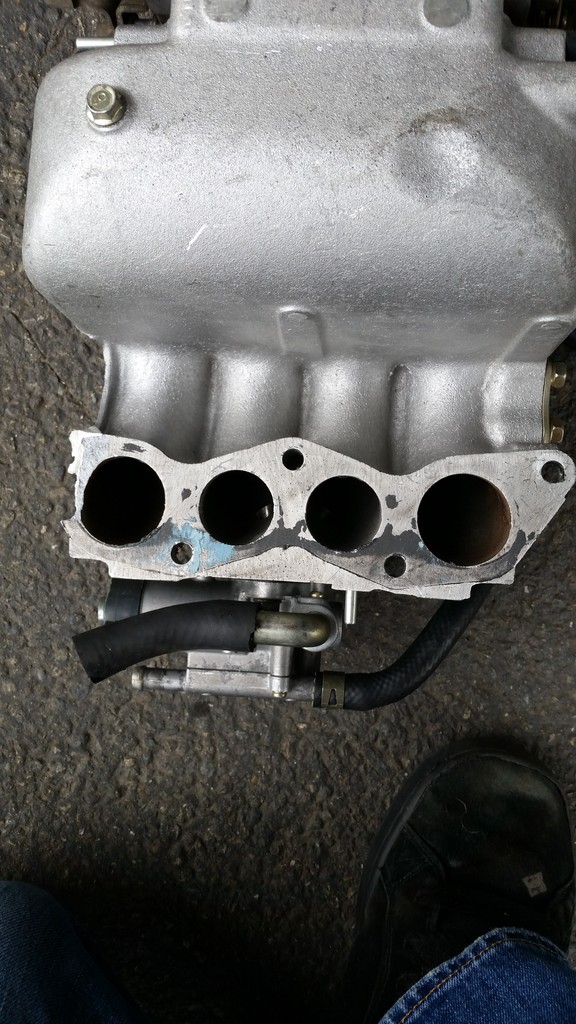
Apparently It had cracked during the installation. I tried to fill it with some sealant to see if it would make a difference, but it was too far gone.
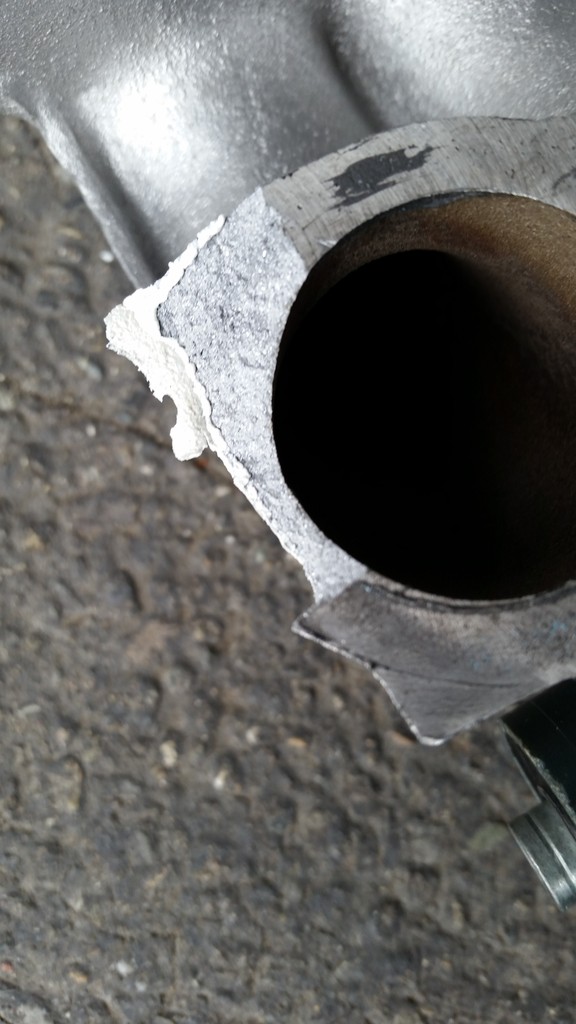
Luckily the piece that was broken off was a perfect fit so I'm pretty confident nothing made its way into the engine.
So here I am. If anyone has a spare UIM please let me know!!! Thought I found one locally, but the guy is out of town for a couple weeks. I'm itching to get this thing running!
I have read a lot about startup items and I would like some input on what steps you guys do in order on a new rebuild.
I'm thinking (Once I nail down an idle)
1. TPS
2. Lock down the timing
3. get idle rock steady
4. Load in the timing map by Arghx on the Rtek
5. Use it to tune under 3-4k rpm under break in.
Let me know if you have any input on what order you accomplish things after a rebuild!
My first task was to finish up the battery relocation. Ran the 1/0 cable up through the driver's side floorboard and into the engine compartment. I only had to drill one hole behind the driver's seat to accommodate the cable. You can see the first circuit breaker and the hole I ran the cable through.
That 1/0 cable is a pita to run!

Here is the c/b in the engine bay. I am a little worried about these c/b as they were pretty cheap, but I didn't really have too many other options. Got all the wiring done and kept a little extra just in case I'm forced to relocate this when I add the FMIC.

As tidy as it's going to get!

My next issue was the used RB downpipe I purchased off of Craigslist. Someone welded this second bung is a very inconvenient location. First off, it was much too close to the turbo and secondly when I went to temp install it, I saw that it was in a spot that the sensor would either have to be 1" tall or I would be forced to smash the sheet metal in to make some space. This was definitely not an option for me.
It's almost like they guessed where it should be and went with it. This is looking up from under the car and although it's difficult to see, there is no room for a wideband sensor there!

From here I proceeded to weld in a new bung and plug the old one. I put it the recommended distance down the pipe and took it to a local shop to get welded in.
There was also a wayward EGT probe bung that got plugged.
I constructed a heat sink of a sort out of some thin gauge copper sheeting to help with sensor longevity.

After a couple more weeks I plugged along at it and got her here.
Like my gravity trans fluid setup?

And now she is ready to fire for my first stage which will be using the TMIC just for the break in period so that I can drive the car to my work to drill holes and cut some sheet metal for the FMIC install. You can see here I have the fuel pressure regulator scrunched over to the side. Unfortunately it will not fit anywhere else with the TMIC in place so it will have to do temporarily. Performed a fuel leak check and after some electrical gremlins the fuel system checked out perfectly.
I had some more trouble with the starter, but as soon as I replaced that she cranked without issue.

Today was the first fire day but it didn't go so well......
Built up oil pressure, hooked up a battery booster and she started up right away. Revs shot up to 3k and the car would just stumble and die. Could not get it to hold steady revs or idle at all without dying.
Started with the basics and we had fuel,spark and everything hooked up properly electric-wise.
After a lot of frustration and some time to clear my head, I started to check for Vac leaks. Found this..........

Apparently It had cracked during the installation. I tried to fill it with some sealant to see if it would make a difference, but it was too far gone.

Luckily the piece that was broken off was a perfect fit so I'm pretty confident nothing made its way into the engine.
So here I am. If anyone has a spare UIM please let me know!!! Thought I found one locally, but the guy is out of town for a couple weeks. I'm itching to get this thing running!
I have read a lot about startup items and I would like some input on what steps you guys do in order on a new rebuild.
I'm thinking (Once I nail down an idle)
1. TPS
2. Lock down the timing
3. get idle rock steady
4. Load in the timing map by Arghx on the Rtek
5. Use it to tune under 3-4k rpm under break in.
Let me know if you have any input on what order you accomplish things after a rebuild!
05-18-15, 10:17 AM
#34
might be a good time to source an FD upper and go FMIC. rather than some intermediate build only to change it later. break it in with what its going to run in the future, just lower boost.
Also you can set the TPS to WOT with the motor cold. and if you dont have the stock fast idle control on the backside of the manifold you can set it to "hot idle" any time.
Also you can set the TPS to WOT with the motor cold. and if you dont have the stock fast idle control on the backside of the manifold you can set it to "hot idle" any time.
Last edited by sp0ngebob; 05-18-15 at 10:20 AM.
05-18-15, 10:50 AM
#35
Well I got another S4 UIM on the way.
Spongebob, I like the idea but with my current situation I don't possess the means to install the FMIC I have until I drive it to my work. I have a few reasons for not wanting an FD upper. I don't exactly know where to source an adapter these days (Other than getting lucky on the classifieds), I would have to change the FMIC setup considerably, and I don't have the flexibility in tuning with just the Rtek to take advantage of the increased airflow.
I would love to do it someday, but right now while I can, I want to make sure it will run before I put anymore money into it.
I'm trying to plan a second phase to this build probably in a couple years or so where I can upgrade the turbo, do a full custom v mount setup and a standalone ecu all at the same time since I have most of the other supporting mods in place.
07-07-15, 03:11 PM
#36
Lots of updates with so little time...
Great news is that the car runs!!
Once I replaced the UIM, she fired right up and after a couple minor leaks that were fixed I was off down the road.
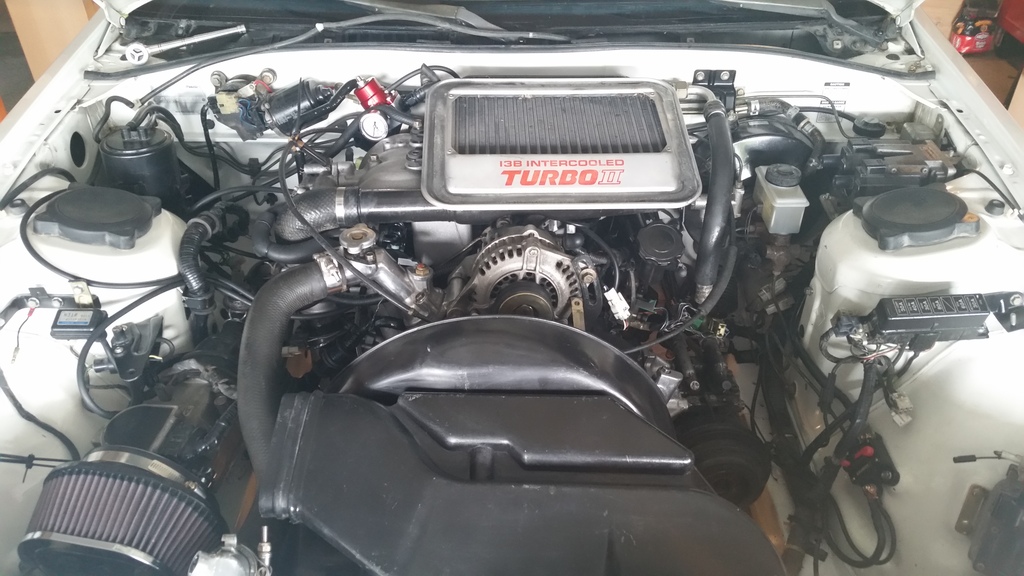
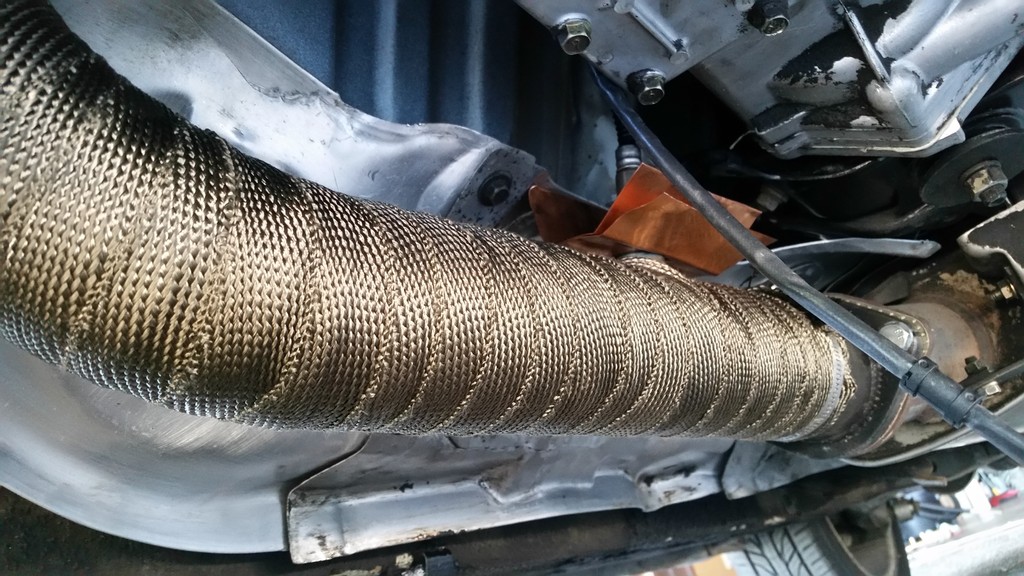
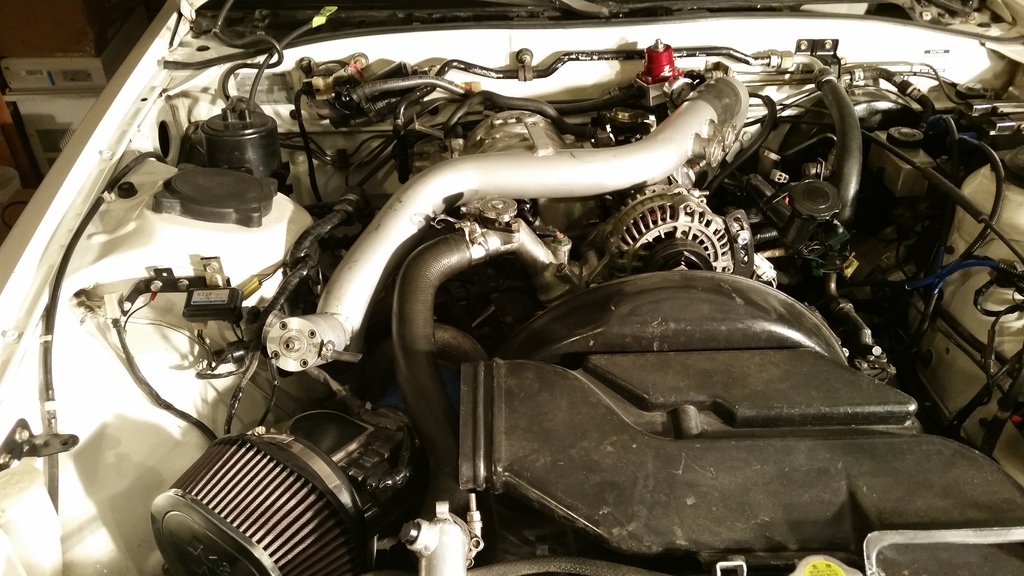
I got a high temp "titanium" wrap for the downpipe and installed it along with the heat sink I fabbed. The underhood temps went down drastically. (Just going by feel, don't have any numbers)

Here is a shot after the install. I love how it came out.
I have been trying to drive it as much as I can to start building compression so the car will idle. At first it wouldn't want to but after about 100mi it will hold a steady idle when warmed up. It has a slight misfire at idle, but that will get more attention later.
Have to get ready for work, I'll post some more tonight.
Great news is that the car runs!!
Once I replaced the UIM, she fired right up and after a couple minor leaks that were fixed I was off down the road.
I got a high temp "titanium" wrap for the downpipe and installed it along with the heat sink I fabbed. The underhood temps went down drastically. (Just going by feel, don't have any numbers)


Here is a shot after the install. I love how it came out.

I have been trying to drive it as much as I can to start building compression so the car will idle. At first it wouldn't want to but after about 100mi it will hold a steady idle when warmed up. It has a slight misfire at idle, but that will get more attention later.
Have to get ready for work, I'll post some more tonight.
07-08-15, 02:13 AM
#37
So the engine is doing really well so far. Oil pressure is great, the car runs cool and I cant wait to start tuning when it is broken in.
I have a few minor concerns and hopefully someone will chime in on these issues.
1. Sometimes when cranking, I can hear a rushing sound. It is almost like pressurized fluid spraying. When the car starts the noise stops. I can't quite pinpoint where it's coming from, but my two guesses would be that it is something related to the coolant system or sometimes I get the feeling the sound is coming from behind me almost as if it were the fuel pump.
There are no leaks anywhere and I am not losing coolant. The coolant has been bled many times and I no longer am getting any air escaping when I try to bleed it.
I also checked near the fuel pump and it is not leaking any fuel.
I'm really stumped on this one.....
2. Exhaust leaks..... I hear a lot of puttering and peeping sounds from the exhaust. Everything is on tight. Does anyone have any suggestions on pinpointing where an exhaust leak is originating from?
3. My next issue is trying to nail down a logical order of getting things dialed in then tuning. I know what I should adjust (TPS,BAC,timing, etc.) But not exactly when to adjust it and in what order.
Currently the idle fluctuates quite a bit. Sometimes it will idle great at spec and sometimes it idles near 1k rpm or when its still cold it will fluctuate between 250-500 and run like a tractor. I am assuming that this is just part of the break in and compression building process, but when should I start adjusting everything? Would it be best to just put my 1000mi on and go from there or could I start sooner?
I was able to dial in the timing when it was idling great so that is good at this point.
I read a ton on the forum and know the importance of making these adjustments, but through countless hours of research I have never seen a logical order presented. (i.e. Timing>TPS>BAC>fuel pressure just as an example.)
Maybe I am just too worried about it. I want all of these things perfect so I can mess with the next headaches of tuning and modernizing the suspension.
If any of the pros can chime in, it would be greatly appreciated.
Other than this everything is going pretty good. I am up to 241mi on the new engine and am having no issues with hot starts, high temps or wacky readings from anything I can track on the rtek.
Just feels good to be back on the road again.........................
I have a few minor concerns and hopefully someone will chime in on these issues.
1. Sometimes when cranking, I can hear a rushing sound. It is almost like pressurized fluid spraying. When the car starts the noise stops. I can't quite pinpoint where it's coming from, but my two guesses would be that it is something related to the coolant system or sometimes I get the feeling the sound is coming from behind me almost as if it were the fuel pump.
There are no leaks anywhere and I am not losing coolant. The coolant has been bled many times and I no longer am getting any air escaping when I try to bleed it.
I also checked near the fuel pump and it is not leaking any fuel.
I'm really stumped on this one.....
2. Exhaust leaks..... I hear a lot of puttering and peeping sounds from the exhaust. Everything is on tight. Does anyone have any suggestions on pinpointing where an exhaust leak is originating from?
3. My next issue is trying to nail down a logical order of getting things dialed in then tuning. I know what I should adjust (TPS,BAC,timing, etc.) But not exactly when to adjust it and in what order.
Currently the idle fluctuates quite a bit. Sometimes it will idle great at spec and sometimes it idles near 1k rpm or when its still cold it will fluctuate between 250-500 and run like a tractor. I am assuming that this is just part of the break in and compression building process, but when should I start adjusting everything? Would it be best to just put my 1000mi on and go from there or could I start sooner?
I was able to dial in the timing when it was idling great so that is good at this point.
I read a ton on the forum and know the importance of making these adjustments, but through countless hours of research I have never seen a logical order presented. (i.e. Timing>TPS>BAC>fuel pressure just as an example.)
Maybe I am just too worried about it. I want all of these things perfect so I can mess with the next headaches of tuning and modernizing the suspension.
If any of the pros can chime in, it would be greatly appreciated.
Other than this everything is going pretty good. I am up to 241mi on the new engine and am having no issues with hot starts, high temps or wacky readings from anything I can track on the rtek.

Just feels good to be back on the road again.........................
07-08-15, 12:31 PM
#38
1. That rushing sound might be fuel returning to the tank via the return  if you go to key on, last position before start can you hear it? did you reattach your cold start tank? you should disconnect it if you did. Its this little resoivor on the firewall that holds coolant and lets it ge sucked into the motor on cold starts. theres a tsb about it.
2. exhaust leaks are pretty easy to find. get under the car and look for little black streaks. it will be carbon blowing out the seals. tell tale sign. Plus theres only what...4-5 gaskets in the exhaust stream? at the keg to manifold, manifold to turbo, turbo to DP, DP to exhaust? not sure if you have a 1 piece or what on there.
3. i thought there was a writeup about that. Oldschool way is TPS first, ignition timing second because it will affect idle speed, then BAC to actually adjust final idle speed. assuming your throttle body stops havent been putzed with.
if you are getting a weird idle speed that sounds like an air leak after the AFM or that you have a blockage in the fast idle valve...assuming you still have that on the back of the manifold. maybe try the carb cleaner trick or just use water if you suspect a vac leak. water will do the same thing but you wont have to worry about a flash fire with a hot engine.
kinda running the logic train, if you were experiencing a constant high idle id immidiately say that the fast idle valve is plugged.
if you had a constant low, and unstable idle, id say the fast idle valve was in the "hot" position constantly but you have a vac leak
if you got a random speed idle and its rough it sounds like your FIV is working but you have a vac leak.
i guess it all points to a vac leak in my brain
if you go to key on, last position before start can you hear it? did you reattach your cold start tank? you should disconnect it if you did. Its this little resoivor on the firewall that holds coolant and lets it ge sucked into the motor on cold starts. theres a tsb about it. 2. exhaust leaks are pretty easy to find. get under the car and look for little black streaks. it will be carbon blowing out the seals. tell tale sign. Plus theres only what...4-5 gaskets in the exhaust stream? at the keg to manifold, manifold to turbo, turbo to DP, DP to exhaust? not sure if you have a 1 piece or what on there.
3. i thought there was a writeup about that. Oldschool way is TPS first, ignition timing second because it will affect idle speed, then BAC to actually adjust final idle speed. assuming your throttle body stops havent been putzed with.
if you are getting a weird idle speed that sounds like an air leak after the AFM or that you have a blockage in the fast idle valve...assuming you still have that on the back of the manifold. maybe try the carb cleaner trick or just use water if you suspect a vac leak. water will do the same thing but you wont have to worry about a flash fire with a hot engine.
kinda running the logic train, if you were experiencing a constant high idle id immidiately say that the fast idle valve is plugged.
if you had a constant low, and unstable idle, id say the fast idle valve was in the "hot" position constantly but you have a vac leak
if you got a random speed idle and its rough it sounds like your FIV is working but you have a vac leak.
i guess it all points to a vac leak in my brain
Last edited by sp0ngebob; 07-08-15 at 12:36 PM.
07-08-15, 09:35 PM
#39
Moderator
iTrader: (3)
Join Date: Mar 2001
Location: https://www2.mazda.com/en/100th/
Posts: 30,830
Received 2,597 Likes
on
1,845 Posts
congrats on getting the car running.
the order isn't super critical, kinda.
TPS is probably the easiest to do first, as all the car needs to be is warmed up. although if its new to you, expect to recheck the TPS shortly, and then again in 6 months.
for timing, the car needs to be under a certain rpm, although once its set it wont move.
once those are right, then you wanna do the idle mixture and BAC, these kind of inter relate, initially you'll wanna do them together. once its set, you probably won't have to touch the BAC again, but might tweak the mixture the next time you do the tps.
 07-09-15, 01:58 AM
#40
Thanks so much for the input!
Maybe it is just the fuel return, it is just loud and concerning. Key on = no sound. It only happens when cranking and even then it happens maybe 75% of the time. The cold start stuff is all removed.
1. That rushing sound might be fuel returning to the tank via the return if you go to key on, last position before start can you hear it? did you reattach your cold start tank? you should disconnect it if you did. Its this little resoivor on the firewall that holds coolant and lets it ge sucked into the motor on cold starts. theres a tsb about it.
if you go to key on, last position before start can you hear it? did you reattach your cold start tank? you should disconnect it if you did. Its this little resoivor on the firewall that holds coolant and lets it ge sucked into the motor on cold starts. theres a tsb about it.
07-09-15, 10:40 AM
#41
i would assume fuel return then. if theres no fluid randomly missing and theres none on the ground then green light.
also oil wouldn't "rush" its too thick in general. it would have to be something with a lower viscosity like coolant or fuel and theres no coolant in the back of the car. only fuel.
also oil wouldn't "rush" its too thick in general. it would have to be something with a lower viscosity like coolant or fuel and theres no coolant in the back of the car. only fuel.
 01-01-16, 07:54 PM
#45
Well it's about time that I update this build. A lot has happened over the past few months!
First of all I got rid of the "rushing" sound. I was having trouble with voltage drops to the starter. I wired in a relay like the kit that is sold for the same problem. After that, the starter works perfectly and cranks right up every time. Whatever the rushing noise was, it disappeared after the starter began to spin faster.
I spent the next few months breaking in the motor and just enjoying the car. No issues whatsoever and after about 1500mi I began to give it a little boost. I kept it very low and rarely hit boost until I hit 2000mi.
Notes from break in: Car runs smooth and strong. Nailed down the idle to a nice 750 and after putting enough miles on her she would start perfect and run nice even on cold/hot starts.
For added protection I performed the fuel pump re-wire so the pump now gets full voltage at all times. Then I picked this up for a nice price and installed her!
In case you can't tell by first look that is an FD alternator which greatly improved the entire system! My windows even roll up much faster than they used to!
Kept driving all the while knowing she would be going under the knife again soon for what I picked up...............
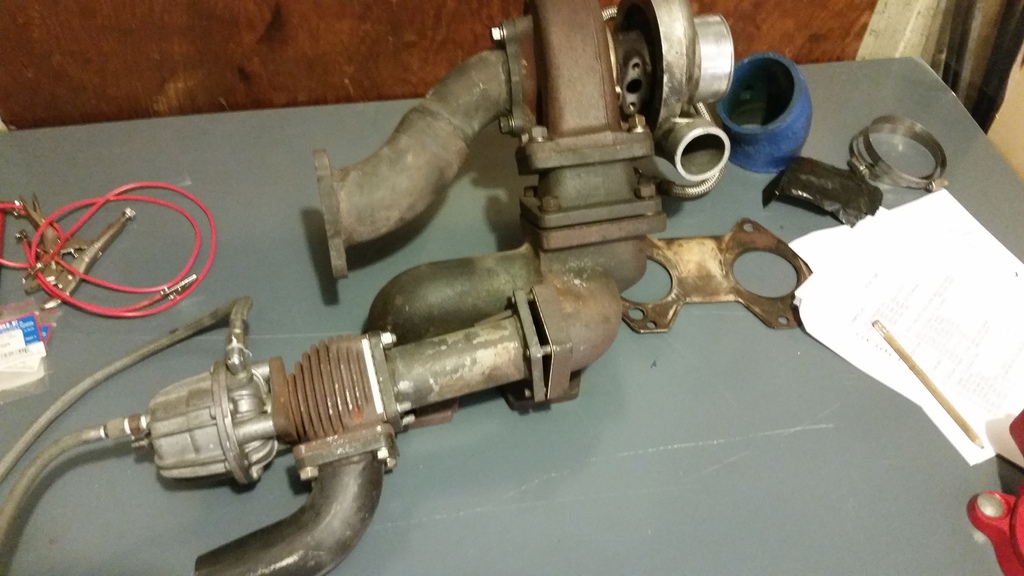

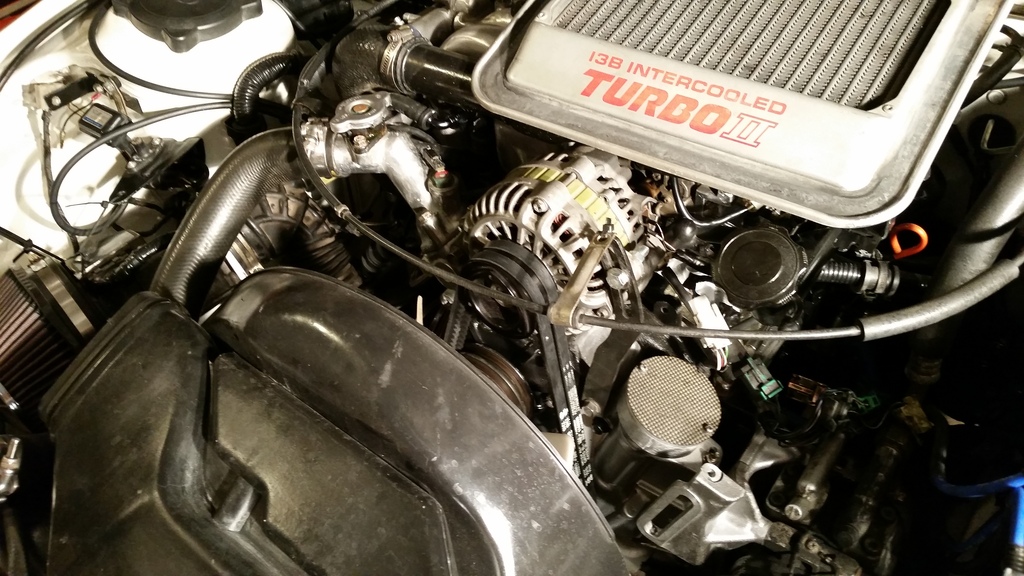
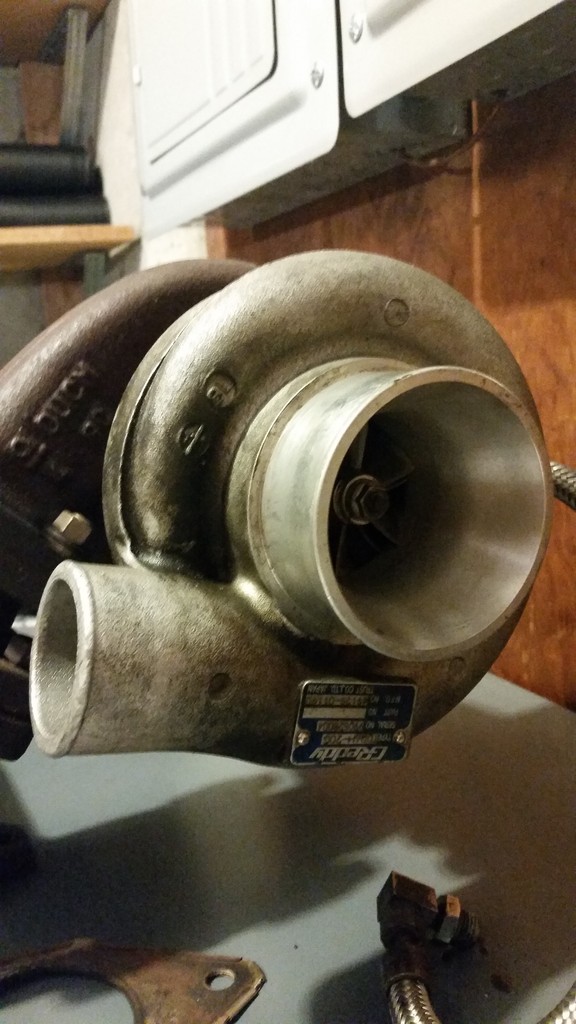
Got a sweet deal on this old school Greddy/Trust FMIC setup and TD06H 20G turbo kit! The wife hated it, but it was much too good to pass up.
I know there are much better turbos, but this is perfect for the power level I want and I consider it to be a period piece now. This car will be a prime example of what was available many years ago.
The turbo is in great shape. The manifold is perfect with no cracks.
The intercooler itself needed some work....
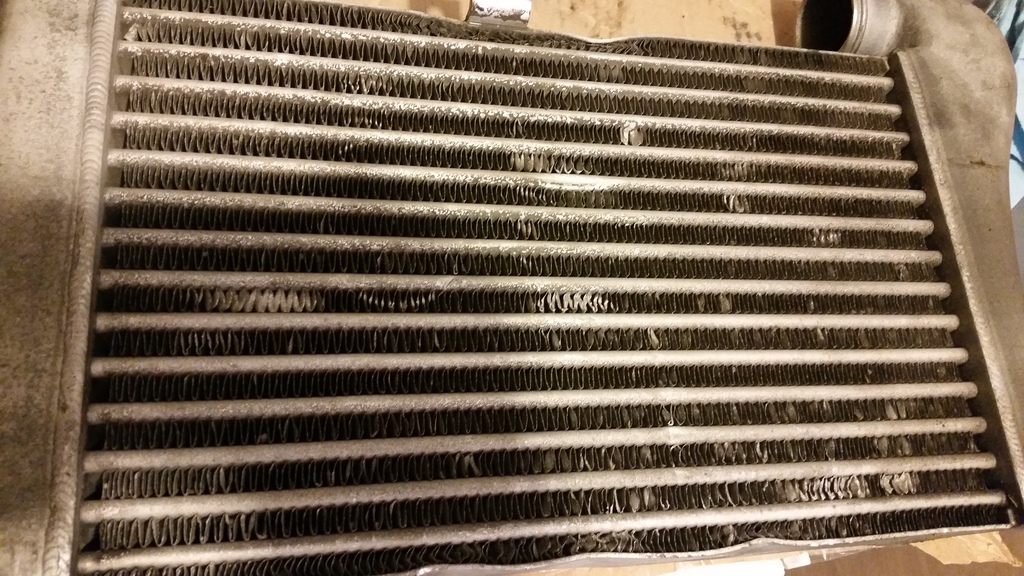
I did not let that get me down! I spent countless hours straightening fins, bending back the buckled plates and polishing her up as good as I could.
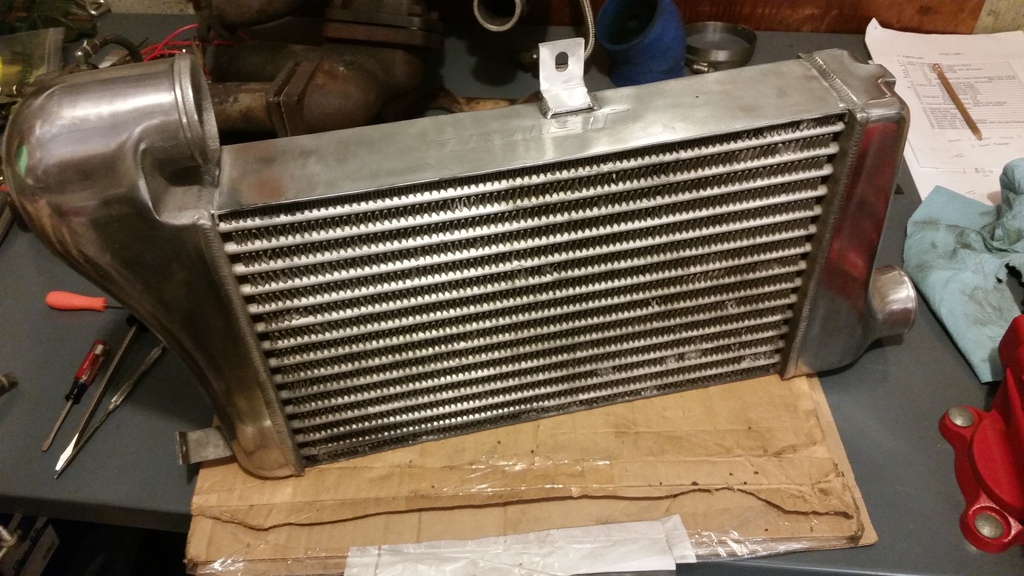
Overall I think it came out great! I tested it for leaks and it seems like a solid piece to me!
First of all I got rid of the "rushing" sound. I was having trouble with voltage drops to the starter. I wired in a relay like the kit that is sold for the same problem. After that, the starter works perfectly and cranks right up every time. Whatever the rushing noise was, it disappeared after the starter began to spin faster.
I spent the next few months breaking in the motor and just enjoying the car. No issues whatsoever and after about 1500mi I began to give it a little boost. I kept it very low and rarely hit boost until I hit 2000mi.
Notes from break in: Car runs smooth and strong. Nailed down the idle to a nice 750 and after putting enough miles on her she would start perfect and run nice even on cold/hot starts.
For added protection I performed the fuel pump re-wire so the pump now gets full voltage at all times. Then I picked this up for a nice price and installed her!

In case you can't tell by first look that is an FD alternator which greatly improved the entire system! My windows even roll up much faster than they used to!
Kept driving all the while knowing she would be going under the knife again soon for what I picked up...............


Got a sweet deal on this old school Greddy/Trust FMIC setup and TD06H 20G turbo kit! The wife hated it, but it was much too good to pass up.
I know there are much better turbos, but this is perfect for the power level I want and I consider it to be a period piece now. This car will be a prime example of what was available many years ago.
The turbo is in great shape. The manifold is perfect with no cracks.

The intercooler itself needed some work....


I did not let that get me down! I spent countless hours straightening fins, bending back the buckled plates and polishing her up as good as I could.

Overall I think it came out great! I tested it for leaks and it seems like a solid piece to me!
01-01-16, 08:21 PM
#46

And now she is prepped for surgery........
First off, I spent a good while tracking down pdf files of the original manuals for the turbo kit as well as the intercooler. I have them available if anyone needs them in the future just message me. After reviewing the parts lists for both kits, I learned that the seller had lied to me about it having 100% of the parts involved.
Of course he disappeared off the face of the earth when I messaged him about it, but oh well it was still a great deal and the parts could be fabbed/sourced elsewhere.
I found that I was missing the oil drain line (Ordered a kit from Kinugawa turbo)
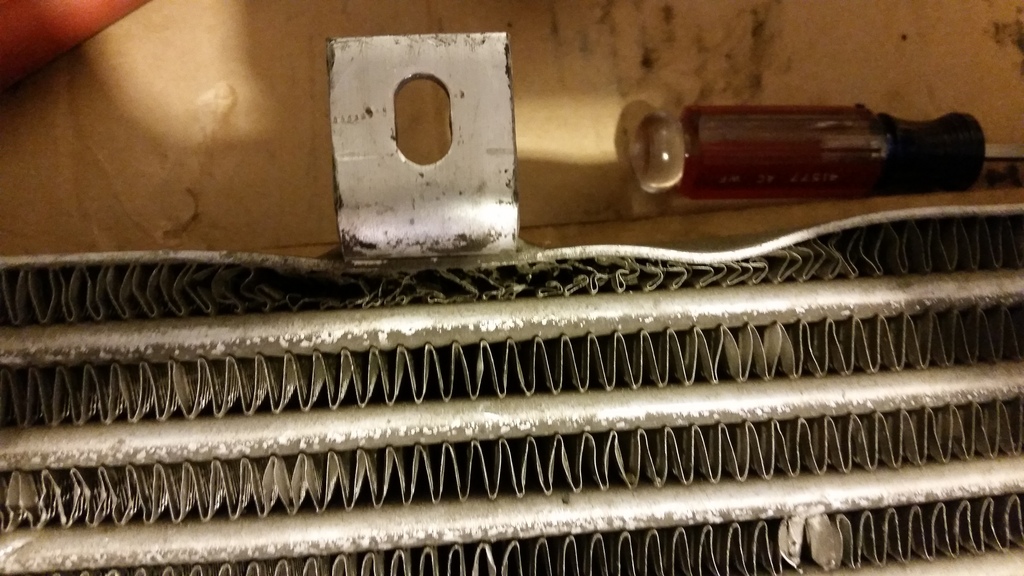
I was also missing the brackets for the intercooler and a bunch of couplers and clamps. (I will fab the necessary brackets and I purchased a bunch of couplers and clamps)
I started by taking everything apart. I knew I was going to need more fuel so I picked up these brand new RC 1200cc injectors for the secondary spots.

Spent some time re-wiring the injector pigtails with new connectors for added insurance.
Got some more of the DEI Titanium wrap and wrapped everything up

Got the turbo mocked up so that I could start on the intercooler.

I really enjoyed (sarcasm) installing this intercooler. It was my first time putting a front mount intercooler on anything, but armed with my poorly translated instructions I dove right in!
The kit required you to modify the hood latch brace by drilling an extra hole. You must grind some material from the A/C fan housing and chop off some of the hood latch mechanism. Of course you must also cut a hole in the car which is something I never wanted to do.
Here are the first components to be modified

The instructions leave a bit to be desired, so I removed a bit more than needed, but it looks nice


On the latch you have to chop off a little bit that extends from the cable mount

Next up I had to remove the old battery box air duct. Not a problem since I don't use it anymore. Just drill off 2 rivets and its done

 01-01-16, 08:40 PM
#47
Next I had to cut the dreaded hole in the car. The manual gives a rough shaded area to be cut with no dimensions so I just went for it.
I spent a few hours trying to make it an nice as possible.

I painted the bare metal with gloss white and I will use some split fuel line as a cheap solution for chafing.
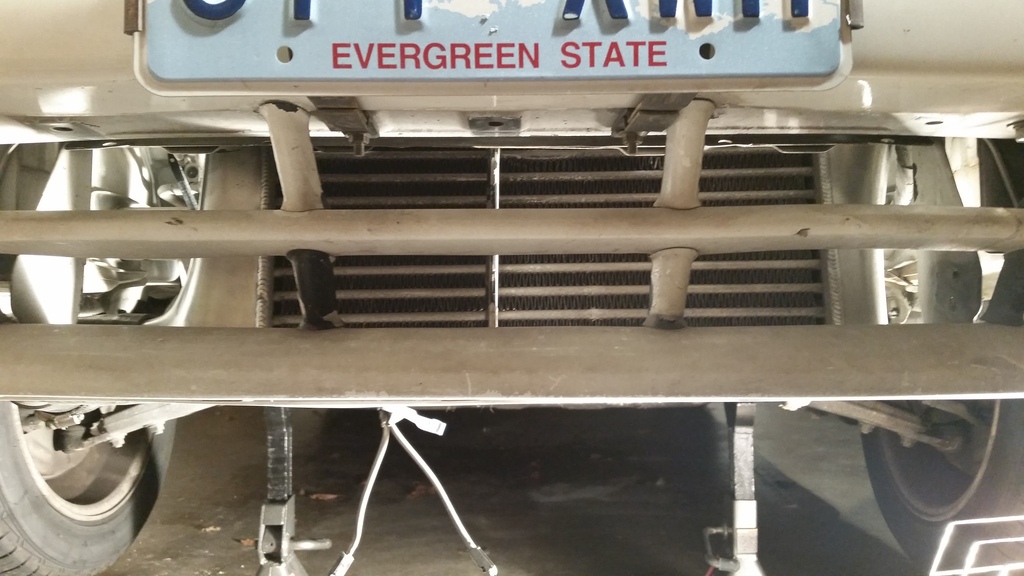
Mocked up the full kit!
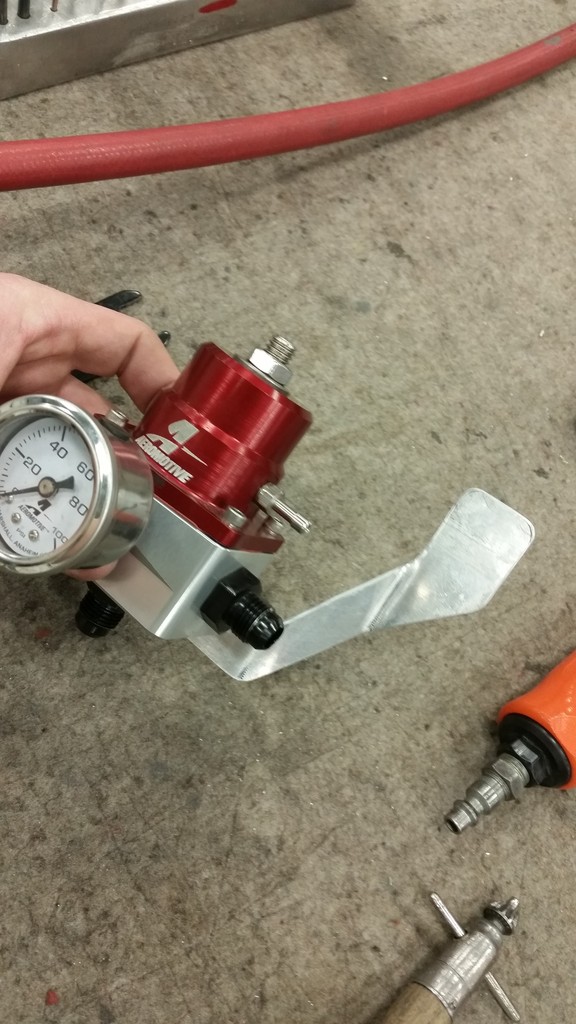
In this pic you can see where the fpr will be relocated. More on that later.

View from below to the turbo

I spent a few hours trying to make it an nice as possible.


I painted the bare metal with gloss white and I will use some split fuel line as a cheap solution for chafing.
Mocked up the full kit!
In this pic you can see where the fpr will be relocated. More on that later.


View from below to the turbo

 01-01-16, 08:51 PM
#48
Overall the kit was not too bad to mock up. The worst part was messing with the AC canister up front. I'm not sure what it does really, not much of an AC guy, just know that I want to keep it. It was a real pain keeping the lines away while cutting as well as intentionally bending them slightly to reposition the canister.
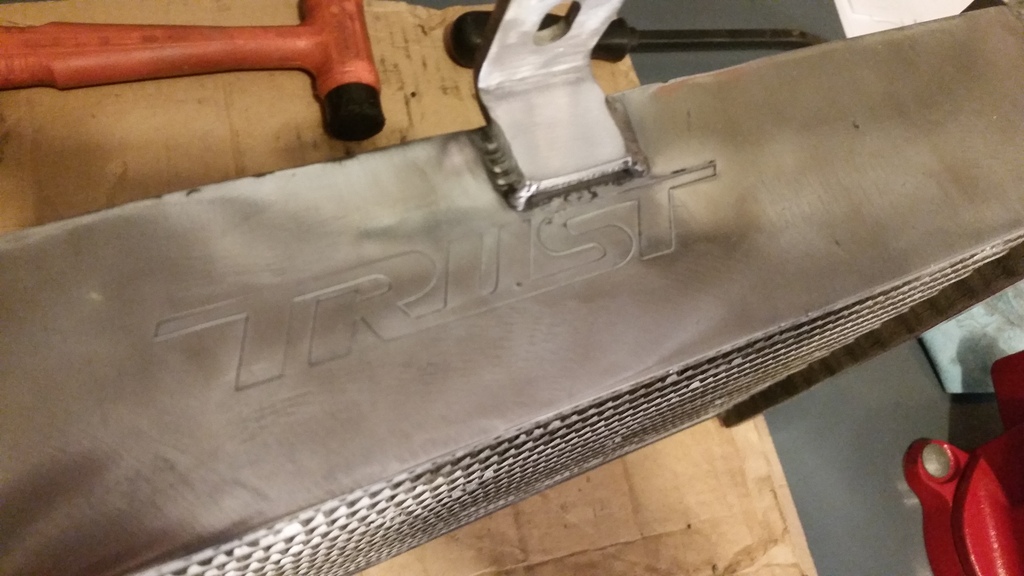
Once it was in place I identified areas that may chafe and they will get some sort of protection from that. I also made the mount bracket for the intercooler. Nothing to write home about, just a 7"x1" strap bent in a 90 with two holes in it.
This one I am a little more proud of...
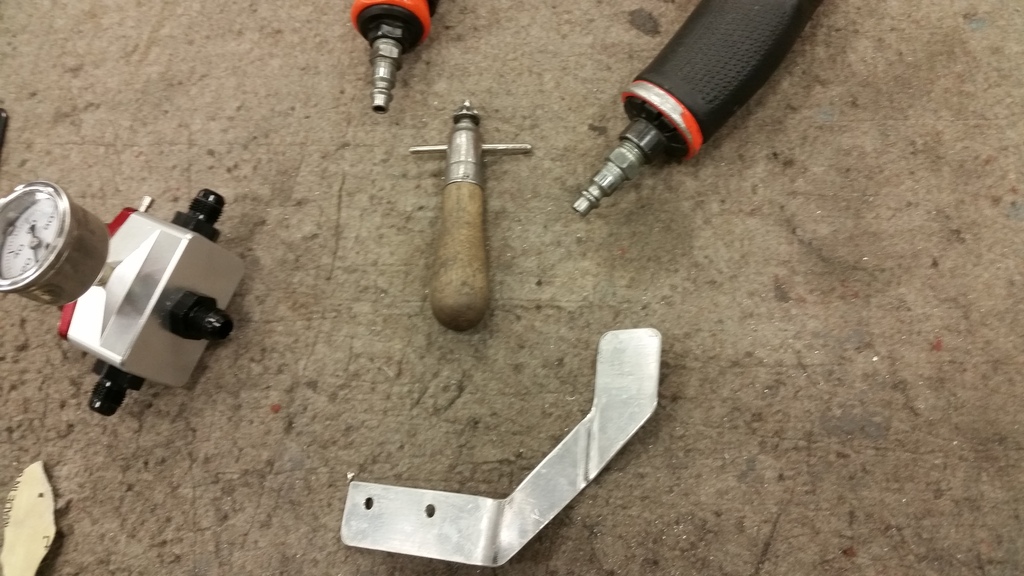
Made this for the FPR. It is .063" 2024 T-3 Aluminum. Nice simple design and it will allow the fpr to sit on the firewall and away from the AC hard lines. It will get primed and painted before I pick up a hole in the firewall and mount it.
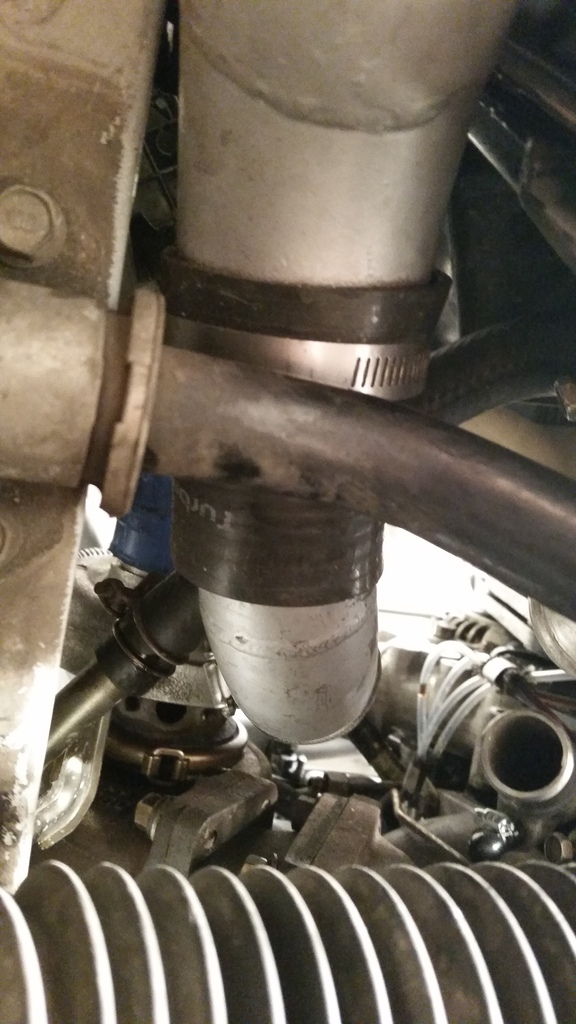
This entire time I kept looking at the elbow that goes between the AFM and turbo. It looked really gross like it had melted. Upon further inspection, I revealed that it had been covered with silicone to seal some micro-fractures.
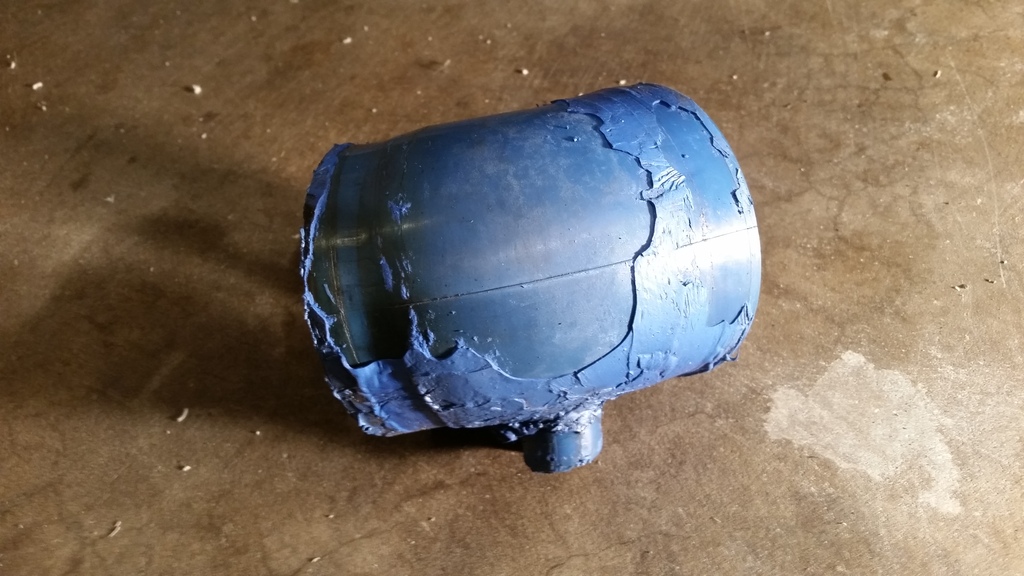
Just what I need at this stage.....
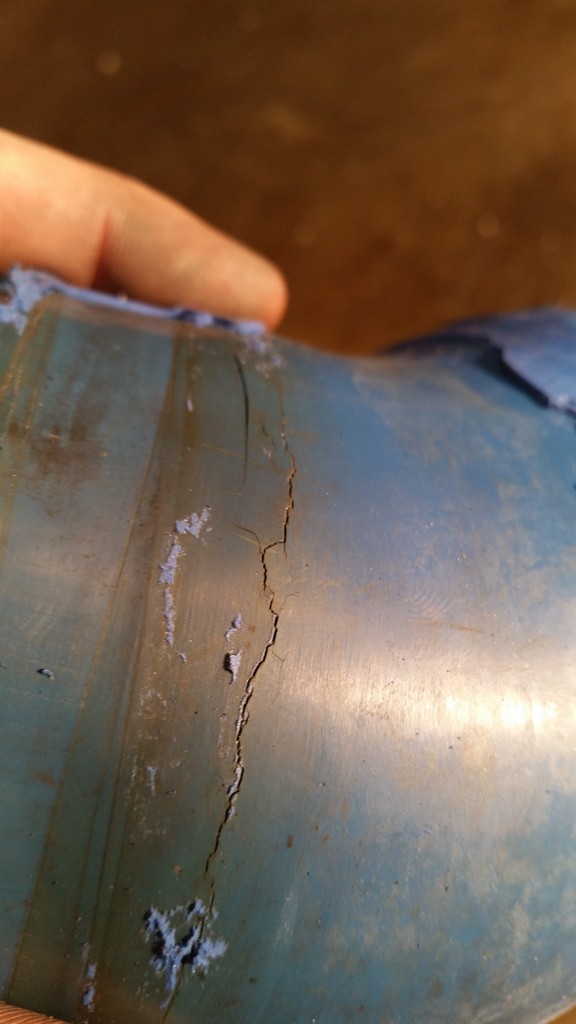
The cracks do not go all the way through as far as I can tell. I think I will try to do the same thing, except give it a proper cleaning first and then scuff the surface to let the sealant bond better. Do any of you have suggestions or know where I can get one of these or something similar?
01-27-16, 09:07 AM
#49
Ok so I got back at it and made a ton of progress.
I scraped more and more old sealant from the silicone intake coupler and found out that it was the authentic original piece.
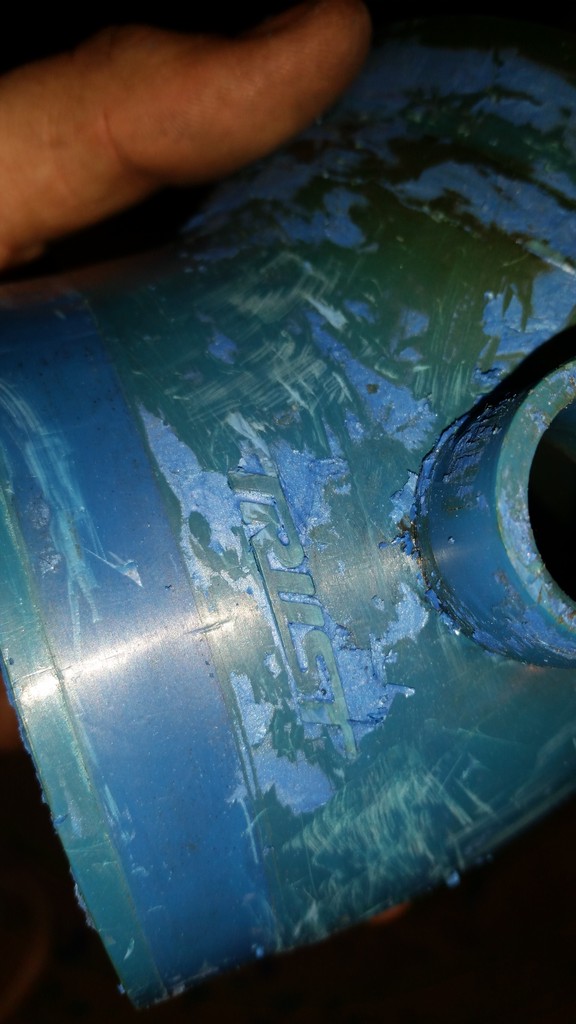
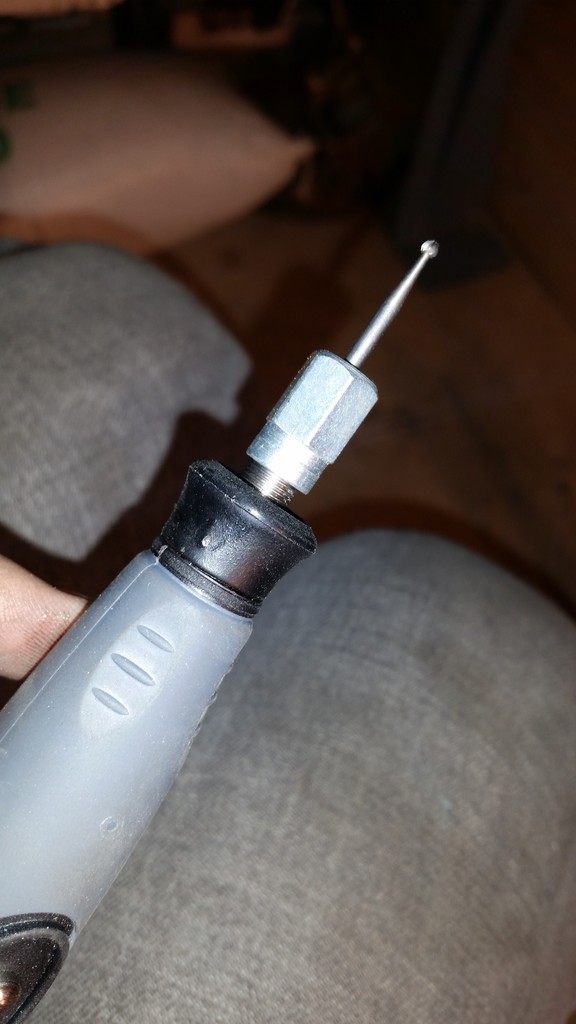
So I decided it was worth trying to save. I used a dremel with a tiny ball file to groove out all of the cracks until they were eliminated.
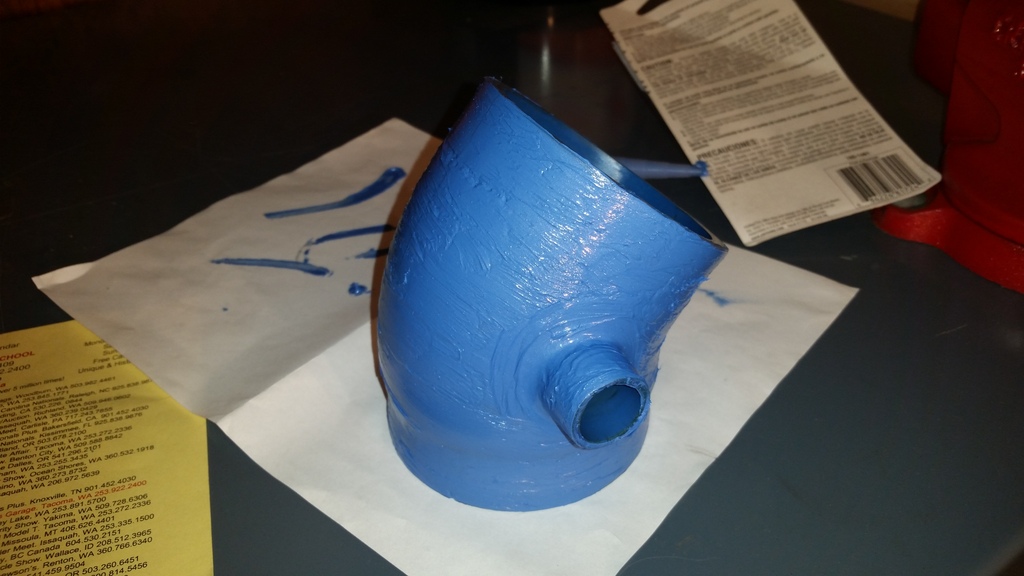
After a solid scuff....

I then applied some silicone and I feel that it is much better with the cracks eliminated and a better bonding surface now that it is scuffed.
Got the oil drain line installed. I just picked up a universal kit from Kinigawa turbo and cut the hose to fit. Nothing fancy here.
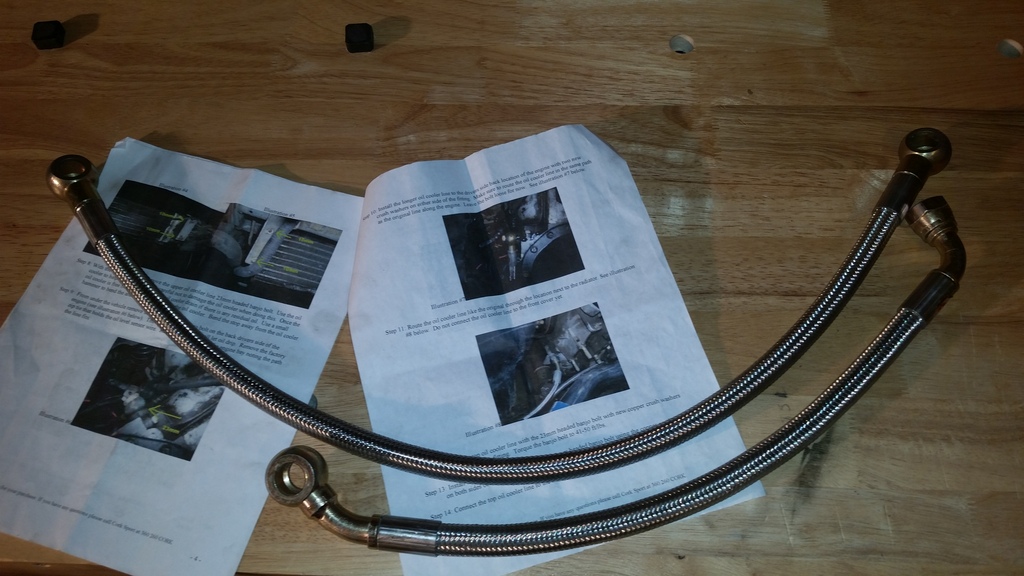
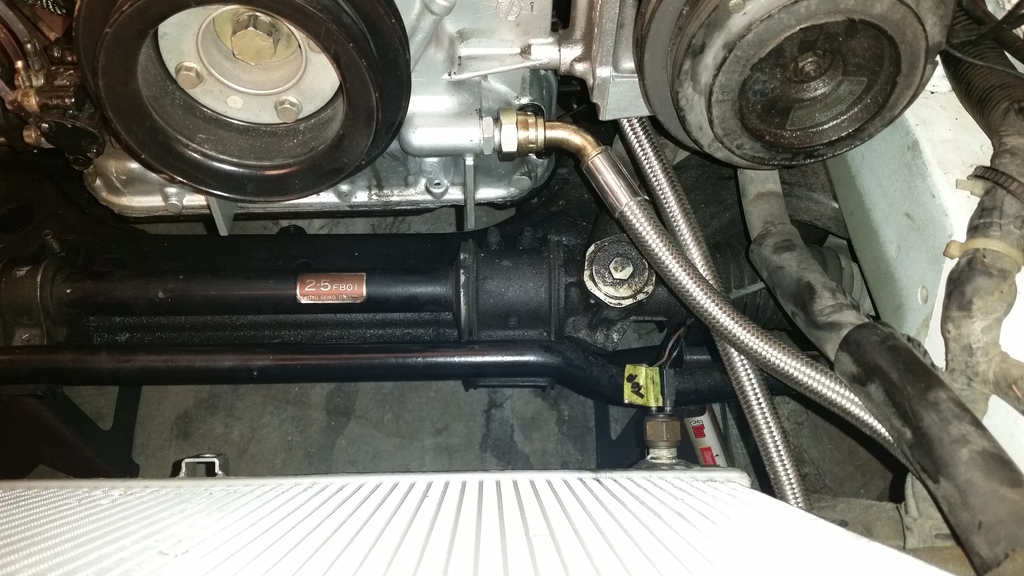
Also picked up some corksport braided lines to replace the leaky stock lines.
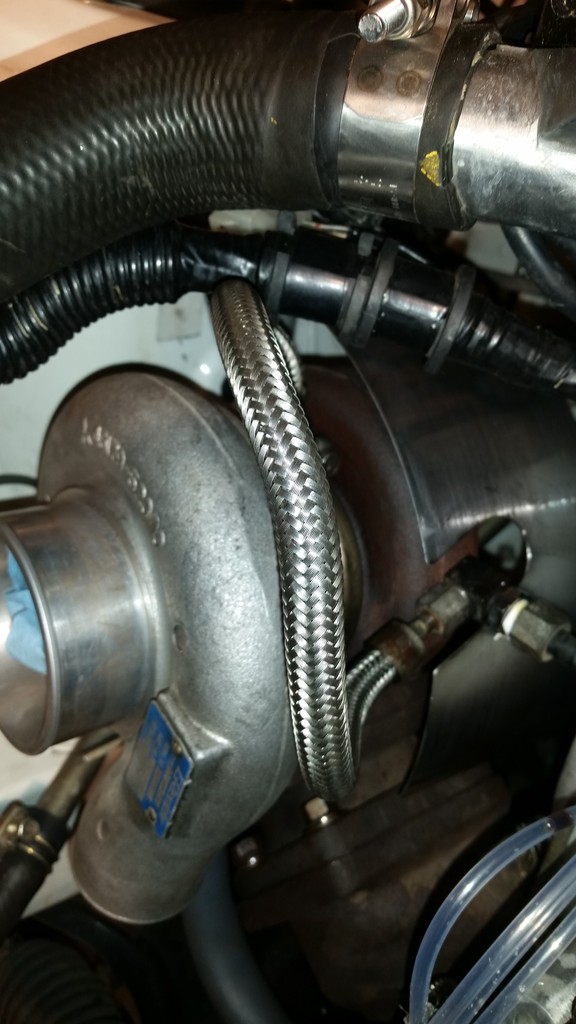
These were a real PITA to install. The oil feed line was damn near fused to the oil cooler. I managed to get if off after a lot of cursing.
Next I started working on a heat shield. I had a rather simple design and I really didn't know how well it would work. I needed something to keep the wire harness away from the turbo. I rolled a piece of stainless with a 90 degree bend on the end so that I could mount it to the shock tower and curve it over the turbo.
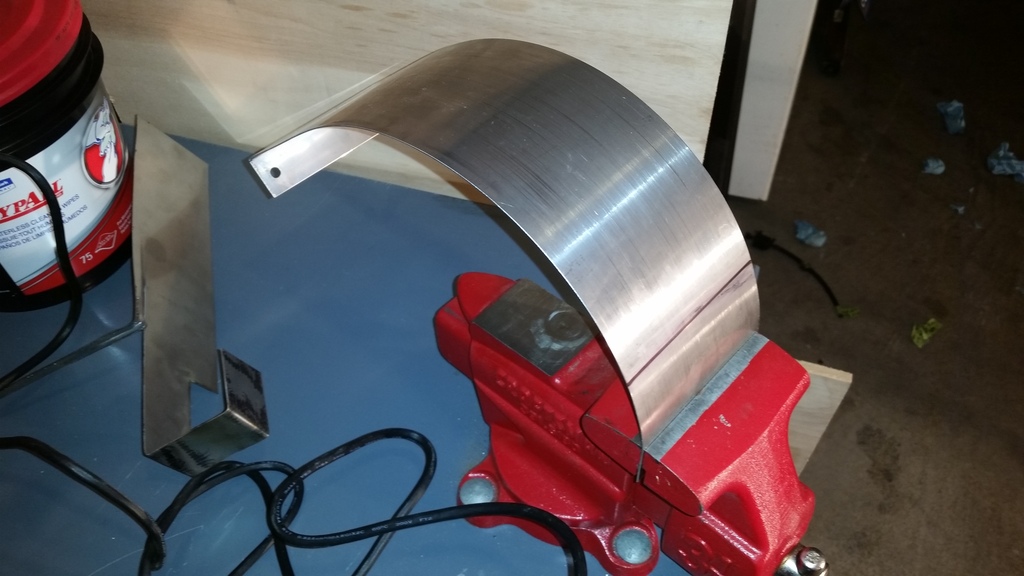
I then had to trim some off due to the trial and error method. I also cut a notch to clear the oil feed line. (This was just the rough cut)
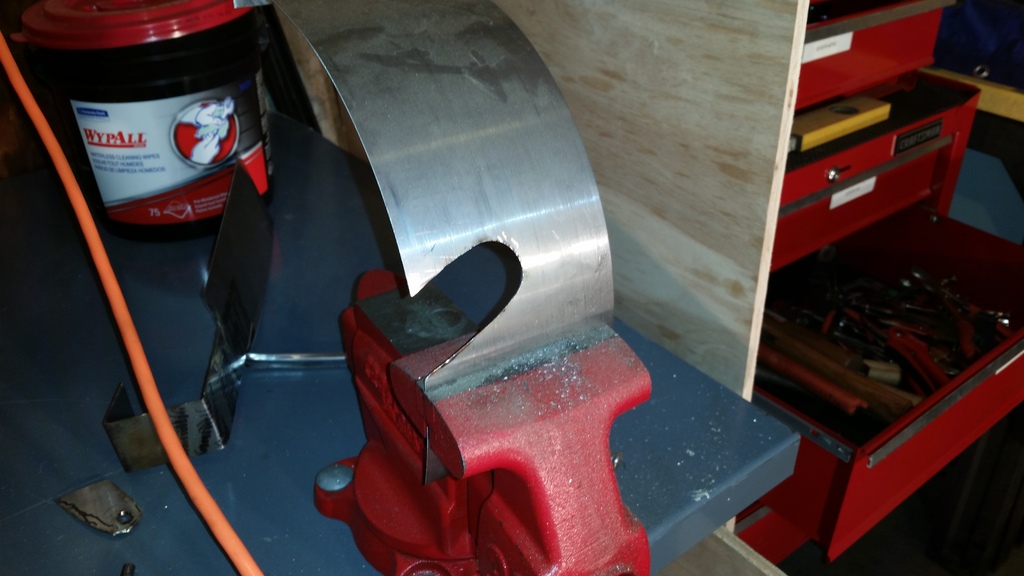
It fits really nice!
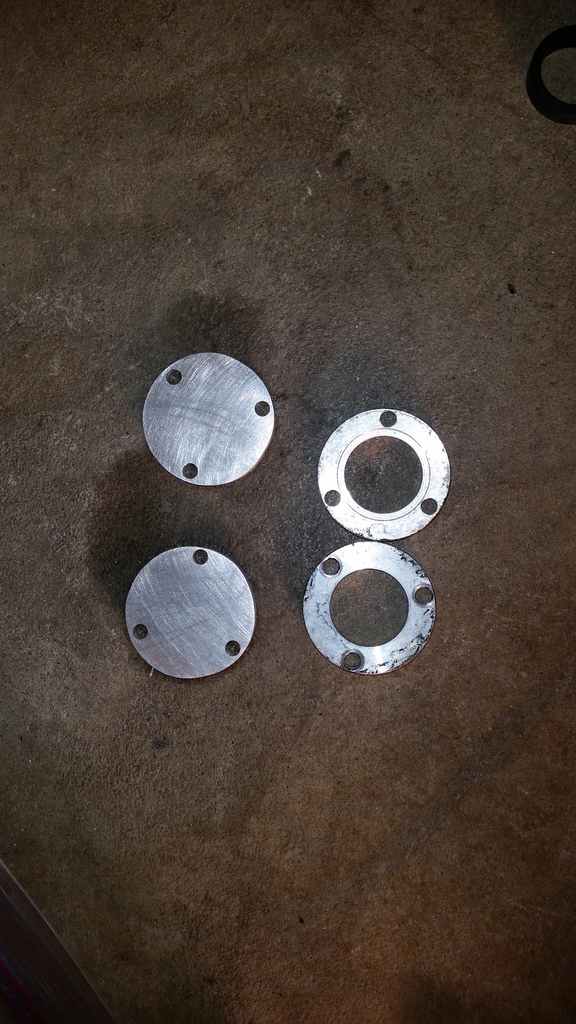
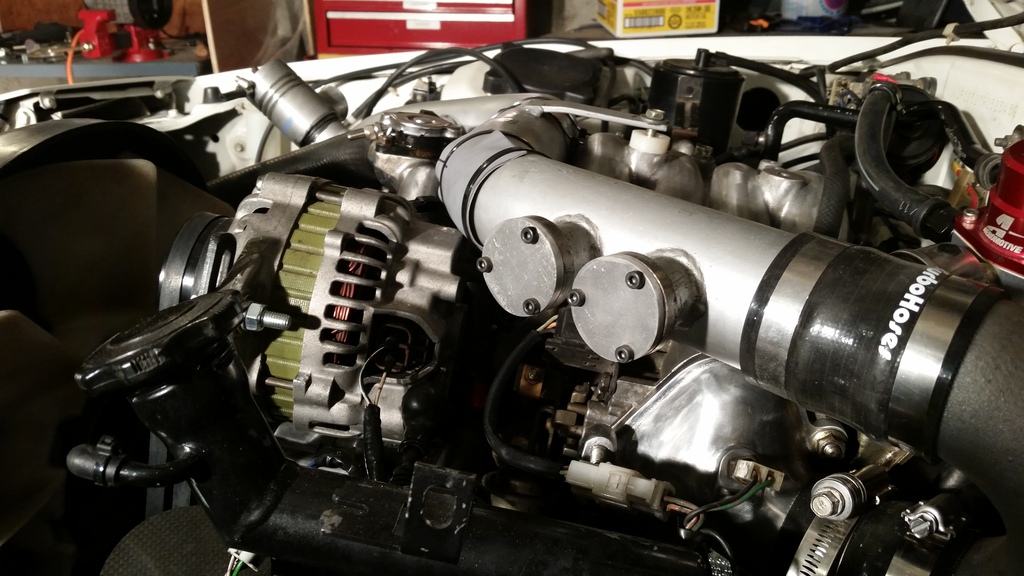
Next up I had to deal with the two massive holes from where the additional injectors mount up to the IC kit. I wanted to leave the option in the future so I made some caps from aluminum and installed with some sealant.
Installed with some fresh hardware... (Ignore the cheezy chafe tape on the pipe. The FD alt is much too big for this kit to fit perfectly. In the future I will either dent the pipe slightly or grind the alternator housing down some.)
I scraped more and more old sealant from the silicone intake coupler and found out that it was the authentic original piece.

So I decided it was worth trying to save. I used a dremel with a tiny ball file to groove out all of the cracks until they were eliminated.

After a solid scuff....

I then applied some silicone and I feel that it is much better with the cracks eliminated and a better bonding surface now that it is scuffed.

Got the oil drain line installed. I just picked up a universal kit from Kinigawa turbo and cut the hose to fit. Nothing fancy here.

Also picked up some corksport braided lines to replace the leaky stock lines.
These were a real PITA to install. The oil feed line was damn near fused to the oil cooler. I managed to get if off after a lot of cursing.


Next I started working on a heat shield. I had a rather simple design and I really didn't know how well it would work. I needed something to keep the wire harness away from the turbo. I rolled a piece of stainless with a 90 degree bend on the end so that I could mount it to the shock tower and curve it over the turbo.

I then had to trim some off due to the trial and error method. I also cut a notch to clear the oil feed line. (This was just the rough cut)

It fits really nice!

Next up I had to deal with the two massive holes from where the additional injectors mount up to the IC kit. I wanted to leave the option in the future so I made some caps from aluminum and installed with some sealant.

Installed with some fresh hardware... (Ignore the cheezy chafe tape on the pipe. The FD alt is much too big for this kit to fit perfectly. In the future I will either dent the pipe slightly or grind the alternator housing down some.)
 01-27-16, 09:08 AM
#50
Next up was a cool headlight cover thing. I need to get this painted, but for now it is function over form. The fitment was not really the best. I think I will attempt a re-design once I get my composite shop going.
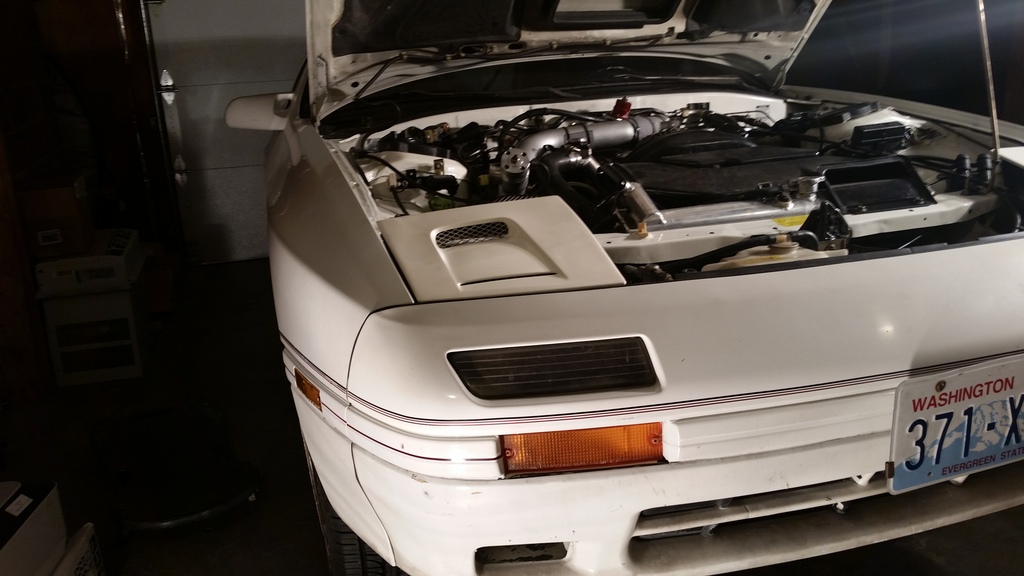
With this and the added flexible ducting I added from the front bumper to the hole I cut, it should get plenty of fresh air.
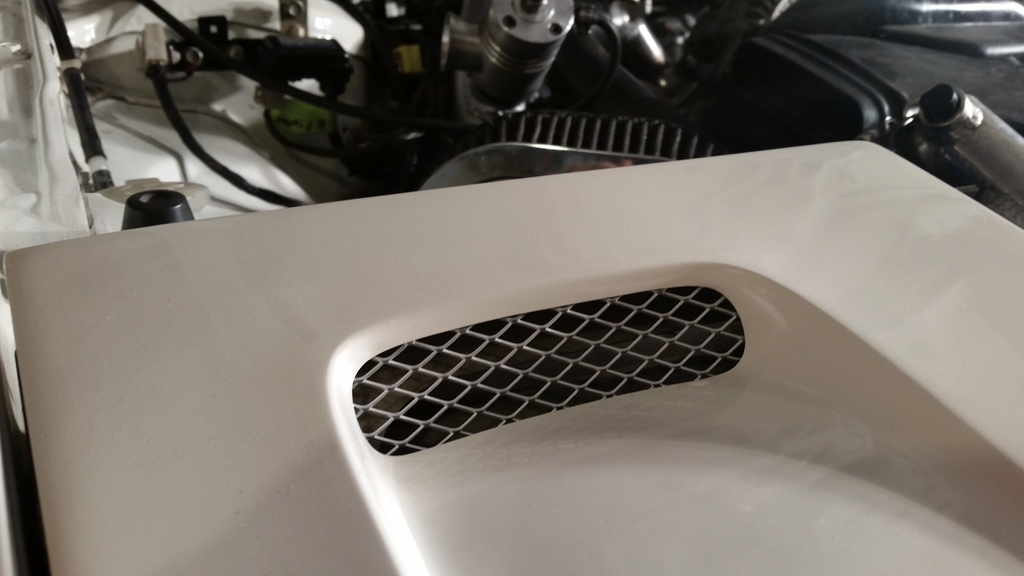
So I put everything back together and she lives again! Stay tuned.............

With this and the added flexible ducting I added from the front bumper to the hole I cut, it should get plenty of fresh air.

So I put everything back together and she lives again! Stay tuned.............