When you click on links to various merchants on this site and make a purchase, this can result in this site earning a commission. Affiliate programs and affiliations include, but are not limited to, the eBay Partner Network.
Just got off the phone with Carlos at CLR Motorsports about my renesis rotors and counterweights a bit ago and just got these pics of them with final balancing corrections and numbers. Just counting the amount of corrections it�s obvious that they were a massive pain in the dick to do, but Carlos is the best at what he does and exactly why I sent them to him
Left out another important part, the rotors were side clearanced and gears were precision ground down as well, this added some cost, but these are now full race rotors which will also now require using a competition oil pump (Under Carlos� recommendation)
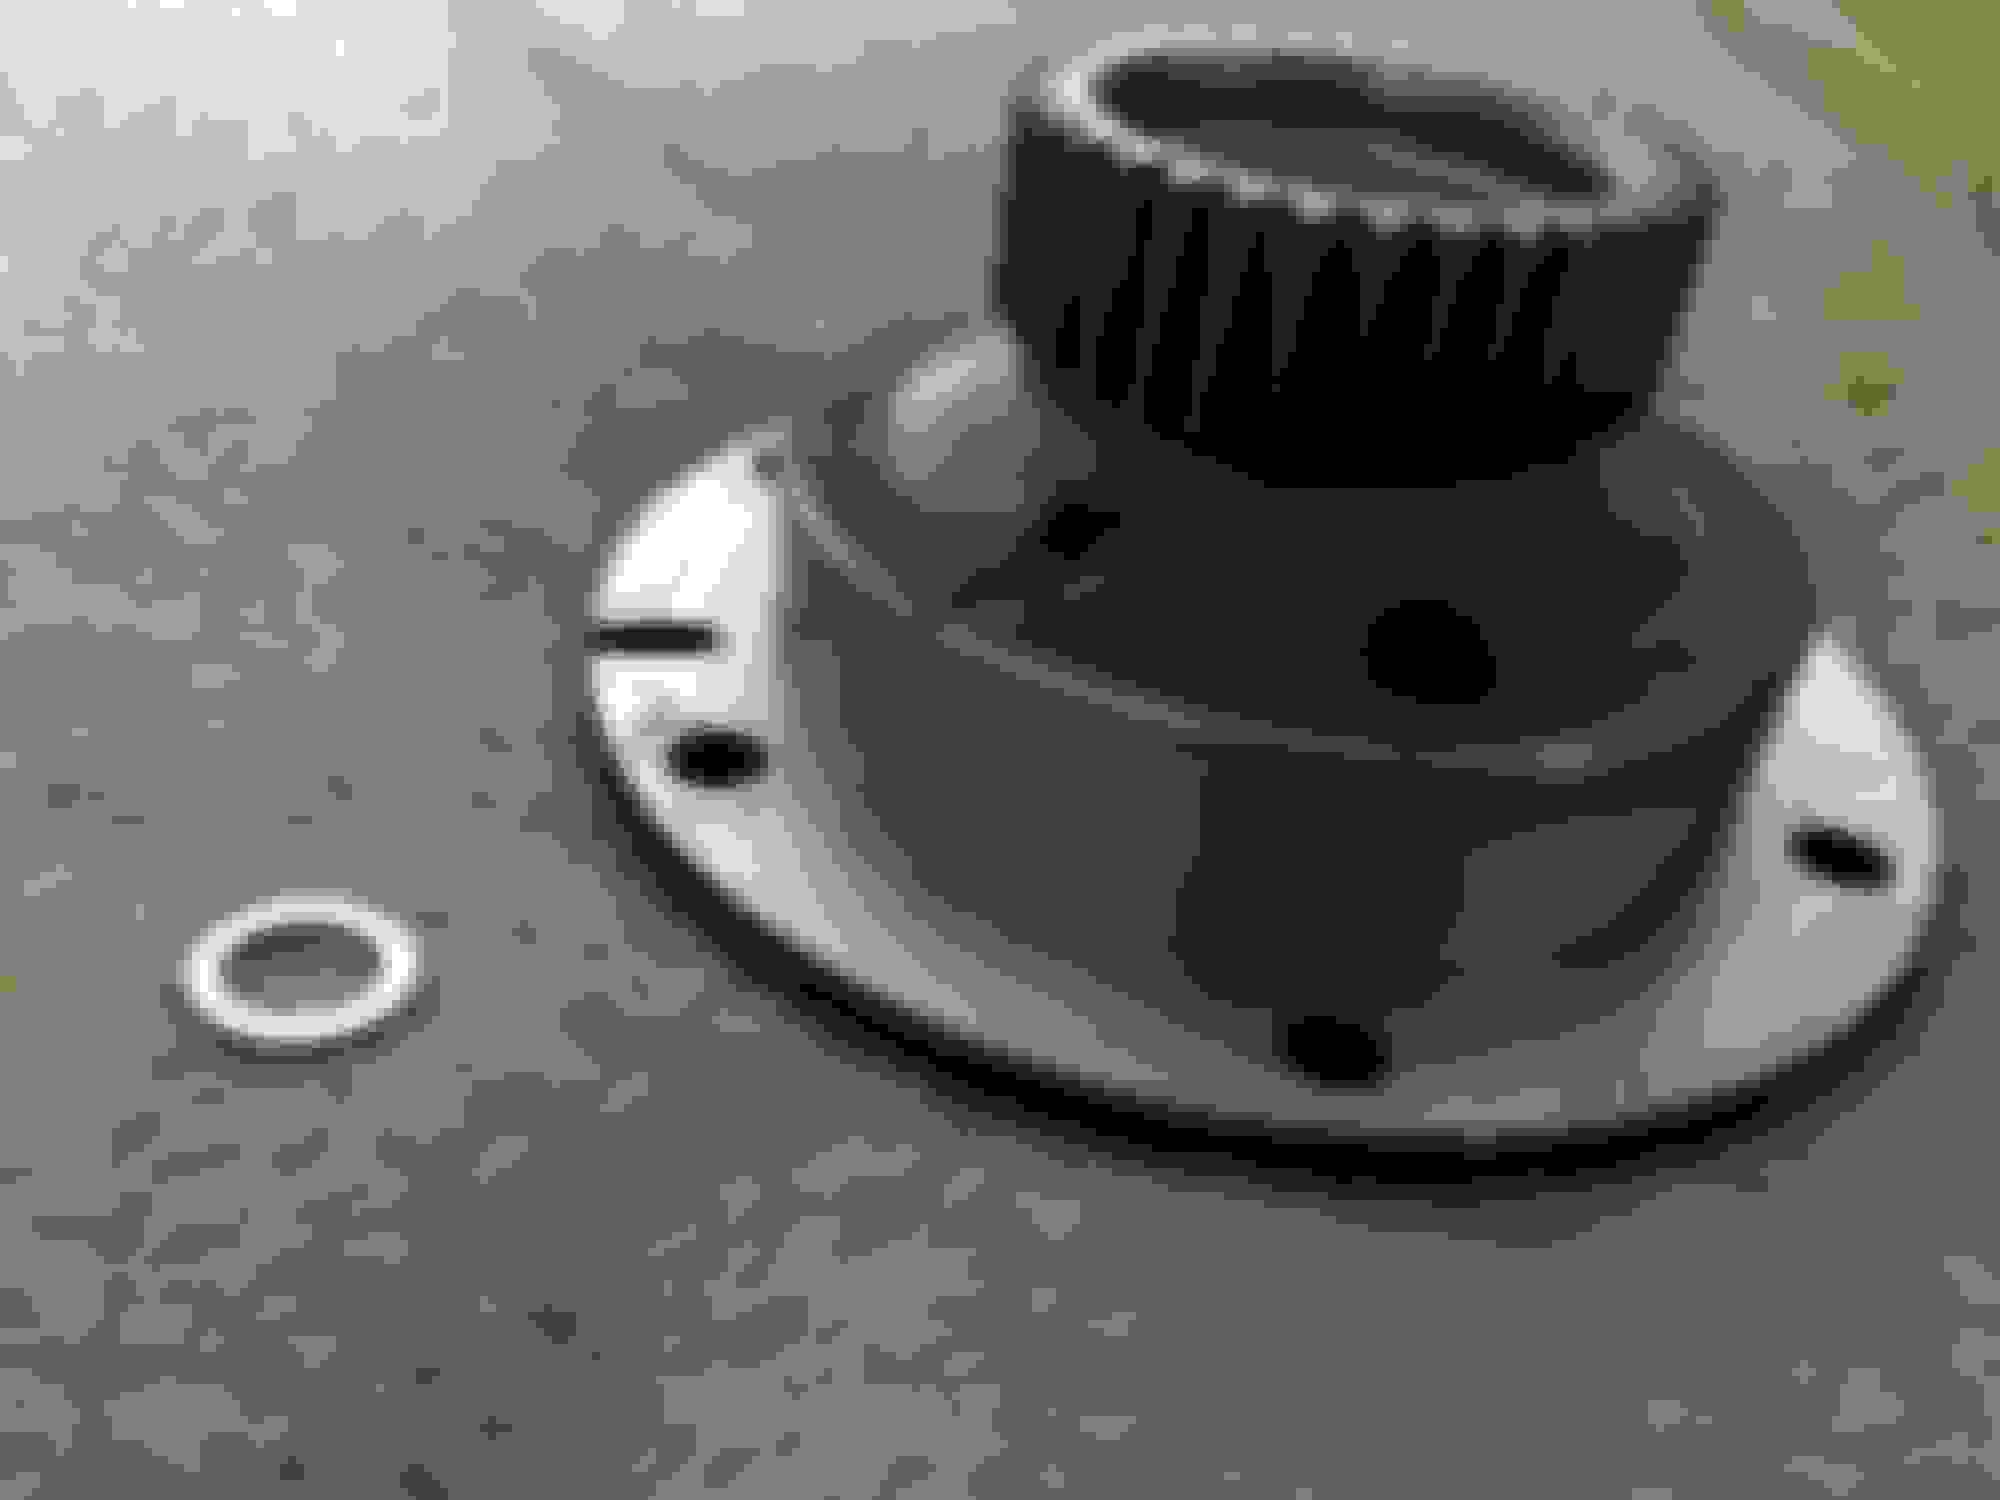
Just got my rear renesis stationary gear and custom front cover oring recess insert in the mail today, now I can use an rx-8 front cover metal gasket no problem and the rear stat gear now just needs the oil port ported out a bit and it will be ready to go
A few updates. Ended up just going with a used OG oil pressure reg that I bought through Erick Krewson at Atkins rotary for a great price, measured my oil pump rotor and it looks to be a 17.5mm (showed 17.3mm on calipers, but I doubt it's within calibration spec - can't fit a 17mm spanner over it, but can fit an 11/16 spanner over it snuggly which is exactly 17.5mm). Also decided to strip, paint and wrap my Racing beat header with titanium wrap because my dumbass left my RB heat shield back in Utah. I know that heat wrap is terrible for headers, but with the prep that was done before wrapping, it should at least last me 1-2 years which by that time I'll have a brand new one on hand anyway, so all good there. Other than that my custom killer bee porting template should be here on or before Friday, so planning on porting the irons Saturday and my rotors should be here by the end or middle of next week. Housings should be back from being resurfaced by the end of next week and if all goes as planned I'll be ready to assembly the engine when they get here
Got a few new bits today. Custom Killer Bee porting template finally got here which was made by Nader Sharif at Built2Apex by scanning my old front iron and basing the template off of that but with straighter cleaner lines (I'm pretty sure the irons had been freehanded previously - not that there's anything wrong with that), but it will definitely be nice to have all perfectly matched ports for this build. Also got a set of SS hex bolts for the front cover to dress up the engine a bit and also got a set of SS water jacket liners. But one thing that I've been wondering since the beginning of this engine build idea is how exactly the genesis rotors line up with the killer bee ports, so I took my new template and a stock rotor and plopped them on an end plate and took a few pics of the rotor at different stages of the intake port.
Do you have any Rx7 rotors you could put under the template to compare?
curious to see how the side seal location looks like under the ports.
That is a pretty big street port. The rules on scca engines is that you cant see the intersection of the corner and side seal from the port opening, this goes almost to the apex seal lol.
I don�t have any non-renesis rotors with me here in Texas unfortunately, but I�d like to see the comparison as well when I do get back to Utah. But I guess if you measure where the Rx8 side seals sit vs older rotors and then scale to the photos, that should give you a good idea.
Also I didn�t look into any race regulations before deciding on this route for my engine build, this is just for my daily street car so if my ports breaks some rules and I can�t participate in something over it then I�m fine with it.
I also finished porting and polishing the irons on Saturday. The polish isn�t a mirror finish, but I wasn�t going for that at all as this engine is going to be and remain NA, so a mirror finish isn�t going to do much other than get likes on IG or something.
New FD front regulator spring showed up. Ordered based on the info available regarding increased oil pressure which is 3 M6x12 hardened washers in the rear reg and 1 m6x12 hardened washers in the front reg (WITH an FD front spring)
*I have plenty of RX-8 and other 13B front springs, but no info to refer to in order to add the correct amount of shims to get my desired oil psi
*2nd pic is an S1 RX-8 front spring next to the FD spring
Was looking over my replacement irons and noticed that pitting in the water seal area was pretty bad. I didn't really give this much thought until a few weeks ago, but I spoke with Erick Krewson at Atkins rotary about it and he suggested using devcon to fill in the pitted areas, so I ordered a small tube of it, put it on the pitted areas and removed the excess with a razor blade, let cure, lightly sanded with 150 grit to remove the bulk of cured devcon and finished off with 2000 grit and now the pitted areas are as smooth as can be and should be just fine now (The rear iron which I'm reusing had no visible pitting). Now all that's left with the irons is smoothing out the ports a bit more and they're ready to go
My God, this is phenomenal work. A very thorough job. I am really digging your approach and attitude toward it all. I really can't wait to see you put it together and get it started.
On a lighter note, I particularly like how you took the engine 900 miles to continue working on it. I used to do that all the time when I used to travel a lot.
I just really wanted something to do while I�m out here, it keeps me busy in my free time and it�s what I enjoy doing most anyway. I�m more than likely getting my orders extended for an entire year so as long as that goes through I can relax a bit and not feel so rushed to get this engine together with little/no time to spare (rotors and housings aren�t back yet and current orders end in early September so I�m on a bit of a time crunch in that case). We�ll see where things are at within the next week or so though
Housings are back and they look beautiful, so smooth and shiny. Not a bad result at all for a total of $100 for both ($50 each)
*Also don't remember if I said anything about this yet, but I decided to go with my original plan to reuse the killer bee housings (Complications with the plan B housings, so will probably use in another build). But at least this way the engine will be a true killer bee the way it was originally done and dyno comparisons will be accurate
So I have both good and bad news. Bad news is that my orders aren't getting extended for another year and I'm leaving Fort Bliss at my original date of the end of my orders which means there is 0 time to do anything further with the engine which rotors and counterweights aren't in my possesion atm anyway, so the engine and all of the parts I brought down are packed up and taking it all back to Utah. I don't regret bringing it down here at all though, I've made a lot of progress and the engine is just about ready to build now aside from rotors not being here.
Good news though is that the rotors are now en route and scheduled to be at my house next Thursday, so when I get home I can put the finishing touches on the engine and then the real fun can begin when the rotors get there and this idea I had 2 years ago can finally be put into action
*Also I bought an RX-8 R3 while I've been down here, so I'll have a car to get around in while the SA is down (I'm having another soldier drive it back while I drive the SA back to Utah if anyone was wondering about that)
Finally have a bit of an update on the killer bee. Green dot bearings were a no go for this build, so I ordered REW/Renesis yellow dot bearings to replace the brand new green dots seeing as I�m using a Renesis eshaft and stat gears with yellow dot rew/Renesis bearings. Dropped them off with Anthony Pasquin of SLC Rotary (Our local rotary group) and he had them done very quickly. Now all that�s left is to cut the side seals and this engine will finally be ready to put together
Moved recently and have been putting this engine build all but completely on hold. Mainly been focusing on my RX-8 R3 since getting back from Texas and just swapping parts over from my other rx8. The SA has for the most part just been sitting due to the bad rearend, but now that I moved and it now has its own garage space I�ll be swapping the rearend out with my gsl rear and focus on finishing up prep for the engine build as I have everything to do it now. Aiming for either before or after June because I�ll be in Texas again for annual training.