Nissan 240SX/Skyline IRS in a road-legal 81 FB completed, plus FC front subframe swap
 06-01-20, 12:38 AM
#76
New to the Club!

Join Date: Jun 2020
Location: Australia
Posts: 1
Likes: 0
Received 0 Likes
on
0 Posts
Hi Jon, Nice Rx7, its really enjoyable looking through the progess photos.
I am curious as to the approval process, I am putting a R33 subframe in to a Valiant Charger and am after any info about how to work with LVVTA and submit plans etc.
I am curious as to the approval process, I am putting a R33 subframe in to a Valiant Charger and am after any info about how to work with LVVTA and submit plans etc.
 06-01-20, 12:51 AM
#77
Senior Member
Thread Starter
I am a qualified welder and although my tickets have expired, that goes a long way too. I photocopied these certs and submitted them with the rest of the paperwork at cert time, so there was no arguing as to the quality of welds etc. I'm not sure if it would have gone as smoothly if I didn't have these qualifications, they might have told me to remove underseal to check things etc.
They will want to see a wheel alignment and your camber will have to be under 2 degrees or so, but really I would recommend talking with a certifier before you do anything. Just let them know what you're up to and let them tell you what they want to see. Your certifier will need to be qualified to sign off on subframe swaps too, so check the LVVTA website to see someone in your area who has the right level of experience. I won't name publicly who my certifier was, but his initials are D M and he's based out of Palmerston North, he was really good and very fair.
PM me if I can help further man.
10-06-21, 10:27 AM
#78
Full Member
So, it's been a while since your last update and I just came across this amazing thread. How is it fairing? All painted? Subframes relocated? Again absolutely amazing project.
10-06-21, 03:04 PM
#79
Senior Member
Thread Starter
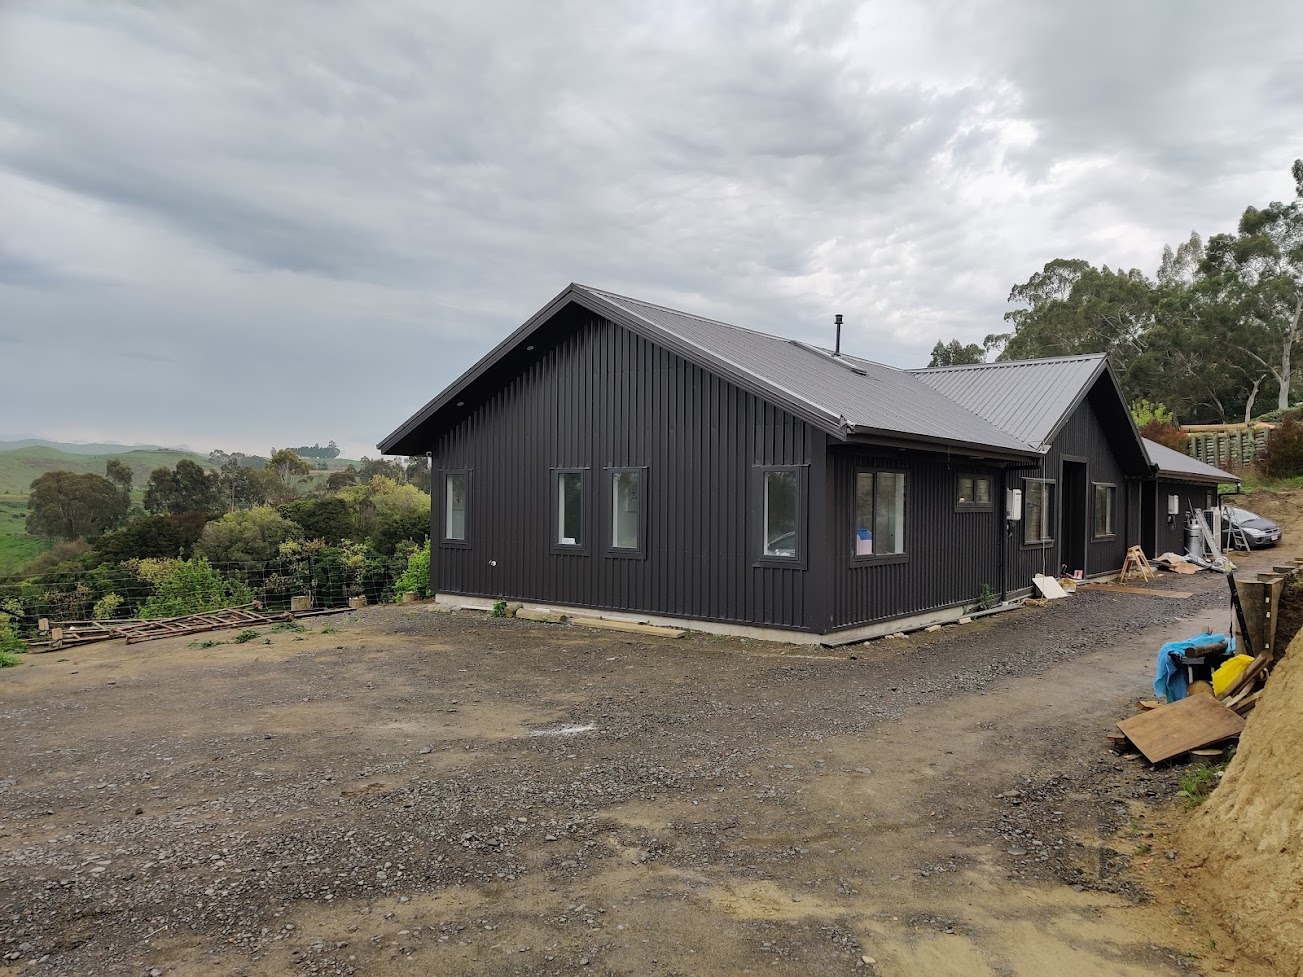
It's been a huge project involving a 3m (10-foot) high retaining wall, massive excavation and then about 11 months in building the actual house and getting it all signed off. We moved in last week.
I've also ordered a 128sqm (1400sqf) four-bay garage kitset that will be delivered in a month or so, it's going to take me a couple more months to build that and get it all kitted out with a hoist etc. At that point, I get to fill it all up with my projects. I'll get the RX-7 stripped down and put on the rotisserie, and sort out the subframes once and for all - get it painted, all that kind of stuff. Also have to fix the RX-2 as it's jammed up in 3rd gear again, I haven't driven it for six months now.
So yeah, 2022 is looking like a big year for the cars. Will update as soon as the workshop is built.
The following users liked this post:
Morganizer (12-14-21)
05-05-23, 03:17 PM
#81
Senior Member
Thread Starter
Well it's been a while.
I parked this car up not really appreciating when I'd be able to get back to it, and with a huge list of other work to do. As previously mentioned, I've built a house and a workshop, which took me out for a while. Then in January when I was tempted to make a start back on the RX-7, I had the opportunity to put some time into my sister's RX-3, so after about 300 hours that's now running and driving. It needs quite a lot of bodywork and paint but the mechanicals are done.
So that means I have about six weeks full time now to work on the RX-7 before going back to Canada for a month-long holiday. So once again, I find myself starting where I left off. But this time with my own 1400 square foot workshop, a vehicle rotisserie and a hoist!

Out comes the fuel tank, engine, box, driveshaft, and rear subframe. My intention here is to fix the issues previously identified with both the front and rear subframe, but also strip the engine and replace all the 20 y/o springs and bridgeport the centre plate. I'd also like to make a new fuel tank out of stainless, fabricate a new 3.5" exhaust and sand the whole car back ready to be painted (colour still to be confirmed).


Out comes the spare front and rear subframe I had in storage, and the electric power steer pump from the SW20 MR2. I'm still not sure if I'm going to fit power steer, that very much depends on whether or not I can find some way to control the speed of the electric pump so it's not howling away all the time, and whether I actually need power steer after all the geometry issues have been resolved and I'm running a narrower tyre on the front.

I also have a 2012 Mitsubishi Colt that will be the donor car for the air conditioning pump, evaporator and condenser, so it'll be interesting to see how well all that goes together. But this week is very much about getting the car back to a shell so I can get an idea on what is required for the subframe modifications.
Before I strip it entirely however, I wanted to measure the bump steer. I set up a mirror and laser and triangulated the toe values at full droop and full compression. Surprisingly there's very little movement at all, certainly nothing to worry about. I think the unpredictability I saw in the past was due to the low castor and wide tyres. However the ultimate goal here is to lower the suspension, so I'm fairly sure there will be bump steer problems if I push it much further.
After removing the coil spring and sway bay to test the bump steer, I raised the front wheel as high as I want it to be in the guard at resting height. This new setting will lower the car approx 40mm, so I have a guide to aim for. To achieve this, I want to raise the front subframe 25mm and space the steering rack up 15mm, leaving me with the same negligible bump steer it currently has. I'll need to move the steering column back a bit after this.

I also need to modify the strut towers as I need to pick up at least 2 degrees of castor, so my ad-hoc estimation puts that at about 30mm of rearward movement at the top of the strut. This will be done by creating a fixture, unpicking the spot welds, moving each tower back and filling in the gaps.
....aaand, if I'm going to move the subframe up, I'll have to change the engine mounts as well, so I may as well move the engine over to the left to give me a bit more clearance for the larger exhaust. Not a major problem, but it will require a new gearbox crossmember to be fabricated.
So that's the plan for the front at least.
From what I can see, it should be relatively easy to raise the rear subframe about 40mm at the back mounts. The front mounts however, not so easy.. it's going to take a fair bit of cutting and fabrication to get all this to go back in, particularly around the traction arms and forward lower arm mounts. I'm certainly not going to cut out the rear floor and reposition it, that ship has sailed. It's going to be hard enough to remove all the underseal and sound deadening before welding in new sections, not to mention most of the interior to avoid a fire.
So, in order, I'll fix the front subframe and towers, then the rear mounts of the rear subframe, then the front mounts of the rear subframe. Then I'll go through the list and fix everything else, strip the engine and port it, then get the body ready for paint.
Right, I have a plan. More soon.
I parked this car up not really appreciating when I'd be able to get back to it, and with a huge list of other work to do. As previously mentioned, I've built a house and a workshop, which took me out for a while. Then in January when I was tempted to make a start back on the RX-7, I had the opportunity to put some time into my sister's RX-3, so after about 300 hours that's now running and driving. It needs quite a lot of bodywork and paint but the mechanicals are done.
So that means I have about six weeks full time now to work on the RX-7 before going back to Canada for a month-long holiday. So once again, I find myself starting where I left off. But this time with my own 1400 square foot workshop, a vehicle rotisserie and a hoist!
Out comes the fuel tank, engine, box, driveshaft, and rear subframe. My intention here is to fix the issues previously identified with both the front and rear subframe, but also strip the engine and replace all the 20 y/o springs and bridgeport the centre plate. I'd also like to make a new fuel tank out of stainless, fabricate a new 3.5" exhaust and sand the whole car back ready to be painted (colour still to be confirmed).
Out comes the spare front and rear subframe I had in storage, and the electric power steer pump from the SW20 MR2. I'm still not sure if I'm going to fit power steer, that very much depends on whether or not I can find some way to control the speed of the electric pump so it's not howling away all the time, and whether I actually need power steer after all the geometry issues have been resolved and I'm running a narrower tyre on the front.
I also have a 2012 Mitsubishi Colt that will be the donor car for the air conditioning pump, evaporator and condenser, so it'll be interesting to see how well all that goes together. But this week is very much about getting the car back to a shell so I can get an idea on what is required for the subframe modifications.
Before I strip it entirely however, I wanted to measure the bump steer. I set up a mirror and laser and triangulated the toe values at full droop and full compression. Surprisingly there's very little movement at all, certainly nothing to worry about. I think the unpredictability I saw in the past was due to the low castor and wide tyres. However the ultimate goal here is to lower the suspension, so I'm fairly sure there will be bump steer problems if I push it much further.
After removing the coil spring and sway bay to test the bump steer, I raised the front wheel as high as I want it to be in the guard at resting height. This new setting will lower the car approx 40mm, so I have a guide to aim for. To achieve this, I want to raise the front subframe 25mm and space the steering rack up 15mm, leaving me with the same negligible bump steer it currently has. I'll need to move the steering column back a bit after this.
I also need to modify the strut towers as I need to pick up at least 2 degrees of castor, so my ad-hoc estimation puts that at about 30mm of rearward movement at the top of the strut. This will be done by creating a fixture, unpicking the spot welds, moving each tower back and filling in the gaps.
....aaand, if I'm going to move the subframe up, I'll have to change the engine mounts as well, so I may as well move the engine over to the left to give me a bit more clearance for the larger exhaust. Not a major problem, but it will require a new gearbox crossmember to be fabricated.
So that's the plan for the front at least.
From what I can see, it should be relatively easy to raise the rear subframe about 40mm at the back mounts. The front mounts however, not so easy.. it's going to take a fair bit of cutting and fabrication to get all this to go back in, particularly around the traction arms and forward lower arm mounts. I'm certainly not going to cut out the rear floor and reposition it, that ship has sailed. It's going to be hard enough to remove all the underseal and sound deadening before welding in new sections, not to mention most of the interior to avoid a fire.
So, in order, I'll fix the front subframe and towers, then the rear mounts of the rear subframe, then the front mounts of the rear subframe. Then I'll go through the list and fix everything else, strip the engine and port it, then get the body ready for paint.
Right, I have a plan. More soon.
The following 3 users liked this post by Jon_Valjean:
05-10-23, 01:34 AM
#82
Senior Member
Thread Starter
The thing that has always bothered me about the FC front subframe swap (apart from the geometry issues it introduces) is just how bulky the unit is, and how much of it hangs under the engine. Clearly Mazda engineers felt that the front subframe should be much more of an integral part of the chassis and shaped it to form under curved front rails, so about the only thing we can do to get it to fit the FB correctly is to cut a heap off the top of it.
38mm to be precise. If you're reading this in black and white, that's 1.5 inches.


That's about as far as you can go without completely remaking the entire thing in tube form, which I would have done if it didn't require another engineering certificate to make legal here.
Since the frame has come up so much, I shouldn't need to space the rack up any distance. But it all depends on how much I can lower the suspension once everything goes back together.
I also had to cut out the front rails a bit so the steering arms fit, so I've added 2mm doubler plates to strengthen that area up too (not shown in photo). Probably not necessary but it didn't take long so why not.

I'll need to move the steering column back a bit and change the angle slightly, but I'll worry about that when I'm crawling under the dash to install the aircon stuff.
Still to do: lower the engine mounts to suit. That'll happen when it's all going back together too.
Next up - move the towers. I wanted 30mm but settled for 25mm, which will bring the whole setup to factory FC specs as you'll recall the subframe is mounted 25mm further back in the body to get the front wheels centred in the guards.


They weren't too hard to unpick, I made up a fixture (my old welding instructor always said a jig is something an Irish person does) but didn't really need it in the end as it was pretty obvious to measure back 25mm and tack them back on. I checked left and right and the strut holes are within 1mm of each other.
Initially I wanted to move them inward some amount in order to get more camber, but due to the shape of the inner guard I've picked up about 10mm of inward movement just by moving them back anyway, and I really wanted to keep this modification pretty stealth. I can already get a good 2 degrees negative camber anyway, so no need to really push it much further by cutting up the towers and arousing suspicion come testing time.
Ok so now that work is done, I can get the car on a rotisserie and start stripping off the purple, which I've been looking forward to for 20 years. Will update again in a week or so.
38mm to be precise. If you're reading this in black and white, that's 1.5 inches.
That's about as far as you can go without completely remaking the entire thing in tube form, which I would have done if it didn't require another engineering certificate to make legal here.
Since the frame has come up so much, I shouldn't need to space the rack up any distance. But it all depends on how much I can lower the suspension once everything goes back together.
I also had to cut out the front rails a bit so the steering arms fit, so I've added 2mm doubler plates to strengthen that area up too (not shown in photo). Probably not necessary but it didn't take long so why not.
I'll need to move the steering column back a bit and change the angle slightly, but I'll worry about that when I'm crawling under the dash to install the aircon stuff.
Still to do: lower the engine mounts to suit. That'll happen when it's all going back together too.
Next up - move the towers. I wanted 30mm but settled for 25mm, which will bring the whole setup to factory FC specs as you'll recall the subframe is mounted 25mm further back in the body to get the front wheels centred in the guards.
They weren't too hard to unpick, I made up a fixture (my old welding instructor always said a jig is something an Irish person does) but didn't really need it in the end as it was pretty obvious to measure back 25mm and tack them back on. I checked left and right and the strut holes are within 1mm of each other.
Initially I wanted to move them inward some amount in order to get more camber, but due to the shape of the inner guard I've picked up about 10mm of inward movement just by moving them back anyway, and I really wanted to keep this modification pretty stealth. I can already get a good 2 degrees negative camber anyway, so no need to really push it much further by cutting up the towers and arousing suspicion come testing time.
Ok so now that work is done, I can get the car on a rotisserie and start stripping off the purple, which I've been looking forward to for 20 years. Will update again in a week or so.
The following 2 users liked this post by Jon_Valjean:
diabolical1 (05-11-23),
j9fd3s (05-12-23)
The following users liked this post:
Jon_Valjean (05-19-23)
05-19-23, 03:38 PM
#84
Senior Member
Thread Starter
I'm now about another 40 hours along from the last post, and to be honest it's been miserable work. I started by loading the car onto the rotisserie and hitting the shell with a 80 grit DA sander and scuffing off as much of the purple as possible to reveal the base primer coat. I did this with the doors and hatch on to prevent the car filling up with dust. As soon as the car was relatively clear of the purple layer, I removed the hood, guards, flares, doors, hatch, headlights and tail lights. Welcome back, swage line!


Then I spent a few hours just looking and measuring. I always seem to find myself trying to figure out how to move things that want to occupy the same space on this project. Let's hope this is the last of the major structural work this car ever needs.
The issue with the rear is that with static ride height on an independent setup, you really want the lower arms to move through an arc crossing zero degrees parallel. So the arms should sit sloping a little downwards at static moving to a little upwards at full compression. This mitigates toe steer and other undesirable byproducts of suspension at the limit of travel. Essentially I want to better emulate the original Nissan setup at static ride height.
I decided to actually start with the forward subframe mounts first, because they're the hardest to fix and if it didn't go well, I could restore them without too much drama. I cut out the left one first, rebuilt the floor area and raised the mounting pin approximately 43mm. I then boxed it all back in without welding the actual pin back in as I'll need to fine-tune the location later.


Then the other side.

This represents about 16 hours of work.
Then the rear right hand side, which involves cutting out the original pin, flattening off the mount and reboxing the pin back in, again 43mm higher than before. I've added 2mm tabs inside the rail to give it a bit more strength.

Then the left. This represents about 12 hours of work.


Now as the subframe sits higher, I need to section the rear rails down to about 40mm in width and add doubler plates to bring the strength back.

Then keep re-fitting the subframe to check and see what parts of the floor are still impacting.

So at this part of the whole operation I can see that it is indeed possible to raise the rear subframe at least 40mm and get enough clearance for everything to work and retain enough strength to keep it all safe. It's just really horrible work and probably the least amount of fun I've had on this entire build. But hey, it has to be done and the result will be worth it. It looks pretty messy but it all needs to be cleaned up, and I have bondo and seam sealer at my disposal and I'm not afraid to use liberal quantities of both to hide it all.
Should get this wrapped up by mid next week and start stripping back the floorpan for a new coat of spray-on underseal. I've discovered a bit of surface rust here and there so I may as well deal with it while it's on the rotisserie.
Then I spent a few hours just looking and measuring. I always seem to find myself trying to figure out how to move things that want to occupy the same space on this project. Let's hope this is the last of the major structural work this car ever needs.
The issue with the rear is that with static ride height on an independent setup, you really want the lower arms to move through an arc crossing zero degrees parallel. So the arms should sit sloping a little downwards at static moving to a little upwards at full compression. This mitigates toe steer and other undesirable byproducts of suspension at the limit of travel. Essentially I want to better emulate the original Nissan setup at static ride height.
I decided to actually start with the forward subframe mounts first, because they're the hardest to fix and if it didn't go well, I could restore them without too much drama. I cut out the left one first, rebuilt the floor area and raised the mounting pin approximately 43mm. I then boxed it all back in without welding the actual pin back in as I'll need to fine-tune the location later.
Then the other side.
This represents about 16 hours of work.
Then the rear right hand side, which involves cutting out the original pin, flattening off the mount and reboxing the pin back in, again 43mm higher than before. I've added 2mm tabs inside the rail to give it a bit more strength.
Then the left. This represents about 12 hours of work.
Now as the subframe sits higher, I need to section the rear rails down to about 40mm in width and add doubler plates to bring the strength back.
Then keep re-fitting the subframe to check and see what parts of the floor are still impacting.
So at this part of the whole operation I can see that it is indeed possible to raise the rear subframe at least 40mm and get enough clearance for everything to work and retain enough strength to keep it all safe. It's just really horrible work and probably the least amount of fun I've had on this entire build. But hey, it has to be done and the result will be worth it. It looks pretty messy but it all needs to be cleaned up, and I have bondo and seam sealer at my disposal and I'm not afraid to use liberal quantities of both to hide it all.
Should get this wrapped up by mid next week and start stripping back the floorpan for a new coat of spray-on underseal. I've discovered a bit of surface rust here and there so I may as well deal with it while it's on the rotisserie.
05-19-23, 03:41 PM
#85
Senior Member
Thread Starter
Also forgot to post this before, looks like my brake master reservoir got a bit nibbled on by rats when the car was in storage. We don't have a lot of predators in New Zealand but the ones we do have suck.

05-19-23, 05:10 PM
#86
Full Member
I bet that was a not so tasty surprise when they got down to the fluid...
The following 2 users liked this post by Conekiller13:
j9fd3s (05-21-23),
Jon_Valjean (05-19-23)
05-21-23, 02:26 AM
#87

Such a cool build thread you have I'm currently doing the same with my s1 rx7 here in New Zealand I have put a s14 front sub frame in my one and am currently doing a nissan inderpendant rear At the moment, I needed a strong diff as I'm putting a 20b turbo in it
05-21-23, 04:10 PM
#88
Senior Member
Thread Starter
20B turbo would go well on a R230 diff out of a later model Fuga I should imagine...
The following users liked this post:
Mentl7 (05-24-23)
05-26-23, 09:27 PM
#89
Senior Member
Thread Starter
This is just a quick post to update on the rear subframe relocation, which is now done.
In the end, I did need to clearance a bit more of the actual subframe:

And as you can see, the upper arm mounts protrude into the floor so I had to make pop-up enclosures above:


I also had to cut and weld the front mount lower brackets to sit at a flatter angle, so I made quick fixture to ensure the height was correct:

Then kind of masked it all up and got ready to hide all the trauma:

Then painted the subframe in an uncharacteristically jaunty satin black in an attempt to move away from all the flat paint I previously used:

Then finally covered the whole thing in a spray-on combination of Mipa stoneguard and bitumin underseal:

And subframe back in it's final place:


So now that's over, I'll get back to cleaning up the engine bay and trying to get that front subframe back in permanently. I'll probably try to sort out the engine mounts so I can then move on to figuring out what I'll be doing with the fuel tank.
In the end, I did need to clearance a bit more of the actual subframe:
And as you can see, the upper arm mounts protrude into the floor so I had to make pop-up enclosures above:
I also had to cut and weld the front mount lower brackets to sit at a flatter angle, so I made quick fixture to ensure the height was correct:
Then kind of masked it all up and got ready to hide all the trauma:
Then painted the subframe in an uncharacteristically jaunty satin black in an attempt to move away from all the flat paint I previously used:
Then finally covered the whole thing in a spray-on combination of Mipa stoneguard and bitumin underseal:
And subframe back in it's final place:
So now that's over, I'll get back to cleaning up the engine bay and trying to get that front subframe back in permanently. I'll probably try to sort out the engine mounts so I can then move on to figuring out what I'll be doing with the fuel tank.
The following 3 users liked this post by Jon_Valjean:
06-02-23, 02:28 AM
#90
Senior Member
Thread Starter
So another 40-ish hours later and the engine bay is painted, the front subframe is painted and installed, as well as the front and rear suspension. You can see now the lower arms are both below horizontal front and rear:


So that's really been the goal of the exercise. I now have another 35-ish milimetres I can lower the car before worrying about adverse handling. I can't really do that however until the car is back on the ground and I can figure out how much more I have to cut out of the guards. I also want to change the tyres from the following:
Front: 215/50/15
Rear: 235/50/15
To:
Front: 205/50/15
Rear: 225/45/15
So I can't change much of the way the flares and the guards work until I have those tyres ready to go, which probably won't happen for another few weeks.
I've also installed a replacement power steer rack from an 86-88 FC, I'm still in the process of figuring out how that's all going to work, so I'll circle back to that later.

I cut off the old engine mounts, and sat the engine back in the bay and measured up for new ones. I've moved it over about 30mm to give more clearance between the turbo and the inner guard in the hope I can plumb the wastegate directly back into the downpipe:

I had to move the steering column back about 15mm due to the higher subframe, so I removed most of the dash and sorted all that out, then drilled three holes in the steering wheel boss to line up with the Mitsubishi combination switch so now the indicators self-cancel:


I had to fix the mounting locations for the electrics both sides behind the seats as the floor is a little higher, so that's all sorted.


I've also removed the sump from the engine, it's now soaking in degreaser ready to be prepared for welding up several pinhole leaks that have plagued it since it was first fabricated out of the remains of two other sumps.
I've now moved on to the fuel tank. From my basic measurements, I think it'll need to be about 800mm wide, 450mm deep and 160mm tall, which will give it a capacity of about 58 litres. I'm going to make it out of 2mm aluminium, and re-use my existing level sender. I'll relocate the filler so it connects directly to the outside of the car rather than filling from the middle of the floor, and I'll create a custom fuel pump hanger to use an in-tank pump for lower noise and better reliability. And rather than mounting it with straps, I'd like to find a way to bolt it directly to the floor.

That's the job for next week.
So that's really been the goal of the exercise. I now have another 35-ish milimetres I can lower the car before worrying about adverse handling. I can't really do that however until the car is back on the ground and I can figure out how much more I have to cut out of the guards. I also want to change the tyres from the following:
Front: 215/50/15
Rear: 235/50/15
To:
Front: 205/50/15
Rear: 225/45/15
So I can't change much of the way the flares and the guards work until I have those tyres ready to go, which probably won't happen for another few weeks.
I've also installed a replacement power steer rack from an 86-88 FC, I'm still in the process of figuring out how that's all going to work, so I'll circle back to that later.
I cut off the old engine mounts, and sat the engine back in the bay and measured up for new ones. I've moved it over about 30mm to give more clearance between the turbo and the inner guard in the hope I can plumb the wastegate directly back into the downpipe:
I had to move the steering column back about 15mm due to the higher subframe, so I removed most of the dash and sorted all that out, then drilled three holes in the steering wheel boss to line up with the Mitsubishi combination switch so now the indicators self-cancel:
I had to fix the mounting locations for the electrics both sides behind the seats as the floor is a little higher, so that's all sorted.
I've also removed the sump from the engine, it's now soaking in degreaser ready to be prepared for welding up several pinhole leaks that have plagued it since it was first fabricated out of the remains of two other sumps.
I've now moved on to the fuel tank. From my basic measurements, I think it'll need to be about 800mm wide, 450mm deep and 160mm tall, which will give it a capacity of about 58 litres. I'm going to make it out of 2mm aluminium, and re-use my existing level sender. I'll relocate the filler so it connects directly to the outside of the car rather than filling from the middle of the floor, and I'll create a custom fuel pump hanger to use an in-tank pump for lower noise and better reliability. And rather than mounting it with straps, I'd like to find a way to bolt it directly to the floor.
That's the job for next week.
The following 2 users liked this post by Jon_Valjean:
gracer7-rx7 (06-02-23),
j9fd3s (06-02-23)
 06-02-23, 03:19 PM
#92
Senior Member
Thread Starter
The following users liked this post:
j9fd3s (06-03-23)
06-09-23, 03:14 AM
#94
Senior Member
Thread Starter
The fuel tank in this car has been a constant annoyance from the minute I started modifying it.
This is actually going to be the fourth tank this car has had. To recap:
1) OEM tank. I still have this in a shed somewhere.
2) Crazy huge aluminium tank that never fitted properly, had to be modified and promptly leaked everywhere the first time I tried to fill it. I still have that in a shed somewhere too.
3) Some Chinese tank that worked but had to be filled from the center, so it never fitted properly and had issues with venting. Again, in a shed.
I really wanted to do this properly this time around, and I'm running out of shed space, so here it is:


It's a bit rubbish and it leaks, so I figured I'd try some kind of metal next.
I picked up a 2400x1200x2mm sheet of 5052 H32 aluminium which I then cut out two sections to be folded together to form a 800x450x160 tank. Turns out it's really hard to fold a big piece of 2mm aluminium, but I got there in the end.


Then it's a matter of welding it all together, which I have managed to do however it's all a bit ugly. I'm using an entry-level 185 amp AC/DC tig to do this and it really struggles getting any kind of penetration despite hours of tweaking it. It does manage it, but it means I have to go over some sections several times, which leads to a pretty ugly result. I ended up using about half a tank of argon just to dial it in so I could get any kind of consistency and it's still not great. Whatever, a new welder is on the list but it'll have to wait for now.


I've installed two baffles and a crescent of plate around the fuel pump which I deliberately didn't take pictures of as the welds were so appalling. You'll just have to take my word for it. They're strong (I hit them with a hammer and they didn't budge) but uuuugly.
In order to find where the filler spout should be welded on, I had to re-make the filler area under the cap again. I'd already changed it to a much shallower angle to fill the tank from the middle of the rear floor:

So I now had to return it to a more factory layout:


So now I can continue to work on the pump hanger for the new Walbro 350L/hr in-tank pump:


As I downed tools this Friday evening, I've tigged all the stainless fittings to the hanger and connected up the pump, I'll get a picture of that for the next post.
That's about another week work of work. I knew the tank was going to take a long time, and doesn't make for particularly interesting results, but it's about done now. This weekend I'll set up a kids paddling pool and pressure test it, find whatever pinholes exist and plug them, then put it all back in. Looks like I'm going to have to strap it in again, there's no good way to use brackets to hold it in and since my welder is so marginal I'm a little reluctant to go welding anything else to the tank anyway. So be it.
Next time, tank should be back in, and I'll be thinking fixing that sump, then more about bodywork and my impending trip to Toronto (wheels up in two weeks today).
This is actually going to be the fourth tank this car has had. To recap:
1) OEM tank. I still have this in a shed somewhere.
2) Crazy huge aluminium tank that never fitted properly, had to be modified and promptly leaked everywhere the first time I tried to fill it. I still have that in a shed somewhere too.
3) Some Chinese tank that worked but had to be filled from the center, so it never fitted properly and had issues with venting. Again, in a shed.
I really wanted to do this properly this time around, and I'm running out of shed space, so here it is:
It's a bit rubbish and it leaks, so I figured I'd try some kind of metal next.
I picked up a 2400x1200x2mm sheet of 5052 H32 aluminium which I then cut out two sections to be folded together to form a 800x450x160 tank. Turns out it's really hard to fold a big piece of 2mm aluminium, but I got there in the end.
Then it's a matter of welding it all together, which I have managed to do however it's all a bit ugly. I'm using an entry-level 185 amp AC/DC tig to do this and it really struggles getting any kind of penetration despite hours of tweaking it. It does manage it, but it means I have to go over some sections several times, which leads to a pretty ugly result. I ended up using about half a tank of argon just to dial it in so I could get any kind of consistency and it's still not great. Whatever, a new welder is on the list but it'll have to wait for now.
I've installed two baffles and a crescent of plate around the fuel pump which I deliberately didn't take pictures of as the welds were so appalling. You'll just have to take my word for it. They're strong (I hit them with a hammer and they didn't budge) but uuuugly.
In order to find where the filler spout should be welded on, I had to re-make the filler area under the cap again. I'd already changed it to a much shallower angle to fill the tank from the middle of the rear floor:
So I now had to return it to a more factory layout:
So now I can continue to work on the pump hanger for the new Walbro 350L/hr in-tank pump:
As I downed tools this Friday evening, I've tigged all the stainless fittings to the hanger and connected up the pump, I'll get a picture of that for the next post.
That's about another week work of work. I knew the tank was going to take a long time, and doesn't make for particularly interesting results, but it's about done now. This weekend I'll set up a kids paddling pool and pressure test it, find whatever pinholes exist and plug them, then put it all back in. Looks like I'm going to have to strap it in again, there's no good way to use brackets to hold it in and since my welder is so marginal I'm a little reluctant to go welding anything else to the tank anyway. So be it.
Next time, tank should be back in, and I'll be thinking fixing that sump, then more about bodywork and my impending trip to Toronto (wheels up in two weeks today).
The following 2 users liked this post by Jon_Valjean:
Conekiller13 (06-09-23),
j9fd3s (06-09-23)
06-16-23, 02:27 AM
#95
Senior Member
Thread Starter
The tank should be in by now, as it's all tested, I've welded on the strap hangers and cut the filler to the right length. However as I've had to order in some 3mm thick nitrile rubber sheet to make a gasket between the pump hanger and the top of the tank, and as the company I ordered it from claimed they shipped it but really didn't and only found it on Thursday, the tank is still on the bench.
So in the meantime, I've been tidying up a heap of small leftover issues, such as filling in the exhaust hole on the left side of the car in preparation for moving it back to the right:


Tidying up the fuel lines and making new 3/16 brake lines in the rear:


Creating a new 2mm aluminium access plate and gasket for the fuel pump in the rear floor - you can also see the new fuel pump hanger in this pic:

Passing the tank vent through the floor to the hatch area - from the hatch it will run through a new hard line to the front of the car where I'll be installing a charcoal canister (more about this in the future):

Winding the coil-overs down another inch in the front to check fitment:

After ticking off a heap of these and feeling a bit smug, I thought I'd throw on the front sway bar. How hard can it be? What an idiot.
The FC sway connects to the top of the lower arms with a little riser arm with a rubber bush each side. However as I've raised the subframe, the sway bar now would need to pass through the steering arms to fit in the same manner. This photo was taken before I lowered it another inch - you can see how the steering arm is in the way:

Ick. So a few options here:
I could take it off and just run the car without a front sway. I know people claim this is a viable option but I'm yet to be convinced. I don't want to rely on the coilovers to perform every aspect of weight transfer when a very simply spring bar can assist and give me a progressive transfer for essentially not much effort. So that's not really an option unless I could spend a day tracking the car to confirm this is even a possibility, and I just don't have the time or the inclination to do that on a street car.
I could get a funky custom sway bar made up by a spring maker, which would work but take ages and probably cost a fair bit.
Or I could find another sway bar that is shaped a bit more favorably and make some new brackets and attach it to the underside of the lower arm instead. So I raided my parts bin and wouldn't you know it, the original FB front sway bar is almost exactly the right shape.


All I have to do is make a plate to connect to the bottom of the lower arm, chop that FC link end in half, tig weld each half to the plate, and job done. If move it forward a bit, it will even clear the bottom of the radiator and I won't have to change how that's mounted either. Hey, sometimes you have to get lucky. That's how I've left it Friday 5pm this week.
Few more things to tidy up this coming week so I'll update one more time then I'm out of here for a month.
So in the meantime, I've been tidying up a heap of small leftover issues, such as filling in the exhaust hole on the left side of the car in preparation for moving it back to the right:
Tidying up the fuel lines and making new 3/16 brake lines in the rear:
Creating a new 2mm aluminium access plate and gasket for the fuel pump in the rear floor - you can also see the new fuel pump hanger in this pic:
Passing the tank vent through the floor to the hatch area - from the hatch it will run through a new hard line to the front of the car where I'll be installing a charcoal canister (more about this in the future):
Winding the coil-overs down another inch in the front to check fitment:
After ticking off a heap of these and feeling a bit smug, I thought I'd throw on the front sway bar. How hard can it be? What an idiot.
The FC sway connects to the top of the lower arms with a little riser arm with a rubber bush each side. However as I've raised the subframe, the sway bar now would need to pass through the steering arms to fit in the same manner. This photo was taken before I lowered it another inch - you can see how the steering arm is in the way:
Ick. So a few options here:
I could take it off and just run the car without a front sway. I know people claim this is a viable option but I'm yet to be convinced. I don't want to rely on the coilovers to perform every aspect of weight transfer when a very simply spring bar can assist and give me a progressive transfer for essentially not much effort. So that's not really an option unless I could spend a day tracking the car to confirm this is even a possibility, and I just don't have the time or the inclination to do that on a street car.
I could get a funky custom sway bar made up by a spring maker, which would work but take ages and probably cost a fair bit.
Or I could find another sway bar that is shaped a bit more favorably and make some new brackets and attach it to the underside of the lower arm instead. So I raided my parts bin and wouldn't you know it, the original FB front sway bar is almost exactly the right shape.
All I have to do is make a plate to connect to the bottom of the lower arm, chop that FC link end in half, tig weld each half to the plate, and job done. If move it forward a bit, it will even clear the bottom of the radiator and I won't have to change how that's mounted either. Hey, sometimes you have to get lucky. That's how I've left it Friday 5pm this week.
Few more things to tidy up this coming week so I'll update one more time then I'm out of here for a month.
06-16-23, 12:31 PM
#96
Moderator
iTrader: (3)
Join Date: Mar 2001
Location: https://www2.mazda.com/en/100th/
Posts: 30,826
Received 2,594 Likes
on
1,842 Posts
I could take it off and just run the car without a front sway. I know people claim this is a viable option but I'm yet to be convinced. I don't want to rely on the coilovers to perform every aspect of weight transfer when a very simply spring bar can assist and give me a progressive transfer for essentially not much effort. So that's not really an option unless I could spend a day tracking the car to confirm this is even a possibility, and I just don't have the time or the inclination to do that on a street car.
.
.
06-16-23, 12:37 PM
#97
Full Member
My opinion/experience says a front bar is pretty important. Having the springs take care of everything would require such a high rate that is would be super uncomfortable and overwhelm lateral traction with anything less than qualifying slicks. Unless of course you install a super complex linked hydraulic damper solution � la McLaren...
06-16-23, 11:42 PM
#98
Senior Member
Thread Starter
Originally Posted by j9fd3s
if you did the math's and ran the numbers, you could probably do without the sway bar. in some setups the bar doesn't really do a lot
Originally Posted by Conekiller13
My opinion/experience says a front bar is pretty important. Having the springs take care of everything would require such a high rate that is would be super uncomfortable and overwhelm lateral traction with anything less than qualifying slicks. Unless of course you install a super complex linked hydraulic damper solution � la McLaren...
This is probably more my way of thinking. My front springs are relatively soft compared to some performance coil-overs I've experienced and I'd like to keep it that way. In any case, it wasn't much work to attach it anyway:


Kind of neat putting the old FB front sway back on. If I keep this up, it'll be back to stock in about another 200 posts.
11-11-23, 04:31 AM
#99
Senior Member
Thread Starter
Ok I know it's been a while, we got back from Toronto in late July however I had a chance to think a lot on the trip and decided that the main priority was to do something about my working conditions on the new shed. So I spent about a month lining the half of the shed that gets the afternoon sun with 100mm thick polystyrene covered in 12mm plywood. I also installed another roller door at the northen end so I can get a good flow of air through the building and actually work when it gets warm.
Then I set up benches, storage and equipment, catergorised everything and generally made it a much more pleasant, efficient experience.
Then, I assembled and fitted my new 12a twin dizzy engine to the RX-2 and spent about 100 hours tidying up a heap of problems with it and getting it ready for the southern hemisphere summer we're heading towards rapidly. This has largely been a success however since this isn't rx2club.com you'll have to take my word for it.

I also had a client bring in a '78 Trans Am that needed rust work, and I've been working on doing a lot of concreting around the property too, so it's really only been in the last couple of weeks I've been able to get the FB back on the hoist and kind of pick up where I left off back in June. Excuses excuses.
Since then I've repaired all the rust in the bottom of both doors:


Fitted the ARP rear wheel studs, which involved drilling out the stud holes to 14mm and pressing in the new studs with my shop press:

I've fitted the fuel tank, connected everything and wired up the new pump:

The diff and axles are back in and connected.
I've also made quite a bit of progress on the Toyota MR2 electric power steering conversion by fitting the pump and wiring up the pulse width modulator to control the speed:


I'm going to set it on about 30% and see what level of assist I have. I really don't need very much at all, and I don't want it screaming all the time like a lot of the youtube videos I've seen. It's also illegal here to have an ungoverned electric power steering pump conversion, not that any cop is going to know or care, but everything else is legal so I don't want to start down that slippery slope.
I have also purchased a 54mm socket, so there's definitely a bridgeport coming up as soon as I can find the time to pull the engine down..
I'll keep picking away when I get time and update again before xmas.
Then I set up benches, storage and equipment, catergorised everything and generally made it a much more pleasant, efficient experience.
Then, I assembled and fitted my new 12a twin dizzy engine to the RX-2 and spent about 100 hours tidying up a heap of problems with it and getting it ready for the southern hemisphere summer we're heading towards rapidly. This has largely been a success however since this isn't rx2club.com you'll have to take my word for it.
I also had a client bring in a '78 Trans Am that needed rust work, and I've been working on doing a lot of concreting around the property too, so it's really only been in the last couple of weeks I've been able to get the FB back on the hoist and kind of pick up where I left off back in June. Excuses excuses.
Since then I've repaired all the rust in the bottom of both doors:
Fitted the ARP rear wheel studs, which involved drilling out the stud holes to 14mm and pressing in the new studs with my shop press:
I've fitted the fuel tank, connected everything and wired up the new pump:
The diff and axles are back in and connected.
I've also made quite a bit of progress on the Toyota MR2 electric power steering conversion by fitting the pump and wiring up the pulse width modulator to control the speed:
I'm going to set it on about 30% and see what level of assist I have. I really don't need very much at all, and I don't want it screaming all the time like a lot of the youtube videos I've seen. It's also illegal here to have an ungoverned electric power steering pump conversion, not that any cop is going to know or care, but everything else is legal so I don't want to start down that slippery slope.
I have also purchased a 54mm socket, so there's definitely a bridgeport coming up as soon as I can find the time to pull the engine down..
I'll keep picking away when I get time and update again before xmas.
