
My 85 S, the parts sponge "Pacman" - Yes, I have too many builds going on

Joined: Aug 2011
Posts: 3,078
Likes: 42
From: Cambridge, Minnesota
Glad to hear it's back to life and out driving man! Must be a blast in the snow out there. I hope it continues going well, and that the idle issue is resolved soon - those suck no matter what the engine is in.
Thread Starter
Joined: Feb 2002
Posts: 8,389
Likes: 120
From: North Jersey
Thanks man, yeah after being off the road since the mid 90's it's back in action. Always a cool feeling to have resurrected one. I'll continue fiddling with the idle issue this week.
Thread Starter
Joined: Feb 2002
Posts: 8,389
Likes: 120
From: North Jersey
Ok, so I've tried replacing every sensor - TPS, pressure, AFM, coolant temp, CAS, the coils, the ECU. Tried different injectors, resealed (again) all the manifolds and no luck. Starts up easy enough but idles like crap - real rough and hunts.
I have officially given up on S5 NA's. I could never get the one in my FC to run right, and now this. Yet I'm able to get S5 T2's to run just fine, and the FI system is basically identical. Very frustrating.
The body is too good, and the suspension too well sorted on this to have a crappy running engine. I have a spare, good T2 and will begin working on swapping that in this week
Yes i'm serious. I have no patience for this NA anymore. Only have so much free time and I'm not wasting any more of it on 160hp...
Pics/updates soon.


Love quick and decisive decisions (redundant? Perhaps...). Mind's made up and marching forward - good, bad, or otherwise, let's move on, we ain't sticking around here anymore so let's go! Love it. Good luck!
Thread Starter
Joined: Feb 2002
Posts: 8,389
Likes: 120
From: North Jersey
Haha  I've been driving myself crazy over the past week and a half trying to get this thing to idle right and I've had it! Life has been... "interesting" we'll say, lately and a headache from what's supposed to be my fun escape (the cars) isn't what I need right now. I've been reminded a few times recently that life is short and I'm not wasting my time on this. Having said that, I would like to revisit this engine someday (maybe in my AE86 which sits unfinished) and figure it out. Not knowing what's wrong is definitely a confidence killer...
I know the T2's inside and out and honestly, besides the turbo and nessesary i/c piping it's actually a much simpler engine in my opinion. No 6 port or VDI to fail/leak and easier to work on. Really my only concerns are getting a intercooler to fit with the battery still in the stock location. I didn't want to move the battery to the bin on this one, so fitting the ic piping might be a challenge. otherwise it shouldn't be too bad. We'll see though...
I've been driving myself crazy over the past week and a half trying to get this thing to idle right and I've had it! Life has been... "interesting" we'll say, lately and a headache from what's supposed to be my fun escape (the cars) isn't what I need right now. I've been reminded a few times recently that life is short and I'm not wasting my time on this. Having said that, I would like to revisit this engine someday (maybe in my AE86 which sits unfinished) and figure it out. Not knowing what's wrong is definitely a confidence killer...I know the T2's inside and out and honestly, besides the turbo and nessesary i/c piping it's actually a much simpler engine in my opinion. No 6 port or VDI to fail/leak and easier to work on. Really my only concerns are getting a intercooler to fit with the battery still in the stock location. I didn't want to move the battery to the bin on this one, so fitting the ic piping might be a challenge. otherwise it shouldn't be too bad. We'll see though...
Thread Starter
Joined: Feb 2002
Posts: 8,389
Likes: 120
From: North Jersey
Yet another road block... So I pulled the engine out of this thing, and pulled the T2 back out of the blue FB (that one is going back to being a 12a ) this weekend. Things went pretty smoothly until i went to drain the oil from that T2 - see the pic, it's chocolatly/watery and white sludge filled. Can only be one thing - coolant is getting into the oil. I pulled the oil pan to see how bad it looked. Horrendous is the answer, the whole bottom of the pan is covered in like 1/4" of white sludge. **** me right... That was supposed to be my good back up engine, now it needs to be rebuilt...
At this point my options for this car are to continue trying to figure out the idle problem, or just rip all the FI crap off of there and put a holley on (Don't really want to go this route, too hard to get smogged) or just buy some other engine (already spent too much, not going this route now). So, fixing the S5 NA I have seems to be it.
When I pulled the header off, the exhaust ports were two distinctly different colors, this is a definite clue. I posted in the tech section, hopefully someone will have some insight about the problems. At this point my plan of attack is just to strip the thing down to the block and start building it back up, making sure to seal everything really well and alleviate any potential vacuum leaks. Hunting/rough idle is usually from being too lean, so I'm assuming theres a leak somewhere in the system. Otherwise i'm kinda out of ideas (and patience).
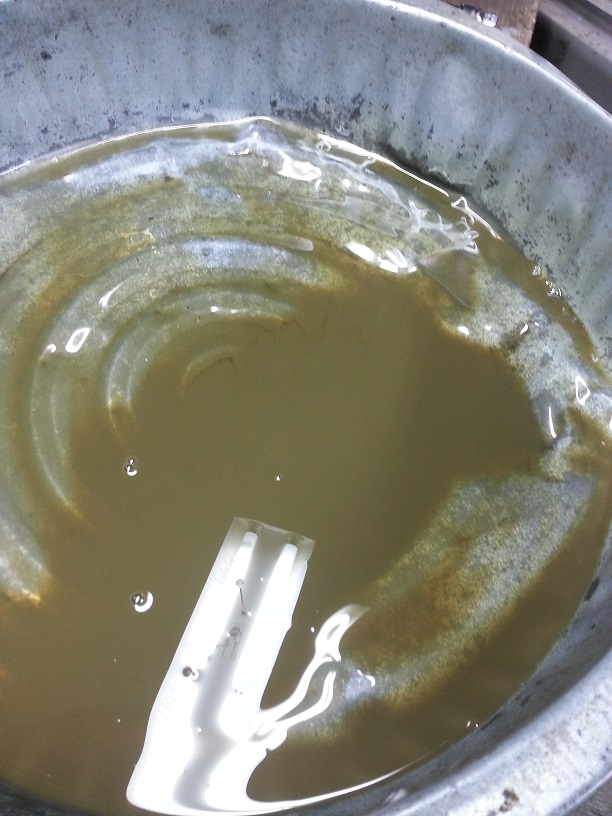

) this weekend. Things went pretty smoothly until i went to drain the oil from that T2 - see the pic, it's chocolatly/watery and white sludge filled. Can only be one thing - coolant is getting into the oil. I pulled the oil pan to see how bad it looked. Horrendous is the answer, the whole bottom of the pan is covered in like 1/4" of white sludge. **** me right... That was supposed to be my good back up engine, now it needs to be rebuilt...At this point my options for this car are to continue trying to figure out the idle problem, or just rip all the FI crap off of there and put a holley on (Don't really want to go this route, too hard to get smogged) or just buy some other engine (already spent too much, not going this route now). So, fixing the S5 NA I have seems to be it.
When I pulled the header off, the exhaust ports were two distinctly different colors, this is a definite clue. I posted in the tech section, hopefully someone will have some insight about the problems. At this point my plan of attack is just to strip the thing down to the block and start building it back up, making sure to seal everything really well and alleviate any potential vacuum leaks. Hunting/rough idle is usually from being too lean, so I'm assuming theres a leak somewhere in the system. Otherwise i'm kinda out of ideas (and patience).
Thread Starter
Joined: Feb 2002
Posts: 8,389
Likes: 120
From: North Jersey
Some good news for once. I haven't made any progress on the Na engine, BUT I looked over the T2 some more and found that I'm an idiot and had the crankcase vent hooked up incorrectly. In my attempt to clean up/simplify the rats nest and shorten the oil filler I had connected the charcoal canister directly to the filler, not the the T'd line that goes over the air intake. Yes I am an idiot sometimes (all the time it seems lately) So all the fuel vapor and moisture had no where to go but get trapped in the oil. I corrected the lines, and proceeded to swap front covers (it had an SE one on there for use in my blue FB) over to a S4 front cover ( will be using a mechanical omp and Rtek ecu to remove the electronic omp completely). I still have to put the water pump housing and FC oil pan back on, but I'm making progress!
I'll be sure to change oil after the first few hours of run time to get any remaining moisture/sludge that is stuck in there out. So there you have it, it was just as well I pulled all these engines out, I wouldn't have found that water/oil problem until it was probably too late and damage had been done.
The S5 NA will go on the proverbial back burner for a while. I'll be swapping to the T2 into this car over the weekend.
Thread Starter
Joined: Feb 2002
Posts: 8,389
Likes: 120
From: North Jersey
Ok so some good news, got the T2 all buttoned up and installed in the car last weekend. Again big thanks to my wife who's been wrenching right along side me over the past few weeks to help get all these damn cars back together. I swear I don't want to touch that engine crane again this year haha. I'll have to update my pandafb (blue one) thread one of these days, but basically I stole all the T2 related stuff out of that one to get this car going. I am going back to 12a on that car so it just made sense to take all the running gear off and start fresh.
Just a quick rundown, the engine itself is a JDM S5 T2, which now has a S4 front cover and mechanical omp. For the most part it's pretty much stock, although the throttle body has been modded, all of the warmup crap is long gone, and it now uses a FB or NA FC throttle cable (they are different, but both could be used, depending on how you make the bracket)
The flywheel is from an FD (same counterweight balancing as the S5's, but a few pounds lighter) The clutch is a centerforce dual plate unit that i had in my 83 S for like 10k miles but removed a few years ago cause I wasn't loving it. It's not a bad clutch, but the feel is a little, I don't know... "off" but it's just sitting there so I figured this would be a good place to use it.
Transmission again is a S5 JDM T2 which has an S4 T2 tail shaft housing on it (makes the trans mount easier to fab up) and FB shifter tower, and modded shifter rod to place the shifter in the stock FB location. Trans mount is a modded FB unit, as is the trans cross member.
Driveshaft is a custom piece from Mazdatrix (call/email them and tell them what you're building and they'll have it made, quick turnaround and fair price too)
Fuel system is the FC in tank style setup, with a Walbro 255.
Wiring harness on the engine is a modified USDM NA S5 piece - much easier to find than a USDM T2 harness, and is easily modified to fit on the T2, and much easier to work with than the short JDM wiring harness. ECU for now is a N374 (JDM S5), but I have a N370 (USDM S5 T2) unit that I'll be sending to Rtek for and upgrade once I have the spare cash. For now I have the S5 omp connected to the wiring, but just zip tied off the side, to keep the ECU happy.
Exhaust - corksport 3-2.5" downpipe, 2.5" catco cat and then a magnaflow resonator and magnaflow muffler. The Maganaflow stuff was actually all from a catback that I had on my old daily driver (94 Accord baby!) It was all in rough shape, but I was able to make a very nice fitting over the axle pipe out of the bends from it, and it provided the resonator and muffler as well. It all fits very nice and isn't too loud at all. The bigger tip matches the flares and attitude of this car very well I think. It'll pass inspection with no problems too, all the smog gear is there.
The intercooler was by far the most annoying thing to integrate on this car. My other T2 FB, as well as the blue FB both have their batteries in the bin. I wanted to keep the bins open on this car, plus I had just bought a new battery (not a sealed one) recently so I wanted to keep it in the bay. Getting the IC piping snaked around there while clearing the headlights and fitting all of the FC coils etc was a challenge, but it all worked out in the end. It is a very tight fit over on that side of the bay, but I'm pretty happy with the result. Blow off valve is a HKS SSQV V3.0 and all couplers are high temp silicone with stainless T-Bolt clamps.
Last change from version 1 of this car, I made some more permanent mounts for the oil cooler, and put an 83-85 stock style radiator in, rather than that ridiculous aluminum thing I had in there a few weeks ago (which fits like crap and leaks) The only catch is that the 83-85 rad won't fit with the FC sway bar in there, the way I had it mounted. Rather than go nuts trying to make new mounts for the FC sway bar, I just took the FB sway bar (rusted to hell old stock thing) cut the eyelets off the end, rotated 180* and welded them back on, so that they attach to the FC end links. I'll have to get some pics of this, sorry I forgot.
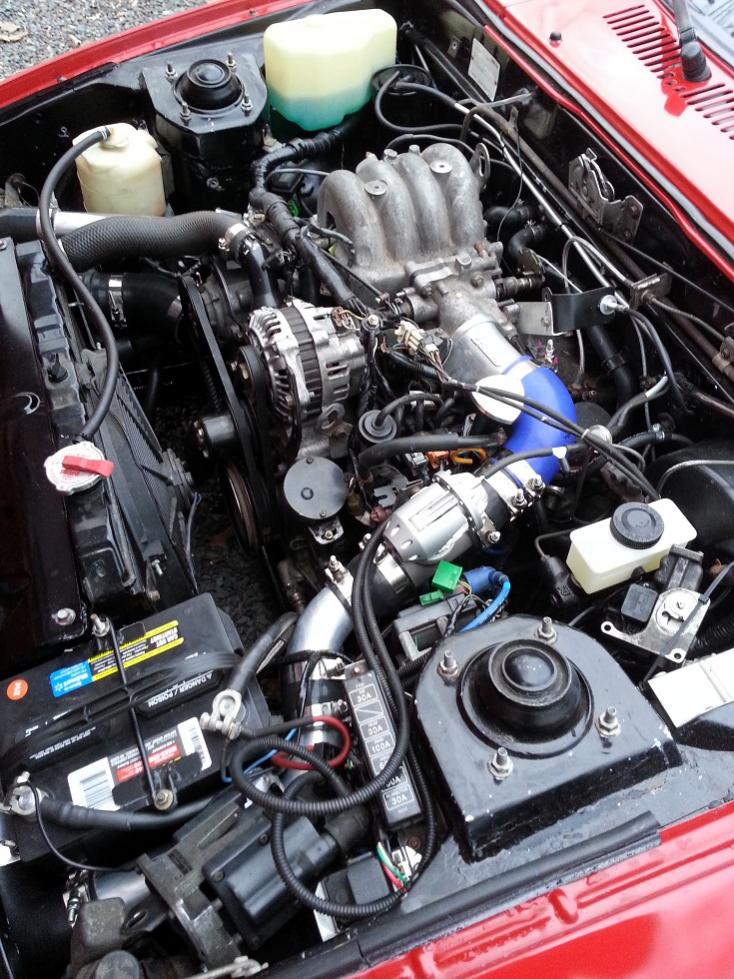
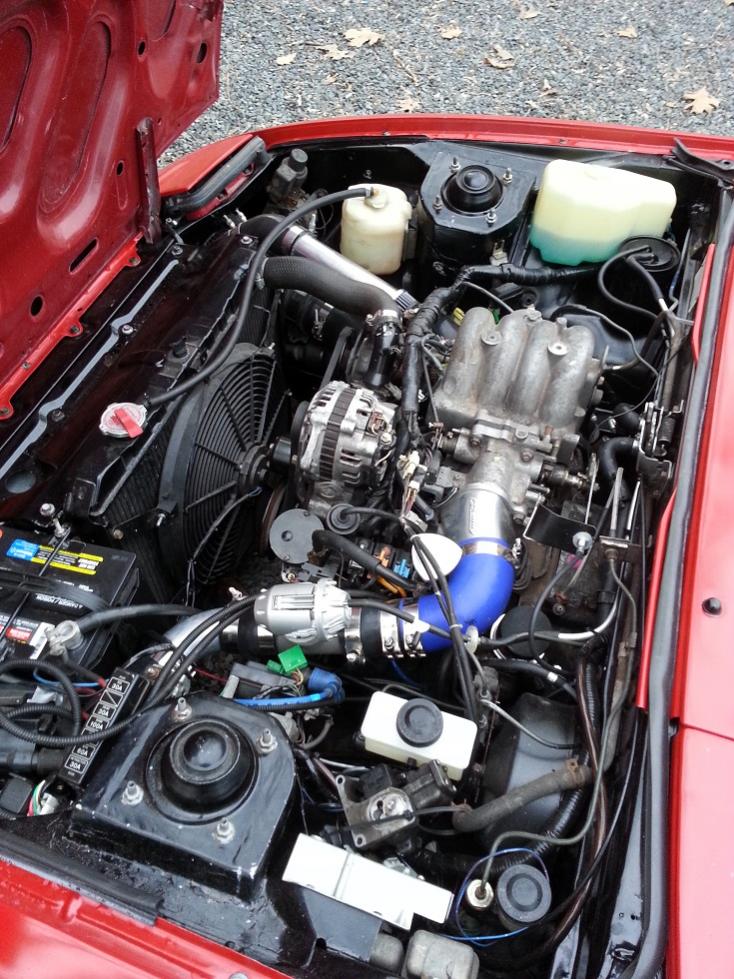
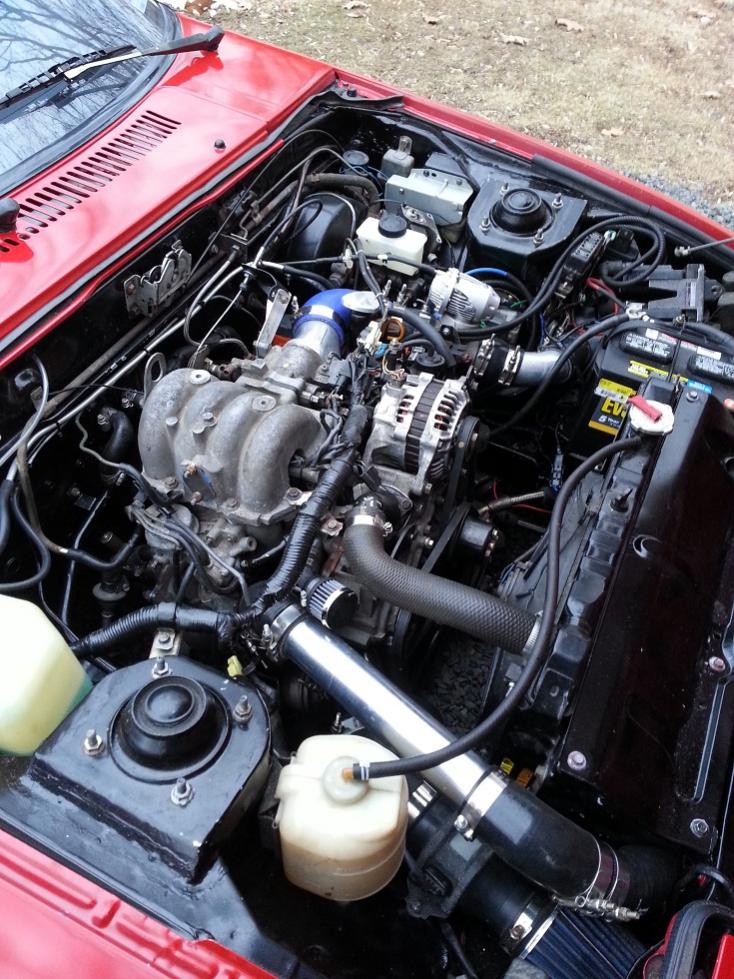
Anyway, I think that's it. It's been a crazy few weeks trying to get this thing done, as always, the car isn't "done" but it's done enough for now. It purrs like a kitten and pulls plenty hard enough. I'm officially burnt out. I'm gonna take a break from this (other than driving of course) for a few weeks then figure out what I'm doing next
Here's a few pics
Just a quick rundown, the engine itself is a JDM S5 T2, which now has a S4 front cover and mechanical omp. For the most part it's pretty much stock, although the throttle body has been modded, all of the warmup crap is long gone, and it now uses a FB or NA FC throttle cable (they are different, but both could be used, depending on how you make the bracket)
The flywheel is from an FD (same counterweight balancing as the S5's, but a few pounds lighter) The clutch is a centerforce dual plate unit that i had in my 83 S for like 10k miles but removed a few years ago cause I wasn't loving it. It's not a bad clutch, but the feel is a little, I don't know... "off" but it's just sitting there so I figured this would be a good place to use it.
Transmission again is a S5 JDM T2 which has an S4 T2 tail shaft housing on it (makes the trans mount easier to fab up) and FB shifter tower, and modded shifter rod to place the shifter in the stock FB location. Trans mount is a modded FB unit, as is the trans cross member.
Driveshaft is a custom piece from Mazdatrix (call/email them and tell them what you're building and they'll have it made, quick turnaround and fair price too)
Fuel system is the FC in tank style setup, with a Walbro 255.
Wiring harness on the engine is a modified USDM NA S5 piece - much easier to find than a USDM T2 harness, and is easily modified to fit on the T2, and much easier to work with than the short JDM wiring harness. ECU for now is a N374 (JDM S5), but I have a N370 (USDM S5 T2) unit that I'll be sending to Rtek for and upgrade once I have the spare cash. For now I have the S5 omp connected to the wiring, but just zip tied off the side, to keep the ECU happy.
Exhaust - corksport 3-2.5" downpipe, 2.5" catco cat and then a magnaflow resonator and magnaflow muffler. The Maganaflow stuff was actually all from a catback that I had on my old daily driver (94 Accord baby!) It was all in rough shape, but I was able to make a very nice fitting over the axle pipe out of the bends from it, and it provided the resonator and muffler as well. It all fits very nice and isn't too loud at all. The bigger tip matches the flares and attitude of this car very well I think. It'll pass inspection with no problems too, all the smog gear is there.
The intercooler was by far the most annoying thing to integrate on this car. My other T2 FB, as well as the blue FB both have their batteries in the bin. I wanted to keep the bins open on this car, plus I had just bought a new battery (not a sealed one) recently so I wanted to keep it in the bay. Getting the IC piping snaked around there while clearing the headlights and fitting all of the FC coils etc was a challenge, but it all worked out in the end. It is a very tight fit over on that side of the bay, but I'm pretty happy with the result. Blow off valve is a HKS SSQV V3.0 and all couplers are high temp silicone with stainless T-Bolt clamps.
Last change from version 1 of this car, I made some more permanent mounts for the oil cooler, and put an 83-85 stock style radiator in, rather than that ridiculous aluminum thing I had in there a few weeks ago (which fits like crap and leaks) The only catch is that the 83-85 rad won't fit with the FC sway bar in there, the way I had it mounted. Rather than go nuts trying to make new mounts for the FC sway bar, I just took the FB sway bar (rusted to hell old stock thing) cut the eyelets off the end, rotated 180* and welded them back on, so that they attach to the FC end links. I'll have to get some pics of this, sorry I forgot.
Anyway, I think that's it. It's been a crazy few weeks trying to get this thing done, as always, the car isn't "done" but it's done enough for now. It purrs like a kitten and pulls plenty hard enough. I'm officially burnt out. I'm gonna take a break from this (other than driving of course) for a few weeks then figure out what I'm doing next
Here's a few pics

Thread Starter
Joined: Feb 2002
Posts: 8,389
Likes: 120
From: North Jersey
cfamilyfix - Thanks! The way the oil cooler is set up on here won't work if you still have the tension rod brackets on the car, which you would if you're keeping the FB steering suspension. The banjo bolt for the rear line would hit the side of that bracket. Where and how you mount the oil cooler on here is kinda dependent on what lines you choose. I have the corksport ones, which work, but limit where you can put the cooler since they aren't very flexible (at least the front/upper line) Basically though I just made some simple brackets out of 1/8" steel and welded them to that tube that runs in front of the radiator. Mine is hanging below the tube, but you could mount yours above that tube. The rear line wouldn't be too much of an issue, but you'll want something longer and more flexible than the corksport line for the upper one to snake it around in there to fit. If you want more info pm me, I can bore you with all the info you need since I have FC coolers on all 3 of my FB's, and not one is done the exact same way lol.
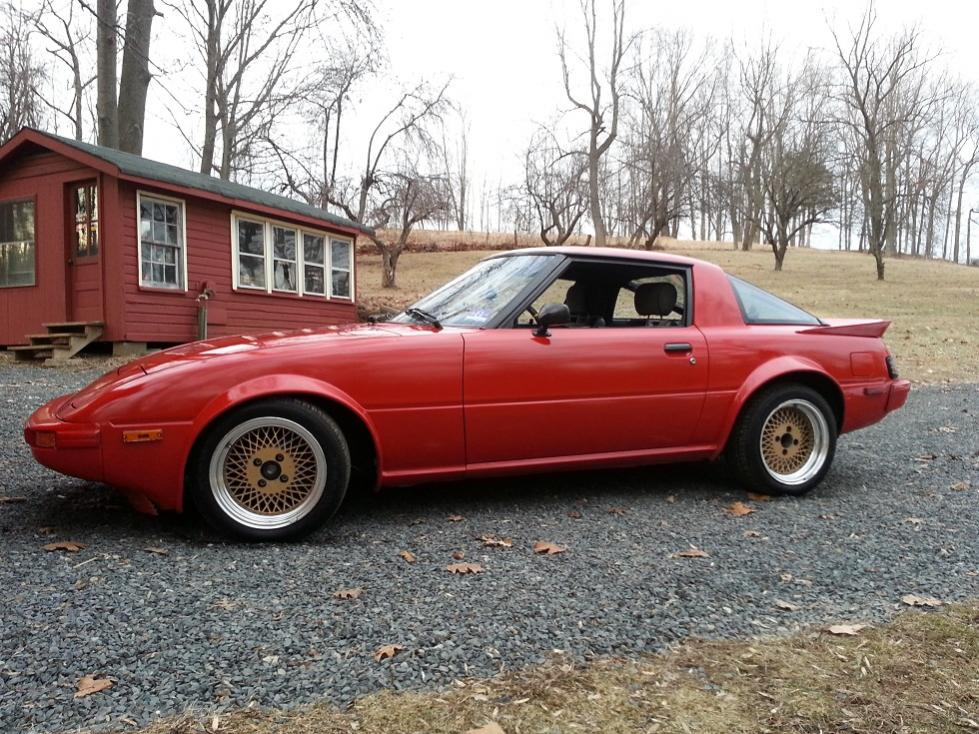
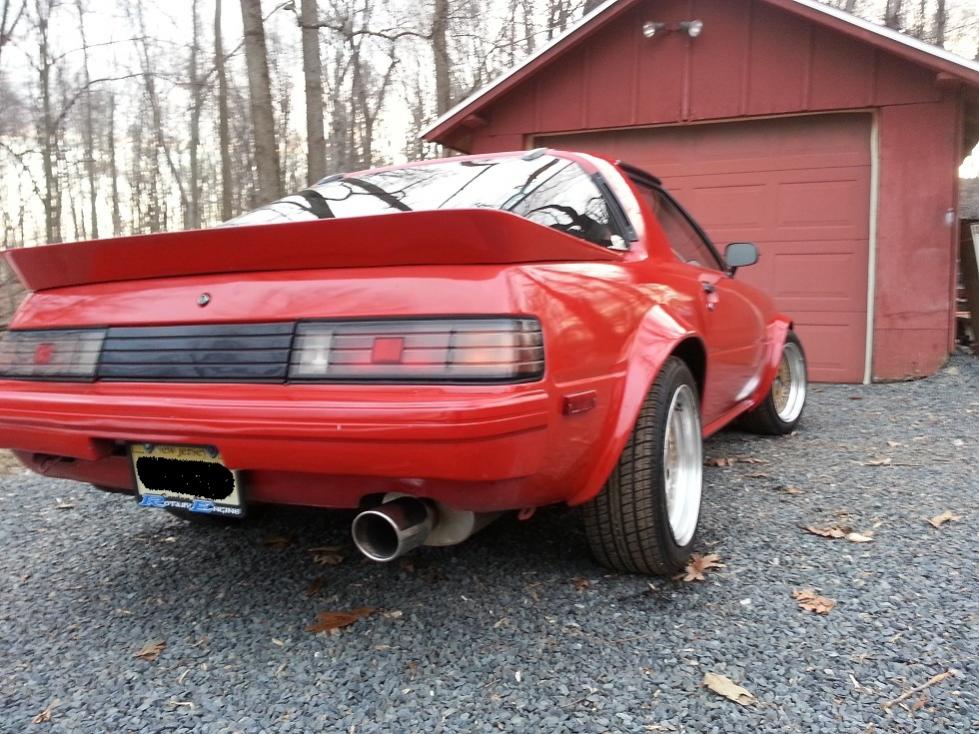
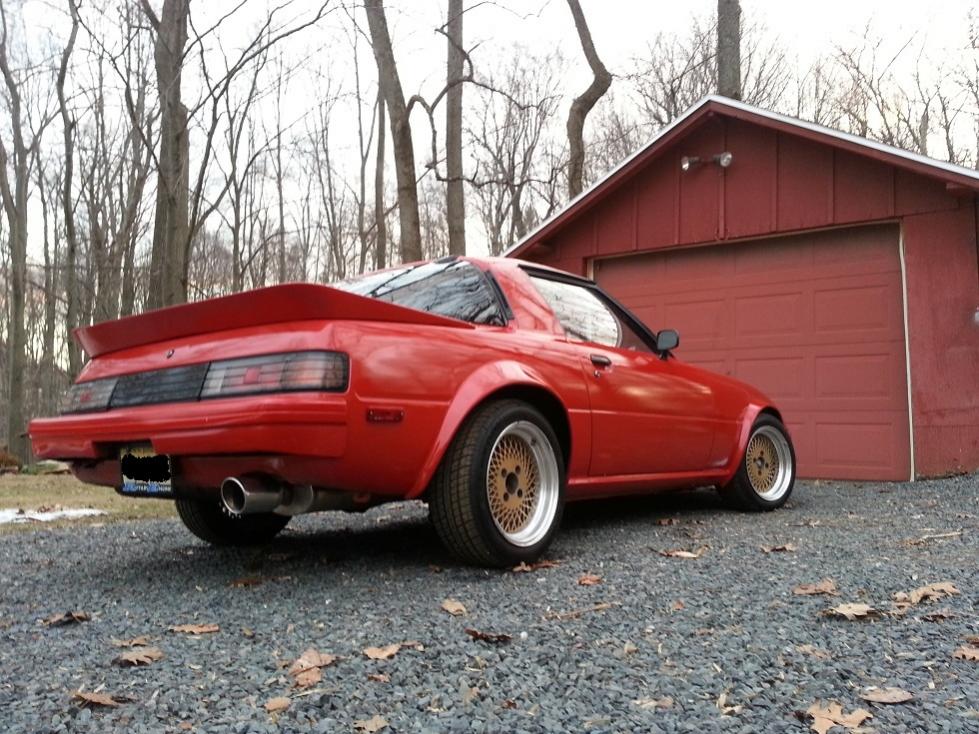
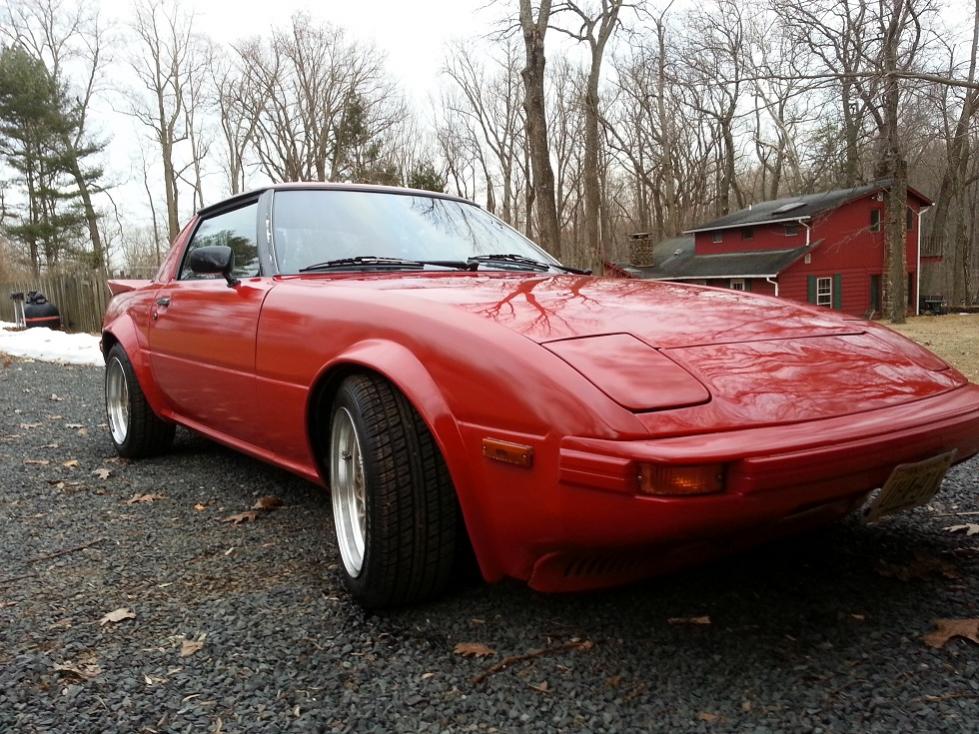
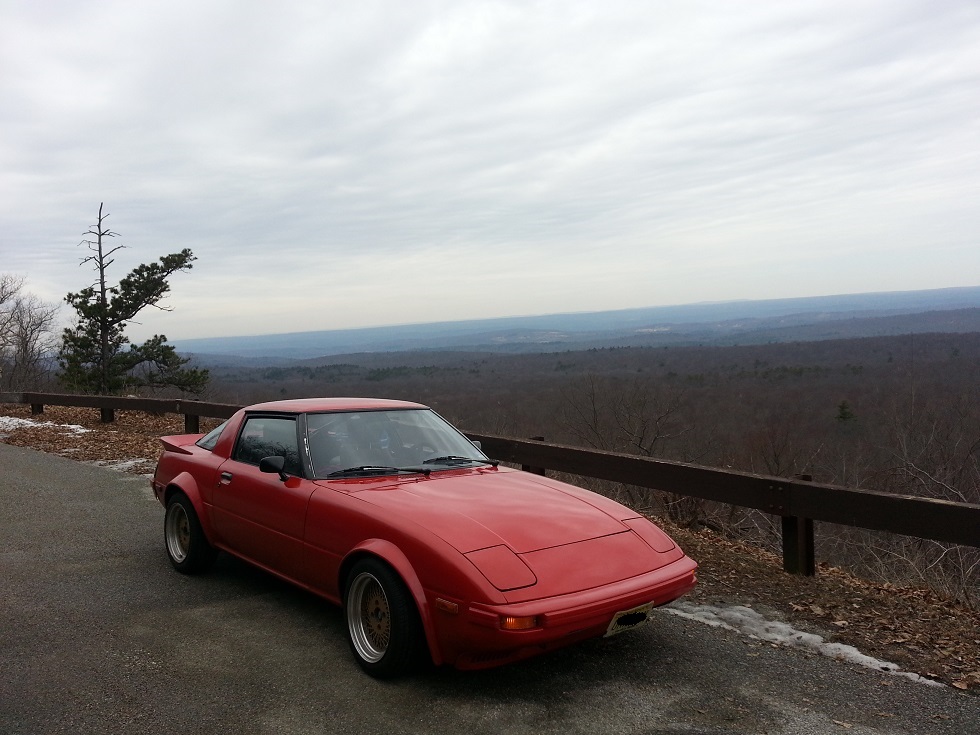
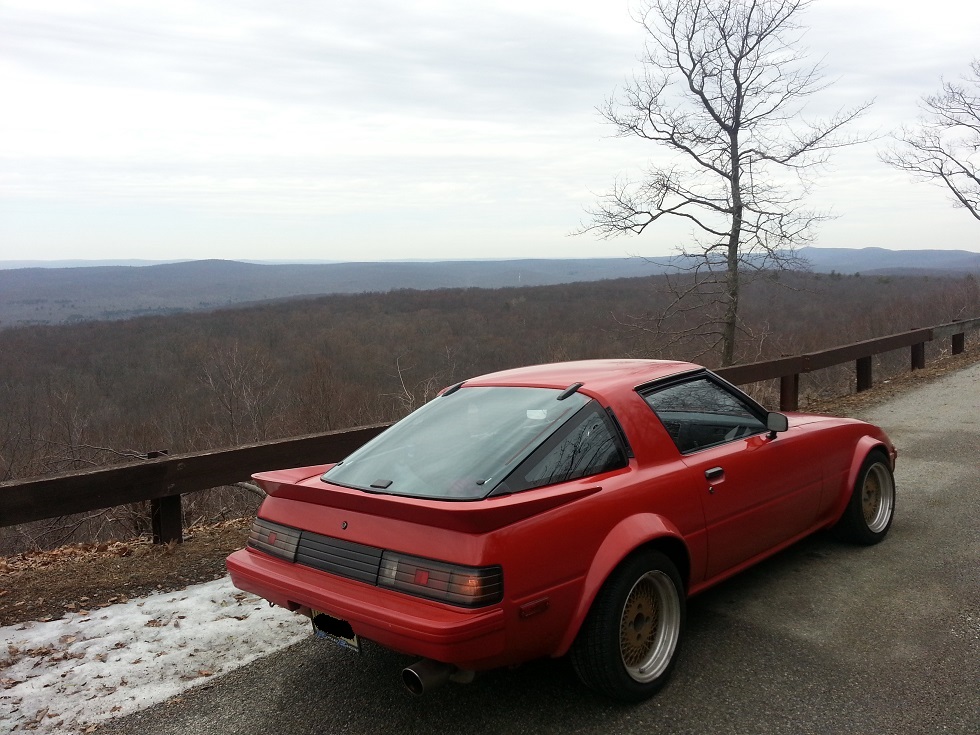
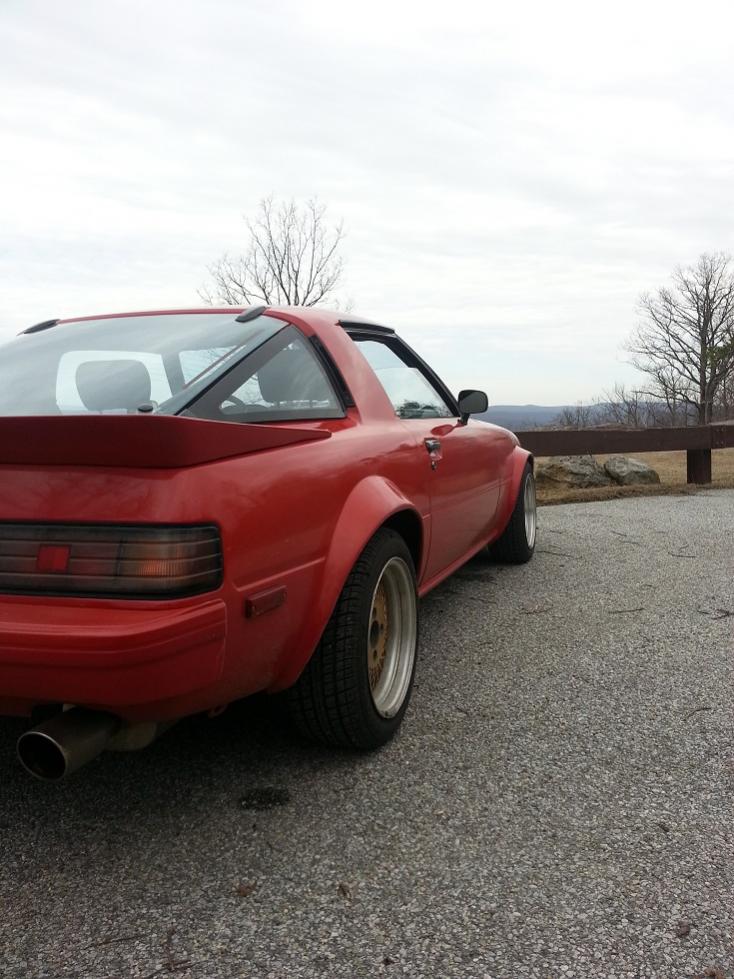
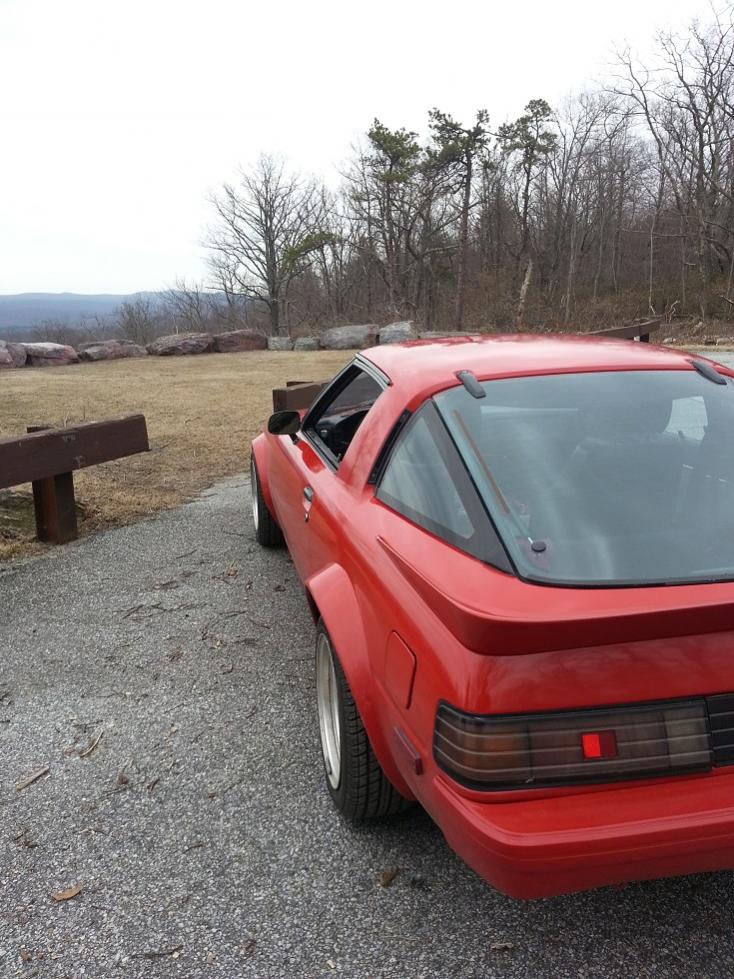
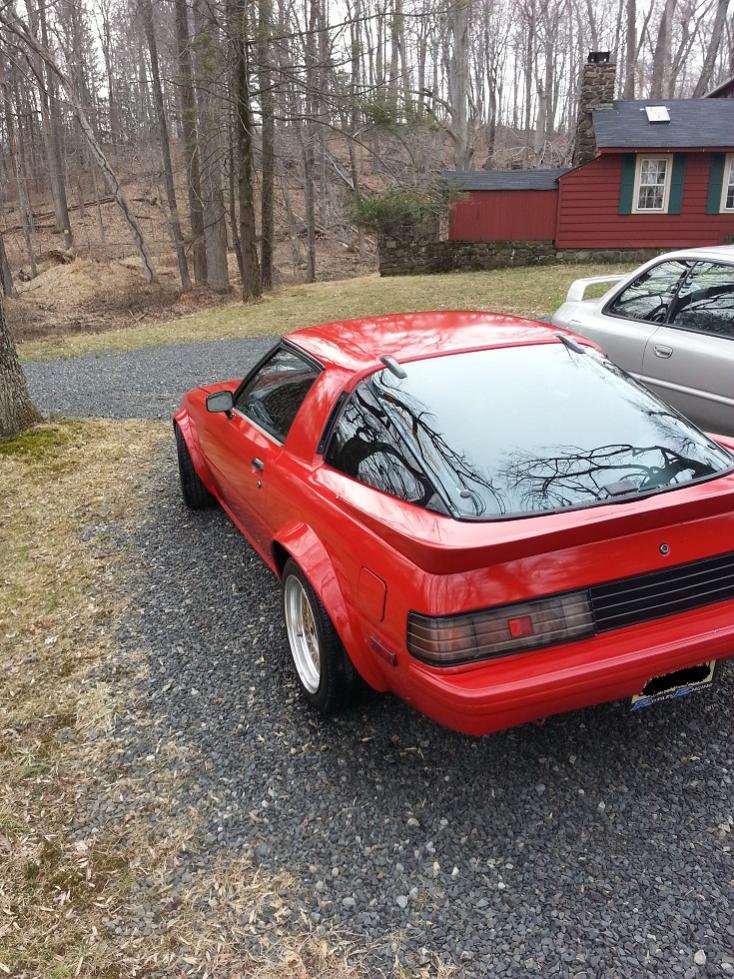
rotordogg - Yeah they are custom made metal flares that some previous owner or body shop did at some point. The fender "lip" is made out of some pipe that's bent into a curve then sheet metal was "bridged" between the quarter panel and the tube. The end result looks very smooth, although honestly I would have chosen a smaller tube or even some small rod to make the outer lip. I also would have spent more time forming the sheet metal "bridge" to minimize the filler needed. All things considered though there really isn't that much filler on this car which is good.
woodmv - I put 160 miles or so on it this weekend, just cruising around with the wife, no wrenching at all. Was a nice change of pace for sure Still some random stuff to do on this, but it can wait for now.
Thanks again for the compliments guys
rotordogg - Yeah they are custom made metal flares that some previous owner or body shop did at some point. The fender "lip" is made out of some pipe that's bent into a curve then sheet metal was "bridged" between the quarter panel and the tube. The end result looks very smooth, although honestly I would have chosen a smaller tube or even some small rod to make the outer lip. I also would have spent more time forming the sheet metal "bridge" to minimize the filler needed. All things considered though there really isn't that much filler on this car which is good.
woodmv - I put 160 miles or so on it this weekend, just cruising around with the wife, no wrenching at all. Was a nice change of pace for sure
Still some random stuff to do on this, but it can wait for now.Thanks again for the compliments guys
Thread Starter
Joined: Feb 2002
Posts: 8,389
Likes: 120
From: North Jersey
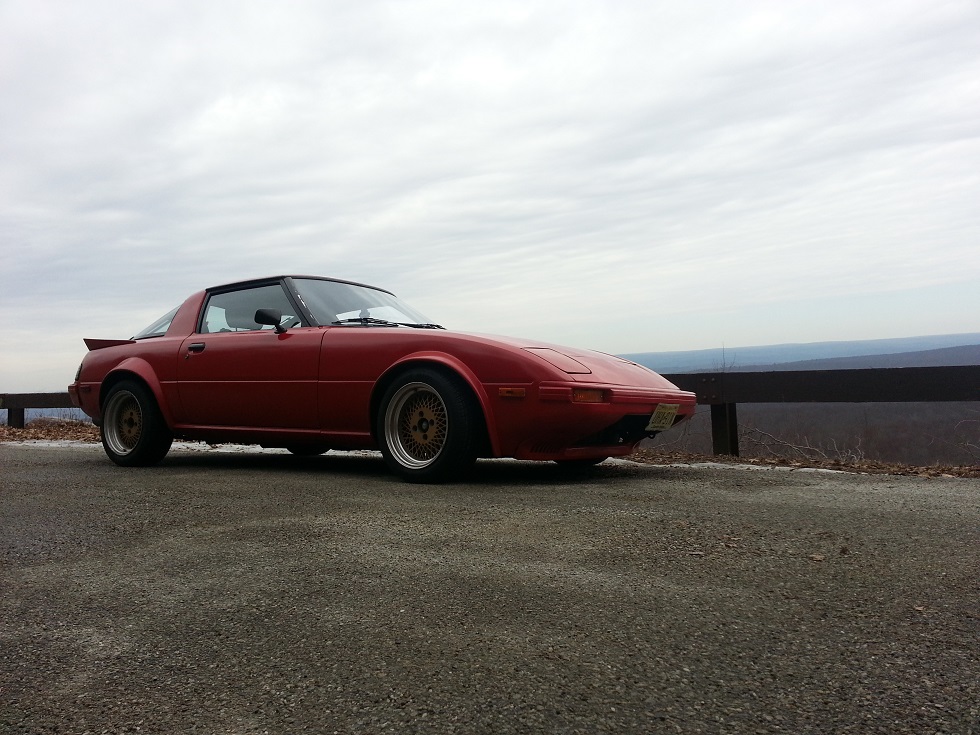
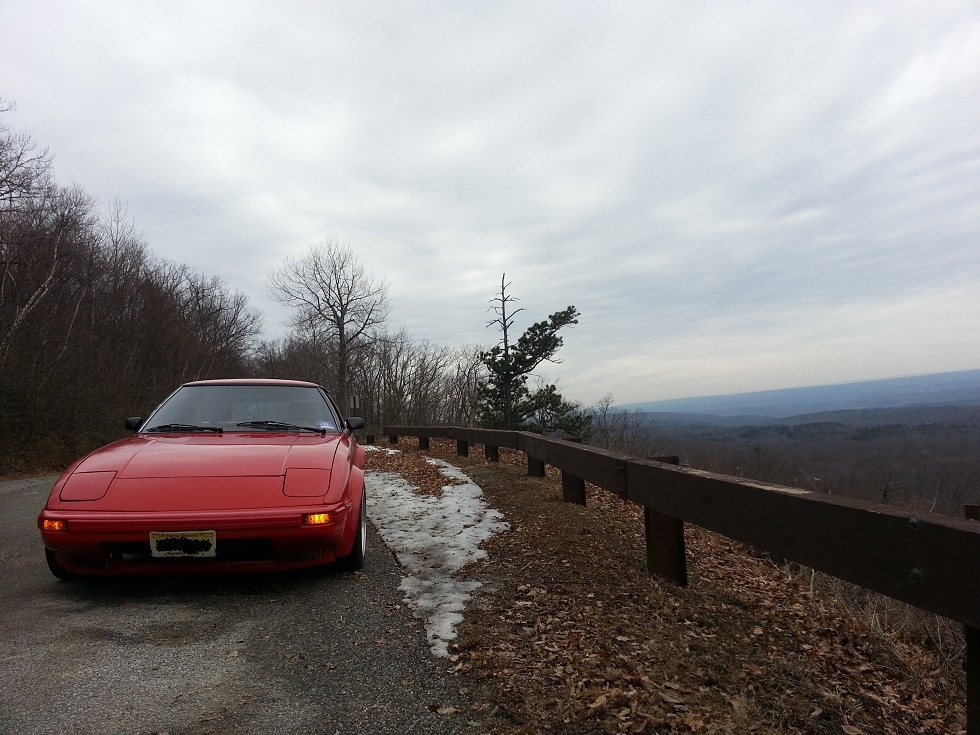
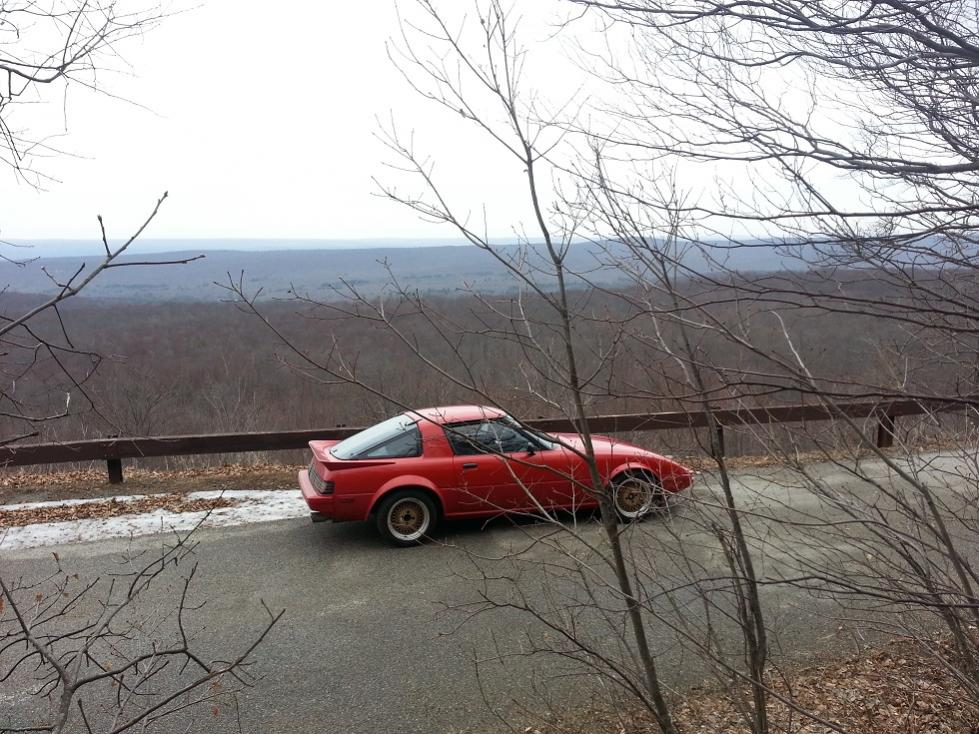
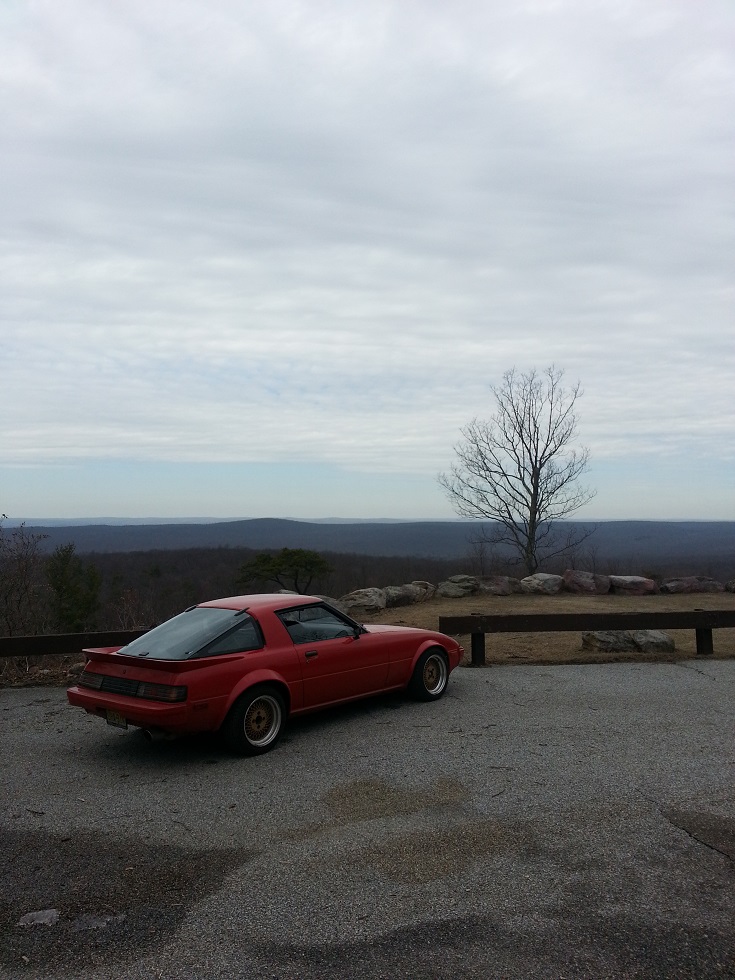
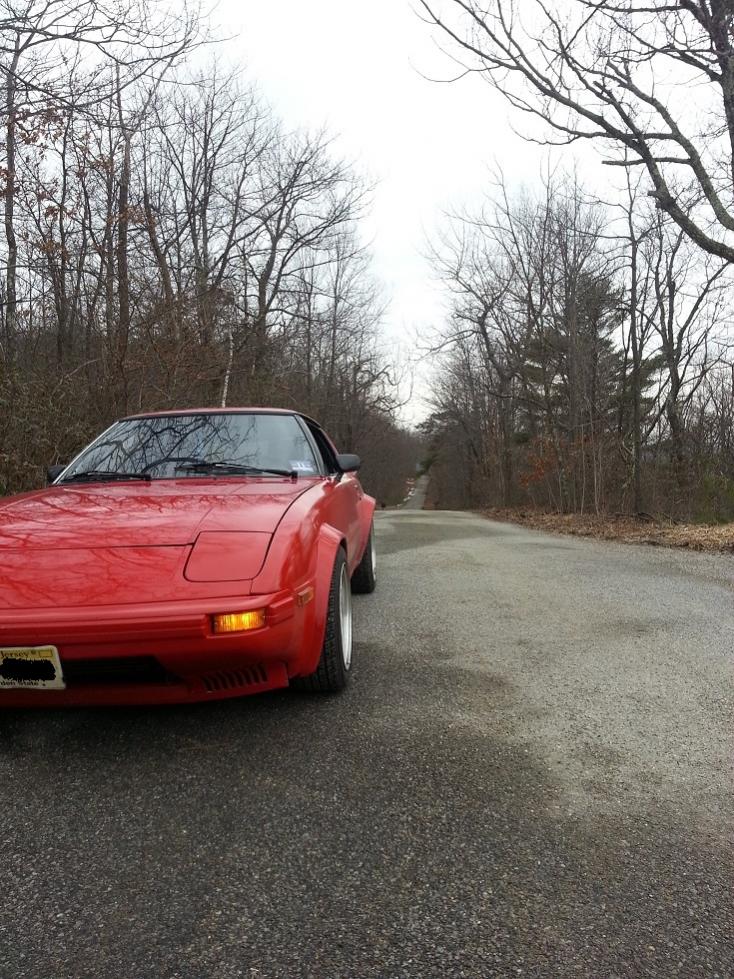
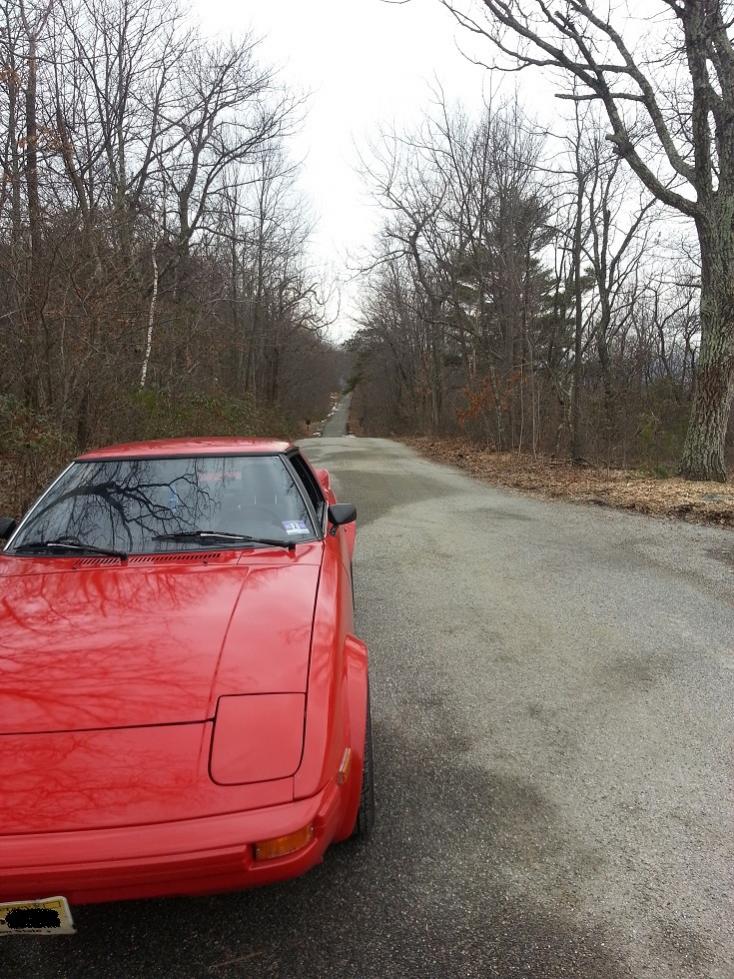
Yeah the car is going really well. Went out on a long drive with the wife Wednesday up to some of the better mountain roads NJ has to offer and took a bunch of shots along the way. Car ran very well. This was by far the longest drive in the car to date (almost 200 miles total, and mostly back roads and a few food stops so a good 5 hours or so) so it was a good chance to really get to know it. There is a small list of To-Do's but overall I'm pleased with the result.
Thread Starter
Joined: Feb 2002
Posts: 8,389
Likes: 120
From: North Jersey
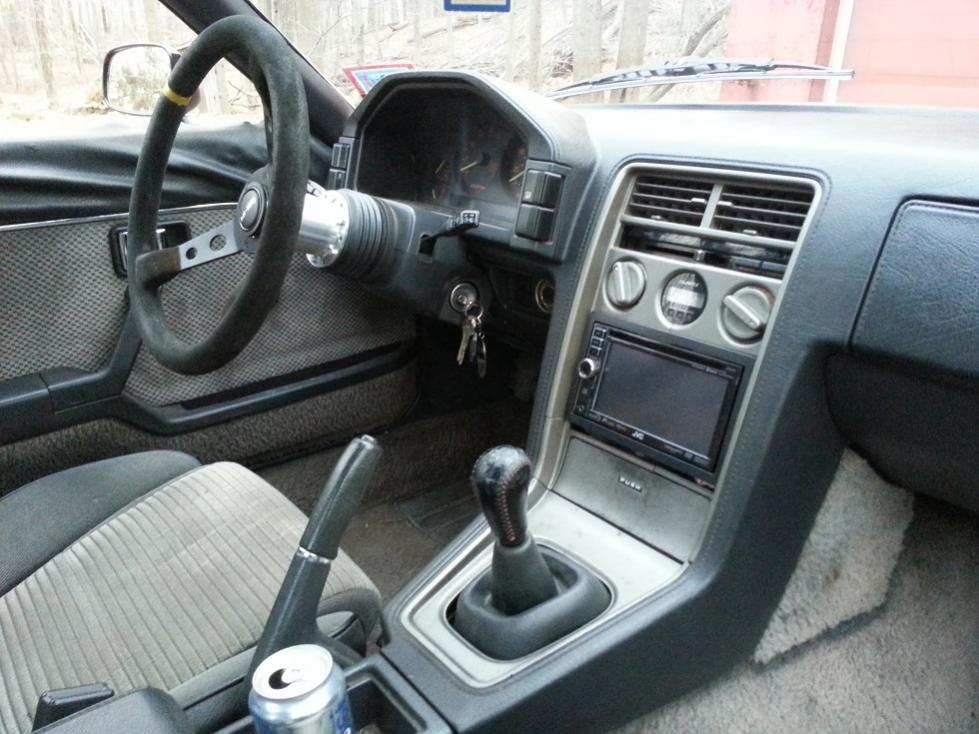
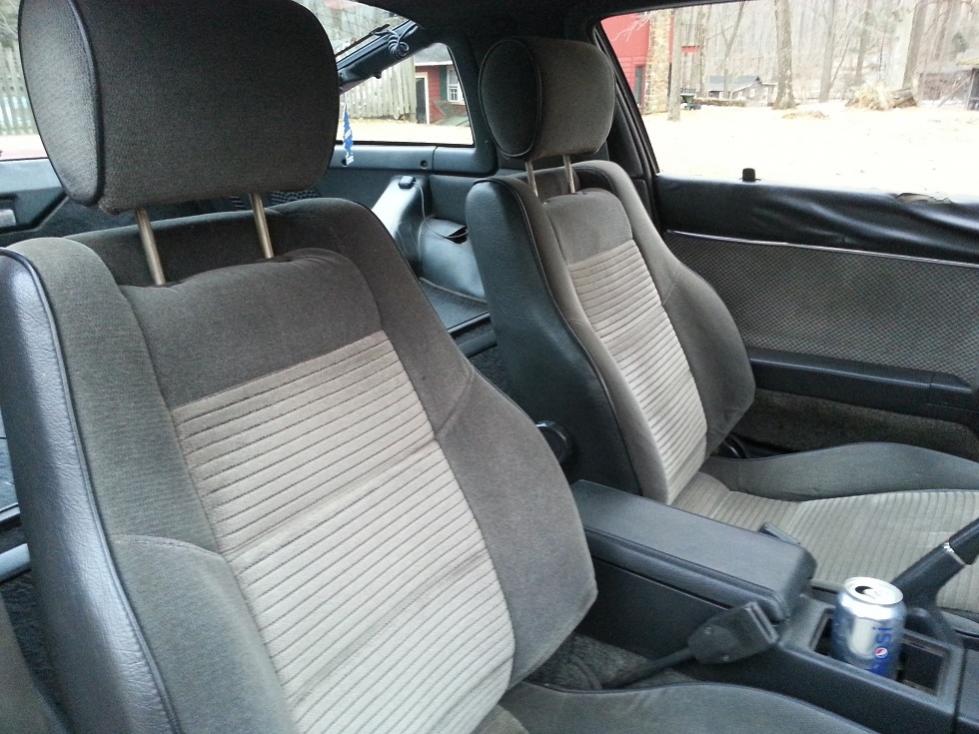
Few more pics and some more details on those to-do's. The biggest complaint we both had was the smell. The car was infested with mice (no shock, it sat for 15 years) which we cleaned out several months ago, but all the febreeze and carpet foam in the world wouldn't do it. It wasn't unbearable by any stretch, but the hotter the floor pan got the more apparent the smell was. The gray carpet was faded to hell, stained and just generally shot. I had a spare black 83 carpet that i"ve been hanging onto as a spare for many years. Figured what the hell, a gray/black two tone interior isn't a bad thing.
Managed to install the carpet without cutting it, or removing the dash, but man what a pain in the *** that was. After seeing the gray carpet out of the car up close, I'm glad I ditched it. Thing was nasty. While I was at it I also put a set of S5 base model seats in. Those Gray S3 seats sit way too high for my liking. I have S5 seats in my other FB's as well and love them to death.
Guess that isn't really on the To-Do list anymore since we did all that yesterday, but whatever.
Otherwise the list of things to do on this is fairly short. The steering is a tad vauge on center, not wondersteer (it's rack and pinion anyway) but like it's got a slight bind and doesn't return to center as smoothly as my other one. Will have to investigate.
Need to do an oil change, and at some point install some gauges, as well as fix some of the non functioning lights on the stock gauges. Otherwise I guess that's about it?? For now anyway...
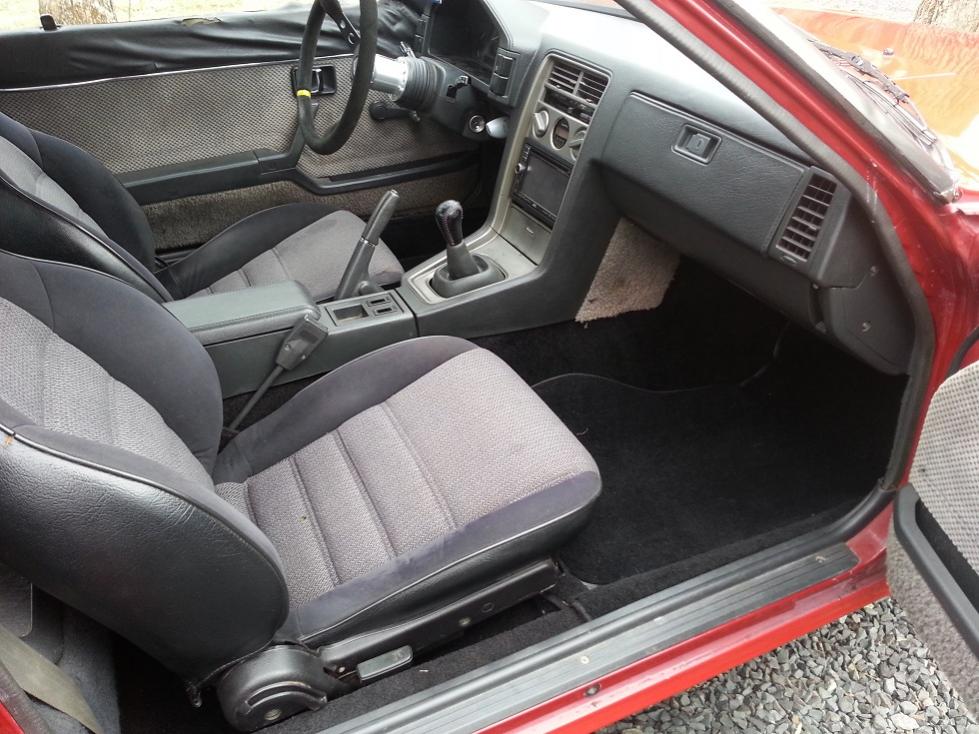
Last edited by 82transam; Apr 7, 2014 at 10:38 AM.
Thread Starter
Joined: Feb 2002
Posts: 8,389
Likes: 120
From: North Jersey
Didn't take any more pics, but put another 175 or so miles on it over the weekend. Decided to go ahead and change the oil to make sure the crankcase vent is working correctly. Thankfully it is, no more water/sludge in the oil. In face it still looked incredibly clean, no signs of contamination at all, very pleased about that.
Also changed the gear oil in the trans. I had cheap-o walmart oil in there just to get the car up and running (no sense in using expensive stuff initially in case you have a leak or need to remove the trans etc) but it was not shifting smoothly into second at all. Left it to drain for a good 20 mins to make sure as much was out as possible then put 2 qts of Redline MTL in there. I always forget how much of a difference that stuff makes. Silky smooth now. Well worth the money as usual.
Tried to locate an annoying exhaust rattle/buzzing that seems to be fairly RPM specific, and seems worse on decel. I'm thinking that old Magnaflow is breaking up inside. Although the exhaust stinks pretty bad so it could be the stuff inside the cat that's broken down. I was hoping to get some more miles out of this exhaust but it looks like I might redo it. I love the sound overall, but I can come up with something better.
Those fenders look great! And nice color combo with the wheels, btw.
Can u elaborate on how you installed the carpet without removing the dash please? I have a new carpet but have not tackled this because of just that. Thanks.
Can u elaborate on how you installed the carpet without removing the dash please? I have a new carpet but have not tackled this because of just that. Thanks.
Thread Starter
Joined: Feb 2002
Posts: 8,389
Likes: 120
From: North Jersey
^Thanks! I'm really happy with how the car came out visually. Paint went on a bit dry in a few spots so it needs a bit of polish, but not a big deal.
Sure I'll give a quick rundown on the carpet, Some steps are probably obvious but in the interest of being thorough -
Remove the door sills, kick panels, seats, center console (arm rest) as well as it's bracket (bit more info on this below), the ebrake handle (just leave it hanging to the side, no need to disconnect the cable), the stereo/shifter surrounds (and the head unit itself if you still have one in there), as well as the shifter itself (put a rag or something in the hole to keep dirt from the carpet etc from falling in) and lastly, the vertical carpet pieces on either side of the lower dash (you can see them in my pics above really clearly since they are still gray)
A bit more on the center console bracket - it's a small sheet metal bracket held to the trans tunnel with two Phillips screws. One is easy to get to , the other is slightly blocked by the plastic tab coming off the lower part of the dash (which is what it attaches to) you will need to Dremel a slight relief in this (don't worry it's hidden by the center console when reassembled) to have proper access to the screw head. Unfortunately because of how tight the fit is in this area, you will need to remove this bracket for the carpet to slide in.
Once all that is removed the real annoying/tricky bit starts. After removing those vertical carpet pieces you will see 2 10mm head (6mm) bolts on either side. These bolt the dash frame to a U-shaped bracket, which is in turn bolted to the trans tunnel. This U bracket is the biggest road block, and the reason so many people cut the carpet I think. Anyway, It's held to the trans tunnel with 3 10mm head (6mm) bolts, that are basically impossible to see (because the dash frame is in the way) but you can access them from the back - put your hand in between the heater core and dash frame. I found that an offset head wrench worked the best, it's a bit tight for a ratchet to fit. Anyway, once those bolts are out, and the 4 bolts on the sides are removed you can remove that bracket. Easier said than done cause it's a tight fit, but some twisting and fiddling and it'll come out. Just be careful not to bend anything too much, otherwise it'll be a real pain to put back together.
If your old carpet is in poor shape like mine you can just tear it out. Mine was actually cut already so it was easy to remove, but if you wanted to save the carpet for some reason you could carefully remove it. Installing the new carpet is "just" a matter of sliding it under the lower dash (the part that goes around the shifter) and up over the shifter tower and under the heater core. Easier said than done of course, even with all that stuff removed, there is very little space under the lower dash to get this in there. One thing I would do differently would be to put some Duct tape, or packing tape over the rubber boot on the shifter. The friction between that rubber and the bottom of the carpet made it a real pain in the *** to slide in. It also got hung up on a rubber foot on the bottom of the heater core. I used a very small amount of wd40 on there to help it slide in the rest of the way.
Getting the U bracket back in there is a pain since again, you can't really see the bolt holes but take your time and make sure nothing cross threads. Everything else is just bolting things back together.
It's not the easiest thing I've ever done on a car, but certainly wasn't the hardest either. Worth the effort to not have a cut up saggy carpet in my opinion. Had I not needed to clean all the mouse "stuff" off my floor pan once the old carpet was out, I could have had this done in under an hour.
I would also note for those reading, if you are doing this on an 83 or earlier it's much easier since you can remove the lower dash/shifter area without removing the whole dash. The rest of the steps are basically the same.
Hope that helps! Hopefully it wasn't too confusing. I didn't really take pics along the way...
Nice work, hopefully the cars are getting good use in these nice spring temps. I have my '83 running daily now. No ac, will enjoy the cool weather while it lasts. If you are ever available to meet up let me know, I promise not to ask a myriad of questions about turbo 12a's or anything similar.
Thread Starter
Joined: Feb 2002
Posts: 8,389
Likes: 120
From: North Jersey
swbtm - We should meet up, always good to meet local rotorheads. Sorry I keep forgetting to reply to your pm, will do that now.
Anyway, updates on this car. Started installing an FC A/C system in it, but nothing wanted to fit right and I got frustrated and abandoned that project for a while. I will revisit it at a later point when I have more patience for it...
Decided it was time to get rid of the, way too small cobbled together exhaust I had on here. It was what remained of a Magnaflow catback on my 94 Accord that I chopped up to fit on an FB. It actually fit really well and had a decent tone, but it's way too small for a Turbo (2.25" from the cat all the way back) and you could really feel the turbo struggling to spool. The packing in the muffler and resonator I was using was also pretty much shot, and everything was quite rusty - time to change.
Figured if I was gonna redo the system I might as well go all the way and do full 3". The exhaust on my 83, while it makes great power and response, is way too quiet for my liking. Needs more loud on this one haha.
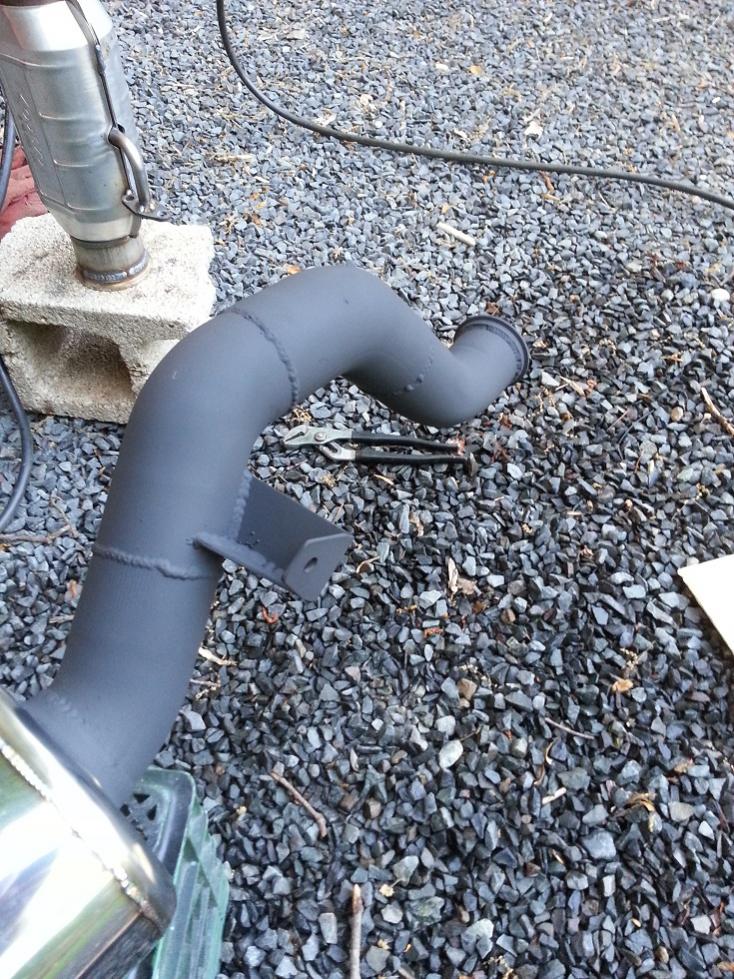
The muffler is a straight through Racing Beat universal muffler (very heavy duty and much larger than I was expecting, which is a good thing. Don't want it too loud) the piping is all from Summit Racing, as is the Catco cat. I decided to give V-Band's a shot on this one since they go together pretty easy and, in theory, make the exhaust easily removable and seal without gaskets. I made the mistake of buying these on ebay. They are some cheap made in China garbage, and while they do seal quite nicely, once you tighten it down it's nearly impossible to remove again. I guess the threads are cut poorly, or the hardware is made out of recycled crap and the threads get all galled up. I tried to remove one and ended up snapping the stud cause the nut got stuck on there so tightly. This was with hand tools, not an impact gun by the way. Anyway, in the end I was able to get two of them to tighten up correctly and seal properly so I'm fine for now, at least until I have to remove it for some reason haha.
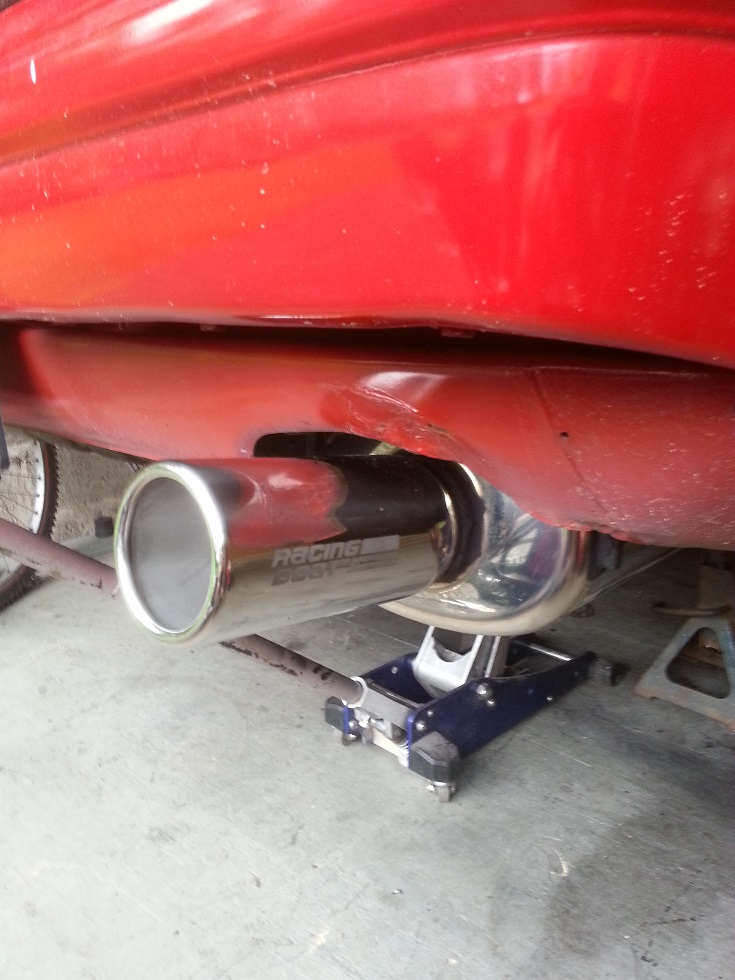
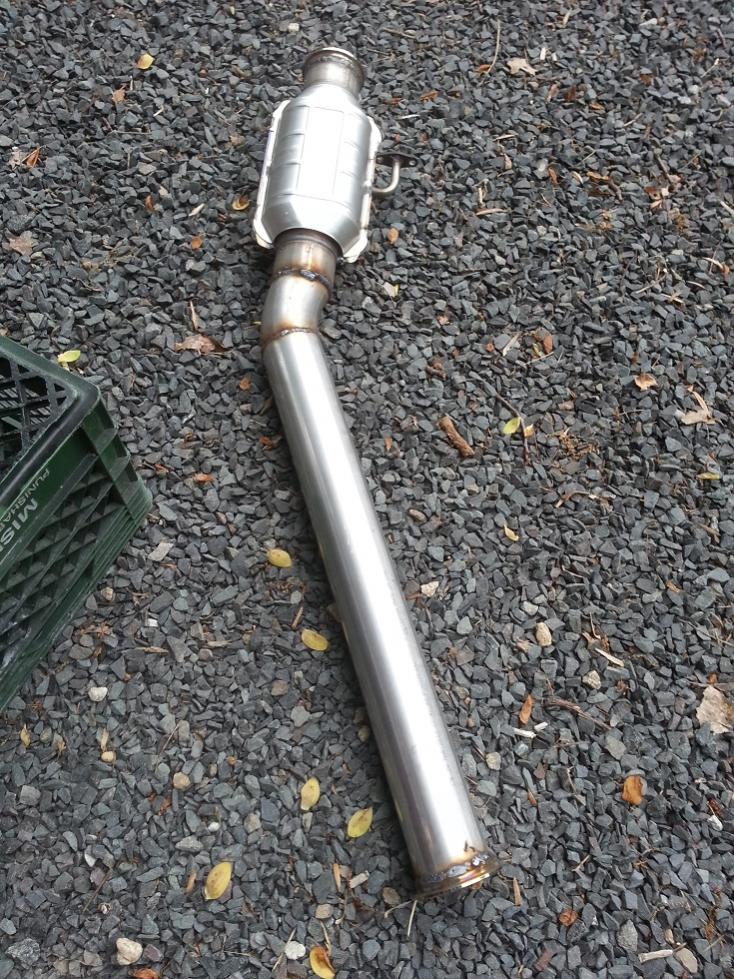
The downpipe (not pictured) was already on the car. It's a Corksport (fits ok, not great) 3"-->2.5" model. I just cut off the reducer section and welded a V band on, so now it's a full 3" all the way down. The over axle piece is just a bunch of 45* mandrel bend pieces cut up and welded together to fit. In order to make things easy I actually mounted the muffler slightly crooked, and then welded the tip on straight out the back. Made the over axle piece easier to fab, but when looking at the car, you can't tell the thing is crooked, since the tip is straight.
Overall it fits really well, and the sound, oh my, it's quite delicious. I love it. Only downer is that damn rattle is still there. I'll have to take another look at my heat shields.
Pics!

Anyway, updates on this car. Started installing an FC A/C system in it, but nothing wanted to fit right and I got frustrated and abandoned that project for a while. I will revisit it at a later point when I have more patience for it...
Decided it was time to get rid of the, way too small cobbled together exhaust I had on here. It was what remained of a Magnaflow catback on my 94 Accord that I chopped up to fit on an FB. It actually fit really well and had a decent tone, but it's way too small for a Turbo (2.25" from the cat all the way back) and you could really feel the turbo struggling to spool. The packing in the muffler and resonator I was using was also pretty much shot, and everything was quite rusty - time to change.
Figured if I was gonna redo the system I might as well go all the way and do full 3". The exhaust on my 83, while it makes great power and response, is way too quiet for my liking. Needs more loud on this one haha.
The muffler is a straight through Racing Beat universal muffler (very heavy duty and much larger than I was expecting, which is a good thing. Don't want it too loud) the piping is all from Summit Racing, as is the Catco cat. I decided to give V-Band's a shot on this one since they go together pretty easy and, in theory, make the exhaust easily removable and seal without gaskets. I made the mistake of buying these on ebay. They are some cheap made in China garbage, and while they do seal quite nicely, once you tighten it down it's nearly impossible to remove again. I guess the threads are cut poorly, or the hardware is made out of recycled crap and the threads get all galled up. I tried to remove one and ended up snapping the stud cause the nut got stuck on there so tightly. This was with hand tools, not an impact gun by the way. Anyway, in the end I was able to get two of them to tighten up correctly and seal properly so I'm fine for now, at least until I have to remove it for some reason haha.
The downpipe (not pictured) was already on the car. It's a Corksport (fits ok, not great) 3"-->2.5" model. I just cut off the reducer section and welded a V band on, so now it's a full 3" all the way down. The over axle piece is just a bunch of 45* mandrel bend pieces cut up and welded together to fit. In order to make things easy I actually mounted the muffler slightly crooked, and then welded the tip on straight out the back. Made the over axle piece easier to fab, but when looking at the car, you can't tell the thing is crooked, since the tip is straight.
Overall it fits really well, and the sound, oh my, it's quite delicious. I love it. Only downer is that damn rattle is still there. I'll have to take another look at my heat shields.
Pics!