My 79 "barn find" project
 09-24-13, 07:45 PM
#226
Some cool forensics and TIPS NEEDED.
So I'm disassembling the front suspension so I can restore the strut cartridges and replace all the worn out parts. I found some more evidence of the crash this thing had. If you remember the front under the battery tray is wrinkled up a bit and the top cross piece that the hood hinges bolts into on the drivers side is wrinkled up. I decided to keep that even though it can be seen in the final product because it gives my 7 character.
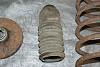
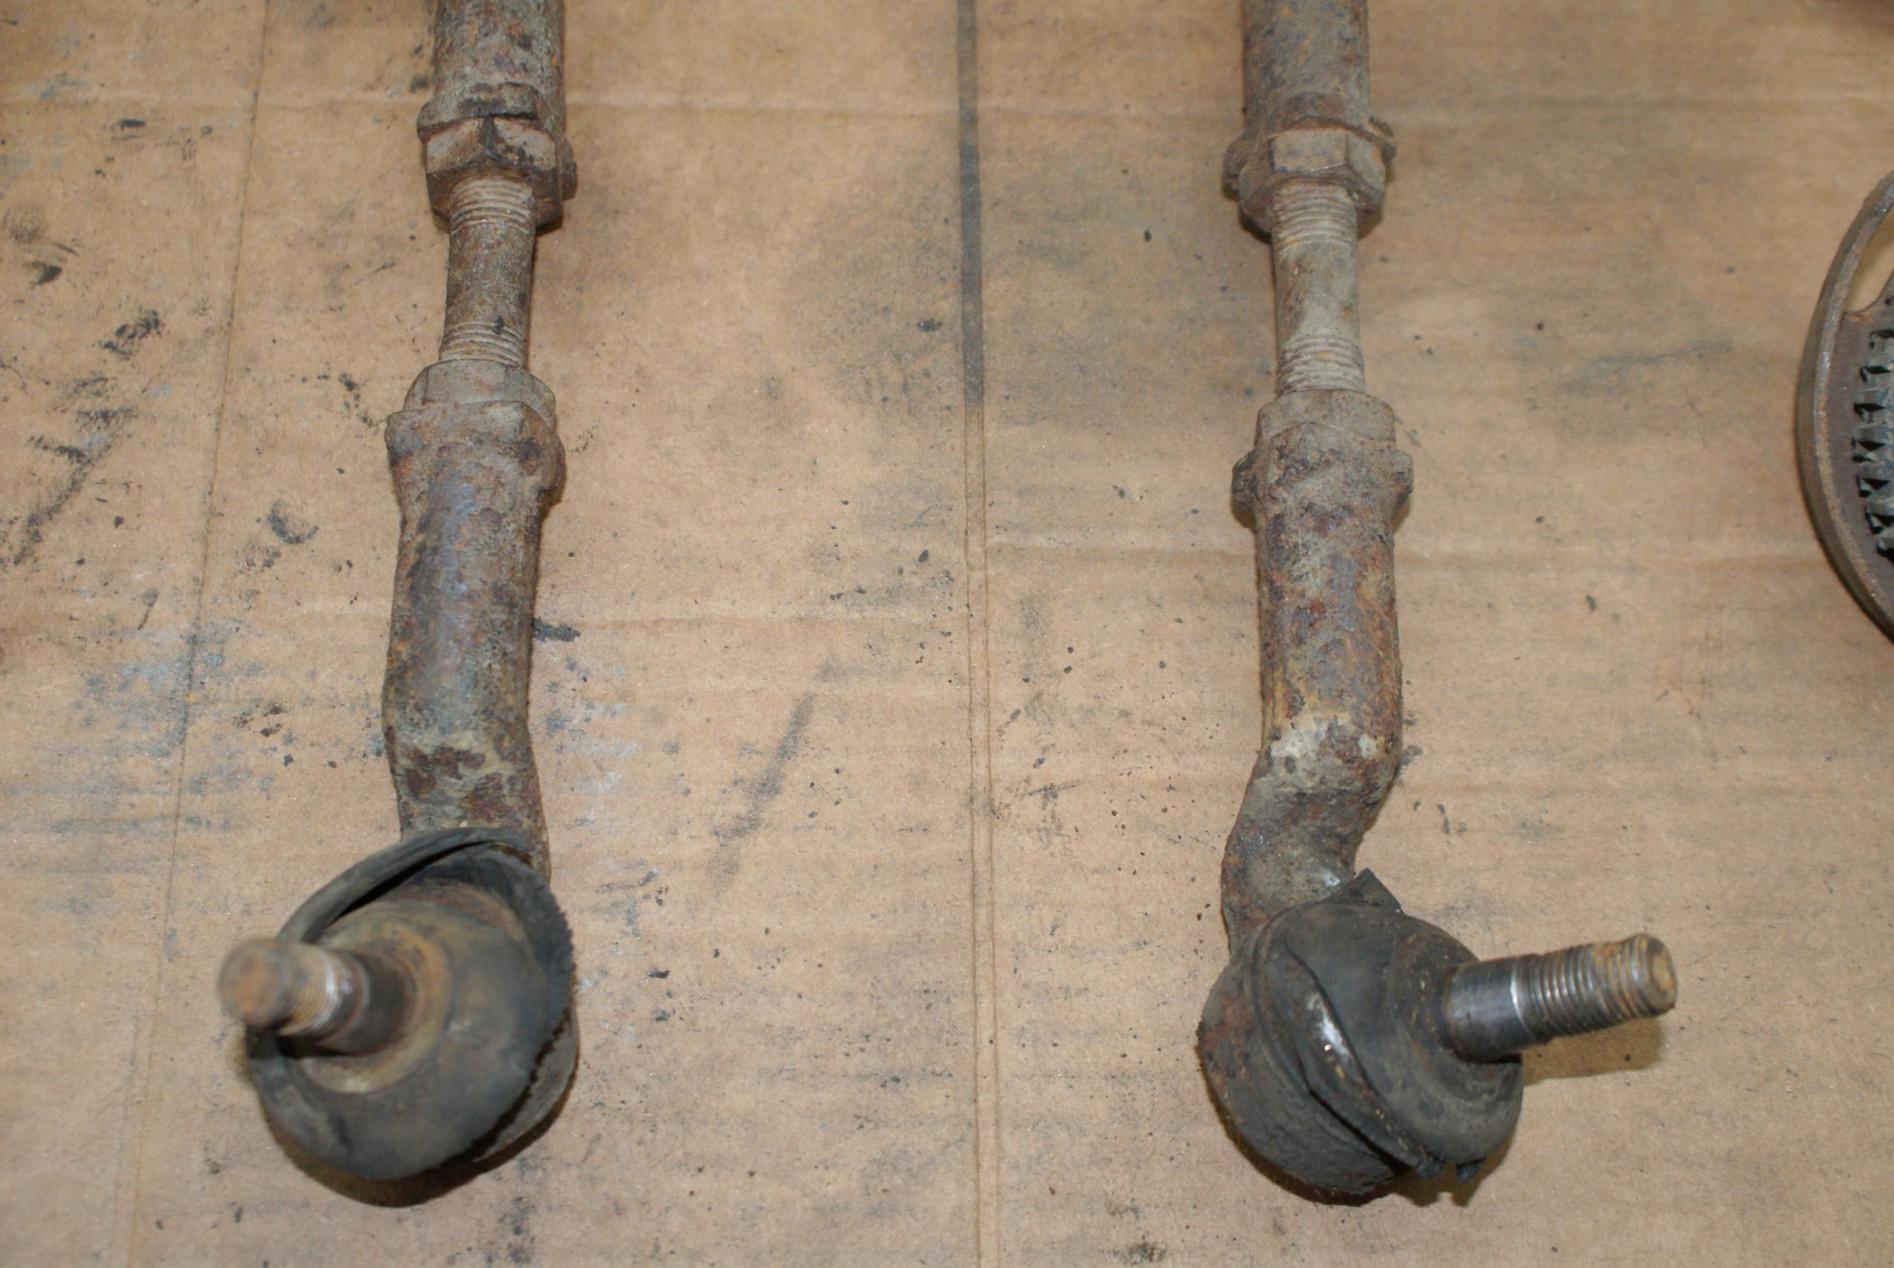
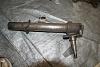
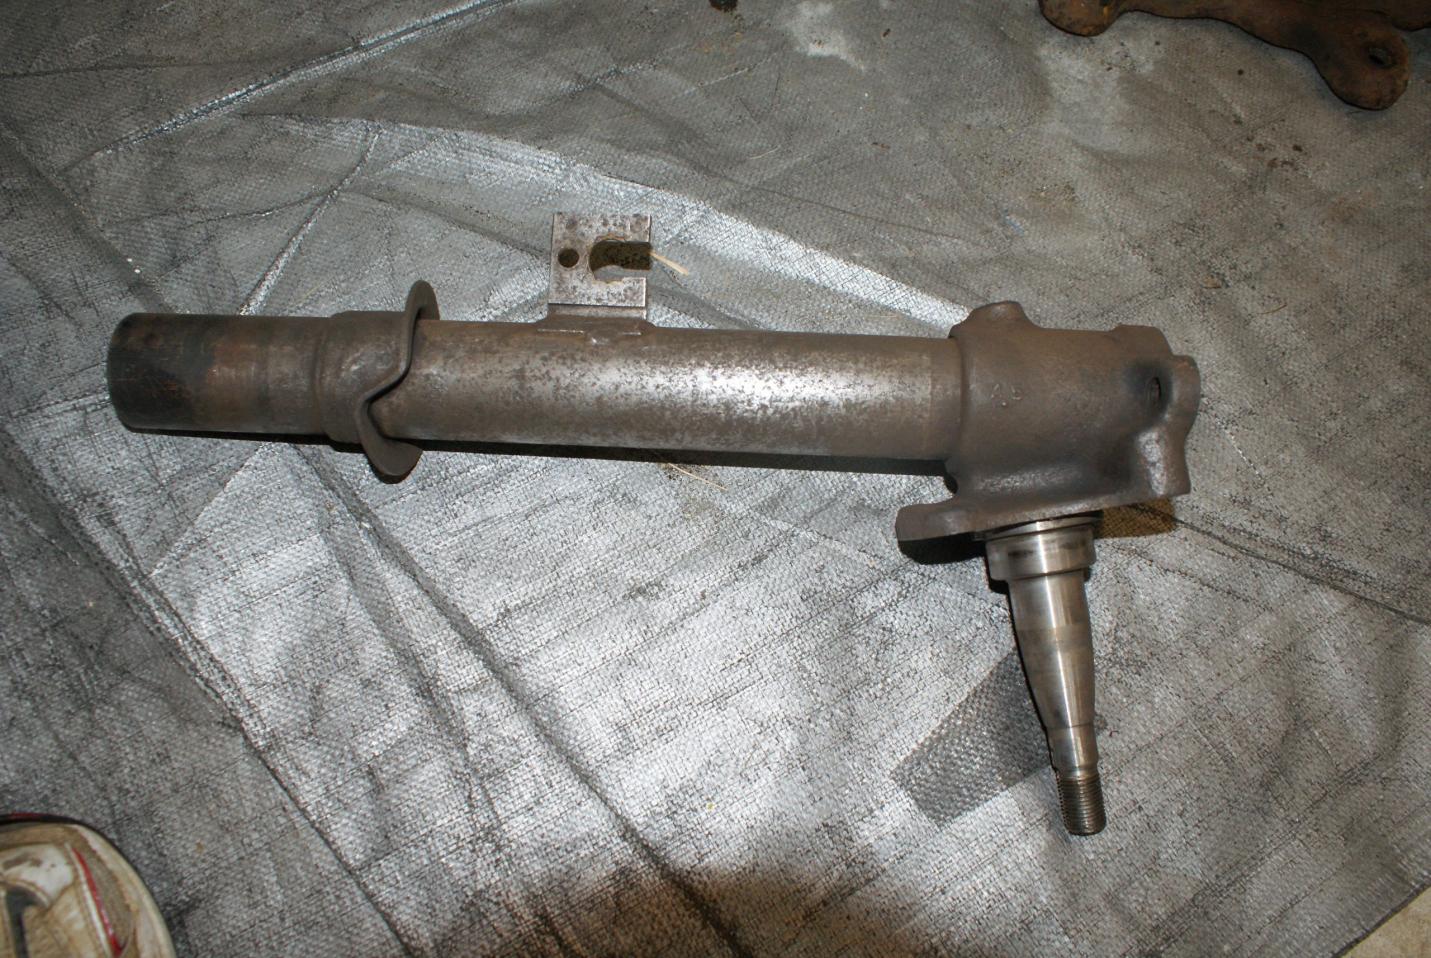
What I found tonight is interesting. I took apart the strut assembly on the passenger side and all was well - LOTs of rust, but that was expected. On the LEFT side however, the bottom of the suspension arm is bent right near the bottom of the ball joint, which faces forward when installed. That's a thick piece of metal to bend... Check it out. You can see it in this pic:
[img]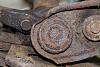 [/img]
Now, I need a tip because someone boogered up the 17 mm bolt that holds the steering knuckle onto the bottom of the strut assembly. It's been rounded off, which you can also see in the picture. Anyone have any ideas on how to get this out besides drilling it out, or adding heat? I don't own a torch so my options are limited unless someone has an idea.
As you can see from the picture the rust and pitting is pretty extensive so I'll be replacing what I can and refurbishing (powder coating) what I have to save, unless of course I can find a new rust free strut assembly.
What I found tonight is interesting. I took apart the strut assembly on the passenger side and all was well - LOTs of rust, but that was expected. On the LEFT side however, the bottom of the suspension arm is bent right near the bottom of the ball joint, which faces forward when installed. That's a thick piece of metal to bend... Check it out. You can see it in this pic:
[img]
 [/img]
Now, I need a tip because someone boogered up the 17 mm bolt that holds the steering knuckle onto the bottom of the strut assembly. It's been rounded off, which you can also see in the picture. Anyone have any ideas on how to get this out besides drilling it out, or adding heat? I don't own a torch so my options are limited unless someone has an idea.
As you can see from the picture the rust and pitting is pretty extensive so I'll be replacing what I can and refurbishing (powder coating) what I have to save, unless of course I can find a new rust free strut assembly.
Last edited by woodmv; 09-24-13 at 08:15 PM.

 09-25-13, 06:33 AM
#228
Pictures lie! Ha!! Thanks Shane, I'm happy with how it came out even though it's not a final product by any means. It's light in some areas and I'll paint the body color over it before I put the engine back in (which still has to be rebuilt and who knows when that'll be). I had the big garage door open and the side door to circulate some air but along with that, and I should have anticipated this, dust got into the paint as it was drying but of course I didn't notice until after it had dried, so now I have to wet sand it to get it smooth again before painting with the final body color.
The POR-15 is a self levelling paint so as long as it isn't going to be your final coat where everyone will see it, you can apply it with a cheap brush like I did in the engine bay, or a sponge brush which I used on the wheel wells and inside of the shock towers. For the engine bay I wanted to make sure I got it into all the corners and blind spots so I used a cheap brush that I could jam into those small spaces and creases and then throw away. I used a good brush for the AC evaporator cover plate that bolts in between the radiator and hood hinges and that came out nice. The sponge brush was messy because I was working from below and it is a sponge so it held the paint and it dripped out the heel of the brush onto the handle and then my hands (use gloves!). The key is to not goop it on too thick all at once but use several light coats, especially on vertical surfaces where it could drip and sag. Those would be tough to sand out and make right after it dries.
POR-15 may not be forever, but I am impressed so far and confident that it will last longer than any normal primer and paint would even though this car will never see sand or salt again as long as I own it. I tried sandblasting the battery tray area where I had already used POR-15 to feather in the old work area with the new, and it wouldn't budge. The stuff was ON there.
09-27-13, 05:53 PM
#229
One Year Anniversary!
It was one year ago today that I got my Dad's RX-7 and dove head first into the restoration!
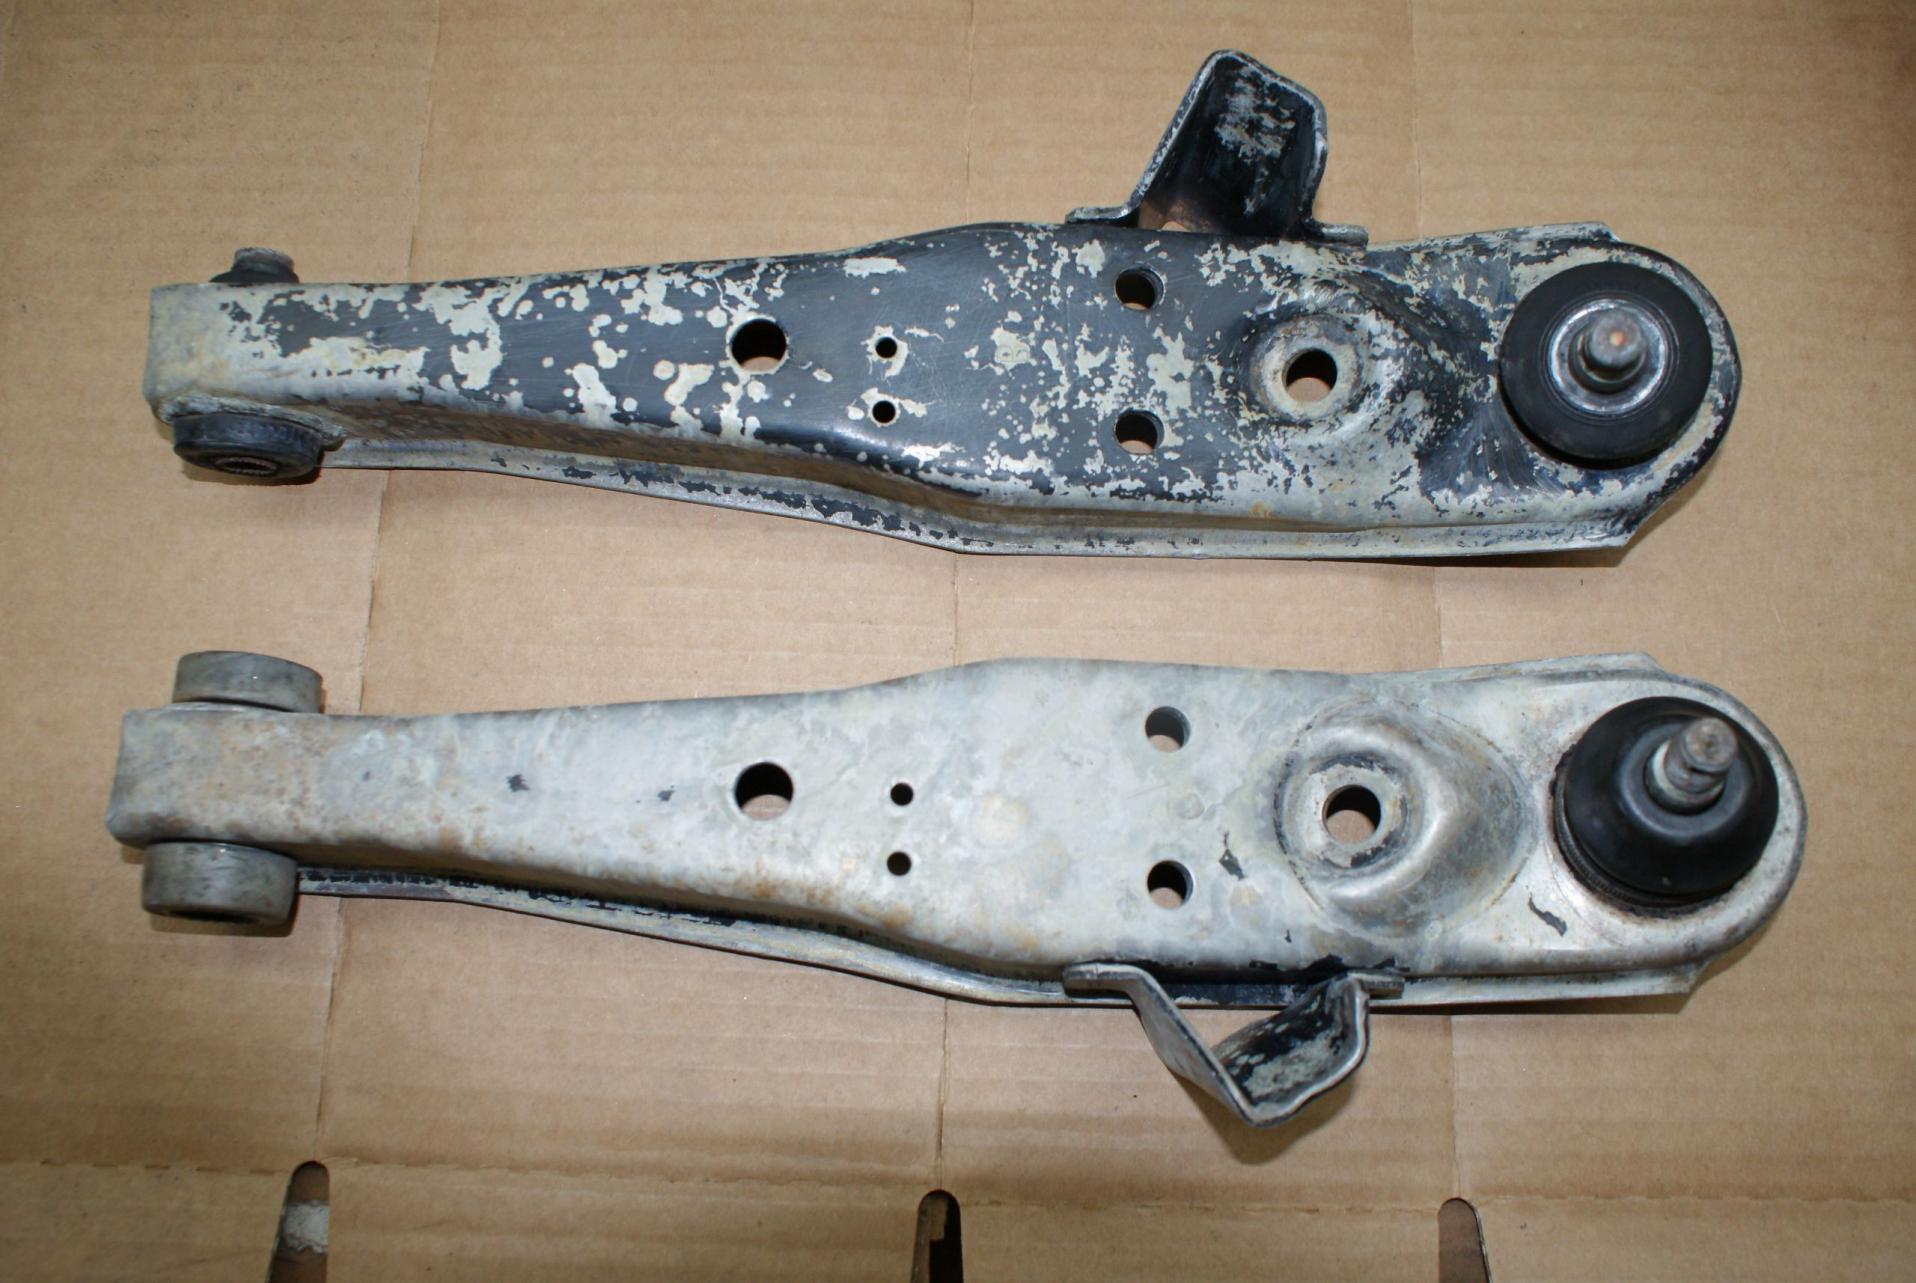
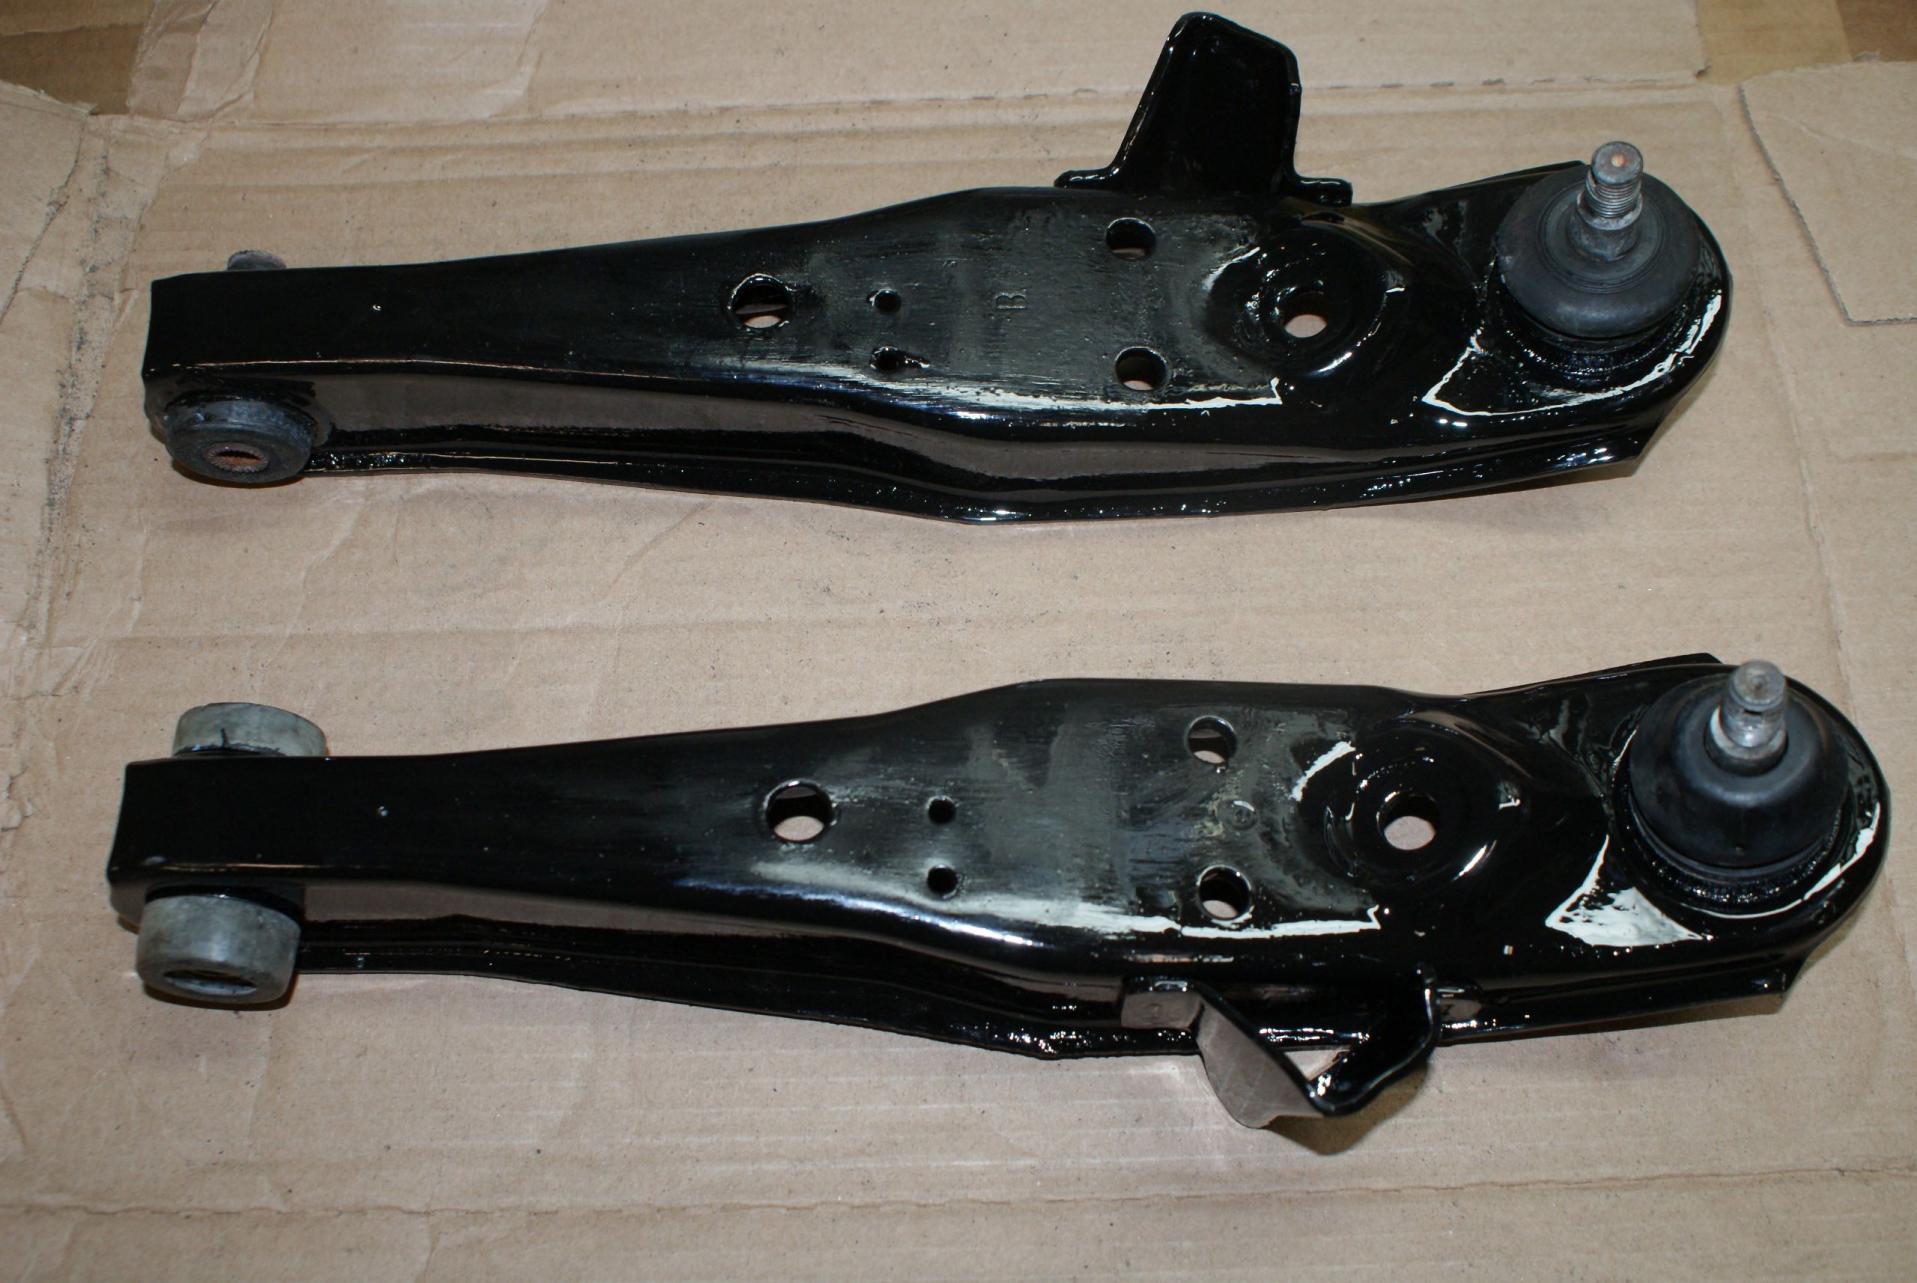
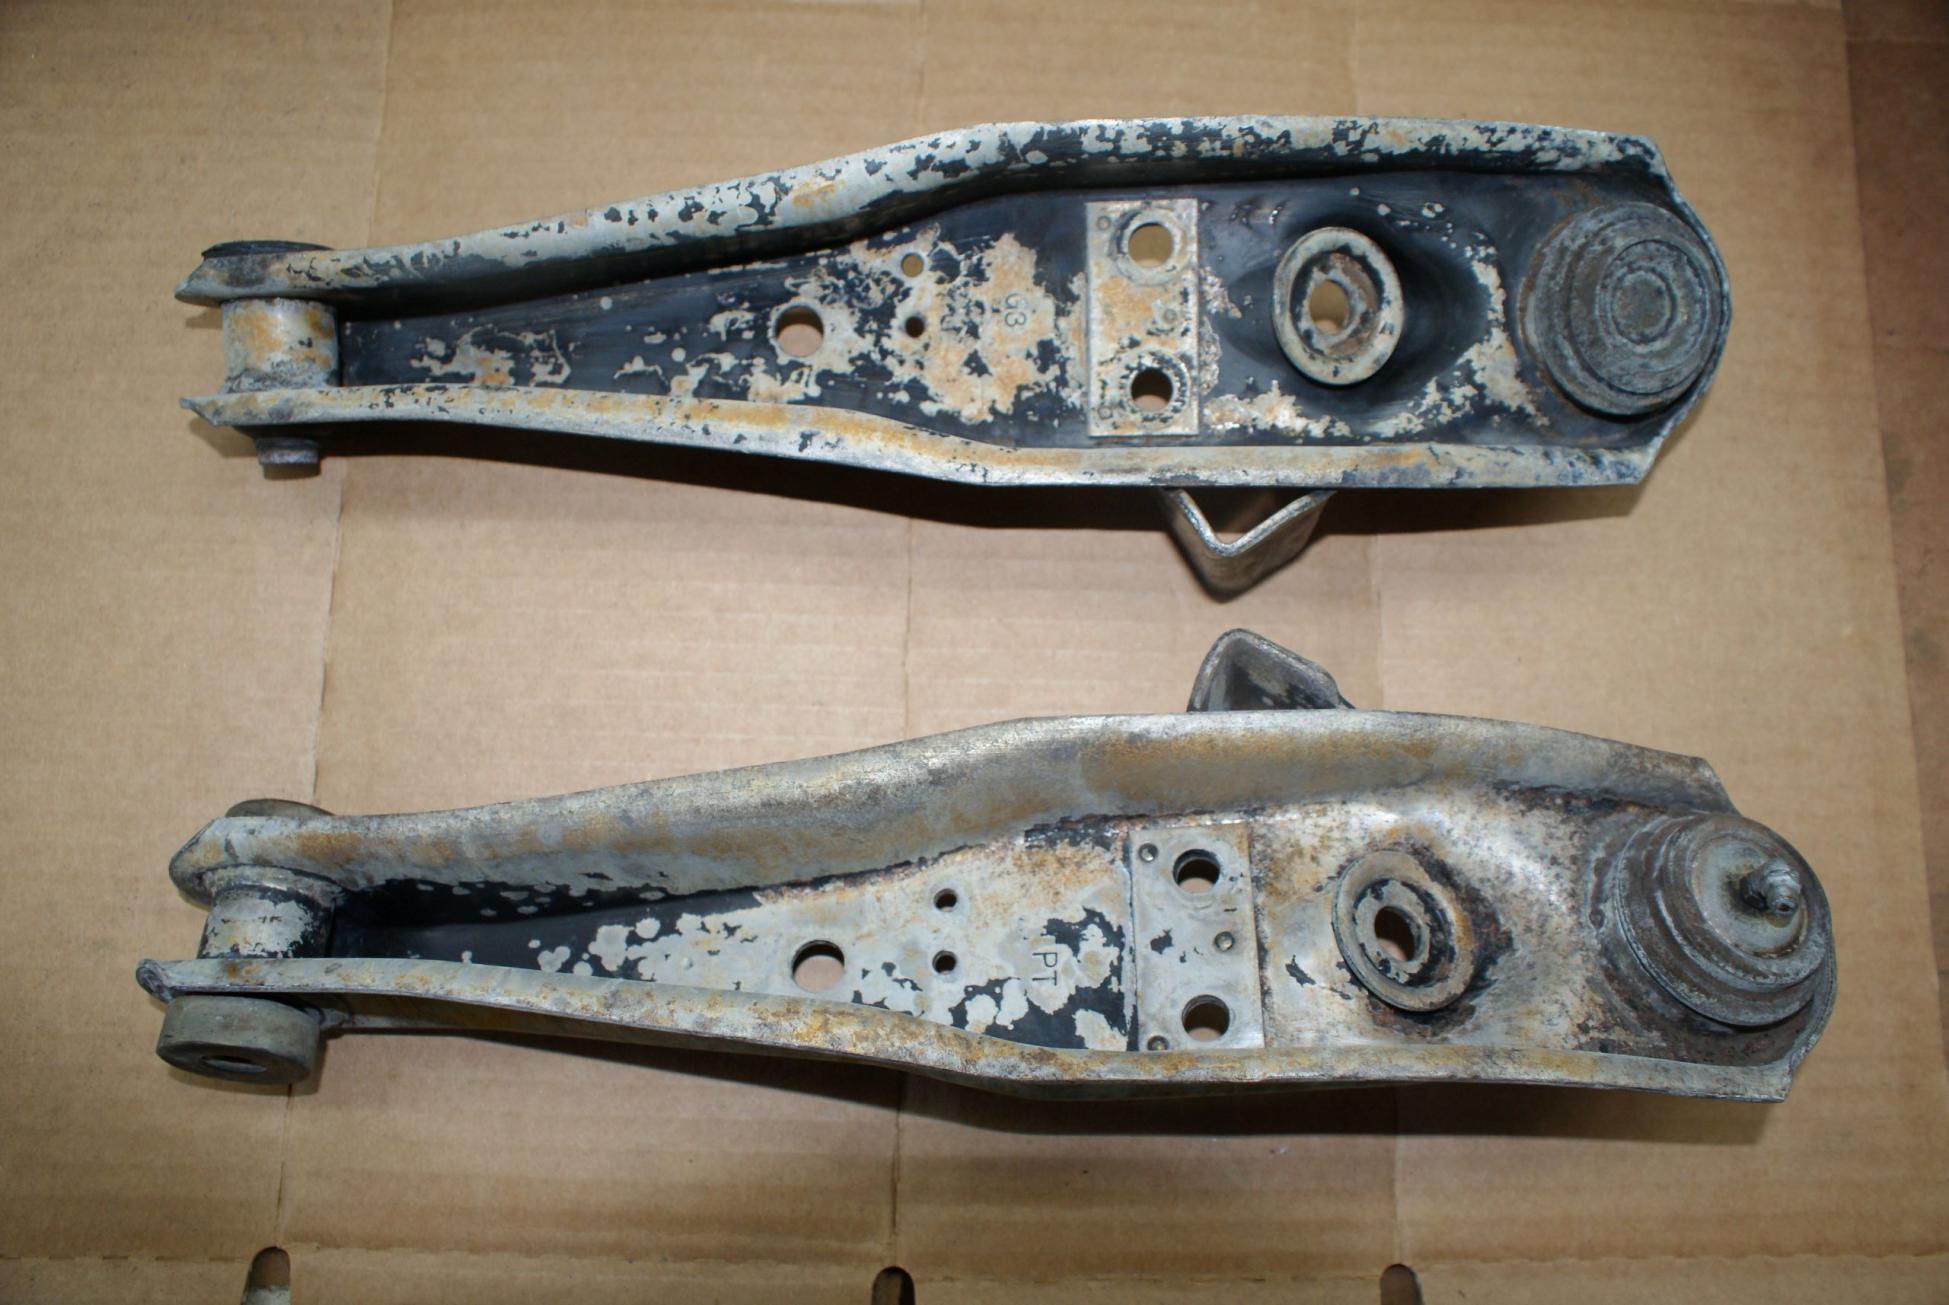
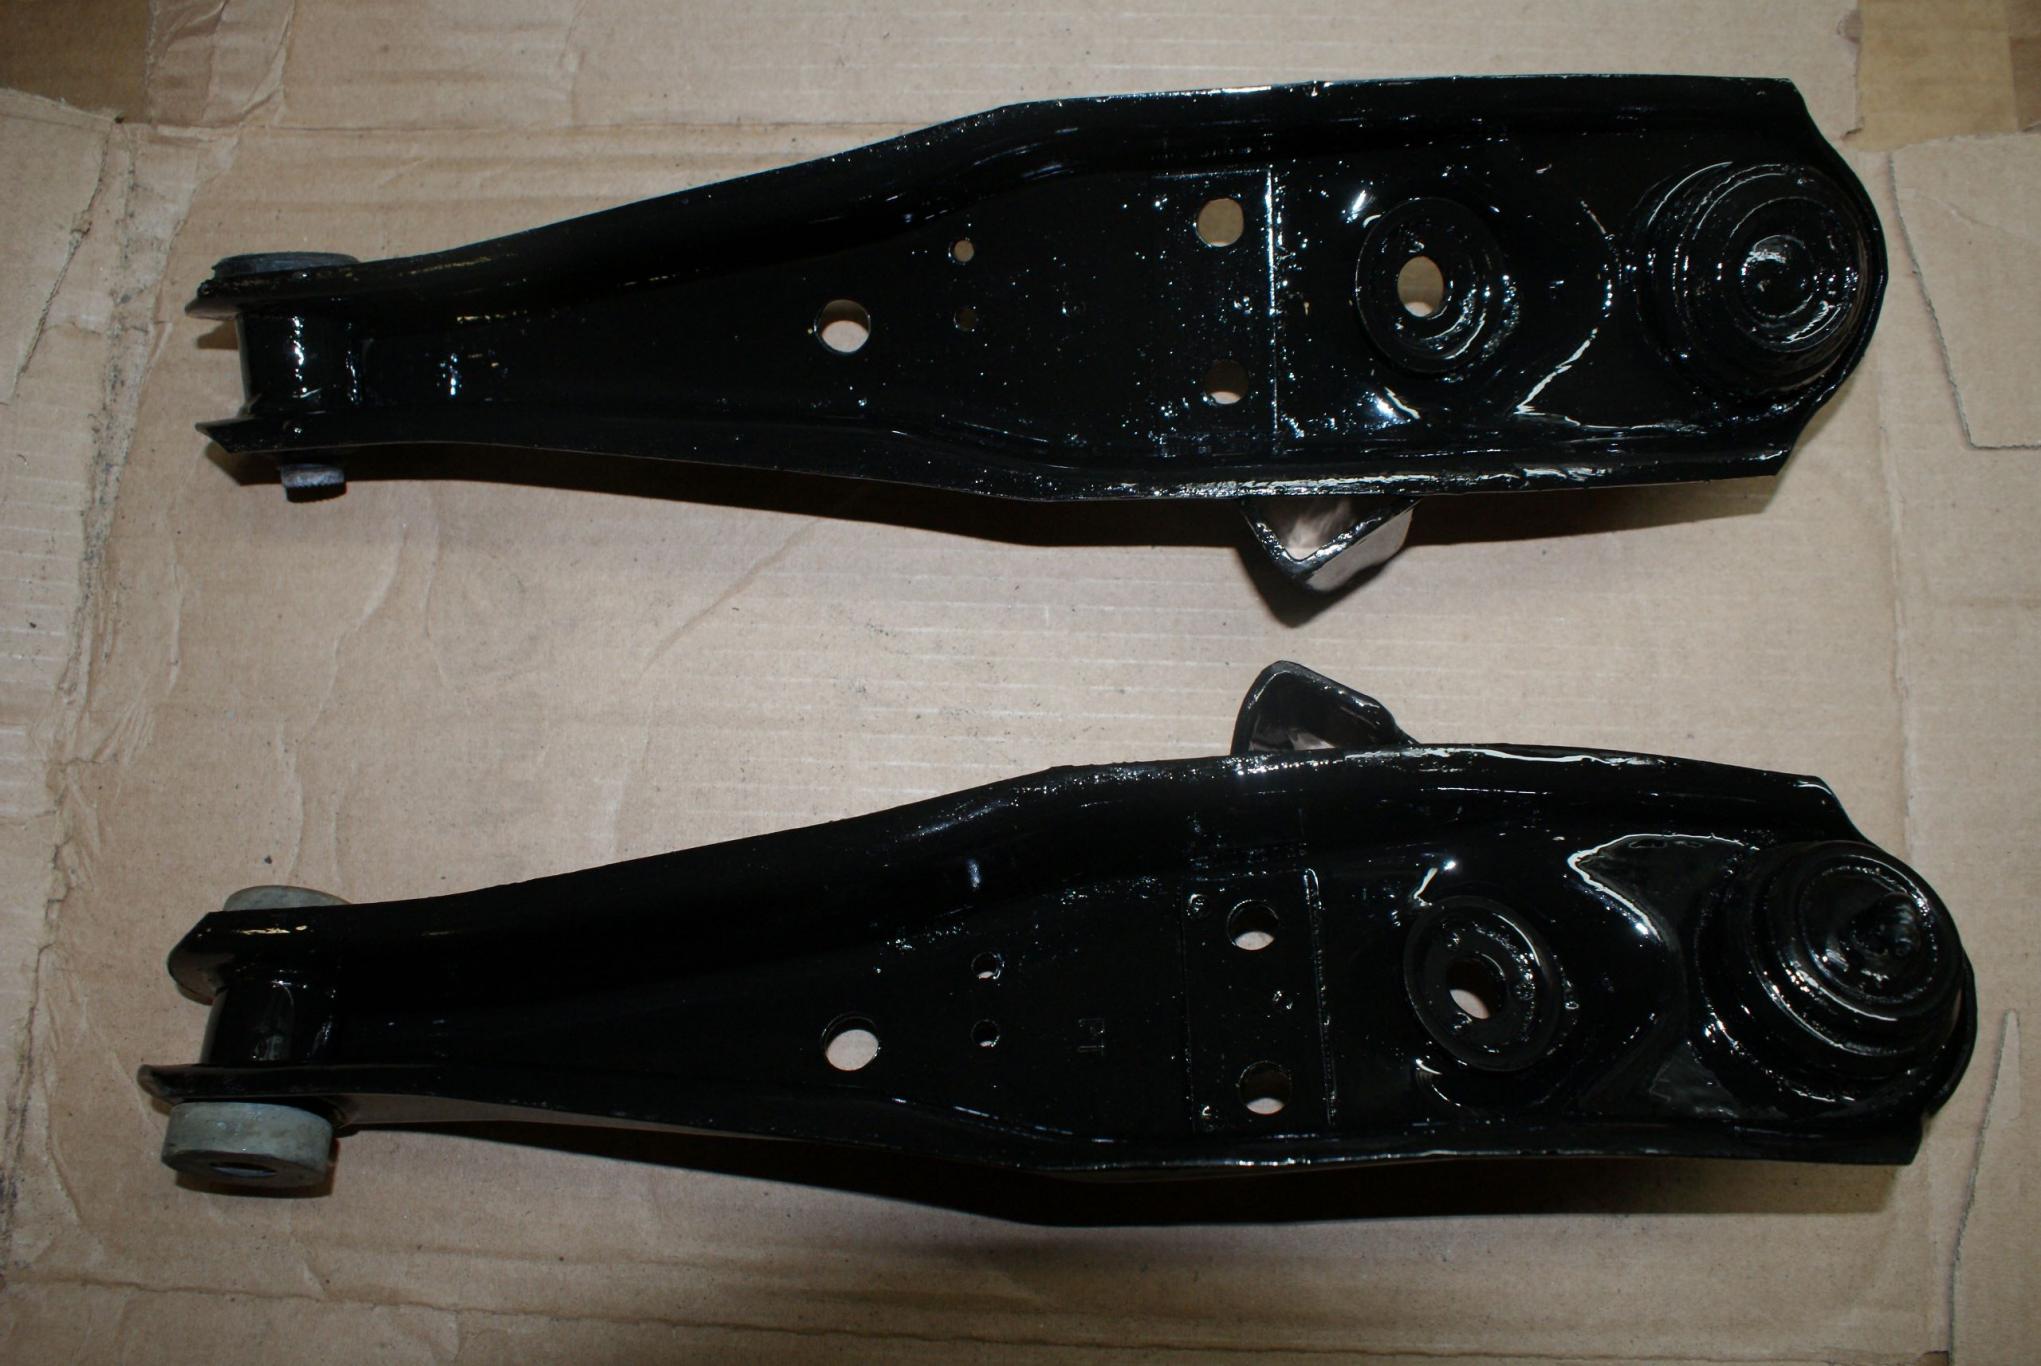
Picked up some goodies today from RotaryHaven - THANKS a TON Jerry! A pair of new (to me) rear shocks - just put a coat of shiny black paint on them, a pass. side headlight motor, gauge cluster and bezel, and two really awesome control arms to replace my super rusty ones, SWEET! Gonna take the coils off tomorrow and throw them in the heap. They're covered in rust and scale. Hope I can save the strut housings/spindles too, but if not I'll be hunting....
THANKS Jerry!
09-29-13, 04:50 PM
#230
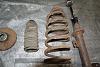
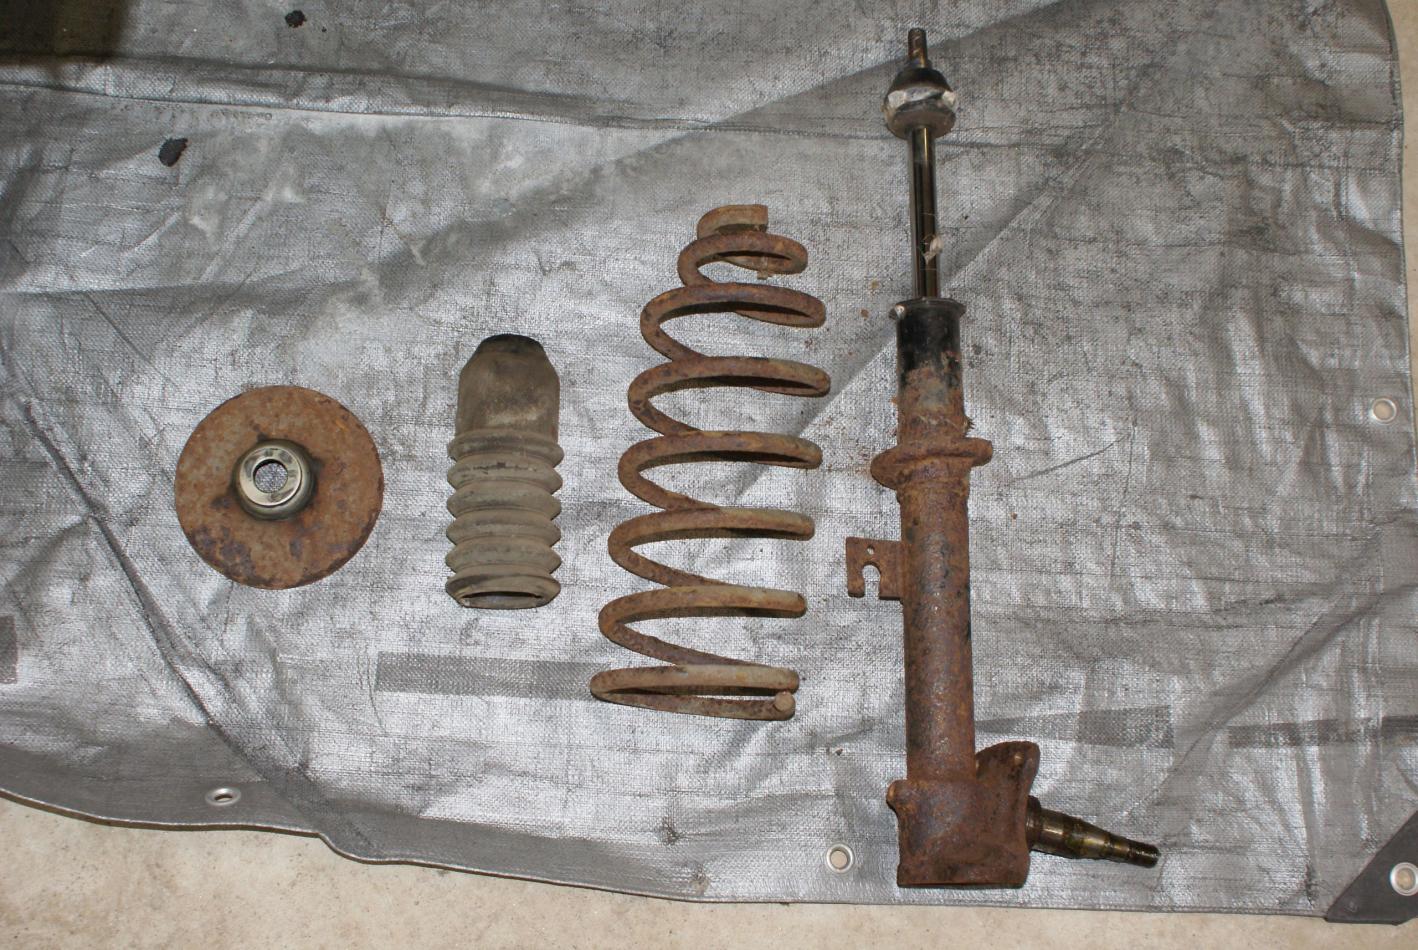
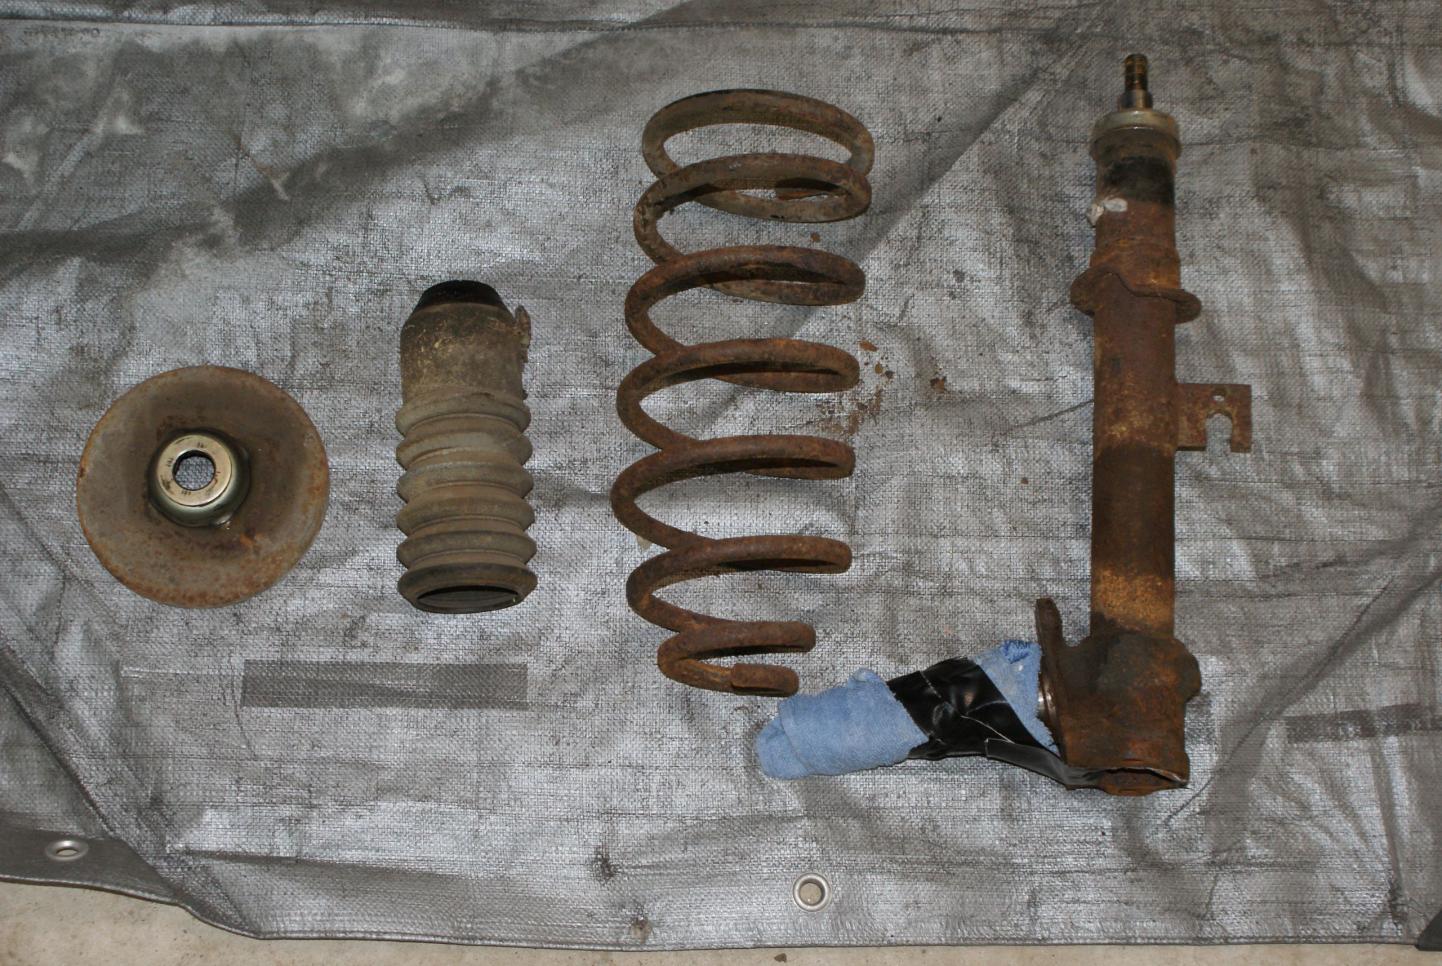
Disassembled both front struts...
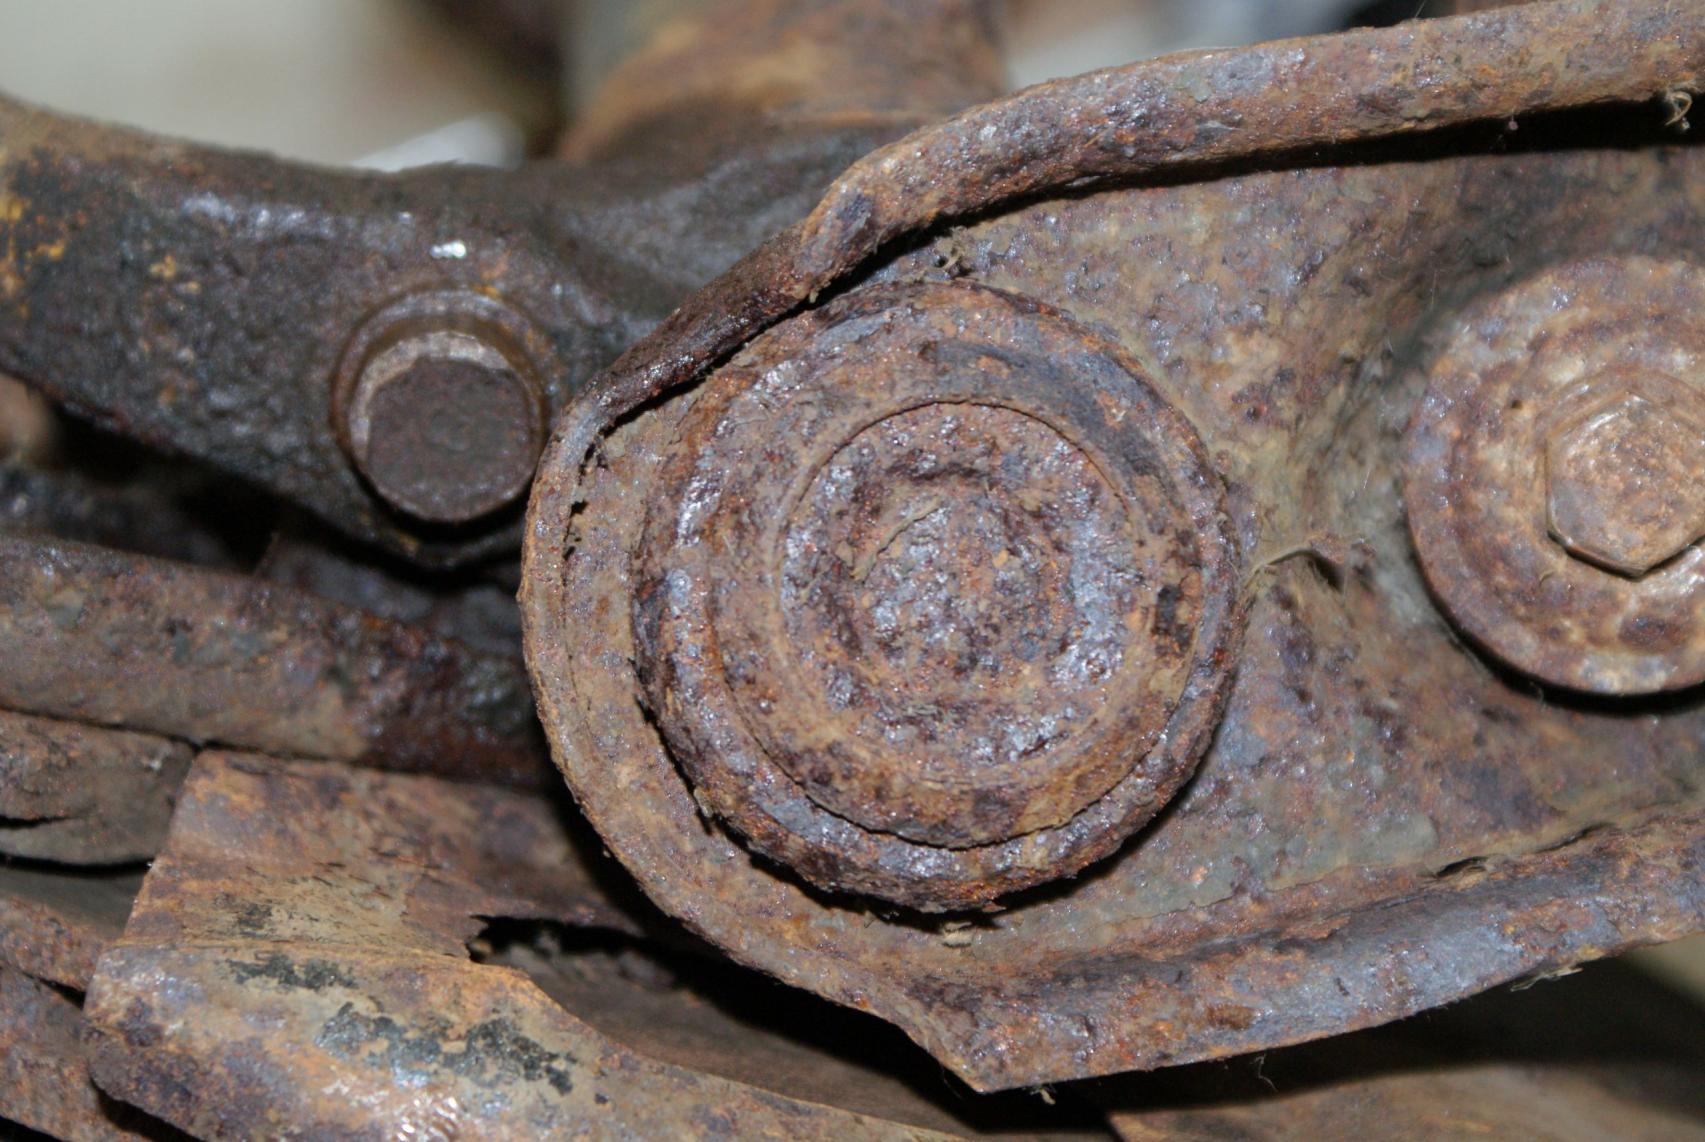
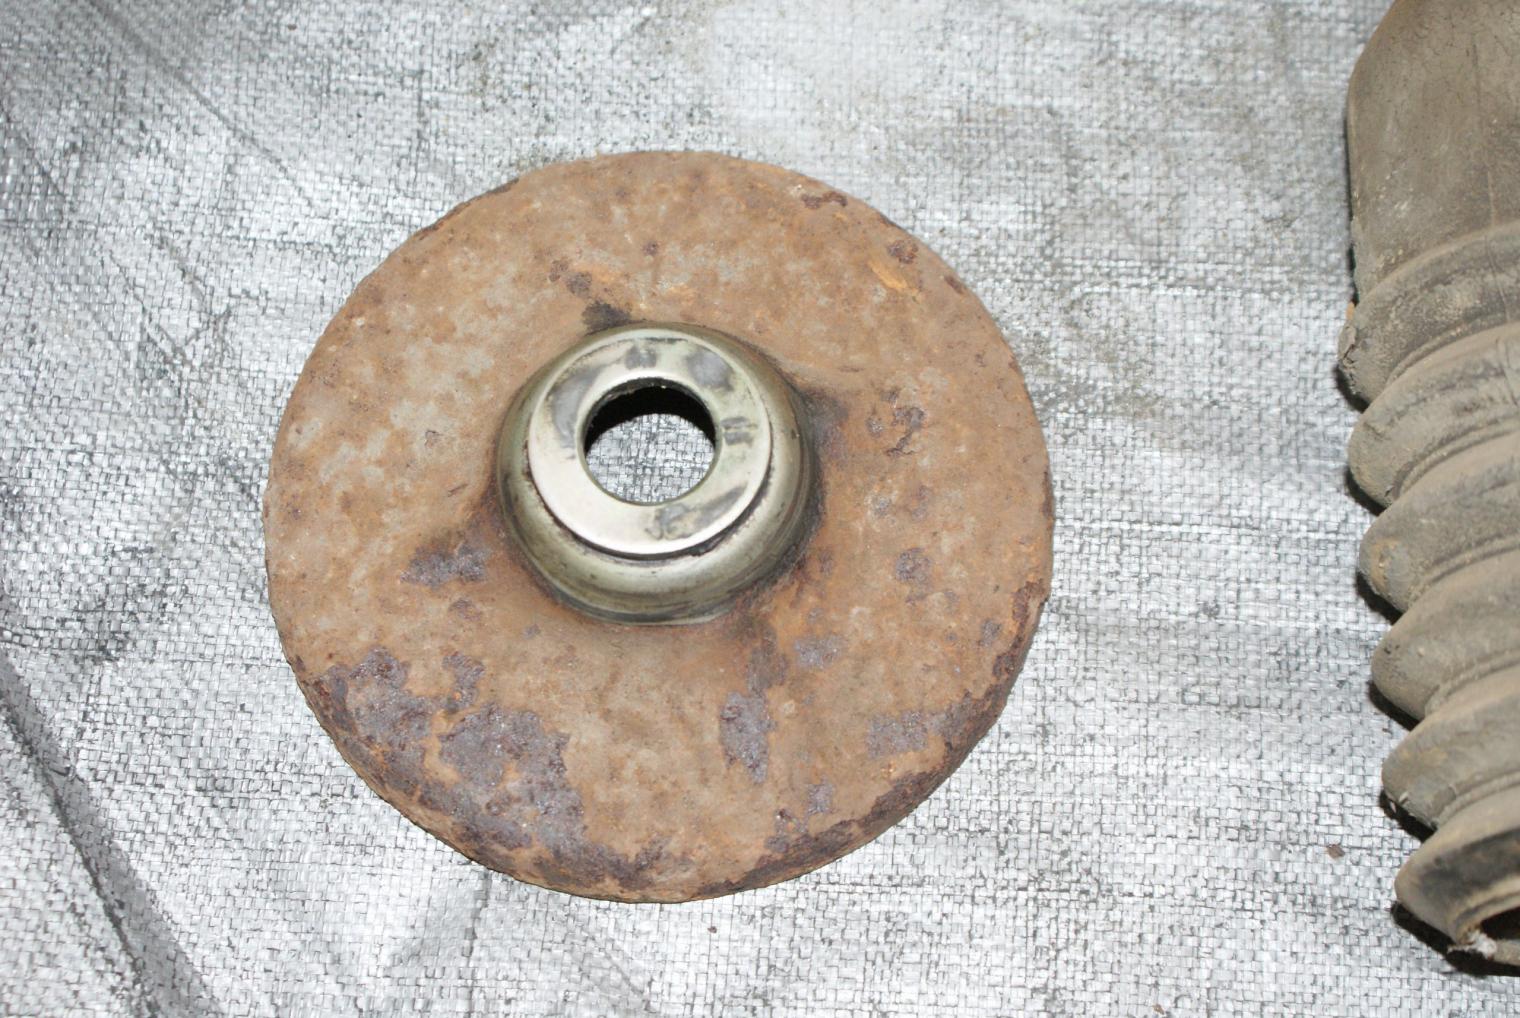
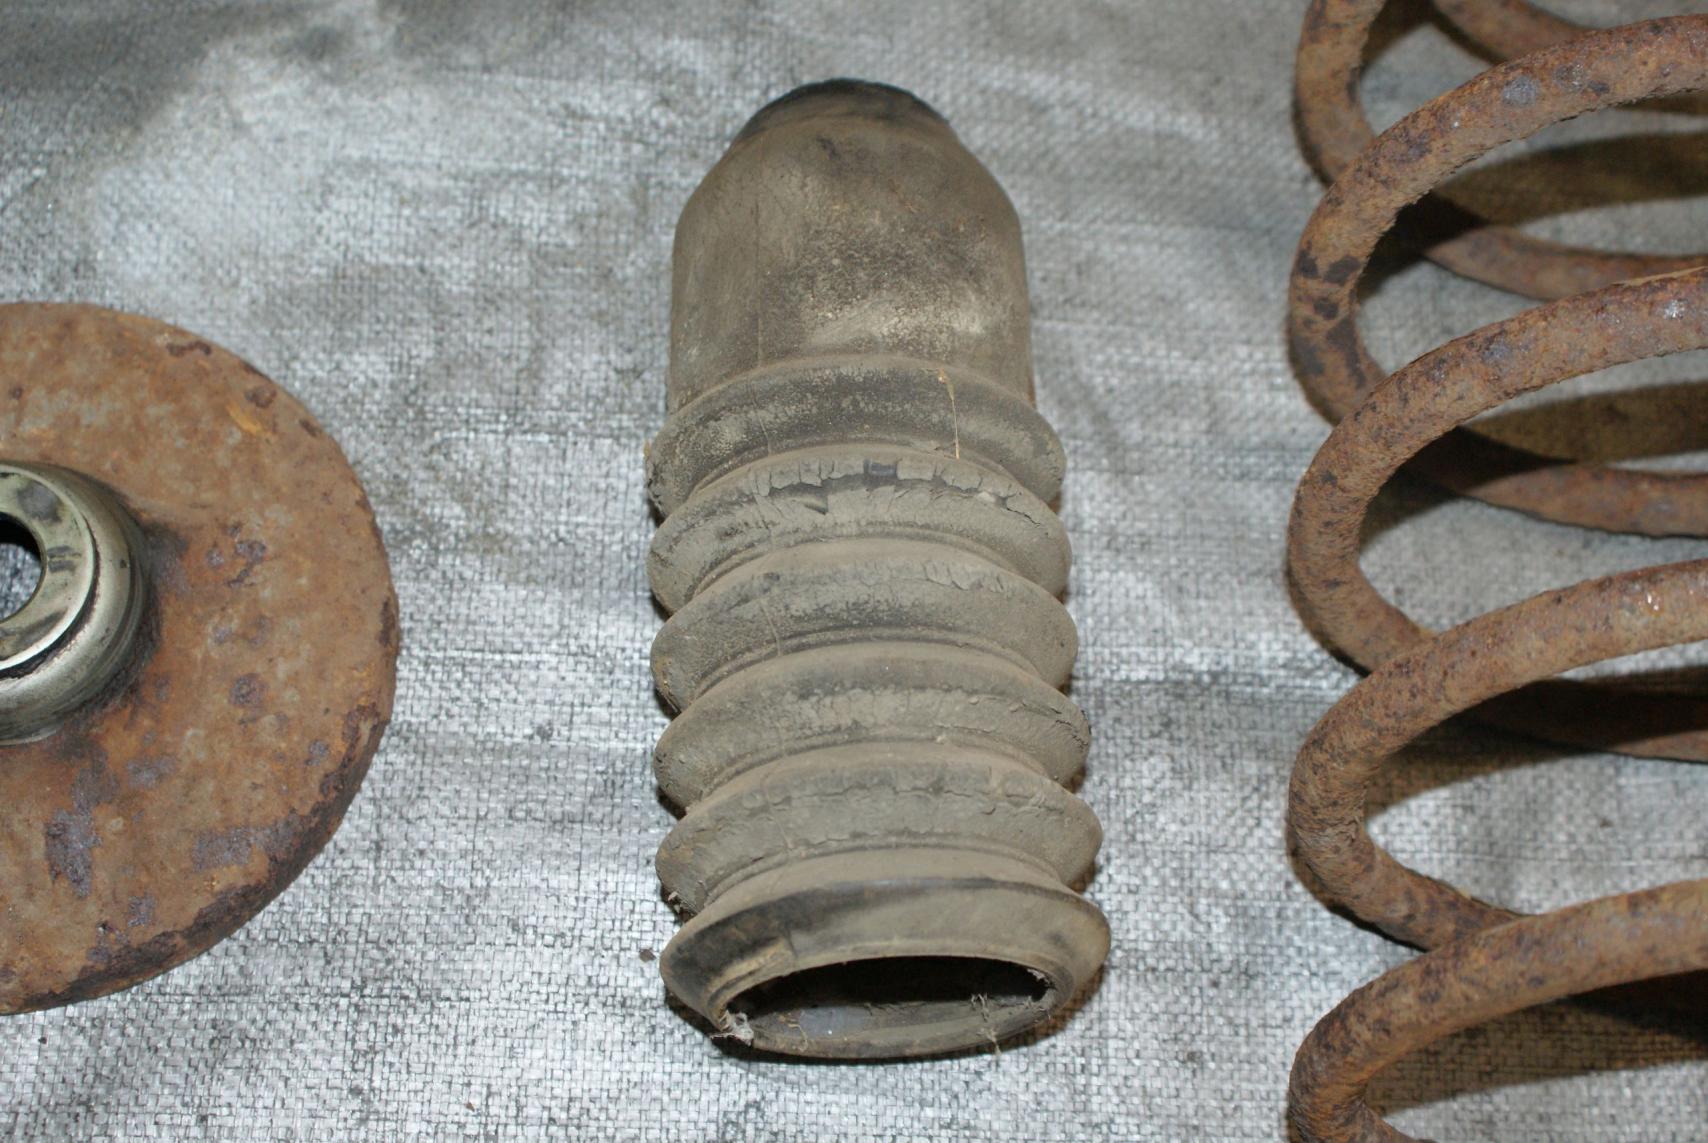
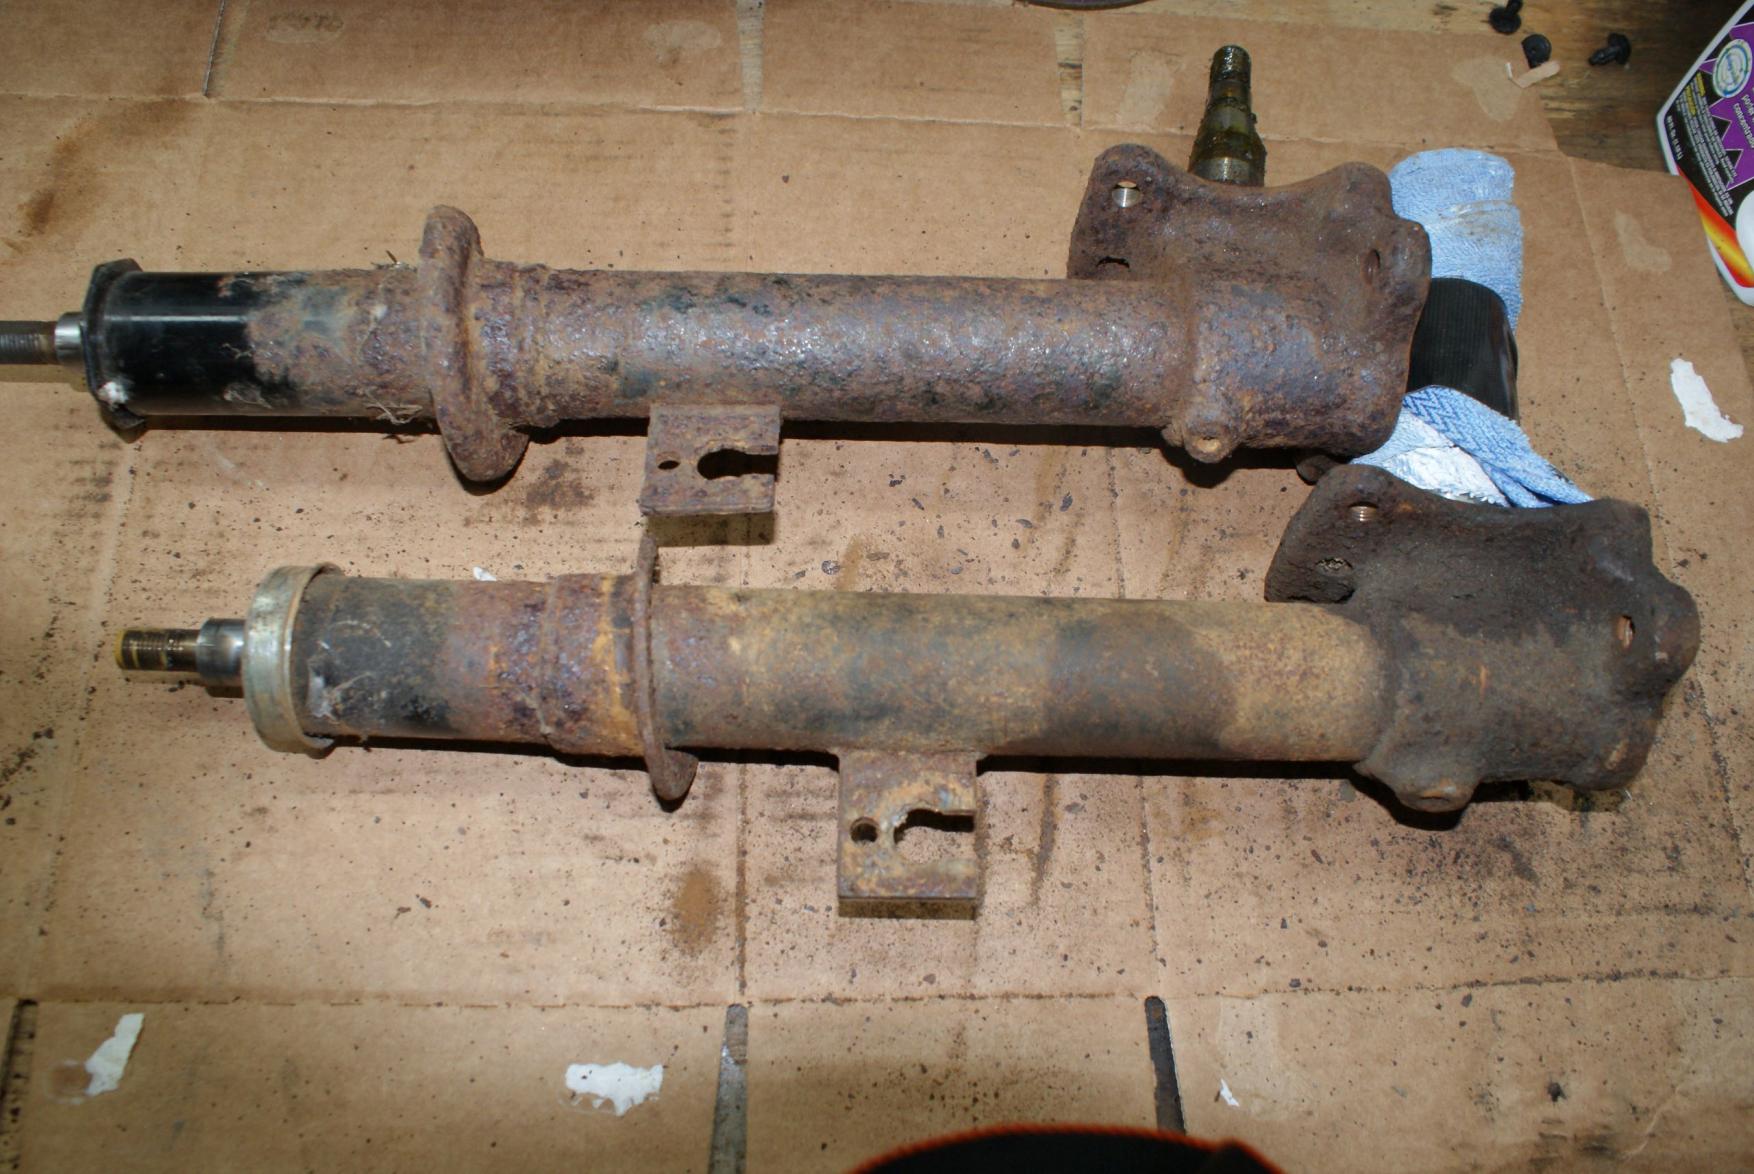
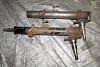
And man there is a lot of rust. I'm gonna try to salvage these housings. I'll have to replace the boots and refurb the struts themselves, and I plan on putting RB springs all around. These struts as you can see are shot. Housings are almost shot too, but I have a contact for powdercoating for a reasonable price. Not sure what that is, or if he can work any magic with these, but I'll give it a go.
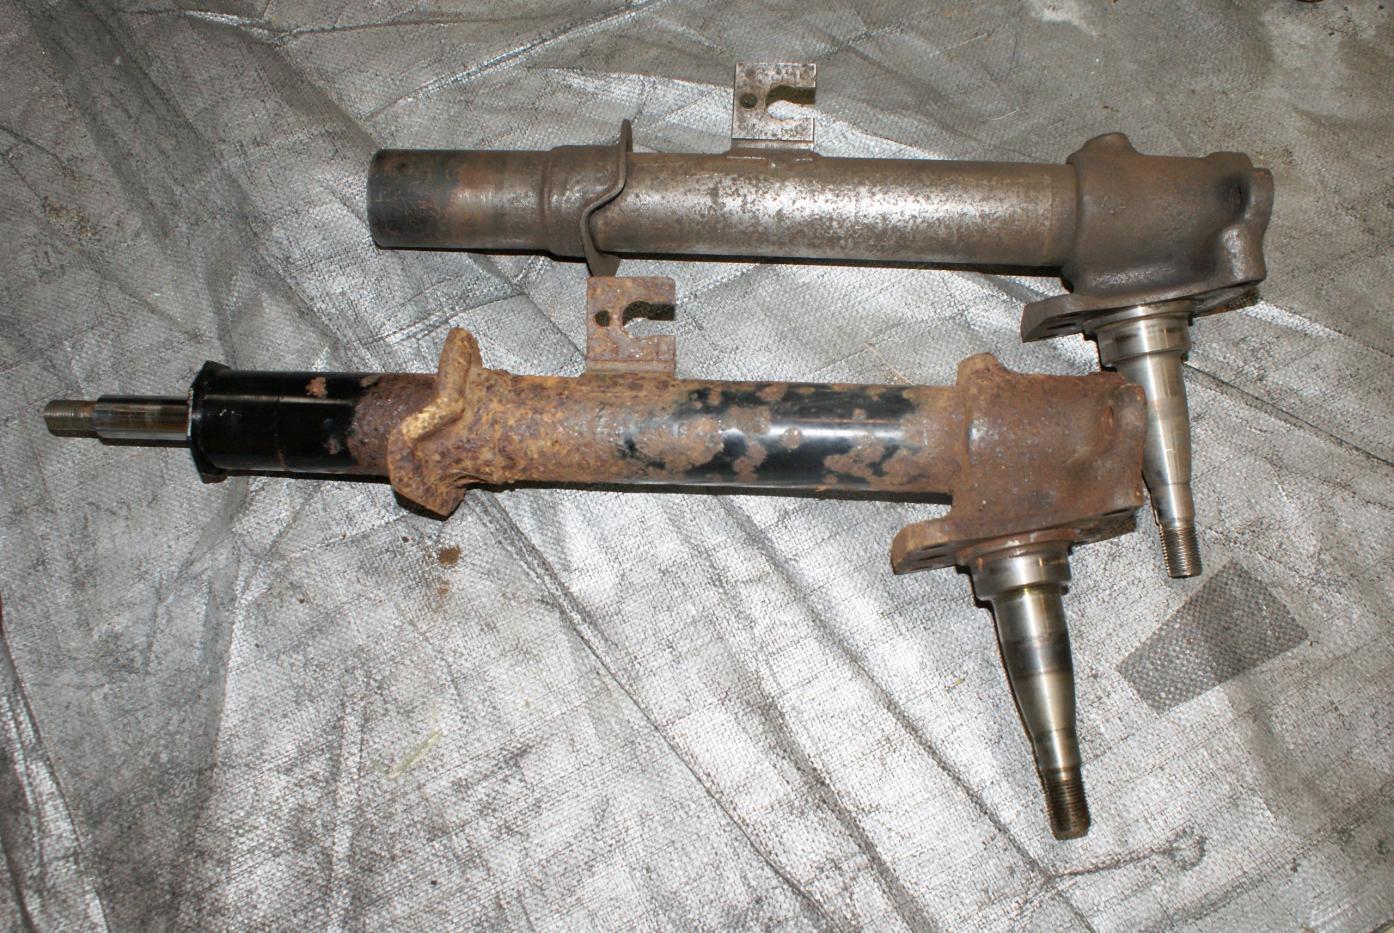
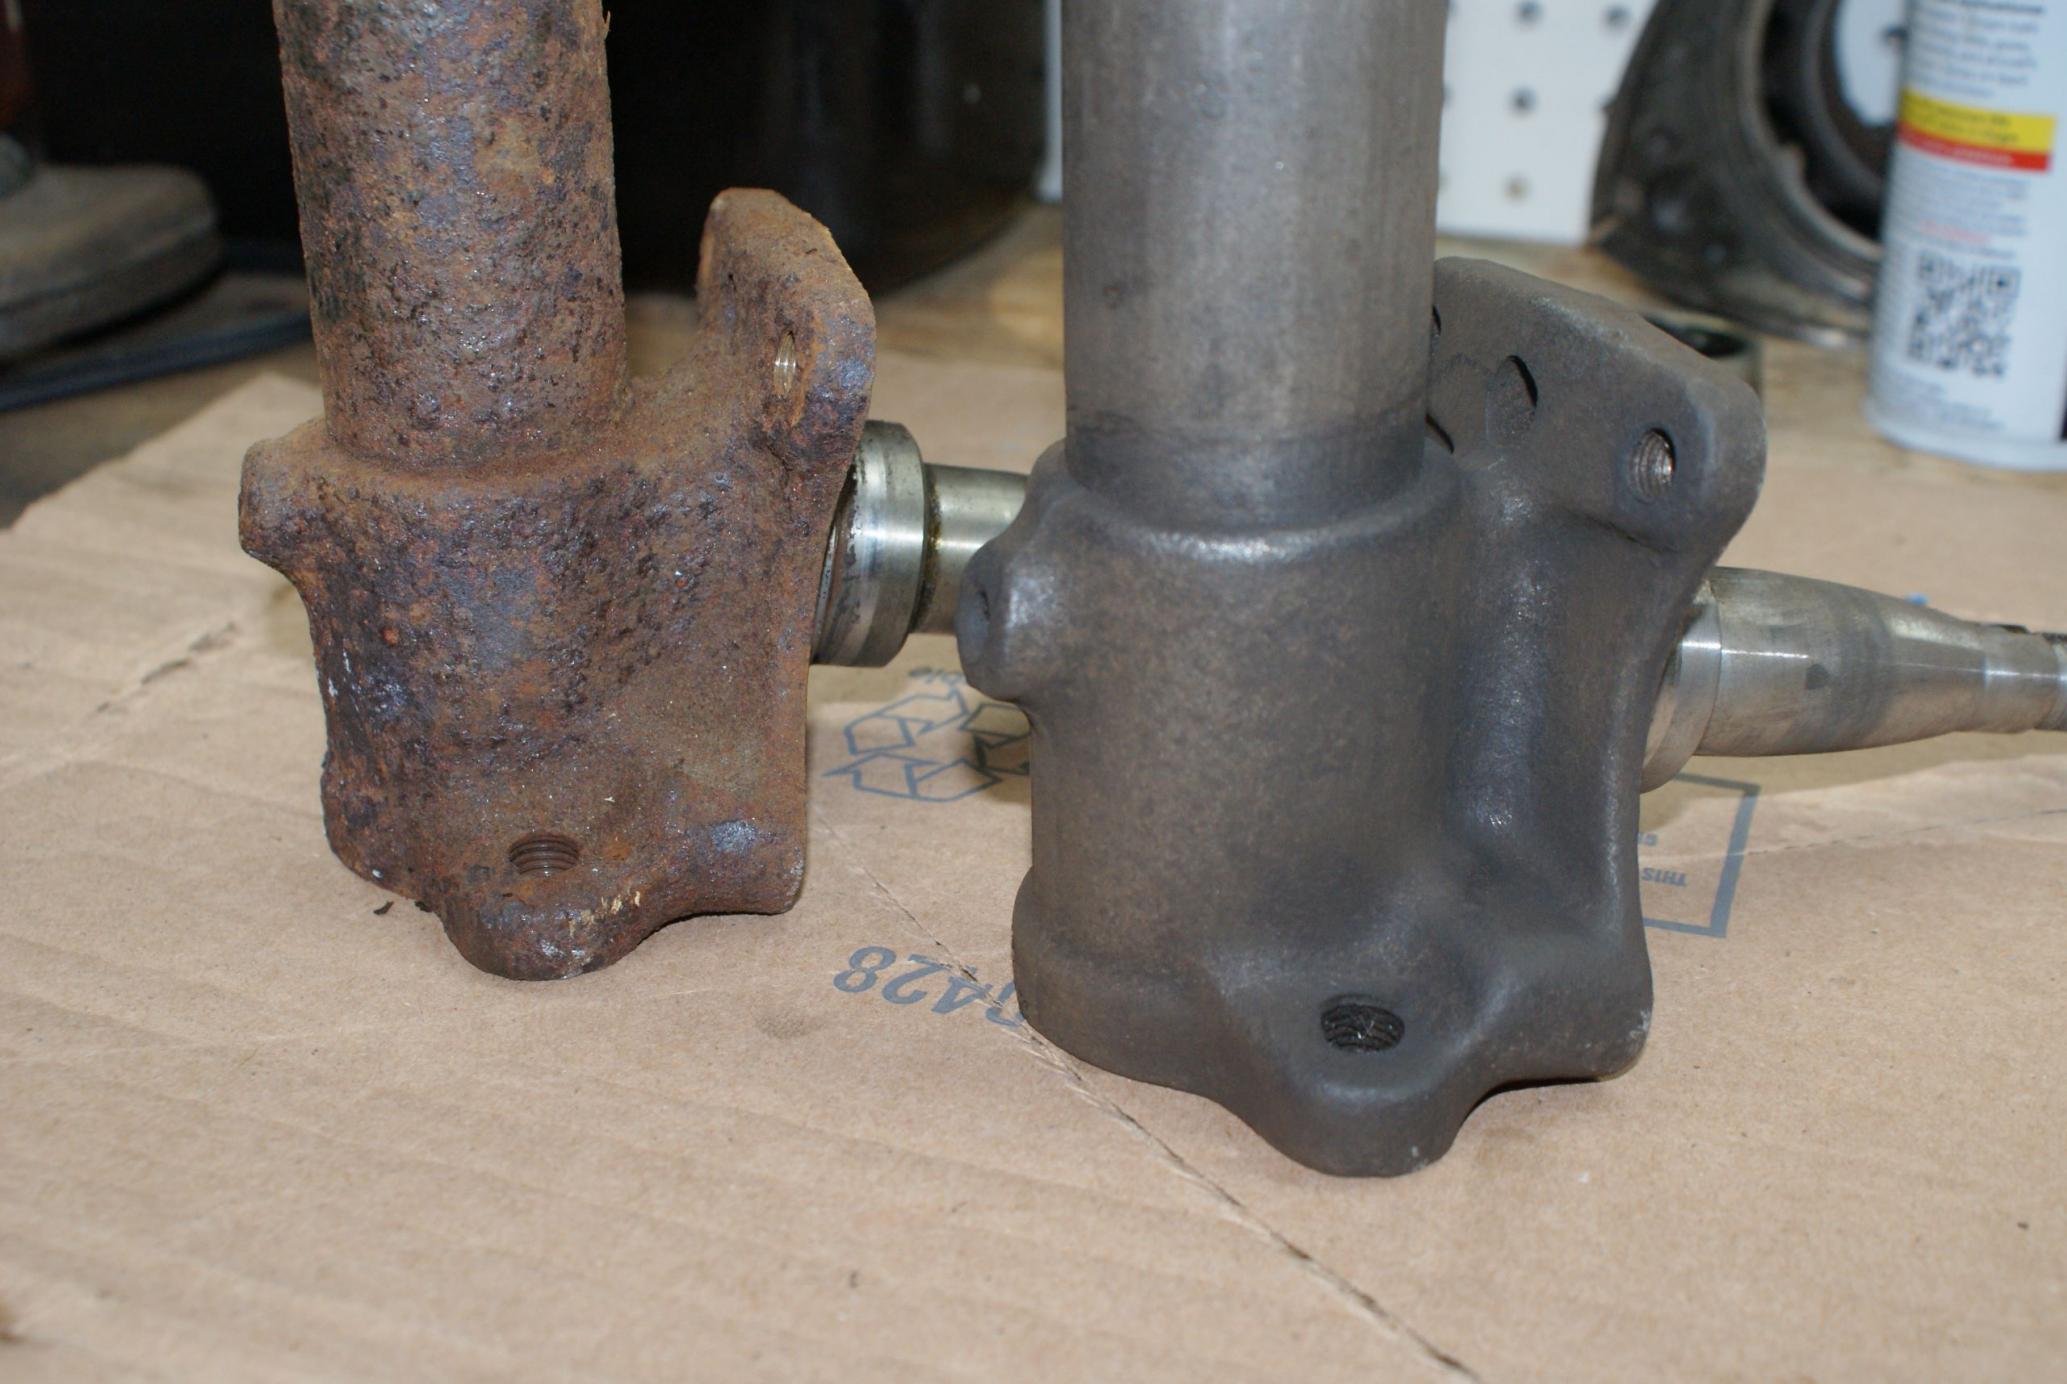
Can you tell the difference between these two struts? They are different in one regard. Let's see if anyone can point it out from the last picture, and I don't mean one has a towel wrapped around the spindle and the other does not.
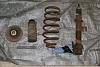

Can you tell the difference between these two struts? They are different in one regard. Let's see if anyone can point it out from the last picture, and I don't mean one has a towel wrapped around the spindle and the other does not.

 10-01-13, 05:19 PM
#233
Score!!
Thanks to my good buddy Jerry, I now have a new powerplant for the 79 - a sweet Atkins Rotary Special. I had to borrow the jack to pay for it, but I'm VERY glad to have it. DEFINITELY speeds up my schedule for getting this back on the road, and can't wait to get it there.

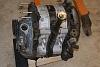
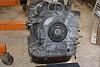
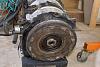
Gonna finish cleaning it up, couple new gaskets, put my 79 oil pan on it, and paint it up. Not sure what color scheme yet, but I'm leaning towards gunmetal and silver (housings are already painted silver), or maybe a nice blue to match my spark plug wires and silver. Haven't made up my mind yet...
Thanks again RotaryHaven!! +100!!
10-03-13, 12:04 PM
#236
What is worth more / better option?
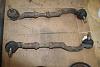
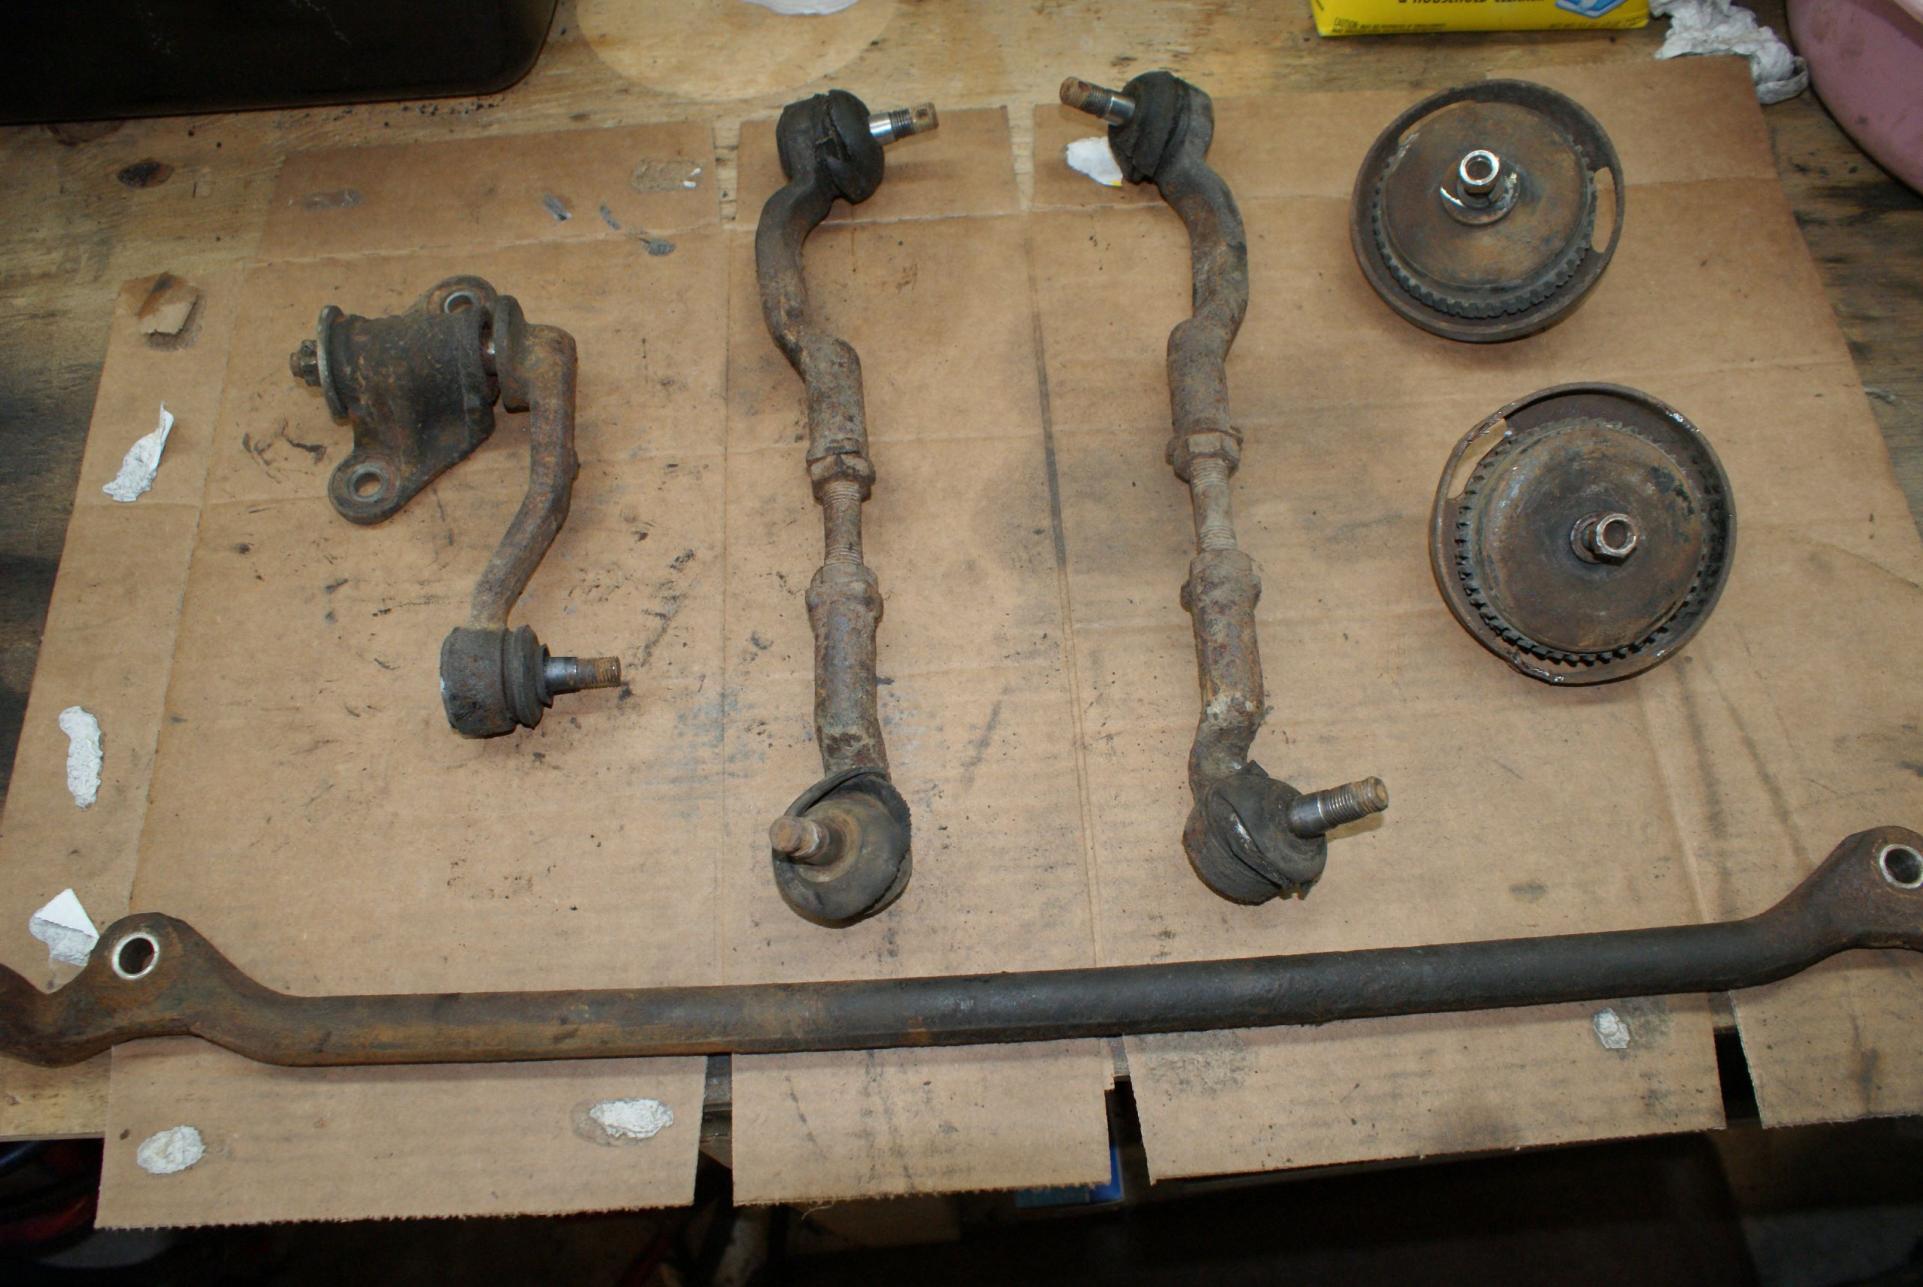
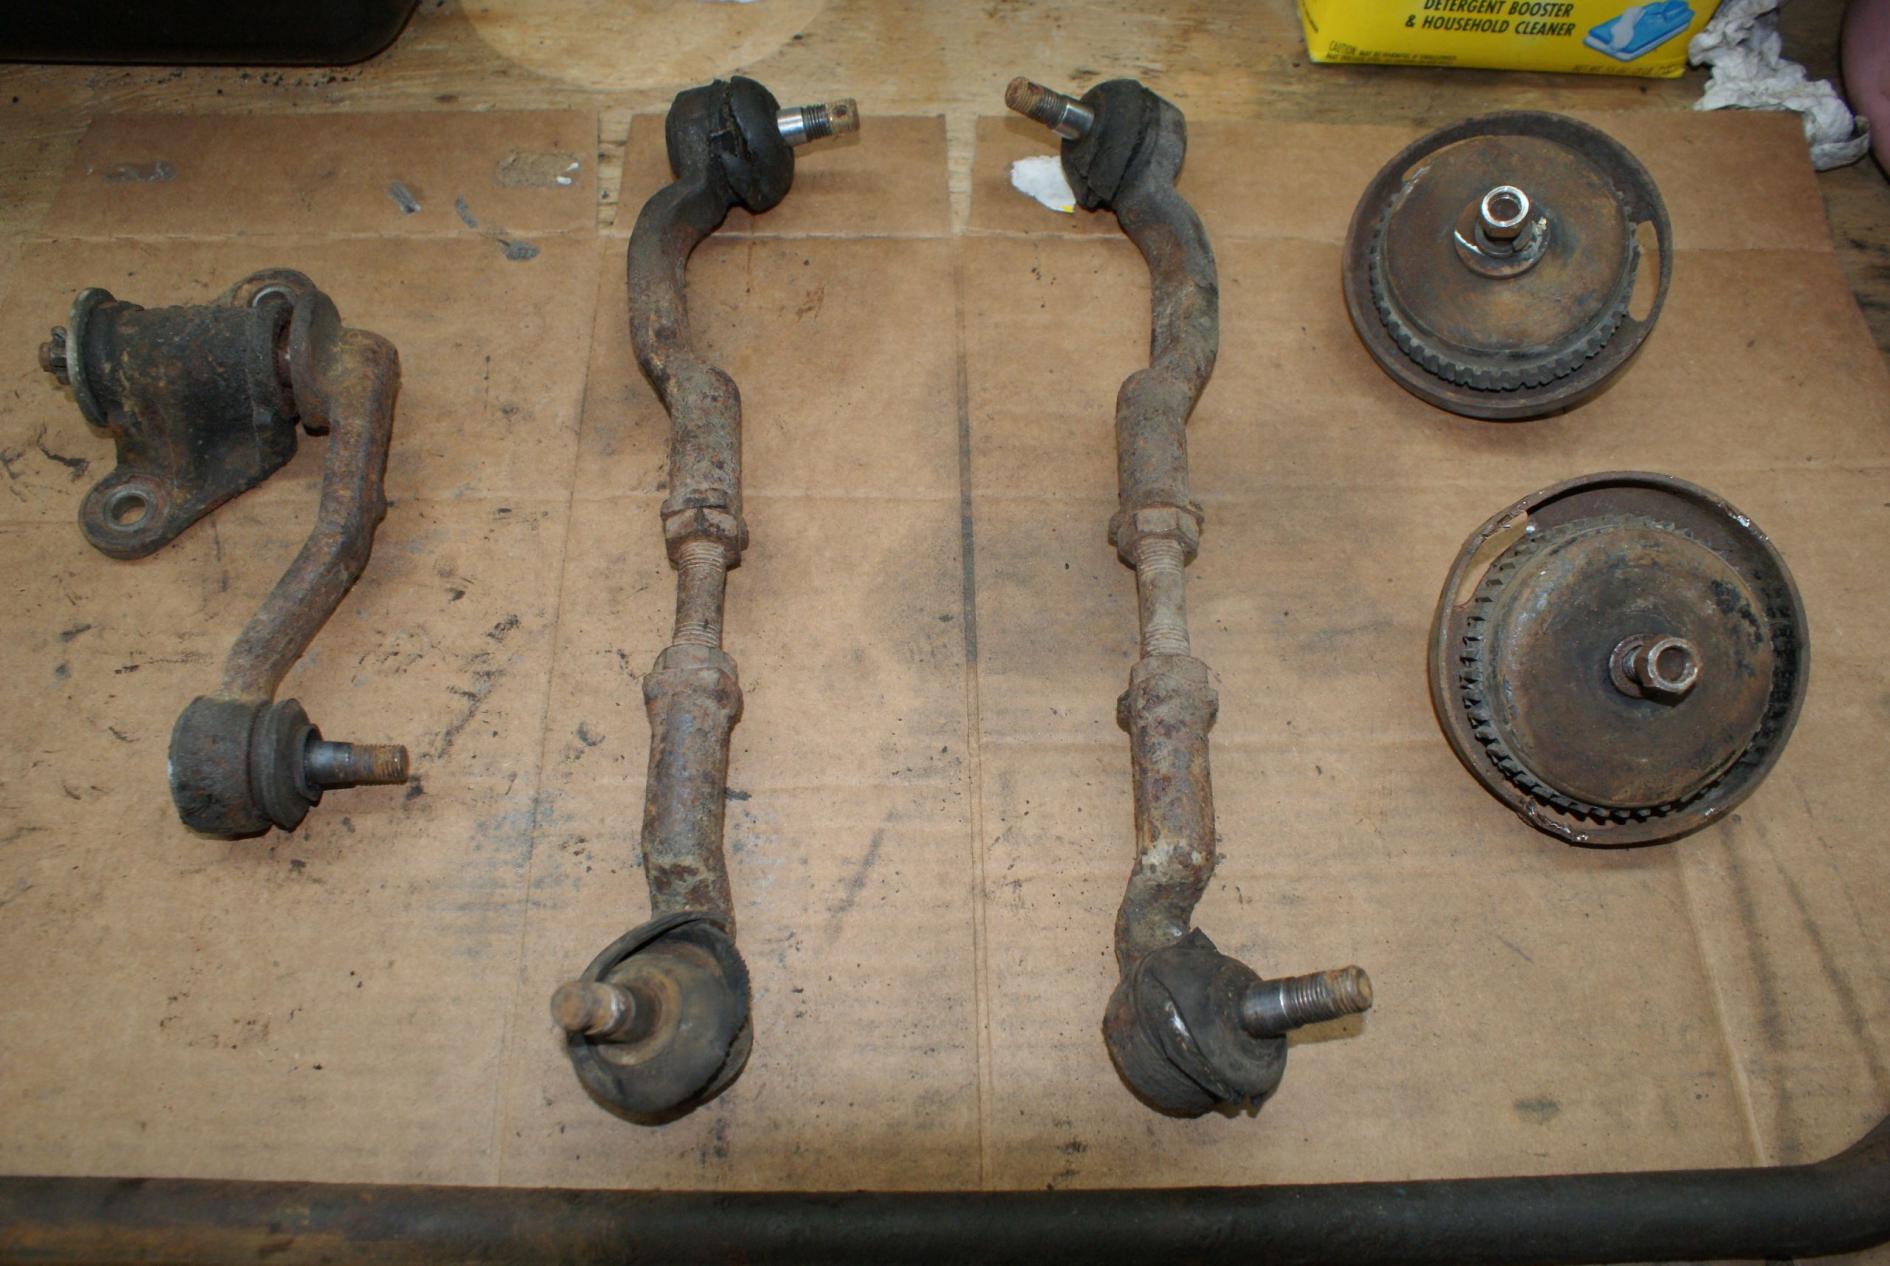
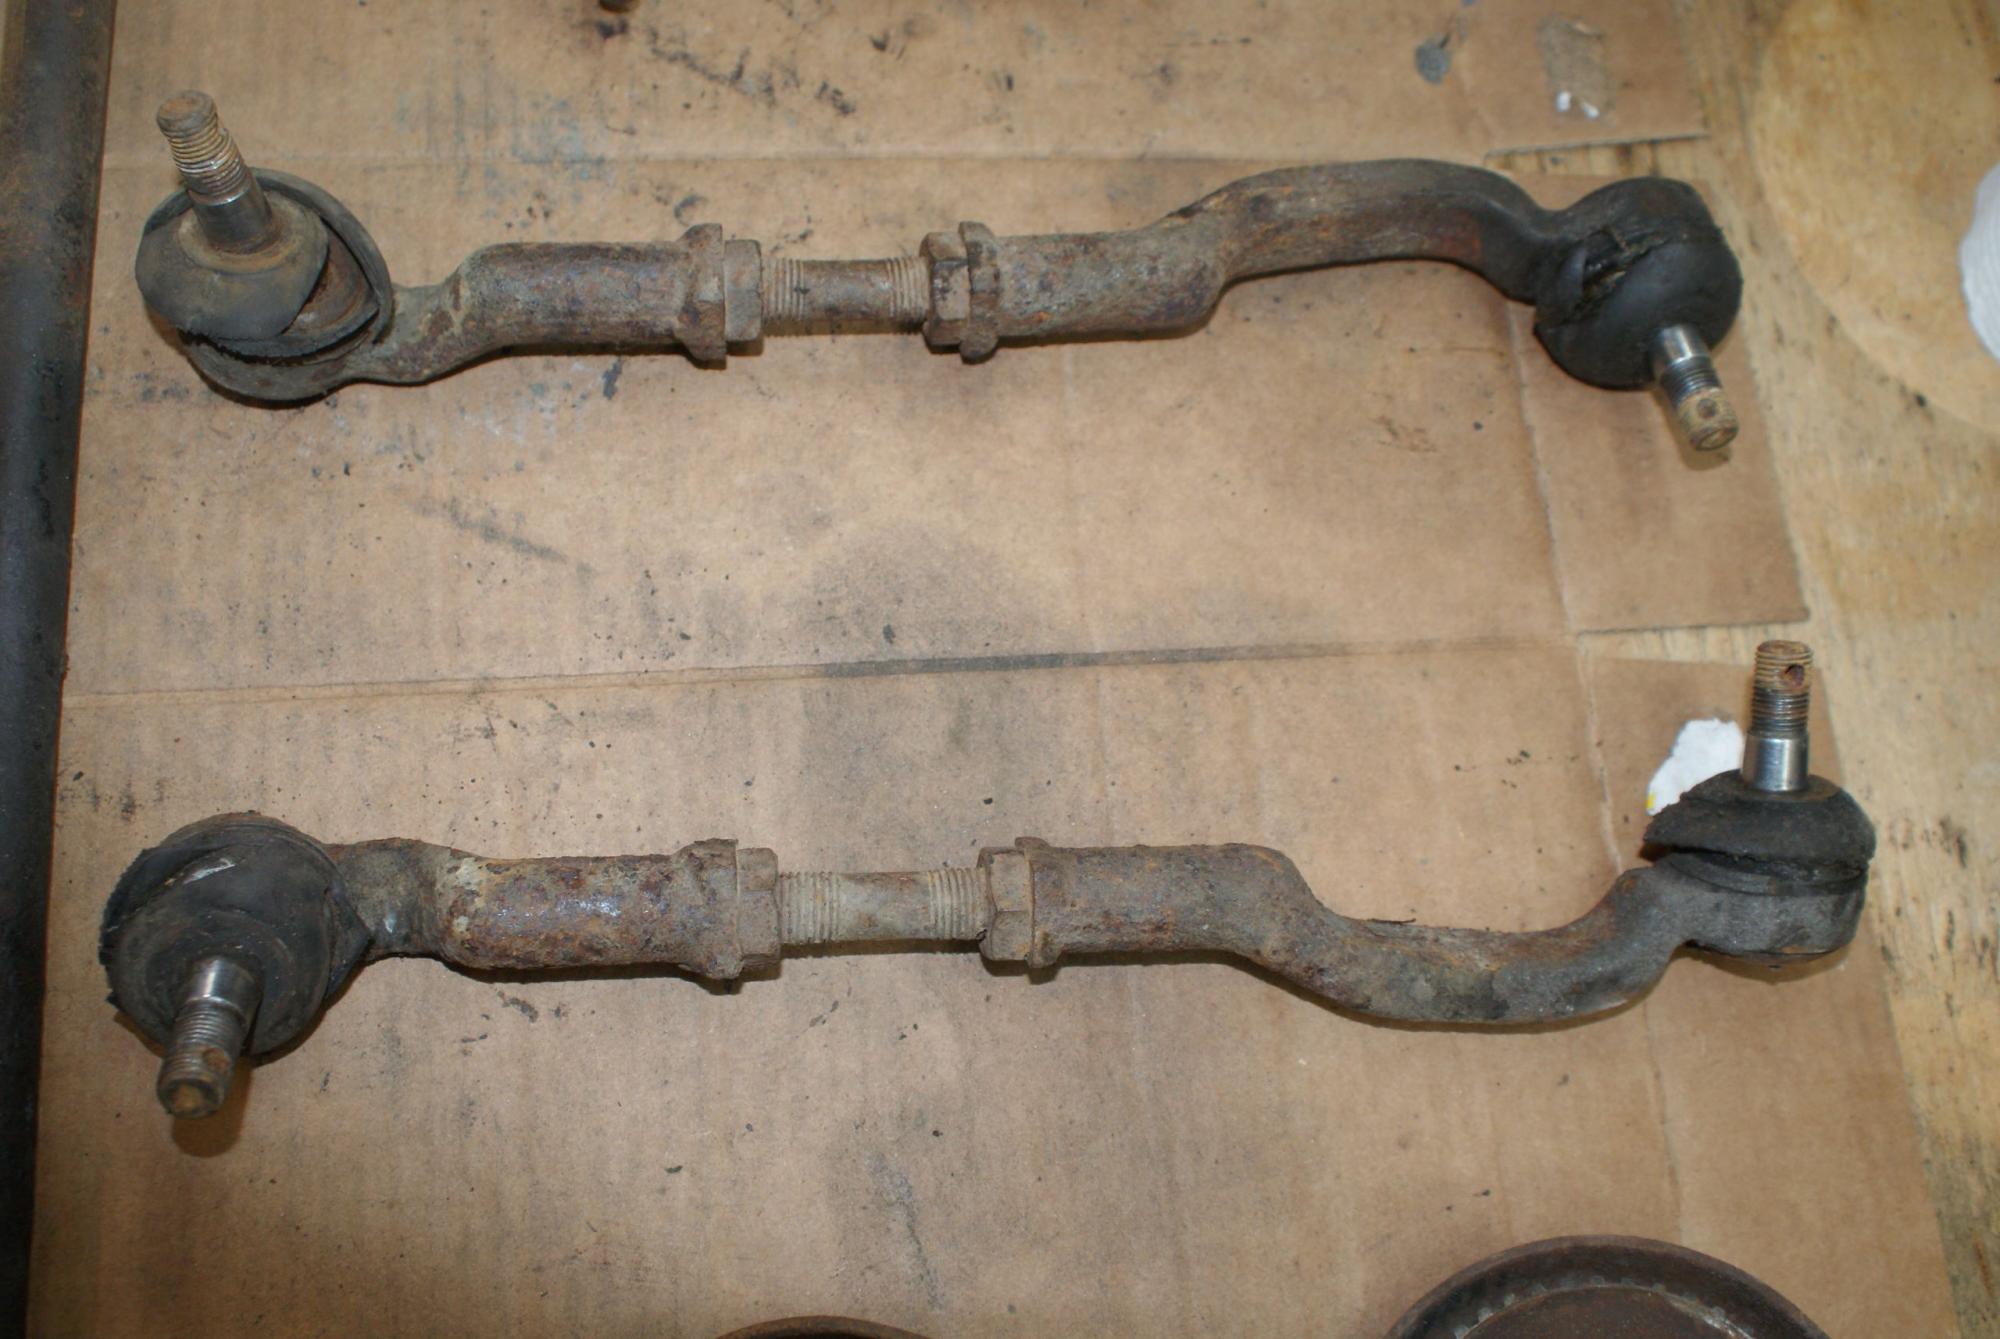
I know as a general rule that the more original a car is the better off you are with value, but with these easily replaceable parts does anyone think it's better to try to refurb or replace? I know that the bar that runs between the tie rods isn't readily available aftermarket, so I plan on keeping that and blasting it.
All opinions welcome!


All opinions welcome!
 10-04-13, 07:01 PM
#240
I've had a lot of time on my hands these last 4 days so I've been disassembling suspension parts, cleaning the garage a bit so I can maneuver in there, and trying to de-rustify parts using electrolysis. Started with the control arms I picked up from RotaryHaven. Electrolysis with POR-15 gloss black makes them look new again.
Last edited by woodmv; 10-04-13 at 07:06 PM.
10-04-13, 08:14 PM
#241
^^^ You're gonna press in new ball joints and bushings right? I mean why not with it off the car and all.
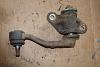
EDIT: also I'd throw that idler arm to the curb. The Moog arm is like HELLA over engineered and built to last. I had that type of idler arm on my car before and itwas a piece of ****.
EDIT: also I'd throw that idler arm to the curb. The Moog arm is like HELLA over engineered and built to last. I had that type of idler arm on my car before and itwas a piece of ****.
Last edited by Qingdao; 10-04-13 at 08:17 PM.
10-04-13, 08:53 PM
#242

Since your going through all this work, check out the Energy Suspension bushings. I just picked up one myself. It also come with two tie rod boots so O picked up two extra. I'll be blasting the parts and powder coating them instead of buying new ones.
Looks good --
Looks good --
10-08-13, 08:04 AM
#243
Ironically those ball joints and control arm bushings are in very good to excellent shape. One was replaced completely and the other one was a new control arm I had taken off a car many years ago. Was going to put them in my car but mine were in good shape. Gave it to WoodMV as gift....
The following users liked this post:
woodmv (12-27-17)
10-08-13, 04:22 PM
#245
Ironically those ball joints and control arm bushings are in very good to excellent shape. One was replaced completely and the other one was a new control arm I had taken off a car many years ago. Was going to put them in my car but mine were in good shape. Gave it to WoodMV as gift....
Question: Are all the aftermarket ball joints the same from manufacturer to manufacturer, and are the "lower ball joints" interchangeable with the ones on the ends of the inner and outer tie rods? Does one size fit all? I'm gonna do a cost comparison of replacing the tie rods, idler arm and pittman arm with just replacing the ball joints if they're compatible. Looking at the idler arm I have tho, not sure I can replace that joint?

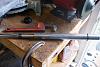
Moving along with the rest of the front end suspension parts. I need to figure out how to remove the struts from the spindle/housings - saw somewhere on a thread here that someone took theirs to a shop and paid like $20 to hgave them taken out so I may try that. The one with the octagonal flange I may be able to get a pipe wrench on and from reading the forum I understand I will demolish it that way, but if it's gonna be replaced then it'll be replaced, right? Got one of the spring seats all de-rustified using electrolysis and the other one is bathing now. LOTS of rust on those, moreso on the passenger side. Everything on the drivers side while still rusty, is newer. Got the link that connects both inner tie rod ends together all polished up on my bench grinder last night and treated with the Metal Ready and it's now ready for some POR-15 paint. Depending on which way I go with the pittman arm, idler arm, inner and outer tie rod ends, I may be bathing all that stuff next followed by the big engine mount that bolts to the frame, the smaller engine mount that bolts to it and the engine, the water pump housing, and whatever else that I can find....
Last edited by woodmv; 10-08-13 at 04:47 PM.
10-11-13, 10:34 AM
#246
"Electrobath" - some really amazing shtuff!!
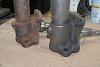
I gotta say, I am amazed at the simplicity of science in restoring rusty metal. I can't believe that the first strut housing came out looking this good after two days in my bucket using electrolysis. The rust on the strut housings was THICK and had bubbled up and was as nasty as I've ever seen it but I am AMAZED at how well electrolysis reversed the effects of years of rust.
I took it out of the bath this morning and could see that some of the rust had popped off in places, so I took the scraper to it and it came off in chunks! Left me with a pile of rust on the workbench. I used some steel wool to quickly polish the strut housing and although it's a bit pitted it looks 100% better than it did before. Crazy. I'll hit it with the polishing wheel on my bench grinder and after some POR-15 I think most of those pits will fill in and not be too noticeable. I'm not going for a showroom restoration, but I am glad that I will be able to reverse the effects of time somewhat and have it look really good for awhile, definitely better than it was!
I had planned to take these to a buddy's shop and sandblast them, but after my sandblasting ordeal with the engine compartment I decided to give the electrolysis a whirl again and see what I could do. It's certainly EASIER than sandblasting (just plug it in and let it do it's thing) and I doubt that sandblasting would have given me the same results. I couldn't be happier with how this first one came out!

Now I'm gonna go to the store and get more Washing Soda and a bigger tub so I can put the big engine mount and the front swaybar in a bath too. Was gonna sandblast them but this is just too easy and the results are fantastic.
I also managed to get the second strut out of the housing without having to take it to someone and have them take it out for me. As luck would have it the first strut came apart like legos and I used it to give me a longer lever arm on my itty bitty pipe wrench. Held the strut housing onto my workbench with a giant C-clamp, put the pipe wrench on it, put the broken strut cartridge on the end of the pipe wrench and walla! Out came the strut! Glad I paid attention in high school physics class.
I took it out of the bath this morning and could see that some of the rust had popped off in places, so I took the scraper to it and it came off in chunks! Left me with a pile of rust on the workbench. I used some steel wool to quickly polish the strut housing and although it's a bit pitted it looks 100% better than it did before. Crazy. I'll hit it with the polishing wheel on my bench grinder and after some POR-15 I think most of those pits will fill in and not be too noticeable. I'm not going for a showroom restoration, but I am glad that I will be able to reverse the effects of time somewhat and have it look really good for awhile, definitely better than it was!
I had planned to take these to a buddy's shop and sandblast them, but after my sandblasting ordeal with the engine compartment I decided to give the electrolysis a whirl again and see what I could do. It's certainly EASIER than sandblasting (just plug it in and let it do it's thing) and I doubt that sandblasting would have given me the same results. I couldn't be happier with how this first one came out!


Now I'm gonna go to the store and get more Washing Soda and a bigger tub so I can put the big engine mount and the front swaybar in a bath too. Was gonna sandblast them but this is just too easy and the results are fantastic.
I also managed to get the second strut out of the housing without having to take it to someone and have them take it out for me. As luck would have it the first strut came apart like legos and I used it to give me a longer lever arm on my itty bitty pipe wrench. Held the strut housing onto my workbench with a giant C-clamp, put the pipe wrench on it, put the broken strut cartridge on the end of the pipe wrench and walla! Out came the strut! Glad I paid attention in high school physics class.
 10-29-13, 07:04 PM
#247
Is this a problem?? Help requested please!
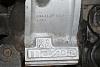
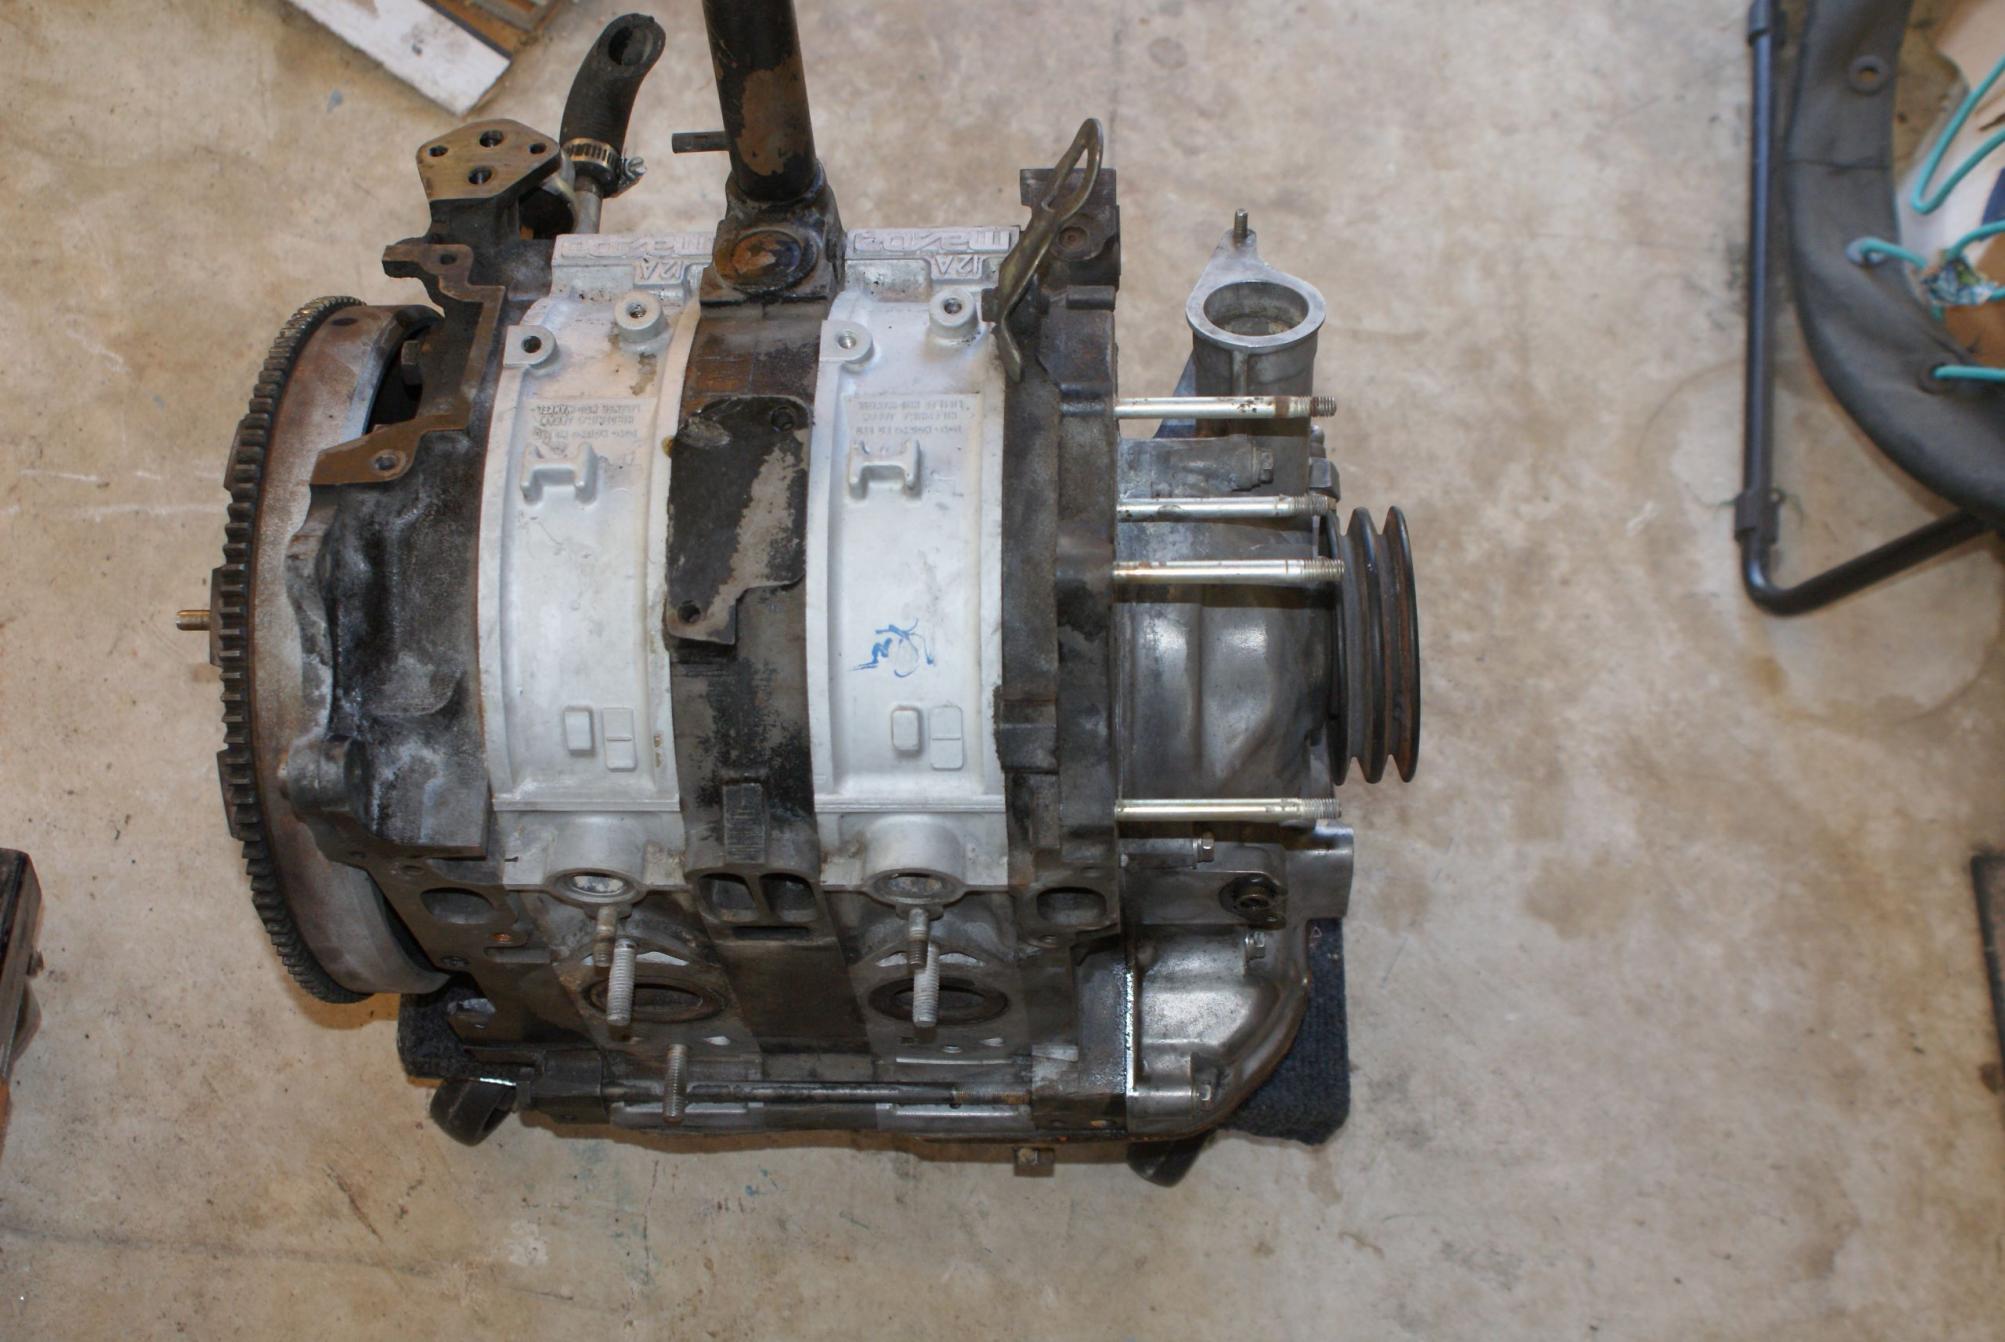
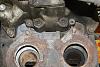
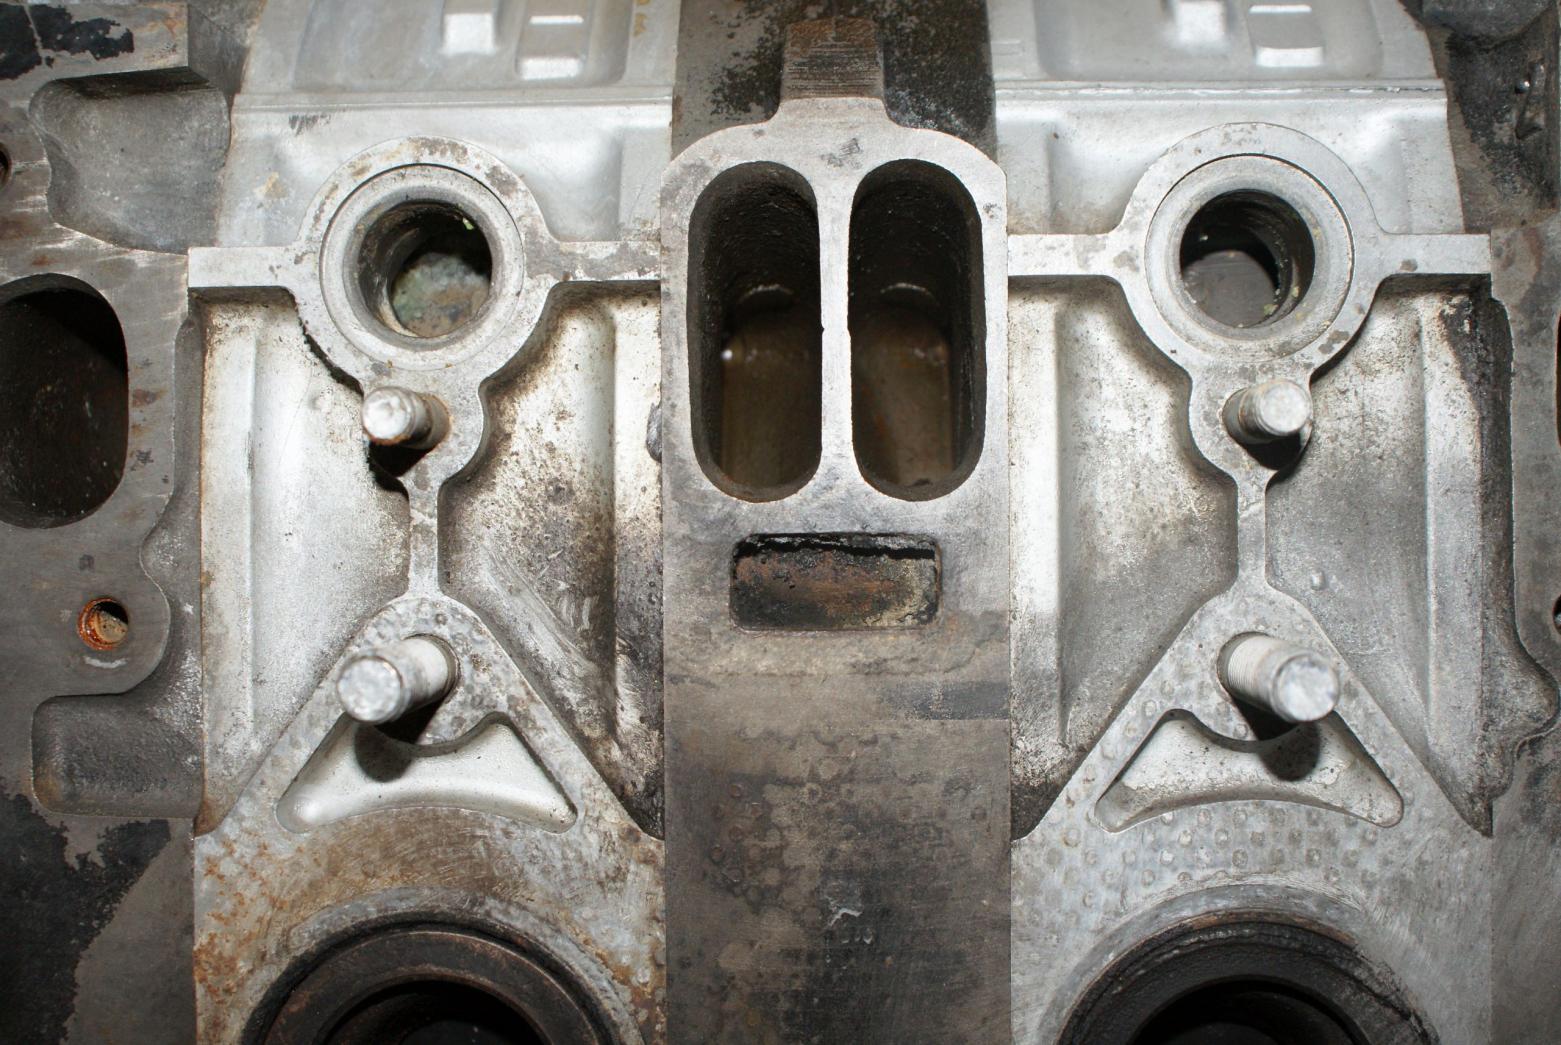
So, I'm getting ready to prep the new engine and I mock up my intake manifold and notice that it doesn't quite cover the hole for what I think, and correct me if I'm wrong, the EGR port. That small-ish square hole between the two intake ports on the center iron:
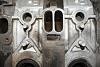
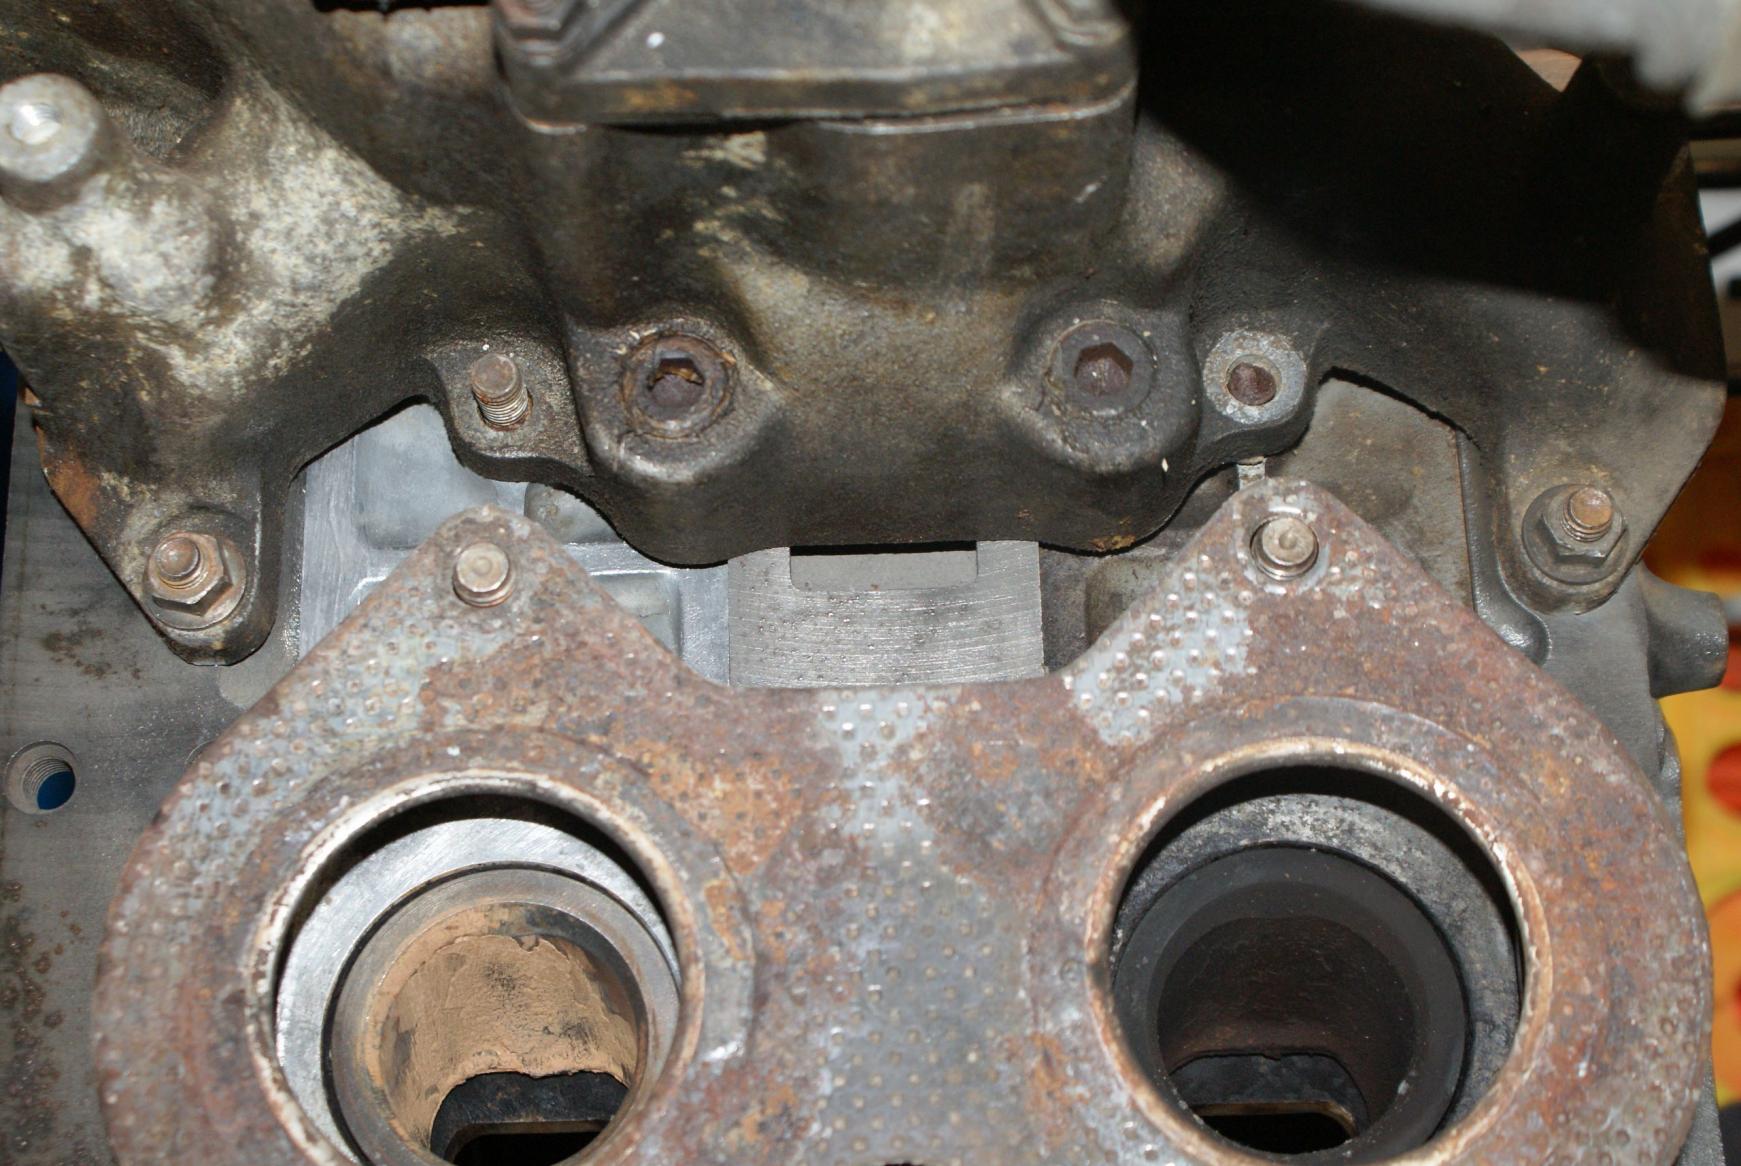
I got to wondering if this engine is an EGR engine and the one I took out of the 79 was not, so I mocked up the intake manifold to the disassembled 79 engine and I see the bottom of the EGR port is uncovered:
1) Isn't this SUPPOSED to be covered?
2) Is it a problem if it ISN'T covered?
3) If it is supposed to be covered, and it's a problem that it isn't what can I do to cover it with my manifold? Or, do I need a new manifold with an EGR? And if I do, does that involve a bunch of emissions stuff that my car may not have had?
I'd reeeeaaaalllly appreciate some help with this one...
10-30-13, 09:14 PM
#249
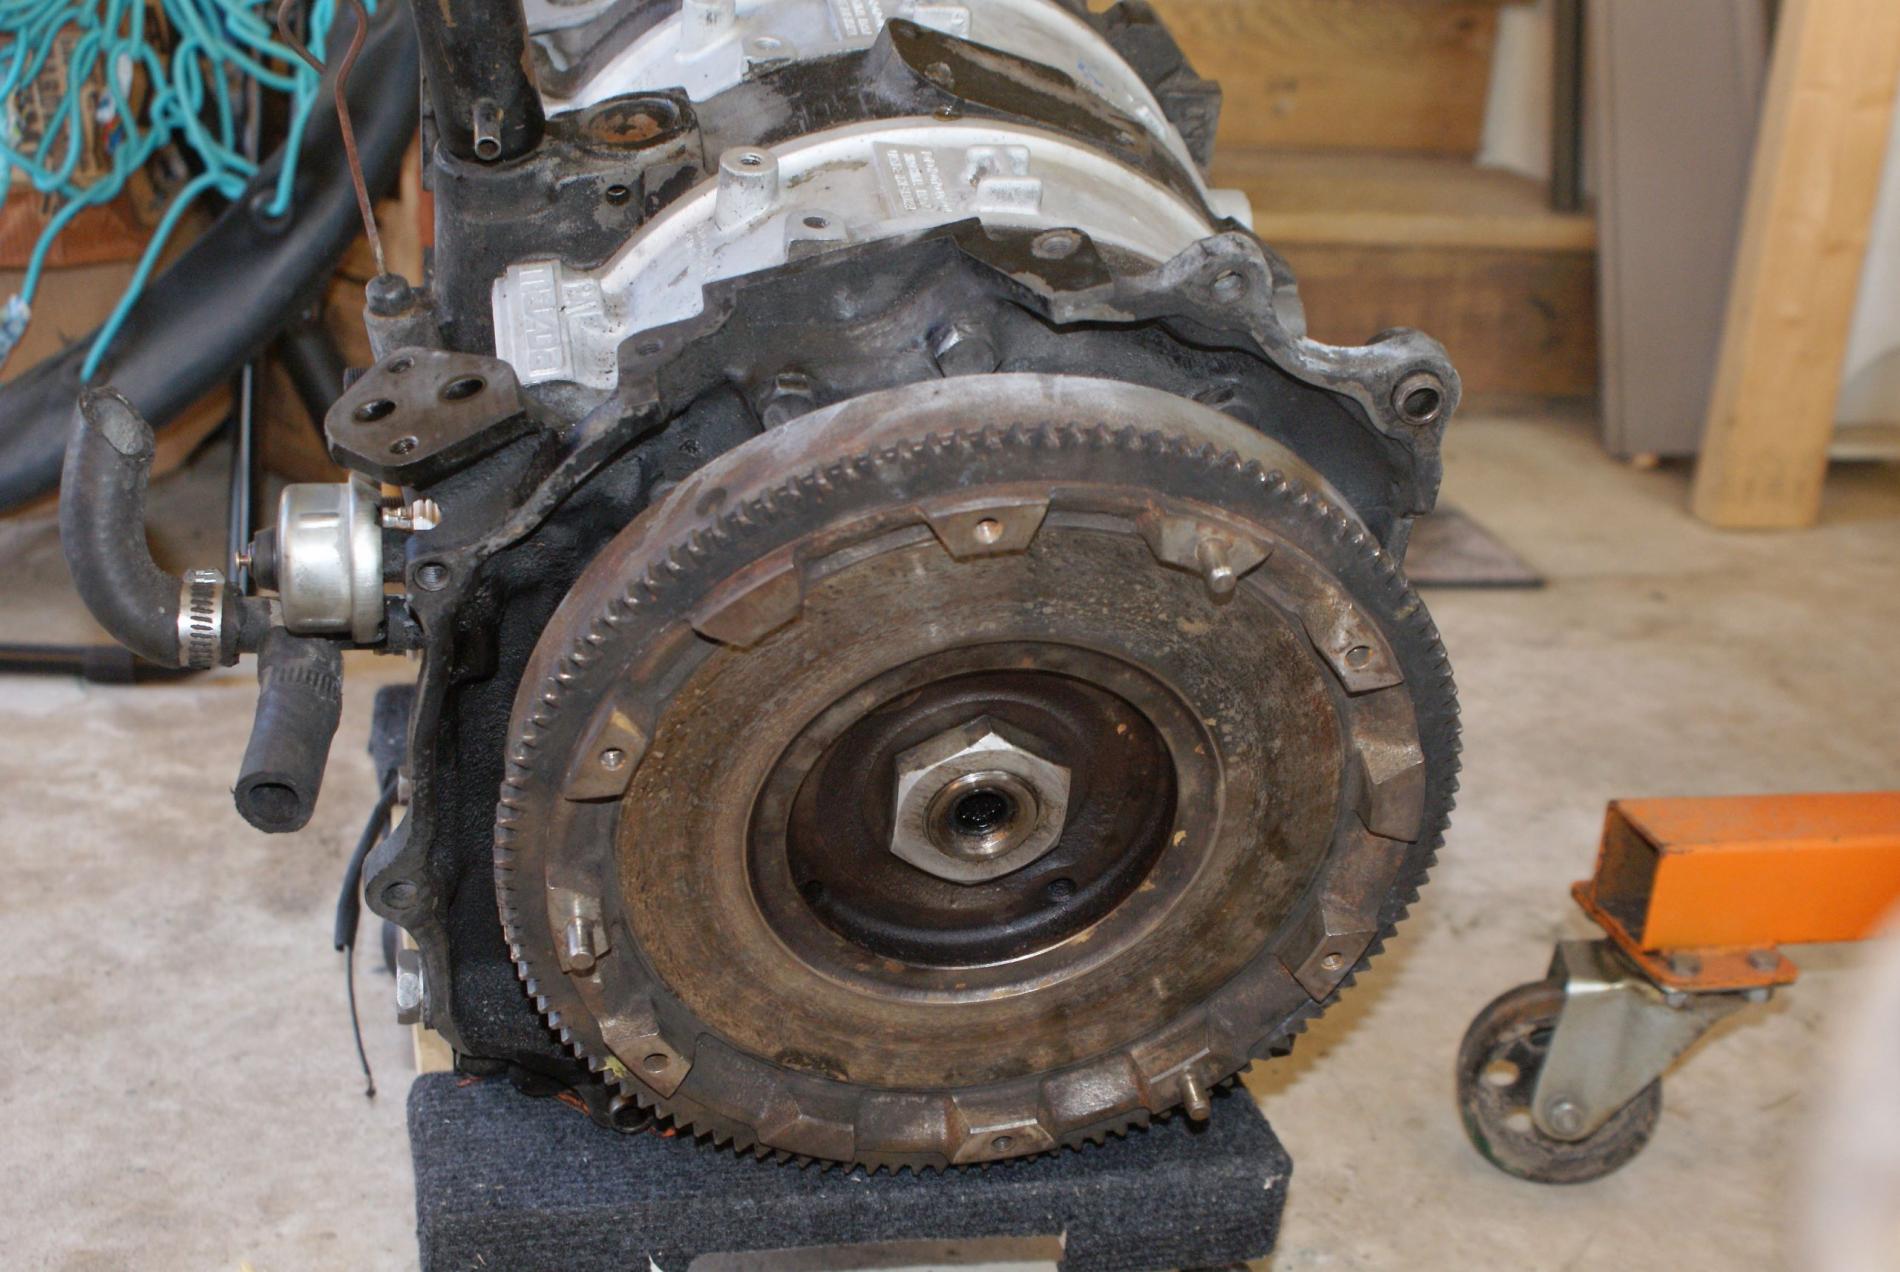
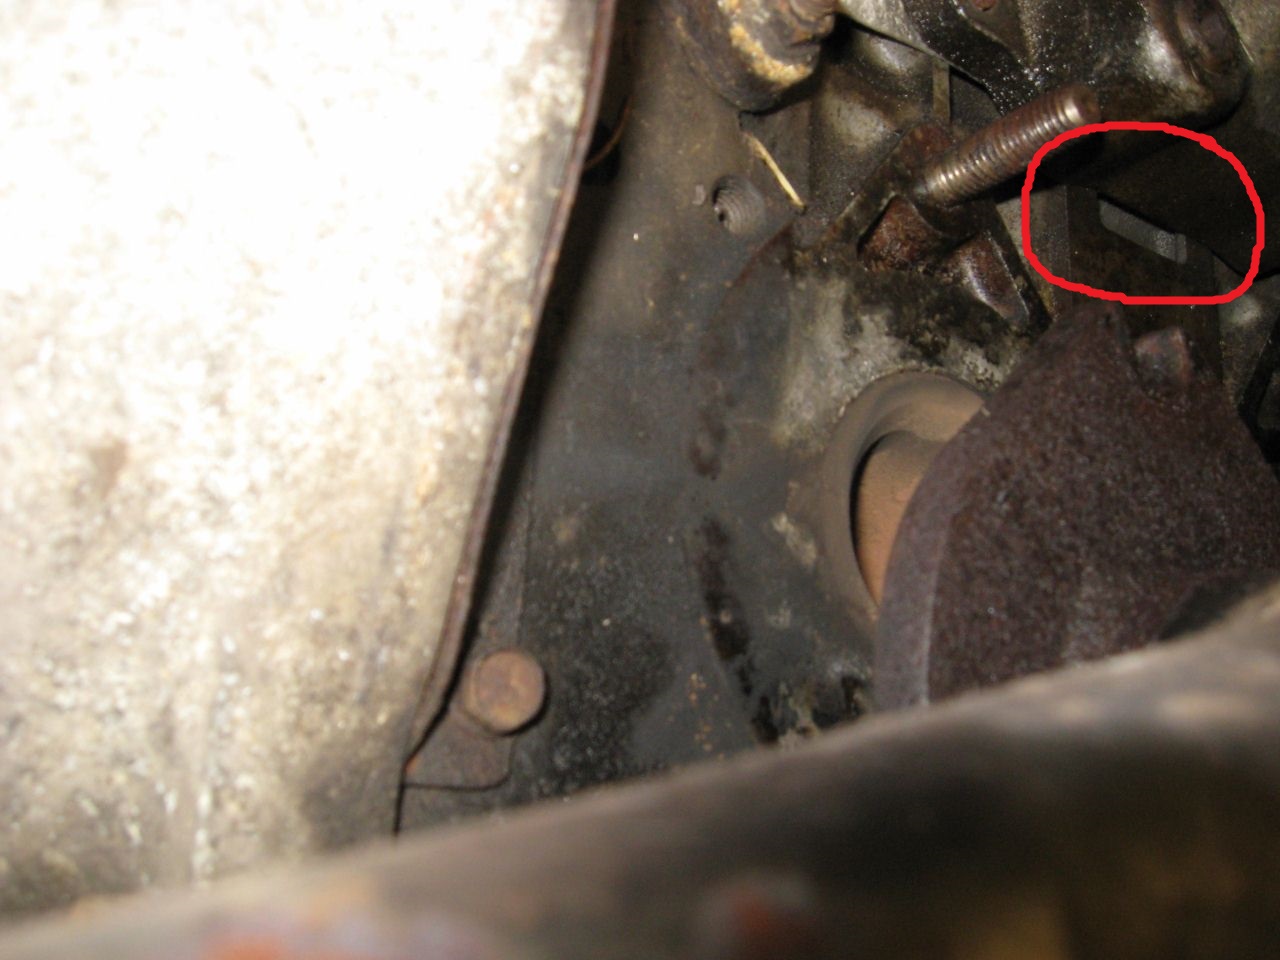
I looked through all the pictures I've taken and I see where that square hole was left wide open on the engine in the car. I circled it in the picture. This one was taken as I was trying to determine the source of that loud "POP, POP, POP" noise. I guess this could have been it.
Whadda y'all think?
Of course I did have some exhaust leaks past the header through the burned up gasket, but that sound persisted after I put a new gasket on there. I think I may have solved the riddle of the mysterious airplane radial engine sound from when I had it running...
Whadda y'all think?
Of course I did have some exhaust leaks past the header through the burned up gasket, but that sound persisted after I put a new gasket on there. I think I may have solved the riddle of the mysterious airplane radial engine sound from when I had it running...
Last edited by woodmv; 10-30-13 at 09:16 PM.
10-31-13, 11:35 AM
#250
Junior Member

Join Date: Jul 2012
Location: Washington State
Posts: 7
Likes: 0
Received 0 Likes
on
0 Posts
I also have a 79 I got from Dad. Mine just needs light resto work. (one headlamp motor, window seals, and radio). I need to sell it for house purchase. Sad really.