
Austin's FB TII Swap - Details and Pics Aplenty

What's that smell?
Joined: Jul 2007
Posts: 217
Likes: 0
From: Dorset, England
Might pay you to check the bushings in the wastegate flapper too before you put it all back together - I'm running same hotside with hybrid coldside and after a year of trouble making boost low down it turned out to be shot hinge bush. After looking through a pile of housings I didn't find a single one that didn't have play in it to some degree. Now that's done it's boost o'clock.
Takes me back to my build, good memories - keep up the good work.
Takes me back to my build, good memories - keep up the good work.
Thread Starter
Joined: Aug 2011
Posts: 3,078
Likes: 42
From: Cambridge, Minnesota
Haha yeah, I hear that. But I have always loved wiring and will continue to for as far as I can see. I'm considering double-majoring in Mechanical Engineering and Electrical Engineering since I love them both so much.
I completely agree. I want to be able to wire everything in and run the car right away instead of waiting to finish up the wiring after everything is already in.
Awesome! Keep tabs on here and I'll keep posting the progress and tricks that I learn along the way.
That's the goal! No messing around with it while it's in the car unless absolutely necessary. Had to stop though to get ready for the install of the engine to finish up the driver's side engine harness to ensure that I get all of the lengths right.
This also makes me really want to get an Rtek so that I can just plug the ECU back in and drive the car instead of redoing the entire wiring harness to run a Haltech or something along those lines.
I'd LOVE to know how you fixed this issue, both hinges on the wastegates are pretty shot and have way too much play to be allowed. Thank you for the tip, I greatly appreciate it!
I completely agree, I'm the same way. That's why I'm doing all new gaskets, fuel lines, vacuum lines, and a mountain of other things to ensure I don't have to pull the engine unless something catastrophic happens.
Well, new updates are as follows:
1. I've been sick for almost a month now. Not sure if it's a sinus infection or something more sinister, have something tightening in my chest and back so I'm going in tomorrow to find out. That's really been slowing the progress down.
2. I think I'm going to use the spare turbo that I have instead of the one that comes apart and was on the car for a few reasons:
A. There's no play whatsoever in the turbo, side to side or front to back
B. Has the coolant lines still attached
C. Appears to be in better shape overall
D. Only has one stud broken off in the back
3. Goal is to drive the car in 41 days to get the windows tinted for a steal through the MNMazda forum by Tint Pros here in Minneapolis.
4. Got the car home last night so I can get the work done faster. May put the gas tank back in and take the 12a for it's last few drives before I'm completely ready to swap to the 13bt. Plan on doing some before and after videos with the engines just for fun. Pretty stoked
So I'm going to try to get some work done today and tomorrow if at all possible.
Thanks for the replies guys, makes it worth posting
I completely agree. I want to be able to wire everything in and run the car right away instead of waiting to finish up the wiring after everything is already in.
This also makes me really want to get an Rtek so that I can just plug the ECU back in and drive the car instead of redoing the entire wiring harness to run a Haltech or something along those lines.
Might pay you to check the bushings in the wastegate flapper too before you put it all back together - I'm running same hotside with hybrid coldside and after a year of trouble making boost low down it turned out to be shot hinge bush. After looking through a pile of housings I didn't find a single one that didn't have play in it to some degree. Now that's done it's boost o'clock.
Takes me back to my build, good memories - keep up the good work.
Takes me back to my build, good memories - keep up the good work.
Well, new updates are as follows:
1. I've been sick for almost a month now. Not sure if it's a sinus infection or something more sinister, have something tightening in my chest and back so I'm going in tomorrow to find out. That's really been slowing the progress down.
2. I think I'm going to use the spare turbo that I have instead of the one that comes apart and was on the car for a few reasons:
A. There's no play whatsoever in the turbo, side to side or front to back
B. Has the coolant lines still attached
C. Appears to be in better shape overall
D. Only has one stud broken off in the back
3. Goal is to drive the car in 41 days to get the windows tinted for a steal through the MNMazda forum by Tint Pros here in Minneapolis.
4. Got the car home last night so I can get the work done faster. May put the gas tank back in and take the 12a for it's last few drives before I'm completely ready to swap to the 13bt. Plan on doing some before and after videos with the engines just for fun. Pretty stoked
So I'm going to try to get some work done today and tomorrow if at all possible.
Thanks for the replies guys, makes it worth posting
Thread Starter
Joined: Aug 2011
Posts: 3,078
Likes: 42
From: Cambridge, Minnesota
I figured it would be something like a rebuild kit, there's one I found for like $150ish that I wouldn't mind picking up next winter.
Getting a little antsy now, drove the 12a powered car last night and absolutely loved it. Can't wait for the 13bt to be in and drive that under its own power.
Thread Starter
Joined: Aug 2011
Posts: 3,078
Likes: 42
From: Cambridge, Minnesota
Modified the turbo oil drain with steel tubing, per Sean's direction  :
:


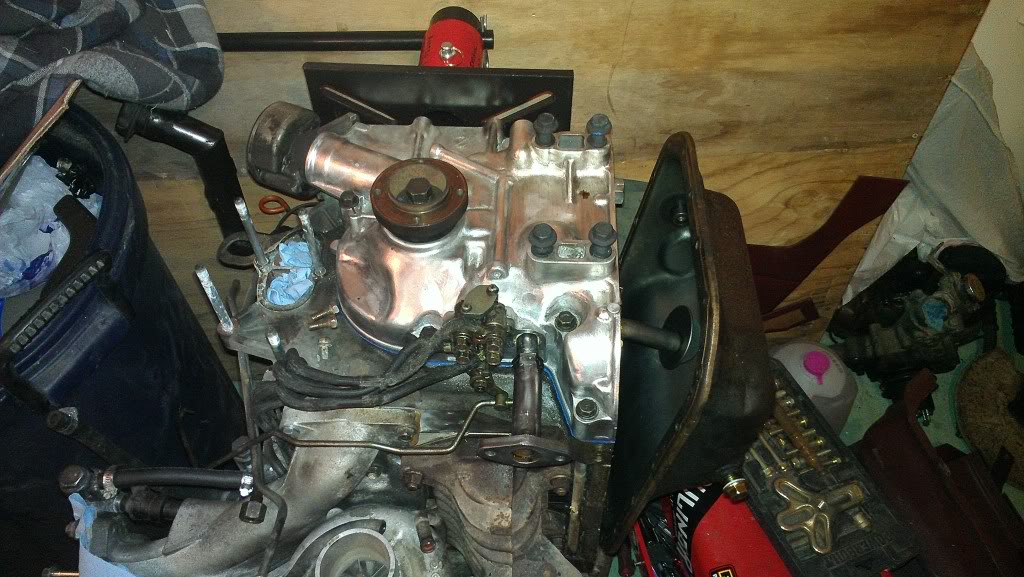
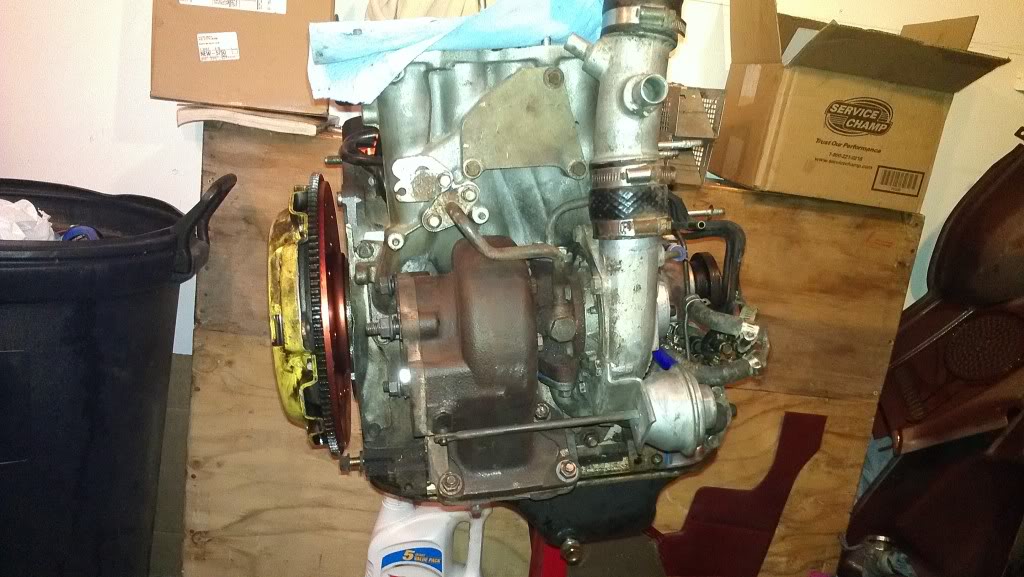
How I left the engine tonight:

List of work done:
Modified turbo oil drain and adapted to FB GSL-SE front cover
New front cover gasket
Cleaned MOP and installed new gasket, completely installed
CAS, MOP, and front eccentric shaft pulley all reinstalled
Cleaned oil pan to ready for install of new oil pan gasket but found that I ordered the wrong one. So I ordered a new one from Atkins tonight, as well as some other small things that I wanted to complete the install.
Slowly but surely, and correctly, I'm getting there.
How I left the engine tonight:
List of work done:
Modified turbo oil drain and adapted to FB GSL-SE front cover
New front cover gasket
Cleaned MOP and installed new gasket, completely installed
CAS, MOP, and front eccentric shaft pulley all reinstalled
Cleaned oil pan to ready for install of new oil pan gasket but found that I ordered the wrong one. So I ordered a new one from Atkins tonight, as well as some other small things that I wanted to complete the install.
Slowly but surely, and correctly, I'm getting there.


Thread Starter
Joined: Aug 2011
Posts: 3,078
Likes: 42
From: Cambridge, Minnesota
No, not the end flange. That end bolts up to the turbo oil drain, I cut off the end that bolts to the front TII cover flat to adapt to that fitting. Not too hard, just took me a while to see how I should do it (with some serious help from Sean ).
I'm thinking one set of shorts per gear change  That TII car, even with leading coil not fully grounding and who knows what else not hooked up or sealed correctly was STILL a blast. And a stripped-but-complete-interior-still-in-car TII is probably still heavier than an FB, so it will be a blast completely hooked up
). That TII car, even with leading coil not fully grounding and who knows what else not hooked up or sealed correctly was STILL a blast. And a stripped-but-complete-interior-still-in-car TII is probably still heavier than an FB, so it will be a blast completely hooked up

Thread Starter
Joined: Aug 2011
Posts: 3,078
Likes: 42
From: Cambridge, Minnesota
There is a difference, in the MOP I believe. Guys run SE front covers on S5 13BT swaps so that they can use the electronic MOP's they come with. I think the guy that did an REW swap did the same thing as well.. I was going to use the 12a I have laying around but just ended up buying an SE so there wasn't any issues.s
Thread Starter
Joined: Aug 2011
Posts: 3,078
Likes: 42
From: Cambridge, Minnesota
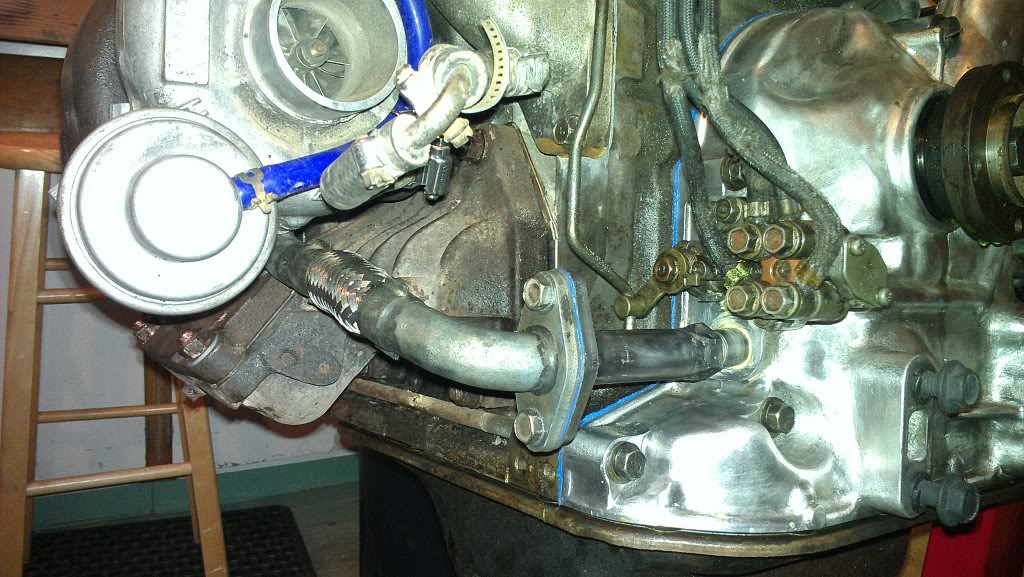
How I Made My Turbo Oil Drain
Making an FB turbo oil drain into the front cover below the OMP.
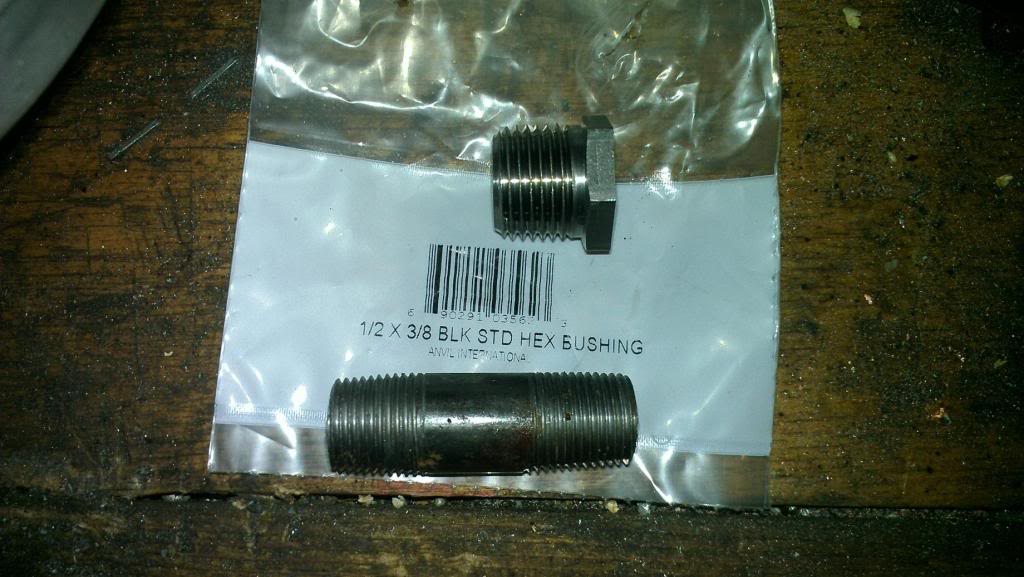
Parts needed from the store:
1/2" x 3/8" NPT Bushing
3/8" NPT 2" pipe
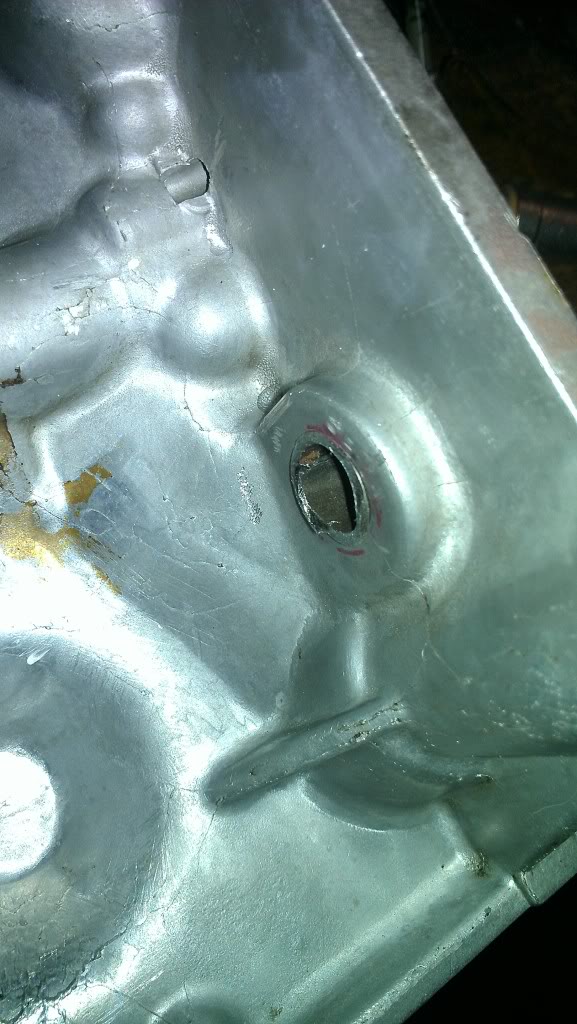
Put the pipe through the 3/8" NPT tapped hole in the front cover and tighten it. Grind off all excess as in this picture so that the pipe is pressing as little as possible on the chain guard for the E-Shaft.
Grind off the threads on the bushing down to almost nothing. Leave just enough to act as barbs to hold it in place for welding.
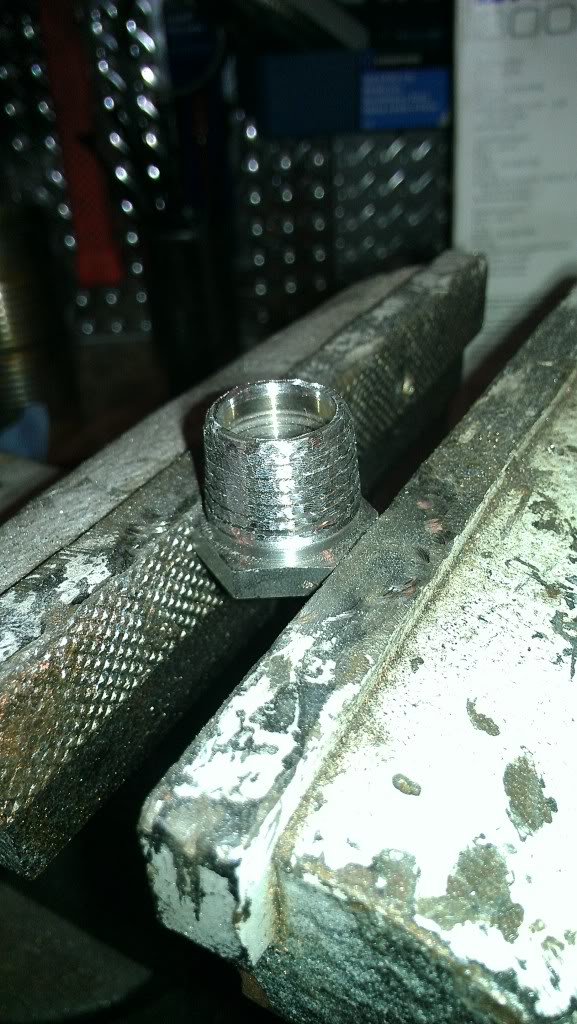
Put the bushing inside the oil drain but don't weld on right away.
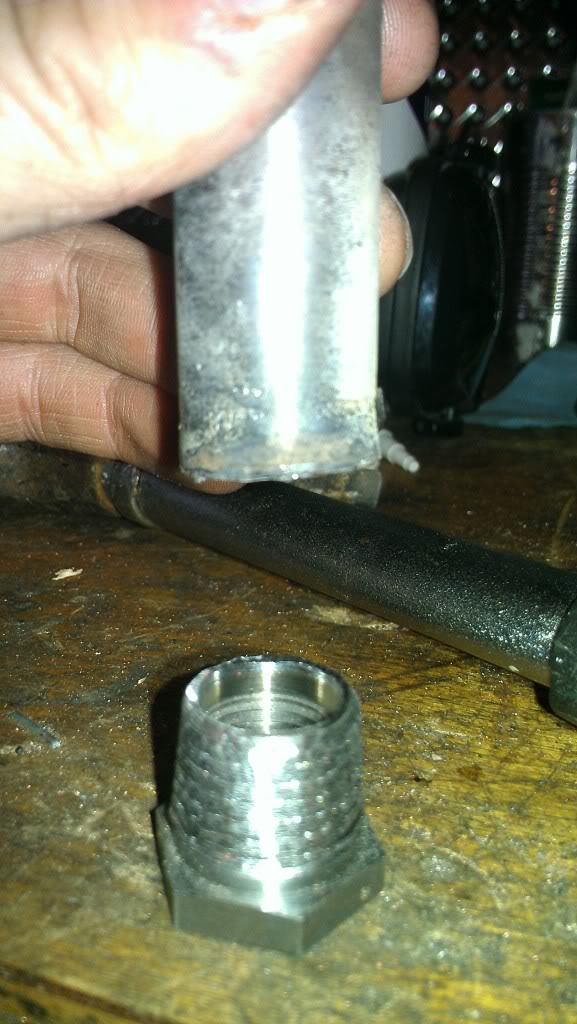
Line up the tighened 2" pipe in the front cover, then tighten the flange with the oil drain all the way up. Mark the relative positions with a Sharpie to ensure that they are tighened to the right spot later. Tack weld the bushing in place and remove to finish weld. Remember to grind off the welds flat to ensure penetration through the stock oil drain pipe to the bushing for no leaks.
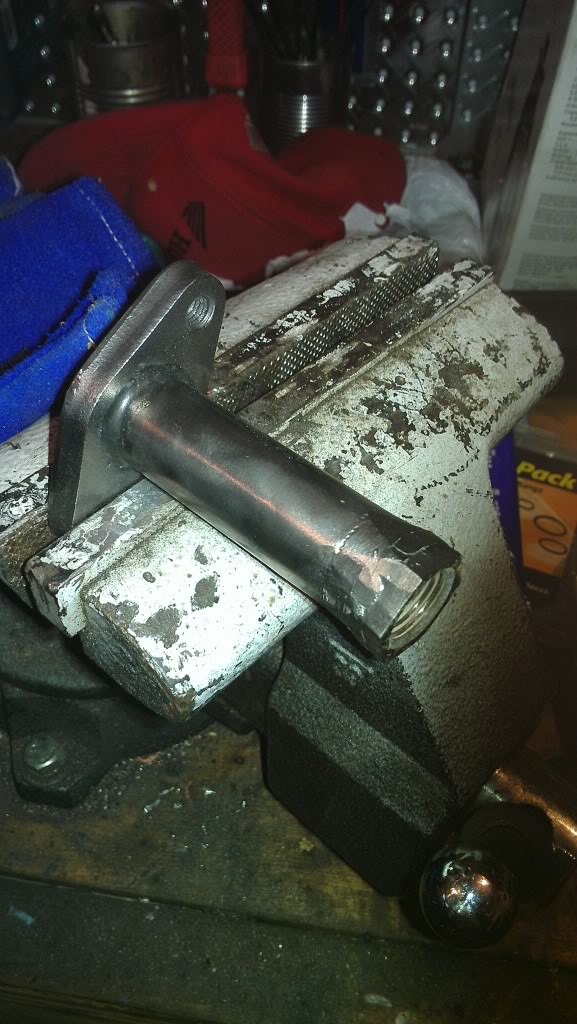
Last pic is what mine looked like when finished.
Typed that up since I had the fix the links for the pics, moved them in my Photobucket account.
Tonight I plan on:
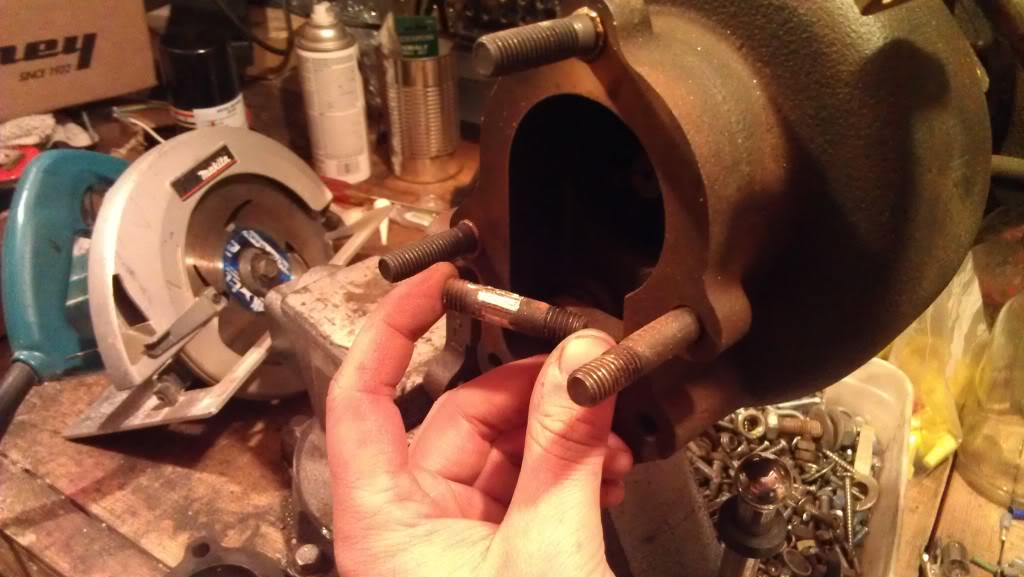
1. Porting the S4 wastegate on the turbo that I'll actually be using
2. Drilling out the busted stud on the back of the exhaust turbine
3. Fully installing the turbo setup
4. Modding the stock 12a engine brace 20mm rearward.
Then there's only a few things left till it's installed!
Parts needed from the store:
1/2" x 3/8" NPT Bushing
3/8" NPT 2" pipe
Put the pipe through the 3/8" NPT tapped hole in the front cover and tighten it. Grind off all excess as in this picture so that the pipe is pressing as little as possible on the chain guard for the E-Shaft.
Grind off the threads on the bushing down to almost nothing. Leave just enough to act as barbs to hold it in place for welding.
Put the bushing inside the oil drain but don't weld on right away.
Line up the tighened 2" pipe in the front cover, then tighten the flange with the oil drain all the way up. Mark the relative positions with a Sharpie to ensure that they are tighened to the right spot later. Tack weld the bushing in place and remove to finish weld. Remember to grind off the welds flat to ensure penetration through the stock oil drain pipe to the bushing for no leaks.
Last pic is what mine looked like when finished.
Typed that up since I had the fix the links for the pics, moved them in my Photobucket account.
Tonight I plan on:
1. Porting the S4 wastegate on the turbo that I'll actually be using
2. Drilling out the busted stud on the back of the exhaust turbine
3. Fully installing the turbo setup
4. Modding the stock 12a engine brace 20mm rearward.
Then there's only a few things left till it's installed!
Damn dude, you're going to have this installed and running before I even finish collecting the bits for my EFI swap.
I gotta get my *** in gear! (And don't slow down - keeping me motivated here!)
I gotta get my *** in gear! (And don't slow down - keeping me motivated here!)
Thread Starter
Joined: Aug 2011
Posts: 3,078
Likes: 42
From: Cambridge, Minnesota
Your car will be awesome when you finish it up too, I swear the parts hunting is among the hardest parts of these projects. I'm waiting on an Atkins order I made last Saturday night and it will be here on Friday. DYING waiting for that box so I can finish the engine up and get it in.Well, here's what I got done tonight:
How I started the night

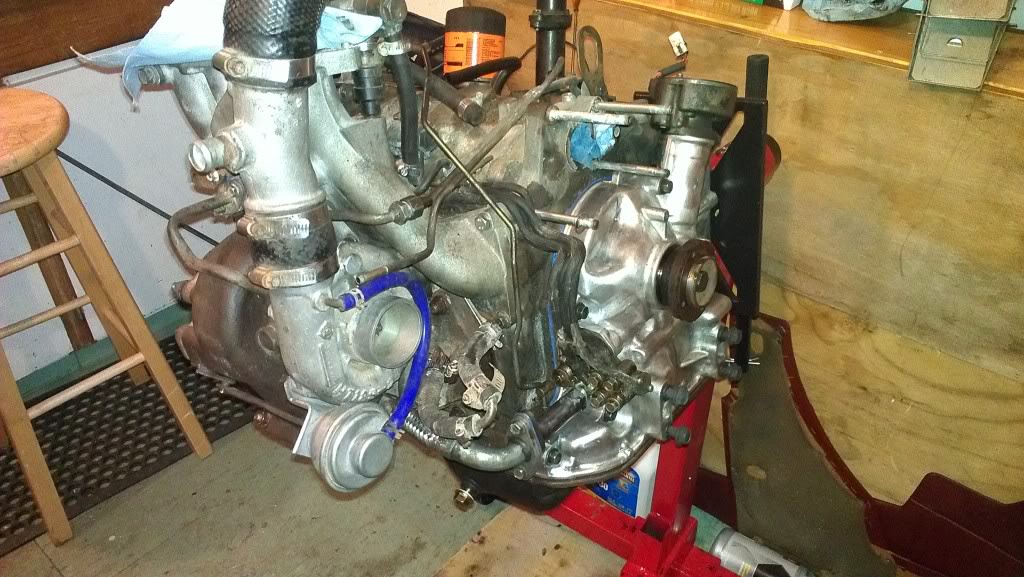
Finished.
Got a lot done tonight and pretty happy with the progress. Should be swapping it in on Saturday hopefully and getting the driveshaft made early next week so I can start driving it!
List of things accomplished tonight are as follows:
Turbo oil drain completely installed and sealed
Coolant line from intake to turbo installed and sealed
2 new down pipe studs installed in turbo
Wastegate ported to the largest diameter the stock flapper would allow (didn't want to go all out on this one, went up about 25% from stock so it will work fine)
Installed turbo wastegate cover/backing plate
Installed turbo completely on engine
Removed clutch to view condition, then reinstalled - looks brand new
Some other things probably but I forget
List of things needed to do to finish engine while removed:
Mod the 12a engine bracket
Install waterpump and housing with new gaskets and new thermostat (waiting on the Atkins order)
New oil pan gasket installed (Atkins order as well)
Then I can INSTALL!
Will be working on wiring harness mostly here, as well as removing the 12a and modding the gas tank till Friday. Hopefully by next week she can be in the driveline shop getting a custom driveshaft and I can start driving it by the middle of next week!
Thread Starter
Joined: Aug 2011
Posts: 3,078
Likes: 42
From: Cambridge, Minnesota
Thank you sir
Well I was, until this happened:
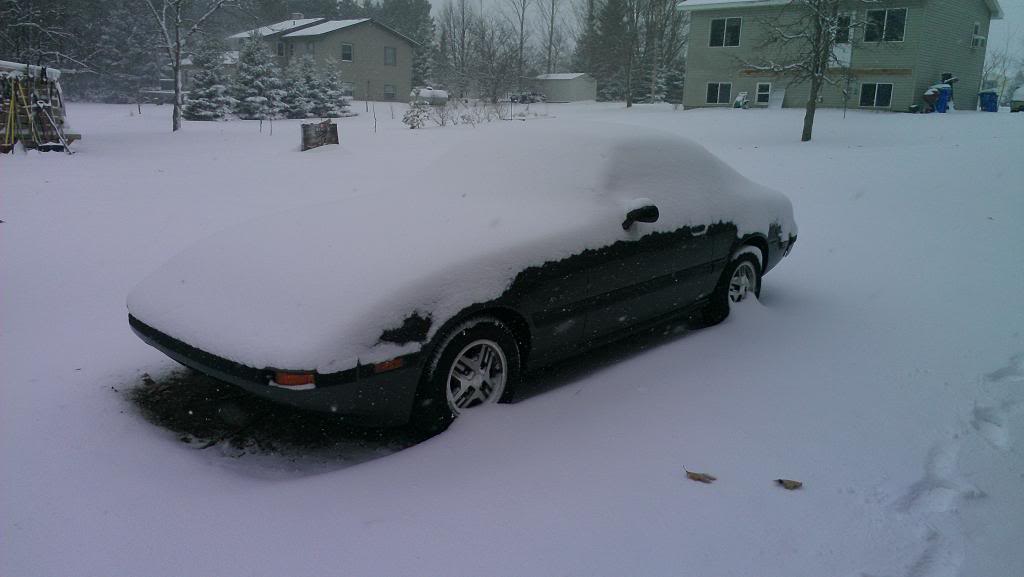
Stupid snow.
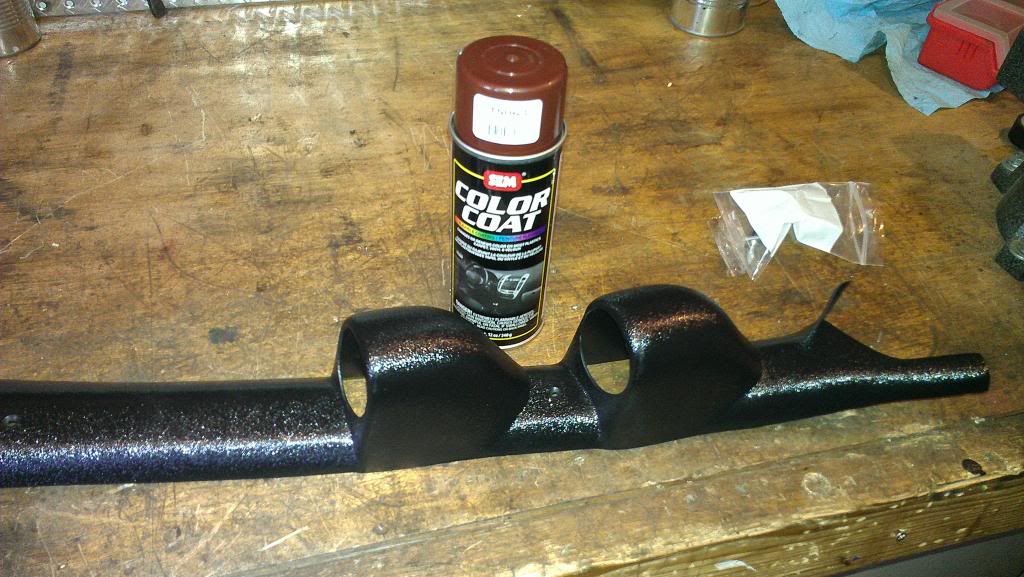
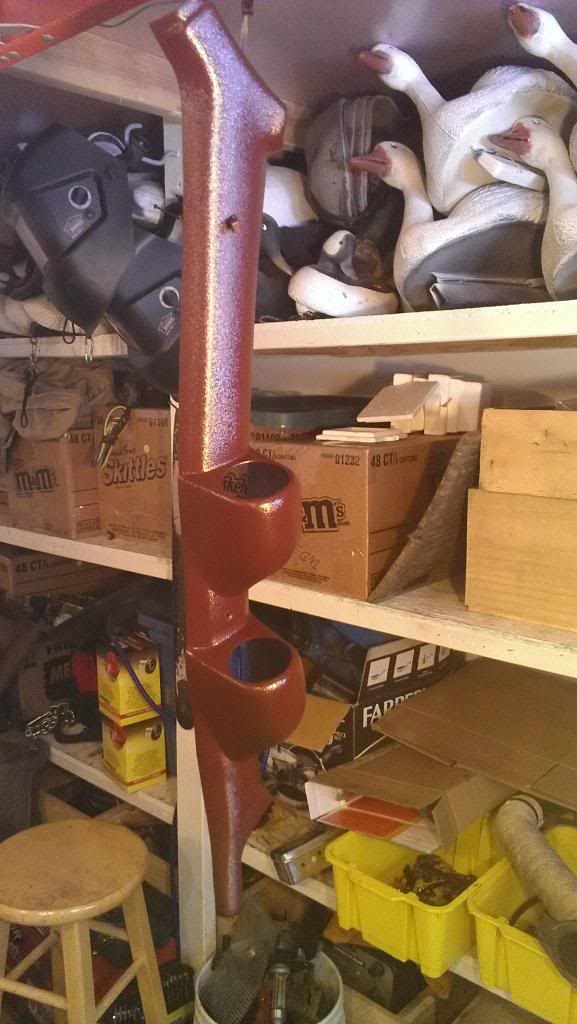
So I've kept myself busy through painting my gauge pod:
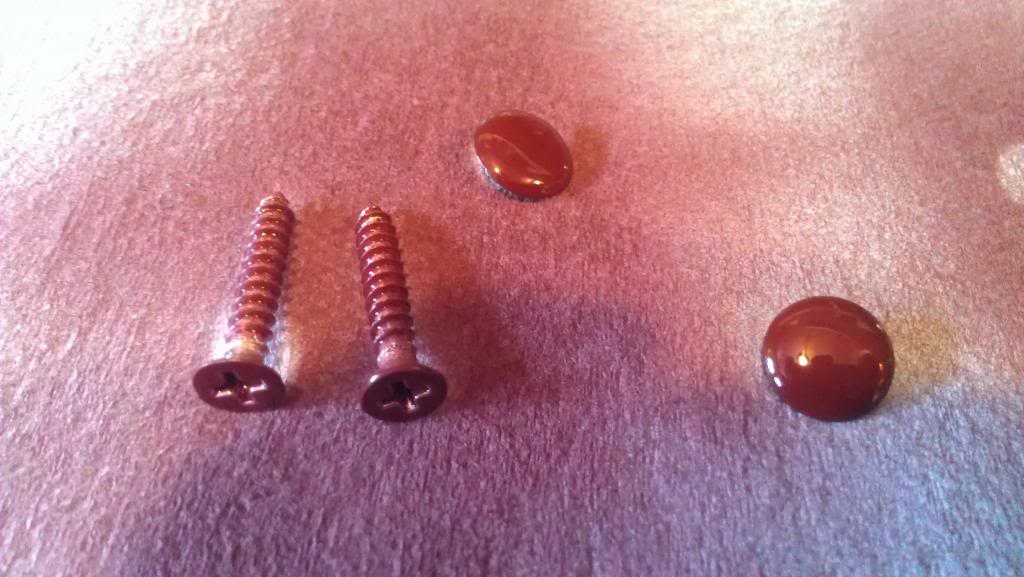
And this made me feel like DivinDriver, since someone made fun of him for painting individual bolt heads
So I'm at a standstill for now, was hoping to get the engine in on Saturday but that's not gonna happen. Guess I'll have to try and get the engine completely ready for the swap with the Atkins package I'm getting today and finish up a few other things but I'm kinda bummed about the weather. MN is terrible for giving you hope then dashing it again.
Well I was, until this happened:

Stupid snow.
So I've kept myself busy through painting my gauge pod:


And this made me feel like DivinDriver, since someone made fun of him for painting individual bolt heads

So I'm at a standstill for now, was hoping to get the engine in on Saturday but that's not gonna happen. Guess I'll have to try and get the engine completely ready for the swap with the Atkins package I'm getting today and finish up a few other things but I'm kinda bummed about the weather. MN is terrible for giving you hope then dashing it again.
The color match on the SEM burgundy is 95-97%.
Giving **** for painting screw heads??? PFFFFT. I've painted EVERY screw I've taken off so far. ALL interior screws have been painted burgundy, and the headlight bucket screws are now matte black.
Keep it up bro - gauges are next on my list too. either tonight or tomorrow AM. Where you thinking of tapping them in? I was thinking to the stereo power harness, although I'm hesitant to add any potential line noise or ground loops into that already convoluted harness.
Thread Starter
Joined: Aug 2011
Posts: 3,078
Likes: 42
From: Cambridge, Minnesota
Haven't modded shifter yet, pretty nervous about that. Don't want to go through sideways and risk screwing up the rod. I'm a smaller guy (5' 8" with shoes on is what I always say
) and I thought it would bring the shifter closer to me if I just cut the tunnel - still unsure what I'd like to do. I don't have a drill press or access to one so I don't know.
Thread Starter
Joined: Aug 2011
Posts: 3,078
Likes: 42
From: Cambridge, Minnesota
I agree, really close but still a little off.
I'll do the same when I get that far. Painted heads makes it look complete. No trash meant by the comment, I just thought of him while painting the heads 
I need to go through and rewire my entire stereo and gauge setup now so I'm unsure what I'll do. Would like to find a good place that has good consistant power that I can leech from. I'll post pics when I get to that point 
Yeah I took the time to restore most of the hardware in my engine bay (chemical strip rust and paint heads black) and have painted lots of other little things here and there. I think a lot of us are that **** about the cars, we just don't post about it as much as DivinDriver does lol.
FYI, any rx7 shift rod can be used as the "base" shift rod for the modification. So if you don't want to risk messing up the T2 rod just use one out of a 12a trans or a NA FC or whatever you can find. You'll need to do some measuring to get it right since both the NA FC and 12a shift rod have the current hole in a different spot than the T2, so you can use the "move it 30mm forward" method...
FYI, any rx7 shift rod can be used as the "base" shift rod for the modification. So if you don't want to risk messing up the T2 rod just use one out of a 12a trans or a NA FC or whatever you can find. You'll need to do some measuring to get it right since both the NA FC and 12a shift rod have the current hole in a different spot than the T2, so you can use the "move it 30mm forward" method...
Thread Starter
Joined: Aug 2011
Posts: 3,078
Likes: 42
From: Cambridge, Minnesota
FYI, any rx7 shift rod can be used as the "base" shift rod for the modification. So if you don't want to risk messing up the T2 rod just use one out of a 12a trans or a NA FC or whatever you can find. You'll need to do some measuring to get it right since both the NA FC and 12a shift rod have the current hole in a different spot than the T2, so you can use the "move it 30mm forward" method...
Well, got a lot done today!
What the engine looked like this morning:

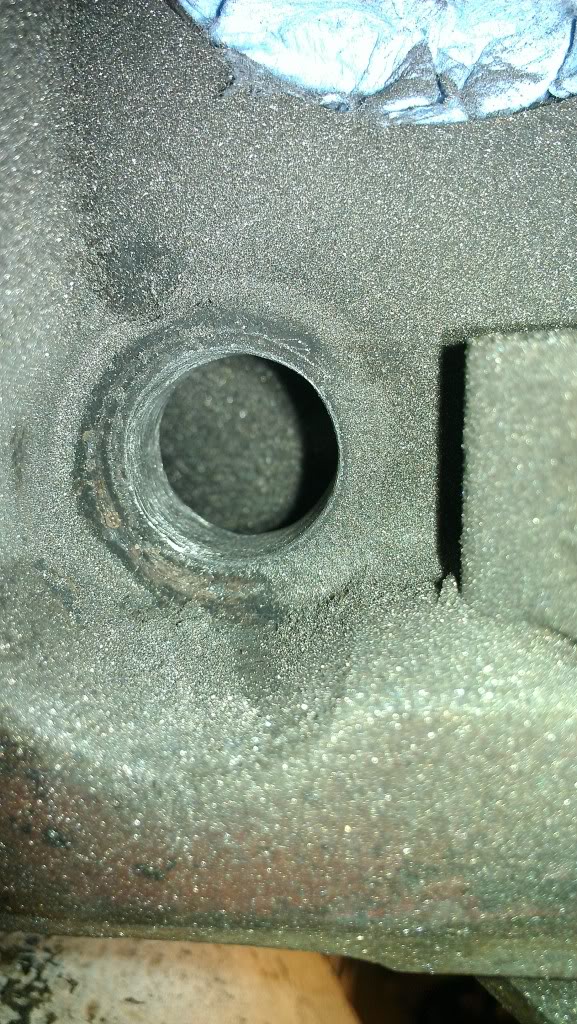
Drilled and tapped the water pump housing for my 1/8 NPT water temp sensor for the temp gauge


New thermostat

Got the oil temp and oil pressure gauge ready for install

How the engine looked when done

List of work done:
New water pump housing to block gasket
New thermostat
New thermostat gasket
Drilled and tapped hole for Auto Meter water temp gauge sensor
Hooked up turbo coolant line
Readied for oil temp and pressure gauges
Oil pan gasket installed
Modified engine mounting brace for 13b engine
In other words - COMPLETELY ENGINE DONE!
I could now insert the engine into the 12a car but can't yet, since there's too much snow around. Will be going in soon though, super stoked!
Thread Starter
Joined: Aug 2011
Posts: 3,078
Likes: 42
From: Cambridge, Minnesota
Yeah, that thing is just to keep the dust out. I'll probably run the nice K&N filters when I really run the engine.Thanks, culmination of 9 hours of hard work today and I feel pretty accomplished