Build Threads The place to discuss complete builds

ZoomZoom's CYM- Imported from Canada; a Journey Begins... Again.

Thread Tools
 
Search this Thread
 
Old 05-22-18, 03:23 PM
  #726  
Sponsor
iTrader: (41)
 
IRPerformance's Avatar
 
Join Date: Apr 2003
Location: NJ
Posts: 11,347
Received 317 Likes on 190 Posts
Looks good.
Old 05-22-18, 04:07 PM
  #727  
SEMI-PRO

Thread Starter
iTrader: (2)
 
ZoomZoom's Avatar
 
Join Date: Feb 2001
Location: New Jersey
Posts: 2,865
Received 36 Likes on 31 Posts
Originally Posted by RCCAZ 1
Yikes, does your garage door truly clear the roof of the white FD in that pic when in the UP position? How much does that 2 car lift cost, and how about the garage door conversion? You've got me thinking BAD thoughts now....
Garage door rails will need to get raised close to the ceiling, you will want to convert your door to a bar and spring and get a jack shaft style opener.
Expect $1500+\- on that. the lift is about $2700 shipped for the basic set up. If you get the sliding jack it’s another $800 plus any other accessories you want.
I did the garage set up at the same time I had a laundry room done on the second floor so we could move the laundry upstairs (it was in the garage on a slab).
I had concrete work that had to be demo’d As well so my expenses reached somewhere around $10k-12k for the upgrades I did.
You can go as far as you want doing a project like this. Epoxy floor, painted walls, upgraded LED lighting, extra outlets put on ceiling etc. drain tile in floor so you can wash them inside in winter... some of my friends have done some of these types of things.
I never want to work on a car laying on a concrete floor again after getting the lift. Do it, you won’t ever regret it. Everyone I know that had any reservations about it look back and are glad they did it.

Mike

I would do it again without hesitation.
Old 05-22-18, 04:11 PM
  #728  
SEMI-PRO

Thread Starter
iTrader: (2)
 
ZoomZoom's Avatar
 
Join Date: Feb 2001
Location: New Jersey
Posts: 2,865
Received 36 Likes on 31 Posts
Originally Posted by IRPerformance
Looks good.
Thanks Ihor. I am looking forward to getting it tuned and back on the road for the summer. May have you make some AC lines for it if you want that type of work. So it can get tuned with the AC running. I will text you because you probably aren’t reading this.

Old 05-27-18, 04:10 PM
  #729  
Full Member


iTrader: (2)
 
Snipe G's Avatar
 
Join Date: Jul 2015
Location: Pensacola Fl
Posts: 198
Received 54 Likes on 45 Posts
ZoomZoom, Great thread on many levels. I must have missed it but where did you get that oil pan?
Old 05-27-18, 05:17 PM
  #730  
SEMI-PRO

Thread Starter
iTrader: (2)
 
ZoomZoom's Avatar
 
Join Date: Feb 2001
Location: New Jersey
Posts: 2,865
Received 36 Likes on 31 Posts
Originally Posted by Snipe G
ZoomZoom, Great thread on many levels. I must have missed it but where did you get that oil pan?
Thanks, it’s the Len Bacon oil pan.
Old 05-27-18, 06:22 PM
  #731  
SEMI-PRO

Thread Starter
iTrader: (2)
 
ZoomZoom's Avatar
 
Join Date: Feb 2001
Location: New Jersey
Posts: 2,865
Received 36 Likes on 31 Posts
I am using the Addicted exhaust manifold because they told me it would fit with the Xcessive lower intake manifold and the FFE idler.
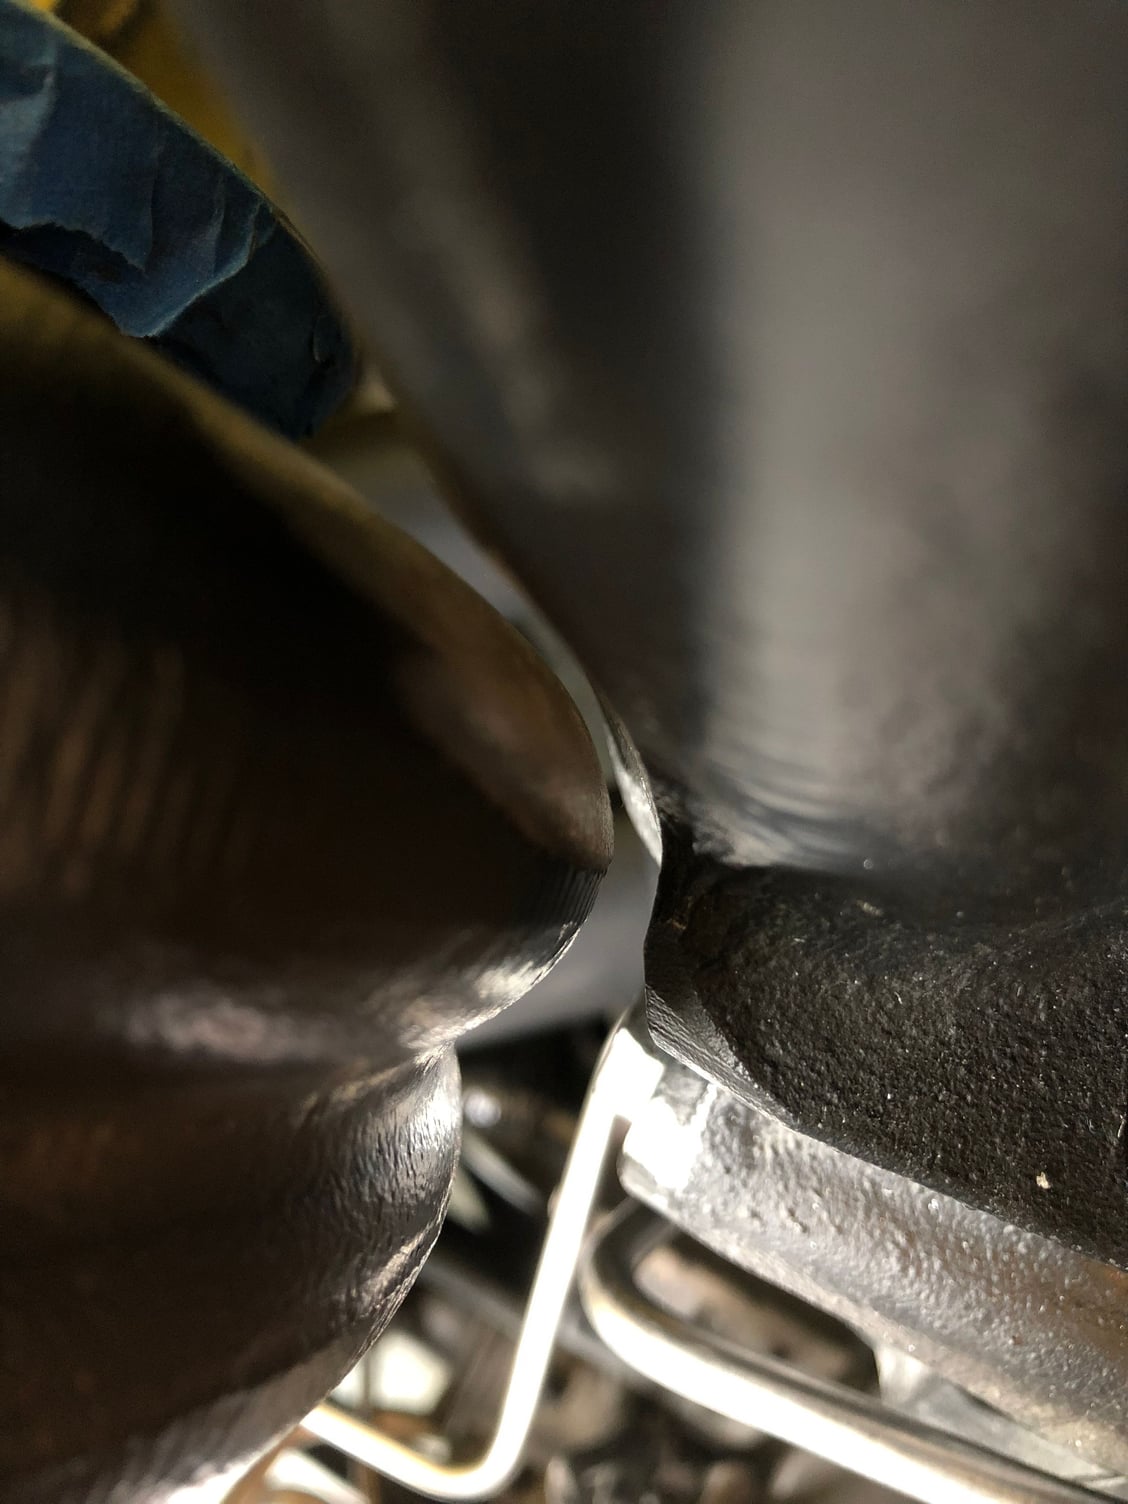
Well it’s not even close to fitting the lower. I got tthink grind off a few hundred dollars worth of ceramic coating and really enjoyed grinding on my new $1800 turbo as well as the lower... still won’t fit.
Now I get to take my ceramic coated exhaust manifold of and have my local welder cut, grind and modify it to actually work.

So so far every possible thing Addicted could screw up they have screwed up. Not to mention they didn’t send more than half the kit and whined about providing a midpipe as compensation. Oh and what they did send took them 5 months... i had heard positive things about that shop but they couldn’t live up to the hype. I way overpaid for what I got from them.
keep it in mind if you decide to do business with them. They are a hot mess with their customer service.

Now i I get to pay to have everything ceramic coated twice because thier manifold didn’t actually fit.

Old 05-27-18, 06:26 PM
  #732  
SEMI-PRO

Thread Starter
iTrader: (2)
 
ZoomZoom's Avatar
 
Join Date: Feb 2001
Location: New Jersey
Posts: 2,865
Received 36 Likes on 31 Posts


Oops, contact with lower


Grinding isn’t helping


There goes hundreds in ceramic coating. Thanks Addicted


See flange under turbo. It’s way off. Lots of grinding. Wasn’t enough.


Isn’t going to
Pics of carnage
Old 05-27-18, 11:33 PM
  #733  
Built Not Bought

iTrader: (14)
 
TwinCharged RX7's Avatar
 
Join Date: May 2008
Location: Stamford, CT
Posts: 4,249
Likes: 0
Received 851 Likes on 537 Posts
Thanks for the heads up. I was thinking about buying a 3rotor manifold from them.
Old 05-29-18, 08:32 AM
  #734  
SEMI-PRO

Thread Starter
iTrader: (2)
 
ZoomZoom's Avatar
 
Join Date: Feb 2001
Location: New Jersey
Posts: 2,865
Received 36 Likes on 31 Posts


Between turbo hot side and lower intake manifold


Carved out enough lower to barely fit. Going to re ceramic coat after tuning session. Wish I had time to send it all back out.
After more grinding.... I see daylight.
Old 05-29-18, 08:36 AM
  #735  
SEMI-PRO

Thread Starter
iTrader: (2)
 
ZoomZoom's Avatar
 
Join Date: Feb 2001
Location: New Jersey
Posts: 2,865
Received 36 Likes on 31 Posts


Elite 2.0 on left


Elite 2.0 oil return from turbo to engine block on front iron.


Elite 2.0 oil return


Elite 2.0. Front cover bolts. Long ones were not quite long enough. Short ones were perfect. Freebie T-short from Sam at Elite
Making oil return line. Highly recommend the Elite 2.0 oil drain fitting for the engine block. Makes threading on the return line much easier. It clears the Oil metering pump.
Old 05-29-18, 10:14 AM
  #736  
Moderator

iTrader: (13)
 
Johnny Kommavongsa's Avatar
 
Join Date: Apr 2013
Posts: 1,421
Received 141 Likes on 92 Posts
Hate to see that stuff not fitting.

and thanks for the info on teh elite 2.0 oil drain fitting to engine block. The oil drain for a single turbo is a pain to work with.
Old 05-29-18, 02:02 PM
  #737  
SEMI-PRO

Thread Starter
iTrader: (2)
 
ZoomZoom's Avatar
 
Join Date: Feb 2001
Location: New Jersey
Posts: 2,865
Received 36 Likes on 31 Posts


-10AN Oil Return lone from Turbo to block. DEI Fire Sleeve for Protection. Put the sleeve on BEFORE you add the AN fittings.
Originally Posted by Johnny Kommavongsa
Hate to see that stuff not fitting.

and thanks for the info on teh elite 2.0 oil drain fitting to engine block. The oil drain for a single turbo is a pain to work with.
Yeah it’s a pain. Made an oil return line. DEI firesleeve to protect it.
Old 06-01-18, 04:40 PM
  #738  
SEMI-PRO

Thread Starter
iTrader: (2)
 
ZoomZoom's Avatar
 
Join Date: Feb 2001
Location: New Jersey
Posts: 2,865
Received 36 Likes on 31 Posts


Haltech Elite 2500 plug and play for the 93-95 FD.
Meanwhile I decided to do this.. The Tech hooked me up. Haltech Elite 2500
Old 06-01-18, 07:18 PM
  #739  
amp
old yella

iTrader: (50)
 
amp's Avatar
 
Join Date: Jan 2002
Location: NYC | PA
Posts: 3,528
Received 97 Likes on 58 Posts
Originally Posted by ZoomZoom
Carved out enough lower to barely fit. Going to re ceramic coat after tuning session. Wish I had time to send it all back out.
After more grinding.... I see daylight.
could you not have just fab'd a thicker mani gasket to clear the lim instead of grindin anything...
Old 06-01-18, 08:35 PM
  #740  
SEMI-PRO

Thread Starter
iTrader: (2)
 
ZoomZoom's Avatar
 
Join Date: Feb 2001
Location: New Jersey
Posts: 2,865
Received 36 Likes on 31 Posts
Originally Posted by amp
could you not have just fab'd a thicker mani gasket to clear the lim instead of grindin anything...
I ran it by some friends and grinding seemed to be the way. Adding extra gaskets invite exhaust leaks. There was some talk of having a spacer flange made and run a gasket on either side. There are a lot of scenarios that take weeks to get made by a machine shop... its summer and it’s time to get the car off the lift. These will end up “forever projects” if you don’t move the ball forward.
There will be a more permanent solution at some point, probably during the winter when I prefer sorting things like this out.

We we also talked about machining down the lower intake where it meets the motor pulling it further away from the turbo. (Probably the best idea from Jehan) so maybe we will end up doing that.
All these things hamstring getting the car running and tuned so for the sake of saving weeks or even months the grinder made it happen.
Old 06-02-18, 12:28 AM
  #741  
amp
old yella

iTrader: (50)
 
amp's Avatar
 
Join Date: Jan 2002
Location: NYC | PA
Posts: 3,528
Received 97 Likes on 58 Posts
i ran a spacer to my mani to fit my gt40r... no exhaust leaks
i get the timing but had mine done during season... might have helped that i provided the cadd template for them..
since i could not find phenolic spacers to use and also wanted to try em out....

ive done the lower intake mani shaving as well on my old 20b but that just introduced more concerns since its a domino effect for other components..
it will move the whole intake track cold side to elbow... tb.. uim.. if your clearances are tight.. there could be additional points of failure there..
my issue with having shaved mine was that my primary rail now clashed with the secondary.. depending on what rails you have.. this could be a potential problem...
i solved the intake track movement with hump hoses..

Last edited by amp; 06-02-18 at 12:48 AM.
Old 06-02-18, 11:41 PM
  #742  
Built Not Bought

iTrader: (14)
 
TwinCharged RX7's Avatar
 
Join Date: May 2008
Location: Stamford, CT
Posts: 4,249
Likes: 0
Received 851 Likes on 537 Posts
Sick. I didn't know they made a plug and play adapter for the elite.
Old 06-03-18, 10:46 AM
  #743  
SEMI-PRO

Thread Starter
iTrader: (2)
 
ZoomZoom's Avatar
 
Join Date: Feb 2001
Location: New Jersey
Posts: 2,865
Received 36 Likes on 31 Posts
Originally Posted by TwinCharged RX7
Sick. I didn't know they made a plug and play adapter for the elite.
It just came out for th 93-95 cars so I snatched one up.
Old 06-03-18, 10:49 AM
  #744  
SEMI-PRO

Thread Starter
iTrader: (2)
 
ZoomZoom's Avatar
 
Join Date: Feb 2001
Location: New Jersey
Posts: 2,865
Received 36 Likes on 31 Posts
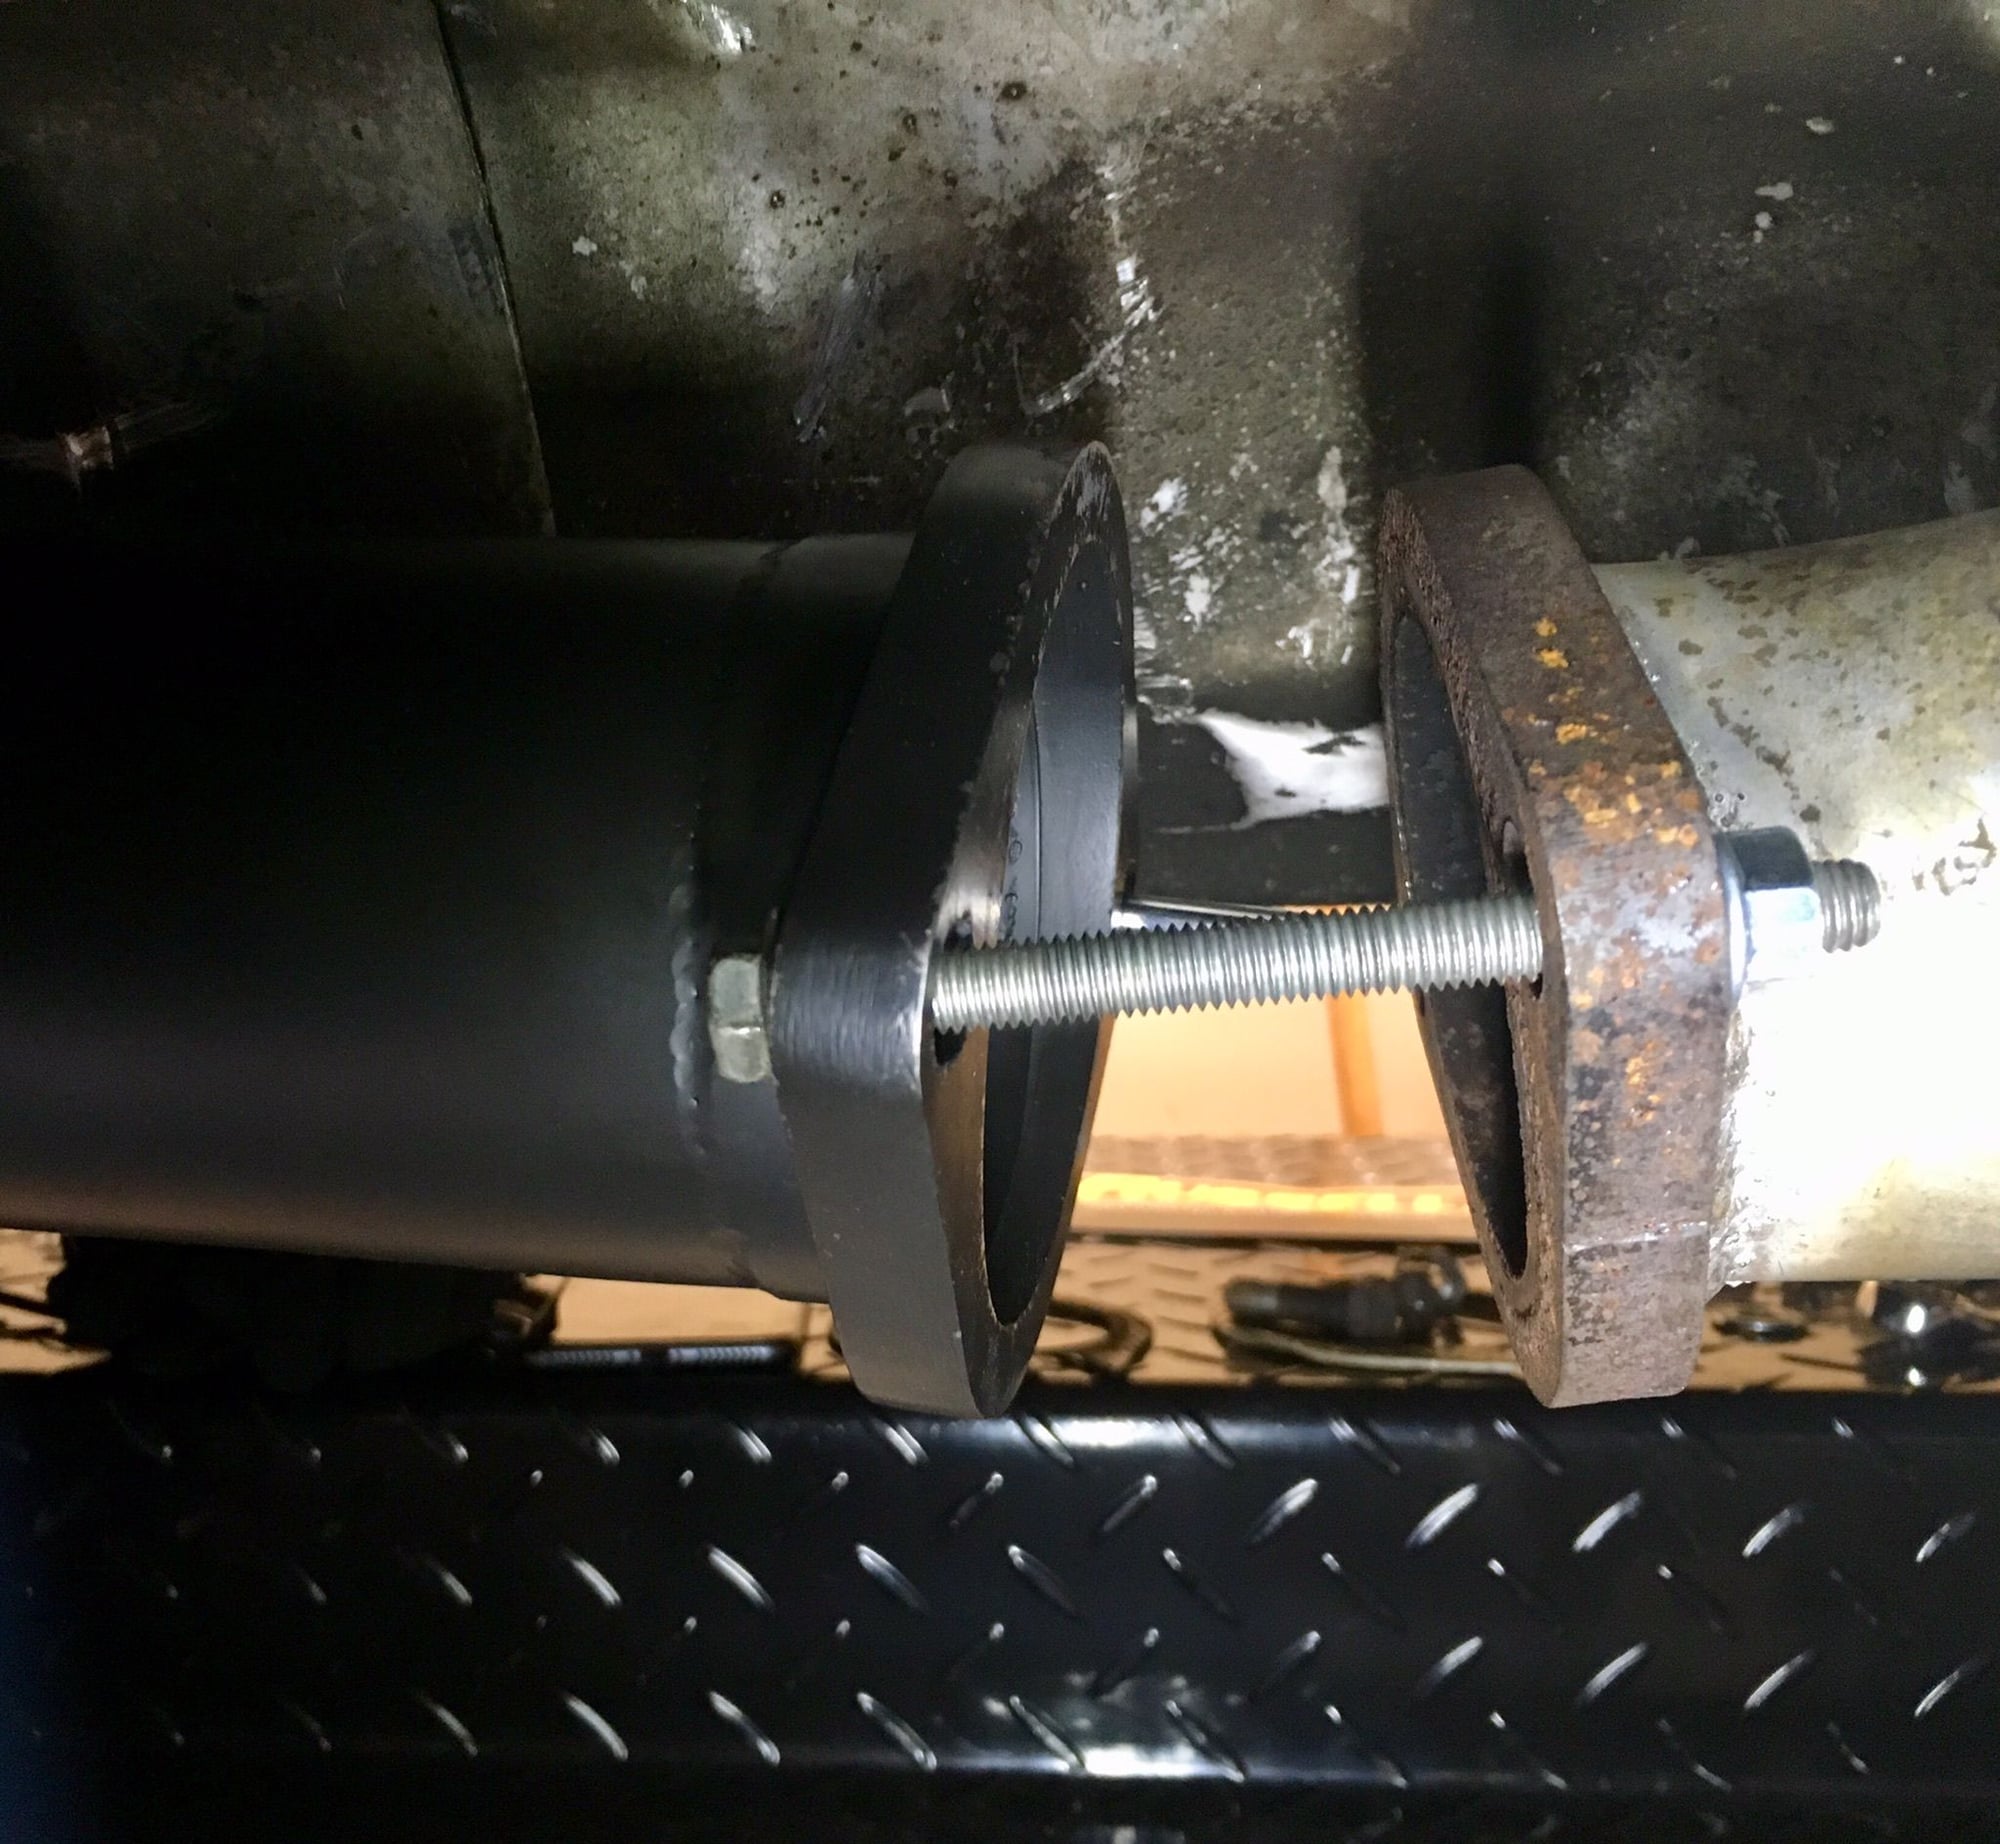
GoodfellaFD3S came down with a Midpipe and a coolant sensor I was missing. Unfortunately the Downpipe is about 2 inches short.
Old 06-03-18, 10:52 AM
  #745  
SEMI-PRO

Thread Starter
iTrader: (2)
 
ZoomZoom's Avatar
 
Join Date: Feb 2001
Location: New Jersey
Posts: 2,865
Received 36 Likes on 31 Posts


Short DP
GoodfellaFD3S came down with a Midpipe and a coolant sensor I was missing. Unfortunately the Downpipe is about 2 inches short.
Old 06-03-18, 10:35 PM
  #746  
Time or Money, Pick one

iTrader: (37)
 
silverTRD's Avatar
 
Join Date: Oct 2005
Location: Torrance, ca.
Posts: 3,353
Received 154 Likes on 125 Posts
What the heck?! And why is it at a wrong angle also??
Old 06-04-18, 09:36 AM
  #747  
Ban Peak

iTrader: (49)
 
Molotovman's Avatar
 
Join Date: Jul 2002
Location: Northern Virginia
Posts: 3,996
Received 412 Likes on 265 Posts
What a bummer man, it's really disappointing that you were sold new parts that don't work.
Old 06-07-18, 01:25 PM
  #748  
SEMI-PRO

Thread Starter
iTrader: (2)
 
ZoomZoom's Avatar
 
Join Date: Feb 2001
Location: New Jersey
Posts: 2,865
Received 36 Likes on 31 Posts


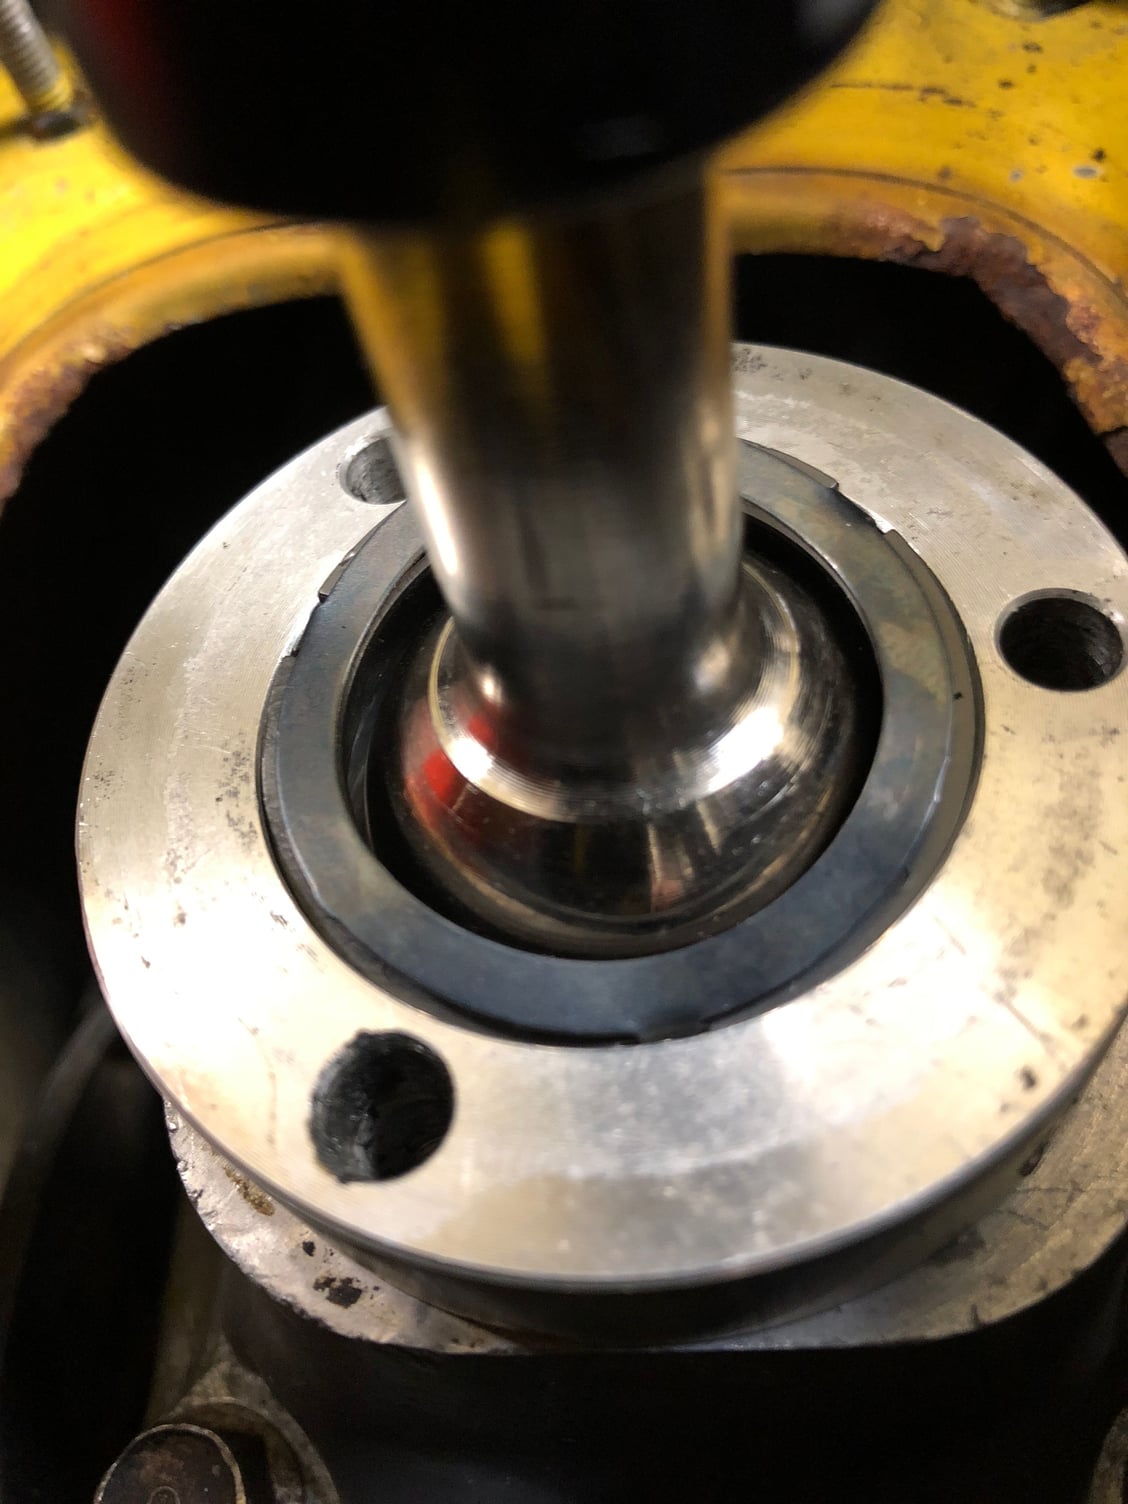
Mazdaspeed shifter. Don’t worry I put the boot on before I finished...


Buttoned up
Fourtyounce will arrive Saturday with his welder and will make a new midpipe to work for the time being.
meanwhile the show must go on.
picked up a Mazdaspeed shifter from Japan and rebuilt it with new bushings and boot.
Old 06-07-18, 01:29 PM
  #749  
SEMI-PRO

Thread Starter
iTrader: (2)
 
ZoomZoom's Avatar
 
Join Date: Feb 2001
Location: New Jersey
Posts: 2,865
Received 36 Likes on 31 Posts
Isn’t much of a video but it’s my new Mazdaspeed shifter and so far I like it in theory. Once I bleed the clutch and brakes I will play racecar driver and see.
Old 06-07-18, 01:31 PM
  #750  
SEMI-PRO

Thread Starter
iTrader: (2)
 
ZoomZoom's Avatar
 
Join Date: Feb 2001
Location: New Jersey
Posts: 2,865
Received 36 Likes on 31 Posts


Engine bay
Pic of some slight progress. Added some fluid to the trans. All my oil and coolant lines are made and installed. Ready for more accessories to get installed today after work.


All times are GMT -5. The time now is 07:17 PM.